
A Beginner's Guide to Cross-Hatching
📰 Quick Directory
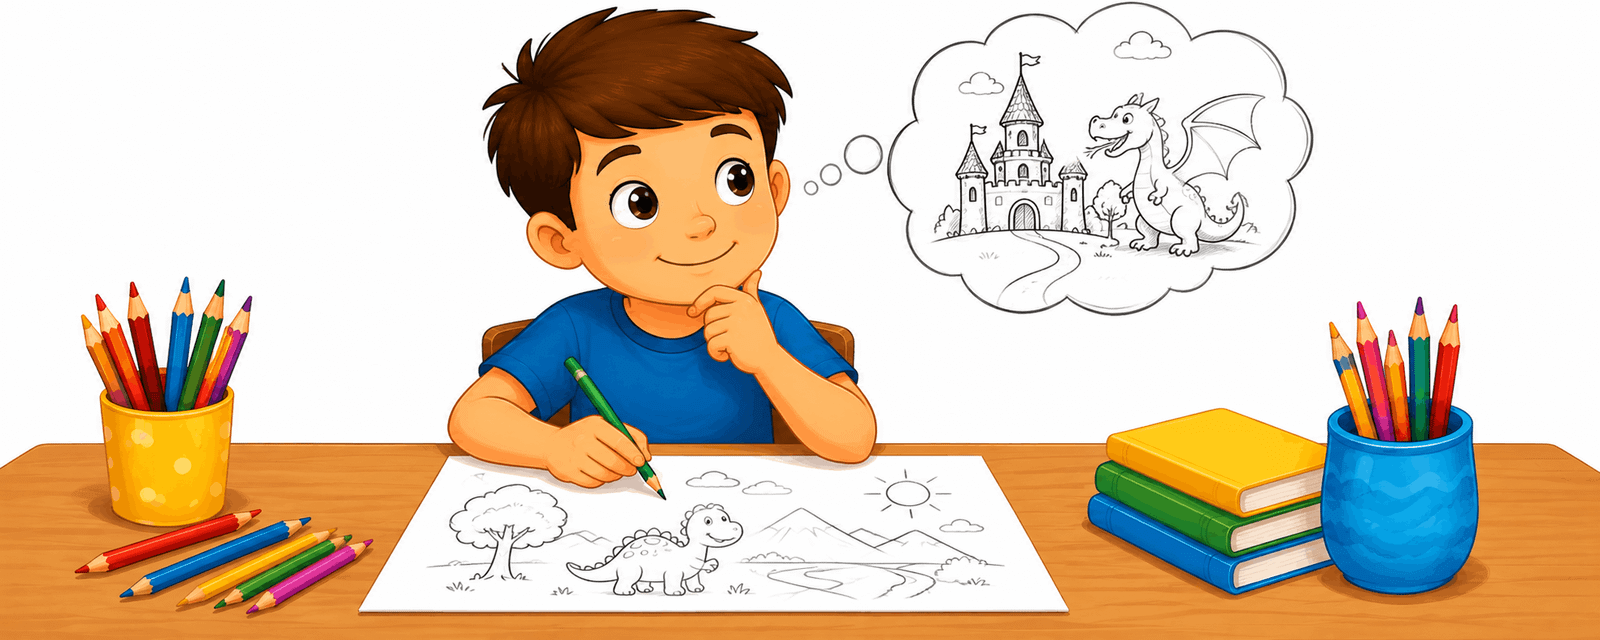 A Beginner's Guide to Drawing From Imagination
🧒
Understanding Drawing Development Stages in Early Childhood
🎨
Large-Format Poster Printing: A Practical Guide
💡
How Drawing Encourages Finding Inspiration
💡
The Role of Doodling in Children's Art
🎲
How to Play Board Game Design
🎨
A Construction Site Trailer Coloring and Drawing Ideas for Kids
🌈
Relaxing Musical Themes Coloring Activities
🎨
A Community Storm Siren: A Family Safety Guide
🎨
A Simple Machine Screw: A Coloring and STEM Guide for Kids
🧒
Drawing Activities for The Symbol-Making Stage
🎲
Step-by-Step Visual Puzzle Games
🎨
Being a Polite Guest: A Simple Social Skill for Kids
🎨
A Solar-Powered Robot: A Coloring and Invention Guide for Kids
🍂
Celebrate Winter With Coloring Activities
👨👩👧
Coloring Ideas for Activities for Only Children
🧠
How Drawing May Support Visual Thinking
🎨
Dodgeball Coloring Pages and Drawing Ideas for Kids
A Beginner's Guide to Drawing From Imagination
🧒
Understanding Drawing Development Stages in Early Childhood
🎨
Large-Format Poster Printing: A Practical Guide
💡
How Drawing Encourages Finding Inspiration
💡
The Role of Doodling in Children's Art
🎲
How to Play Board Game Design
🎨
A Construction Site Trailer Coloring and Drawing Ideas for Kids
🌈
Relaxing Musical Themes Coloring Activities
🎨
A Community Storm Siren: A Family Safety Guide
🎨
A Simple Machine Screw: A Coloring and STEM Guide for Kids
🧒
Drawing Activities for The Symbol-Making Stage
🎲
Step-by-Step Visual Puzzle Games
🎨
Being a Polite Guest: A Simple Social Skill for Kids
🎨
A Solar-Powered Robot: A Coloring and Invention Guide for Kids
🍂
Celebrate Winter With Coloring Activities
👨👩👧
Coloring Ideas for Activities for Only Children
🧠
How Drawing May Support Visual Thinking
🎨
Dodgeball Coloring Pages and Drawing Ideas for Kids
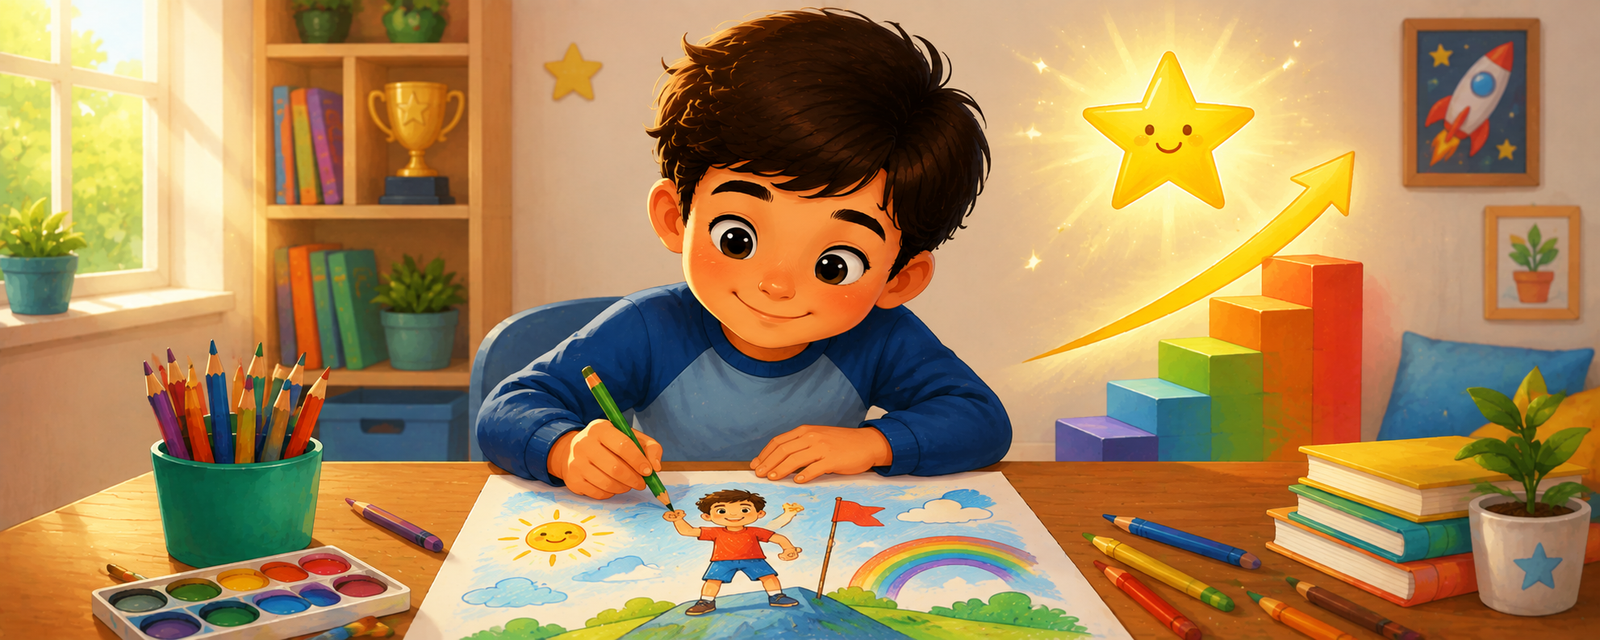 The Link Between Drawing and Confidence Building
💬
Why Diagrams Matter in Everyday Life
🖌️
A Beginner's Guide to Blending Techniques
🎨
Splashing in Puddles: Coloring Ideas and Activities for the Whole Family
🍂
Seasonal Coloring Guide: Easter
🎨
A Savings Account Passbook: A Money Guide for Kids and Parents
🎨
Leafhopper Coloring and Drawing Ideas for Kids
🧒
Drawing Activities for Ages 5-6
🎨
Meet the Software Developer: A Community Helper Coloring Guide
🎨
Stink Bug Coloring and Drawing Ideas for Kids
The Link Between Drawing and Confidence Building
💬
Why Diagrams Matter in Everyday Life
🖌️
A Beginner's Guide to Blending Techniques
🎨
Splashing in Puddles: Coloring Ideas and Activities for the Whole Family
🍂
Seasonal Coloring Guide: Easter
🎨
A Savings Account Passbook: A Money Guide for Kids and Parents
🎨
Leafhopper Coloring and Drawing Ideas for Kids
🧒
Drawing Activities for Ages 5-6
🎨
Meet the Software Developer: A Community Helper Coloring Guide
🎨
Stink Bug Coloring and Drawing Ideas for Kids
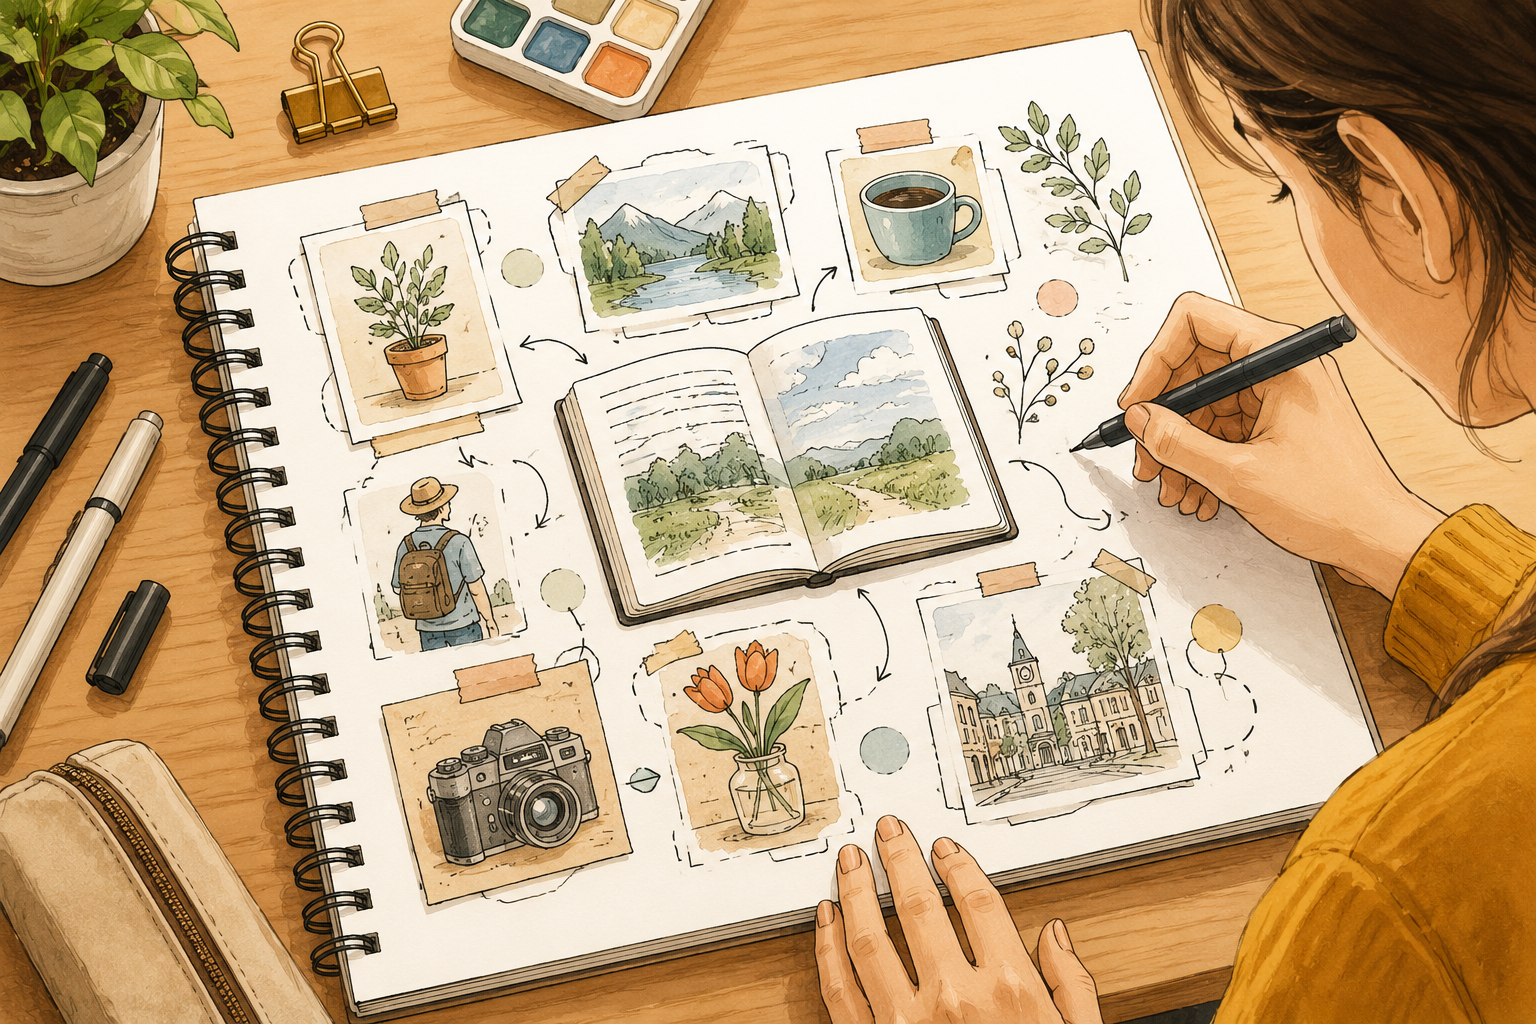 Why Visual Thinkers Use Sketch Journaling
🎨
an Emotion Faces Chart: A Simple Mindfulness Activity for Kids
🧒
Fun Ways to Build Encouraging Reluctant Artists
🎨
Wee Willie Winkie: A Nursery Rhyme Coloring Guide for Kids
🏺
Exploring Hieroglyphics
🔬
A Simple Guide to RGB Color Mixing
🎨
Feeding a Dog: A Simple Pet Care Guide for Kids
🎨
A Talking Robot: A Coloring and Invention Guide for Kids
🔎
Why Visual Thinkers Use Sketching to Understand Complex Ideas
📐
Teaching Graphs and Charts Through Coloring and Drawing
🎨
How to Draw a Ukulele: A Coloring and Music Guide for Kids
🍎
Using Coloring Pages for Differentiated Art Instruction
💬
Why Visual Instructions Matter in Everyday Life
💡
Why Storytelling Matters for Young Artists
🎨
A Dog Toy Basket: A Simple Pet Care Guide for Kids
🌈
Jungle Scenes Coloring Ideas for Classrooms
🎨
Meet Pop Art: An Art Appreciation Guide for Kids
🎨
A Face Painting Booth Coloring and Drawing Ideas for Kids
🎨
A Circus Poodle Coloring and Drawing Ideas for Kids
🎨
How to Draw a Castanets: A Coloring and Music Guide for Kids
💬
The Power of Diagrams
🎨
A Wooden Ship's Wheel Coloring and Drawing Ideas for Kids
📐
Fun Drawing Activities for Shapes
🎨
Golden Pavilion: Coloring Page and Fun Facts for Kids
🎨
An Electric Car: A Coloring and Invention Guide for Kids
🎨
How to Draw a Drum: A Coloring and Music Guide for Kids
💡
Building Character Design Through Coloring and Drawing
🎨
Pyramids of Giza: Coloring Page and Fun Facts for Kids
🎨
Wildfire Awareness: A Family Safety Guide
🎨
A Swing Set Contest: A Coloring and Playtime Guide for Kids
🔬
Why Screens Use RGB Explained for Kids
🎨
Ancient Phoenician Sailors and Traders: An Ancient History Coloring Guide for Kids
🎨
Fun Unicycle Coloring and Drawing Ideas for Kids
🎨
Severe Weather Alerts on a Phone: A Family Safety Guide
🎨
A Classroom Weather Chart: A Classroom Coloring and Learning Guide
🎲
Fun Visual Puzzle Games for Kids
🖌️
Simple Steps for Using Watercolor
🎨
A Coin Sorting Jar: A Money Guide for Kids and Parents
🎨
Genie Coloring and Drawing Ideas for Kids
💡
Building Personal Artistic Style Through Coloring and Drawing
🎨
A Family Pet Portrait: A Simple Pet Care Guide for Kids
🎨
A Robotic Vacuum: A Coloring and Invention Guide for Kids
🎨
Exploring A Star Cluster: A Coloring and Learning Guide for Kids
🎨
Exploring A Space Dust Cloud: A Coloring and Learning Guide for Kids
🎨
Freeze Dance: A Coloring and Playtime Guide for Kids
🍎
A Teacher's Guide to Art Lessons for History Class
🎨
A School Assembly: A Classroom Coloring and Learning Guide
🎨
Pandora's Box: A Classic Story Coloring Guide for Kids
🏺
What We Know About Petroglyphs and Rock Art
✏️
Fun Exercises for Drawing Simple Faces
🎨
Woolly Mammoth Coloring Page: Fun Facts for Young Paleontologists
🎨
The Pied Piper: A Classic Story Coloring Guide for Kids
🎨
Five Senses Grounding: A Simple Mindfulness Activity for Kids
🍂
Fun Easter Classroom Coloring Ideas
🎨
Popcorn Coloring Ideas for Kids Who Love to Create
🔤
Using Coloring Pages to Teach Sentence Building
🎨
A Simple Loan Between Siblings: A Money Guide for Kids and Parents
🎨
Saying Please and Thank You: A Simple Social Skill for Kids
🎨
an Emotion Check-In Chart: A Simple Mindfulness Activity for Kids
✏️
Easy Steps to Practice Basic Perspective
🎨
The Number 12: An Alphabet and Number Coloring Page
🖌️
A Beginner's Guide to Outlining Techniques
📴
Creative Alternatives to Screens During Family Game Nights
💡
Why Artistic Risk-Taking Matters for Young Artists
🖌️
Exploring Using Colored Pencils
🔎
Why Visual Thinkers Use Connecting Ideas Through Drawing
💬
The Power of Maps and Wayfinding Symbols
🎨
A Shrinking-Power Superhero: A Superhero Coloring and Design Guide for Kids
🎨
Exploring Indonesia: A Coloring and Culture Guide for Kids
🖍️
A Beginner's Guide to Coloring With Watercolor Pencils
🔤
Drawing Activities for Sentence Building
🎨
A Knight in Shining Armor: A Medieval Coloring and History Guide for Kids
🎨
Jack-in-the-Box Coloring and Drawing Ideas for Kids
🎨
A Kids' Fundraiser Table: A Money Guide for Kids and Parents
🎨
Meet the Painter and Decorator: A Community Helper Coloring Guide
🎨
A Robot Pet: A Coloring and Invention Guide for Kids
🎨
How to Draw a Semicircle: A Step-by-Step Guide for Kids
🎨
Weekly Planner Doodles: Free Ideas for Your Next Celebration
🧒
Understanding Color Recognition in Early Childhood
🧒
Drawing Activities for Toddlers (Ages 1-2)
🔬
Color Psychology Explained for Kids
🎨
How to Draw a Steel Drum: A Coloring and Music Guide for Kids
💬
How Wordless Storytelling Communicate Ideas
🖌️
Why Layering Techniques Matters for Young Artists
🎨
Fun Camper Van Coloring and Drawing Ideas for Kids
🎨
A Farmers Market: A Coloring and Food Science Guide for Kids
🎨
A Pumpkin Patch Growing: A Gardening Guide for Kids and Families
🎨
King Snake Coloring and Drawing Ideas for Kids
🎨
Puss in Boots: A Classic Story Coloring Guide for Kids
🧒
What to Expect When Teaching Color Recognition
🌈
Relaxing Jungle Scenes Coloring Activities
🎨
Calm Breathing Star Cards: A Simple Mindfulness Activity for Kids
🧘
How Repetitive Pattern Coloring Can Create a Quiet Moment
🎨
A Cooling Rack: A Kitchen Guide for Kids and Parents
🖍️
A Beginner's Guide to Coloring Animals Realistically
🖍️
Why Coloring Large Areas Makes a Difference
🔎
Using Connecting Ideas Through Drawing to Solve Problems
🏺
Exploring Ancient Egyptian Art
✏️
How to Improve Your Using an Eraser Effectively
🔤
Using Coloring Pages to Teach the Alphabet
🧠
Why Drawing Can Help With Concentration and Focus
🎨
Bubbles Coloring and Drawing Ideas for Kids
🎨
Organizing Coloring Supplies: A Buying and Technique Guide
🎨
A Seagull on the Boardwalk Railing Coloring and Drawing Ideas for Kids
💗
Creative Approaches to Processing Big Feelings
🎨
a Beach Vacation Day Coloring Ideas and Activities for the Whole Family
🧘
Why Bedtime Coloring Routines Feels Calming
🎨
Angkor Wat: Coloring Page and Fun Facts for Kids
🎨
A Cape and Mask Design: A Superhero Coloring and Design Guide for Kids
🎨
A Greek Traditional Folk Costume: A Coloring and Culture Guide for Kids
🎨
Creative Birds Drawing Exercises
🍂
Seasonal Coloring Guide: Summer
💬
Why Visual Storytelling Matter in Everyday Life
💗
Creative Approaches to Art for Stressful Days
🖌️
How to Practice Stippling
📴
Hands-On Activities for Restaurant Wait Times
🎨
How to Draw a Argyle Pattern: A Step-by-Step Guide
🎨
Great Wall of China: Coloring Page and Fun Facts for Kids
🎨
CN Tower: Coloring Page and Fun Facts for Kids
🎨
A Pile of Lumber Coloring and Drawing Ideas for Kids
🎨
Reward Chart Coloring: Free Ideas for Your Next Celebration
🧘
Why Coloring as a Calm-Down Tool Feels Calming
👨👩👧
Making the Most of Activities for Only Children
🎨
A Superhero Helping an Elderly Neighbor: A Superhero Coloring and Design Guide for Kids
💬
Understanding Visual Storytelling
🖍️
Tips for Choosing Your First Coloring Pencils
🎨
Connect Four Board Coloring and Drawing Ideas for Kids
📐
Fun Drawing Activities for Proportion
🎨
A Treehouse Construction Coloring and Drawing Ideas for Kids
🎨
Spaghetti Coloring Ideas for Kids Who Love to Create
🧠
Can Drawing Improve Working Memory?
🎨
How to Draw a Star Mandala: A Step-by-Step Guide
🎲
Step-by-Step Collaborative Drawing Games
🎨
Empire State Building: Coloring Page and Fun Facts for Kids
🎨
The Elves and the Shoemaker: A Classic Story Coloring Guide for Kids
🎨
A Tightrope Walker Coloring and Drawing Ideas for Kids
🎨
Baa Baa Black Sheep: A Nursery Rhyme Coloring Guide for Kids
🧘
Simple Steps for Coloring for Focus
🎨
A Last Day of School Countdown: A Classroom Coloring and Learning Guide
🎨
A Cold Frame for Seedlings: A Gardening Guide for Kids and Families
🎨
Table Mountain: Coloring Page and Fun Facts for Kids
🎨
Humpty Dumpty: A Nursery Rhyme Coloring Guide for Kids
🎨
How to Draw a Heart: A Step-by-Step Guide for Kids
🔤
Learning Emotions and Feelings Words Through Drawing
🎨
How to Draw a Herringbone Pattern: A Step-by-Step Guide
🎨
Practicing Eye Contact While Talking: A Simple Social Skill for Kids
🔬
Understanding Color Contrast
🧠
How Drawing May Support Critical Thinking
🎨
The Letter K: An Alphabet and Number Coloring Page
🎨
Building a Snowman: Coloring Ideas and Activities for the Whole Family
🎨
A Dump Truck Unloading Coloring and Drawing Ideas for Kids
🎨
A Japanese Kimono: A Coloring and Culture Guide for Kids
🎨
a Safe Space Poster: A Simple Mindfulness Activity for Kids
🎨
A Beginner's Guide to Drawing Original Superhero Characters
🖍️
Tips for Coloring Skies and Backgrounds
📴
Creative Alternatives to Screens During Sick Days at Home
🖌️
Why Stippling Matters for Young Artists
💗
The Role of Coloring in Building Self-Esteem Through Art
🎨
Hamburger Coloring Ideas for Kids Who Love to Create
👨👩👧
Creative Rainy Day Activities for Kids
🎨
Jaguar Coloring and Drawing Ideas for Kids
🎨
Santa's Workshop Coloring Ideas and Activities for the Whole Family
💡
Nurturing Divergent Thinking at Home
🧒
How Drawing Supports Building Drawing Confidence
🎨
Easy Emotions and Faces Drawing Ideas
🍂
Creative Christmas Coloring Projects for Classrooms
🔤
Visual Vocabulary: Sight Words
🎨
Eagle Coloring Page Ideas for Kids
🌈
A Guide to Mandalas Coloring Pages
🎨
A Rodeo Bull Rider: A Wild West Coloring and History Guide for Kids
🎨
A Cowboy Boot: A Wild West Coloring and History Guide for Kids
🧒
What to Expect When Teaching First-Time Artists
🎨
A Poutine Plate: Coloring Ideas and Fun Facts for Kids
🎨
Dimetrodon Coloring Page: Fun Facts for Young Paleontologists
🎨
Dice Coloring and Drawing Ideas for Kids
🎨
A Superhero Lifting a Car: A Superhero Coloring and Design Guide for Kids
🎨
Certificate of Achievement Coloring: Free Ideas for Your Next Celebration
🎨
Behavior Chart Printables: Free Ideas for Your Next Celebration
🎨
A Clown Juggling Torches Coloring and Drawing Ideas for Kids
📴
Why Coloring Beats Scrolling on Outdoor Picnics
🎨
Woodpecker Coloring Page Ideas for Kids
🎨
Fire-Bellied Toad Coloring and Drawing Ideas for Kids
🧠
The Link Between Drawing and Imagination
🎨
A Dog Park Visit: A Simple Pet Care Guide for Kids
🎨
Teaching Sincerity: A Simple Activity for Kids
🎨
Leopard Gecko Coloring and Drawing Ideas for Kids
🎨
Butterfly Coloring and Drawing Ideas for Kids
✏️
Why Drawing From Observation Matters for New Artists
🎨
A Family Communication Plan: A Family Safety Guide
🎨
Meet Wassily Kandinsky: An Art Appreciation Guide for Kids
🎨
Story Time Circle: A Classroom Coloring and Learning Guide
🔤
How Pictures Help Children Learn Story Sequencing
🎨
Calf Coloring and Drawing Ideas for Kids
🎲
How to Play Strategy Sketching for Sports
🎨
Exploring Italy: A Coloring and Culture Guide for Kids
🎨
Fun Cement Mixer Coloring and Drawing Ideas for Kids
🎨
Ordinal Numbers First to Tenth: An Alphabet and Number Coloring Page
🧠
Exploring Drawing and Memory
🎨
A Wild West Railroad Station: A Wild West Coloring and History Guide for Kids
🍎
A Teacher's Guide to Back-to-School Activities
🎨
Surfing Coloring Pages and Drawing Ideas for Kids
🎨
A Paella Pan: Coloring Ideas and Fun Facts for Kids
🎨
Ankylosaurus Coloring Page: Fun Facts for Young Paleontologists
🖍️
Tips for Choosing Paper for Coloring
🎲
Mazes: A Creative Twist
📴
Making the Most of Device-Free Evenings Without Screens
🎨
Greeting a Guest Politely: A Simple Social Skill for Kids
🎨
Ibis Coloring Page Ideas for Kids
🎨
A Reading Nook: A Classroom Coloring and Learning Guide
🖍️
Why Coloring Inside the Lines Makes a Difference
🎨
Introducing Yourself Politely: A Simple Social Skill for Kids
📐
Teaching Measurement Through Coloring and Drawing
🎨
Exploring the Netherlands: A Coloring and Culture Guide for Kids
🎨
Fun Segway Coloring and Drawing Ideas for Kids
👨👩👧
Why Parents Love Screen-Free Afternoons
📐
Learning Graphs and Charts Through Drawing
🎨
Daffodil: A Coloring and Nature Guide for Kids
🎨
Blue Jay Coloring Page Ideas for Kids
🎨
Snapdragon: A Coloring and Nature Guide for Kids
🎨
The Three Billy Goats Gruff: A Classic Story Coloring Guide for Kids
🔬
Understanding Color Psychology
🧒
Understanding Ages 5-6 in Early Childhood
🍂
Fun St. Patrick's Day Classroom Coloring Ideas
🎨
A Paleontologist Dig Site Coloring Page: Fun Facts for Young Paleontologists
📴
Making the Most of Restaurant Wait Times Without Screens
📐
Fun Drawing Activities for Tessellations
🔤
Learning Sight Words Through Drawing
💗
The Role of Coloring in Creative Journaling
🧘
A Beginner's Guide to Coloring as a Calm-Down Tool
🍂
Seasonal Coloring Guide: Earth Day
💡
How Drawing Encourages Creative Journaling
🎨
Warthog Coloring and Drawing Ideas for Kids
🎨
A Giant Redwood Tree: A Coloring and Nature Guide for Kids
🔎
A Beginner's Guide to Visual Problem-Solving
🎨
Doctor Foster: A Nursery Rhyme Coloring Guide for Kids
🎨
Creative Vehicles Drawing Exercises
🎨
Lettuce Coloring and Drawing Ideas for Kids
👨👩👧
Making the Most of Summer Break Activities
🎨
Lighting for Coloring Sessions: A Buying and Technique Guide
🎨
Holiday Card Making: Free Ideas for Your Next Celebration
🏺
How Ancient Egyptian Art Shaped Human Communication
🎨
A Ship's Anchor Coloring and Drawing Ideas for Kids
🎨
Sharing a Toy: A Simple Life Skill for Kids
🎨
Ancient Sumerian Writing Tablets: An Ancient History Coloring Guide for Kids
🎨
Farm Life Drawing Prompts for Beginners
🎨
a Congratulations Card: Free Ideas for Your Next Celebration
🎨
A Fruit Bowl on the Counter: A Kitchen Guide for Kids and Parents
🎨
An Austrian Traditional Dress: A Coloring and Culture Guide for Kids
🔬
What Is How Light Creates Color?
🔤
How Pictures Help Children Learn Question Words
🎨
A Programmer at a Desk: A Coloring and STEM Guide for Kids
🎨
Teaching Teamwork: A Simple Activity for Kids
🎨
Meet the Construction Worker: A Community Helper Coloring Guide
🏺
The History of Ancient Pottery Art
🎨
A Traditional Woven Textile Pattern: A Coloring and Culture Guide for Kids
🍂
Seasonal Coloring Guide: Father's Day
🎨
Orchid: A Coloring and Nature Guide for Kids
🎨
An Animal-Whisperer Superhero: A Superhero Coloring and Design Guide for Kids
🎨
A Cargo Robot: A Coloring and Invention Guide for Kids
🎨
Honey Making: A Coloring and Food Science Guide for Kids
💗
How Drawing Supports Creative Journaling
🧒
Understanding The Symbol-Making Stage in Early Childhood
🌈
Printable Nature Landscapes Coloring Activities
🎨
A Butterfly Waystation: A Gardening Guide for Kids and Families
🎨
Narwhal Coloring and Drawing Ideas for Kids
🎨
A Horse-Drawn Buggy: A Wild West Coloring and History Guide for Kids
🎨
A Frontier River Crossing: A Wild West Coloring and History Guide for Kids
🎨
A Factory Robot Arm: A Coloring and Invention Guide for Kids
🎨
The Letter N: An Alphabet and Number Coloring Page
🎨
A Family Baking Day: A Kitchen Guide for Kids and Parents
🌈
A Guide to Food and Treats Coloring Pages
🎨
How to Draw a A Cross Shape: A Step-by-Step Guide for Kids
🎨
Flash Flood Awareness: A Family Safety Guide
🎨
A Dairy Farm: A Coloring and Food Science Guide for Kids
🎨
A Vegetable Harvest Basket: A Gardening Guide for Kids and Families
🎨
A Potting Bench: A Gardening Guide for Kids and Families
🎨
Meerkat Coloring and Drawing Ideas for Kids
🎨
Trick or Treating Coloring Ideas and Activities for the Whole Family
🎨
Gnat Coloring and Drawing Ideas for Kids
🎨
Bookmark Printables: Free Ideas for Your Next Celebration
🎨
How Lungs Breathe: A Coloring and Health Guide for Kids
🔤
Using Coloring Pages to Teach Animal Names
🖍️
How to Get Better at Using Complementary Colors
🎨
Tapir Coloring and Drawing Ideas for Kids
🎲
Storyboard Games: A Creative Twist
🎨
Meet the Chef: A Community Helper Coloring Guide
🎨
Meet Sculpture Art: An Art Appreciation Guide for Kids
🍎
A Teacher's Guide to Circle Time Activities
🎨
Cave Formation Coloring Page: A Nature Learning Guide for Kids
✏️
How to Improve Your Drawing Stick Figures
🎨
A Lunch Tray: A Classroom Coloring and Learning Guide
🍎
Classroom Ideas: Assessing Creativity in the Classroom
🎨
Building Blocks Coloring and Drawing Ideas for Kids
🎨
An Ice Cream Stand on the Boardwalk Coloring and Drawing Ideas for Kids
🎨
Orange Coloring and Drawing Ideas for Kids
🧒
Fun Ways to Build Fine Motor Skills
🖌️
A Beginner's Guide to Stippling
🎨
A Long-Necked Herd at a Watering Hole Coloring Page: Fun Facts for Young Paleontologists
🎨
Geyser Eruption Coloring Page: A Nature Learning Guide for Kids
🎨
Staying Informed During a Storm Watch: A Family Safety Guide
💬
Why Infographics Matter in Everyday Life
🎨
A Bandage on a Scrape: A Coloring and Health Guide for Kids
🎨
Hand Puppet Coloring and Drawing Ideas for Kids
🎨
Ring Around the Rosie: A Coloring and Playtime Guide for Kids
🎨
A Medieval Feast: A Medieval Coloring and History Guide for Kids
🎨
Meet the Doctor: A Community Helper Coloring Guide
🎨
Ostrich Coloring Page Ideas for Kids
🎨
The Enormous Turnip: A Classic Story Coloring Guide for Kids
🎨
Ring Around the Rosie: A Nursery Rhyme Coloring Guide for Kids
🎨
Zucchini Coloring and Drawing Ideas for Kids
🎨
A Pirate Flag Skull Coloring and Drawing Ideas for Kids
🧠
Exploring Drawing and Sequential Thinking
🎨
A Knight's Training Yard: A Medieval Coloring and History Guide for Kids
🎨
Cinderella: A Classic Story Coloring Guide for Kids
🎨
A Beach Volleyball Game Coloring and Drawing Ideas for Kids
🖌️
Exploring Using Crayons Creatively
🧘
Simple Steps for Coloring in Silence
🎲
How to Play Treasure Map Games
🎨
A Balloon Toss: A Coloring and Playtime Guide for Kids
🎨
A Castle Dungeon: A Medieval Coloring and History Guide for Kids
🖍️
A Beginner's Guide to Using Complementary Colors
👨👩👧
Creative Low-Mess Activities for Kids
🎨
Ladybug Coloring and Drawing Ideas for Kids
✏️
Easy Steps to Practice Using an Eraser Effectively
🎨
Layering Colors: A Buying and Technique Guide
🎨
Exploring Uranus: A Coloring and Learning Guide for Kids
🎨
A Trail Map: Coloring Ideas for Your Next Family Adventure
🎨
A Royal Feast Hall Table: A Medieval Coloring and History Guide for Kids
🎨
A Camping Checklist: Coloring Ideas for Your Next Family Adventure
🧘
How Coloring as a Calm-Down Tool Can Create a Quiet Moment
🔬
The Science Behind Subtractive Color Mixing
🔬
What Is Additive Color Mixing?
💗
Understanding Expressing Gratitude Through Art
🎨
A Static Electricity Hair Test: A Step-by-Step Science Guide for Kids
🎨
Exploring A Nebula: A Coloring and Learning Guide for Kids
🎲
Drawing Battles: A Creative Twist
🌈
Relaxing Sports Scenes Coloring Activities
🎨
Using Fixative Spray: A Buying and Technique Guide
🎨
Pizza Dough Making: A Coloring and Food Science Guide for Kids
🍎
Simple Back-to-School Activities for Busy Classrooms
🔤
Drawing Activities for Numbers in a New Language
🎨
Armadillo Coloring and Drawing Ideas for Kids
🎨
Growing Plants in Space: A Coloring and Space Mission Guide for Kids
🎨
A Thank You Card for a Vet: A Simple Pet Care Guide for Kids
🎨
Exploring Peru: A Coloring and Culture Guide for Kids
🎨
Ice Cream Making: A Coloring and Food Science Guide for Kids
🍂
Creative Winter Coloring Projects for Classrooms
🌈
Printable Animals Coloring Activities
🎨
A Rowboat to Shore Coloring and Drawing Ideas for Kids
🎨
A Solar-Powered Gadget: A Coloring and STEM Guide for Kids
🎨
Teaching Compassion: A Simple Activity for Kids
🎨
A Snake Shedding Its Skin Coloring and Drawing Ideas for Kids
🎨
Deep Breathing to Relax: A Coloring and Health Guide for Kids
🎨
Pixie Coloring and Drawing Ideas for Kids
🎨
Terrapin Coloring and Drawing Ideas for Kids
🎨
Ant Coloring and Drawing Ideas for Kids
🧘
Exploring Coloring for Sensory Breaks
💡
The Role of Divergent Thinking in Children's Art
🎨
Oak Tree: A Coloring and Nature Guide for Kids
🧠
The Link Between Drawing and Problem-Solving
🎲
How to Play Drawing Prompt Games
🎨
A Splashdown Landing: A Coloring and Space Mission Guide for Kids
🧒
What to Expect When Teaching Ages 3-4
🎨
The Number 10: An Alphabet and Number Coloring Page
🎨
Lavender: A Coloring and Nature Guide for Kids
🎨
Meet the Mechanic: A Community Helper Coloring Guide
🎨
A Banyan Tree: A Coloring and Nature Guide for Kids
🌈
A Guide to Farm Scenes Coloring Pages
🌈
A Guide to Weather Scenes Coloring Pages
🎨
A Portable Site Office Coloring and Drawing Ideas for Kids
🎨
Placemat Coloring Sheets: Free Ideas for Your Next Celebration
🎲
How to Play Scavenger Hunt Drawings
📐
Learning Shapes Through Drawing
🎨
Lily: A Coloring and Nature Guide for Kids
🎨
Marigold: A Coloring and Nature Guide for Kids
🎨
A Melting Ice Race: A Step-by-Step Science Guide for Kids
🎨
A Pencil Case: A Classroom Coloring and Learning Guide
🎨
A Teacher's Desk: A Classroom Coloring and Learning Guide
🎨
Origami Crane Coloring and Drawing Ideas for Kids
💡
Building Combining Ideas Through Coloring and Drawing
🎨
A Wild West Blacksmith: A Wild West Coloring and History Guide for Kids
🎨
A Colombian Traditional Dress: A Coloring and Culture Guide for Kids
🧘
Exploring Guided Mindful Coloring
🎨
Sand Storm Coloring Page: A Nature Learning Guide for Kids
🎨
Goblin Coloring and Drawing Ideas for Kids
🎨
A Heat Shield During Re-Entry: A Coloring and Space Mission Guide for Kids
🎨
A Level and Tape Measure Coloring and Drawing Ideas for Kids
🔎
Using Organizing Research With Sketches to Solve Problems
💗
Understanding Art for Quiet Reflection
🎨
Saving Coloring Pages as PDFs: A Practical Guide
🎨
A Dinosaur Herd Coloring Page: Fun Facts for Young Paleontologists
🎨
A STEM Career Computer Programmer: A Coloring and STEM Guide for Kids
🎨
Remote Control Car Coloring and Drawing Ideas for Kids
💡
Why Personal Artistic Style Matters for Young Artists
🎨
Rocket Stages Separating: A Coloring and Space Mission Guide for Kids
🎨
Skip Counting by Twos: An Alphabet and Number Coloring Page
🎨
Gnome Coloring and Drawing Ideas for Kids
🎨
Weasel Coloring and Drawing Ideas for Kids
🎨
Weeping Willow: A Coloring and Nature Guide for Kids
🎨
Congratulating a Winner: A Simple Social Skill for Kids
🎨
Easy Space and Planets Drawing Ideas
🎨
Stick Insect Coloring and Drawing Ideas for Kids
🍎
A Teacher's Guide to Morning Work Activities
🎨
A Fishing Pier Coloring and Drawing Ideas for Kids
🎨
A Chef's Apron: A Kitchen Guide for Kids and Parents
📴
Hands-On Activities for Camping Trips
🎨
A Rustic Log Cabin: Coloring Ideas for Your Next Family Adventure
🎨
Mountain Peak Coloring Page: A Nature Learning Guide for Kids
🧠
Why Drawing Can Help With Self-Expression
🖌️
Simple Steps for Layering Techniques
🎨
A Moroccan Kaftan: A Coloring and Culture Guide for Kids
🎨
A Density Tower: A Step-by-Step Science Guide for Kids
🎲
How to Play Guess-the-Drawing Games
🎨
Baboon Coloring and Drawing Ideas for Kids
📐
Fun Drawing Activities for Counting
🎨
Great Barrier Reef: Coloring Page and Fun Facts for Kids
🎨
Turnip Coloring and Drawing Ideas for Kids
💗
Creative Approaches to Art for Quiet Reflection
🎨
A Prehistoric Swamp Coloring Page: Fun Facts for Young Paleontologists
🎨
Gift Tag Coloring: Free Ideas for Your Next Celebration
🎨
a Puppet Cutout Printable: Free Ideas for Your Next Celebration
🔤
Drawing Activities for the Alphabet
📴
Hands-On Activities for Summer Vacations
👨👩👧
Easy Morning Routine Activities With Coloring Pages
🎨
A Homemade Periscope: A Step-by-Step Science Guide for Kids
🌈
Fun Sports Scenes Coloring Pages for Kids
🎨
Moth Coloring and Drawing Ideas for Kids
🎨
Cliff Face Coloring Page: A Nature Learning Guide for Kids
💗
Creative Approaches to Expressing Gratitude Through Art
🎨
Fruit Pie Coloring Ideas for Kids Who Love to Create
🎲
Chess Strategy Diagrams: A Creative Twist
🎲
Strategy Sketching for Sports: A Creative Twist
🎨
How to Draw Space and Planets Step by Step
🎨
Boa Constrictor Coloring and Drawing Ideas for Kids
🎨
A Robot Band: A Coloring and Invention Guide for Kids
🏺
What We Know About Hieroglyphics
🎨
Exploring A Meteor Shower: A Coloring and Learning Guide for Kids
🎨
Exploring A Friendly Alien Spaceship: A Coloring and Learning Guide for Kids
🎨
A Circus Tightrope Net Coloring and Drawing Ideas for Kids
👨👩👧
Easy Road Trip Activities With Coloring Pages
🎨
A Lasso Rope: A Wild West Coloring and History Guide for Kids
🔎
Exploring Concept Mapping for Students
🎨
Koala Coloring and Drawing Ideas for Kids
🎨
Valentine's Day Coloring Ideas and Activities for the Whole Family
🎨
Dingo Coloring and Drawing Ideas for Kids
🔬
Understanding Additive Color Mixing
🎨
Artichoke Coloring and Drawing Ideas for Kids
🎨
A Ship Sailing into a Sunset Coloring and Drawing Ideas for Kids
🧒
Drawing Activities for Preschoolers
🎨
A Basket of Croissants: Coloring Ideas and Fun Facts for Kids
🎨
Crop Rotation: A Coloring and Food Science Guide for Kids
🎨
Comparing Tablet Coloring Apps: A Practical Guide
🎨
A Knight's Shield and Sword: A Medieval Coloring and History Guide for Kids
🍎
A Teacher's Guide to Classroom Coloring Stations
🎨
Heat Wave Safety: A Family Safety Guide
🎨
A Sleeping Bag Under the Stars: Coloring Ideas for Your Next Family Adventure
🎨
Choosing a Pencil Sharpener: A Buying and Technique Guide
🎨
Jack and Jill: A Nursery Rhyme Coloring Guide for Kids
🎨
A Trapeze Artist Coloring and Drawing Ideas for Kids
🎨
A Carnival Balloon Animal Coloring and Drawing Ideas for Kids
🎨
A Sound Vibration Experiment: A Step-by-Step Science Guide for Kids
🎨
Triceratops Coloring Page: Fun Facts for Young Paleontologists
🎨
Dryad Coloring and Drawing Ideas for Kids
🎨
First Steps on the Moon: A Coloring and Space Mission Guide for Kids
🎨
The Little Mermaid: A Classic Story Coloring Guide for Kids
🎨
a Calm-Down Corner: A Simple Mindfulness Activity for Kids
🎨
Scented Markers: A Buying and Technique Guide
🎨
A Safe Room at Home: A Family Safety Guide
🔤
How Pictures Help Children Learn Everyday Objects
🍎
How Teachers Can Use Assessing Creativity in the Classroom
🎨
Taking Turns in a Game: A Simple Social Skill for Kids
🎨
A Concrete Foundation Pour Coloring and Drawing Ideas for Kids
🎨
Easy Favorite Foods Drawing Ideas
🎨
How Muscles Work: A Coloring and Health Guide for Kids
🎨
Winter Earmuffs: Coloring Ideas and Activities for the Whole Family
🧘
Why Nature-Inspired Calm Coloring Feels Calming
🎨
How to Draw a Glockenspiel: A Coloring and Music Guide for Kids
🎨
Tag: A Coloring and Playtime Guide for Kids
🎨
Cinco de Mayo Coloring Ideas and Activities for the Whole Family
🎨
Siren Coloring and Drawing Ideas for Kids
🎨
A Simple Trade or Barter Scene: A Money Guide for Kids and Parents
🎨
Lotus Flower: A Coloring and Nature Guide for Kids
🎨
A Cowboy Guitar by the Campfire: A Wild West Coloring and History Guide for Kids
🧒
A Parent's Guide to Ages 5-6
🎨
Ancient Greek Columns: An Ancient History Coloring Guide for Kids
🎨
Hickory Dickory Dock: A Nursery Rhyme Coloring Guide for Kids
🔬
The Science Behind RGB Color Mixing
🎨
Preserving Finished Coloring Pages: A Buying and Technique Guide
🌈
Fun Vehicles Coloring Pages for Kids
🎨
Hopscotch: A Coloring and Playtime Guide for Kids
🎲
Football Play Diagrams: A Creative Twist
🔎
Using Timeline Diagrams to Solve Problems
🔤
How Pictures Help Children Learn the Alphabet
🎨
A Beginner's Guide to Drawing Sports
🎨
A Pair of Pruning Shears: A Gardening Guide for Kids and Families
🎨
Teaching Responsibility: A Simple Activity for Kids
🔬
Understanding CMYK Printing Colors
🎨
How to Draw a Parallelogram: A Step-by-Step Guide for Kids
🎨
Easy Farm Life Drawing Ideas
🎨
Fun Delivery Van Coloring and Drawing Ideas for Kids
🎨
A Beginner's Guide to Drawing Self-Portraits
🎨
A Piggy Bank: A Money Guide for Kids and Parents
🔎
Exploring Sketch Journaling for Students
🎨
Bowling Coloring Pages and Drawing Ideas for Kids
🎨
Avocado Coloring and Drawing Ideas for Kids
🧒
How Drawing Supports First-Time Artists
🎨
Extreme Cold Safety: A Family Safety Guide
🌈
Printable Jungle Scenes Coloring Activities
🎨
A Space Elevator Concept: A Coloring and Space Mission Guide for Kids
🎨
A Backhoe Loader Coloring and Drawing Ideas for Kids
🔎
Exploring Diagrams in Science for Students
🎨
Washing Hands Before Eating: A Coloring and Health Guide for Kids
🖌️
Why Composition Basics Matters for Young Artists
🎨
A Kids' Money Jar Labeled Goals: A Money Guide for Kids and Parents
👨👩👧
Coloring Ideas for Grandparent and Grandchild Activities
🏺
The History of Prehistoric Drawing Tools
🎨
A Cuban Guayabera Shirt: A Coloring and Culture Guide for Kids
🎨
Three Little Kittens: A Nursery Rhyme Coloring Guide for Kids
💡
How Drawing Encourages Open-Ended Play
🎨
Fun Family Portraits Drawing Activities for Kids
🎨
Ancient Egyptian Hieroglyphics: An Ancient History Coloring Guide for Kids
🧠
How Drawing May Support Observation Skills
🖌️
A Beginner's Guide to Layering Techniques
🎨
Cheetah Coloring and Drawing Ideas for Kids
💡
Nurturing Personal Artistic Style at Home
🌈
Relaxing Nature Landscapes Coloring Activities
🎨
Fun Bicycle Coloring and Drawing Ideas for Kids
🎨
A Ballet Barre Practice: A Coloring and Movement Guide for Kids
🍂
Creative Hanukkah Coloring Projects for Classrooms
🎨
Badger Coloring and Drawing Ideas for Kids
🎨
a Bedtime Wind-Down Routine: A Simple Mindfulness Activity for Kids
🎨
Fun Monorail Coloring and Drawing Ideas for Kids
🔬
A Simple Guide to How Light Creates Color
🎨
A Pierogi Plate: Coloring Ideas and Fun Facts for Kids
🌈
Creative Ways to Color Buildings and Castles
🔎
How Timeline Diagrams Support Learning
📐
Why Patterns and Drawing Go Together
🎨
Backyard Squirrel Coloring and Drawing Ideas for Kids
🎨
A Smartwatch: A Coloring and Invention Guide for Kids
🎨
A Homework Folder: A Classroom Coloring and Learning Guide
💗
Understanding Art and Relaxation
🎨
Meet Pointillism: An Art Appreciation Guide for Kids
🎨
Silverfish Coloring and Drawing Ideas for Kids
🎨
A Flamenco Dancer: A Coloring and Movement Guide for Kids
🎨
A Family Discussing a Big Purchase: A Money Guide for Kids and Parents
🔎
How Sketching to Understand Complex Ideas Support Learning
🎨
Fun Hot Air Balloon Coloring and Drawing Ideas for Kids
🧠
Exploring Drawing and Working Memory
🔎
Why Visual Thinkers Use Mind Maps
🌈
Relaxing Mandalas Coloring Activities
🎨
Chore Chart Printables: Free Ideas for Your Next Celebration
🎨
How to Draw a Zither: A Coloring and Music Guide for Kids
🧠
The Link Between Drawing and Sequential Thinking
🖌️
How to Practice Working With Light and Shadow
🎨
Fun Gardens and Flowers Drawing Activities for Kids
🍎
Classroom Ideas: Differentiated Art Instruction
🎨
A Class Election: A Classroom Coloring and Learning Guide
🎨
Cupcake Decorating Coloring Ideas for Kids Who Love to Create
🎨
Walrus Coloring and Drawing Ideas for Kids
🎨
How to Draw a A Grid of Squares: A Step-by-Step Guide for Kids
🌈
Creative Ways to Color Weather Scenes
👨👩👧
Easy Grandparent and Grandchild Activities With Coloring Pages
🎨
A Sandcastle Coloring and Drawing Ideas for Kids
🎨
Garden Composting: A Coloring and Food Science Guide for Kids
🔤
Drawing Activities for Early Literacy Skills
🖍️
Tips for Coloring Skin Tones
🎨
Hydra Coloring and Drawing Ideas for Kids
🎨
Building a Moon Base: A Coloring and Space Mission Guide for Kids
🎨
Fun Buildings and Houses Drawing Activities for Kids
🧒
Fun Ways to Build Ages 3-4
🎨
A Woolly Rhino Coloring Page: Fun Facts for Young Paleontologists
📴
Making the Most of Sick Days at Home Without Screens
📐
How Children Understand Graphs and Charts With Art
🎨
Caiman Coloring and Drawing Ideas for Kids
📐
Teaching Shapes Through Coloring and Drawing
🌈
Relaxing Community Helpers Coloring Activities
🎨
River Bend Coloring Page: A Nature Learning Guide for Kids
🎨
Cricket Coloring Pages and Drawing Ideas for Kids
👨👩👧
Creative After-School Activities for Kids
✏️
Easy Steps to Practice Holding a Pencil Correctly
🎨
A Row of Planted Seeds: A Gardening Guide for Kids and Families
🎨
Easy Everyday Objects Drawing Ideas
🎨
How to Draw a Wind Chimes: A Coloring and Music Guide for Kids
🎨
A Show-and-Tell Object: A Classroom Coloring and Learning Guide
🎨
How to Draw a Zentangle Pattern: A Step-by-Step Guide
🎨
A Pet Birthday Celebration: A Simple Pet Care Guide for Kids
🎨
A Launch Countdown: A Coloring and Space Mission Guide for Kids
🎨
A Carnival Game Booth Coloring and Drawing Ideas for Kids
🎨
Classroom Printing on a Budget: A Practical Guide
🎨
A Kids' Business Idea: A Money Guide for Kids and Parents
🎨
A Medieval Trade Caravan: A Medieval Coloring and History Guide for Kids
🎨
Meet Mosaic Art: An Art Appreciation Guide for Kids
🎨
A Wagon Ride on the Farm Coloring and Drawing Ideas for Kids
📐
How Children Understand Grids and Coordinates With Art
🧘
Why Coloring in Silence Feels Calming
📴
Creative Alternatives to Screens During Weekend Mornings
🎨
A Kids' Pretend Store: A Money Guide for Kids and Parents
💡
Building Creative Confidence Through Coloring and Drawing
🎨
Meet the Scientist: A Community Helper Coloring Guide
🎨
Winter Hot Cocoa by the Fire: Coloring Ideas and Activities for the Whole Family
🎲
Using Drawing for Collaborative Drawing Games
🧒
How Drawing Supports Hand-Eye Coordination
🍂
Fun Winter Classroom Coloring Ideas
🎨
Golf Coloring Pages and Drawing Ideas for Kids
🎨
A Beginner's Guide to Drawing Emotions and Faces
🎨
Kale Coloring and Drawing Ideas for Kids
👨👩👧
Creative Activities for Only Children for Kids
🎨
Marble Run Coloring and Drawing Ideas for Kids
👨👩👧
Coloring Ideas for Low-Mess Activities
🎨
A Solar Oven S'more: A Step-by-Step Science Guide for Kids
🎨
Creative Weather Drawing Exercises
🎨
The Letter Q: An Alphabet and Number Coloring Page
🎨
Fall Pumpkin Carving: Coloring Ideas and Activities for the Whole Family
📴
Creative Alternatives to Screens During Outdoor Picnics
🎨
A Savings Goal Thermometer: A Money Guide for Kids and Parents
🎨
Sea Sponge Coloring and Drawing Ideas for Kids
🎨
A Pet Sitter Visit: A Simple Pet Care Guide for Kids
👨👩👧
Fun and Simple After-School Activities
🎨
Color vs. Black-and-White Printing: A Practical Guide
🎨
Wearing Glasses: A Coloring and Health Guide for Kids
📐
Learning Patterns Through Drawing
🎲
Step-by-Step Drawing-Based Party Games
🍂
Fun Graduation Season Classroom Coloring Ideas
🎨
Tug of War Coloring Pages and Drawing Ideas for Kids
🍂
Creative Spring Coloring Projects for Classrooms
🖌️
Why Outlining Techniques Matters for Young Artists
🎨
A Pet's Name Tag: A Simple Pet Care Guide for Kids
🎨
Meet the Zookeeper: A Community Helper Coloring Guide
🎨
A Mars Rover Deployment: A Coloring and Space Mission Guide for Kids
🎨
An X-Ray Vision Superhero: A Superhero Coloring and Design Guide for Kids
🎨
Viking Explorers: An Ancient History Coloring Guide for Kids
🎨
Delta River Mouth Coloring Page: A Nature Learning Guide for Kids
🎲
Fun Treasure Map Games for Kids
🔎
A Beginner's Guide to Sketching to Understand Complex Ideas
🎨
A Wild Mustang Running Free: A Wild West Coloring and History Guide for Kids
🎨
Comforting a Sad Friend: A Simple Social Skill for Kids
🏺
Why Ancient Egyptian Art Matter to Historians
🎨
a Class Photo Frame: Free Ideas for Your Next Celebration
👨👩👧
Fun and Simple Grandparent and Grandchild Activities
🎨
Burnishing Technique: A Buying and Technique Guide
🎨
Choosing the Right Printer Ink: A Practical Guide
🎨
Wild Turkey Coloring and Drawing Ideas for Kids
🎨
Turning Coloring Pages Into Cards: A Practical Guide
🎨
Teaching Courage: A Simple Activity for Kids
🎨
Fun Vehicles Drawing Activities for Kids
🍎
A Teacher's Guide to Indoor Recess Activities
🎨
Exploring A Spiral Galaxy: A Coloring and Learning Guide for Kids
🎨
The Boy Who Called Wolf: A Classic Story Coloring Guide for Kids
🎨
Easy Dinosaurs Drawing Ideas
🎨
Fun Pickup Truck Coloring and Drawing Ideas for Kids
🍎
Classroom Ideas: Classroom Coloring Stations
🎨
Pumpkin Coloring and Drawing Ideas for Kids
🎨
A Treasure Map Coloring and Drawing Ideas for Kids
🎨
Rain Boots and an Umbrella: Coloring Ideas and Activities for the Whole Family
🎨
Holding the Door for Someone: A Simple Social Skill for Kids
🎨
A Sequoia Tree: A Coloring and Nature Guide for Kids
🎨
Rooster Coloring Page Ideas for Kids
🎨
a Worry Monster Craft: A Simple Mindfulness Activity for Kids
🎨
A Diwali Rangoli Design: Coloring Ideas and Fun Facts for Kids
🎨
A Loop of Repeated Steps: A Coloring and STEM Guide for Kids
🎨
Meet the Fisherman: A Community Helper Coloring Guide
🎨
A Wheelbarrow of Mulch: A Gardening Guide for Kids and Families
🖌️
Simple Steps for Using Colored Pencils
🎨
A Trail of Wildflowers: Coloring Ideas for Your Next Family Adventure
🎨
Teaching Dependability: A Simple Activity for Kids
🌈
A Guide to Fairy Tale Scenes Coloring Pages
🎨
Forbidden City: Coloring Page and Fun Facts for Kids
👨👩👧
Fun and Simple Sibling Bonding Activities
🔬
Understanding Digital vs Traditional Color
🎨
A Superhero Costume Design Contest: A Superhero Coloring and Design Guide for Kids
🎨
Baby Shower Coloring Sheets: Free Ideas for Your Next Celebration
🔤
Learning Animal Names Through Drawing
🧒
How Drawing Supports Ages 2-3
🎨
A Samoan Traditional Lavalava: A Coloring and Culture Guide for Kids
🔬
A Simple Guide to Color Wheels
🖍️
A Beginner's Guide to Coloring Skies and Backgrounds
🎲
Using Drawing for Chess Strategy Diagrams
🎨
Using Please and Thank You at a Restaurant: A Simple Social Skill for Kids
🎨
Sunrise Over Hills Coloring Page: A Nature Learning Guide for Kids
🎨
A Moon Cake for Mid-Autumn Festival: Coloring Ideas and Fun Facts for Kids
🎨
Farm Dog Coloring and Drawing Ideas for Kids
🎨
New Year's Eve Coloring Ideas and Activities for the Whole Family
🖍️
Simple Techniques for Coloring Skies and Backgrounds
🎨
Crystal Unicorn Coloring and Drawing Ideas for Kids
🎨
Zipping a Jacket: A Simple Life Skill for Kids
🎨
Alcohol Markers vs. Water-Based Markers: A Buying and Technique Guide
🎨
Rock-a-Bye Baby: A Nursery Rhyme Coloring Guide for Kids
🍂
Fun Autumn Classroom Coloring Ideas
🖍️
Tips for Coloring With Markers
🌈
Fun Robots and Machines Coloring Pages for Kids
💡
Why Creative Journaling Matters for Young Artists
🎨
A Skyscraper Being Built Coloring and Drawing Ideas for Kids
🎨
Bhangra Dancers: A Coloring and Movement Guide for Kids
🎨
An Allowance Chart: A Money Guide for Kids and Parents
🖌️
Exploring Cross-Hatching
🎨
the First Day of School Coloring Ideas and Activities for the Whole Family
🎨
Meet the Journalist: A Community Helper Coloring Guide
🎨
A Wild West Saddle: A Wild West Coloring and History Guide for Kids
🎨
A Delivery Drone: A Coloring and Invention Guide for Kids
🍂
Printable Spring Coloring Pages for Kids
🏺
Why Cave Paintings Matter to Historians
🎨
Preparing a Go-Bag: A Family Safety Guide
🎨
A Family Reunification Plan: A Family Safety Guide
💡
The Role of Creative Confidence in Children's Art
🎨
A Sea Chart and Compass Coloring and Drawing Ideas for Kids
🎨
Earth Day Coloring Ideas and Activities for the Whole Family
🎨
A Moon Buggy: A Coloring and Space Mission Guide for Kids
💡
Nurturing Free Drawing at Home
🎨
Quail Coloring Page Ideas for Kids
🎨
a Worry Jar Craft: A Simple Mindfulness Activity for Kids
🎨
Staying Positive During an Emergency: A Family Safety Guide
🎨
Sharks and Minnows: A Coloring and Playtime Guide for Kids
🌈
Relaxing Dinosaurs Coloring Activities
🎨
Fun Musical Instruments Drawing Activities for Kids
🔬
Understanding Warm and Cool Colors
🎨
Triangular Crayons for Grip: A Buying and Technique Guide
🎨
Asking for Help Politely: A Simple Life Skill for Kids
🎨
Exploring The Big Dipper: A Coloring and Learning Guide for Kids
🎨
A Dance Recital: A Coloring and Movement Guide for Kids
🎨
Backyard Deer Coloring and Drawing Ideas for Kids
🎨
A Dragon Guarding a Castle: A Medieval Coloring and History Guide for Kids
🎨
A Medieval Scribe Writing: A Medieval Coloring and History Guide for Kids
🎨
A Rocket Engine Ignition: A Coloring and Space Mission Guide for Kids
✏️
Why Drawing Curved Lines Matters for New Artists
🎨
Emotions and Faces Drawing Prompts for Beginners
🎨
A Tisket A Tasket: A Nursery Rhyme Coloring Guide for Kids
🖌️
Exploring Using Oil Pastels
🎨
A Castle Rose Garden: A Medieval Coloring and History Guide for Kids
🎨
Exploring Ireland: A Coloring and Culture Guide for Kids
🎨
Friendship Kindness Cards: A Simple Mindfulness Activity for Kids
✏️
Fun Exercises for Pencil Control
💗
Exploring What Art Therapy Actually Is Through Art
💗
Exploring Art for Quiet Reflection Through Art
🎨
A Boardwalk Bumper Cars Ride Coloring and Drawing Ideas for Kids
🧠
Exploring Drawing and Observation Skills
🎨
A Lantern-Lit Ship at Night Coloring and Drawing Ideas for Kids
🎨
A Tunnel Boring Machine Coloring and Drawing Ideas for Kids
🎨
The Maya Pyramid Temples: An Ancient History Coloring Guide for Kids
🎨
Daddy Long Legs Coloring and Drawing Ideas for Kids
✏️
How to Improve Your Drawing Paper Types
🎨
How to Draw a Gong: A Coloring and Music Guide for Kids
🧠
How Drawing May Support Patience
🎨
Concert Stage Lights: A Coloring and Movement Guide for Kids
🎨
Germs and Handwashing: A Coloring and Health Guide for Kids
🎨
Octopus Coloring and Drawing Ideas for Kids
💡
Nurturing Daydreaming at Home
👨👩👧
Fun and Simple Low-Mess Activities
🎨
A Forest Ranger Station: Coloring Ideas for Your Next Family Adventure
📐
How Children Understand Sequences With Art
🎨
Teaching Wisdom: A Simple Activity for Kids
🍂
Printable Summer Coloring Pages for Kids
🎨
Exploring Nepal: A Coloring and Culture Guide for Kids
🧠
How Drawing May Support Spatial Awareness
🎨
Double Rainbow Coloring Page: A Nature Learning Guide for Kids
🎲
Using Drawing for Visual Puzzle Games
🎨
Fun Birds Drawing Activities for Kids
🎨
Bubble Breathing: A Simple Mindfulness Activity for Kids
🎨
A Starfish on the Sand Coloring and Drawing Ideas for Kids
🧠
How Drawing May Support Fine Motor Coordination
🖌️
How to Practice Composition Basics
📴
Creative Alternatives to Screens During Camping Trips
💡
Nurturing Combining Ideas at Home
🖌️
Why Using Oil Pastels Matters for Young Artists
🎨
A Medieval Village Market: A Medieval Coloring and History Guide for Kids
🎨
Canada Day Coloring Ideas and Activities for the Whole Family
👨👩👧
Coloring Ideas for Bedtime Wind-Down Routines
💗
The Role of Coloring in Art for Quiet Reflection
🎨
The Number 13: An Alphabet and Number Coloring Page
📐
Fun Drawing Activities for Patterns
🎲
Step-by-Step Memory Matching Games
🎨
A Chameleon Changing Colors Coloring and Drawing Ideas for Kids
🎨
Mindful Eating: A Simple Mindfulness Activity for Kids
🍂
Creative Valentine's Day Coloring Projects for Classrooms
🎨
A Training Centrifuge: A Coloring and Space Mission Guide for Kids
🎨
Mindful Coloring Mandalas: A Simple Mindfulness Activity for Kids
🎨
Exploring the Philippines: A Coloring and Culture Guide for Kids
🔤
Learning the Alphabet Through Drawing
🎨
How to Draw a Moon Mandala: A Step-by-Step Guide
🎨
A Garden Fairy House: A Gardening Guide for Kids and Families
🔎
Why Visual Thinkers Use Flowcharts
🍂
Celebrate Hanukkah With Coloring Activities
🎨
Eco-Friendly Printing: A Practical Guide
💡
The Role of Free Drawing in Children's Art
🎲
Using Drawing for Tic-Tac-Toe Variations
🎨
A Medieval Falconer: A Medieval Coloring and History Guide for Kids
🎨
Meet the Architect: A Community Helper Coloring Guide
🎨
A House of Mirrors Coloring and Drawing Ideas for Kids
📴
Screen-Free Coloring Ideas for Holiday Travel
👨👩👧
Creative Sibling Bonding Activities for Kids
👨👩👧
Coloring Ideas for Quiet Time Activities
🖍️
Why Coloring Cartoon Characters Makes a Difference
🎨
The Number 18: An Alphabet and Number Coloring Page
💡
The Role of Making Mistakes in Art in Children's Art
🌈
Fun Seasonal Scenes Coloring Pages for Kids
🎨
A Castle Drawbridge: A Medieval Coloring and History Guide for Kids
🎨
Saying Please and Thank You: A Simple Life Skill for Kids
🎨
Milkshake Coloring Ideas for Kids Who Love to Create
🎨
Little Red Riding Hood: A Classic Story Coloring Guide for Kids
🧒
What to Expect When Teaching Pencil Grip Development
🎨
Making a Grocery List: A Simple Life Skill for Kids
🎨
Kids Yoga Poses for Calm: A Simple Mindfulness Activity for Kids
✏️
How to Improve Your Sketching Basics
🎨
A Classroom Aquarium: A Classroom Coloring and Learning Guide
🎨
A Summer Swimsuit: Coloring Ideas and Activities for the Whole Family
💡
The Role of Creative Journaling in Children's Art
🎨
Meet the Judge: A Community Helper Coloring Guide
👨👩👧
Making the Most of Outdoor-Inspired Drawing
🎨
A Superhero Training Obstacle Course: A Superhero Coloring and Design Guide for Kids
🍂
Printable Thanksgiving Coloring Pages for Kids
🎨
A Grater: A Kitchen Guide for Kids and Parents
🎨
Fun Nature Scenes Drawing Activities for Kids
🎨
a Growth Mindset Poster: A Simple Mindfulness Activity for Kids
🎨
A Circus Elephant Coloring and Drawing Ideas for Kids
📴
Making the Most of Waiting Rooms Without Screens
🎨
A Cowboy Bandit on Horseback: A Wild West Coloring and History Guide for Kids
🎨
Diwali Coloring Ideas and Activities for the Whole Family
🌈
Relaxing Space Coloring Activities
🎨
How to Draw Under the Sea Step by Step
🖍️
A Beginner's Guide to Choosing Paper for Coloring
🎨
A Kite Festival in the Sky: Coloring Ideas and Fun Facts for Kids
🎨
Teaching Generosity: A Simple Activity for Kids
🎨
an Emotional Regulation Toolkit: A Simple Mindfulness Activity for Kids
🧒
Understanding Fine Motor Skills in Early Childhood
🌈
Fun Ocean Life Coloring Pages for Kids
🌈
Fun Flowers and Gardens Coloring Pages for Kids
🎨
Being a Good Sport After Losing: A Simple Social Skill for Kids
🎨
A Frog on a Lily Pad Coloring and Drawing Ideas for Kids
🎨
Standing Up for a Friend: A Simple Social Skill for Kids
🎨
Packing a Lunch: A Simple Life Skill for Kids
🍎
A Teacher's Guide to Classroom Printable Activities
🎨
How to Draw a A Shape Puzzle Page: A Step-by-Step Guide for Kids
🎨
Cabbage Coloring and Drawing Ideas for Kids
🎨
A Violinist Performing: A Coloring and Movement Guide for Kids
🎨
A Kids' Cooking Class Scene: A Kitchen Guide for Kids and Parents
🎨
Pow Wow Dancers: A Coloring and Movement Guide for Kids
🎨
Moose Coloring and Drawing Ideas for Kids
🎨
Cactus: A Coloring and Nature Guide for Kids
🎨
Niagara Falls: Coloring Page and Fun Facts for Kids
🎨
Setting an Alarm Clock: A Simple Life Skill for Kids
📴
Why Coloring Beats Scrolling on Weekend Mornings
🎨
Australia Day Coloring Ideas and Activities for the Whole Family
🎨
A Camping Flashlight: Coloring Ideas for Your Next Family Adventure
🎨
A Dog Learning to Fetch: A Simple Pet Care Guide for Kids
📐
Fun Drawing Activities for Grids and Coordinates
🎨
Exploring Sweden: A Coloring and Culture Guide for Kids
🎨
A Science Fair Project: A Classroom Coloring and Learning Guide
🍎
Simple Assessing Creativity in the Classroom for Busy Classrooms
🧠
Exploring Drawing and Spatial Awareness
🎨
A Vertical Garden Wall: A Gardening Guide for Kids and Families
🍂
Celebrate Father's Day With Coloring Activities
🎨
Carrot Coloring and Drawing Ideas for Kids
🔤
Visual Vocabulary: Descriptive Words
🔤
Visual Vocabulary: Story Sequencing
📐
Fun Drawing Activities for Sequences
🎨
A Cowboy Campfire Sing-Along: A Wild West Coloring and History Guide for Kids
🎨
Solomon Grundy: A Nursery Rhyme Coloring Guide for Kids
🌈
Creative Ways to Color Emotions and Faces
🎨
Iguazu Falls: Coloring Page and Fun Facts for Kids
🎨
a Sticker Chart Printable: Free Ideas for Your Next Celebration
🎨
Eid al-Fitr Coloring Ideas and Activities for the Whole Family
🎨
Father's Day Coloring Ideas and Activities for the Whole Family
🎨
A Kitchen Apron for Kids: A Kitchen Guide for Kids and Parents
🎨
Okra Coloring and Drawing Ideas for Kids
🎨
A Marching Band Drumline: A Coloring and Movement Guide for Kids
🎨
An Egyptian Traditional Galabeya: A Coloring and Culture Guide for Kids
🎨
Sleepover Activity Ideas: Free Ideas for Your Next Celebration
🎨
Teaching Gratitude Journaling: A Simple Activity for Kids
🎨
A Homemade Bubble Solution: A Step-by-Step Science Guide for Kids
🎨
A Group Campfire Sing-Along: Coloring Ideas for Your Next Family Adventure
🌈
A Guide to Everyday Objects Coloring Pages
Why Visual Thinkers Use Sketch Journaling
🎨
an Emotion Faces Chart: A Simple Mindfulness Activity for Kids
🧒
Fun Ways to Build Encouraging Reluctant Artists
🎨
Wee Willie Winkie: A Nursery Rhyme Coloring Guide for Kids
🏺
Exploring Hieroglyphics
🔬
A Simple Guide to RGB Color Mixing
🎨
Feeding a Dog: A Simple Pet Care Guide for Kids
🎨
A Talking Robot: A Coloring and Invention Guide for Kids
🔎
Why Visual Thinkers Use Sketching to Understand Complex Ideas
📐
Teaching Graphs and Charts Through Coloring and Drawing
🎨
How to Draw a Ukulele: A Coloring and Music Guide for Kids
🍎
Using Coloring Pages for Differentiated Art Instruction
💬
Why Visual Instructions Matter in Everyday Life
💡
Why Storytelling Matters for Young Artists
🎨
A Dog Toy Basket: A Simple Pet Care Guide for Kids
🌈
Jungle Scenes Coloring Ideas for Classrooms
🎨
Meet Pop Art: An Art Appreciation Guide for Kids
🎨
A Face Painting Booth Coloring and Drawing Ideas for Kids
🎨
A Circus Poodle Coloring and Drawing Ideas for Kids
🎨
How to Draw a Castanets: A Coloring and Music Guide for Kids
💬
The Power of Diagrams
🎨
A Wooden Ship's Wheel Coloring and Drawing Ideas for Kids
📐
Fun Drawing Activities for Shapes
🎨
Golden Pavilion: Coloring Page and Fun Facts for Kids
🎨
An Electric Car: A Coloring and Invention Guide for Kids
🎨
How to Draw a Drum: A Coloring and Music Guide for Kids
💡
Building Character Design Through Coloring and Drawing
🎨
Pyramids of Giza: Coloring Page and Fun Facts for Kids
🎨
Wildfire Awareness: A Family Safety Guide
🎨
A Swing Set Contest: A Coloring and Playtime Guide for Kids
🔬
Why Screens Use RGB Explained for Kids
🎨
Ancient Phoenician Sailors and Traders: An Ancient History Coloring Guide for Kids
🎨
Fun Unicycle Coloring and Drawing Ideas for Kids
🎨
Severe Weather Alerts on a Phone: A Family Safety Guide
🎨
A Classroom Weather Chart: A Classroom Coloring and Learning Guide
🎲
Fun Visual Puzzle Games for Kids
🖌️
Simple Steps for Using Watercolor
🎨
A Coin Sorting Jar: A Money Guide for Kids and Parents
🎨
Genie Coloring and Drawing Ideas for Kids
💡
Building Personal Artistic Style Through Coloring and Drawing
🎨
A Family Pet Portrait: A Simple Pet Care Guide for Kids
🎨
A Robotic Vacuum: A Coloring and Invention Guide for Kids
🎨
Exploring A Star Cluster: A Coloring and Learning Guide for Kids
🎨
Exploring A Space Dust Cloud: A Coloring and Learning Guide for Kids
🎨
Freeze Dance: A Coloring and Playtime Guide for Kids
🍎
A Teacher's Guide to Art Lessons for History Class
🎨
A School Assembly: A Classroom Coloring and Learning Guide
🎨
Pandora's Box: A Classic Story Coloring Guide for Kids
🏺
What We Know About Petroglyphs and Rock Art
✏️
Fun Exercises for Drawing Simple Faces
🎨
Woolly Mammoth Coloring Page: Fun Facts for Young Paleontologists
🎨
The Pied Piper: A Classic Story Coloring Guide for Kids
🎨
Five Senses Grounding: A Simple Mindfulness Activity for Kids
🍂
Fun Easter Classroom Coloring Ideas
🎨
Popcorn Coloring Ideas for Kids Who Love to Create
🔤
Using Coloring Pages to Teach Sentence Building
🎨
A Simple Loan Between Siblings: A Money Guide for Kids and Parents
🎨
Saying Please and Thank You: A Simple Social Skill for Kids
🎨
an Emotion Check-In Chart: A Simple Mindfulness Activity for Kids
✏️
Easy Steps to Practice Basic Perspective
🎨
The Number 12: An Alphabet and Number Coloring Page
🖌️
A Beginner's Guide to Outlining Techniques
📴
Creative Alternatives to Screens During Family Game Nights
💡
Why Artistic Risk-Taking Matters for Young Artists
🖌️
Exploring Using Colored Pencils
🔎
Why Visual Thinkers Use Connecting Ideas Through Drawing
💬
The Power of Maps and Wayfinding Symbols
🎨
A Shrinking-Power Superhero: A Superhero Coloring and Design Guide for Kids
🎨
Exploring Indonesia: A Coloring and Culture Guide for Kids
🖍️
A Beginner's Guide to Coloring With Watercolor Pencils
🔤
Drawing Activities for Sentence Building
🎨
A Knight in Shining Armor: A Medieval Coloring and History Guide for Kids
🎨
Jack-in-the-Box Coloring and Drawing Ideas for Kids
🎨
A Kids' Fundraiser Table: A Money Guide for Kids and Parents
🎨
Meet the Painter and Decorator: A Community Helper Coloring Guide
🎨
A Robot Pet: A Coloring and Invention Guide for Kids
🎨
How to Draw a Semicircle: A Step-by-Step Guide for Kids
🎨
Weekly Planner Doodles: Free Ideas for Your Next Celebration
🧒
Understanding Color Recognition in Early Childhood
🧒
Drawing Activities for Toddlers (Ages 1-2)
🔬
Color Psychology Explained for Kids
🎨
How to Draw a Steel Drum: A Coloring and Music Guide for Kids
💬
How Wordless Storytelling Communicate Ideas
🖌️
Why Layering Techniques Matters for Young Artists
🎨
Fun Camper Van Coloring and Drawing Ideas for Kids
🎨
A Farmers Market: A Coloring and Food Science Guide for Kids
🎨
A Pumpkin Patch Growing: A Gardening Guide for Kids and Families
🎨
King Snake Coloring and Drawing Ideas for Kids
🎨
Puss in Boots: A Classic Story Coloring Guide for Kids
🧒
What to Expect When Teaching Color Recognition
🌈
Relaxing Jungle Scenes Coloring Activities
🎨
Calm Breathing Star Cards: A Simple Mindfulness Activity for Kids
🧘
How Repetitive Pattern Coloring Can Create a Quiet Moment
🎨
A Cooling Rack: A Kitchen Guide for Kids and Parents
🖍️
A Beginner's Guide to Coloring Animals Realistically
🖍️
Why Coloring Large Areas Makes a Difference
🔎
Using Connecting Ideas Through Drawing to Solve Problems
🏺
Exploring Ancient Egyptian Art
✏️
How to Improve Your Using an Eraser Effectively
🔤
Using Coloring Pages to Teach the Alphabet
🧠
Why Drawing Can Help With Concentration and Focus
🎨
Bubbles Coloring and Drawing Ideas for Kids
🎨
Organizing Coloring Supplies: A Buying and Technique Guide
🎨
A Seagull on the Boardwalk Railing Coloring and Drawing Ideas for Kids
💗
Creative Approaches to Processing Big Feelings
🎨
a Beach Vacation Day Coloring Ideas and Activities for the Whole Family
🧘
Why Bedtime Coloring Routines Feels Calming
🎨
Angkor Wat: Coloring Page and Fun Facts for Kids
🎨
A Cape and Mask Design: A Superhero Coloring and Design Guide for Kids
🎨
A Greek Traditional Folk Costume: A Coloring and Culture Guide for Kids
🎨
Creative Birds Drawing Exercises
🍂
Seasonal Coloring Guide: Summer
💬
Why Visual Storytelling Matter in Everyday Life
💗
Creative Approaches to Art for Stressful Days
🖌️
How to Practice Stippling
📴
Hands-On Activities for Restaurant Wait Times
🎨
How to Draw a Argyle Pattern: A Step-by-Step Guide
🎨
Great Wall of China: Coloring Page and Fun Facts for Kids
🎨
CN Tower: Coloring Page and Fun Facts for Kids
🎨
A Pile of Lumber Coloring and Drawing Ideas for Kids
🎨
Reward Chart Coloring: Free Ideas for Your Next Celebration
🧘
Why Coloring as a Calm-Down Tool Feels Calming
👨👩👧
Making the Most of Activities for Only Children
🎨
A Superhero Helping an Elderly Neighbor: A Superhero Coloring and Design Guide for Kids
💬
Understanding Visual Storytelling
🖍️
Tips for Choosing Your First Coloring Pencils
🎨
Connect Four Board Coloring and Drawing Ideas for Kids
📐
Fun Drawing Activities for Proportion
🎨
A Treehouse Construction Coloring and Drawing Ideas for Kids
🎨
Spaghetti Coloring Ideas for Kids Who Love to Create
🧠
Can Drawing Improve Working Memory?
🎨
How to Draw a Star Mandala: A Step-by-Step Guide
🎲
Step-by-Step Collaborative Drawing Games
🎨
Empire State Building: Coloring Page and Fun Facts for Kids
🎨
The Elves and the Shoemaker: A Classic Story Coloring Guide for Kids
🎨
A Tightrope Walker Coloring and Drawing Ideas for Kids
🎨
Baa Baa Black Sheep: A Nursery Rhyme Coloring Guide for Kids
🧘
Simple Steps for Coloring for Focus
🎨
A Last Day of School Countdown: A Classroom Coloring and Learning Guide
🎨
A Cold Frame for Seedlings: A Gardening Guide for Kids and Families
🎨
Table Mountain: Coloring Page and Fun Facts for Kids
🎨
Humpty Dumpty: A Nursery Rhyme Coloring Guide for Kids
🎨
How to Draw a Heart: A Step-by-Step Guide for Kids
🔤
Learning Emotions and Feelings Words Through Drawing
🎨
How to Draw a Herringbone Pattern: A Step-by-Step Guide
🎨
Practicing Eye Contact While Talking: A Simple Social Skill for Kids
🔬
Understanding Color Contrast
🧠
How Drawing May Support Critical Thinking
🎨
The Letter K: An Alphabet and Number Coloring Page
🎨
Building a Snowman: Coloring Ideas and Activities for the Whole Family
🎨
A Dump Truck Unloading Coloring and Drawing Ideas for Kids
🎨
A Japanese Kimono: A Coloring and Culture Guide for Kids
🎨
a Safe Space Poster: A Simple Mindfulness Activity for Kids
🎨
A Beginner's Guide to Drawing Original Superhero Characters
🖍️
Tips for Coloring Skies and Backgrounds
📴
Creative Alternatives to Screens During Sick Days at Home
🖌️
Why Stippling Matters for Young Artists
💗
The Role of Coloring in Building Self-Esteem Through Art
🎨
Hamburger Coloring Ideas for Kids Who Love to Create
👨👩👧
Creative Rainy Day Activities for Kids
🎨
Jaguar Coloring and Drawing Ideas for Kids
🎨
Santa's Workshop Coloring Ideas and Activities for the Whole Family
💡
Nurturing Divergent Thinking at Home
🧒
How Drawing Supports Building Drawing Confidence
🎨
Easy Emotions and Faces Drawing Ideas
🍂
Creative Christmas Coloring Projects for Classrooms
🔤
Visual Vocabulary: Sight Words
🎨
Eagle Coloring Page Ideas for Kids
🌈
A Guide to Mandalas Coloring Pages
🎨
A Rodeo Bull Rider: A Wild West Coloring and History Guide for Kids
🎨
A Cowboy Boot: A Wild West Coloring and History Guide for Kids
🧒
What to Expect When Teaching First-Time Artists
🎨
A Poutine Plate: Coloring Ideas and Fun Facts for Kids
🎨
Dimetrodon Coloring Page: Fun Facts for Young Paleontologists
🎨
Dice Coloring and Drawing Ideas for Kids
🎨
A Superhero Lifting a Car: A Superhero Coloring and Design Guide for Kids
🎨
Certificate of Achievement Coloring: Free Ideas for Your Next Celebration
🎨
Behavior Chart Printables: Free Ideas for Your Next Celebration
🎨
A Clown Juggling Torches Coloring and Drawing Ideas for Kids
📴
Why Coloring Beats Scrolling on Outdoor Picnics
🎨
Woodpecker Coloring Page Ideas for Kids
🎨
Fire-Bellied Toad Coloring and Drawing Ideas for Kids
🧠
The Link Between Drawing and Imagination
🎨
A Dog Park Visit: A Simple Pet Care Guide for Kids
🎨
Teaching Sincerity: A Simple Activity for Kids
🎨
Leopard Gecko Coloring and Drawing Ideas for Kids
🎨
Butterfly Coloring and Drawing Ideas for Kids
✏️
Why Drawing From Observation Matters for New Artists
🎨
A Family Communication Plan: A Family Safety Guide
🎨
Meet Wassily Kandinsky: An Art Appreciation Guide for Kids
🎨
Story Time Circle: A Classroom Coloring and Learning Guide
🔤
How Pictures Help Children Learn Story Sequencing
🎨
Calf Coloring and Drawing Ideas for Kids
🎲
How to Play Strategy Sketching for Sports
🎨
Exploring Italy: A Coloring and Culture Guide for Kids
🎨
Fun Cement Mixer Coloring and Drawing Ideas for Kids
🎨
Ordinal Numbers First to Tenth: An Alphabet and Number Coloring Page
🧠
Exploring Drawing and Memory
🎨
A Wild West Railroad Station: A Wild West Coloring and History Guide for Kids
🍎
A Teacher's Guide to Back-to-School Activities
🎨
Surfing Coloring Pages and Drawing Ideas for Kids
🎨
A Paella Pan: Coloring Ideas and Fun Facts for Kids
🎨
Ankylosaurus Coloring Page: Fun Facts for Young Paleontologists
🖍️
Tips for Choosing Paper for Coloring
🎲
Mazes: A Creative Twist
📴
Making the Most of Device-Free Evenings Without Screens
🎨
Greeting a Guest Politely: A Simple Social Skill for Kids
🎨
Ibis Coloring Page Ideas for Kids
🎨
A Reading Nook: A Classroom Coloring and Learning Guide
🖍️
Why Coloring Inside the Lines Makes a Difference
🎨
Introducing Yourself Politely: A Simple Social Skill for Kids
📐
Teaching Measurement Through Coloring and Drawing
🎨
Exploring the Netherlands: A Coloring and Culture Guide for Kids
🎨
Fun Segway Coloring and Drawing Ideas for Kids
👨👩👧
Why Parents Love Screen-Free Afternoons
📐
Learning Graphs and Charts Through Drawing
🎨
Daffodil: A Coloring and Nature Guide for Kids
🎨
Blue Jay Coloring Page Ideas for Kids
🎨
Snapdragon: A Coloring and Nature Guide for Kids
🎨
The Three Billy Goats Gruff: A Classic Story Coloring Guide for Kids
🔬
Understanding Color Psychology
🧒
Understanding Ages 5-6 in Early Childhood
🍂
Fun St. Patrick's Day Classroom Coloring Ideas
🎨
A Paleontologist Dig Site Coloring Page: Fun Facts for Young Paleontologists
📴
Making the Most of Restaurant Wait Times Without Screens
📐
Fun Drawing Activities for Tessellations
🔤
Learning Sight Words Through Drawing
💗
The Role of Coloring in Creative Journaling
🧘
A Beginner's Guide to Coloring as a Calm-Down Tool
🍂
Seasonal Coloring Guide: Earth Day
💡
How Drawing Encourages Creative Journaling
🎨
Warthog Coloring and Drawing Ideas for Kids
🎨
A Giant Redwood Tree: A Coloring and Nature Guide for Kids
🔎
A Beginner's Guide to Visual Problem-Solving
🎨
Doctor Foster: A Nursery Rhyme Coloring Guide for Kids
🎨
Creative Vehicles Drawing Exercises
🎨
Lettuce Coloring and Drawing Ideas for Kids
👨👩👧
Making the Most of Summer Break Activities
🎨
Lighting for Coloring Sessions: A Buying and Technique Guide
🎨
Holiday Card Making: Free Ideas for Your Next Celebration
🏺
How Ancient Egyptian Art Shaped Human Communication
🎨
A Ship's Anchor Coloring and Drawing Ideas for Kids
🎨
Sharing a Toy: A Simple Life Skill for Kids
🎨
Ancient Sumerian Writing Tablets: An Ancient History Coloring Guide for Kids
🎨
Farm Life Drawing Prompts for Beginners
🎨
a Congratulations Card: Free Ideas for Your Next Celebration
🎨
A Fruit Bowl on the Counter: A Kitchen Guide for Kids and Parents
🎨
An Austrian Traditional Dress: A Coloring and Culture Guide for Kids
🔬
What Is How Light Creates Color?
🔤
How Pictures Help Children Learn Question Words
🎨
A Programmer at a Desk: A Coloring and STEM Guide for Kids
🎨
Teaching Teamwork: A Simple Activity for Kids
🎨
Meet the Construction Worker: A Community Helper Coloring Guide
🏺
The History of Ancient Pottery Art
🎨
A Traditional Woven Textile Pattern: A Coloring and Culture Guide for Kids
🍂
Seasonal Coloring Guide: Father's Day
🎨
Orchid: A Coloring and Nature Guide for Kids
🎨
An Animal-Whisperer Superhero: A Superhero Coloring and Design Guide for Kids
🎨
A Cargo Robot: A Coloring and Invention Guide for Kids
🎨
Honey Making: A Coloring and Food Science Guide for Kids
💗
How Drawing Supports Creative Journaling
🧒
Understanding The Symbol-Making Stage in Early Childhood
🌈
Printable Nature Landscapes Coloring Activities
🎨
A Butterfly Waystation: A Gardening Guide for Kids and Families
🎨
Narwhal Coloring and Drawing Ideas for Kids
🎨
A Horse-Drawn Buggy: A Wild West Coloring and History Guide for Kids
🎨
A Frontier River Crossing: A Wild West Coloring and History Guide for Kids
🎨
A Factory Robot Arm: A Coloring and Invention Guide for Kids
🎨
The Letter N: An Alphabet and Number Coloring Page
🎨
A Family Baking Day: A Kitchen Guide for Kids and Parents
🌈
A Guide to Food and Treats Coloring Pages
🎨
How to Draw a A Cross Shape: A Step-by-Step Guide for Kids
🎨
Flash Flood Awareness: A Family Safety Guide
🎨
A Dairy Farm: A Coloring and Food Science Guide for Kids
🎨
A Vegetable Harvest Basket: A Gardening Guide for Kids and Families
🎨
A Potting Bench: A Gardening Guide for Kids and Families
🎨
Meerkat Coloring and Drawing Ideas for Kids
🎨
Trick or Treating Coloring Ideas and Activities for the Whole Family
🎨
Gnat Coloring and Drawing Ideas for Kids
🎨
Bookmark Printables: Free Ideas for Your Next Celebration
🎨
How Lungs Breathe: A Coloring and Health Guide for Kids
🔤
Using Coloring Pages to Teach Animal Names
🖍️
How to Get Better at Using Complementary Colors
🎨
Tapir Coloring and Drawing Ideas for Kids
🎲
Storyboard Games: A Creative Twist
🎨
Meet the Chef: A Community Helper Coloring Guide
🎨
Meet Sculpture Art: An Art Appreciation Guide for Kids
🍎
A Teacher's Guide to Circle Time Activities
🎨
Cave Formation Coloring Page: A Nature Learning Guide for Kids
✏️
How to Improve Your Drawing Stick Figures
🎨
A Lunch Tray: A Classroom Coloring and Learning Guide
🍎
Classroom Ideas: Assessing Creativity in the Classroom
🎨
Building Blocks Coloring and Drawing Ideas for Kids
🎨
An Ice Cream Stand on the Boardwalk Coloring and Drawing Ideas for Kids
🎨
Orange Coloring and Drawing Ideas for Kids
🧒
Fun Ways to Build Fine Motor Skills
🖌️
A Beginner's Guide to Stippling
🎨
A Long-Necked Herd at a Watering Hole Coloring Page: Fun Facts for Young Paleontologists
🎨
Geyser Eruption Coloring Page: A Nature Learning Guide for Kids
🎨
Staying Informed During a Storm Watch: A Family Safety Guide
💬
Why Infographics Matter in Everyday Life
🎨
A Bandage on a Scrape: A Coloring and Health Guide for Kids
🎨
Hand Puppet Coloring and Drawing Ideas for Kids
🎨
Ring Around the Rosie: A Coloring and Playtime Guide for Kids
🎨
A Medieval Feast: A Medieval Coloring and History Guide for Kids
🎨
Meet the Doctor: A Community Helper Coloring Guide
🎨
Ostrich Coloring Page Ideas for Kids
🎨
The Enormous Turnip: A Classic Story Coloring Guide for Kids
🎨
Ring Around the Rosie: A Nursery Rhyme Coloring Guide for Kids
🎨
Zucchini Coloring and Drawing Ideas for Kids
🎨
A Pirate Flag Skull Coloring and Drawing Ideas for Kids
🧠
Exploring Drawing and Sequential Thinking
🎨
A Knight's Training Yard: A Medieval Coloring and History Guide for Kids
🎨
Cinderella: A Classic Story Coloring Guide for Kids
🎨
A Beach Volleyball Game Coloring and Drawing Ideas for Kids
🖌️
Exploring Using Crayons Creatively
🧘
Simple Steps for Coloring in Silence
🎲
How to Play Treasure Map Games
🎨
A Balloon Toss: A Coloring and Playtime Guide for Kids
🎨
A Castle Dungeon: A Medieval Coloring and History Guide for Kids
🖍️
A Beginner's Guide to Using Complementary Colors
👨👩👧
Creative Low-Mess Activities for Kids
🎨
Ladybug Coloring and Drawing Ideas for Kids
✏️
Easy Steps to Practice Using an Eraser Effectively
🎨
Layering Colors: A Buying and Technique Guide
🎨
Exploring Uranus: A Coloring and Learning Guide for Kids
🎨
A Trail Map: Coloring Ideas for Your Next Family Adventure
🎨
A Royal Feast Hall Table: A Medieval Coloring and History Guide for Kids
🎨
A Camping Checklist: Coloring Ideas for Your Next Family Adventure
🧘
How Coloring as a Calm-Down Tool Can Create a Quiet Moment
🔬
The Science Behind Subtractive Color Mixing
🔬
What Is Additive Color Mixing?
💗
Understanding Expressing Gratitude Through Art
🎨
A Static Electricity Hair Test: A Step-by-Step Science Guide for Kids
🎨
Exploring A Nebula: A Coloring and Learning Guide for Kids
🎲
Drawing Battles: A Creative Twist
🌈
Relaxing Sports Scenes Coloring Activities
🎨
Using Fixative Spray: A Buying and Technique Guide
🎨
Pizza Dough Making: A Coloring and Food Science Guide for Kids
🍎
Simple Back-to-School Activities for Busy Classrooms
🔤
Drawing Activities for Numbers in a New Language
🎨
Armadillo Coloring and Drawing Ideas for Kids
🎨
Growing Plants in Space: A Coloring and Space Mission Guide for Kids
🎨
A Thank You Card for a Vet: A Simple Pet Care Guide for Kids
🎨
Exploring Peru: A Coloring and Culture Guide for Kids
🎨
Ice Cream Making: A Coloring and Food Science Guide for Kids
🍂
Creative Winter Coloring Projects for Classrooms
🌈
Printable Animals Coloring Activities
🎨
A Rowboat to Shore Coloring and Drawing Ideas for Kids
🎨
A Solar-Powered Gadget: A Coloring and STEM Guide for Kids
🎨
Teaching Compassion: A Simple Activity for Kids
🎨
A Snake Shedding Its Skin Coloring and Drawing Ideas for Kids
🎨
Deep Breathing to Relax: A Coloring and Health Guide for Kids
🎨
Pixie Coloring and Drawing Ideas for Kids
🎨
Terrapin Coloring and Drawing Ideas for Kids
🎨
Ant Coloring and Drawing Ideas for Kids
🧘
Exploring Coloring for Sensory Breaks
💡
The Role of Divergent Thinking in Children's Art
🎨
Oak Tree: A Coloring and Nature Guide for Kids
🧠
The Link Between Drawing and Problem-Solving
🎲
How to Play Drawing Prompt Games
🎨
A Splashdown Landing: A Coloring and Space Mission Guide for Kids
🧒
What to Expect When Teaching Ages 3-4
🎨
The Number 10: An Alphabet and Number Coloring Page
🎨
Lavender: A Coloring and Nature Guide for Kids
🎨
Meet the Mechanic: A Community Helper Coloring Guide
🎨
A Banyan Tree: A Coloring and Nature Guide for Kids
🌈
A Guide to Farm Scenes Coloring Pages
🌈
A Guide to Weather Scenes Coloring Pages
🎨
A Portable Site Office Coloring and Drawing Ideas for Kids
🎨
Placemat Coloring Sheets: Free Ideas for Your Next Celebration
🎲
How to Play Scavenger Hunt Drawings
📐
Learning Shapes Through Drawing
🎨
Lily: A Coloring and Nature Guide for Kids
🎨
Marigold: A Coloring and Nature Guide for Kids
🎨
A Melting Ice Race: A Step-by-Step Science Guide for Kids
🎨
A Pencil Case: A Classroom Coloring and Learning Guide
🎨
A Teacher's Desk: A Classroom Coloring and Learning Guide
🎨
Origami Crane Coloring and Drawing Ideas for Kids
💡
Building Combining Ideas Through Coloring and Drawing
🎨
A Wild West Blacksmith: A Wild West Coloring and History Guide for Kids
🎨
A Colombian Traditional Dress: A Coloring and Culture Guide for Kids
🧘
Exploring Guided Mindful Coloring
🎨
Sand Storm Coloring Page: A Nature Learning Guide for Kids
🎨
Goblin Coloring and Drawing Ideas for Kids
🎨
A Heat Shield During Re-Entry: A Coloring and Space Mission Guide for Kids
🎨
A Level and Tape Measure Coloring and Drawing Ideas for Kids
🔎
Using Organizing Research With Sketches to Solve Problems
💗
Understanding Art for Quiet Reflection
🎨
Saving Coloring Pages as PDFs: A Practical Guide
🎨
A Dinosaur Herd Coloring Page: Fun Facts for Young Paleontologists
🎨
A STEM Career Computer Programmer: A Coloring and STEM Guide for Kids
🎨
Remote Control Car Coloring and Drawing Ideas for Kids
💡
Why Personal Artistic Style Matters for Young Artists
🎨
Rocket Stages Separating: A Coloring and Space Mission Guide for Kids
🎨
Skip Counting by Twos: An Alphabet and Number Coloring Page
🎨
Gnome Coloring and Drawing Ideas for Kids
🎨
Weasel Coloring and Drawing Ideas for Kids
🎨
Weeping Willow: A Coloring and Nature Guide for Kids
🎨
Congratulating a Winner: A Simple Social Skill for Kids
🎨
Easy Space and Planets Drawing Ideas
🎨
Stick Insect Coloring and Drawing Ideas for Kids
🍎
A Teacher's Guide to Morning Work Activities
🎨
A Fishing Pier Coloring and Drawing Ideas for Kids
🎨
A Chef's Apron: A Kitchen Guide for Kids and Parents
📴
Hands-On Activities for Camping Trips
🎨
A Rustic Log Cabin: Coloring Ideas for Your Next Family Adventure
🎨
Mountain Peak Coloring Page: A Nature Learning Guide for Kids
🧠
Why Drawing Can Help With Self-Expression
🖌️
Simple Steps for Layering Techniques
🎨
A Moroccan Kaftan: A Coloring and Culture Guide for Kids
🎨
A Density Tower: A Step-by-Step Science Guide for Kids
🎲
How to Play Guess-the-Drawing Games
🎨
Baboon Coloring and Drawing Ideas for Kids
📐
Fun Drawing Activities for Counting
🎨
Great Barrier Reef: Coloring Page and Fun Facts for Kids
🎨
Turnip Coloring and Drawing Ideas for Kids
💗
Creative Approaches to Art for Quiet Reflection
🎨
A Prehistoric Swamp Coloring Page: Fun Facts for Young Paleontologists
🎨
Gift Tag Coloring: Free Ideas for Your Next Celebration
🎨
a Puppet Cutout Printable: Free Ideas for Your Next Celebration
🔤
Drawing Activities for the Alphabet
📴
Hands-On Activities for Summer Vacations
👨👩👧
Easy Morning Routine Activities With Coloring Pages
🎨
A Homemade Periscope: A Step-by-Step Science Guide for Kids
🌈
Fun Sports Scenes Coloring Pages for Kids
🎨
Moth Coloring and Drawing Ideas for Kids
🎨
Cliff Face Coloring Page: A Nature Learning Guide for Kids
💗
Creative Approaches to Expressing Gratitude Through Art
🎨
Fruit Pie Coloring Ideas for Kids Who Love to Create
🎲
Chess Strategy Diagrams: A Creative Twist
🎲
Strategy Sketching for Sports: A Creative Twist
🎨
How to Draw Space and Planets Step by Step
🎨
Boa Constrictor Coloring and Drawing Ideas for Kids
🎨
A Robot Band: A Coloring and Invention Guide for Kids
🏺
What We Know About Hieroglyphics
🎨
Exploring A Meteor Shower: A Coloring and Learning Guide for Kids
🎨
Exploring A Friendly Alien Spaceship: A Coloring and Learning Guide for Kids
🎨
A Circus Tightrope Net Coloring and Drawing Ideas for Kids
👨👩👧
Easy Road Trip Activities With Coloring Pages
🎨
A Lasso Rope: A Wild West Coloring and History Guide for Kids
🔎
Exploring Concept Mapping for Students
🎨
Koala Coloring and Drawing Ideas for Kids
🎨
Valentine's Day Coloring Ideas and Activities for the Whole Family
🎨
Dingo Coloring and Drawing Ideas for Kids
🔬
Understanding Additive Color Mixing
🎨
Artichoke Coloring and Drawing Ideas for Kids
🎨
A Ship Sailing into a Sunset Coloring and Drawing Ideas for Kids
🧒
Drawing Activities for Preschoolers
🎨
A Basket of Croissants: Coloring Ideas and Fun Facts for Kids
🎨
Crop Rotation: A Coloring and Food Science Guide for Kids
🎨
Comparing Tablet Coloring Apps: A Practical Guide
🎨
A Knight's Shield and Sword: A Medieval Coloring and History Guide for Kids
🍎
A Teacher's Guide to Classroom Coloring Stations
🎨
Heat Wave Safety: A Family Safety Guide
🎨
A Sleeping Bag Under the Stars: Coloring Ideas for Your Next Family Adventure
🎨
Choosing a Pencil Sharpener: A Buying and Technique Guide
🎨
Jack and Jill: A Nursery Rhyme Coloring Guide for Kids
🎨
A Trapeze Artist Coloring and Drawing Ideas for Kids
🎨
A Carnival Balloon Animal Coloring and Drawing Ideas for Kids
🎨
A Sound Vibration Experiment: A Step-by-Step Science Guide for Kids
🎨
Triceratops Coloring Page: Fun Facts for Young Paleontologists
🎨
Dryad Coloring and Drawing Ideas for Kids
🎨
First Steps on the Moon: A Coloring and Space Mission Guide for Kids
🎨
The Little Mermaid: A Classic Story Coloring Guide for Kids
🎨
a Calm-Down Corner: A Simple Mindfulness Activity for Kids
🎨
Scented Markers: A Buying and Technique Guide
🎨
A Safe Room at Home: A Family Safety Guide
🔤
How Pictures Help Children Learn Everyday Objects
🍎
How Teachers Can Use Assessing Creativity in the Classroom
🎨
Taking Turns in a Game: A Simple Social Skill for Kids
🎨
A Concrete Foundation Pour Coloring and Drawing Ideas for Kids
🎨
Easy Favorite Foods Drawing Ideas
🎨
How Muscles Work: A Coloring and Health Guide for Kids
🎨
Winter Earmuffs: Coloring Ideas and Activities for the Whole Family
🧘
Why Nature-Inspired Calm Coloring Feels Calming
🎨
How to Draw a Glockenspiel: A Coloring and Music Guide for Kids
🎨
Tag: A Coloring and Playtime Guide for Kids
🎨
Cinco de Mayo Coloring Ideas and Activities for the Whole Family
🎨
Siren Coloring and Drawing Ideas for Kids
🎨
A Simple Trade or Barter Scene: A Money Guide for Kids and Parents
🎨
Lotus Flower: A Coloring and Nature Guide for Kids
🎨
A Cowboy Guitar by the Campfire: A Wild West Coloring and History Guide for Kids
🧒
A Parent's Guide to Ages 5-6
🎨
Ancient Greek Columns: An Ancient History Coloring Guide for Kids
🎨
Hickory Dickory Dock: A Nursery Rhyme Coloring Guide for Kids
🔬
The Science Behind RGB Color Mixing
🎨
Preserving Finished Coloring Pages: A Buying and Technique Guide
🌈
Fun Vehicles Coloring Pages for Kids
🎨
Hopscotch: A Coloring and Playtime Guide for Kids
🎲
Football Play Diagrams: A Creative Twist
🔎
Using Timeline Diagrams to Solve Problems
🔤
How Pictures Help Children Learn the Alphabet
🎨
A Beginner's Guide to Drawing Sports
🎨
A Pair of Pruning Shears: A Gardening Guide for Kids and Families
🎨
Teaching Responsibility: A Simple Activity for Kids
🔬
Understanding CMYK Printing Colors
🎨
How to Draw a Parallelogram: A Step-by-Step Guide for Kids
🎨
Easy Farm Life Drawing Ideas
🎨
Fun Delivery Van Coloring and Drawing Ideas for Kids
🎨
A Beginner's Guide to Drawing Self-Portraits
🎨
A Piggy Bank: A Money Guide for Kids and Parents
🔎
Exploring Sketch Journaling for Students
🎨
Bowling Coloring Pages and Drawing Ideas for Kids
🎨
Avocado Coloring and Drawing Ideas for Kids
🧒
How Drawing Supports First-Time Artists
🎨
Extreme Cold Safety: A Family Safety Guide
🌈
Printable Jungle Scenes Coloring Activities
🎨
A Space Elevator Concept: A Coloring and Space Mission Guide for Kids
🎨
A Backhoe Loader Coloring and Drawing Ideas for Kids
🔎
Exploring Diagrams in Science for Students
🎨
Washing Hands Before Eating: A Coloring and Health Guide for Kids
🖌️
Why Composition Basics Matters for Young Artists
🎨
A Kids' Money Jar Labeled Goals: A Money Guide for Kids and Parents
👨👩👧
Coloring Ideas for Grandparent and Grandchild Activities
🏺
The History of Prehistoric Drawing Tools
🎨
A Cuban Guayabera Shirt: A Coloring and Culture Guide for Kids
🎨
Three Little Kittens: A Nursery Rhyme Coloring Guide for Kids
💡
How Drawing Encourages Open-Ended Play
🎨
Fun Family Portraits Drawing Activities for Kids
🎨
Ancient Egyptian Hieroglyphics: An Ancient History Coloring Guide for Kids
🧠
How Drawing May Support Observation Skills
🖌️
A Beginner's Guide to Layering Techniques
🎨
Cheetah Coloring and Drawing Ideas for Kids
💡
Nurturing Personal Artistic Style at Home
🌈
Relaxing Nature Landscapes Coloring Activities
🎨
Fun Bicycle Coloring and Drawing Ideas for Kids
🎨
A Ballet Barre Practice: A Coloring and Movement Guide for Kids
🍂
Creative Hanukkah Coloring Projects for Classrooms
🎨
Badger Coloring and Drawing Ideas for Kids
🎨
a Bedtime Wind-Down Routine: A Simple Mindfulness Activity for Kids
🎨
Fun Monorail Coloring and Drawing Ideas for Kids
🔬
A Simple Guide to How Light Creates Color
🎨
A Pierogi Plate: Coloring Ideas and Fun Facts for Kids
🌈
Creative Ways to Color Buildings and Castles
🔎
How Timeline Diagrams Support Learning
📐
Why Patterns and Drawing Go Together
🎨
Backyard Squirrel Coloring and Drawing Ideas for Kids
🎨
A Smartwatch: A Coloring and Invention Guide for Kids
🎨
A Homework Folder: A Classroom Coloring and Learning Guide
💗
Understanding Art and Relaxation
🎨
Meet Pointillism: An Art Appreciation Guide for Kids
🎨
Silverfish Coloring and Drawing Ideas for Kids
🎨
A Flamenco Dancer: A Coloring and Movement Guide for Kids
🎨
A Family Discussing a Big Purchase: A Money Guide for Kids and Parents
🔎
How Sketching to Understand Complex Ideas Support Learning
🎨
Fun Hot Air Balloon Coloring and Drawing Ideas for Kids
🧠
Exploring Drawing and Working Memory
🔎
Why Visual Thinkers Use Mind Maps
🌈
Relaxing Mandalas Coloring Activities
🎨
Chore Chart Printables: Free Ideas for Your Next Celebration
🎨
How to Draw a Zither: A Coloring and Music Guide for Kids
🧠
The Link Between Drawing and Sequential Thinking
🖌️
How to Practice Working With Light and Shadow
🎨
Fun Gardens and Flowers Drawing Activities for Kids
🍎
Classroom Ideas: Differentiated Art Instruction
🎨
A Class Election: A Classroom Coloring and Learning Guide
🎨
Cupcake Decorating Coloring Ideas for Kids Who Love to Create
🎨
Walrus Coloring and Drawing Ideas for Kids
🎨
How to Draw a A Grid of Squares: A Step-by-Step Guide for Kids
🌈
Creative Ways to Color Weather Scenes
👨👩👧
Easy Grandparent and Grandchild Activities With Coloring Pages
🎨
A Sandcastle Coloring and Drawing Ideas for Kids
🎨
Garden Composting: A Coloring and Food Science Guide for Kids
🔤
Drawing Activities for Early Literacy Skills
🖍️
Tips for Coloring Skin Tones
🎨
Hydra Coloring and Drawing Ideas for Kids
🎨
Building a Moon Base: A Coloring and Space Mission Guide for Kids
🎨
Fun Buildings and Houses Drawing Activities for Kids
🧒
Fun Ways to Build Ages 3-4
🎨
A Woolly Rhino Coloring Page: Fun Facts for Young Paleontologists
📴
Making the Most of Sick Days at Home Without Screens
📐
How Children Understand Graphs and Charts With Art
🎨
Caiman Coloring and Drawing Ideas for Kids
📐
Teaching Shapes Through Coloring and Drawing
🌈
Relaxing Community Helpers Coloring Activities
🎨
River Bend Coloring Page: A Nature Learning Guide for Kids
🎨
Cricket Coloring Pages and Drawing Ideas for Kids
👨👩👧
Creative After-School Activities for Kids
✏️
Easy Steps to Practice Holding a Pencil Correctly
🎨
A Row of Planted Seeds: A Gardening Guide for Kids and Families
🎨
Easy Everyday Objects Drawing Ideas
🎨
How to Draw a Wind Chimes: A Coloring and Music Guide for Kids
🎨
A Show-and-Tell Object: A Classroom Coloring and Learning Guide
🎨
How to Draw a Zentangle Pattern: A Step-by-Step Guide
🎨
A Pet Birthday Celebration: A Simple Pet Care Guide for Kids
🎨
A Launch Countdown: A Coloring and Space Mission Guide for Kids
🎨
A Carnival Game Booth Coloring and Drawing Ideas for Kids
🎨
Classroom Printing on a Budget: A Practical Guide
🎨
A Kids' Business Idea: A Money Guide for Kids and Parents
🎨
A Medieval Trade Caravan: A Medieval Coloring and History Guide for Kids
🎨
Meet Mosaic Art: An Art Appreciation Guide for Kids
🎨
A Wagon Ride on the Farm Coloring and Drawing Ideas for Kids
📐
How Children Understand Grids and Coordinates With Art
🧘
Why Coloring in Silence Feels Calming
📴
Creative Alternatives to Screens During Weekend Mornings
🎨
A Kids' Pretend Store: A Money Guide for Kids and Parents
💡
Building Creative Confidence Through Coloring and Drawing
🎨
Meet the Scientist: A Community Helper Coloring Guide
🎨
Winter Hot Cocoa by the Fire: Coloring Ideas and Activities for the Whole Family
🎲
Using Drawing for Collaborative Drawing Games
🧒
How Drawing Supports Hand-Eye Coordination
🍂
Fun Winter Classroom Coloring Ideas
🎨
Golf Coloring Pages and Drawing Ideas for Kids
🎨
A Beginner's Guide to Drawing Emotions and Faces
🎨
Kale Coloring and Drawing Ideas for Kids
👨👩👧
Creative Activities for Only Children for Kids
🎨
Marble Run Coloring and Drawing Ideas for Kids
👨👩👧
Coloring Ideas for Low-Mess Activities
🎨
A Solar Oven S'more: A Step-by-Step Science Guide for Kids
🎨
Creative Weather Drawing Exercises
🎨
The Letter Q: An Alphabet and Number Coloring Page
🎨
Fall Pumpkin Carving: Coloring Ideas and Activities for the Whole Family
📴
Creative Alternatives to Screens During Outdoor Picnics
🎨
A Savings Goal Thermometer: A Money Guide for Kids and Parents
🎨
Sea Sponge Coloring and Drawing Ideas for Kids
🎨
A Pet Sitter Visit: A Simple Pet Care Guide for Kids
👨👩👧
Fun and Simple After-School Activities
🎨
Color vs. Black-and-White Printing: A Practical Guide
🎨
Wearing Glasses: A Coloring and Health Guide for Kids
📐
Learning Patterns Through Drawing
🎲
Step-by-Step Drawing-Based Party Games
🍂
Fun Graduation Season Classroom Coloring Ideas
🎨
Tug of War Coloring Pages and Drawing Ideas for Kids
🍂
Creative Spring Coloring Projects for Classrooms
🖌️
Why Outlining Techniques Matters for Young Artists
🎨
A Pet's Name Tag: A Simple Pet Care Guide for Kids
🎨
Meet the Zookeeper: A Community Helper Coloring Guide
🎨
A Mars Rover Deployment: A Coloring and Space Mission Guide for Kids
🎨
An X-Ray Vision Superhero: A Superhero Coloring and Design Guide for Kids
🎨
Viking Explorers: An Ancient History Coloring Guide for Kids
🎨
Delta River Mouth Coloring Page: A Nature Learning Guide for Kids
🎲
Fun Treasure Map Games for Kids
🔎
A Beginner's Guide to Sketching to Understand Complex Ideas
🎨
A Wild Mustang Running Free: A Wild West Coloring and History Guide for Kids
🎨
Comforting a Sad Friend: A Simple Social Skill for Kids
🏺
Why Ancient Egyptian Art Matter to Historians
🎨
a Class Photo Frame: Free Ideas for Your Next Celebration
👨👩👧
Fun and Simple Grandparent and Grandchild Activities
🎨
Burnishing Technique: A Buying and Technique Guide
🎨
Choosing the Right Printer Ink: A Practical Guide
🎨
Wild Turkey Coloring and Drawing Ideas for Kids
🎨
Turning Coloring Pages Into Cards: A Practical Guide
🎨
Teaching Courage: A Simple Activity for Kids
🎨
Fun Vehicles Drawing Activities for Kids
🍎
A Teacher's Guide to Indoor Recess Activities
🎨
Exploring A Spiral Galaxy: A Coloring and Learning Guide for Kids
🎨
The Boy Who Called Wolf: A Classic Story Coloring Guide for Kids
🎨
Easy Dinosaurs Drawing Ideas
🎨
Fun Pickup Truck Coloring and Drawing Ideas for Kids
🍎
Classroom Ideas: Classroom Coloring Stations
🎨
Pumpkin Coloring and Drawing Ideas for Kids
🎨
A Treasure Map Coloring and Drawing Ideas for Kids
🎨
Rain Boots and an Umbrella: Coloring Ideas and Activities for the Whole Family
🎨
Holding the Door for Someone: A Simple Social Skill for Kids
🎨
A Sequoia Tree: A Coloring and Nature Guide for Kids
🎨
Rooster Coloring Page Ideas for Kids
🎨
a Worry Monster Craft: A Simple Mindfulness Activity for Kids
🎨
A Diwali Rangoli Design: Coloring Ideas and Fun Facts for Kids
🎨
A Loop of Repeated Steps: A Coloring and STEM Guide for Kids
🎨
Meet the Fisherman: A Community Helper Coloring Guide
🎨
A Wheelbarrow of Mulch: A Gardening Guide for Kids and Families
🖌️
Simple Steps for Using Colored Pencils
🎨
A Trail of Wildflowers: Coloring Ideas for Your Next Family Adventure
🎨
Teaching Dependability: A Simple Activity for Kids
🌈
A Guide to Fairy Tale Scenes Coloring Pages
🎨
Forbidden City: Coloring Page and Fun Facts for Kids
👨👩👧
Fun and Simple Sibling Bonding Activities
🔬
Understanding Digital vs Traditional Color
🎨
A Superhero Costume Design Contest: A Superhero Coloring and Design Guide for Kids
🎨
Baby Shower Coloring Sheets: Free Ideas for Your Next Celebration
🔤
Learning Animal Names Through Drawing
🧒
How Drawing Supports Ages 2-3
🎨
A Samoan Traditional Lavalava: A Coloring and Culture Guide for Kids
🔬
A Simple Guide to Color Wheels
🖍️
A Beginner's Guide to Coloring Skies and Backgrounds
🎲
Using Drawing for Chess Strategy Diagrams
🎨
Using Please and Thank You at a Restaurant: A Simple Social Skill for Kids
🎨
Sunrise Over Hills Coloring Page: A Nature Learning Guide for Kids
🎨
A Moon Cake for Mid-Autumn Festival: Coloring Ideas and Fun Facts for Kids
🎨
Farm Dog Coloring and Drawing Ideas for Kids
🎨
New Year's Eve Coloring Ideas and Activities for the Whole Family
🖍️
Simple Techniques for Coloring Skies and Backgrounds
🎨
Crystal Unicorn Coloring and Drawing Ideas for Kids
🎨
Zipping a Jacket: A Simple Life Skill for Kids
🎨
Alcohol Markers vs. Water-Based Markers: A Buying and Technique Guide
🎨
Rock-a-Bye Baby: A Nursery Rhyme Coloring Guide for Kids
🍂
Fun Autumn Classroom Coloring Ideas
🖍️
Tips for Coloring With Markers
🌈
Fun Robots and Machines Coloring Pages for Kids
💡
Why Creative Journaling Matters for Young Artists
🎨
A Skyscraper Being Built Coloring and Drawing Ideas for Kids
🎨
Bhangra Dancers: A Coloring and Movement Guide for Kids
🎨
An Allowance Chart: A Money Guide for Kids and Parents
🖌️
Exploring Cross-Hatching
🎨
the First Day of School Coloring Ideas and Activities for the Whole Family
🎨
Meet the Journalist: A Community Helper Coloring Guide
🎨
A Wild West Saddle: A Wild West Coloring and History Guide for Kids
🎨
A Delivery Drone: A Coloring and Invention Guide for Kids
🍂
Printable Spring Coloring Pages for Kids
🏺
Why Cave Paintings Matter to Historians
🎨
Preparing a Go-Bag: A Family Safety Guide
🎨
A Family Reunification Plan: A Family Safety Guide
💡
The Role of Creative Confidence in Children's Art
🎨
A Sea Chart and Compass Coloring and Drawing Ideas for Kids
🎨
Earth Day Coloring Ideas and Activities for the Whole Family
🎨
A Moon Buggy: A Coloring and Space Mission Guide for Kids
💡
Nurturing Free Drawing at Home
🎨
Quail Coloring Page Ideas for Kids
🎨
a Worry Jar Craft: A Simple Mindfulness Activity for Kids
🎨
Staying Positive During an Emergency: A Family Safety Guide
🎨
Sharks and Minnows: A Coloring and Playtime Guide for Kids
🌈
Relaxing Dinosaurs Coloring Activities
🎨
Fun Musical Instruments Drawing Activities for Kids
🔬
Understanding Warm and Cool Colors
🎨
Triangular Crayons for Grip: A Buying and Technique Guide
🎨
Asking for Help Politely: A Simple Life Skill for Kids
🎨
Exploring The Big Dipper: A Coloring and Learning Guide for Kids
🎨
A Dance Recital: A Coloring and Movement Guide for Kids
🎨
Backyard Deer Coloring and Drawing Ideas for Kids
🎨
A Dragon Guarding a Castle: A Medieval Coloring and History Guide for Kids
🎨
A Medieval Scribe Writing: A Medieval Coloring and History Guide for Kids
🎨
A Rocket Engine Ignition: A Coloring and Space Mission Guide for Kids
✏️
Why Drawing Curved Lines Matters for New Artists
🎨
Emotions and Faces Drawing Prompts for Beginners
🎨
A Tisket A Tasket: A Nursery Rhyme Coloring Guide for Kids
🖌️
Exploring Using Oil Pastels
🎨
A Castle Rose Garden: A Medieval Coloring and History Guide for Kids
🎨
Exploring Ireland: A Coloring and Culture Guide for Kids
🎨
Friendship Kindness Cards: A Simple Mindfulness Activity for Kids
✏️
Fun Exercises for Pencil Control
💗
Exploring What Art Therapy Actually Is Through Art
💗
Exploring Art for Quiet Reflection Through Art
🎨
A Boardwalk Bumper Cars Ride Coloring and Drawing Ideas for Kids
🧠
Exploring Drawing and Observation Skills
🎨
A Lantern-Lit Ship at Night Coloring and Drawing Ideas for Kids
🎨
A Tunnel Boring Machine Coloring and Drawing Ideas for Kids
🎨
The Maya Pyramid Temples: An Ancient History Coloring Guide for Kids
🎨
Daddy Long Legs Coloring and Drawing Ideas for Kids
✏️
How to Improve Your Drawing Paper Types
🎨
How to Draw a Gong: A Coloring and Music Guide for Kids
🧠
How Drawing May Support Patience
🎨
Concert Stage Lights: A Coloring and Movement Guide for Kids
🎨
Germs and Handwashing: A Coloring and Health Guide for Kids
🎨
Octopus Coloring and Drawing Ideas for Kids
💡
Nurturing Daydreaming at Home
👨👩👧
Fun and Simple Low-Mess Activities
🎨
A Forest Ranger Station: Coloring Ideas for Your Next Family Adventure
📐
How Children Understand Sequences With Art
🎨
Teaching Wisdom: A Simple Activity for Kids
🍂
Printable Summer Coloring Pages for Kids
🎨
Exploring Nepal: A Coloring and Culture Guide for Kids
🧠
How Drawing May Support Spatial Awareness
🎨
Double Rainbow Coloring Page: A Nature Learning Guide for Kids
🎲
Using Drawing for Visual Puzzle Games
🎨
Fun Birds Drawing Activities for Kids
🎨
Bubble Breathing: A Simple Mindfulness Activity for Kids
🎨
A Starfish on the Sand Coloring and Drawing Ideas for Kids
🧠
How Drawing May Support Fine Motor Coordination
🖌️
How to Practice Composition Basics
📴
Creative Alternatives to Screens During Camping Trips
💡
Nurturing Combining Ideas at Home
🖌️
Why Using Oil Pastels Matters for Young Artists
🎨
A Medieval Village Market: A Medieval Coloring and History Guide for Kids
🎨
Canada Day Coloring Ideas and Activities for the Whole Family
👨👩👧
Coloring Ideas for Bedtime Wind-Down Routines
💗
The Role of Coloring in Art for Quiet Reflection
🎨
The Number 13: An Alphabet and Number Coloring Page
📐
Fun Drawing Activities for Patterns
🎲
Step-by-Step Memory Matching Games
🎨
A Chameleon Changing Colors Coloring and Drawing Ideas for Kids
🎨
Mindful Eating: A Simple Mindfulness Activity for Kids
🍂
Creative Valentine's Day Coloring Projects for Classrooms
🎨
A Training Centrifuge: A Coloring and Space Mission Guide for Kids
🎨
Mindful Coloring Mandalas: A Simple Mindfulness Activity for Kids
🎨
Exploring the Philippines: A Coloring and Culture Guide for Kids
🔤
Learning the Alphabet Through Drawing
🎨
How to Draw a Moon Mandala: A Step-by-Step Guide
🎨
A Garden Fairy House: A Gardening Guide for Kids and Families
🔎
Why Visual Thinkers Use Flowcharts
🍂
Celebrate Hanukkah With Coloring Activities
🎨
Eco-Friendly Printing: A Practical Guide
💡
The Role of Free Drawing in Children's Art
🎲
Using Drawing for Tic-Tac-Toe Variations
🎨
A Medieval Falconer: A Medieval Coloring and History Guide for Kids
🎨
Meet the Architect: A Community Helper Coloring Guide
🎨
A House of Mirrors Coloring and Drawing Ideas for Kids
📴
Screen-Free Coloring Ideas for Holiday Travel
👨👩👧
Creative Sibling Bonding Activities for Kids
👨👩👧
Coloring Ideas for Quiet Time Activities
🖍️
Why Coloring Cartoon Characters Makes a Difference
🎨
The Number 18: An Alphabet and Number Coloring Page
💡
The Role of Making Mistakes in Art in Children's Art
🌈
Fun Seasonal Scenes Coloring Pages for Kids
🎨
A Castle Drawbridge: A Medieval Coloring and History Guide for Kids
🎨
Saying Please and Thank You: A Simple Life Skill for Kids
🎨
Milkshake Coloring Ideas for Kids Who Love to Create
🎨
Little Red Riding Hood: A Classic Story Coloring Guide for Kids
🧒
What to Expect When Teaching Pencil Grip Development
🎨
Making a Grocery List: A Simple Life Skill for Kids
🎨
Kids Yoga Poses for Calm: A Simple Mindfulness Activity for Kids
✏️
How to Improve Your Sketching Basics
🎨
A Classroom Aquarium: A Classroom Coloring and Learning Guide
🎨
A Summer Swimsuit: Coloring Ideas and Activities for the Whole Family
💡
The Role of Creative Journaling in Children's Art
🎨
Meet the Judge: A Community Helper Coloring Guide
👨👩👧
Making the Most of Outdoor-Inspired Drawing
🎨
A Superhero Training Obstacle Course: A Superhero Coloring and Design Guide for Kids
🍂
Printable Thanksgiving Coloring Pages for Kids
🎨
A Grater: A Kitchen Guide for Kids and Parents
🎨
Fun Nature Scenes Drawing Activities for Kids
🎨
a Growth Mindset Poster: A Simple Mindfulness Activity for Kids
🎨
A Circus Elephant Coloring and Drawing Ideas for Kids
📴
Making the Most of Waiting Rooms Without Screens
🎨
A Cowboy Bandit on Horseback: A Wild West Coloring and History Guide for Kids
🎨
Diwali Coloring Ideas and Activities for the Whole Family
🌈
Relaxing Space Coloring Activities
🎨
How to Draw Under the Sea Step by Step
🖍️
A Beginner's Guide to Choosing Paper for Coloring
🎨
A Kite Festival in the Sky: Coloring Ideas and Fun Facts for Kids
🎨
Teaching Generosity: A Simple Activity for Kids
🎨
an Emotional Regulation Toolkit: A Simple Mindfulness Activity for Kids
🧒
Understanding Fine Motor Skills in Early Childhood
🌈
Fun Ocean Life Coloring Pages for Kids
🌈
Fun Flowers and Gardens Coloring Pages for Kids
🎨
Being a Good Sport After Losing: A Simple Social Skill for Kids
🎨
A Frog on a Lily Pad Coloring and Drawing Ideas for Kids
🎨
Standing Up for a Friend: A Simple Social Skill for Kids
🎨
Packing a Lunch: A Simple Life Skill for Kids
🍎
A Teacher's Guide to Classroom Printable Activities
🎨
How to Draw a A Shape Puzzle Page: A Step-by-Step Guide for Kids
🎨
Cabbage Coloring and Drawing Ideas for Kids
🎨
A Violinist Performing: A Coloring and Movement Guide for Kids
🎨
A Kids' Cooking Class Scene: A Kitchen Guide for Kids and Parents
🎨
Pow Wow Dancers: A Coloring and Movement Guide for Kids
🎨
Moose Coloring and Drawing Ideas for Kids
🎨
Cactus: A Coloring and Nature Guide for Kids
🎨
Niagara Falls: Coloring Page and Fun Facts for Kids
🎨
Setting an Alarm Clock: A Simple Life Skill for Kids
📴
Why Coloring Beats Scrolling on Weekend Mornings
🎨
Australia Day Coloring Ideas and Activities for the Whole Family
🎨
A Camping Flashlight: Coloring Ideas for Your Next Family Adventure
🎨
A Dog Learning to Fetch: A Simple Pet Care Guide for Kids
📐
Fun Drawing Activities for Grids and Coordinates
🎨
Exploring Sweden: A Coloring and Culture Guide for Kids
🎨
A Science Fair Project: A Classroom Coloring and Learning Guide
🍎
Simple Assessing Creativity in the Classroom for Busy Classrooms
🧠
Exploring Drawing and Spatial Awareness
🎨
A Vertical Garden Wall: A Gardening Guide for Kids and Families
🍂
Celebrate Father's Day With Coloring Activities
🎨
Carrot Coloring and Drawing Ideas for Kids
🔤
Visual Vocabulary: Descriptive Words
🔤
Visual Vocabulary: Story Sequencing
📐
Fun Drawing Activities for Sequences
🎨
A Cowboy Campfire Sing-Along: A Wild West Coloring and History Guide for Kids
🎨
Solomon Grundy: A Nursery Rhyme Coloring Guide for Kids
🌈
Creative Ways to Color Emotions and Faces
🎨
Iguazu Falls: Coloring Page and Fun Facts for Kids
🎨
a Sticker Chart Printable: Free Ideas for Your Next Celebration
🎨
Eid al-Fitr Coloring Ideas and Activities for the Whole Family
🎨
Father's Day Coloring Ideas and Activities for the Whole Family
🎨
A Kitchen Apron for Kids: A Kitchen Guide for Kids and Parents
🎨
Okra Coloring and Drawing Ideas for Kids
🎨
A Marching Band Drumline: A Coloring and Movement Guide for Kids
🎨
An Egyptian Traditional Galabeya: A Coloring and Culture Guide for Kids
🎨
Sleepover Activity Ideas: Free Ideas for Your Next Celebration
🎨
Teaching Gratitude Journaling: A Simple Activity for Kids
🎨
A Homemade Bubble Solution: A Step-by-Step Science Guide for Kids
🎨
A Group Campfire Sing-Along: Coloring Ideas for Your Next Family Adventure
🌈
A Guide to Everyday Objects Coloring Pages
 A Beginner's Guide to Drawing Curved Lines
🎨
How to Draw a Clarinet: A Coloring and Music Guide for Kids
🧘
Simple Steps for Guided Mindful Coloring
🎨
Dominoes Coloring and Drawing Ideas for Kids
🎨
A Dinosaur Volcano Scene Coloring Page: Fun Facts for Young Paleontologists
🎨
Fun Everyday Objects Drawing Activities for Kids
🎨
An Asteroid Mining Concept: A Coloring and Space Mission Guide for Kids
💗
How Drawing Supports Processing Big Feelings
🎨
Window Cling Coloring: Free Ideas for Your Next Celebration
🎨
Tide Rock Pool Coloring Page: A Nature Learning Guide for Kids
🖍️
How to Get Better at Choosing Your First Coloring Pencils
🎨
Sandbox Coloring and Drawing Ideas for Kids
👨👩👧
Easy Travel-Friendly Activities With Coloring Pages
🌈
Relaxing Everyday Objects Coloring Activities
🔬
Subtractive Color Mixing Explained for Kids
🎨
An Oktoberfest Dirndl Dress: Coloring Ideas and Fun Facts for Kids
✏️
How to Improve Your Drawing Simple Animals
🧒
Understanding Hand-Eye Coordination in Early Childhood
🎨
Brussels Sprout Coloring and Drawing Ideas for Kids
🍎
Simple Group Art Projects for Busy Classrooms
🍎
Simple Bulletin Board Ideas for Busy Classrooms
🎨
Candy Jar Coloring Ideas for Kids Who Love to Create
🖍️
How to Get Better at Coloring Skin Tones
🧘
Exploring Coloring in Silence
🎨
An Ancient Marketplace Bazaar: An Ancient History Coloring Guide for Kids
🍎
How Teachers Can Use Cross-Curricular Art Lessons
🌈
Printable Seasonal Scenes Coloring Activities
🎨
Rocking Horse Coloring and Drawing Ideas for Kids
🎨
Magnolia Flower: A Coloring and Nature Guide for Kids
🎨
Teaching Assertiveness: A Simple Activity for Kids
🧒
What to Expect When Teaching Ages 4-5
🎨
A Peruvian Poncho: A Coloring and Culture Guide for Kids
🎨
A Ringmaster's Top Hat Coloring and Drawing Ideas for Kids
🏺
Why Ancient Cave Pigments Matter to Historians
🎨
A Simple Water Filter: A Step-by-Step Science Guide for Kids
🏺
How Ancient Symbols Shaped Human Communication
🎨
How to Draw a Mandala With Hearts: A Step-by-Step Guide
🎨
Meet the Sea Captain: A Community Helper Coloring Guide
🎨
Ice Skating Coloring Pages and Drawing Ideas for Kids
🎨
Monday's Child: A Nursery Rhyme Coloring Guide for Kids
🎨
Greenhouse Growing: A Coloring and Food Science Guide for Kids
🧠
Can Drawing Improve Critical Thinking?
🖌️
How to Practice Using Crayons Creatively
🔎
How Diagrams in Science Support Learning
🎨
Choosing Crayons for Toddlers: A Buying and Technique Guide
🎨
The Snow Queen: A Classic Story Coloring Guide for Kids
🎨
An Ancient Greek Olympic Athlete: An Ancient History Coloring Guide for Kids
🖌️
How to Practice Using Oil Pastels
🎨
Griffin Coloring and Drawing Ideas for Kids
📐
Learning Number Lines Through Drawing
🎨
Ogre Coloring and Drawing Ideas for Kids
🎨
Packing a Backpack: A Simple Life Skill for Kids
🌈
A Guide to Holiday Scenes Coloring Pages
A Beginner's Guide to Drawing Curved Lines
🎨
How to Draw a Clarinet: A Coloring and Music Guide for Kids
🧘
Simple Steps for Guided Mindful Coloring
🎨
Dominoes Coloring and Drawing Ideas for Kids
🎨
A Dinosaur Volcano Scene Coloring Page: Fun Facts for Young Paleontologists
🎨
Fun Everyday Objects Drawing Activities for Kids
🎨
An Asteroid Mining Concept: A Coloring and Space Mission Guide for Kids
💗
How Drawing Supports Processing Big Feelings
🎨
Window Cling Coloring: Free Ideas for Your Next Celebration
🎨
Tide Rock Pool Coloring Page: A Nature Learning Guide for Kids
🖍️
How to Get Better at Choosing Your First Coloring Pencils
🎨
Sandbox Coloring and Drawing Ideas for Kids
👨👩👧
Easy Travel-Friendly Activities With Coloring Pages
🌈
Relaxing Everyday Objects Coloring Activities
🔬
Subtractive Color Mixing Explained for Kids
🎨
An Oktoberfest Dirndl Dress: Coloring Ideas and Fun Facts for Kids
✏️
How to Improve Your Drawing Simple Animals
🧒
Understanding Hand-Eye Coordination in Early Childhood
🎨
Brussels Sprout Coloring and Drawing Ideas for Kids
🍎
Simple Group Art Projects for Busy Classrooms
🍎
Simple Bulletin Board Ideas for Busy Classrooms
🎨
Candy Jar Coloring Ideas for Kids Who Love to Create
🖍️
How to Get Better at Coloring Skin Tones
🧘
Exploring Coloring in Silence
🎨
An Ancient Marketplace Bazaar: An Ancient History Coloring Guide for Kids
🍎
How Teachers Can Use Cross-Curricular Art Lessons
🌈
Printable Seasonal Scenes Coloring Activities
🎨
Rocking Horse Coloring and Drawing Ideas for Kids
🎨
Magnolia Flower: A Coloring and Nature Guide for Kids
🎨
Teaching Assertiveness: A Simple Activity for Kids
🧒
What to Expect When Teaching Ages 4-5
🎨
A Peruvian Poncho: A Coloring and Culture Guide for Kids
🎨
A Ringmaster's Top Hat Coloring and Drawing Ideas for Kids
🏺
Why Ancient Cave Pigments Matter to Historians
🎨
A Simple Water Filter: A Step-by-Step Science Guide for Kids
🏺
How Ancient Symbols Shaped Human Communication
🎨
How to Draw a Mandala With Hearts: A Step-by-Step Guide
🎨
Meet the Sea Captain: A Community Helper Coloring Guide
🎨
Ice Skating Coloring Pages and Drawing Ideas for Kids
🎨
Monday's Child: A Nursery Rhyme Coloring Guide for Kids
🎨
Greenhouse Growing: A Coloring and Food Science Guide for Kids
🧠
Can Drawing Improve Critical Thinking?
🖌️
How to Practice Using Crayons Creatively
🔎
How Diagrams in Science Support Learning
🎨
Choosing Crayons for Toddlers: A Buying and Technique Guide
🎨
The Snow Queen: A Classic Story Coloring Guide for Kids
🎨
An Ancient Greek Olympic Athlete: An Ancient History Coloring Guide for Kids
🖌️
How to Practice Using Oil Pastels
🎨
Griffin Coloring and Drawing Ideas for Kids
📐
Learning Number Lines Through Drawing
🎨
Ogre Coloring and Drawing Ideas for Kids
🎨
Packing a Backpack: A Simple Life Skill for Kids
🌈
A Guide to Holiday Scenes Coloring Pages
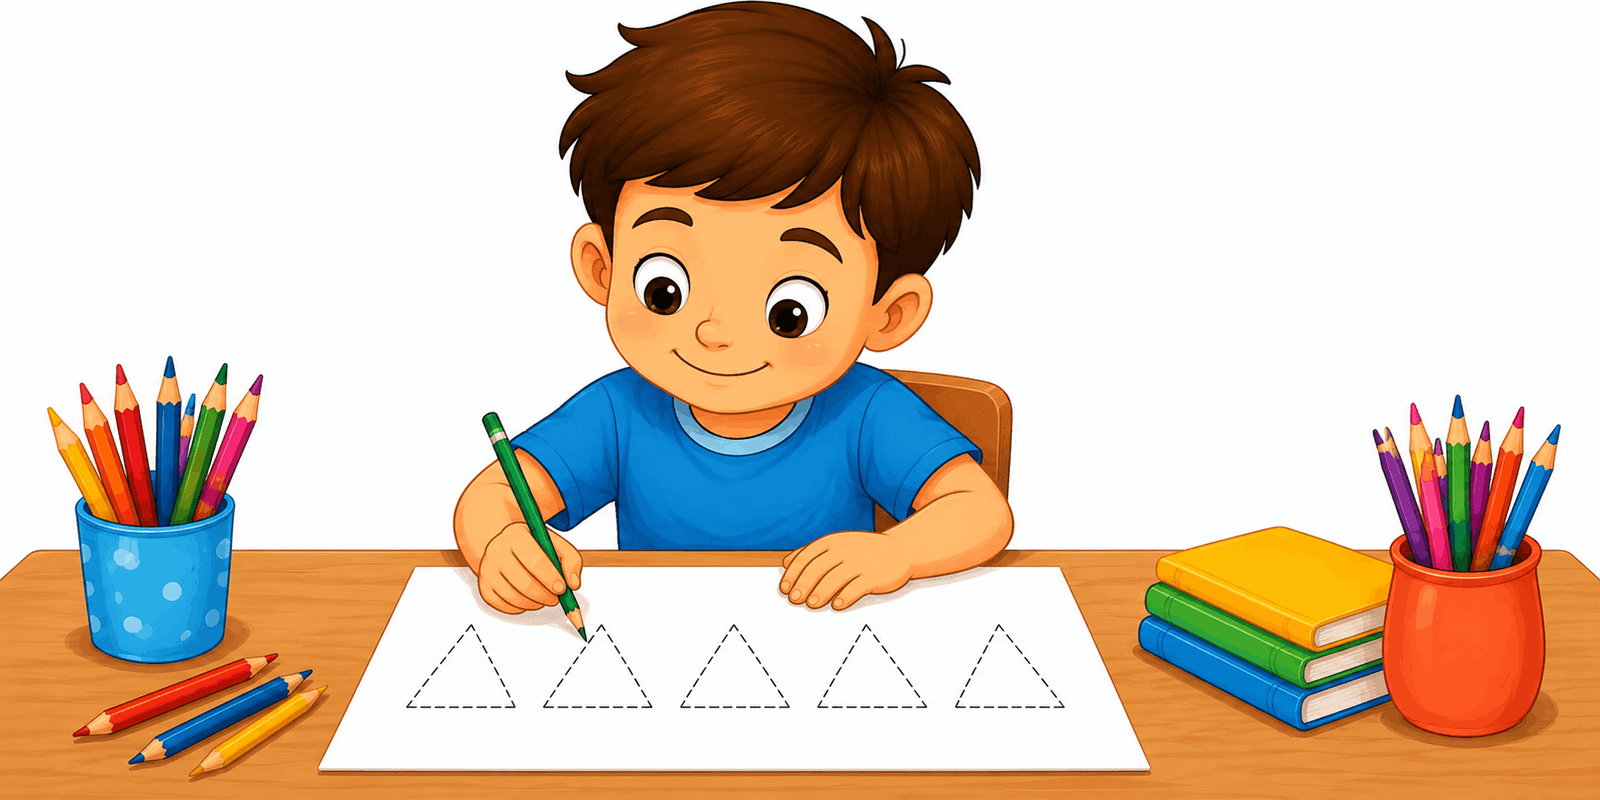 A Beginner's Guide to Drawing Triangles
🎨
Severe Weather Warning Signs: A Family Safety Guide
🧠
Can Drawing Improve Imagination?
🎨
Kitchen Utensils Coloring Ideas for Kids Who Love to Create
🎨
Memory Match Cards Coloring and Drawing Ideas for Kids
🎨
A Cat Being Brushed: A Simple Pet Care Guide for Kids
🌈
A Guide to Sports Scenes Coloring Pages
👨👩👧
Making the Most of Quiet Time Activities
🎨
Little Miss Muffet: A Nursery Rhyme Coloring Guide for Kids
🎨
Exploring A Space Telescope: A Coloring and Learning Guide for Kids
🍎
How Teachers Can Use Circle Time Activities
🖍️
Why Coloring With Markers Makes a Difference
🧒
Drawing Activities for Ages 2-3
🎨
A Pet's First Day Home: A Simple Pet Care Guide for Kids
🌈
Flowers and Gardens Coloring Ideas for Classrooms
🎨
A Kwanzaa Kinara: Coloring Ideas and Fun Facts for Kids
🎨
A Window Box Planter: A Gardening Guide for Kids and Families
🎨
A Robot Dog: A Coloring and Invention Guide for Kids
🎨
Radish Coloring and Drawing Ideas for Kids
🖌️
A Beginner's Guide to Composition Basics
🎨
A Sandbox Dig: A Coloring and Playtime Guide for Kids
🎨
Meet the Park Ranger: A Community Helper Coloring Guide
🍂
Printable Hanukkah Coloring Pages for Kids
🧘
Simple Steps for Nature-Inspired Calm Coloring
🎨
Egg Collecting: A Coloring and Food Science Guide for Kids
🎨
A Cutting Knife (Kid-Safe): A Kitchen Guide for Kids and Parents
🍂
Creative Birthday Celebrations Coloring Projects for Classrooms
📴
Screen-Free Coloring Ideas for Waiting Rooms
🎨
Yoga Stretches for Kids: A Coloring and Health Guide for Kids
🔬
What Is Subtractive Color Mixing?
🎨
Tango Dancers: A Coloring and Movement Guide for Kids
🧠
How Drawing May Support Sequential Thinking
🎨
A Microphone on Stage: A Coloring and Movement Guide for Kids
🖍️
Simple Techniques for Choosing Paper for Coloring
🎨
Meet Michelangelo: An Art Appreciation Guide for Kids
🎨
Venus Flytrap: A Coloring and Nature Guide for Kids
🎨
A Waterfall Hike: Coloring Ideas for Your Next Family Adventure
🧘
How Coloring Before Exams Can Create a Quiet Moment
👨👩👧
Fun and Simple Outdoor-Inspired Drawing
🔎
Exploring Idea Webs for Students
🎨
A Simple Circuit with a Light Bulb: A Step-by-Step Science Guide for Kids
🎨
A Field Day Race: A Classroom Coloring and Learning Guide
🎨
A Garden Gate: A Gardening Guide for Kids and Families
🎨
Zombie Tag: A Coloring and Playtime Guide for Kids
🎨
Teaching Patience: A Simple Activity for Kids
📴
Hands-On Activities for Outdoor Picnics
🎨
A Piggy Bank Shaped Like an Animal: A Money Guide for Kids and Parents
👨👩👧
Easy Budget-Friendly Activities With Coloring Pages
🎨
Asking Before Borrowing Something: A Simple Social Skill for Kids
🎨
Animals Drawing Prompts for Beginners
🎨
A Multicultural Potluck Table: Coloring Ideas and Fun Facts for Kids
🎨
A Class Map on the Wall: A Classroom Coloring and Learning Guide
🎨
A Circuit Board: A Coloring and STEM Guide for Kids
🎨
A Simple Machine Wheel and Axle: A Coloring and STEM Guide for Kids
🎨
Tiger Coloring and Drawing Ideas for Kids
🧠
Exploring Drawing and Problem-Solving
🎨
A Homemade Fire Extinguisher Demo: A Step-by-Step Science Guide for Kids
🎨
A Book Fair Table: A Classroom Coloring and Learning Guide
🎲
How to Play Memory Matching Games
👨👩👧
Coloring Ideas for After-School Activities
🎨
Answering the Phone Politely: A Simple Social Skill for Kids
🎨
A Frontier Fort: A Wild West Coloring and History Guide for Kids
🎨
A Simple Electric Circuit: A Step-by-Step Science Guide for Kids
🎨
How to Draw a A Cluster of Stars: A Step-by-Step Guide for Kids
🎨
A Folk Dance Circle: A Coloring and Movement Guide for Kids
🎨
Wiping Up a Spill: A Simple Life Skill for Kids
🎨
A Ranch Barn: A Wild West Coloring and History Guide for Kids
🍎
Classroom Ideas: Art Lessons for History Class
🍎
How Teachers Can Use Indoor Recess Activities
🎨
A Beginner's Guide to Drawing Birds
🎨
Fall Apple Picking: Coloring Ideas and Activities for the Whole Family
💡
The Role of Personal Artistic Style in Children's Art
📐
How Children Understand Shapes With Art
🏺
What We Know About Ancient Art Materials
🎨
A Kitchen Scale: A Kitchen Guide for Kids and Parents
🎨
A Fall Flannel Jacket: Coloring Ideas and Activities for the Whole Family
🎨
Jumping in Leaf Piles: Coloring Ideas and Activities for the Whole Family
🎨
Meet Jackson Pollock: An Art Appreciation Guide for Kids
🎨
How to Draw Musical Instruments Step by Step
🍎
Classroom Ideas: Morning Work Activities
🍂
Printable New Year Coloring Pages for Kids
🎨
Double-Sided Printing: A Practical Guide
🎨
A Beginner's Guide to Drawing Castles
💡
Nurturing Imaginative Play at Home
🧒
Understanding Ages 2-3 in Early Childhood
🎨
One Two Buckle My Shoe: A Nursery Rhyme Coloring Guide for Kids
🖍️
A Beginner's Guide to Choosing a Color Palette
🎨
Coloring Page Display Wall Ideas: A Practical Guide
🎨
The Letter M: An Alphabet and Number Coloring Page
🍂
Creative Independence Day Coloring Projects for Classrooms
🎨
A Pirate's Parrot Squawking Coloring and Drawing Ideas for Kids
🎨
Hopscotch Court Coloring and Drawing Ideas for Kids
🎨
Sand Dollar Coloring and Drawing Ideas for Kids
🌈
Relaxing Seasonal Scenes Coloring Activities
🍎
How Teachers Can Use Early Finisher Activities
🎨
Mongoose Coloring and Drawing Ideas for Kids
🎨
Meet Edgar Degas: An Art Appreciation Guide for Kids
🎨
Stonehenge: Coloring Page and Fun Facts for Kids
🎨
A Growing-Power Superhero: A Superhero Coloring and Design Guide for Kids
🎨
A Brazilian Carnival Costume: A Coloring and Culture Guide for Kids
🧒
Understanding Pattern Recognition in Early Childhood
🎨
Chicken Coloring and Drawing Ideas for Kids
🎨
A Visit to the Doctor: A Coloring and Health Guide for Kids
🎨
the Winter Solstice Coloring Ideas and Activities for the Whole Family
🎨
An Ethiopian Habesha Kemis: A Coloring and Culture Guide for Kids
🎨
The Cat and the Fiddle: A Nursery Rhyme Coloring Guide for Kids
🎨
Groundhog Day Coloring Ideas and Activities for the Whole Family
🎨
Sweeping a Floor: A Simple Life Skill for Kids
🎨
A Milk Plastic Experiment: A Step-by-Step Science Guide for Kids
🎨
Meet Still Life Painting: An Art Appreciation Guide for Kids
🎨
Fun Sports Drawing Activities for Kids
🎨
A Fire-Power Superhero: A Superhero Coloring and Design Guide for Kids
🎨
Mindful Listening: A Simple Mindfulness Activity for Kids
🎨
Counting Coins: A Money Guide for Kids and Parents
🌈
A Guide to Dinosaurs Coloring Pages
🎨
A Family Preparedness Backpack: A Family Safety Guide
🎨
A Castle Herb Garden: A Medieval Coloring and History Guide for Kids
🎨
Robin Coloring Page Ideas for Kids
🎨
An Astronaut's Exercise Routine: A Coloring and Space Mission Guide for Kids
🔬
The Science Behind CMYK Printing Colors
🖍️
Why Coloring Animals Realistically Makes a Difference
🌈
Printable Robots and Machines Coloring Activities
🎨
A Birthday Money Gift: A Money Guide for Kids and Parents
🎨
Kingfisher Coloring Page Ideas for Kids
🎨
Vulture Coloring Page Ideas for Kids
👨👩👧
Fun and Simple Waiting Room Activities
🔎
Exploring Visual Problem-Solving for Students
🧘
Simple Steps for Bedtime Coloring Routines
🎨
A Muffin Tin: A Kitchen Guide for Kids and Parents
🎨
Meet the Librarian: A Community Helper Coloring Guide
🎨
Raven Coloring Page Ideas for Kids
🎨
The Gingerbread Man: A Classic Story Coloring Guide for Kids
🎨
Nightingale Coloring Page Ideas for Kids
🎨
A Tea Ceremony Setting: Coloring Ideas and Fun Facts for Kids
🎨
a Word Search Coloring Combo: Free Ideas for Your Next Celebration
👨👩👧
Creative Travel-Friendly Activities for Kids
🎨
Sea Lion Coloring and Drawing Ideas for Kids
🎨
Machu Picchu: Coloring Page and Fun Facts for Kids
🎨
Uluru: Coloring Page and Fun Facts for Kids
🎨
A Desert Coyote Howling at the Moon: A Wild West Coloring and History Guide for Kids
🎨
How to Draw a A Big and Small Shape Pair: A Step-by-Step Guide for Kids
🎨
Orca Coloring and Drawing Ideas for Kids
🎨
A Medieval Windmill: A Medieval Coloring and History Guide for Kids
✏️
Easy Steps to Practice Pencil Control
🎨
A Measuring Cup Set: A Kitchen Guide for Kids and Parents
🔤
How Pictures Help Children Learn Colors in a New Language
🎨
Line Dancing: A Coloring and Movement Guide for Kids
🎨
A Computer Server Room Concept: A Coloring and STEM Guide for Kids
🧠
Exploring Drawing and Visual Thinking
🎨
Yeti Coloring and Drawing Ideas for Kids
🎨
Easy Sports Drawing Ideas
🧠
The Link Between Drawing and Fine Motor Coordination
👨👩👧
Creative Holiday Break Activities for Kids
🎨
How to Draw a Dreamcatcher Pattern: A Step-by-Step Guide
A Beginner's Guide to Drawing Triangles
🎨
Severe Weather Warning Signs: A Family Safety Guide
🧠
Can Drawing Improve Imagination?
🎨
Kitchen Utensils Coloring Ideas for Kids Who Love to Create
🎨
Memory Match Cards Coloring and Drawing Ideas for Kids
🎨
A Cat Being Brushed: A Simple Pet Care Guide for Kids
🌈
A Guide to Sports Scenes Coloring Pages
👨👩👧
Making the Most of Quiet Time Activities
🎨
Little Miss Muffet: A Nursery Rhyme Coloring Guide for Kids
🎨
Exploring A Space Telescope: A Coloring and Learning Guide for Kids
🍎
How Teachers Can Use Circle Time Activities
🖍️
Why Coloring With Markers Makes a Difference
🧒
Drawing Activities for Ages 2-3
🎨
A Pet's First Day Home: A Simple Pet Care Guide for Kids
🌈
Flowers and Gardens Coloring Ideas for Classrooms
🎨
A Kwanzaa Kinara: Coloring Ideas and Fun Facts for Kids
🎨
A Window Box Planter: A Gardening Guide for Kids and Families
🎨
A Robot Dog: A Coloring and Invention Guide for Kids
🎨
Radish Coloring and Drawing Ideas for Kids
🖌️
A Beginner's Guide to Composition Basics
🎨
A Sandbox Dig: A Coloring and Playtime Guide for Kids
🎨
Meet the Park Ranger: A Community Helper Coloring Guide
🍂
Printable Hanukkah Coloring Pages for Kids
🧘
Simple Steps for Nature-Inspired Calm Coloring
🎨
Egg Collecting: A Coloring and Food Science Guide for Kids
🎨
A Cutting Knife (Kid-Safe): A Kitchen Guide for Kids and Parents
🍂
Creative Birthday Celebrations Coloring Projects for Classrooms
📴
Screen-Free Coloring Ideas for Waiting Rooms
🎨
Yoga Stretches for Kids: A Coloring and Health Guide for Kids
🔬
What Is Subtractive Color Mixing?
🎨
Tango Dancers: A Coloring and Movement Guide for Kids
🧠
How Drawing May Support Sequential Thinking
🎨
A Microphone on Stage: A Coloring and Movement Guide for Kids
🖍️
Simple Techniques for Choosing Paper for Coloring
🎨
Meet Michelangelo: An Art Appreciation Guide for Kids
🎨
Venus Flytrap: A Coloring and Nature Guide for Kids
🎨
A Waterfall Hike: Coloring Ideas for Your Next Family Adventure
🧘
How Coloring Before Exams Can Create a Quiet Moment
👨👩👧
Fun and Simple Outdoor-Inspired Drawing
🔎
Exploring Idea Webs for Students
🎨
A Simple Circuit with a Light Bulb: A Step-by-Step Science Guide for Kids
🎨
A Field Day Race: A Classroom Coloring and Learning Guide
🎨
A Garden Gate: A Gardening Guide for Kids and Families
🎨
Zombie Tag: A Coloring and Playtime Guide for Kids
🎨
Teaching Patience: A Simple Activity for Kids
📴
Hands-On Activities for Outdoor Picnics
🎨
A Piggy Bank Shaped Like an Animal: A Money Guide for Kids and Parents
👨👩👧
Easy Budget-Friendly Activities With Coloring Pages
🎨
Asking Before Borrowing Something: A Simple Social Skill for Kids
🎨
Animals Drawing Prompts for Beginners
🎨
A Multicultural Potluck Table: Coloring Ideas and Fun Facts for Kids
🎨
A Class Map on the Wall: A Classroom Coloring and Learning Guide
🎨
A Circuit Board: A Coloring and STEM Guide for Kids
🎨
A Simple Machine Wheel and Axle: A Coloring and STEM Guide for Kids
🎨
Tiger Coloring and Drawing Ideas for Kids
🧠
Exploring Drawing and Problem-Solving
🎨
A Homemade Fire Extinguisher Demo: A Step-by-Step Science Guide for Kids
🎨
A Book Fair Table: A Classroom Coloring and Learning Guide
🎲
How to Play Memory Matching Games
👨👩👧
Coloring Ideas for After-School Activities
🎨
Answering the Phone Politely: A Simple Social Skill for Kids
🎨
A Frontier Fort: A Wild West Coloring and History Guide for Kids
🎨
A Simple Electric Circuit: A Step-by-Step Science Guide for Kids
🎨
How to Draw a A Cluster of Stars: A Step-by-Step Guide for Kids
🎨
A Folk Dance Circle: A Coloring and Movement Guide for Kids
🎨
Wiping Up a Spill: A Simple Life Skill for Kids
🎨
A Ranch Barn: A Wild West Coloring and History Guide for Kids
🍎
Classroom Ideas: Art Lessons for History Class
🍎
How Teachers Can Use Indoor Recess Activities
🎨
A Beginner's Guide to Drawing Birds
🎨
Fall Apple Picking: Coloring Ideas and Activities for the Whole Family
💡
The Role of Personal Artistic Style in Children's Art
📐
How Children Understand Shapes With Art
🏺
What We Know About Ancient Art Materials
🎨
A Kitchen Scale: A Kitchen Guide for Kids and Parents
🎨
A Fall Flannel Jacket: Coloring Ideas and Activities for the Whole Family
🎨
Jumping in Leaf Piles: Coloring Ideas and Activities for the Whole Family
🎨
Meet Jackson Pollock: An Art Appreciation Guide for Kids
🎨
How to Draw Musical Instruments Step by Step
🍎
Classroom Ideas: Morning Work Activities
🍂
Printable New Year Coloring Pages for Kids
🎨
Double-Sided Printing: A Practical Guide
🎨
A Beginner's Guide to Drawing Castles
💡
Nurturing Imaginative Play at Home
🧒
Understanding Ages 2-3 in Early Childhood
🎨
One Two Buckle My Shoe: A Nursery Rhyme Coloring Guide for Kids
🖍️
A Beginner's Guide to Choosing a Color Palette
🎨
Coloring Page Display Wall Ideas: A Practical Guide
🎨
The Letter M: An Alphabet and Number Coloring Page
🍂
Creative Independence Day Coloring Projects for Classrooms
🎨
A Pirate's Parrot Squawking Coloring and Drawing Ideas for Kids
🎨
Hopscotch Court Coloring and Drawing Ideas for Kids
🎨
Sand Dollar Coloring and Drawing Ideas for Kids
🌈
Relaxing Seasonal Scenes Coloring Activities
🍎
How Teachers Can Use Early Finisher Activities
🎨
Mongoose Coloring and Drawing Ideas for Kids
🎨
Meet Edgar Degas: An Art Appreciation Guide for Kids
🎨
Stonehenge: Coloring Page and Fun Facts for Kids
🎨
A Growing-Power Superhero: A Superhero Coloring and Design Guide for Kids
🎨
A Brazilian Carnival Costume: A Coloring and Culture Guide for Kids
🧒
Understanding Pattern Recognition in Early Childhood
🎨
Chicken Coloring and Drawing Ideas for Kids
🎨
A Visit to the Doctor: A Coloring and Health Guide for Kids
🎨
the Winter Solstice Coloring Ideas and Activities for the Whole Family
🎨
An Ethiopian Habesha Kemis: A Coloring and Culture Guide for Kids
🎨
The Cat and the Fiddle: A Nursery Rhyme Coloring Guide for Kids
🎨
Groundhog Day Coloring Ideas and Activities for the Whole Family
🎨
Sweeping a Floor: A Simple Life Skill for Kids
🎨
A Milk Plastic Experiment: A Step-by-Step Science Guide for Kids
🎨
Meet Still Life Painting: An Art Appreciation Guide for Kids
🎨
Fun Sports Drawing Activities for Kids
🎨
A Fire-Power Superhero: A Superhero Coloring and Design Guide for Kids
🎨
Mindful Listening: A Simple Mindfulness Activity for Kids
🎨
Counting Coins: A Money Guide for Kids and Parents
🌈
A Guide to Dinosaurs Coloring Pages
🎨
A Family Preparedness Backpack: A Family Safety Guide
🎨
A Castle Herb Garden: A Medieval Coloring and History Guide for Kids
🎨
Robin Coloring Page Ideas for Kids
🎨
An Astronaut's Exercise Routine: A Coloring and Space Mission Guide for Kids
🔬
The Science Behind CMYK Printing Colors
🖍️
Why Coloring Animals Realistically Makes a Difference
🌈
Printable Robots and Machines Coloring Activities
🎨
A Birthday Money Gift: A Money Guide for Kids and Parents
🎨
Kingfisher Coloring Page Ideas for Kids
🎨
Vulture Coloring Page Ideas for Kids
👨👩👧
Fun and Simple Waiting Room Activities
🔎
Exploring Visual Problem-Solving for Students
🧘
Simple Steps for Bedtime Coloring Routines
🎨
A Muffin Tin: A Kitchen Guide for Kids and Parents
🎨
Meet the Librarian: A Community Helper Coloring Guide
🎨
Raven Coloring Page Ideas for Kids
🎨
The Gingerbread Man: A Classic Story Coloring Guide for Kids
🎨
Nightingale Coloring Page Ideas for Kids
🎨
A Tea Ceremony Setting: Coloring Ideas and Fun Facts for Kids
🎨
a Word Search Coloring Combo: Free Ideas for Your Next Celebration
👨👩👧
Creative Travel-Friendly Activities for Kids
🎨
Sea Lion Coloring and Drawing Ideas for Kids
🎨
Machu Picchu: Coloring Page and Fun Facts for Kids
🎨
Uluru: Coloring Page and Fun Facts for Kids
🎨
A Desert Coyote Howling at the Moon: A Wild West Coloring and History Guide for Kids
🎨
How to Draw a A Big and Small Shape Pair: A Step-by-Step Guide for Kids
🎨
Orca Coloring and Drawing Ideas for Kids
🎨
A Medieval Windmill: A Medieval Coloring and History Guide for Kids
✏️
Easy Steps to Practice Pencil Control
🎨
A Measuring Cup Set: A Kitchen Guide for Kids and Parents
🔤
How Pictures Help Children Learn Colors in a New Language
🎨
Line Dancing: A Coloring and Movement Guide for Kids
🎨
A Computer Server Room Concept: A Coloring and STEM Guide for Kids
🧠
Exploring Drawing and Visual Thinking
🎨
Yeti Coloring and Drawing Ideas for Kids
🎨
Easy Sports Drawing Ideas
🧠
The Link Between Drawing and Fine Motor Coordination
👨👩👧
Creative Holiday Break Activities for Kids
🎨
How to Draw a Dreamcatcher Pattern: A Step-by-Step Guide
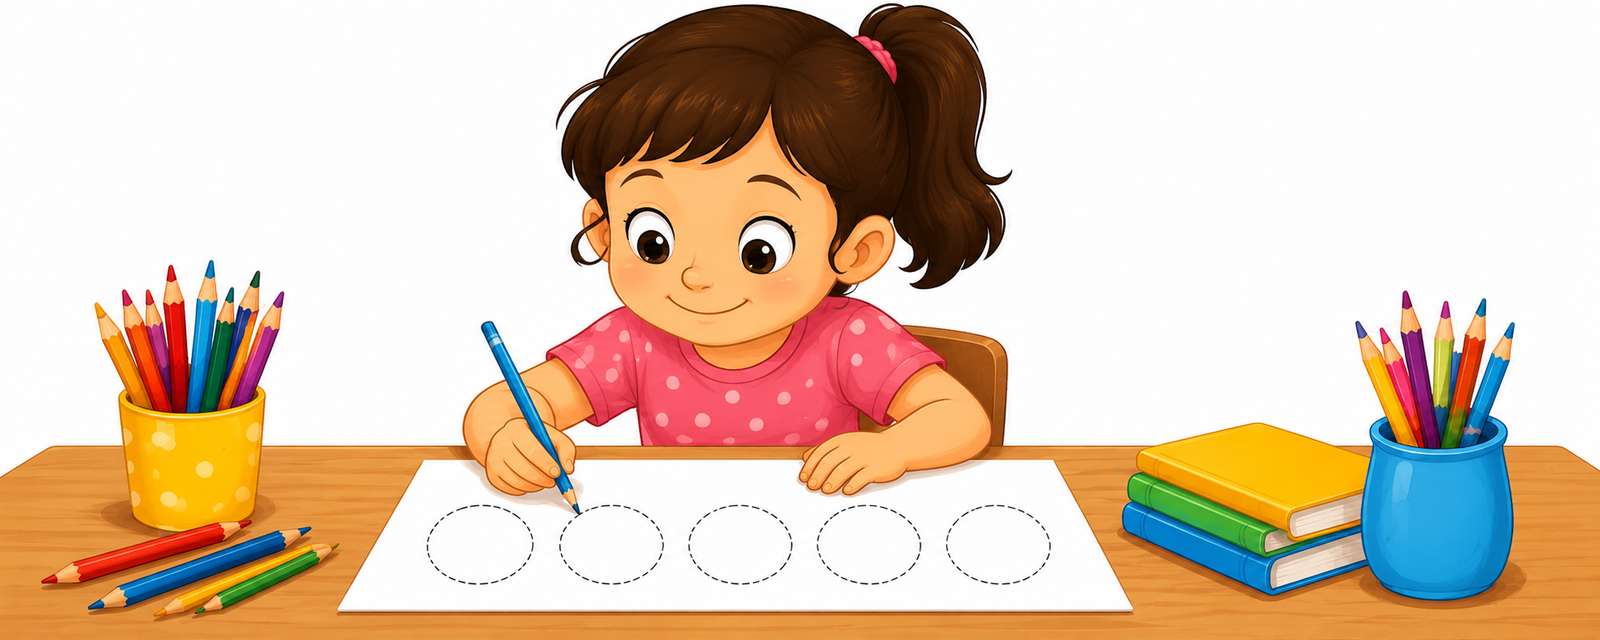 A Beginner's Guide to Drawing Circles
📐
Teaching Number Lines Through Coloring and Drawing
✏️
Easy Steps to Practice Warm-Up Drawing Exercises
🎨
Exploring Pluto: A Coloring and Learning Guide for Kids
🎨
A Beginner's Guide to Drawing Nature Scenes
🎨
A Paper Circuit Card: A Coloring and STEM Guide for Kids
🧒
Drawing Activities for Ages 6-7
📴
Hands-On Activities for Family Game Nights
🎨
Teaching Gentleness: A Simple Activity for Kids
🎨
Exploring Iceland: A Coloring and Culture Guide for Kids
🎨
Safe Driving in Bad Weather: A Family Safety Guide
🎨
A Cheer Dance Routine: A Coloring and Movement Guide for Kids
🎨
Teaching Encouragement: A Simple Activity for Kids
🎨
A Traditional Harvest Festival Outfit: A Coloring and Culture Guide for Kids
🎨
Water Polo Coloring Pages and Drawing Ideas for Kids
🖍️
Tips for Coloring Small Details
🖍️
How to Get Better at Coloring Large Areas
🎨
Including Someone Who Is Left Out: A Simple Social Skill for Kids
🎨
Garden Snail Coloring and Drawing Ideas for Kids
🎨
Easy Self-Portraits Drawing Ideas
💬
Understanding Symbols and Icons
🖌️
Simple Steps for Using Crayons Creatively
🎨
Mermaid Coloring and Drawing Ideas for Kids
🍂
Fun New Year Classroom Coloring Ideas
💗
How Drawing Supports Art and Relaxation
🎨
A Mixing Stand Mixer: A Kitchen Guide for Kids and Parents
🎨
A Seed Packet: A Gardening Guide for Kids and Families
🎨
Toy Drone Coloring and Drawing Ideas for Kids
🎨
Finch Coloring Page Ideas for Kids
🔎
Using Concept Mapping to Solve Problems
🎨
A Beach Picnic Coloring and Drawing Ideas for Kids
🍎
Simple Transition Time Activities for Busy Classrooms
🎨
How to Draw Castles Step by Step
🎨
Exploring The Space Shuttle: A Coloring and Learning Guide for Kids
🍂
Seasonal Coloring Guide: Birthday Celebrations
📴
Making the Most of Quiet Time Before Bed Without Screens
🔎
Why Visual Thinkers Use Visual Note-Taking
🎨
How to Draw a A Row of Circles: A Step-by-Step Guide for Kids
🎨
An Opera Singer: A Coloring and Movement Guide for Kids
🎨
The Number 15: An Alphabet and Number Coloring Page
👨👩👧
Making the Most of Waiting Room Activities
🎨
Space and Planets Drawing Prompts for Beginners
💬
Understanding Diagrams
🎨
Sharing Toys with a Friend: A Simple Social Skill for Kids
🎨
Crossing the Street Safely: A Simple Life Skill for Kids
🎨
Bee Coloring and Drawing Ideas for Kids
🎨
Exploring Denmark: A Coloring and Culture Guide for Kids
🎨
Fun Rocket Ship Coloring and Drawing Ideas for Kids
🎨
Setting Up a Classroom Coloring Station: A Practical Guide
🖌️
A Beginner's Guide to Using Oil Pastels
🌈
Creative Ways to Color Farm Scenes
🎨
A Site Surveyor with a Tripod Coloring and Drawing Ideas for Kids
🎨
A Homemade Lava Lamp: A Step-by-Step Science Guide for Kids
🎨
Ancient Japanese Samurai: An Ancient History Coloring Guide for Kids
🎨
Karate Coloring Pages and Drawing Ideas for Kids
🖍️
How to Get Better at Avoiding Smudges While Coloring
🎨
Body Scan Relaxation: A Simple Mindfulness Activity for Kids
💗
How Drawing Supports Art as a Creative Outlet
🔬
A Simple Guide to Subtractive Color Mixing
🍎
Classroom Ideas: Transition Time Activities
🎨
The Letter P: An Alphabet and Number Coloring Page
📐
Why Spatial Relationships and Drawing Go Together
🎨
A Flying Drone: A Coloring and Invention Guide for Kids
🔎
Exploring Visual Research Methods for Students
🎨
a Quiet Time Basket: A Simple Mindfulness Activity for Kids
🎨
a Calm Corner Setup: A Simple Mindfulness Activity for Kids
🧒
Understanding The Pictorial Stage in Early Childhood
🎨
A Pet Photo Album: A Simple Pet Care Guide for Kids
🎨
Neuschwanstein Castle: Coloring Page and Fun Facts for Kids
🔬
What Is Color Contrast?
🎨
Pitching a Tent: Coloring Ideas for Your Next Family Adventure
🌈
Holiday Scenes Coloring Ideas for Classrooms
💡
Nurturing Visual Brainstorming at Home
🎨
Goose Coloring Page Ideas for Kids
🎨
A House Being Framed Coloring and Drawing Ideas for Kids
🎨
An Ice-Power Superhero: A Superhero Coloring and Design Guide for Kids
🎨
A Superhero Emergency Response: A Superhero Coloring and Design Guide for Kids
🎨
Exploring A Solar System Diagram: A Coloring and Learning Guide for Kids
🎨
The Number 2: An Alphabet and Number Coloring Page
🎨
A Fall Scarecrow: Coloring Ideas and Activities for the Whole Family
🎨
Mount Rushmore: Coloring Page and Fun Facts for Kids
📐
Why Sequences and Drawing Go Together
🖍️
Simple Techniques for Choosing a Color Palette
🌈
Fun Farm Scenes Coloring Pages for Kids
🖌️
Exploring Layering Techniques
📐
Fun Drawing Activities for Symmetry
🎨
Snapping Turtle Coloring and Drawing Ideas for Kids
🎨
Bumper Cars Coloring and Drawing Ideas for Kids
🧒
Understanding Drawing Milestones in Early Childhood
🎨
Teaching Forgiveness: A Simple Activity for Kids
🎨
Hummingbird Coloring Page Ideas for Kids
🎨
Exploring Australia: A Coloring and Culture Guide for Kids
🎨
Ancient Nubian Pyramids: An Ancient History Coloring Guide for Kids
🎨
A Root Cellar: A Coloring and Food Science Guide for Kids
🍂
Seasonal Coloring Guide: Mother's Day
🎨
A Bridge Under Construction Coloring and Drawing Ideas for Kids
🎨
Fun Robots Drawing Activities for Kids
🎨
A Wild West Wagon Train: A Wild West Coloring and History Guide for Kids
🎨
Fun Police Car Coloring and Drawing Ideas for Kids
🎨
How to Draw a Spiral Pattern: A Step-by-Step Guide
🎨
Flying Fish Coloring and Drawing Ideas for Kids
🎨
Gel Pens vs. Markers: A Buying and Technique Guide
🎨
A Site Safety Sign Coloring and Drawing Ideas for Kids
🎨
Five Little Ducks: A Nursery Rhyme Coloring Guide for Kids
🎨
Exploring Jupiter: A Coloring and Learning Guide for Kids
💡
How Drawing Encourages Creative Problem-Solving
🏺
Why Ancient Symbols Matter to Historians
🎨
A Stilt Walker Coloring and Drawing Ideas for Kids
🎨
A Crab Scuttling on the Sand Coloring and Drawing Ideas for Kids
🎨
Rabbit Coloring and Drawing Ideas for Kids
🎨
A Rope Swing Over a Creek: Coloring Ideas for Your Next Family Adventure
🧒
How Drawing Supports Pencil Grip Development
🍂
Printable Winter Coloring Pages for Kids
🔤
Learning Question Words Through Drawing
🎨
Laminating Pages for Reuse: A Practical Guide
🌈
Creative Ways to Color Fairy Tale Scenes
🍎
A Teacher's Guide to Transition Time Activities
🎨
Pig Coloring and Drawing Ideas for Kids
🎨
Mushroom Coloring and Drawing Ideas for Kids
🎨
A Medieval Castle: A Medieval Coloring and History Guide for Kids
📐
Learning 3D Shapes Through Drawing
🎨
Exploring Turkey: A Coloring and Culture Guide for Kids
🎨
Ancient Cave Paintings: An Ancient History Coloring Guide for Kids
🎨
How to Draw a Overlapping Circles: A Step-by-Step Guide for Kids
🎨
Training a Puppy to Sit: A Simple Pet Care Guide for Kids
🎨
A Coin Counting Machine: A Money Guide for Kids and Parents
🎨
Teaching Cheerfulness: A Simple Activity for Kids
🎨
Mudskipper Fish Coloring and Drawing Ideas for Kids
👨👩👧
Why Parents Love Activities for Twins
🎨
a Turkey Dinner Table Coloring Ideas and Activities for the Whole Family
🎨
Grand Canyon: Coloring Page and Fun Facts for Kids
🧒
A Parent's Guide to Fine Motor Skills
🔬
The Science Behind Secondary Colors
🎨
Teaching Leadership: A Simple Activity for Kids
🧒
Drawing Activities for Children Who Dislike Drawing
🎨
An Electrician's Wiring Coloring and Drawing Ideas for Kids
🎨
A Beach Volleyball Net Coloring and Drawing Ideas for Kids
🖌️
Why Using Crayons Creatively Matters for Young Artists
🎲
Treasure Map Games: A Creative Twist
🎨
Easy Weather Drawing Ideas
🎨
Creative Everyday Objects Drawing Exercises
🎨
Lunch Box Note Coloring: Free Ideas for Your Next Celebration
💡
Why Imaginary Worlds Matters for Young Artists
🎨
Planting a Flag on the Moon: A Coloring and Space Mission Guide for Kids
🔎
A Beginner's Guide to Storyboarding for Projects
✏️
Why Drawing Simple Objects Matters for New Artists
🍎
Simple Classroom Management Through Art for Busy Classrooms
🎨
Teddy Bear Coloring and Drawing Ideas for Kids
💡
Building Storytelling Through Coloring and Drawing
🎨
A Knight's Loyal Steed: A Medieval Coloring and History Guide for Kids
🔎
Exploring Flowcharts for Students
🍂
Printable Father's Day Coloring Pages for Kids
🎨
An Invisible Ink Message: A Step-by-Step Science Guide for Kids
🎨
A Wooden Spoon: A Kitchen Guide for Kids and Parents
🎨
A Math Worksheet: A Classroom Coloring and Learning Guide
🧠
Exploring Drawing and Organizing Ideas
🎨
A Ninja Warrior Obstacle Course: A Coloring and Playtime Guide for Kids
🎨
Nudibranch Coloring and Drawing Ideas for Kids
💬
The Power of Visual Instructions
🎨
Pizza Coloring Ideas for Kids Who Love to Create
🧒
How Drawing Supports Shape Recognition
🎨
Mockingbird Coloring Page Ideas for Kids
🎨
A Superhero Helping at School: A Superhero Coloring and Design Guide for Kids
🎨
A Chef's Hat: A Kitchen Guide for Kids and Parents
🎨
If You're Happy and You Know It: A Nursery Rhyme Coloring Guide for Kids
🎨
How to Draw a Polka Dot Pattern: A Step-by-Step Guide
🎨
How to Draw a Tribal Pattern: A Step-by-Step Guide
🎨
A Traditional Embroidered Vest: A Coloring and Culture Guide for Kids
💗
Understanding Family Art Time and Connection
🧠
Can Drawing Improve Planning Skills?
🎨
An Obstacle Course: A Coloring and Playtime Guide for Kids
A Beginner's Guide to Drawing Circles
📐
Teaching Number Lines Through Coloring and Drawing
✏️
Easy Steps to Practice Warm-Up Drawing Exercises
🎨
Exploring Pluto: A Coloring and Learning Guide for Kids
🎨
A Beginner's Guide to Drawing Nature Scenes
🎨
A Paper Circuit Card: A Coloring and STEM Guide for Kids
🧒
Drawing Activities for Ages 6-7
📴
Hands-On Activities for Family Game Nights
🎨
Teaching Gentleness: A Simple Activity for Kids
🎨
Exploring Iceland: A Coloring and Culture Guide for Kids
🎨
Safe Driving in Bad Weather: A Family Safety Guide
🎨
A Cheer Dance Routine: A Coloring and Movement Guide for Kids
🎨
Teaching Encouragement: A Simple Activity for Kids
🎨
A Traditional Harvest Festival Outfit: A Coloring and Culture Guide for Kids
🎨
Water Polo Coloring Pages and Drawing Ideas for Kids
🖍️
Tips for Coloring Small Details
🖍️
How to Get Better at Coloring Large Areas
🎨
Including Someone Who Is Left Out: A Simple Social Skill for Kids
🎨
Garden Snail Coloring and Drawing Ideas for Kids
🎨
Easy Self-Portraits Drawing Ideas
💬
Understanding Symbols and Icons
🖌️
Simple Steps for Using Crayons Creatively
🎨
Mermaid Coloring and Drawing Ideas for Kids
🍂
Fun New Year Classroom Coloring Ideas
💗
How Drawing Supports Art and Relaxation
🎨
A Mixing Stand Mixer: A Kitchen Guide for Kids and Parents
🎨
A Seed Packet: A Gardening Guide for Kids and Families
🎨
Toy Drone Coloring and Drawing Ideas for Kids
🎨
Finch Coloring Page Ideas for Kids
🔎
Using Concept Mapping to Solve Problems
🎨
A Beach Picnic Coloring and Drawing Ideas for Kids
🍎
Simple Transition Time Activities for Busy Classrooms
🎨
How to Draw Castles Step by Step
🎨
Exploring The Space Shuttle: A Coloring and Learning Guide for Kids
🍂
Seasonal Coloring Guide: Birthday Celebrations
📴
Making the Most of Quiet Time Before Bed Without Screens
🔎
Why Visual Thinkers Use Visual Note-Taking
🎨
How to Draw a A Row of Circles: A Step-by-Step Guide for Kids
🎨
An Opera Singer: A Coloring and Movement Guide for Kids
🎨
The Number 15: An Alphabet and Number Coloring Page
👨👩👧
Making the Most of Waiting Room Activities
🎨
Space and Planets Drawing Prompts for Beginners
💬
Understanding Diagrams
🎨
Sharing Toys with a Friend: A Simple Social Skill for Kids
🎨
Crossing the Street Safely: A Simple Life Skill for Kids
🎨
Bee Coloring and Drawing Ideas for Kids
🎨
Exploring Denmark: A Coloring and Culture Guide for Kids
🎨
Fun Rocket Ship Coloring and Drawing Ideas for Kids
🎨
Setting Up a Classroom Coloring Station: A Practical Guide
🖌️
A Beginner's Guide to Using Oil Pastels
🌈
Creative Ways to Color Farm Scenes
🎨
A Site Surveyor with a Tripod Coloring and Drawing Ideas for Kids
🎨
A Homemade Lava Lamp: A Step-by-Step Science Guide for Kids
🎨
Ancient Japanese Samurai: An Ancient History Coloring Guide for Kids
🎨
Karate Coloring Pages and Drawing Ideas for Kids
🖍️
How to Get Better at Avoiding Smudges While Coloring
🎨
Body Scan Relaxation: A Simple Mindfulness Activity for Kids
💗
How Drawing Supports Art as a Creative Outlet
🔬
A Simple Guide to Subtractive Color Mixing
🍎
Classroom Ideas: Transition Time Activities
🎨
The Letter P: An Alphabet and Number Coloring Page
📐
Why Spatial Relationships and Drawing Go Together
🎨
A Flying Drone: A Coloring and Invention Guide for Kids
🔎
Exploring Visual Research Methods for Students
🎨
a Quiet Time Basket: A Simple Mindfulness Activity for Kids
🎨
a Calm Corner Setup: A Simple Mindfulness Activity for Kids
🧒
Understanding The Pictorial Stage in Early Childhood
🎨
A Pet Photo Album: A Simple Pet Care Guide for Kids
🎨
Neuschwanstein Castle: Coloring Page and Fun Facts for Kids
🔬
What Is Color Contrast?
🎨
Pitching a Tent: Coloring Ideas for Your Next Family Adventure
🌈
Holiday Scenes Coloring Ideas for Classrooms
💡
Nurturing Visual Brainstorming at Home
🎨
Goose Coloring Page Ideas for Kids
🎨
A House Being Framed Coloring and Drawing Ideas for Kids
🎨
An Ice-Power Superhero: A Superhero Coloring and Design Guide for Kids
🎨
A Superhero Emergency Response: A Superhero Coloring and Design Guide for Kids
🎨
Exploring A Solar System Diagram: A Coloring and Learning Guide for Kids
🎨
The Number 2: An Alphabet and Number Coloring Page
🎨
A Fall Scarecrow: Coloring Ideas and Activities for the Whole Family
🎨
Mount Rushmore: Coloring Page and Fun Facts for Kids
📐
Why Sequences and Drawing Go Together
🖍️
Simple Techniques for Choosing a Color Palette
🌈
Fun Farm Scenes Coloring Pages for Kids
🖌️
Exploring Layering Techniques
📐
Fun Drawing Activities for Symmetry
🎨
Snapping Turtle Coloring and Drawing Ideas for Kids
🎨
Bumper Cars Coloring and Drawing Ideas for Kids
🧒
Understanding Drawing Milestones in Early Childhood
🎨
Teaching Forgiveness: A Simple Activity for Kids
🎨
Hummingbird Coloring Page Ideas for Kids
🎨
Exploring Australia: A Coloring and Culture Guide for Kids
🎨
Ancient Nubian Pyramids: An Ancient History Coloring Guide for Kids
🎨
A Root Cellar: A Coloring and Food Science Guide for Kids
🍂
Seasonal Coloring Guide: Mother's Day
🎨
A Bridge Under Construction Coloring and Drawing Ideas for Kids
🎨
Fun Robots Drawing Activities for Kids
🎨
A Wild West Wagon Train: A Wild West Coloring and History Guide for Kids
🎨
Fun Police Car Coloring and Drawing Ideas for Kids
🎨
How to Draw a Spiral Pattern: A Step-by-Step Guide
🎨
Flying Fish Coloring and Drawing Ideas for Kids
🎨
Gel Pens vs. Markers: A Buying and Technique Guide
🎨
A Site Safety Sign Coloring and Drawing Ideas for Kids
🎨
Five Little Ducks: A Nursery Rhyme Coloring Guide for Kids
🎨
Exploring Jupiter: A Coloring and Learning Guide for Kids
💡
How Drawing Encourages Creative Problem-Solving
🏺
Why Ancient Symbols Matter to Historians
🎨
A Stilt Walker Coloring and Drawing Ideas for Kids
🎨
A Crab Scuttling on the Sand Coloring and Drawing Ideas for Kids
🎨
Rabbit Coloring and Drawing Ideas for Kids
🎨
A Rope Swing Over a Creek: Coloring Ideas for Your Next Family Adventure
🧒
How Drawing Supports Pencil Grip Development
🍂
Printable Winter Coloring Pages for Kids
🔤
Learning Question Words Through Drawing
🎨
Laminating Pages for Reuse: A Practical Guide
🌈
Creative Ways to Color Fairy Tale Scenes
🍎
A Teacher's Guide to Transition Time Activities
🎨
Pig Coloring and Drawing Ideas for Kids
🎨
Mushroom Coloring and Drawing Ideas for Kids
🎨
A Medieval Castle: A Medieval Coloring and History Guide for Kids
📐
Learning 3D Shapes Through Drawing
🎨
Exploring Turkey: A Coloring and Culture Guide for Kids
🎨
Ancient Cave Paintings: An Ancient History Coloring Guide for Kids
🎨
How to Draw a Overlapping Circles: A Step-by-Step Guide for Kids
🎨
Training a Puppy to Sit: A Simple Pet Care Guide for Kids
🎨
A Coin Counting Machine: A Money Guide for Kids and Parents
🎨
Teaching Cheerfulness: A Simple Activity for Kids
🎨
Mudskipper Fish Coloring and Drawing Ideas for Kids
👨👩👧
Why Parents Love Activities for Twins
🎨
a Turkey Dinner Table Coloring Ideas and Activities for the Whole Family
🎨
Grand Canyon: Coloring Page and Fun Facts for Kids
🧒
A Parent's Guide to Fine Motor Skills
🔬
The Science Behind Secondary Colors
🎨
Teaching Leadership: A Simple Activity for Kids
🧒
Drawing Activities for Children Who Dislike Drawing
🎨
An Electrician's Wiring Coloring and Drawing Ideas for Kids
🎨
A Beach Volleyball Net Coloring and Drawing Ideas for Kids
🖌️
Why Using Crayons Creatively Matters for Young Artists
🎲
Treasure Map Games: A Creative Twist
🎨
Easy Weather Drawing Ideas
🎨
Creative Everyday Objects Drawing Exercises
🎨
Lunch Box Note Coloring: Free Ideas for Your Next Celebration
💡
Why Imaginary Worlds Matters for Young Artists
🎨
Planting a Flag on the Moon: A Coloring and Space Mission Guide for Kids
🔎
A Beginner's Guide to Storyboarding for Projects
✏️
Why Drawing Simple Objects Matters for New Artists
🍎
Simple Classroom Management Through Art for Busy Classrooms
🎨
Teddy Bear Coloring and Drawing Ideas for Kids
💡
Building Storytelling Through Coloring and Drawing
🎨
A Knight's Loyal Steed: A Medieval Coloring and History Guide for Kids
🔎
Exploring Flowcharts for Students
🍂
Printable Father's Day Coloring Pages for Kids
🎨
An Invisible Ink Message: A Step-by-Step Science Guide for Kids
🎨
A Wooden Spoon: A Kitchen Guide for Kids and Parents
🎨
A Math Worksheet: A Classroom Coloring and Learning Guide
🧠
Exploring Drawing and Organizing Ideas
🎨
A Ninja Warrior Obstacle Course: A Coloring and Playtime Guide for Kids
🎨
Nudibranch Coloring and Drawing Ideas for Kids
💬
The Power of Visual Instructions
🎨
Pizza Coloring Ideas for Kids Who Love to Create
🧒
How Drawing Supports Shape Recognition
🎨
Mockingbird Coloring Page Ideas for Kids
🎨
A Superhero Helping at School: A Superhero Coloring and Design Guide for Kids
🎨
A Chef's Hat: A Kitchen Guide for Kids and Parents
🎨
If You're Happy and You Know It: A Nursery Rhyme Coloring Guide for Kids
🎨
How to Draw a Polka Dot Pattern: A Step-by-Step Guide
🎨
How to Draw a Tribal Pattern: A Step-by-Step Guide
🎨
A Traditional Embroidered Vest: A Coloring and Culture Guide for Kids
💗
Understanding Family Art Time and Connection
🧠
Can Drawing Improve Planning Skills?
🎨
An Obstacle Course: A Coloring and Playtime Guide for Kids
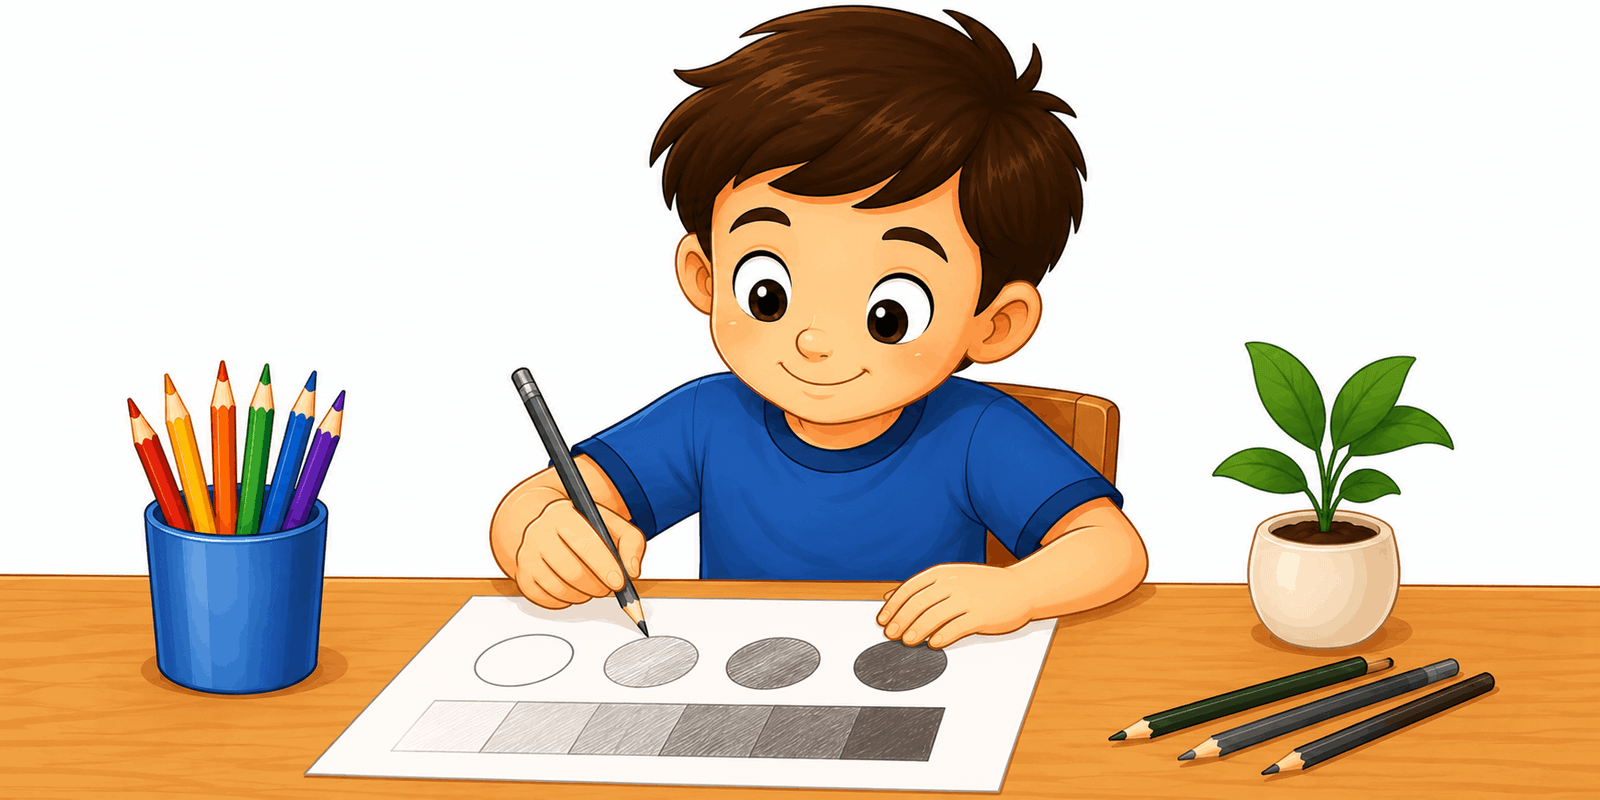 A Beginner's Guide to Shading Basics
🎨
A Cotton Candy Stand Coloring and Drawing Ideas for Kids
🍂
Celebrate New Year With Coloring Activities
💗
Understanding Stress Relief
💡
The Role of Inventing New Ideas in Children's Art
🎨
Mother May I: A Coloring and Playtime Guide for Kids
🎨
Teaching Resilience: A Simple Activity for Kids
🎨
Meet Grandma Moses: An Art Appreciation Guide for Kids
🎨
Cloud Formations Coloring Page: A Nature Learning Guide for Kids
🎨
Fruit Basket Coloring Ideas for Kids Who Love to Create
📐
Teaching Proportion Through Coloring and Drawing
🧠
How Drawing May Support Hand-Eye Coordination
🎨
A Street Musician: A Coloring and Movement Guide for Kids
🎨
Coffee and Pastry Coloring Ideas for Kids Who Love to Create
🌈
Musical Themes Coloring Ideas for Classrooms
🎨
A Kids' First Paycheck Concept: A Money Guide for Kids and Parents
🎨
Teaching Loyalty: A Simple Activity for Kids
🎨
A Space Robot: A Coloring and Invention Guide for Kids
🎨
Wild Turkey Coloring Page Ideas for Kids
🔎
Using Visual Problem-Solving to Solve Problems
🎨
The Crow and the Pitcher: A Classic Story Coloring Guide for Kids
🎨
A Traditional Festival Mask Costume: A Coloring and Culture Guide for Kids
🍎
Using Coloring Pages for Cross-Curricular Art Lessons
🔬
A Simple Guide to Color Theory Basics
🎨
A Classroom Calendar: A Classroom Coloring and Learning Guide
🎨
A Peg Leg Pirate Coloring and Drawing Ideas for Kids
🎨
A STEM Career Engineer: A Coloring and STEM Guide for Kids
🎨
Orangutan Coloring and Drawing Ideas for Kids
🔎
How Visual Note-Taking Support Learning
🎨
Saying Goodbye Politely: A Simple Social Skill for Kids
🌈
A Guide to Flowers and Gardens Coloring Pages
🎨
Meet the Graphic Designer: A Community Helper Coloring Guide
🎨
Hanging Up a Coat: A Simple Life Skill for Kids
🧘
Exploring Coloring as a Calm-Down Tool
💬
From Cave Drawings to Emojis and Modern Pictograms
🎨
Hide and Seek: A Coloring and Playtime Guide for Kids
🎨
Werewolf Coloring and Drawing Ideas for Kids
🎨
Poppy: A Coloring and Nature Guide for Kids
🎨
A Zip Line Adventure: Coloring Ideas for Your Next Family Adventure
🎨
A Self-Driving Car: A Coloring and Invention Guide for Kids
🧒
A Parent's Guide to Pencil Grip Development
🎨
A Family Meeting Point Plan: A Family Safety Guide
🎨
A Tongs: A Kitchen Guide for Kids and Parents
🎨
A Rain Jacket: Coloring Ideas and Activities for the Whole Family
🎨
Counting by Tens: An Alphabet and Number Coloring Page
🖌️
Exploring Working With Light and Shadow
🧒
How Drawing Supports Ages 3-4
🎨
Meet Rembrandt: An Art Appreciation Guide for Kids
🔎
How Data Visualization Basics Support Learning
🎨
A Tiny Microbot: A Coloring and Invention Guide for Kids
🍎
Using Coloring Pages for Art Lessons for History Class
🎨
A Shadow Tracking Activity: A Step-by-Step Science Guide for Kids
🍂
Celebrate Spring With Coloring Activities
🎨
How to Draw a Diamond Pattern: A Step-by-Step Guide
🧒
Drawing Activities for The Pictorial Stage
🎨
Meet Diego Rivera: An Art Appreciation Guide for Kids
✏️
Easy Steps to Practice Drawing Simple Objects
🧒
Fun Ways to Build Drawing Milestones
🖍️
Why Mixing Warm and Cool Colors Makes a Difference
🎨
Gazelle Coloring and Drawing Ideas for Kids
🎨
A Rodeo Arena: A Wild West Coloring and History Guide for Kids
🧘
How Guided Mindful Coloring Can Create a Quiet Moment
🎨
A Beach Frisbee Toss Coloring and Drawing Ideas for Kids
🎨
Rooster Coloring and Drawing Ideas for Kids
🌈
Creative Ways to Color Space
🌈
Creative Ways to Color Mandalas
🌈
Relaxing Holiday Scenes Coloring Activities
🎨
A Dumpling Steamer: Coloring Ideas and Fun Facts for Kids
🎨
A Website Wireframe Sketch: A Coloring and STEM Guide for Kids
🎨
The Five Senses: A Coloring and Health Guide for Kids
🎲
Fun Scavenger Hunt Drawings for Kids
🎨
Lobster Coloring and Drawing Ideas for Kids
💡
Building Doodling Through Coloring and Drawing
🔎
A Beginner's Guide to Concept Mapping
🎨
A Virtual Reality Headset: A Coloring and Invention Guide for Kids
🎨
A Farm Robot: A Coloring and Invention Guide for Kids
🧘
Simple Steps for Quiet Morning Coloring
🎨
Track and Field Coloring Pages and Drawing Ideas for Kids
🎨
Snowboarding Coloring Pages and Drawing Ideas for Kids
🎨
How to Draw a Yin Yang Symmetry: A Step-by-Step Guide
🧒
How Drawing Supports Drawing Milestones
🎨
a Goal Chart Printable: Free Ideas for Your Next Celebration
🎨
A Bowl of Ramen: Coloring Ideas and Fun Facts for Kids
🎨
Preparing a Car Emergency Kit: A Family Safety Guide
🎨
Severe Weather Season Awareness: A Family Safety Guide
🌈
Printable Vehicles Coloring Activities
🍂
Creative Cultural Festivals Coloring Projects for Classrooms
🎨
Taking Out the Trash: A Simple Life Skill for Kids
🎨
A Summer Lemonade Stand: Coloring Ideas and Activities for the Whole Family
🎨
Ocean Sunset Coloring and Drawing Ideas for Kids
🎨
A Royal Family Portrait: A Medieval Coloring and History Guide for Kids
🎨
A Robot Musician: A Coloring and Invention Guide for Kids
💗
The Role of Coloring in What Art Therapy Actually Is
📐
Learning Symmetry Through Drawing
🎨
Teaching Bravery: A Simple Activity for Kids
💡
Nurturing Storytelling at Home
🎨
A Superhero's Gadget Belt: A Superhero Coloring and Design Guide for Kids
🎨
Spring Seed Planting: Coloring Ideas and Activities for the Whole Family
🎨
St. Patrick's Day Coloring Ideas and Activities for the Whole Family
🎨
Ramadan Coloring Ideas and Activities for the Whole Family
🧒
How Drawing Supports Encouraging Reluctant Artists
🎨
A Frontier Schoolhouse: A Wild West Coloring and History Guide for Kids
🎨
A Big Top Tent Interior Coloring and Drawing Ideas for Kids
🎨
A Sunflower Growing Tall: A Gardening Guide for Kids and Families
🎨
Statue Tag: A Coloring and Playtime Guide for Kids
🎲
Step-by-Step Drawing Challenges
🔎
Why Visual Thinkers Use Data Visualization Basics
🧘
Exploring Coloring for Focus
🎨
A Spelling Bee: A Classroom Coloring and Learning Guide
🎨
A Water-Power Superhero: A Superhero Coloring and Design Guide for Kids
🎨
Rainbow Coloring Page: A Nature Learning Guide for Kids
📐
How Children Understand 3D Shapes With Art
👨👩👧
Easy Activities for Twins With Coloring Pages
🎨
Grebe Coloring Page Ideas for Kids
🔬
Warm and Cool Colors Explained for Kids
🎨
How to Draw a Flute: A Coloring and Music Guide for Kids
🎨
A Superhero Comic Book Cover Design: A Superhero Coloring and Design Guide for Kids
🎨
Exploring A Space Suit: A Coloring and Learning Guide for Kids
🎨
Wisteria Vine: A Coloring and Nature Guide for Kids
🧒
What to Expect When Teaching The Symbol-Making Stage
🎨
A Community Garden: A Coloring and Food Science Guide for Kids
💡
How Drawing Encourages Free Drawing
🔤
Visual Vocabulary: Question Words
🎨
A Pet's Bed: A Simple Pet Care Guide for Kids
🎨
Oil Pastels: A Buying and Technique Guide
🍂
Celebrate Valentine's Day With Coloring Activities
💗
The Role of Coloring in Art and Relaxation
A Beginner's Guide to Shading Basics
🎨
A Cotton Candy Stand Coloring and Drawing Ideas for Kids
🍂
Celebrate New Year With Coloring Activities
💗
Understanding Stress Relief
💡
The Role of Inventing New Ideas in Children's Art
🎨
Mother May I: A Coloring and Playtime Guide for Kids
🎨
Teaching Resilience: A Simple Activity for Kids
🎨
Meet Grandma Moses: An Art Appreciation Guide for Kids
🎨
Cloud Formations Coloring Page: A Nature Learning Guide for Kids
🎨
Fruit Basket Coloring Ideas for Kids Who Love to Create
📐
Teaching Proportion Through Coloring and Drawing
🧠
How Drawing May Support Hand-Eye Coordination
🎨
A Street Musician: A Coloring and Movement Guide for Kids
🎨
Coffee and Pastry Coloring Ideas for Kids Who Love to Create
🌈
Musical Themes Coloring Ideas for Classrooms
🎨
A Kids' First Paycheck Concept: A Money Guide for Kids and Parents
🎨
Teaching Loyalty: A Simple Activity for Kids
🎨
A Space Robot: A Coloring and Invention Guide for Kids
🎨
Wild Turkey Coloring Page Ideas for Kids
🔎
Using Visual Problem-Solving to Solve Problems
🎨
The Crow and the Pitcher: A Classic Story Coloring Guide for Kids
🎨
A Traditional Festival Mask Costume: A Coloring and Culture Guide for Kids
🍎
Using Coloring Pages for Cross-Curricular Art Lessons
🔬
A Simple Guide to Color Theory Basics
🎨
A Classroom Calendar: A Classroom Coloring and Learning Guide
🎨
A Peg Leg Pirate Coloring and Drawing Ideas for Kids
🎨
A STEM Career Engineer: A Coloring and STEM Guide for Kids
🎨
Orangutan Coloring and Drawing Ideas for Kids
🔎
How Visual Note-Taking Support Learning
🎨
Saying Goodbye Politely: A Simple Social Skill for Kids
🌈
A Guide to Flowers and Gardens Coloring Pages
🎨
Meet the Graphic Designer: A Community Helper Coloring Guide
🎨
Hanging Up a Coat: A Simple Life Skill for Kids
🧘
Exploring Coloring as a Calm-Down Tool
💬
From Cave Drawings to Emojis and Modern Pictograms
🎨
Hide and Seek: A Coloring and Playtime Guide for Kids
🎨
Werewolf Coloring and Drawing Ideas for Kids
🎨
Poppy: A Coloring and Nature Guide for Kids
🎨
A Zip Line Adventure: Coloring Ideas for Your Next Family Adventure
🎨
A Self-Driving Car: A Coloring and Invention Guide for Kids
🧒
A Parent's Guide to Pencil Grip Development
🎨
A Family Meeting Point Plan: A Family Safety Guide
🎨
A Tongs: A Kitchen Guide for Kids and Parents
🎨
A Rain Jacket: Coloring Ideas and Activities for the Whole Family
🎨
Counting by Tens: An Alphabet and Number Coloring Page
🖌️
Exploring Working With Light and Shadow
🧒
How Drawing Supports Ages 3-4
🎨
Meet Rembrandt: An Art Appreciation Guide for Kids
🔎
How Data Visualization Basics Support Learning
🎨
A Tiny Microbot: A Coloring and Invention Guide for Kids
🍎
Using Coloring Pages for Art Lessons for History Class
🎨
A Shadow Tracking Activity: A Step-by-Step Science Guide for Kids
🍂
Celebrate Spring With Coloring Activities
🎨
How to Draw a Diamond Pattern: A Step-by-Step Guide
🧒
Drawing Activities for The Pictorial Stage
🎨
Meet Diego Rivera: An Art Appreciation Guide for Kids
✏️
Easy Steps to Practice Drawing Simple Objects
🧒
Fun Ways to Build Drawing Milestones
🖍️
Why Mixing Warm and Cool Colors Makes a Difference
🎨
Gazelle Coloring and Drawing Ideas for Kids
🎨
A Rodeo Arena: A Wild West Coloring and History Guide for Kids
🧘
How Guided Mindful Coloring Can Create a Quiet Moment
🎨
A Beach Frisbee Toss Coloring and Drawing Ideas for Kids
🎨
Rooster Coloring and Drawing Ideas for Kids
🌈
Creative Ways to Color Space
🌈
Creative Ways to Color Mandalas
🌈
Relaxing Holiday Scenes Coloring Activities
🎨
A Dumpling Steamer: Coloring Ideas and Fun Facts for Kids
🎨
A Website Wireframe Sketch: A Coloring and STEM Guide for Kids
🎨
The Five Senses: A Coloring and Health Guide for Kids
🎲
Fun Scavenger Hunt Drawings for Kids
🎨
Lobster Coloring and Drawing Ideas for Kids
💡
Building Doodling Through Coloring and Drawing
🔎
A Beginner's Guide to Concept Mapping
🎨
A Virtual Reality Headset: A Coloring and Invention Guide for Kids
🎨
A Farm Robot: A Coloring and Invention Guide for Kids
🧘
Simple Steps for Quiet Morning Coloring
🎨
Track and Field Coloring Pages and Drawing Ideas for Kids
🎨
Snowboarding Coloring Pages and Drawing Ideas for Kids
🎨
How to Draw a Yin Yang Symmetry: A Step-by-Step Guide
🧒
How Drawing Supports Drawing Milestones
🎨
a Goal Chart Printable: Free Ideas for Your Next Celebration
🎨
A Bowl of Ramen: Coloring Ideas and Fun Facts for Kids
🎨
Preparing a Car Emergency Kit: A Family Safety Guide
🎨
Severe Weather Season Awareness: A Family Safety Guide
🌈
Printable Vehicles Coloring Activities
🍂
Creative Cultural Festivals Coloring Projects for Classrooms
🎨
Taking Out the Trash: A Simple Life Skill for Kids
🎨
A Summer Lemonade Stand: Coloring Ideas and Activities for the Whole Family
🎨
Ocean Sunset Coloring and Drawing Ideas for Kids
🎨
A Royal Family Portrait: A Medieval Coloring and History Guide for Kids
🎨
A Robot Musician: A Coloring and Invention Guide for Kids
💗
The Role of Coloring in What Art Therapy Actually Is
📐
Learning Symmetry Through Drawing
🎨
Teaching Bravery: A Simple Activity for Kids
💡
Nurturing Storytelling at Home
🎨
A Superhero's Gadget Belt: A Superhero Coloring and Design Guide for Kids
🎨
Spring Seed Planting: Coloring Ideas and Activities for the Whole Family
🎨
St. Patrick's Day Coloring Ideas and Activities for the Whole Family
🎨
Ramadan Coloring Ideas and Activities for the Whole Family
🧒
How Drawing Supports Encouraging Reluctant Artists
🎨
A Frontier Schoolhouse: A Wild West Coloring and History Guide for Kids
🎨
A Big Top Tent Interior Coloring and Drawing Ideas for Kids
🎨
A Sunflower Growing Tall: A Gardening Guide for Kids and Families
🎨
Statue Tag: A Coloring and Playtime Guide for Kids
🎲
Step-by-Step Drawing Challenges
🔎
Why Visual Thinkers Use Data Visualization Basics
🧘
Exploring Coloring for Focus
🎨
A Spelling Bee: A Classroom Coloring and Learning Guide
🎨
A Water-Power Superhero: A Superhero Coloring and Design Guide for Kids
🎨
Rainbow Coloring Page: A Nature Learning Guide for Kids
📐
How Children Understand 3D Shapes With Art
👨👩👧
Easy Activities for Twins With Coloring Pages
🎨
Grebe Coloring Page Ideas for Kids
🔬
Warm and Cool Colors Explained for Kids
🎨
How to Draw a Flute: A Coloring and Music Guide for Kids
🎨
A Superhero Comic Book Cover Design: A Superhero Coloring and Design Guide for Kids
🎨
Exploring A Space Suit: A Coloring and Learning Guide for Kids
🎨
Wisteria Vine: A Coloring and Nature Guide for Kids
🧒
What to Expect When Teaching The Symbol-Making Stage
🎨
A Community Garden: A Coloring and Food Science Guide for Kids
💡
How Drawing Encourages Free Drawing
🔤
Visual Vocabulary: Question Words
🎨
A Pet's Bed: A Simple Pet Care Guide for Kids
🎨
Oil Pastels: A Buying and Technique Guide
🍂
Celebrate Valentine's Day With Coloring Activities
💗
The Role of Coloring in Art and Relaxation
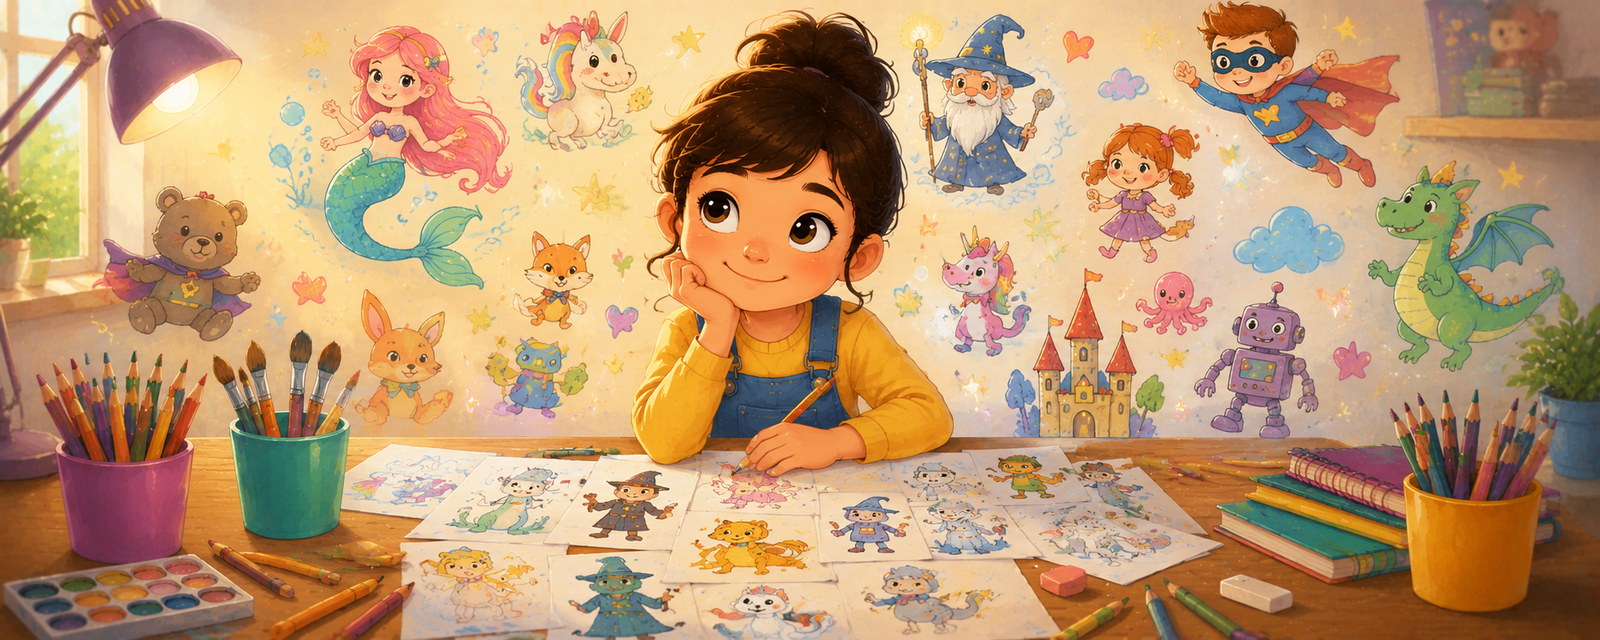 How Drawing Encourages Character Design
🎲
How to Play Collaborative Drawing Games
🎨
A Superhero Standing Up for a Friend: A Superhero Coloring and Design Guide for Kids
🎨
Kraken Coloring and Drawing Ideas for Kids
🎨
What Time Is It, Mr. Fox: A Coloring and Playtime Guide for Kids
🎨
Mole Coloring and Drawing Ideas for Kids
🎨
A Camp Counselor: Coloring Ideas for Your Next Family Adventure
✏️
How to Improve Your Drawing Curved Lines
🎨
A Beginner's Guide to Drawing Dinosaurs
🎨
Basilisk Coloring and Drawing Ideas for Kids
🎨
A Native American Village (Respectfully Depicted): A Wild West Coloring and History Guide for Kids
🎨
Meet the Fashion Designer: A Community Helper Coloring Guide
🎨
The Princess and the Pea: A Classic Story Coloring Guide for Kids
🎨
A Painter on Scaffolding Coloring and Drawing Ideas for Kids
🎨
How to Draw a French Horn: A Coloring and Music Guide for Kids
🎨
A Simple Density Experiment with Oil and Water: A Step-by-Step Science Guide for Kids
🎨
A Kettle: A Kitchen Guide for Kids and Parents
🎨
A Beginner's Guide to Drawing Gardens and Flowers
🔬
Understanding Color Wheels
✏️
Easy Steps to Practice Drawing Simple Animals
🎨
Yogurt Making: A Coloring and Food Science Guide for Kids
💡
The Role of Visual Brainstorming in Children's Art
🧘
A Beginner's Guide to Deep Breathing and Coloring
🎨
A Solar Panel: A Coloring and Invention Guide for Kids
🎨
The Inca City of Machu Picchu: An Ancient History Coloring Guide for Kids
🎨
How to Draw a Triangle: A Coloring and Music Guide for Kids
🧒
Understanding Left-Handed Children in Early Childhood
🎨
Binding a Coloring Book at Home: A Practical Guide
💡
How Drawing Encourages Doodling
🎨
Wombat Coloring and Drawing Ideas for Kids
🎨
Sea Serpent Coloring and Drawing Ideas for Kids
🎨
Folding Laundry: A Simple Life Skill for Kids
👨👩👧
Fun and Simple Travel-Friendly Activities
💬
Understanding Picture Books
🎨
A Home Generator Safety Guide: A Family Safety Guide
🖌️
Simple Steps for Using Oil Pastels
🖍️
Simple Techniques for Layering Colors
🖍️
Simple Techniques for Applying Even Pressure
🎨
Puma Coloring and Drawing Ideas for Kids
🎨
Colosseum: Coloring Page and Fun Facts for Kids
🧘
How Mindful Coloring for Beginners Can Create a Quiet Moment
🎨
How to Draw a Electric Guitar: A Coloring and Music Guide for Kids
🎨
A Neighborhood Emergency Plan: A Family Safety Guide
🎨
Meet Paul Cezanne: An Art Appreciation Guide for Kids
🎨
Exploring Earth: A Coloring and Learning Guide for Kids
🎨
A Ship's Figurehead Coloring and Drawing Ideas for Kids
🎨
Pegasus Coloring and Drawing Ideas for Kids
🎨
Teaching Tolerance: A Simple Activity for Kids
🎨
Ancient Mesopotamian Ziggurats: An Ancient History Coloring Guide for Kids
🎨
A Boardwalk Ferris Wheel Coloring and Drawing Ideas for Kids
🎨
Parakeet Coloring and Drawing Ideas for Kids
📐
How Children Understand Symmetry With Art
🎨
Graduation Day Coloring Ideas and Activities for the Whole Family
🎨
A Gelato Cart: Coloring Ideas and Fun Facts for Kids
🎨
Tacos Coloring Ideas for Kids Who Love to Create
👨👩👧
Creative Activities for Twins for Kids
🎨
Being Welcoming to a New Student: A Simple Social Skill for Kids
🎨
a Kindness Chain: A Simple Mindfulness Activity for Kids
🍎
Using Coloring Pages for Classroom Coloring Stations
🎨
Jack Be Nimble: A Nursery Rhyme Coloring Guide for Kids
🎨
A Pirate Adventure Camp Coloring and Drawing Ideas for Kids
🔬
A Simple Guide to Primary Colors
🧠
Can Drawing Improve Patience?
🎨
Zebra Coloring and Drawing Ideas for Kids
🎨
A Family Budget Chart: A Money Guide for Kids and Parents
🖍️
Simple Techniques for Using Complementary Colors
🎨
Fun Gondola Coloring and Drawing Ideas for Kids
🎨
Hamster Coloring and Drawing Ideas for Kids
🎨
The Letter Z: An Alphabet and Number Coloring Page
👨👩👧
Why Parents Love Low-Mess Activities
🎨
Raising Your Hand to Speak: A Simple Social Skill for Kids
🧘
How Coloring for Focus Can Create a Quiet Moment
🍂
Printable Graduation Season Coloring Pages for Kids
🎨
Fog Over a Forest Coloring Page: A Nature Learning Guide for Kids
🎨
A Paddleboard on Calm Water Coloring and Drawing Ideas for Kids
🎨
Cleaning a Fish Tank: A Simple Pet Care Guide for Kids
🎨
Teaching Integrity: A Simple Activity for Kids
🌈
A Guide to Nature Landscapes Coloring Pages
🎨
How to Draw a Labyrinth Pattern: A Step-by-Step Guide
🍂
Fun Hanukkah Classroom Coloring Ideas
🎨
Tap Shoes: A Coloring and Movement Guide for Kids
🌈
Printable Farm Scenes Coloring Activities
🎨
A Kraken Legend Coloring and Drawing Ideas for Kids
🎨
A Camping Lantern: Coloring Ideas for Your Next Family Adventure
🎨
Chess Coloring Pages and Drawing Ideas for Kids
🎨
Exploring An Alien Planet: A Coloring and Learning Guide for Kids
📴
Why Coloring Beats Scrolling on Restaurant Wait Times
💡
Nurturing Open-Ended Play at Home
🎨
Easy Under the Sea Drawing Ideas
🎨
A Robotics Kit: A Coloring and STEM Guide for Kids
🎨
A Fall Cider Mill Trip: Coloring Ideas and Activities for the Whole Family
🎨
A Class Field Trip: A Classroom Coloring and Learning Guide
🎨
A School Talent Show: A Coloring and Movement Guide for Kids
💡
How Drawing Encourages Storytelling
🎨
Stargazing at Night: Coloring Ideas for Your Next Family Adventure
🎨
Fun Insects Drawing Activities for Kids
🎨
A Tilt-a-Whirl Ride Coloring and Drawing Ideas for Kids
🎲
Using Drawing for Drawing Prompt Games
🔬
What Is Color Wheels?
🎨
Red Light Green Light: A Coloring and Playtime Guide for Kids
🎨
A Pet Grooming Kit: A Simple Pet Care Guide for Kids
🎨
Exploring An Astronaut: A Coloring and Learning Guide for Kids
🖍️
How to Get Better at Coloring Cartoon Characters
💡
Nurturing Creative Confidence at Home
🎨
Chichen Itza: Coloring Page and Fun Facts for Kids
👨👩👧
Fun and Simple Screen-Free Afternoons
🔎
Exploring Sketching to Understand Complex Ideas for Students
🖍️
Why Choosing Your First Coloring Pencils Makes a Difference
🌈
Creative Ways to Color Fantasy Creatures
💡
Building Inventing New Ideas Through Coloring and Drawing
🎨
A Pet's Bedtime Routine: A Simple Pet Care Guide for Kids
🎨
Rainforest Canopy Coloring Page: A Nature Learning Guide for Kids
🎨
A Garden Hoe: A Gardening Guide for Kids and Families
📐
Learning Tessellations Through Drawing
👨👩👧
Easy Holiday Break Activities With Coloring Pages
🎨
A Wild West Town Main Street: A Wild West Coloring and History Guide for Kids
👨👩👧
Making the Most of Screen-Free Afternoons
🌈
A Guide to Emotions and Faces Coloring Pages
🧘
How Mandala Coloring Can Create a Quiet Moment
🌈
Relaxing Buildings and Castles Coloring Activities
🍎
A Teacher's Guide to Art Lessons for Math Class
🧒
Understanding Shape Recognition in Early Childhood
🎨
How to Draw a Honeycomb Pattern: A Step-by-Step Guide
🔬
Understanding How Light Creates Color
🍂
Printable Valentine's Day Coloring Pages for Kids
🧒
Fun Ways to Build The Scribbling Stage
🎨
How to Draw a A Shape Pattern Sequence: A Step-by-Step Guide for Kids
🍎
Simple Early Finisher Activities for Busy Classrooms
🎨
Jellyfish Coloring and Drawing Ideas for Kids
🎨
An Egg and Spoon Race: A Coloring and Playtime Guide for Kids
🎨
Sea Dragon Coloring and Drawing Ideas for Kids
📐
Why Grids and Coordinates and Drawing Go Together
🧒
A Parent's Guide to Children Who Dislike Drawing
🎨
A Beginner's Guide to Drawing Everyday Objects
🎨
A Programming Language Logo Concept: A Coloring and STEM Guide for Kids
🎨
Meet Leonardo da Vinci: An Art Appreciation Guide for Kids
🎨
Meet the Pilot: A Community Helper Coloring Guide
🌈
Fairy Tale Scenes Coloring Ideas for Classrooms
🎨
Complimenting a Friend: A Simple Social Skill for Kids
🎨
A Stagecoach: A Wild West Coloring and History Guide for Kids
🎨
A Road Roller Machine Coloring and Drawing Ideas for Kids
🌈
Creative Ways to Color Ocean Life
🌈
A Guide to Insects and Bugs Coloring Pages
🎨
Meet Watercolor Painting: An Art Appreciation Guide for Kids
🎨
Saying Sorry and Meaning It: A Simple Social Skill for Kids
🎨
Vehicles Drawing Prompts for Beginners
🔤
Drawing Activities for Emotions and Feelings Words
🎨
A Dino Egg Hatching Close-Up Coloring Page: Fun Facts for Young Paleontologists
🖍️
Simple Techniques for Coloring Cartoon Characters
🎨
Peter Peter Pumpkin Eater: A Nursery Rhyme Coloring Guide for Kids
🎨
How to Draw a An Arch Shape: A Step-by-Step Guide for Kids
🎨
Teaching Gratitude: A Simple Activity for Kids
🎨
A Superhero's First Day on the Job: A Superhero Coloring and Design Guide for Kids
🎨
A Peeler: A Kitchen Guide for Kids and Parents
📐
Why Graphs and Charts and Drawing Go Together
🎨
A Teleportation Superhero: A Superhero Coloring and Design Guide for Kids
🎨
Party Favor Coloring Sheets: Free Ideas for Your Next Celebration
🎨
Hot Spring Coloring Page: A Nature Learning Guide for Kids
🎨
Phoenix Coloring and Drawing Ideas for Kids
🎨
Tennis Coloring Pages and Drawing Ideas for Kids
🎨
Creative Buildings and Houses Drawing Exercises
🎨
The Letter G: An Alphabet and Number Coloring Page
🔎
How Mind Maps Support Learning
🎨
Mermaid Lagoon Coloring and Drawing Ideas for Kids
🎨
Respecting Personal Space: A Simple Social Skill for Kids
🎨
A Giant Robot: A Coloring and Invention Guide for Kids
🎨
A Roller Coaster Coloring and Drawing Ideas for Kids
🎨
A Beach Chair Coloring and Drawing Ideas for Kids
🎨
Creative Nature Scenes Drawing Exercises
🎨
Meet the Photographer: A Community Helper Coloring Guide
🎨
Sahara Desert: Coloring Page and Fun Facts for Kids
✏️
Why Drawing Squares and Rectangles Matters for New Artists
🎨
How to Draw a A Pattern of Triangles: A Step-by-Step Guide for Kids
💬
Why Maps and Wayfinding Symbols Matter in Everyday Life
🎨
Vegetable Garden Bed Coloring and Drawing Ideas for Kids
🎨
A Compass and Map: Coloring Ideas for Your Next Family Adventure
🎨
Polly Put the Kettle On: A Nursery Rhyme Coloring Guide for Kids
🎨
A Bucket and Shovel Coloring and Drawing Ideas for Kids
How Drawing Encourages Character Design
🎲
How to Play Collaborative Drawing Games
🎨
A Superhero Standing Up for a Friend: A Superhero Coloring and Design Guide for Kids
🎨
Kraken Coloring and Drawing Ideas for Kids
🎨
What Time Is It, Mr. Fox: A Coloring and Playtime Guide for Kids
🎨
Mole Coloring and Drawing Ideas for Kids
🎨
A Camp Counselor: Coloring Ideas for Your Next Family Adventure
✏️
How to Improve Your Drawing Curved Lines
🎨
A Beginner's Guide to Drawing Dinosaurs
🎨
Basilisk Coloring and Drawing Ideas for Kids
🎨
A Native American Village (Respectfully Depicted): A Wild West Coloring and History Guide for Kids
🎨
Meet the Fashion Designer: A Community Helper Coloring Guide
🎨
The Princess and the Pea: A Classic Story Coloring Guide for Kids
🎨
A Painter on Scaffolding Coloring and Drawing Ideas for Kids
🎨
How to Draw a French Horn: A Coloring and Music Guide for Kids
🎨
A Simple Density Experiment with Oil and Water: A Step-by-Step Science Guide for Kids
🎨
A Kettle: A Kitchen Guide for Kids and Parents
🎨
A Beginner's Guide to Drawing Gardens and Flowers
🔬
Understanding Color Wheels
✏️
Easy Steps to Practice Drawing Simple Animals
🎨
Yogurt Making: A Coloring and Food Science Guide for Kids
💡
The Role of Visual Brainstorming in Children's Art
🧘
A Beginner's Guide to Deep Breathing and Coloring
🎨
A Solar Panel: A Coloring and Invention Guide for Kids
🎨
The Inca City of Machu Picchu: An Ancient History Coloring Guide for Kids
🎨
How to Draw a Triangle: A Coloring and Music Guide for Kids
🧒
Understanding Left-Handed Children in Early Childhood
🎨
Binding a Coloring Book at Home: A Practical Guide
💡
How Drawing Encourages Doodling
🎨
Wombat Coloring and Drawing Ideas for Kids
🎨
Sea Serpent Coloring and Drawing Ideas for Kids
🎨
Folding Laundry: A Simple Life Skill for Kids
👨👩👧
Fun and Simple Travel-Friendly Activities
💬
Understanding Picture Books
🎨
A Home Generator Safety Guide: A Family Safety Guide
🖌️
Simple Steps for Using Oil Pastels
🖍️
Simple Techniques for Layering Colors
🖍️
Simple Techniques for Applying Even Pressure
🎨
Puma Coloring and Drawing Ideas for Kids
🎨
Colosseum: Coloring Page and Fun Facts for Kids
🧘
How Mindful Coloring for Beginners Can Create a Quiet Moment
🎨
How to Draw a Electric Guitar: A Coloring and Music Guide for Kids
🎨
A Neighborhood Emergency Plan: A Family Safety Guide
🎨
Meet Paul Cezanne: An Art Appreciation Guide for Kids
🎨
Exploring Earth: A Coloring and Learning Guide for Kids
🎨
A Ship's Figurehead Coloring and Drawing Ideas for Kids
🎨
Pegasus Coloring and Drawing Ideas for Kids
🎨
Teaching Tolerance: A Simple Activity for Kids
🎨
Ancient Mesopotamian Ziggurats: An Ancient History Coloring Guide for Kids
🎨
A Boardwalk Ferris Wheel Coloring and Drawing Ideas for Kids
🎨
Parakeet Coloring and Drawing Ideas for Kids
📐
How Children Understand Symmetry With Art
🎨
Graduation Day Coloring Ideas and Activities for the Whole Family
🎨
A Gelato Cart: Coloring Ideas and Fun Facts for Kids
🎨
Tacos Coloring Ideas for Kids Who Love to Create
👨👩👧
Creative Activities for Twins for Kids
🎨
Being Welcoming to a New Student: A Simple Social Skill for Kids
🎨
a Kindness Chain: A Simple Mindfulness Activity for Kids
🍎
Using Coloring Pages for Classroom Coloring Stations
🎨
Jack Be Nimble: A Nursery Rhyme Coloring Guide for Kids
🎨
A Pirate Adventure Camp Coloring and Drawing Ideas for Kids
🔬
A Simple Guide to Primary Colors
🧠
Can Drawing Improve Patience?
🎨
Zebra Coloring and Drawing Ideas for Kids
🎨
A Family Budget Chart: A Money Guide for Kids and Parents
🖍️
Simple Techniques for Using Complementary Colors
🎨
Fun Gondola Coloring and Drawing Ideas for Kids
🎨
Hamster Coloring and Drawing Ideas for Kids
🎨
The Letter Z: An Alphabet and Number Coloring Page
👨👩👧
Why Parents Love Low-Mess Activities
🎨
Raising Your Hand to Speak: A Simple Social Skill for Kids
🧘
How Coloring for Focus Can Create a Quiet Moment
🍂
Printable Graduation Season Coloring Pages for Kids
🎨
Fog Over a Forest Coloring Page: A Nature Learning Guide for Kids
🎨
A Paddleboard on Calm Water Coloring and Drawing Ideas for Kids
🎨
Cleaning a Fish Tank: A Simple Pet Care Guide for Kids
🎨
Teaching Integrity: A Simple Activity for Kids
🌈
A Guide to Nature Landscapes Coloring Pages
🎨
How to Draw a Labyrinth Pattern: A Step-by-Step Guide
🍂
Fun Hanukkah Classroom Coloring Ideas
🎨
Tap Shoes: A Coloring and Movement Guide for Kids
🌈
Printable Farm Scenes Coloring Activities
🎨
A Kraken Legend Coloring and Drawing Ideas for Kids
🎨
A Camping Lantern: Coloring Ideas for Your Next Family Adventure
🎨
Chess Coloring Pages and Drawing Ideas for Kids
🎨
Exploring An Alien Planet: A Coloring and Learning Guide for Kids
📴
Why Coloring Beats Scrolling on Restaurant Wait Times
💡
Nurturing Open-Ended Play at Home
🎨
Easy Under the Sea Drawing Ideas
🎨
A Robotics Kit: A Coloring and STEM Guide for Kids
🎨
A Fall Cider Mill Trip: Coloring Ideas and Activities for the Whole Family
🎨
A Class Field Trip: A Classroom Coloring and Learning Guide
🎨
A School Talent Show: A Coloring and Movement Guide for Kids
💡
How Drawing Encourages Storytelling
🎨
Stargazing at Night: Coloring Ideas for Your Next Family Adventure
🎨
Fun Insects Drawing Activities for Kids
🎨
A Tilt-a-Whirl Ride Coloring and Drawing Ideas for Kids
🎲
Using Drawing for Drawing Prompt Games
🔬
What Is Color Wheels?
🎨
Red Light Green Light: A Coloring and Playtime Guide for Kids
🎨
A Pet Grooming Kit: A Simple Pet Care Guide for Kids
🎨
Exploring An Astronaut: A Coloring and Learning Guide for Kids
🖍️
How to Get Better at Coloring Cartoon Characters
💡
Nurturing Creative Confidence at Home
🎨
Chichen Itza: Coloring Page and Fun Facts for Kids
👨👩👧
Fun and Simple Screen-Free Afternoons
🔎
Exploring Sketching to Understand Complex Ideas for Students
🖍️
Why Choosing Your First Coloring Pencils Makes a Difference
🌈
Creative Ways to Color Fantasy Creatures
💡
Building Inventing New Ideas Through Coloring and Drawing
🎨
A Pet's Bedtime Routine: A Simple Pet Care Guide for Kids
🎨
Rainforest Canopy Coloring Page: A Nature Learning Guide for Kids
🎨
A Garden Hoe: A Gardening Guide for Kids and Families
📐
Learning Tessellations Through Drawing
👨👩👧
Easy Holiday Break Activities With Coloring Pages
🎨
A Wild West Town Main Street: A Wild West Coloring and History Guide for Kids
👨👩👧
Making the Most of Screen-Free Afternoons
🌈
A Guide to Emotions and Faces Coloring Pages
🧘
How Mandala Coloring Can Create a Quiet Moment
🌈
Relaxing Buildings and Castles Coloring Activities
🍎
A Teacher's Guide to Art Lessons for Math Class
🧒
Understanding Shape Recognition in Early Childhood
🎨
How to Draw a Honeycomb Pattern: A Step-by-Step Guide
🔬
Understanding How Light Creates Color
🍂
Printable Valentine's Day Coloring Pages for Kids
🧒
Fun Ways to Build The Scribbling Stage
🎨
How to Draw a A Shape Pattern Sequence: A Step-by-Step Guide for Kids
🍎
Simple Early Finisher Activities for Busy Classrooms
🎨
Jellyfish Coloring and Drawing Ideas for Kids
🎨
An Egg and Spoon Race: A Coloring and Playtime Guide for Kids
🎨
Sea Dragon Coloring and Drawing Ideas for Kids
📐
Why Grids and Coordinates and Drawing Go Together
🧒
A Parent's Guide to Children Who Dislike Drawing
🎨
A Beginner's Guide to Drawing Everyday Objects
🎨
A Programming Language Logo Concept: A Coloring and STEM Guide for Kids
🎨
Meet Leonardo da Vinci: An Art Appreciation Guide for Kids
🎨
Meet the Pilot: A Community Helper Coloring Guide
🌈
Fairy Tale Scenes Coloring Ideas for Classrooms
🎨
Complimenting a Friend: A Simple Social Skill for Kids
🎨
A Stagecoach: A Wild West Coloring and History Guide for Kids
🎨
A Road Roller Machine Coloring and Drawing Ideas for Kids
🌈
Creative Ways to Color Ocean Life
🌈
A Guide to Insects and Bugs Coloring Pages
🎨
Meet Watercolor Painting: An Art Appreciation Guide for Kids
🎨
Saying Sorry and Meaning It: A Simple Social Skill for Kids
🎨
Vehicles Drawing Prompts for Beginners
🔤
Drawing Activities for Emotions and Feelings Words
🎨
A Dino Egg Hatching Close-Up Coloring Page: Fun Facts for Young Paleontologists
🖍️
Simple Techniques for Coloring Cartoon Characters
🎨
Peter Peter Pumpkin Eater: A Nursery Rhyme Coloring Guide for Kids
🎨
How to Draw a An Arch Shape: A Step-by-Step Guide for Kids
🎨
Teaching Gratitude: A Simple Activity for Kids
🎨
A Superhero's First Day on the Job: A Superhero Coloring and Design Guide for Kids
🎨
A Peeler: A Kitchen Guide for Kids and Parents
📐
Why Graphs and Charts and Drawing Go Together
🎨
A Teleportation Superhero: A Superhero Coloring and Design Guide for Kids
🎨
Party Favor Coloring Sheets: Free Ideas for Your Next Celebration
🎨
Hot Spring Coloring Page: A Nature Learning Guide for Kids
🎨
Phoenix Coloring and Drawing Ideas for Kids
🎨
Tennis Coloring Pages and Drawing Ideas for Kids
🎨
Creative Buildings and Houses Drawing Exercises
🎨
The Letter G: An Alphabet and Number Coloring Page
🔎
How Mind Maps Support Learning
🎨
Mermaid Lagoon Coloring and Drawing Ideas for Kids
🎨
Respecting Personal Space: A Simple Social Skill for Kids
🎨
A Giant Robot: A Coloring and Invention Guide for Kids
🎨
A Roller Coaster Coloring and Drawing Ideas for Kids
🎨
A Beach Chair Coloring and Drawing Ideas for Kids
🎨
Creative Nature Scenes Drawing Exercises
🎨
Meet the Photographer: A Community Helper Coloring Guide
🎨
Sahara Desert: Coloring Page and Fun Facts for Kids
✏️
Why Drawing Squares and Rectangles Matters for New Artists
🎨
How to Draw a A Pattern of Triangles: A Step-by-Step Guide for Kids
💬
Why Maps and Wayfinding Symbols Matter in Everyday Life
🎨
Vegetable Garden Bed Coloring and Drawing Ideas for Kids
🎨
A Compass and Map: Coloring Ideas for Your Next Family Adventure
🎨
Polly Put the Kettle On: A Nursery Rhyme Coloring Guide for Kids
🎨
A Bucket and Shovel Coloring and Drawing Ideas for Kids
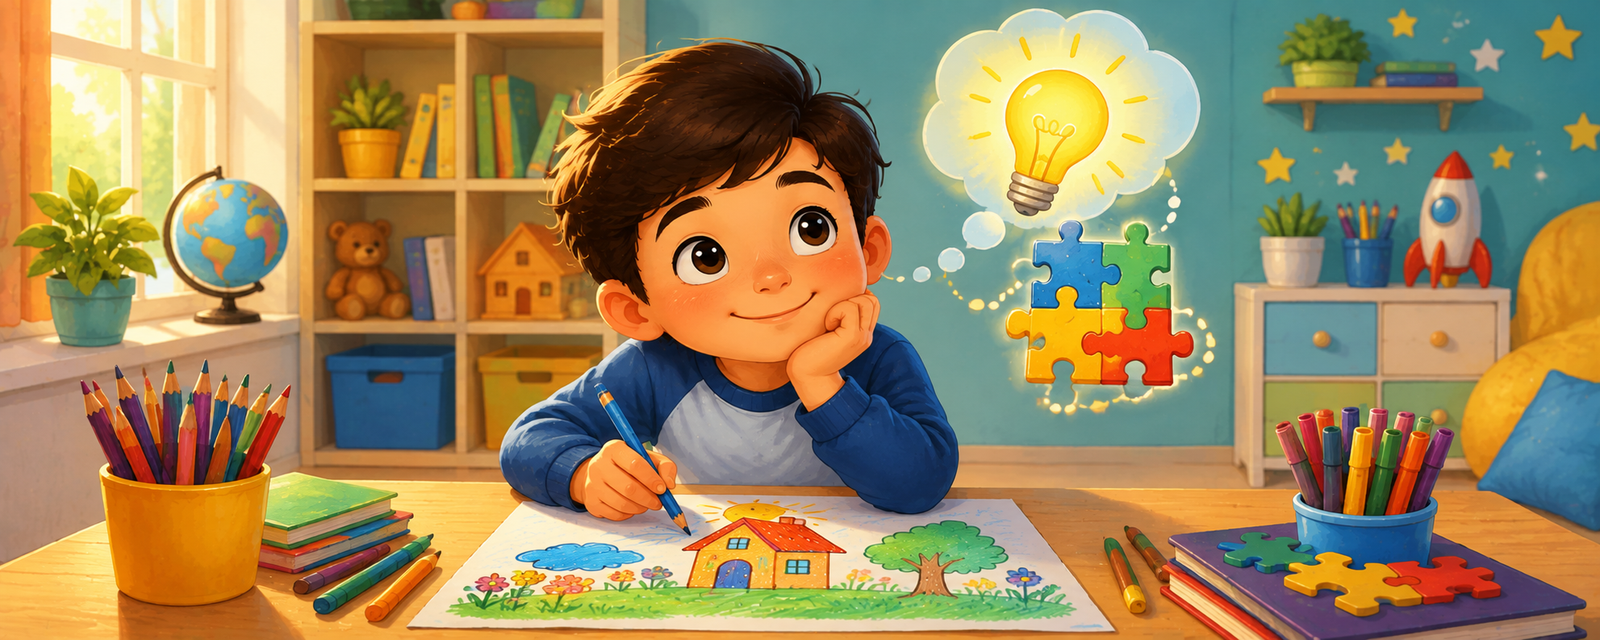 The Link Between Drawing and Planning Skills
🎨
A Sea Chest of Gold Coins Coloring and Drawing Ideas for Kids
🎨
A Kids' Yard Work Business: A Money Guide for Kids and Parents
🎨
A Ladder Against a Wall Coloring and Drawing Ideas for Kids
🎨
A Beach Bike Ride Coloring and Drawing Ideas for Kids
🖍️
A Beginner's Guide to Avoiding Smudges While Coloring
💗
Understanding Art for Stressful Days
🌈
Fun Community Helpers Coloring Pages for Kids
🎨
Camel Coloring and Drawing Ideas for Kids
🎨
A Seesaw Ride: A Coloring and Playtime Guide for Kids
🎨
Rattlesnake Coloring and Drawing Ideas for Kids
🎨
Meet the News Anchor: A Community Helper Coloring Guide
🎨
The Boy Who Cried Wolf: A Classic Story Coloring Guide for Kids
🎨
Exploring Belgium: A Coloring and Culture Guide for Kids
💡
Building Imaginary Worlds Through Coloring and Drawing
👨👩👧
Easy Birthday Party Activities With Coloring Pages
🎨
Pastel Pencils: A Buying and Technique Guide
💗
Exploring The Difference Between Art Therapy and Coloring Through Art
🖍️
A Beginner's Guide to Coloring Large Areas
🎨
Horse Coloring and Drawing Ideas for Kids
🎨
A Trilobite Coloring Page: Fun Facts for Young Paleontologists
🎨
Pinwheel Coloring and Drawing Ideas for Kids
🎨
Christmas Coloring Ideas and Activities for the Whole Family
🎨
Firefly Coloring and Drawing Ideas for Kids
🎨
Easy Buildings and Houses Drawing Ideas
🎨
A Sunken Shipwreck Coloring and Drawing Ideas for Kids
🎨
A Summer Popsicle Stand: Coloring Ideas and Activities for the Whole Family
🎲
Using Drawing for Sketch Relay Games
🎨
Pine Tree: A Coloring and Nature Guide for Kids
🧒
Drawing Activities for Drawing Development Stages
🎨
A GPS Satellite: A Coloring and Space Mission Guide for Kids
🌈
Relaxing Ocean Life Coloring Activities
🎨
Trampoline Coloring Pages and Drawing Ideas for Kids
🎨
A Marble Run Machine: A Coloring and STEM Guide for Kids
🎨
Wooden Blocks Coloring and Drawing Ideas for Kids
📐
How Children Understand Measurement With Art
🎲
Step-by-Step Mazes
🎨
Meet the Police Officer: A Community Helper Coloring Guide
🎨
A Construction Worker in a Hard Hat Coloring and Drawing Ideas for Kids
🎨
Meet Landscape Painting: An Art Appreciation Guide for Kids
🎨
Space Needle: Coloring Page and Fun Facts for Kids
🎨
The Little Red Hen: A Classic Story Coloring Guide for Kids
🍎
A Teacher's Guide to Cross-Curricular Art Lessons
🏺
Why Ancient Pottery Art Matter to Historians
🔬
What Is Secondary Colors?
🍂
Fun Halloween Classroom Coloring Ideas
🧠
How Drawing May Support Memory
🎨
Amazon Rainforest: Coloring Page and Fun Facts for Kids
✏️
Easy Steps to Practice Drawing Triangles
🎨
How to Draw a Crescent Moon Shape: A Step-by-Step Guide for Kids
💬
Why Emojis and Modern Pictograms Matter in Everyday Life
🎨
Upcycling Coloring Pages Into Crafts: A Practical Guide
🎨
Okapi Coloring and Drawing Ideas for Kids
🧒
A Parent's Guide to Ages 4-5
🎨
How to Draw a Oval: A Step-by-Step Guide for Kids
🎨
The Wheels on the Bus: A Nursery Rhyme Coloring Guide for Kids
🏺
Exploring Ancient Symbols
🧠
Why Drawing Can Help With Cognitive Development
🧠
Why Drawing Can Help With Imagination
🎨
A Spring Butterfly Garden: Coloring Ideas and Activities for the Whole Family
🎨
A Cattle Drive: A Wild West Coloring and History Guide for Kids
🧘
A Beginner's Guide to Coloring With Soft Music
🎨
Yankee Doodle: A Nursery Rhyme Coloring Guide for Kids
🔤
Visual Vocabulary: Opposites
🎨
Meet Claude Monet: An Art Appreciation Guide for Kids
🎨
Table Manners at Dinner: A Simple Social Skill for Kids
🎨
Snow Sledding: Coloring Ideas and Activities for the Whole Family
💡
Nurturing Character Design at Home
🎨
Horned Lizard Coloring and Drawing Ideas for Kids
🔬
What Is Why Printers Use CMYK?
🖍️
Why Blending Colors Smoothly Makes a Difference
🎨
The Digestive System: A Coloring and Health Guide for Kids
🎨
Hyena Coloring and Drawing Ideas for Kids
🎨
Ocelot Coloring and Drawing Ideas for Kids
🎨
Teaching Graciousness: A Simple Activity for Kids
🎨
Tying Shoelaces: A Simple Life Skill for Kids
🎨
Hansel and Gretel: A Classic Story Coloring Guide for Kids
🎨
Fun Submarine Coloring and Drawing Ideas for Kids
🎨
Cerberus Coloring and Drawing Ideas for Kids
👨👩👧
Coloring Ideas for Waiting Room Activities
🎨
Keeping a Promise: A Simple Social Skill for Kids
✏️
Why Sketching Basics Matters for New Artists
🎨
A Simple Interest Concept (Coins Growing Over Time): A Money Guide for Kids and Parents
📐
Why Measurement and Drawing Go Together
🎨
A Paper Chromatography Flower: A Step-by-Step Science Guide for Kids
🎨
How to Draw a An Arrow Shape: A Step-by-Step Guide for Kids
🧠
How Drawing May Support Cognitive Development
🧠
The Link Between Drawing and Working Memory
🎨
A Cave Painting of a Dinosaur Coloring Page: Fun Facts for Young Paleontologists
🌈
Community Helpers Coloring Ideas for Classrooms
🎨
Dual-Tip Markers: A Buying and Technique Guide
🎨
a Mask Cutout Printable: Free Ideas for Your Next Celebration
💗
Understanding Drawing Feelings Instead of Words
🎨
A Dance Battle: A Coloring and Movement Guide for Kids
🎨
Meet the Airline Pilot: A Community Helper Coloring Guide
👨👩👧
Easy Outdoor-Inspired Drawing With Coloring Pages
🔎
Exploring Mind Maps for Students
💗
Creative Approaches to Emotional Expression
🎨
Red Barn Coloring and Drawing Ideas for Kids
🖍️
Simple Techniques for Coloring With Crayons
🎨
Answering the Phone Politely: A Simple Life Skill for Kids
🧘
Why Guided Mindful Coloring Feels Calming
🎨
Easy Robots Drawing Ideas
🎨
A Tibetan Traditional Chuba: A Coloring and Culture Guide for Kids
🎨
A Tide Pool Full of Creatures Coloring and Drawing Ideas for Kids
🍎
Simple Art Lessons for Science Class for Busy Classrooms
🖍️
Why Using Complementary Colors Makes a Difference
🎨
Cheese Platter Coloring Ideas for Kids Who Love to Create
🎨
Popsicle Coloring Ideas for Kids Who Love to Create
🎨
Stuck in the Mud Tag: A Coloring and Playtime Guide for Kids
🔎
How Connecting Ideas Through Drawing Support Learning
📐
Why Fractions and Drawing Go Together
🎨
Fun Fire Truck Coloring and Drawing Ideas for Kids
🎨
A Community Building Project Coloring and Drawing Ideas for Kids
🎨
Growing Taller: A Coloring and Health Guide for Kids
🌈
Weather Scenes Coloring Ideas for Classrooms
👨👩👧
Coloring Ideas for Morning Routine Activities
🎨
A Vietnamese Ao Dai: A Coloring and Culture Guide for Kids
🧘
How Coloring in Silence Can Create a Quiet Moment
🎨
Sandwich Coloring Ideas for Kids Who Love to Create
💡
The Role of Finding Inspiration in Children's Art
🎨
Affirmation Coloring: A Simple Mindfulness Activity for Kids
🍂
Printable Christmas Coloring Pages for Kids
🎨
A Class Art Wall Display: A Classroom Coloring and Learning Guide
🎲
Using Drawing for Memory Matching Games
🎲
Step-by-Step Treasure Map Games
🎨
Taking Responsibility for a Mistake: A Simple Social Skill for Kids
🔎
Using Flowcharts to Solve Problems
🎨
Red Rover: A Coloring and Playtime Guide for Kids
🎨
A Kids' Money Quiz Chart: A Money Guide for Kids and Parents
🧒
What to Expect When Teaching Left-Handed Children
🔤
Drawing Activities for Action Words
🎨
Meet Jean-Michel Basquiat: An Art Appreciation Guide for Kids
🍂
Printable Autumn Coloring Pages for Kids
🎨
Cow Coloring and Drawing Ideas for Kids
🎨
Exploring Canada: A Coloring and Culture Guide for Kids
🎲
Fun Board Game Design for Kids
🎨
A Family Bike Ride on a Trail: Coloring Ideas for Your Next Family Adventure
🎨
Hot Dog Coloring Ideas for Kids Who Love to Create
🖍️
How to Get Better at Coloring Animals Realistically
🖌️
Exploring Outlining Techniques
👨👩👧
Easy Weekend Family Activities With Coloring Pages
🎨
A Traditional Dance Costume with Bells: A Coloring and Culture Guide for Kids
🎨
Exploring Venus: A Coloring and Learning Guide for Kids
💗
The Role of Coloring in Coping With Change Through Drawing
🎨
Pea Pod Coloring and Drawing Ideas for Kids
🔎
How Organizing Research With Sketches Support Learning
🎨
The Ugly Duckling: A Classic Story Coloring Guide for Kids
🎨
Mindful Walking: A Simple Mindfulness Activity for Kids
🎨
Meadow of Wildflowers Coloring Page: A Nature Learning Guide for Kids
🧠
The Link Between Drawing and Hand-Eye Coordination
🎨
A Traditional Dragon Dance: A Coloring and Movement Guide for Kids
🎨
A Gear System: A Coloring and STEM Guide for Kids
🧠
Why Drawing Can Help With Sequential Thinking
📐
Why Proportion and Drawing Go Together
🎨
Being Kind to Someone Different: A Simple Social Skill for Kids
🌈
Relaxing Fairy Tale Scenes Coloring Activities
🎨
How to Draw a Rectangle: A Step-by-Step Guide for Kids
🎨
A Trained Seal Coloring and Drawing Ideas for Kids
🎨
Cuttlefish Coloring and Drawing Ideas for Kids
🌈
A Guide to Community Helpers Coloring Pages
🎨
Meet Abstract Expressionism: An Art Appreciation Guide for Kids
🎨
Fun Steam Train Coloring and Drawing Ideas for Kids
🎨
How to Draw a Wavy Line: A Step-by-Step Guide for Kids
🎨
How to Draw a Xylophone: A Coloring and Music Guide for Kids
🎨
Pineapple Coloring and Drawing Ideas for Kids
🎨
How to Draw a Fractal Pattern: A Step-by-Step Guide
📴
Hands-On Activities for Weekend Mornings
🎨
Handling Disagreements Calmly: A Simple Social Skill for Kids
🎨
Weevil Coloring and Drawing Ideas for Kids
🧠
The Link Between Drawing and Attention to Detail
🎨
A Dinosaur Egg Nest Coloring Page: Fun Facts for Young Paleontologists
🎨
Ice Skating on a Pond: Coloring Ideas and Activities for the Whole Family
🎨
Toy Train Set Coloring and Drawing Ideas for Kids
🎨
Meet Gustav Klimt: An Art Appreciation Guide for Kids
🏺
The History of Ancient Egyptian Art
🎨
Skateboarding Coloring Pages and Drawing Ideas for Kids
🔤
Drawing Activities for Sight Words
🎨
Starfish Coloring and Drawing Ideas for Kids
🎨
Box Turtle Coloring and Drawing Ideas for Kids
👨👩👧
Making the Most of Low-Mess Activities
🍎
Using Coloring Pages for Transition Time Activities
🎨
Desert Dunes Coloring Page: A Nature Learning Guide for Kids
🎨
Broccoli Coloring and Drawing Ideas for Kids
🧠
The Link Between Drawing and Observation Skills
🎨
Framing Kids Coloring Art: A Practical Guide
🎲
Pictionary-Style Games: A Creative Twist
🎨
A Brick Wall Being Built Coloring and Drawing Ideas for Kids
🎨
Building a Travel Coloring Kit: A Buying and Technique Guide
🔬
The Science Behind Color Wheels
🎨
Exploring A Satellite: A Coloring and Learning Guide for Kids
🎨
Eyes and How We See: A Coloring and Health Guide for Kids
🎨
Staying Hydrated: A Coloring and Health Guide for Kids
🖌️
How to Practice Using Watercolor
🎨
Teaching Positivity: A Simple Activity for Kids
🏺
Why Early Writing Systems Matter to Historians
🌈
Printable Fantasy Creatures Coloring Activities
🎨
The Letter Y: An Alphabet and Number Coloring Page
🧒
Understanding The Scribbling Stage in Early Childhood
🎨
A Kitchen Timer: A Kitchen Guide for Kids and Parents
🎨
A Crow's Nest Lookout Coloring and Drawing Ideas for Kids
🔤
Drawing Activities for Colors in a New Language
🎨
Meet the Baker Kneading Bread: A Community Helper Coloring Guide
🍎
A Teacher's Guide to Group Art Projects
🏺
Exploring Ancient Pottery Art
🎨
Snail on a Leaf Coloring and Drawing Ideas for Kids
🎨
How to Draw a Sorting Shapes by Size: A Step-by-Step Guide for Kids
🖍️
A Beginner's Guide to Blending Colors Smoothly
🎲
How to Play Drawing-Based Party Games
🎨
Meet Katsushika Hokusai: An Art Appreciation Guide for Kids
🎨
An Ancient Scribe Writing on Papyrus: An Ancient History Coloring Guide for Kids
🎨
A Falafel Plate: Coloring Ideas and Fun Facts for Kids
🍎
Simple Circle Time Activities for Busy Classrooms
🖍️
Simple Techniques for Mixing Warm and Cool Colors
🔎
Why Visual Thinkers Use Storyboarding for Projects
🎨
Fun Ferry Boat Coloring and Drawing Ideas for Kids
🎨
How to Draw a Maracas: A Coloring and Music Guide for Kids
💗
Creative Approaches to Family Art Time and Connection
💡
Why Doodling Matters for Young Artists
🎨
Exploring Russia: A Coloring and Culture Guide for Kids
🎨
Twistable Crayons: A Buying and Technique Guide
🎨
Lightning Safety Rules: A Family Safety Guide
🎨
A Library Coloring Program: A Practical Guide
🎨
How to Draw a Feather Mandala: A Step-by-Step Guide
🎨
Learning About Allergies: A Coloring and Health Guide for Kids
🎨
Sailfish Coloring and Drawing Ideas for Kids
🍂
Celebrate Easter With Coloring Activities
🎨
A Music Festival Crowd: A Coloring and Movement Guide for Kids
🎨
A Raised Garden Bed: A Gardening Guide for Kids and Families
🎨
Tuna Coloring and Drawing Ideas for Kids
🎨
Pond Turtle Coloring and Drawing Ideas for Kids
🎨
How to Draw a Trapezoid: A Step-by-Step Guide for Kids
🎨
Baseball Coloring Pages and Drawing Ideas for Kids
💗
Exploring Processing Big Feelings Through Art
🎨
A Fishing Boat at Work: A Coloring and Food Science Guide for Kids
🔤
Visual Vocabulary: Sentence Building
🎨
How to Draw a Gingham Pattern: A Step-by-Step Guide
🎨
Exploring Ethiopia: A Coloring and Culture Guide for Kids
🏺
How Cave Paintings Shaped Human Communication
🎨
a Graduation Cap Coloring Sheet: Free Ideas for Your Next Celebration
🍎
How Teachers Can Use Classroom Reward Activities
🍂
Seasonal Coloring Guide: Cultural Festivals
🌈
Printable Ocean Life Coloring Activities
🎨
Fun Favorite Foods Drawing Activities for Kids
🎨
How to Draw a Harp: A Coloring and Music Guide for Kids
🎨
A Traditional Wedding Headdress: A Coloring and Culture Guide for Kids
🎨
A Family Fire Drill: A Family Safety Guide
📴
Why Coloring Beats Scrolling on Waiting Rooms
🎨
Meet the Nurse: A Community Helper Coloring Guide
🎨
Fun Taxi Cab Coloring and Drawing Ideas for Kids
💗
Understanding The Difference Between Art Therapy and Coloring
🍂
Creative Thanksgiving Coloring Projects for Classrooms
🎨
Thanksgiving Coloring Ideas and Activities for the Whole Family
🌈
Creative Ways to Color Insects and Bugs
🎨
Meet Roy Lichtenstein: An Art Appreciation Guide for Kids
🎨
Tick Coloring and Drawing Ideas for Kids
🧒
How Drawing Supports Pre-Writing Skills
🎨
A Thai Traditional Silk Dress: A Coloring and Culture Guide for Kids
🍂
Celebrate Mother's Day With Coloring Activities
🎨
Quetzalcoatlus Coloring Page: Fun Facts for Young Paleontologists
🎨
Using Scissors Safely: A Simple Life Skill for Kids
🎨
A Break Dancer: A Coloring and Movement Guide for Kids
🎨
Jump Rope Double Dutch: A Coloring and Playtime Guide for Kids
🎨
A Music Box: A Coloring and Movement Guide for Kids
🎨
A Community Garden Plot: A Gardening Guide for Kids and Families
🔤
Learning New Vocabulary Words Through Drawing
🎨
Creative Emotions and Faces Drawing Exercises
🎨
The Letter E: An Alphabet and Number Coloring Page
🎨
A Prototype Model: A Coloring and STEM Guide for Kids
🎨
Playground Slide Coloring and Drawing Ideas for Kids
🎨
a Camping Trip Coloring Ideas and Activities for the Whole Family
🔎
Why Visual Thinkers Use Diagrams in Science
🍎
A Teacher's Guide to Classroom Management Through Art
🎨
A Rapper on Stage: A Coloring and Movement Guide for Kids
🎨
A Garden Arch with Vines: A Gardening Guide for Kids and Families
🎨
A Wallet and Coin Purse: A Money Guide for Kids and Parents
🎨
A Healthy Snack Choice: A Coloring and Health Guide for Kids
📐
How Children Understand Counting With Art
🎨
Mindful Stretching: A Simple Mindfulness Activity for Kids
🎨
Badminton Coloring Pages and Drawing Ideas for Kids
🎨
A Family Beach Umbrella Setup Coloring and Drawing Ideas for Kids
💬
The Power of Visual Storytelling
💡
How Drawing Encourages Divergent Thinking
🎲
Fun Strategy Sketching for Sports for Kids
🎨
A Simple Bank Account: A Money Guide for Kids and Parents
🎨
A Piggy Bank Being Counted: A Money Guide for Kids and Parents
💡
Building Artistic Risk-Taking Through Coloring and Drawing
🎨
A Kids' Pet Responsibility Chart: A Simple Pet Care Guide for Kids
🎨
Green Bean Coloring and Drawing Ideas for Kids
🎨
A Sea Shanty Sing-Along Coloring and Drawing Ideas for Kids
👨👩👧
Why Parents Love Sibling Bonding Activities
🎨
Teaching Determination: A Simple Activity for Kids
🎨
Creative Farm Life Drawing Exercises
🎨
Tomato Coloring and Drawing Ideas for Kids
🔤
How Pictures Help Children Learn Opposites
🎨
A Mermaid Spotted at Sea Coloring and Drawing Ideas for Kids
🎲
Using Drawing for Guess-the-Drawing Games
🎨
Being a Good Listener: A Simple Life Skill for Kids
🎨
A Fire Eater Coloring and Drawing Ideas for Kids
🎨
Checkers Board Coloring and Drawing Ideas for Kids
🖍️
How to Get Better at Mixing Warm and Cool Colors
🎨
Salamander Coloring and Drawing Ideas for Kids
🎨
Following a Recipe: A Simple Life Skill for Kids
🎨
A Hoverboard: A Coloring and Invention Guide for Kids
🎨
A Strongman Coloring and Drawing Ideas for Kids
🎨
Llama Coloring and Drawing Ideas for Kids
🔎
A Beginner's Guide to Brainstorming With Pictures
🧒
What to Expect When Teaching Hand-Eye Coordination
🎨
How to Draw a Diamond: A Step-by-Step Guide for Kids
🏺
Exploring Prehistoric Drawing Tools
🎨
A Beginner's Guide to Drawing Community Helpers
🍎
Simple Cross-Curricular Art Lessons for Busy Classrooms
The Link Between Drawing and Planning Skills
🎨
A Sea Chest of Gold Coins Coloring and Drawing Ideas for Kids
🎨
A Kids' Yard Work Business: A Money Guide for Kids and Parents
🎨
A Ladder Against a Wall Coloring and Drawing Ideas for Kids
🎨
A Beach Bike Ride Coloring and Drawing Ideas for Kids
🖍️
A Beginner's Guide to Avoiding Smudges While Coloring
💗
Understanding Art for Stressful Days
🌈
Fun Community Helpers Coloring Pages for Kids
🎨
Camel Coloring and Drawing Ideas for Kids
🎨
A Seesaw Ride: A Coloring and Playtime Guide for Kids
🎨
Rattlesnake Coloring and Drawing Ideas for Kids
🎨
Meet the News Anchor: A Community Helper Coloring Guide
🎨
The Boy Who Cried Wolf: A Classic Story Coloring Guide for Kids
🎨
Exploring Belgium: A Coloring and Culture Guide for Kids
💡
Building Imaginary Worlds Through Coloring and Drawing
👨👩👧
Easy Birthday Party Activities With Coloring Pages
🎨
Pastel Pencils: A Buying and Technique Guide
💗
Exploring The Difference Between Art Therapy and Coloring Through Art
🖍️
A Beginner's Guide to Coloring Large Areas
🎨
Horse Coloring and Drawing Ideas for Kids
🎨
A Trilobite Coloring Page: Fun Facts for Young Paleontologists
🎨
Pinwheel Coloring and Drawing Ideas for Kids
🎨
Christmas Coloring Ideas and Activities for the Whole Family
🎨
Firefly Coloring and Drawing Ideas for Kids
🎨
Easy Buildings and Houses Drawing Ideas
🎨
A Sunken Shipwreck Coloring and Drawing Ideas for Kids
🎨
A Summer Popsicle Stand: Coloring Ideas and Activities for the Whole Family
🎲
Using Drawing for Sketch Relay Games
🎨
Pine Tree: A Coloring and Nature Guide for Kids
🧒
Drawing Activities for Drawing Development Stages
🎨
A GPS Satellite: A Coloring and Space Mission Guide for Kids
🌈
Relaxing Ocean Life Coloring Activities
🎨
Trampoline Coloring Pages and Drawing Ideas for Kids
🎨
A Marble Run Machine: A Coloring and STEM Guide for Kids
🎨
Wooden Blocks Coloring and Drawing Ideas for Kids
📐
How Children Understand Measurement With Art
🎲
Step-by-Step Mazes
🎨
Meet the Police Officer: A Community Helper Coloring Guide
🎨
A Construction Worker in a Hard Hat Coloring and Drawing Ideas for Kids
🎨
Meet Landscape Painting: An Art Appreciation Guide for Kids
🎨
Space Needle: Coloring Page and Fun Facts for Kids
🎨
The Little Red Hen: A Classic Story Coloring Guide for Kids
🍎
A Teacher's Guide to Cross-Curricular Art Lessons
🏺
Why Ancient Pottery Art Matter to Historians
🔬
What Is Secondary Colors?
🍂
Fun Halloween Classroom Coloring Ideas
🧠
How Drawing May Support Memory
🎨
Amazon Rainforest: Coloring Page and Fun Facts for Kids
✏️
Easy Steps to Practice Drawing Triangles
🎨
How to Draw a Crescent Moon Shape: A Step-by-Step Guide for Kids
💬
Why Emojis and Modern Pictograms Matter in Everyday Life
🎨
Upcycling Coloring Pages Into Crafts: A Practical Guide
🎨
Okapi Coloring and Drawing Ideas for Kids
🧒
A Parent's Guide to Ages 4-5
🎨
How to Draw a Oval: A Step-by-Step Guide for Kids
🎨
The Wheels on the Bus: A Nursery Rhyme Coloring Guide for Kids
🏺
Exploring Ancient Symbols
🧠
Why Drawing Can Help With Cognitive Development
🧠
Why Drawing Can Help With Imagination
🎨
A Spring Butterfly Garden: Coloring Ideas and Activities for the Whole Family
🎨
A Cattle Drive: A Wild West Coloring and History Guide for Kids
🧘
A Beginner's Guide to Coloring With Soft Music
🎨
Yankee Doodle: A Nursery Rhyme Coloring Guide for Kids
🔤
Visual Vocabulary: Opposites
🎨
Meet Claude Monet: An Art Appreciation Guide for Kids
🎨
Table Manners at Dinner: A Simple Social Skill for Kids
🎨
Snow Sledding: Coloring Ideas and Activities for the Whole Family
💡
Nurturing Character Design at Home
🎨
Horned Lizard Coloring and Drawing Ideas for Kids
🔬
What Is Why Printers Use CMYK?
🖍️
Why Blending Colors Smoothly Makes a Difference
🎨
The Digestive System: A Coloring and Health Guide for Kids
🎨
Hyena Coloring and Drawing Ideas for Kids
🎨
Ocelot Coloring and Drawing Ideas for Kids
🎨
Teaching Graciousness: A Simple Activity for Kids
🎨
Tying Shoelaces: A Simple Life Skill for Kids
🎨
Hansel and Gretel: A Classic Story Coloring Guide for Kids
🎨
Fun Submarine Coloring and Drawing Ideas for Kids
🎨
Cerberus Coloring and Drawing Ideas for Kids
👨👩👧
Coloring Ideas for Waiting Room Activities
🎨
Keeping a Promise: A Simple Social Skill for Kids
✏️
Why Sketching Basics Matters for New Artists
🎨
A Simple Interest Concept (Coins Growing Over Time): A Money Guide for Kids and Parents
📐
Why Measurement and Drawing Go Together
🎨
A Paper Chromatography Flower: A Step-by-Step Science Guide for Kids
🎨
How to Draw a An Arrow Shape: A Step-by-Step Guide for Kids
🧠
How Drawing May Support Cognitive Development
🧠
The Link Between Drawing and Working Memory
🎨
A Cave Painting of a Dinosaur Coloring Page: Fun Facts for Young Paleontologists
🌈
Community Helpers Coloring Ideas for Classrooms
🎨
Dual-Tip Markers: A Buying and Technique Guide
🎨
a Mask Cutout Printable: Free Ideas for Your Next Celebration
💗
Understanding Drawing Feelings Instead of Words
🎨
A Dance Battle: A Coloring and Movement Guide for Kids
🎨
Meet the Airline Pilot: A Community Helper Coloring Guide
👨👩👧
Easy Outdoor-Inspired Drawing With Coloring Pages
🔎
Exploring Mind Maps for Students
💗
Creative Approaches to Emotional Expression
🎨
Red Barn Coloring and Drawing Ideas for Kids
🖍️
Simple Techniques for Coloring With Crayons
🎨
Answering the Phone Politely: A Simple Life Skill for Kids
🧘
Why Guided Mindful Coloring Feels Calming
🎨
Easy Robots Drawing Ideas
🎨
A Tibetan Traditional Chuba: A Coloring and Culture Guide for Kids
🎨
A Tide Pool Full of Creatures Coloring and Drawing Ideas for Kids
🍎
Simple Art Lessons for Science Class for Busy Classrooms
🖍️
Why Using Complementary Colors Makes a Difference
🎨
Cheese Platter Coloring Ideas for Kids Who Love to Create
🎨
Popsicle Coloring Ideas for Kids Who Love to Create
🎨
Stuck in the Mud Tag: A Coloring and Playtime Guide for Kids
🔎
How Connecting Ideas Through Drawing Support Learning
📐
Why Fractions and Drawing Go Together
🎨
Fun Fire Truck Coloring and Drawing Ideas for Kids
🎨
A Community Building Project Coloring and Drawing Ideas for Kids
🎨
Growing Taller: A Coloring and Health Guide for Kids
🌈
Weather Scenes Coloring Ideas for Classrooms
👨👩👧
Coloring Ideas for Morning Routine Activities
🎨
A Vietnamese Ao Dai: A Coloring and Culture Guide for Kids
🧘
How Coloring in Silence Can Create a Quiet Moment
🎨
Sandwich Coloring Ideas for Kids Who Love to Create
💡
The Role of Finding Inspiration in Children's Art
🎨
Affirmation Coloring: A Simple Mindfulness Activity for Kids
🍂
Printable Christmas Coloring Pages for Kids
🎨
A Class Art Wall Display: A Classroom Coloring and Learning Guide
🎲
Using Drawing for Memory Matching Games
🎲
Step-by-Step Treasure Map Games
🎨
Taking Responsibility for a Mistake: A Simple Social Skill for Kids
🔎
Using Flowcharts to Solve Problems
🎨
Red Rover: A Coloring and Playtime Guide for Kids
🎨
A Kids' Money Quiz Chart: A Money Guide for Kids and Parents
🧒
What to Expect When Teaching Left-Handed Children
🔤
Drawing Activities for Action Words
🎨
Meet Jean-Michel Basquiat: An Art Appreciation Guide for Kids
🍂
Printable Autumn Coloring Pages for Kids
🎨
Cow Coloring and Drawing Ideas for Kids
🎨
Exploring Canada: A Coloring and Culture Guide for Kids
🎲
Fun Board Game Design for Kids
🎨
A Family Bike Ride on a Trail: Coloring Ideas for Your Next Family Adventure
🎨
Hot Dog Coloring Ideas for Kids Who Love to Create
🖍️
How to Get Better at Coloring Animals Realistically
🖌️
Exploring Outlining Techniques
👨👩👧
Easy Weekend Family Activities With Coloring Pages
🎨
A Traditional Dance Costume with Bells: A Coloring and Culture Guide for Kids
🎨
Exploring Venus: A Coloring and Learning Guide for Kids
💗
The Role of Coloring in Coping With Change Through Drawing
🎨
Pea Pod Coloring and Drawing Ideas for Kids
🔎
How Organizing Research With Sketches Support Learning
🎨
The Ugly Duckling: A Classic Story Coloring Guide for Kids
🎨
Mindful Walking: A Simple Mindfulness Activity for Kids
🎨
Meadow of Wildflowers Coloring Page: A Nature Learning Guide for Kids
🧠
The Link Between Drawing and Hand-Eye Coordination
🎨
A Traditional Dragon Dance: A Coloring and Movement Guide for Kids
🎨
A Gear System: A Coloring and STEM Guide for Kids
🧠
Why Drawing Can Help With Sequential Thinking
📐
Why Proportion and Drawing Go Together
🎨
Being Kind to Someone Different: A Simple Social Skill for Kids
🌈
Relaxing Fairy Tale Scenes Coloring Activities
🎨
How to Draw a Rectangle: A Step-by-Step Guide for Kids
🎨
A Trained Seal Coloring and Drawing Ideas for Kids
🎨
Cuttlefish Coloring and Drawing Ideas for Kids
🌈
A Guide to Community Helpers Coloring Pages
🎨
Meet Abstract Expressionism: An Art Appreciation Guide for Kids
🎨
Fun Steam Train Coloring and Drawing Ideas for Kids
🎨
How to Draw a Wavy Line: A Step-by-Step Guide for Kids
🎨
How to Draw a Xylophone: A Coloring and Music Guide for Kids
🎨
Pineapple Coloring and Drawing Ideas for Kids
🎨
How to Draw a Fractal Pattern: A Step-by-Step Guide
📴
Hands-On Activities for Weekend Mornings
🎨
Handling Disagreements Calmly: A Simple Social Skill for Kids
🎨
Weevil Coloring and Drawing Ideas for Kids
🧠
The Link Between Drawing and Attention to Detail
🎨
A Dinosaur Egg Nest Coloring Page: Fun Facts for Young Paleontologists
🎨
Ice Skating on a Pond: Coloring Ideas and Activities for the Whole Family
🎨
Toy Train Set Coloring and Drawing Ideas for Kids
🎨
Meet Gustav Klimt: An Art Appreciation Guide for Kids
🏺
The History of Ancient Egyptian Art
🎨
Skateboarding Coloring Pages and Drawing Ideas for Kids
🔤
Drawing Activities for Sight Words
🎨
Starfish Coloring and Drawing Ideas for Kids
🎨
Box Turtle Coloring and Drawing Ideas for Kids
👨👩👧
Making the Most of Low-Mess Activities
🍎
Using Coloring Pages for Transition Time Activities
🎨
Desert Dunes Coloring Page: A Nature Learning Guide for Kids
🎨
Broccoli Coloring and Drawing Ideas for Kids
🧠
The Link Between Drawing and Observation Skills
🎨
Framing Kids Coloring Art: A Practical Guide
🎲
Pictionary-Style Games: A Creative Twist
🎨
A Brick Wall Being Built Coloring and Drawing Ideas for Kids
🎨
Building a Travel Coloring Kit: A Buying and Technique Guide
🔬
The Science Behind Color Wheels
🎨
Exploring A Satellite: A Coloring and Learning Guide for Kids
🎨
Eyes and How We See: A Coloring and Health Guide for Kids
🎨
Staying Hydrated: A Coloring and Health Guide for Kids
🖌️
How to Practice Using Watercolor
🎨
Teaching Positivity: A Simple Activity for Kids
🏺
Why Early Writing Systems Matter to Historians
🌈
Printable Fantasy Creatures Coloring Activities
🎨
The Letter Y: An Alphabet and Number Coloring Page
🧒
Understanding The Scribbling Stage in Early Childhood
🎨
A Kitchen Timer: A Kitchen Guide for Kids and Parents
🎨
A Crow's Nest Lookout Coloring and Drawing Ideas for Kids
🔤
Drawing Activities for Colors in a New Language
🎨
Meet the Baker Kneading Bread: A Community Helper Coloring Guide
🍎
A Teacher's Guide to Group Art Projects
🏺
Exploring Ancient Pottery Art
🎨
Snail on a Leaf Coloring and Drawing Ideas for Kids
🎨
How to Draw a Sorting Shapes by Size: A Step-by-Step Guide for Kids
🖍️
A Beginner's Guide to Blending Colors Smoothly
🎲
How to Play Drawing-Based Party Games
🎨
Meet Katsushika Hokusai: An Art Appreciation Guide for Kids
🎨
An Ancient Scribe Writing on Papyrus: An Ancient History Coloring Guide for Kids
🎨
A Falafel Plate: Coloring Ideas and Fun Facts for Kids
🍎
Simple Circle Time Activities for Busy Classrooms
🖍️
Simple Techniques for Mixing Warm and Cool Colors
🔎
Why Visual Thinkers Use Storyboarding for Projects
🎨
Fun Ferry Boat Coloring and Drawing Ideas for Kids
🎨
How to Draw a Maracas: A Coloring and Music Guide for Kids
💗
Creative Approaches to Family Art Time and Connection
💡
Why Doodling Matters for Young Artists
🎨
Exploring Russia: A Coloring and Culture Guide for Kids
🎨
Twistable Crayons: A Buying and Technique Guide
🎨
Lightning Safety Rules: A Family Safety Guide
🎨
A Library Coloring Program: A Practical Guide
🎨
How to Draw a Feather Mandala: A Step-by-Step Guide
🎨
Learning About Allergies: A Coloring and Health Guide for Kids
🎨
Sailfish Coloring and Drawing Ideas for Kids
🍂
Celebrate Easter With Coloring Activities
🎨
A Music Festival Crowd: A Coloring and Movement Guide for Kids
🎨
A Raised Garden Bed: A Gardening Guide for Kids and Families
🎨
Tuna Coloring and Drawing Ideas for Kids
🎨
Pond Turtle Coloring and Drawing Ideas for Kids
🎨
How to Draw a Trapezoid: A Step-by-Step Guide for Kids
🎨
Baseball Coloring Pages and Drawing Ideas for Kids
💗
Exploring Processing Big Feelings Through Art
🎨
A Fishing Boat at Work: A Coloring and Food Science Guide for Kids
🔤
Visual Vocabulary: Sentence Building
🎨
How to Draw a Gingham Pattern: A Step-by-Step Guide
🎨
Exploring Ethiopia: A Coloring and Culture Guide for Kids
🏺
How Cave Paintings Shaped Human Communication
🎨
a Graduation Cap Coloring Sheet: Free Ideas for Your Next Celebration
🍎
How Teachers Can Use Classroom Reward Activities
🍂
Seasonal Coloring Guide: Cultural Festivals
🌈
Printable Ocean Life Coloring Activities
🎨
Fun Favorite Foods Drawing Activities for Kids
🎨
How to Draw a Harp: A Coloring and Music Guide for Kids
🎨
A Traditional Wedding Headdress: A Coloring and Culture Guide for Kids
🎨
A Family Fire Drill: A Family Safety Guide
📴
Why Coloring Beats Scrolling on Waiting Rooms
🎨
Meet the Nurse: A Community Helper Coloring Guide
🎨
Fun Taxi Cab Coloring and Drawing Ideas for Kids
💗
Understanding The Difference Between Art Therapy and Coloring
🍂
Creative Thanksgiving Coloring Projects for Classrooms
🎨
Thanksgiving Coloring Ideas and Activities for the Whole Family
🌈
Creative Ways to Color Insects and Bugs
🎨
Meet Roy Lichtenstein: An Art Appreciation Guide for Kids
🎨
Tick Coloring and Drawing Ideas for Kids
🧒
How Drawing Supports Pre-Writing Skills
🎨
A Thai Traditional Silk Dress: A Coloring and Culture Guide for Kids
🍂
Celebrate Mother's Day With Coloring Activities
🎨
Quetzalcoatlus Coloring Page: Fun Facts for Young Paleontologists
🎨
Using Scissors Safely: A Simple Life Skill for Kids
🎨
A Break Dancer: A Coloring and Movement Guide for Kids
🎨
Jump Rope Double Dutch: A Coloring and Playtime Guide for Kids
🎨
A Music Box: A Coloring and Movement Guide for Kids
🎨
A Community Garden Plot: A Gardening Guide for Kids and Families
🔤
Learning New Vocabulary Words Through Drawing
🎨
Creative Emotions and Faces Drawing Exercises
🎨
The Letter E: An Alphabet and Number Coloring Page
🎨
A Prototype Model: A Coloring and STEM Guide for Kids
🎨
Playground Slide Coloring and Drawing Ideas for Kids
🎨
a Camping Trip Coloring Ideas and Activities for the Whole Family
🔎
Why Visual Thinkers Use Diagrams in Science
🍎
A Teacher's Guide to Classroom Management Through Art
🎨
A Rapper on Stage: A Coloring and Movement Guide for Kids
🎨
A Garden Arch with Vines: A Gardening Guide for Kids and Families
🎨
A Wallet and Coin Purse: A Money Guide for Kids and Parents
🎨
A Healthy Snack Choice: A Coloring and Health Guide for Kids
📐
How Children Understand Counting With Art
🎨
Mindful Stretching: A Simple Mindfulness Activity for Kids
🎨
Badminton Coloring Pages and Drawing Ideas for Kids
🎨
A Family Beach Umbrella Setup Coloring and Drawing Ideas for Kids
💬
The Power of Visual Storytelling
💡
How Drawing Encourages Divergent Thinking
🎲
Fun Strategy Sketching for Sports for Kids
🎨
A Simple Bank Account: A Money Guide for Kids and Parents
🎨
A Piggy Bank Being Counted: A Money Guide for Kids and Parents
💡
Building Artistic Risk-Taking Through Coloring and Drawing
🎨
A Kids' Pet Responsibility Chart: A Simple Pet Care Guide for Kids
🎨
Green Bean Coloring and Drawing Ideas for Kids
🎨
A Sea Shanty Sing-Along Coloring and Drawing Ideas for Kids
👨👩👧
Why Parents Love Sibling Bonding Activities
🎨
Teaching Determination: A Simple Activity for Kids
🎨
Creative Farm Life Drawing Exercises
🎨
Tomato Coloring and Drawing Ideas for Kids
🔤
How Pictures Help Children Learn Opposites
🎨
A Mermaid Spotted at Sea Coloring and Drawing Ideas for Kids
🎲
Using Drawing for Guess-the-Drawing Games
🎨
Being a Good Listener: A Simple Life Skill for Kids
🎨
A Fire Eater Coloring and Drawing Ideas for Kids
🎨
Checkers Board Coloring and Drawing Ideas for Kids
🖍️
How to Get Better at Mixing Warm and Cool Colors
🎨
Salamander Coloring and Drawing Ideas for Kids
🎨
Following a Recipe: A Simple Life Skill for Kids
🎨
A Hoverboard: A Coloring and Invention Guide for Kids
🎨
A Strongman Coloring and Drawing Ideas for Kids
🎨
Llama Coloring and Drawing Ideas for Kids
🔎
A Beginner's Guide to Brainstorming With Pictures
🧒
What to Expect When Teaching Hand-Eye Coordination
🎨
How to Draw a Diamond: A Step-by-Step Guide for Kids
🏺
Exploring Prehistoric Drawing Tools
🎨
A Beginner's Guide to Drawing Community Helpers
🍎
Simple Cross-Curricular Art Lessons for Busy Classrooms
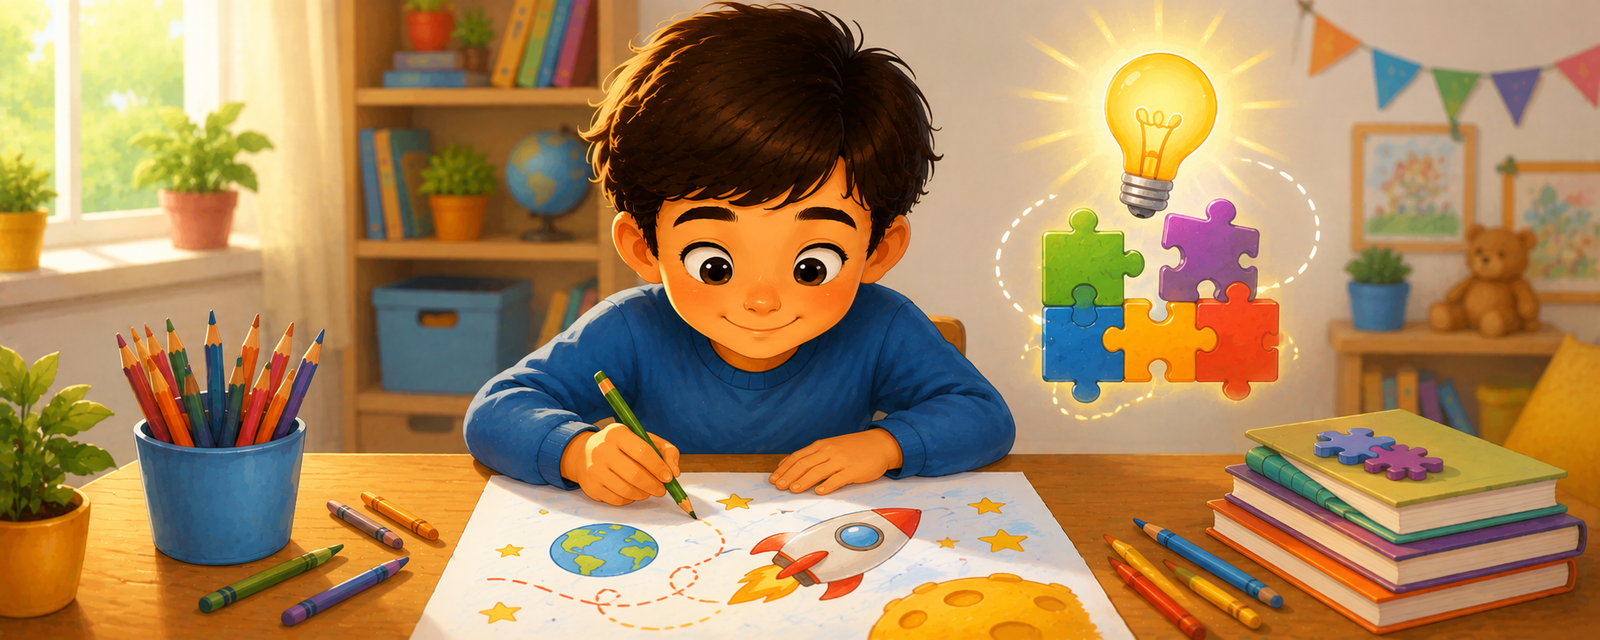 Can Drawing Improve Problem-Solving?
🎨
Raking Autumn Leaves: Coloring Ideas and Activities for the Whole Family
🧠
Exploring Drawing and Confidence Building
🍂
Celebrate Back-to-School Season With Coloring Activities
🎨
A Fireworks Festival: Coloring Ideas and Fun Facts for Kids
💬
From Cave Drawings to Comic Strips
🌈
Creative Ways to Color Holiday Scenes
🎨
Fun School Bus Coloring and Drawing Ideas for Kids
🎨
A Homemade Kaleidoscope: A Step-by-Step Science Guide for Kids
🎨
Gardening Gloves: A Gardening Guide for Kids and Families
🎨
A Computer Keyboard and Mouse: A Coloring and STEM Guide for Kids
🎨
Hanukkah Coloring Ideas and Activities for the Whole Family
🎨
A Royal Coronation: A Medieval Coloring and History Guide for Kids
🎨
Coral Garden Coloring and Drawing Ideas for Kids
🎨
A Bibimbap Bowl: Coloring Ideas and Fun Facts for Kids
🎲
Step-by-Step Dot-to-Dot Games
🎨
Eiffel Tower: Coloring Page and Fun Facts for Kids
🎨
A Bulldozer Clearing Ground Coloring and Drawing Ideas for Kids
🎨
How to Draw a Counting to Five with Shapes: A Step-by-Step Guide for Kids
🎨
How to Draw a Sitar: A Coloring and Music Guide for Kids
🎨
Meet the Florist: A Community Helper Coloring Guide
🎨
Ancient Musicians and Instruments: An Ancient History Coloring Guide for Kids
🎨
Exploring Planet Rings: A Coloring and Learning Guide for Kids
🎨
Wearing a Helmet Safely: A Coloring and Health Guide for Kids
🎨
Bird of Paradise Coloring Page Ideas for Kids
🎨
Gardens and Flowers Drawing Prompts for Beginners
🎨
Exploring A Solar Eclipse: A Coloring and Learning Guide for Kids
🎨
A Family Watching the Sunset at the Beach Coloring and Drawing Ideas for Kids
🎨
A Street Food Market: Coloring Ideas and Fun Facts for Kids
🎨
Fresh Cookies from the Oven Coloring Ideas for Kids Who Love to Create
🎨
Iris Flower: A Coloring and Nature Guide for Kids
👨👩👧
Coloring Ideas for Budget-Friendly Activities
🏺
The History of Ancient Storytelling Through Pictures
🎨
Honeybee Coloring and Drawing Ideas for Kids
🎨
How to Draw a A Teardrop Shape: A Step-by-Step Guide for Kids
🎨
Farm Silo Coloring and Drawing Ideas for Kids
🖌️
Why Creating Texture Matters for Young Artists
🎨
Sunflower: A Coloring and Nature Guide for Kids
🎨
A Welcome Home Ceremony: A Coloring and Space Mission Guide for Kids
🎨
A West African Dashiki: A Coloring and Culture Guide for Kids
🎨
A Mexican Charro Suit: A Coloring and Culture Guide for Kids
🎨
The Ancient Silk Road Caravan: An Ancient History Coloring Guide for Kids
🎨
Georgie Porgie: A Nursery Rhyme Coloring Guide for Kids
🎨
Musical Instruments Drawing Prompts for Beginners
🎨
A Ladle: A Kitchen Guide for Kids and Parents
🎨
The Letter T: An Alphabet and Number Coloring Page
👨👩👧
Why Parents Love Weekend Family Activities
🧒
Drawing Activities for Pattern Recognition
🌈
A Guide to Animals Coloring Pages
🎨
Meet Alexander Calder: An Art Appreciation Guide for Kids
🎨
Using a Napkin Properly: A Simple Life Skill for Kids
🎨
Meet Folk Art Style: An Art Appreciation Guide for Kids
🎨
A Cowboy Roping a Steer: A Wild West Coloring and History Guide for Kids
🖍️
Why Coloring With Crayons Makes a Difference
🎨
A Vegetable Garden Row: A Gardening Guide for Kids and Families
🎨
A Sea Turtle Near the Ship Coloring and Drawing Ideas for Kids
🎨
Owl Coloring Page Ideas for Kids
🎨
Exploring Portugal: A Coloring and Culture Guide for Kids
🏺
How Early Writing Systems Shaped Human Communication
🔤
Drawing Activities for Animal Names
💡
How Drawing Encourages Personal Artistic Style
🎨
Maple Tree: A Coloring and Nature Guide for Kids
✏️
Easy Steps to Practice Drawing Simple Faces
🎨
Jump Rope Coloring Pages and Drawing Ideas for Kids
🎨
A Dinosaur Skeleton Fossil Coloring Page: Fun Facts for Young Paleontologists
🖌️
A Beginner's Guide to Using Crayons Creatively
🖍️
How to Get Better at Choosing a Color Palette
🖍️
How to Get Better at Coloring With Crayons
🎨
Partridge Coloring Page Ideas for Kids
🎨
A Smart Home Device: A Coloring and Invention Guide for Kids
✏️
How to Improve Your Basic Perspective
🎨
A Garden Rake: A Gardening Guide for Kids and Families
🔤
Using Coloring Pages to Teach New Vocabulary Words
🖌️
How to Practice Blending Techniques
🧠
Exploring Drawing and Planning Skills
📐
How Children Understand Angles With Art
🧒
How Drawing Supports Left-Handed Children
🎨
Fun Seasons Drawing Activities for Kids
🎨
Robots Drawing Prompts for Beginners
🎨
Buildings and Houses Drawing Prompts for Beginners
🔤
How Pictures Help Children Learn Emotions and Feelings Words
🎨
Clownfish Coloring and Drawing Ideas for Kids
🎨
A Lunar Lander: A Coloring and Space Mission Guide for Kids
🎨
A Tadpole Coloring and Drawing Ideas for Kids
🧒
What to Expect When Teaching Fine Motor Skills
🎨
A Farmers Cooperative: A Coloring and Food Science Guide for Kids
🖌️
A Beginner's Guide to Creating Texture
🎨
Tea Party Set Coloring Ideas for Kids Who Love to Create
🎨
Petunia: A Coloring and Nature Guide for Kids
🎨
Pinecone: A Coloring and Nature Guide for Kids
🎨
A Cactus Flower Blooming: A Wild West Coloring and History Guide for Kids
🏺
The History of Early Writing Systems
🎨
A Rolling Pin: A Kitchen Guide for Kids and Parents
🎨
Seed Sprouting: A Coloring and Food Science Guide for Kids
🎨
A Castle Great Hall: A Medieval Coloring and History Guide for Kids
🎨
Tulip: A Coloring and Nature Guide for Kids
🔎
How Sketch Journaling Support Learning
💗
The Role of Coloring in The Difference Between Art Therapy and Coloring
💬
Why Comic Strips Matter in Everyday Life
🎨
A Coloring Page Advent Calendar: A Practical Guide
🧠
Can Drawing Improve Self-Expression?
📴
Creative Alternatives to Screens During Waiting Rooms
🎨
A Fishing Net Full of Fish Coloring and Drawing Ideas for Kids
📴
Why Coloring Beats Scrolling on Rainy Afternoons
🌈
Creative Ways to Color Sports Scenes
🎨
Lyrebird Coloring Page Ideas for Kids
🎨
Loon Coloring Page Ideas for Kids
🎨
An Invisible Power Superhero: A Superhero Coloring and Design Guide for Kids
🎨
A Baklava Tray: Coloring Ideas and Fun Facts for Kids
📐
Teaching Grids and Coordinates Through Coloring and Drawing
🎨
A Construction Crew Meeting Coloring and Drawing Ideas for Kids
🏺
What We Know About Ancient Symbols
🎨
A Superhero Courage Badge: A Superhero Coloring and Design Guide for Kids
🎨
A Ring Toss Game Coloring and Drawing Ideas for Kids
🎨
How to Draw a Washboard: A Coloring and Music Guide for Kids
📴
Screen-Free Coloring Ideas for Weekend Mornings
💡
Why Free Drawing Matters for Young Artists
🎨
Meet the Veterinarian: A Community Helper Coloring Guide
🎨
Reading a Clock: A Simple Life Skill for Kids
🎨
Meet Oil Painting: An Art Appreciation Guide for Kids
✏️
Easy Steps to Practice Shading Basics
🎨
Boxing Coloring Pages and Drawing Ideas for Kids
🎨
A Beginner's Guide to Drawing Musical Instruments
🎨
Insects Drawing Prompts for Beginners
🎨
Crab Coloring and Drawing Ideas for Kids
📴
Why Coloring Beats Scrolling on Device-Free Evenings
🎨
Carnation: A Coloring and Nature Guide for Kids
🎨
A Weather Radio at Home: A Family Safety Guide
🎨
A Wild West Bandana: A Wild West Coloring and History Guide for Kids
🎨
Lemon Coloring and Drawing Ideas for Kids
🎨
A Recycling-Power Superhero: A Superhero Coloring and Design Guide for Kids
🖍️
Simple Techniques for Blending Colors Smoothly
🎨
A Scottish Kilt: A Coloring and Culture Guide for Kids
🎨
A Maori Traditional Cloak: A Coloring and Culture Guide for Kids
🎨
A Pirate Ship Battle Coloring and Drawing Ideas for Kids
🌈
Fun Holiday Scenes Coloring Pages for Kids
🎨
Meet the Electrician: A Community Helper Coloring Guide
🔬
What Is Warm and Cool Colors?
🍂
Fun Back-to-School Season Classroom Coloring Ideas
🎨
The Human Skeleton: A Coloring and Health Guide for Kids
🖍️
Simple Techniques for Coloring Skin Tones
🎨
Ivy Vine: A Coloring and Nature Guide for Kids
🧒
What to Expect When Teaching Ages 2-3
🎨
Dung Beetle Coloring and Drawing Ideas for Kids
🧠
How Drawing May Support Planning Skills
🎨
Baby Chick Coloring and Drawing Ideas for Kids
🧠
Can Drawing Improve Confidence Building?
🍎
Classroom Ideas: Classroom Management Through Art
🎨
A First Day of School Sign: A Classroom Coloring and Learning Guide
🎨
A Tiny House Build Coloring and Drawing Ideas for Kids
🎨
Ancient Native American Cliff Dwellings: An Ancient History Coloring Guide for Kids
✏️
Fun Exercises for Shading Basics
🧒
A Parent's Guide to Color Recognition
🔬
What Is Primary Colors?
🎨
a New Baby Announcement: Free Ideas for Your Next Celebration
🎨
A Choir Singing: A Coloring and Movement Guide for Kids
💡
How Drawing Encourages Imaginative Play
🧒
A Parent's Guide to Preschoolers
🎨
Ancient Chinese Silk Road Traders: An Ancient History Coloring Guide for Kids
✏️
Fun Exercises for Drawing Triangles
🎨
Diving Coloring Pages and Drawing Ideas for Kids
🎨
Capture the Flag: A Coloring and Playtime Guide for Kids
🎨
Monitor Lizard Coloring and Drawing Ideas for Kids
🎨
Ancient Indian Temple Carvings: An Ancient History Coloring Guide for Kids
🍎
Simple Classroom Printable Activities for Busy Classrooms
🎨
A STEM Career Scientist: A Coloring and STEM Guide for Kids
🎨
A Donation Jar for Charity: A Money Guide for Kids and Parents
📴
Hands-On Activities for Holiday Travel
🎨
Using Blending Stumps: A Buying and Technique Guide
✏️
Easy Steps to Practice Drawing Squares and Rectangles
🎨
Teaching Cooperation: A Simple Activity for Kids
💡
Nurturing Artistic Risk-Taking at Home
🎨
An Astronaut Helmet Visor Reflection: A Coloring and Space Mission Guide for Kids
🎨
Acropolis of Athens: Coloring Page and Fun Facts for Kids
🎨
Easy Original Superhero Characters Drawing Ideas
📐
Fun Drawing Activities for Fractions
🎨
Square Breathing: A Simple Mindfulness Activity for Kids
💬
How Emojis and Modern Pictograms Communicate Ideas
🍂
Celebrate Graduation Season With Coloring Activities
📴
Why Coloring Beats Scrolling on Sibling Playtime
🎨
How to Draw a Op Art Illusion: A Step-by-Step Guide
🎨
A Camping First Aid Kit: Coloring Ideas for Your Next Family Adventure
👨👩👧
Fun and Simple Activities for Only Children
🎨
Cockatoo Coloring Page Ideas for Kids
🎨
How to Draw a Building a Picture from Shapes: A Step-by-Step Guide for Kids
🎲
Fun Guess-the-Drawing Games for Kids
🎨
Summer Camping Under the Stars: Coloring Ideas and Activities for the Whole Family
🌈
A Guide to Buildings and Castles Coloring Pages
Can Drawing Improve Problem-Solving?
🎨
Raking Autumn Leaves: Coloring Ideas and Activities for the Whole Family
🧠
Exploring Drawing and Confidence Building
🍂
Celebrate Back-to-School Season With Coloring Activities
🎨
A Fireworks Festival: Coloring Ideas and Fun Facts for Kids
💬
From Cave Drawings to Comic Strips
🌈
Creative Ways to Color Holiday Scenes
🎨
Fun School Bus Coloring and Drawing Ideas for Kids
🎨
A Homemade Kaleidoscope: A Step-by-Step Science Guide for Kids
🎨
Gardening Gloves: A Gardening Guide for Kids and Families
🎨
A Computer Keyboard and Mouse: A Coloring and STEM Guide for Kids
🎨
Hanukkah Coloring Ideas and Activities for the Whole Family
🎨
A Royal Coronation: A Medieval Coloring and History Guide for Kids
🎨
Coral Garden Coloring and Drawing Ideas for Kids
🎨
A Bibimbap Bowl: Coloring Ideas and Fun Facts for Kids
🎲
Step-by-Step Dot-to-Dot Games
🎨
Eiffel Tower: Coloring Page and Fun Facts for Kids
🎨
A Bulldozer Clearing Ground Coloring and Drawing Ideas for Kids
🎨
How to Draw a Counting to Five with Shapes: A Step-by-Step Guide for Kids
🎨
How to Draw a Sitar: A Coloring and Music Guide for Kids
🎨
Meet the Florist: A Community Helper Coloring Guide
🎨
Ancient Musicians and Instruments: An Ancient History Coloring Guide for Kids
🎨
Exploring Planet Rings: A Coloring and Learning Guide for Kids
🎨
Wearing a Helmet Safely: A Coloring and Health Guide for Kids
🎨
Bird of Paradise Coloring Page Ideas for Kids
🎨
Gardens and Flowers Drawing Prompts for Beginners
🎨
Exploring A Solar Eclipse: A Coloring and Learning Guide for Kids
🎨
A Family Watching the Sunset at the Beach Coloring and Drawing Ideas for Kids
🎨
A Street Food Market: Coloring Ideas and Fun Facts for Kids
🎨
Fresh Cookies from the Oven Coloring Ideas for Kids Who Love to Create
🎨
Iris Flower: A Coloring and Nature Guide for Kids
👨👩👧
Coloring Ideas for Budget-Friendly Activities
🏺
The History of Ancient Storytelling Through Pictures
🎨
Honeybee Coloring and Drawing Ideas for Kids
🎨
How to Draw a A Teardrop Shape: A Step-by-Step Guide for Kids
🎨
Farm Silo Coloring and Drawing Ideas for Kids
🖌️
Why Creating Texture Matters for Young Artists
🎨
Sunflower: A Coloring and Nature Guide for Kids
🎨
A Welcome Home Ceremony: A Coloring and Space Mission Guide for Kids
🎨
A West African Dashiki: A Coloring and Culture Guide for Kids
🎨
A Mexican Charro Suit: A Coloring and Culture Guide for Kids
🎨
The Ancient Silk Road Caravan: An Ancient History Coloring Guide for Kids
🎨
Georgie Porgie: A Nursery Rhyme Coloring Guide for Kids
🎨
Musical Instruments Drawing Prompts for Beginners
🎨
A Ladle: A Kitchen Guide for Kids and Parents
🎨
The Letter T: An Alphabet and Number Coloring Page
👨👩👧
Why Parents Love Weekend Family Activities
🧒
Drawing Activities for Pattern Recognition
🌈
A Guide to Animals Coloring Pages
🎨
Meet Alexander Calder: An Art Appreciation Guide for Kids
🎨
Using a Napkin Properly: A Simple Life Skill for Kids
🎨
Meet Folk Art Style: An Art Appreciation Guide for Kids
🎨
A Cowboy Roping a Steer: A Wild West Coloring and History Guide for Kids
🖍️
Why Coloring With Crayons Makes a Difference
🎨
A Vegetable Garden Row: A Gardening Guide for Kids and Families
🎨
A Sea Turtle Near the Ship Coloring and Drawing Ideas for Kids
🎨
Owl Coloring Page Ideas for Kids
🎨
Exploring Portugal: A Coloring and Culture Guide for Kids
🏺
How Early Writing Systems Shaped Human Communication
🔤
Drawing Activities for Animal Names
💡
How Drawing Encourages Personal Artistic Style
🎨
Maple Tree: A Coloring and Nature Guide for Kids
✏️
Easy Steps to Practice Drawing Simple Faces
🎨
Jump Rope Coloring Pages and Drawing Ideas for Kids
🎨
A Dinosaur Skeleton Fossil Coloring Page: Fun Facts for Young Paleontologists
🖌️
A Beginner's Guide to Using Crayons Creatively
🖍️
How to Get Better at Choosing a Color Palette
🖍️
How to Get Better at Coloring With Crayons
🎨
Partridge Coloring Page Ideas for Kids
🎨
A Smart Home Device: A Coloring and Invention Guide for Kids
✏️
How to Improve Your Basic Perspective
🎨
A Garden Rake: A Gardening Guide for Kids and Families
🔤
Using Coloring Pages to Teach New Vocabulary Words
🖌️
How to Practice Blending Techniques
🧠
Exploring Drawing and Planning Skills
📐
How Children Understand Angles With Art
🧒
How Drawing Supports Left-Handed Children
🎨
Fun Seasons Drawing Activities for Kids
🎨
Robots Drawing Prompts for Beginners
🎨
Buildings and Houses Drawing Prompts for Beginners
🔤
How Pictures Help Children Learn Emotions and Feelings Words
🎨
Clownfish Coloring and Drawing Ideas for Kids
🎨
A Lunar Lander: A Coloring and Space Mission Guide for Kids
🎨
A Tadpole Coloring and Drawing Ideas for Kids
🧒
What to Expect When Teaching Fine Motor Skills
🎨
A Farmers Cooperative: A Coloring and Food Science Guide for Kids
🖌️
A Beginner's Guide to Creating Texture
🎨
Tea Party Set Coloring Ideas for Kids Who Love to Create
🎨
Petunia: A Coloring and Nature Guide for Kids
🎨
Pinecone: A Coloring and Nature Guide for Kids
🎨
A Cactus Flower Blooming: A Wild West Coloring and History Guide for Kids
🏺
The History of Early Writing Systems
🎨
A Rolling Pin: A Kitchen Guide for Kids and Parents
🎨
Seed Sprouting: A Coloring and Food Science Guide for Kids
🎨
A Castle Great Hall: A Medieval Coloring and History Guide for Kids
🎨
Tulip: A Coloring and Nature Guide for Kids
🔎
How Sketch Journaling Support Learning
💗
The Role of Coloring in The Difference Between Art Therapy and Coloring
💬
Why Comic Strips Matter in Everyday Life
🎨
A Coloring Page Advent Calendar: A Practical Guide
🧠
Can Drawing Improve Self-Expression?
📴
Creative Alternatives to Screens During Waiting Rooms
🎨
A Fishing Net Full of Fish Coloring and Drawing Ideas for Kids
📴
Why Coloring Beats Scrolling on Rainy Afternoons
🌈
Creative Ways to Color Sports Scenes
🎨
Lyrebird Coloring Page Ideas for Kids
🎨
Loon Coloring Page Ideas for Kids
🎨
An Invisible Power Superhero: A Superhero Coloring and Design Guide for Kids
🎨
A Baklava Tray: Coloring Ideas and Fun Facts for Kids
📐
Teaching Grids and Coordinates Through Coloring and Drawing
🎨
A Construction Crew Meeting Coloring and Drawing Ideas for Kids
🏺
What We Know About Ancient Symbols
🎨
A Superhero Courage Badge: A Superhero Coloring and Design Guide for Kids
🎨
A Ring Toss Game Coloring and Drawing Ideas for Kids
🎨
How to Draw a Washboard: A Coloring and Music Guide for Kids
📴
Screen-Free Coloring Ideas for Weekend Mornings
💡
Why Free Drawing Matters for Young Artists
🎨
Meet the Veterinarian: A Community Helper Coloring Guide
🎨
Reading a Clock: A Simple Life Skill for Kids
🎨
Meet Oil Painting: An Art Appreciation Guide for Kids
✏️
Easy Steps to Practice Shading Basics
🎨
Boxing Coloring Pages and Drawing Ideas for Kids
🎨
A Beginner's Guide to Drawing Musical Instruments
🎨
Insects Drawing Prompts for Beginners
🎨
Crab Coloring and Drawing Ideas for Kids
📴
Why Coloring Beats Scrolling on Device-Free Evenings
🎨
Carnation: A Coloring and Nature Guide for Kids
🎨
A Weather Radio at Home: A Family Safety Guide
🎨
A Wild West Bandana: A Wild West Coloring and History Guide for Kids
🎨
Lemon Coloring and Drawing Ideas for Kids
🎨
A Recycling-Power Superhero: A Superhero Coloring and Design Guide for Kids
🖍️
Simple Techniques for Blending Colors Smoothly
🎨
A Scottish Kilt: A Coloring and Culture Guide for Kids
🎨
A Maori Traditional Cloak: A Coloring and Culture Guide for Kids
🎨
A Pirate Ship Battle Coloring and Drawing Ideas for Kids
🌈
Fun Holiday Scenes Coloring Pages for Kids
🎨
Meet the Electrician: A Community Helper Coloring Guide
🔬
What Is Warm and Cool Colors?
🍂
Fun Back-to-School Season Classroom Coloring Ideas
🎨
The Human Skeleton: A Coloring and Health Guide for Kids
🖍️
Simple Techniques for Coloring Skin Tones
🎨
Ivy Vine: A Coloring and Nature Guide for Kids
🧒
What to Expect When Teaching Ages 2-3
🎨
Dung Beetle Coloring and Drawing Ideas for Kids
🧠
How Drawing May Support Planning Skills
🎨
Baby Chick Coloring and Drawing Ideas for Kids
🧠
Can Drawing Improve Confidence Building?
🍎
Classroom Ideas: Classroom Management Through Art
🎨
A First Day of School Sign: A Classroom Coloring and Learning Guide
🎨
A Tiny House Build Coloring and Drawing Ideas for Kids
🎨
Ancient Native American Cliff Dwellings: An Ancient History Coloring Guide for Kids
✏️
Fun Exercises for Shading Basics
🧒
A Parent's Guide to Color Recognition
🔬
What Is Primary Colors?
🎨
a New Baby Announcement: Free Ideas for Your Next Celebration
🎨
A Choir Singing: A Coloring and Movement Guide for Kids
💡
How Drawing Encourages Imaginative Play
🧒
A Parent's Guide to Preschoolers
🎨
Ancient Chinese Silk Road Traders: An Ancient History Coloring Guide for Kids
✏️
Fun Exercises for Drawing Triangles
🎨
Diving Coloring Pages and Drawing Ideas for Kids
🎨
Capture the Flag: A Coloring and Playtime Guide for Kids
🎨
Monitor Lizard Coloring and Drawing Ideas for Kids
🎨
Ancient Indian Temple Carvings: An Ancient History Coloring Guide for Kids
🍎
Simple Classroom Printable Activities for Busy Classrooms
🎨
A STEM Career Scientist: A Coloring and STEM Guide for Kids
🎨
A Donation Jar for Charity: A Money Guide for Kids and Parents
📴
Hands-On Activities for Holiday Travel
🎨
Using Blending Stumps: A Buying and Technique Guide
✏️
Easy Steps to Practice Drawing Squares and Rectangles
🎨
Teaching Cooperation: A Simple Activity for Kids
💡
Nurturing Artistic Risk-Taking at Home
🎨
An Astronaut Helmet Visor Reflection: A Coloring and Space Mission Guide for Kids
🎨
Acropolis of Athens: Coloring Page and Fun Facts for Kids
🎨
Easy Original Superhero Characters Drawing Ideas
📐
Fun Drawing Activities for Fractions
🎨
Square Breathing: A Simple Mindfulness Activity for Kids
💬
How Emojis and Modern Pictograms Communicate Ideas
🍂
Celebrate Graduation Season With Coloring Activities
📴
Why Coloring Beats Scrolling on Sibling Playtime
🎨
How to Draw a Op Art Illusion: A Step-by-Step Guide
🎨
A Camping First Aid Kit: Coloring Ideas for Your Next Family Adventure
👨👩👧
Fun and Simple Activities for Only Children
🎨
Cockatoo Coloring Page Ideas for Kids
🎨
How to Draw a Building a Picture from Shapes: A Step-by-Step Guide for Kids
🎲
Fun Guess-the-Drawing Games for Kids
🎨
Summer Camping Under the Stars: Coloring Ideas and Activities for the Whole Family
🌈
A Guide to Buildings and Castles Coloring Pages
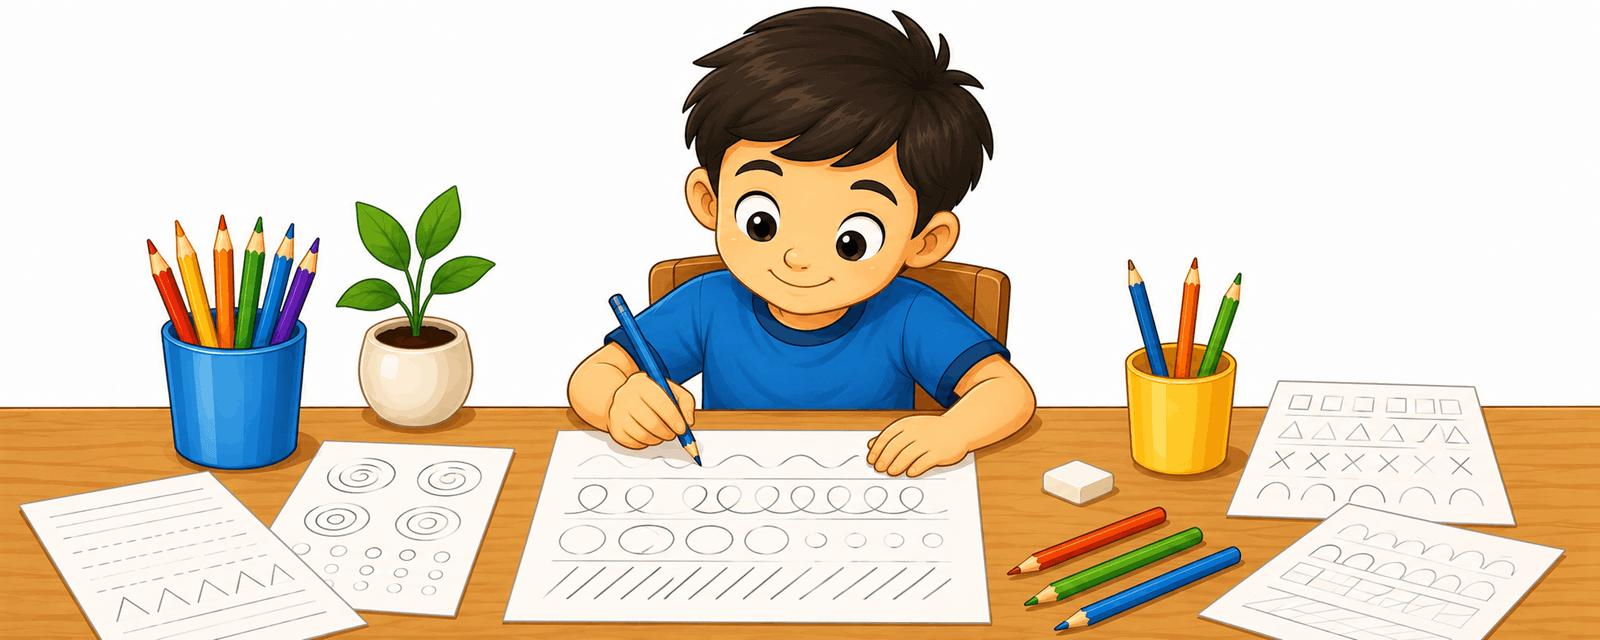 A Beginner's Guide to Warm-Up Drawing Exercises
🎨
Teaching Optimism: A Simple Activity for Kids
🖌️
Exploring Stippling
🖍️
Why Coloring Skies and Backgrounds Makes a Difference
🎨
A Video Game Design Sketch: A Coloring and STEM Guide for Kids
🎨
Sea Urchin Coloring and Drawing Ideas for Kids
🎨
A Fizzing Bath Bomb: A Step-by-Step Science Guide for Kids
🎨
A Harlequin Costume Coloring and Drawing Ideas for Kids
💬
The Power of Emojis and Modern Pictograms
🎨
Saber-Tooth Tiger Coloring Page: Fun Facts for Young Paleontologists
🍎
Classroom Ideas: Classroom Printable Activities
🌈
Creative Ways to Color Vehicles
🖍️
Simple Techniques for Coloring Mandalas
🎨
A Family Walking the Dog: A Simple Pet Care Guide for Kids
🎨
A Knight's Helmet: A Medieval Coloring and History Guide for Kids
🎨
Star Breathing: A Simple Mindfulness Activity for Kids
🎨
Exploring Mars: A Coloring and Learning Guide for Kids
💬
Understanding Infographics
🍂
Celebrate Halloween With Coloring Activities
🖍️
A Beginner's Guide to Coloring Cartoon Characters
💗
Understanding Creative Outlets for Teens
🍂
Creative Easter Coloring Projects for Classrooms
🎨
Toner-Saving Print Settings: A Practical Guide
🎨
A T-Rex and Triceratops Face-Off Coloring Page: Fun Facts for Young Paleontologists
🎲
How to Play Tic-Tac-Toe Variations
🎨
A Baby Dinosaur Hatching Coloring Page: Fun Facts for Young Paleontologists
🎨
The Number 1: An Alphabet and Number Coloring Page
🎨
An Autumn Scarf and Boots: Coloring Ideas and Activities for the Whole Family
🎨
How to Draw Robots Step by Step
🎨
A Filipino Barong Tagalog: A Coloring and Culture Guide for Kids
🍎
Classroom Ideas: Circle Time Activities
💬
Understanding Maps and Wayfinding Symbols
🎲
How to Play Football Play Diagrams
🎨
A Trampoline Bounce Game: A Coloring and Playtime Guide for Kids
🎨
Glitter Gel Pens: A Buying and Technique Guide
🎨
Earthquake Safety Drills: A Family Safety Guide
🎨
A Compass Rose Coloring and Drawing Ideas for Kids
📴
Creative Alternatives to Screens During Device-Free Evenings
🎨
Bison Coloring and Drawing Ideas for Kids
🎨
Victoria Falls: Coloring Page and Fun Facts for Kids
🧒
A Parent's Guide to Kindergarteners
🧠
The Link Between Drawing and Self-Expression
🧒
What to Expect When Teaching Drawing Development Stages
🎨
A Tiny Nanobot: A Coloring and Invention Guide for Kids
🎨
Cheese Making: A Coloring and Food Science Guide for Kids
🎲
Using Drawing for Board Game Design
🎨
A Bird Cage: A Simple Pet Care Guide for Kids
🧒
Drawing Activities for Hand-Eye Coordination
🧒
What to Expect When Teaching Kindergarteners
🎨
Easy Insects Drawing Ideas
🎨
Honeybee Honey Making: A Coloring and Food Science Guide for Kids
💗
Creative Approaches to What Art Therapy Actually Is
🎨
A Ship's Bell Coloring and Drawing Ideas for Kids
👨👩👧
Coloring Ideas for Activities for Twins
🎨
Brushing Hair: A Simple Life Skill for Kids
🎨
Peaceful Place Visualization: A Simple Mindfulness Activity for Kids
🎨
Fun Ice Cream Truck Coloring and Drawing Ideas for Kids
🔤
How Pictures Help Children Learn Animal Names
🎲
Using Drawing for Drawing Battles
🎨
Tide Pool Scene Coloring and Drawing Ideas for Kids
🧒
A Parent's Guide to Shape Recognition
🎨
Kickball Coloring Pages and Drawing Ideas for Kids
🎨
A Cookie Sheet Full of Treats: A Kitchen Guide for Kids and Parents
🎨
A Hero Saving a Cat from a Tree: A Superhero Coloring and Design Guide for Kids
🎨
Carpenter Ant Coloring and Drawing Ideas for Kids
🎨
Fun Hot Rod Coloring and Drawing Ideas for Kids
🎨
A Superhero Overcoming Fear: A Superhero Coloring and Design Guide for Kids
🎨
Fantasy Creatures Drawing Prompts for Beginners
🎨
Ancient Minoan Palaces: An Ancient History Coloring Guide for Kids
🎨
How to Draw a Dotted Line: A Step-by-Step Guide for Kids
🎨
A Disaster Preparedness Checklist: A Family Safety Guide
🎨
A Simple Machine Lever: A Coloring and STEM Guide for Kids
🧠
Why Drawing Can Help With Fine Motor Coordination
🌈
Dinosaurs Coloring Ideas for Classrooms
📐
How Children Understand Fractions With Art
🎨
A Launch Pad at Night: A Coloring and Space Mission Guide for Kids
🎨
A Security Robot: A Coloring and Invention Guide for Kids
🎨
A Music Class: A Classroom Coloring and Learning Guide
🎨
Organizing a Coloring Page Binder: A Practical Guide
🖍️
Tips for Blending Colors Smoothly
🎨
A Seed Starting Tray: A Gardening Guide for Kids and Families
🎨
Whale Shark Coloring and Drawing Ideas for Kids
🎨
Exploring Japan: A Coloring and Culture Guide for Kids
📐
Teaching Sequences Through Coloring and Drawing
🎨
A Nail Gun and Hammer Coloring and Drawing Ideas for Kids
🎨
How to Draw a Didgeridoo: A Coloring and Music Guide for Kids
🔬
Digital vs Traditional Color Explained for Kids
🎨
Painted Lady Butterfly Coloring and Drawing Ideas for Kids
🔤
Learning Colors in a New Language Through Drawing
🎨
A Cafeteria Lunch Line: A Classroom Coloring and Learning Guide
🧠
Why Drawing Can Help With Attention to Detail
🎨
A Balance Beam Walk: A Coloring and Playtime Guide for Kids
🎲
Collaborative Drawing Games: A Creative Twist
👨👩👧
Easy Sibling Bonding Activities With Coloring Pages
🎨
Making a Bed: A Simple Life Skill for Kids
🎨
Teaching Trustworthiness: A Simple Activity for Kids
🎨
A Cement Mixer Truck Coloring and Drawing Ideas for Kids
🎨
Blending Markers: A Buying and Technique Guide
A Beginner's Guide to Warm-Up Drawing Exercises
🎨
Teaching Optimism: A Simple Activity for Kids
🖌️
Exploring Stippling
🖍️
Why Coloring Skies and Backgrounds Makes a Difference
🎨
A Video Game Design Sketch: A Coloring and STEM Guide for Kids
🎨
Sea Urchin Coloring and Drawing Ideas for Kids
🎨
A Fizzing Bath Bomb: A Step-by-Step Science Guide for Kids
🎨
A Harlequin Costume Coloring and Drawing Ideas for Kids
💬
The Power of Emojis and Modern Pictograms
🎨
Saber-Tooth Tiger Coloring Page: Fun Facts for Young Paleontologists
🍎
Classroom Ideas: Classroom Printable Activities
🌈
Creative Ways to Color Vehicles
🖍️
Simple Techniques for Coloring Mandalas
🎨
A Family Walking the Dog: A Simple Pet Care Guide for Kids
🎨
A Knight's Helmet: A Medieval Coloring and History Guide for Kids
🎨
Star Breathing: A Simple Mindfulness Activity for Kids
🎨
Exploring Mars: A Coloring and Learning Guide for Kids
💬
Understanding Infographics
🍂
Celebrate Halloween With Coloring Activities
🖍️
A Beginner's Guide to Coloring Cartoon Characters
💗
Understanding Creative Outlets for Teens
🍂
Creative Easter Coloring Projects for Classrooms
🎨
Toner-Saving Print Settings: A Practical Guide
🎨
A T-Rex and Triceratops Face-Off Coloring Page: Fun Facts for Young Paleontologists
🎲
How to Play Tic-Tac-Toe Variations
🎨
A Baby Dinosaur Hatching Coloring Page: Fun Facts for Young Paleontologists
🎨
The Number 1: An Alphabet and Number Coloring Page
🎨
An Autumn Scarf and Boots: Coloring Ideas and Activities for the Whole Family
🎨
How to Draw Robots Step by Step
🎨
A Filipino Barong Tagalog: A Coloring and Culture Guide for Kids
🍎
Classroom Ideas: Circle Time Activities
💬
Understanding Maps and Wayfinding Symbols
🎲
How to Play Football Play Diagrams
🎨
A Trampoline Bounce Game: A Coloring and Playtime Guide for Kids
🎨
Glitter Gel Pens: A Buying and Technique Guide
🎨
Earthquake Safety Drills: A Family Safety Guide
🎨
A Compass Rose Coloring and Drawing Ideas for Kids
📴
Creative Alternatives to Screens During Device-Free Evenings
🎨
Bison Coloring and Drawing Ideas for Kids
🎨
Victoria Falls: Coloring Page and Fun Facts for Kids
🧒
A Parent's Guide to Kindergarteners
🧠
The Link Between Drawing and Self-Expression
🧒
What to Expect When Teaching Drawing Development Stages
🎨
A Tiny Nanobot: A Coloring and Invention Guide for Kids
🎨
Cheese Making: A Coloring and Food Science Guide for Kids
🎲
Using Drawing for Board Game Design
🎨
A Bird Cage: A Simple Pet Care Guide for Kids
🧒
Drawing Activities for Hand-Eye Coordination
🧒
What to Expect When Teaching Kindergarteners
🎨
Easy Insects Drawing Ideas
🎨
Honeybee Honey Making: A Coloring and Food Science Guide for Kids
💗
Creative Approaches to What Art Therapy Actually Is
🎨
A Ship's Bell Coloring and Drawing Ideas for Kids
👨👩👧
Coloring Ideas for Activities for Twins
🎨
Brushing Hair: A Simple Life Skill for Kids
🎨
Peaceful Place Visualization: A Simple Mindfulness Activity for Kids
🎨
Fun Ice Cream Truck Coloring and Drawing Ideas for Kids
🔤
How Pictures Help Children Learn Animal Names
🎲
Using Drawing for Drawing Battles
🎨
Tide Pool Scene Coloring and Drawing Ideas for Kids
🧒
A Parent's Guide to Shape Recognition
🎨
Kickball Coloring Pages and Drawing Ideas for Kids
🎨
A Cookie Sheet Full of Treats: A Kitchen Guide for Kids and Parents
🎨
A Hero Saving a Cat from a Tree: A Superhero Coloring and Design Guide for Kids
🎨
Carpenter Ant Coloring and Drawing Ideas for Kids
🎨
Fun Hot Rod Coloring and Drawing Ideas for Kids
🎨
A Superhero Overcoming Fear: A Superhero Coloring and Design Guide for Kids
🎨
Fantasy Creatures Drawing Prompts for Beginners
🎨
Ancient Minoan Palaces: An Ancient History Coloring Guide for Kids
🎨
How to Draw a Dotted Line: A Step-by-Step Guide for Kids
🎨
A Disaster Preparedness Checklist: A Family Safety Guide
🎨
A Simple Machine Lever: A Coloring and STEM Guide for Kids
🧠
Why Drawing Can Help With Fine Motor Coordination
🌈
Dinosaurs Coloring Ideas for Classrooms
📐
How Children Understand Fractions With Art
🎨
A Launch Pad at Night: A Coloring and Space Mission Guide for Kids
🎨
A Security Robot: A Coloring and Invention Guide for Kids
🎨
A Music Class: A Classroom Coloring and Learning Guide
🎨
Organizing a Coloring Page Binder: A Practical Guide
🖍️
Tips for Blending Colors Smoothly
🎨
A Seed Starting Tray: A Gardening Guide for Kids and Families
🎨
Whale Shark Coloring and Drawing Ideas for Kids
🎨
Exploring Japan: A Coloring and Culture Guide for Kids
📐
Teaching Sequences Through Coloring and Drawing
🎨
A Nail Gun and Hammer Coloring and Drawing Ideas for Kids
🎨
How to Draw a Didgeridoo: A Coloring and Music Guide for Kids
🔬
Digital vs Traditional Color Explained for Kids
🎨
Painted Lady Butterfly Coloring and Drawing Ideas for Kids
🔤
Learning Colors in a New Language Through Drawing
🎨
A Cafeteria Lunch Line: A Classroom Coloring and Learning Guide
🧠
Why Drawing Can Help With Attention to Detail
🎨
A Balance Beam Walk: A Coloring and Playtime Guide for Kids
🎲
Collaborative Drawing Games: A Creative Twist
👨👩👧
Easy Sibling Bonding Activities With Coloring Pages
🎨
Making a Bed: A Simple Life Skill for Kids
🎨
Teaching Trustworthiness: A Simple Activity for Kids
🎨
A Cement Mixer Truck Coloring and Drawing Ideas for Kids
🎨
Blending Markers: A Buying and Technique Guide
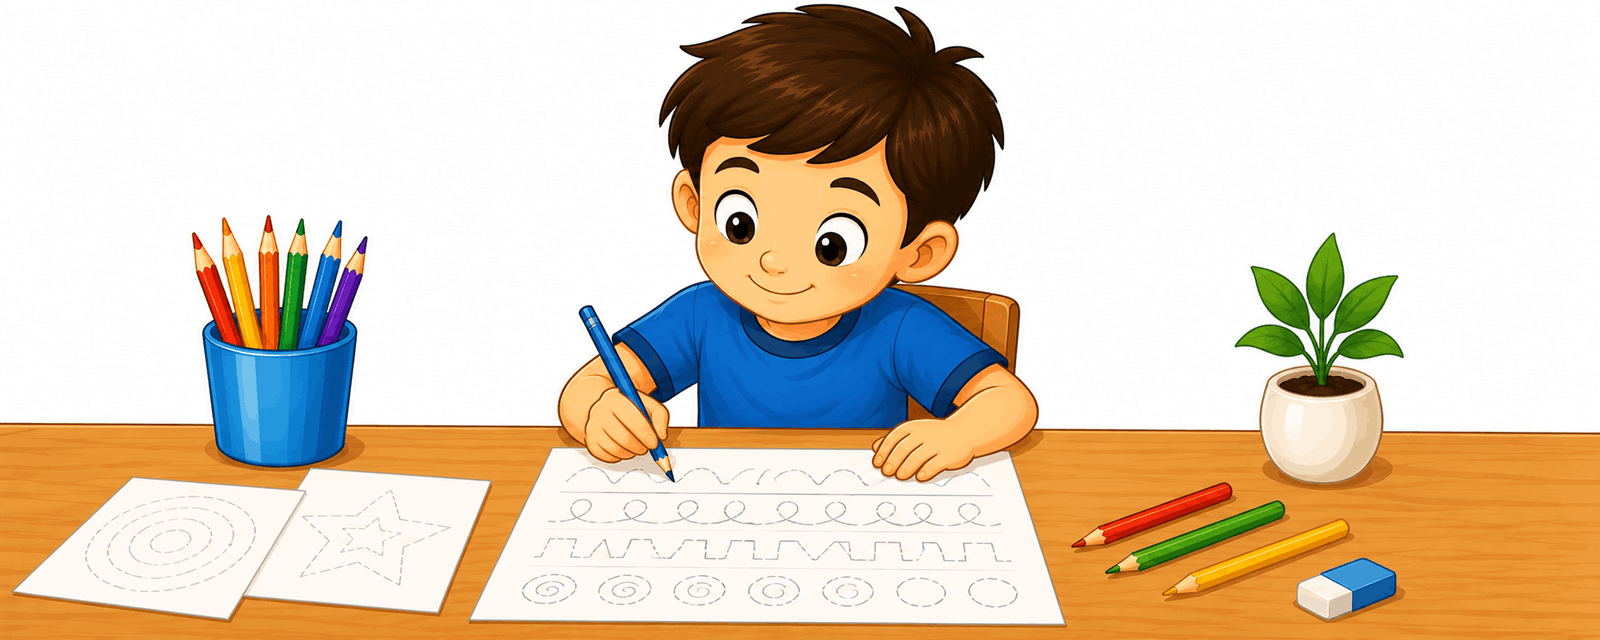 Why Pencil Control Matters for New Artists
🎨
Music Note Doodles: A Coloring and Movement Guide for Kids
🖍️
How to Get Better at Coloring Inside the Lines
🎨
Easter Coloring Ideas and Activities for the Whole Family
🌈
Creative Ways to Color Flowers and Gardens
🎨
How to Draw a Wave Pattern: A Step-by-Step Guide
💡
Building Imaginative Play Through Coloring and Drawing
🎨
Parrot Coloring Page Ideas for Kids
💡
Nurturing Original Thinking at Home
🎨
A Balloon Rocket: A Step-by-Step Science Guide for Kids
🔬
A Simple Guide to Why Screens Use RGB
🎨
An Art Class Easel: A Classroom Coloring and Learning Guide
🎨
Coloring Page Subscription Ideas: A Practical Guide
🎨
A Square Dance: A Coloring and Movement Guide for Kids
💗
Creative Approaches to Art as a Creative Outlet
🎨
Penguin Coloring and Drawing Ideas for Kids
🎨
Meet Keith Haring: An Art Appreciation Guide for Kids
🎨
A 3D Printer: A Coloring and Invention Guide for Kids
🎨
A Medieval King and Queen: A Medieval Coloring and History Guide for Kids
🎨
a Birthday Party with Balloons Coloring Ideas and Activities for the Whole Family
🎨
A Fall Corn Maze: Coloring Ideas and Activities for the Whole Family
🎨
The Lion and the Mouse: A Classic Story Coloring Guide for Kids
🎨
A Garden Bench: A Gardening Guide for Kids and Families
🎨
a Maze Activity Sheet: Free Ideas for Your Next Celebration
🎨
A Marching Band: A Coloring and Movement Guide for Kids
🎨
Pretzel Coloring Ideas for Kids Who Love to Create
📴
Screen-Free Coloring Ideas for Sibling Playtime
🎨
How to Draw a Geometric Mandala: A Step-by-Step Guide
🎨
A Team Brainstorming Session: A Coloring and STEM Guide for Kids
👨👩👧
Coloring Ideas for Holiday Break Activities
🎨
Ancient Egyptian Pyramids: An Ancient History Coloring Guide for Kids
🍎
A Teacher's Guide to Substitute Teacher Activities
💗
The Role of Coloring in Emotional Expression
🎨
How to Draw a Aztec Pattern: A Step-by-Step Guide
📐
Learning Proportion Through Drawing
🎨
Decorating a Christmas Tree Coloring Ideas and Activities for the Whole Family
🎨
Underwater Cave Coloring and Drawing Ideas for Kids
🍂
Seasonal Coloring Guide: New Year
🎨
Number Bonds to Ten: An Alphabet and Number Coloring Page
🎨
A Relay Race: A Coloring and Playtime Guide for Kids
🎨
Saying Excuse Me: A Simple Social Skill for Kids
👨👩👧
Fun and Simple Road Trip Activities
🎨
Northern Lights Sky: Coloring Page and Fun Facts for Kids
✏️
Why Basic Perspective Matters for New Artists
🧘
Exploring Mandala Coloring
🎨
A School Garden: A Classroom Coloring and Learning Guide
🔤
Drawing Activities for New Vocabulary Words
🎨
Four Square: A Coloring and Playtime Guide for Kids
🎨
Fun Snowplow Coloring and Drawing Ideas for Kids
🎨
the Summer Solstice Coloring Ideas and Activities for the Whole Family
🎲
Step-by-Step Drawing Prompt Games
🎨
Hoopoe Coloring Page Ideas for Kids
🎨
Gratitude Journaling: A Simple Mindfulness Activity for Kids
Why Pencil Control Matters for New Artists
🎨
Music Note Doodles: A Coloring and Movement Guide for Kids
🖍️
How to Get Better at Coloring Inside the Lines
🎨
Easter Coloring Ideas and Activities for the Whole Family
🌈
Creative Ways to Color Flowers and Gardens
🎨
How to Draw a Wave Pattern: A Step-by-Step Guide
💡
Building Imaginative Play Through Coloring and Drawing
🎨
Parrot Coloring Page Ideas for Kids
💡
Nurturing Original Thinking at Home
🎨
A Balloon Rocket: A Step-by-Step Science Guide for Kids
🔬
A Simple Guide to Why Screens Use RGB
🎨
An Art Class Easel: A Classroom Coloring and Learning Guide
🎨
Coloring Page Subscription Ideas: A Practical Guide
🎨
A Square Dance: A Coloring and Movement Guide for Kids
💗
Creative Approaches to Art as a Creative Outlet
🎨
Penguin Coloring and Drawing Ideas for Kids
🎨
Meet Keith Haring: An Art Appreciation Guide for Kids
🎨
A 3D Printer: A Coloring and Invention Guide for Kids
🎨
A Medieval King and Queen: A Medieval Coloring and History Guide for Kids
🎨
a Birthday Party with Balloons Coloring Ideas and Activities for the Whole Family
🎨
A Fall Corn Maze: Coloring Ideas and Activities for the Whole Family
🎨
The Lion and the Mouse: A Classic Story Coloring Guide for Kids
🎨
A Garden Bench: A Gardening Guide for Kids and Families
🎨
a Maze Activity Sheet: Free Ideas for Your Next Celebration
🎨
A Marching Band: A Coloring and Movement Guide for Kids
🎨
Pretzel Coloring Ideas for Kids Who Love to Create
📴
Screen-Free Coloring Ideas for Sibling Playtime
🎨
How to Draw a Geometric Mandala: A Step-by-Step Guide
🎨
A Team Brainstorming Session: A Coloring and STEM Guide for Kids
👨👩👧
Coloring Ideas for Holiday Break Activities
🎨
Ancient Egyptian Pyramids: An Ancient History Coloring Guide for Kids
🍎
A Teacher's Guide to Substitute Teacher Activities
💗
The Role of Coloring in Emotional Expression
🎨
How to Draw a Aztec Pattern: A Step-by-Step Guide
📐
Learning Proportion Through Drawing
🎨
Decorating a Christmas Tree Coloring Ideas and Activities for the Whole Family
🎨
Underwater Cave Coloring and Drawing Ideas for Kids
🍂
Seasonal Coloring Guide: New Year
🎨
Number Bonds to Ten: An Alphabet and Number Coloring Page
🎨
A Relay Race: A Coloring and Playtime Guide for Kids
🎨
Saying Excuse Me: A Simple Social Skill for Kids
👨👩👧
Fun and Simple Road Trip Activities
🎨
Northern Lights Sky: Coloring Page and Fun Facts for Kids
✏️
Why Basic Perspective Matters for New Artists
🧘
Exploring Mandala Coloring
🎨
A School Garden: A Classroom Coloring and Learning Guide
🔤
Drawing Activities for New Vocabulary Words
🎨
Four Square: A Coloring and Playtime Guide for Kids
🎨
Fun Snowplow Coloring and Drawing Ideas for Kids
🎨
the Summer Solstice Coloring Ideas and Activities for the Whole Family
🎲
Step-by-Step Drawing Prompt Games
🎨
Hoopoe Coloring Page Ideas for Kids
🎨
Gratitude Journaling: A Simple Mindfulness Activity for Kids
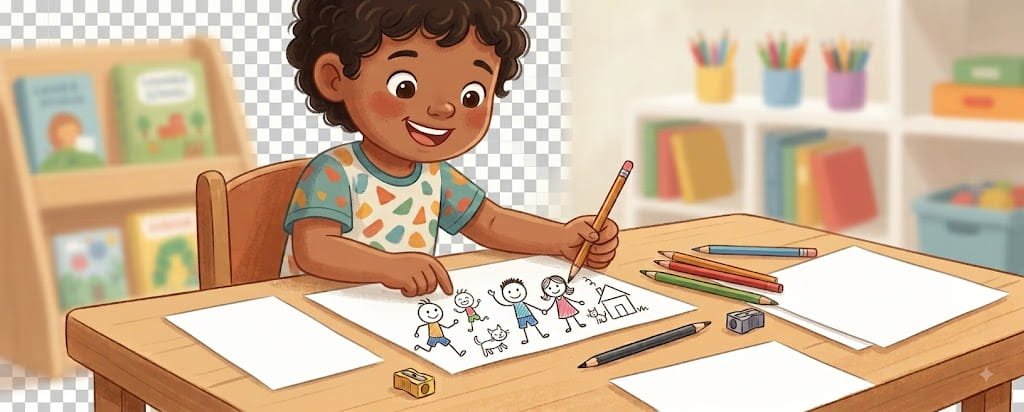 A Beginner's Guide to Drawing Stick Figures
🧘
A Beginner's Guide to Coloring in Silence
🎲
How to Play Storyboard Games
🧒
Drawing Activities for Fine Motor Skills
🎨
How to Draw a Grid Pattern: A Step-by-Step Guide
🎨
Fire Dragon Coloring and Drawing Ideas for Kids
🎨
A Kids' Recycling for Cash Program: A Money Guide for Kids and Parents
👨👩👧
Easy Waiting Room Activities With Coloring Pages
🔎
Using Visual Note-Taking to Solve Problems
🎨
Flood Safety Basics: A Family Safety Guide
✏️
Fun Exercises for Drawing Circles
🍎
How Teachers Can Use Classroom Printable Activities
🎨
A Tambourine Dancer: A Coloring and Movement Guide for Kids
🍂
Creative Back-to-School Season Coloring Projects for Classrooms
🎨
A Knight's Tournament Joust: A Medieval Coloring and History Guide for Kids
🎨
Wildebeest Coloring and Drawing Ideas for Kids
🎨
How to Draw Buildings and Houses Step by Step
🎨
Self-Portraits Drawing Prompts for Beginners
🎨
Songkran Water Festival: Coloring Ideas and Fun Facts for Kids
🎨
A Ship's Rigging and Sails Coloring and Drawing Ideas for Kids
📐
Learning Sequences Through Drawing
🎨
A Pet Emergency Kit: A Simple Pet Care Guide for Kids
🎨
A Toad in a Garden Coloring and Drawing Ideas for Kids
🎨
A Desert Canyon: A Wild West Coloring and History Guide for Kids
👨👩👧
Making the Most of Bedtime Wind-Down Routines
🧘
A Beginner's Guide to Repetitive Pattern Coloring
🎨
A Circus Tent Coloring and Drawing Ideas for Kids
🎨
Sweet Potato Coloring and Drawing Ideas for Kids
🖍️
Why Avoiding Smudges While Coloring Makes a Difference
🎨
Tying Coloring Pages Into Homeschool: A Practical Guide
🎲
Using Drawing for Football Play Diagrams
🧒
Drawing Activities for Color Recognition
🎨
A Magician on Stage Coloring and Drawing Ideas for Kids
🎨
A Three-Legged Race: A Coloring and Playtime Guide for Kids
🎨
Fun Dinosaurs Drawing Activities for Kids
🍂
Printable Independence Day Coloring Pages for Kids
🎨
Unicorn Coloring and Drawing Ideas for Kids
🎨
Daisy: A Coloring and Nature Guide for Kids
🧒
What to Expect When Teaching The Pictorial Stage
👨👩👧
Making the Most of Travel-Friendly Activities
🎨
Butter Churning: A Coloring and Food Science Guide for Kids
🧠
The Link Between Drawing and Patience
🎨
A Summer Beach Ball: Coloring Ideas and Activities for the Whole Family
🎨
A Campsite Picnic Table: Coloring Ideas for Your Next Family Adventure
🎨
A Toolbox and Tools Coloring and Drawing Ideas for Kids
🎨
Being Considerate of Others' Feelings: A Simple Social Skill for Kids
🎨
Grasshopper Coloring and Drawing Ideas for Kids
🎨
Fun Zeppelin Coloring and Drawing Ideas for Kids
💗
Understanding Art as a Creative Outlet
🎨
Teaching Respect: A Simple Activity for Kids
🔎
Using Brainstorming With Pictures to Solve Problems
👨👩👧
Fun and Simple Birthday Party Activities
🎨
Ancient African Kingdoms: An Ancient History Coloring Guide for Kids
🎨
Stonehenge Builders: An Ancient History Coloring Guide for Kids
🖍️
A Beginner's Guide to Layering Colors
🎨
A Can Opener: A Kitchen Guide for Kids and Parents
🎨
Rubik's Cube Coloring and Drawing Ideas for Kids
🎨
Lion Coloring and Drawing Ideas for Kids
🎲
Board Game Design: A Creative Twist
🎨
Rice Growing: A Coloring and Food Science Guide for Kids
🎨
Labeling a Coloring Page Collection: A Practical Guide
🎨
A Library Corner: A Classroom Coloring and Learning Guide
🎨
Volleyball Coloring Pages and Drawing Ideas for Kids
💡
Why Character Design Matters for Young Artists
🎨
Carnival in Brazil Coloring Ideas and Activities for the Whole Family
🎨
Whooping Crane Coloring Page Ideas for Kids
🎨
Exploring China: A Coloring and Culture Guide for Kids
🎨
Wedding Kids-Table Activities: Free Ideas for Your Next Celebration
🎨
Seasons Drawing Prompts for Beginners
🍂
Celebrate Cultural Festivals With Coloring Activities
🧘
Why Coloring Before Exams Feels Calming
🎨
Door Hanger Coloring: Free Ideas for Your Next Celebration
🎨
Preparing Pets for an Emergency: A Family Safety Guide
🎨
a Family Tree Printable: Free Ideas for Your Next Celebration
🖍️
Tips for Layering Colors
🎨
The Letter S: An Alphabet and Number Coloring Page
🎨
Gorilla Coloring and Drawing Ideas for Kids
🎨
Meet Street Art Murals: An Art Appreciation Guide for Kids
🎨
A Chinese New Year Dragon: Coloring Ideas and Fun Facts for Kids
🎨
A Ballet Dancer: A Coloring and Movement Guide for Kids
🧠
Why Drawing Can Help With Confidence Building
🎨
Cassowary Coloring Page Ideas for Kids
🍎
Classroom Ideas: Substitute Teacher Activities
🎨
Holi Festival of Colors Coloring Ideas and Activities for the Whole Family
🎨
Wrapping a Gift: A Simple Life Skill for Kids
🧘
Exploring Bedtime Coloring Routines
✏️
Fun Exercises for Drawing Straight Lines
📴
Screen-Free Coloring Ideas for Long Car Rides
🎨
Food Truck Coloring Ideas for Kids Who Love to Create
🎨
a Color-by-Number Printable: Free Ideas for Your Next Celebration
🎨
a Memory Card Game Printable: Free Ideas for Your Next Celebration
🎨
How to Draw Weather Step by Step
🎨
Bread Making: A Coloring and Food Science Guide for Kids
🧠
The Link Between Drawing and Visual Thinking
🎨
A First Aid Kit: A Coloring and Health Guide for Kids
🎨
Birthday Banner Coloring: Free Ideas for Your Next Celebration
🎨
A Colander: A Kitchen Guide for Kids and Parents
🎨
Halloween Coloring Ideas and Activities for the Whole Family
🎨
A Medieval Minstrel: A Medieval Coloring and History Guide for Kids
🎨
Meet the Artist: A Community Helper Coloring Guide
🎨
The Fox and the Grapes: A Classic Story Coloring Guide for Kids
🔬
CMYK Printing Colors Explained for Kids
🎨
A LEGO-Style Construction Scene Coloring and Drawing Ideas for Kids
🎨
A Sunhat and Flip-Flops Coloring and Drawing Ideas for Kids
🍂
Fun Birthday Celebrations Classroom Coloring Ideas
🎨
A Desert Island Coloring and Drawing Ideas for Kids
🎨
A Booster Separation: A Coloring and Space Mission Guide for Kids
🔤
Learning Numbers in a New Language Through Drawing
💡
Why Combining Ideas Matters for Young Artists
🎨
How to Draw a Infinity Loop Pattern: A Step-by-Step Guide
📐
Fun Drawing Activities for Graphs and Charts
📐
Why Geometry and Drawing Go Together
🎨
Fun Golf Cart Coloring and Drawing Ideas for Kids
🎨
A Human Cannonball Coloring and Drawing Ideas for Kids
🍎
Classroom Ideas: Early Finisher Activities
🎨
Exploring A Lunar Eclipse: A Coloring and Learning Guide for Kids
🎨
A Pirate Captain Coloring and Drawing Ideas for Kids
🎨
Duck Duck Goose: A Coloring and Playtime Guide for Kids
🎨
A Commercial Spaceplane: A Coloring and Space Mission Guide for Kids
🎨
How to Draw Seasons Step by Step
🎨
An Argentine Gaucho Outfit: A Coloring and Culture Guide for Kids
🎨
An Ancient Stone Tool Maker: An Ancient History Coloring Guide for Kids
🖍️
A Beginner's Guide to Coloring Skin Tones
🎨
A Rain Barrel: A Gardening Guide for Kids and Families
🎨
Heron Coloring Page Ideas for Kids
🎨
A Flower Pot: A Gardening Guide for Kids and Families
🎨
A Simple Machine Wedge: A Coloring and STEM Guide for Kids
🎨
Getting Fresh Air Outside: A Coloring and Health Guide for Kids
🎨
Communicating with Mission Control: A Coloring and Space Mission Guide for Kids
🎨
Easy Fantasy Creatures Drawing Ideas
🧒
Fun Ways to Build Pre-Writing Skills
🍎
Using Coloring Pages for Early Finisher Activities
🍎
Using Coloring Pages for Classroom Reward Activities
🎨
A Fire Drill Line: A Classroom Coloring and Learning Guide
💬
The Power of Picture Books
🎨
Marco Polo: A Coloring and Playtime Guide for Kids
💗
How Drawing Supports What Art Therapy Actually Is
🎨
A Debugging Detective Scene: A Coloring and STEM Guide for Kids
🎨
Bear Coloring and Drawing Ideas for Kids
🔎
Using Diagrams in Science to Solve Problems
💗
Exploring Art as a Creative Outlet Through Art
💗
The Role of Coloring in Stress Relief
🎲
Step-by-Step Guess-the-Drawing Games
🎨
A Cowboy Hat Tipped in Greeting: A Wild West Coloring and History Guide for Kids
🎨
A Ringmaster Coloring and Drawing Ideas for Kids
🎨
Calendar Coloring Pages: Free Ideas for Your Next Celebration
🎨
How to Draw a Pan Flute: A Coloring and Music Guide for Kids
🌈
A Guide to Seasonal Scenes Coloring Pages
👨👩👧
Making the Most of Birthday Party Activities
🎨
Mangrove Forest Coloring Page: A Nature Learning Guide for Kids
🔤
Using Coloring Pages to Teach Colors in a New Language
🎨
A Lemonade Stand Business: A Money Guide for Kids and Parents
🎨
Teaching Good Humor: A Simple Activity for Kids
🔎
Exploring Visual Note-Taking for Students
🎨
Frost Patterns Coloring Page: A Nature Learning Guide for Kids
🎨
Barnacle Coloring and Drawing Ideas for Kids
🍎
Using Coloring Pages for End-of-Year Activities
🖌️
Why Cross-Hatching Matters for Young Artists
🎨
Comparing Prices While Shopping: A Money Guide for Kids and Parents
🎨
Making a New Friend: A Simple Social Skill for Kids
🎨
Big Ben: Coloring Page and Fun Facts for Kids
📐
Fun Drawing Activities for 3D Shapes
🍂
Seasonal Coloring Guide: Spring
💬
From Cave Drawings to Diagrams
🎨
Goose Coloring and Drawing Ideas for Kids
🌈
Printable Buildings and Castles Coloring Activities
🎨
Freeze Tag: A Coloring and Playtime Guide for Kids
🧒
Drawing Activities for Encouraging Reluctant Artists
🎨
Shading With Colored Pencils: A Buying and Technique Guide
🎨
How to Draw a A Shape Scavenger Hunt Page: A Step-by-Step Guide for Kids
🎨
How to Draw a Matching Shape Pairs: A Step-by-Step Guide for Kids
🍂
Celebrate Christmas With Coloring Activities
🎨
Minotaur Coloring and Drawing Ideas for Kids
🎨
The Frog Prince: A Classic Story Coloring Guide for Kids
🎨
Feeding a Pet on Schedule: A Simple Life Skill for Kids
🎨
Exploring Mercury: A Coloring and Learning Guide for Kids
🎨
Mushroom Patch: A Coloring and Nature Guide for Kids
🎨
Fun Emotions and Faces Drawing Activities for Kids
🎨
The Nightingale: A Classic Story Coloring Guide for Kids
🌈
Creative Ways to Color Musical Themes
🎲
Step-by-Step Pictionary-Style Games
🎨
A Scaffolding Frame Coloring and Drawing Ideas for Kids
🎨
Bell Pepper Coloring and Drawing Ideas for Kids
🎨
A Beginner's Guide to Drawing Fantasy Creatures
🎲
Fun Drawing-Based Party Games for Kids
🌈
Fun Food and Treats Coloring Pages for Kids
💡
Building Free Drawing Through Coloring and Drawing
🔬
Understanding Secondary Colors
🎨
Scaling a Page to Fit Paper: A Practical Guide
💬
From Cave Drawings to Picture Books
🎨
How to Draw Animals Step by Step
🎨
Waterfall Coloring Page: A Nature Learning Guide for Kids
🎨
Aurora Borealis Coloring Page: A Nature Learning Guide for Kids
💗
Understanding Coping With Change Through Drawing
🎨
Coloring Page Storage Folder Ideas: A Practical Guide
👨👩👧
Creative Budget-Friendly Activities for Kids
🔎
A Beginner's Guide to Sketch Journaling
🎨
An Egyptian Pharaoh: An Ancient History Coloring Guide for Kids
🎨
Exploring Neptune: A Coloring and Learning Guide for Kids
🔬
A Simple Guide to Color Psychology
🎨
A Dinosaur Footprint Coloring Page: Fun Facts for Young Paleontologists
🎲
Fun Tic-Tac-Toe Variations for Kids
📴
Why Coloring Beats Scrolling on Sick Days at Home
🎨
A Spacecraft Window View: A Coloring and Space Mission Guide for Kids
🎨
Exploring The Milky Way Galaxy: A Coloring and Learning Guide for Kids
🔤
Learning Family Words Through Drawing
🎨
Hagia Sophia: Coloring Page and Fun Facts for Kids
🎨
King Midas and the Golden Touch: A Classic Story Coloring Guide for Kids
🎨
A Medical Robot: A Coloring and Invention Guide for Kids
✏️
Easy Steps to Practice Drawing Stick Figures
🍎
A Teacher's Guide to Assessing Creativity in the Classroom
🎨
Milk Delivery: A Coloring and Food Science Guide for Kids
🎨
Exploring A Supernova: A Coloring and Learning Guide for Kids
🧠
The Link Between Drawing and Memory
🎨
Pomegranate Coloring and Drawing Ideas for Kids
🎨
A Battery and Light Bulb Circuit: A Coloring and STEM Guide for Kids
🌈
Fun Mandalas Coloring Pages for Kids
🖌️
Simple Steps for Outlining Techniques
🎨
Red Panda Coloring and Drawing Ideas for Kids
🎲
Using Drawing for Drawing Challenges
🧒
What to Expect When Teaching Pre-Writing Skills
🎨
a Feelings Wheel: A Simple Mindfulness Activity for Kids
🔬
Color Theory Basics Explained for Kids
🍎
How Teachers Can Use Morning Work Activities
🎨
Cookies Coloring Ideas for Kids Who Love to Create
🎨
A School Award Ceremony: A Classroom Coloring and Learning Guide
👨👩👧
Making the Most of Grandparent and Grandchild Activities
🔬
A Simple Guide to Why Printers Use CMYK
🎨
A Beginner's Guide to Drawing Under the Sea
👨👩👧
Creative Summer Break Activities for Kids
🎨
Buckingham Palace: Coloring Page and Fun Facts for Kids
🎨
Sing a Song of Sixpence: A Nursery Rhyme Coloring Guide for Kids
🎨
Wrestling Coloring Pages and Drawing Ideas for Kids
🎨
A Sailor's Knot Coloring and Drawing Ideas for Kids
🎨
Pangolin Coloring and Drawing Ideas for Kids
🎨
Windmills of Kinderdijk: Coloring Page and Fun Facts for Kids
🎨
Exploring Hungary: A Coloring and Culture Guide for Kids
🎨
A Lion Tamer Coloring and Drawing Ideas for Kids
🎨
A Spatula: A Kitchen Guide for Kids and Parents
🎨
A Feast Table for a Harvest Festival: Coloring Ideas and Fun Facts for Kids
🎨
The Letter X: An Alphabet and Number Coloring Page
🎨
A Compost Bin: A Gardening Guide for Kids and Families
🖍️
Why Applying Even Pressure Makes a Difference
📐
Why Tessellations and Drawing Go Together
👨👩👧
Making the Most of After-School Activities
🎨
A Construction Site Sunset Coloring and Drawing Ideas for Kids
🎨
A Model Building Kit Coloring and Drawing Ideas for Kids
🧒
Fun Ways to Build Color Recognition
🧒
Understanding Children Who Dislike Drawing in Early Childhood
🎨
A Pot Holder: A Kitchen Guide for Kids and Parents
🧒
How Drawing Supports Color Recognition
🎨
Fun Weather Drawing Activities for Kids
🎨
An Ancient Japanese Pagoda: An Ancient History Coloring Guide for Kids
🎨
How to Draw a Bugle: A Coloring and Music Guide for Kids
🎨
a Gratitude Jar: A Simple Mindfulness Activity for Kids
✏️
Why Warm-Up Drawing Exercises Matters for New Artists
🎨
A Rock Candy Crystal: A Step-by-Step Science Guide for Kids
🎨
Salt Harvesting: A Coloring and Food Science Guide for Kids
🎨
Waffles Coloring Ideas for Kids Who Love to Create
🎨
Ichthyosaurus Coloring Page: Fun Facts for Young Paleontologists
🖍️
Simple Techniques for Choosing Your First Coloring Pencils
🎨
A Grocery Store Budget List: A Money Guide for Kids and Parents
👨👩👧
Coloring Ideas for Summer Break Activities
🎨
Making a Simple Sandwich: A Simple Life Skill for Kids
A Beginner's Guide to Drawing Stick Figures
🧘
A Beginner's Guide to Coloring in Silence
🎲
How to Play Storyboard Games
🧒
Drawing Activities for Fine Motor Skills
🎨
How to Draw a Grid Pattern: A Step-by-Step Guide
🎨
Fire Dragon Coloring and Drawing Ideas for Kids
🎨
A Kids' Recycling for Cash Program: A Money Guide for Kids and Parents
👨👩👧
Easy Waiting Room Activities With Coloring Pages
🔎
Using Visual Note-Taking to Solve Problems
🎨
Flood Safety Basics: A Family Safety Guide
✏️
Fun Exercises for Drawing Circles
🍎
How Teachers Can Use Classroom Printable Activities
🎨
A Tambourine Dancer: A Coloring and Movement Guide for Kids
🍂
Creative Back-to-School Season Coloring Projects for Classrooms
🎨
A Knight's Tournament Joust: A Medieval Coloring and History Guide for Kids
🎨
Wildebeest Coloring and Drawing Ideas for Kids
🎨
How to Draw Buildings and Houses Step by Step
🎨
Self-Portraits Drawing Prompts for Beginners
🎨
Songkran Water Festival: Coloring Ideas and Fun Facts for Kids
🎨
A Ship's Rigging and Sails Coloring and Drawing Ideas for Kids
📐
Learning Sequences Through Drawing
🎨
A Pet Emergency Kit: A Simple Pet Care Guide for Kids
🎨
A Toad in a Garden Coloring and Drawing Ideas for Kids
🎨
A Desert Canyon: A Wild West Coloring and History Guide for Kids
👨👩👧
Making the Most of Bedtime Wind-Down Routines
🧘
A Beginner's Guide to Repetitive Pattern Coloring
🎨
A Circus Tent Coloring and Drawing Ideas for Kids
🎨
Sweet Potato Coloring and Drawing Ideas for Kids
🖍️
Why Avoiding Smudges While Coloring Makes a Difference
🎨
Tying Coloring Pages Into Homeschool: A Practical Guide
🎲
Using Drawing for Football Play Diagrams
🧒
Drawing Activities for Color Recognition
🎨
A Magician on Stage Coloring and Drawing Ideas for Kids
🎨
A Three-Legged Race: A Coloring and Playtime Guide for Kids
🎨
Fun Dinosaurs Drawing Activities for Kids
🍂
Printable Independence Day Coloring Pages for Kids
🎨
Unicorn Coloring and Drawing Ideas for Kids
🎨
Daisy: A Coloring and Nature Guide for Kids
🧒
What to Expect When Teaching The Pictorial Stage
👨👩👧
Making the Most of Travel-Friendly Activities
🎨
Butter Churning: A Coloring and Food Science Guide for Kids
🧠
The Link Between Drawing and Patience
🎨
A Summer Beach Ball: Coloring Ideas and Activities for the Whole Family
🎨
A Campsite Picnic Table: Coloring Ideas for Your Next Family Adventure
🎨
A Toolbox and Tools Coloring and Drawing Ideas for Kids
🎨
Being Considerate of Others' Feelings: A Simple Social Skill for Kids
🎨
Grasshopper Coloring and Drawing Ideas for Kids
🎨
Fun Zeppelin Coloring and Drawing Ideas for Kids
💗
Understanding Art as a Creative Outlet
🎨
Teaching Respect: A Simple Activity for Kids
🔎
Using Brainstorming With Pictures to Solve Problems
👨👩👧
Fun and Simple Birthday Party Activities
🎨
Ancient African Kingdoms: An Ancient History Coloring Guide for Kids
🎨
Stonehenge Builders: An Ancient History Coloring Guide for Kids
🖍️
A Beginner's Guide to Layering Colors
🎨
A Can Opener: A Kitchen Guide for Kids and Parents
🎨
Rubik's Cube Coloring and Drawing Ideas for Kids
🎨
Lion Coloring and Drawing Ideas for Kids
🎲
Board Game Design: A Creative Twist
🎨
Rice Growing: A Coloring and Food Science Guide for Kids
🎨
Labeling a Coloring Page Collection: A Practical Guide
🎨
A Library Corner: A Classroom Coloring and Learning Guide
🎨
Volleyball Coloring Pages and Drawing Ideas for Kids
💡
Why Character Design Matters for Young Artists
🎨
Carnival in Brazil Coloring Ideas and Activities for the Whole Family
🎨
Whooping Crane Coloring Page Ideas for Kids
🎨
Exploring China: A Coloring and Culture Guide for Kids
🎨
Wedding Kids-Table Activities: Free Ideas for Your Next Celebration
🎨
Seasons Drawing Prompts for Beginners
🍂
Celebrate Cultural Festivals With Coloring Activities
🧘
Why Coloring Before Exams Feels Calming
🎨
Door Hanger Coloring: Free Ideas for Your Next Celebration
🎨
Preparing Pets for an Emergency: A Family Safety Guide
🎨
a Family Tree Printable: Free Ideas for Your Next Celebration
🖍️
Tips for Layering Colors
🎨
The Letter S: An Alphabet and Number Coloring Page
🎨
Gorilla Coloring and Drawing Ideas for Kids
🎨
Meet Street Art Murals: An Art Appreciation Guide for Kids
🎨
A Chinese New Year Dragon: Coloring Ideas and Fun Facts for Kids
🎨
A Ballet Dancer: A Coloring and Movement Guide for Kids
🧠
Why Drawing Can Help With Confidence Building
🎨
Cassowary Coloring Page Ideas for Kids
🍎
Classroom Ideas: Substitute Teacher Activities
🎨
Holi Festival of Colors Coloring Ideas and Activities for the Whole Family
🎨
Wrapping a Gift: A Simple Life Skill for Kids
🧘
Exploring Bedtime Coloring Routines
✏️
Fun Exercises for Drawing Straight Lines
📴
Screen-Free Coloring Ideas for Long Car Rides
🎨
Food Truck Coloring Ideas for Kids Who Love to Create
🎨
a Color-by-Number Printable: Free Ideas for Your Next Celebration
🎨
a Memory Card Game Printable: Free Ideas for Your Next Celebration
🎨
How to Draw Weather Step by Step
🎨
Bread Making: A Coloring and Food Science Guide for Kids
🧠
The Link Between Drawing and Visual Thinking
🎨
A First Aid Kit: A Coloring and Health Guide for Kids
🎨
Birthday Banner Coloring: Free Ideas for Your Next Celebration
🎨
A Colander: A Kitchen Guide for Kids and Parents
🎨
Halloween Coloring Ideas and Activities for the Whole Family
🎨
A Medieval Minstrel: A Medieval Coloring and History Guide for Kids
🎨
Meet the Artist: A Community Helper Coloring Guide
🎨
The Fox and the Grapes: A Classic Story Coloring Guide for Kids
🔬
CMYK Printing Colors Explained for Kids
🎨
A LEGO-Style Construction Scene Coloring and Drawing Ideas for Kids
🎨
A Sunhat and Flip-Flops Coloring and Drawing Ideas for Kids
🍂
Fun Birthday Celebrations Classroom Coloring Ideas
🎨
A Desert Island Coloring and Drawing Ideas for Kids
🎨
A Booster Separation: A Coloring and Space Mission Guide for Kids
🔤
Learning Numbers in a New Language Through Drawing
💡
Why Combining Ideas Matters for Young Artists
🎨
How to Draw a Infinity Loop Pattern: A Step-by-Step Guide
📐
Fun Drawing Activities for Graphs and Charts
📐
Why Geometry and Drawing Go Together
🎨
Fun Golf Cart Coloring and Drawing Ideas for Kids
🎨
A Human Cannonball Coloring and Drawing Ideas for Kids
🍎
Classroom Ideas: Early Finisher Activities
🎨
Exploring A Lunar Eclipse: A Coloring and Learning Guide for Kids
🎨
A Pirate Captain Coloring and Drawing Ideas for Kids
🎨
Duck Duck Goose: A Coloring and Playtime Guide for Kids
🎨
A Commercial Spaceplane: A Coloring and Space Mission Guide for Kids
🎨
How to Draw Seasons Step by Step
🎨
An Argentine Gaucho Outfit: A Coloring and Culture Guide for Kids
🎨
An Ancient Stone Tool Maker: An Ancient History Coloring Guide for Kids
🖍️
A Beginner's Guide to Coloring Skin Tones
🎨
A Rain Barrel: A Gardening Guide for Kids and Families
🎨
Heron Coloring Page Ideas for Kids
🎨
A Flower Pot: A Gardening Guide for Kids and Families
🎨
A Simple Machine Wedge: A Coloring and STEM Guide for Kids
🎨
Getting Fresh Air Outside: A Coloring and Health Guide for Kids
🎨
Communicating with Mission Control: A Coloring and Space Mission Guide for Kids
🎨
Easy Fantasy Creatures Drawing Ideas
🧒
Fun Ways to Build Pre-Writing Skills
🍎
Using Coloring Pages for Early Finisher Activities
🍎
Using Coloring Pages for Classroom Reward Activities
🎨
A Fire Drill Line: A Classroom Coloring and Learning Guide
💬
The Power of Picture Books
🎨
Marco Polo: A Coloring and Playtime Guide for Kids
💗
How Drawing Supports What Art Therapy Actually Is
🎨
A Debugging Detective Scene: A Coloring and STEM Guide for Kids
🎨
Bear Coloring and Drawing Ideas for Kids
🔎
Using Diagrams in Science to Solve Problems
💗
Exploring Art as a Creative Outlet Through Art
💗
The Role of Coloring in Stress Relief
🎲
Step-by-Step Guess-the-Drawing Games
🎨
A Cowboy Hat Tipped in Greeting: A Wild West Coloring and History Guide for Kids
🎨
A Ringmaster Coloring and Drawing Ideas for Kids
🎨
Calendar Coloring Pages: Free Ideas for Your Next Celebration
🎨
How to Draw a Pan Flute: A Coloring and Music Guide for Kids
🌈
A Guide to Seasonal Scenes Coloring Pages
👨👩👧
Making the Most of Birthday Party Activities
🎨
Mangrove Forest Coloring Page: A Nature Learning Guide for Kids
🔤
Using Coloring Pages to Teach Colors in a New Language
🎨
A Lemonade Stand Business: A Money Guide for Kids and Parents
🎨
Teaching Good Humor: A Simple Activity for Kids
🔎
Exploring Visual Note-Taking for Students
🎨
Frost Patterns Coloring Page: A Nature Learning Guide for Kids
🎨
Barnacle Coloring and Drawing Ideas for Kids
🍎
Using Coloring Pages for End-of-Year Activities
🖌️
Why Cross-Hatching Matters for Young Artists
🎨
Comparing Prices While Shopping: A Money Guide for Kids and Parents
🎨
Making a New Friend: A Simple Social Skill for Kids
🎨
Big Ben: Coloring Page and Fun Facts for Kids
📐
Fun Drawing Activities for 3D Shapes
🍂
Seasonal Coloring Guide: Spring
💬
From Cave Drawings to Diagrams
🎨
Goose Coloring and Drawing Ideas for Kids
🌈
Printable Buildings and Castles Coloring Activities
🎨
Freeze Tag: A Coloring and Playtime Guide for Kids
🧒
Drawing Activities for Encouraging Reluctant Artists
🎨
Shading With Colored Pencils: A Buying and Technique Guide
🎨
How to Draw a A Shape Scavenger Hunt Page: A Step-by-Step Guide for Kids
🎨
How to Draw a Matching Shape Pairs: A Step-by-Step Guide for Kids
🍂
Celebrate Christmas With Coloring Activities
🎨
Minotaur Coloring and Drawing Ideas for Kids
🎨
The Frog Prince: A Classic Story Coloring Guide for Kids
🎨
Feeding a Pet on Schedule: A Simple Life Skill for Kids
🎨
Exploring Mercury: A Coloring and Learning Guide for Kids
🎨
Mushroom Patch: A Coloring and Nature Guide for Kids
🎨
Fun Emotions and Faces Drawing Activities for Kids
🎨
The Nightingale: A Classic Story Coloring Guide for Kids
🌈
Creative Ways to Color Musical Themes
🎲
Step-by-Step Pictionary-Style Games
🎨
A Scaffolding Frame Coloring and Drawing Ideas for Kids
🎨
Bell Pepper Coloring and Drawing Ideas for Kids
🎨
A Beginner's Guide to Drawing Fantasy Creatures
🎲
Fun Drawing-Based Party Games for Kids
🌈
Fun Food and Treats Coloring Pages for Kids
💡
Building Free Drawing Through Coloring and Drawing
🔬
Understanding Secondary Colors
🎨
Scaling a Page to Fit Paper: A Practical Guide
💬
From Cave Drawings to Picture Books
🎨
How to Draw Animals Step by Step
🎨
Waterfall Coloring Page: A Nature Learning Guide for Kids
🎨
Aurora Borealis Coloring Page: A Nature Learning Guide for Kids
💗
Understanding Coping With Change Through Drawing
🎨
Coloring Page Storage Folder Ideas: A Practical Guide
👨👩👧
Creative Budget-Friendly Activities for Kids
🔎
A Beginner's Guide to Sketch Journaling
🎨
An Egyptian Pharaoh: An Ancient History Coloring Guide for Kids
🎨
Exploring Neptune: A Coloring and Learning Guide for Kids
🔬
A Simple Guide to Color Psychology
🎨
A Dinosaur Footprint Coloring Page: Fun Facts for Young Paleontologists
🎲
Fun Tic-Tac-Toe Variations for Kids
📴
Why Coloring Beats Scrolling on Sick Days at Home
🎨
A Spacecraft Window View: A Coloring and Space Mission Guide for Kids
🎨
Exploring The Milky Way Galaxy: A Coloring and Learning Guide for Kids
🔤
Learning Family Words Through Drawing
🎨
Hagia Sophia: Coloring Page and Fun Facts for Kids
🎨
King Midas and the Golden Touch: A Classic Story Coloring Guide for Kids
🎨
A Medical Robot: A Coloring and Invention Guide for Kids
✏️
Easy Steps to Practice Drawing Stick Figures
🍎
A Teacher's Guide to Assessing Creativity in the Classroom
🎨
Milk Delivery: A Coloring and Food Science Guide for Kids
🎨
Exploring A Supernova: A Coloring and Learning Guide for Kids
🧠
The Link Between Drawing and Memory
🎨
Pomegranate Coloring and Drawing Ideas for Kids
🎨
A Battery and Light Bulb Circuit: A Coloring and STEM Guide for Kids
🌈
Fun Mandalas Coloring Pages for Kids
🖌️
Simple Steps for Outlining Techniques
🎨
Red Panda Coloring and Drawing Ideas for Kids
🎲
Using Drawing for Drawing Challenges
🧒
What to Expect When Teaching Pre-Writing Skills
🎨
a Feelings Wheel: A Simple Mindfulness Activity for Kids
🔬
Color Theory Basics Explained for Kids
🍎
How Teachers Can Use Morning Work Activities
🎨
Cookies Coloring Ideas for Kids Who Love to Create
🎨
A School Award Ceremony: A Classroom Coloring and Learning Guide
👨👩👧
Making the Most of Grandparent and Grandchild Activities
🔬
A Simple Guide to Why Printers Use CMYK
🎨
A Beginner's Guide to Drawing Under the Sea
👨👩👧
Creative Summer Break Activities for Kids
🎨
Buckingham Palace: Coloring Page and Fun Facts for Kids
🎨
Sing a Song of Sixpence: A Nursery Rhyme Coloring Guide for Kids
🎨
Wrestling Coloring Pages and Drawing Ideas for Kids
🎨
A Sailor's Knot Coloring and Drawing Ideas for Kids
🎨
Pangolin Coloring and Drawing Ideas for Kids
🎨
Windmills of Kinderdijk: Coloring Page and Fun Facts for Kids
🎨
Exploring Hungary: A Coloring and Culture Guide for Kids
🎨
A Lion Tamer Coloring and Drawing Ideas for Kids
🎨
A Spatula: A Kitchen Guide for Kids and Parents
🎨
A Feast Table for a Harvest Festival: Coloring Ideas and Fun Facts for Kids
🎨
The Letter X: An Alphabet and Number Coloring Page
🎨
A Compost Bin: A Gardening Guide for Kids and Families
🖍️
Why Applying Even Pressure Makes a Difference
📐
Why Tessellations and Drawing Go Together
👨👩👧
Making the Most of After-School Activities
🎨
A Construction Site Sunset Coloring and Drawing Ideas for Kids
🎨
A Model Building Kit Coloring and Drawing Ideas for Kids
🧒
Fun Ways to Build Color Recognition
🧒
Understanding Children Who Dislike Drawing in Early Childhood
🎨
A Pot Holder: A Kitchen Guide for Kids and Parents
🧒
How Drawing Supports Color Recognition
🎨
Fun Weather Drawing Activities for Kids
🎨
An Ancient Japanese Pagoda: An Ancient History Coloring Guide for Kids
🎨
How to Draw a Bugle: A Coloring and Music Guide for Kids
🎨
a Gratitude Jar: A Simple Mindfulness Activity for Kids
✏️
Why Warm-Up Drawing Exercises Matters for New Artists
🎨
A Rock Candy Crystal: A Step-by-Step Science Guide for Kids
🎨
Salt Harvesting: A Coloring and Food Science Guide for Kids
🎨
Waffles Coloring Ideas for Kids Who Love to Create
🎨
Ichthyosaurus Coloring Page: Fun Facts for Young Paleontologists
🖍️
Simple Techniques for Choosing Your First Coloring Pencils
🎨
A Grocery Store Budget List: A Money Guide for Kids and Parents
👨👩👧
Coloring Ideas for Summer Break Activities
🎨
Making a Simple Sandwich: A Simple Life Skill for Kids
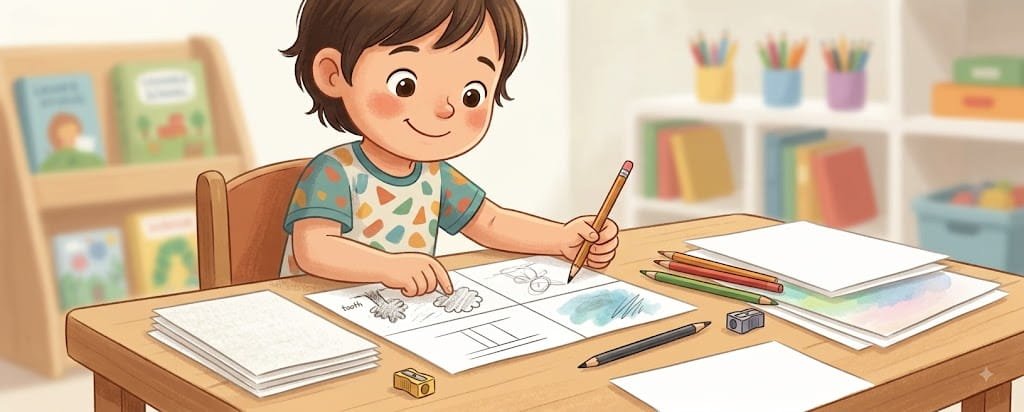 A Beginner's Guide to Drawing Paper Types
🎨
A Boardwalk Arcade Coloring and Drawing Ideas for Kids
🎨
A Simple Machine Pulley: A Coloring and STEM Guide for Kids
🎨
An Amber Fossil Coloring Page: Fun Facts for Young Paleontologists
🎨
How to Draw Original Superhero Characters Step by Step
🏺
What We Know About Ancient Storytelling Through Pictures
📐
How Children Understand Number Lines With Art
🎨
A Spacewalk Tether: A Coloring and Space Mission Guide for Kids
🎨
Washing Hands Thoroughly: A Simple Life Skill for Kids
🎨
Cricket Coloring and Drawing Ideas for Kids
✏️
Easy Steps to Practice Drawing Curved Lines
🧒
Fun Ways to Build Kindergarteners
🎨
Coloring Subscription Boxes: A Buying and Technique Guide
🎨
Basketball Coloring Pages and Drawing Ideas for Kids
🎨
Summer Meadow Coloring Page: A Nature Learning Guide for Kids
🎨
A Saucepan: A Kitchen Guide for Kids and Parents
🧠
The Link Between Drawing and Spatial Awareness
🎨
Coral Reef Coloring and Drawing Ideas for Kids
👨👩👧
Creative Morning Routine Activities for Kids
🎨
A Bake Sale Stand: A Money Guide for Kids and Parents
🎨
A Medieval Archer: A Medieval Coloring and History Guide for Kids
🌈
Robots and Machines Coloring Ideas for Classrooms
🎨
An Excavator Digging Coloring and Drawing Ideas for Kids
🍎
A Teacher's Guide to End-of-Year Activities
🎨
Invitation Card Coloring: Free Ideas for Your Next Celebration
🎨
A Sailor Went to Sea: A Nursery Rhyme Coloring Guide for Kids
🎨
Pet Mouse Coloring and Drawing Ideas for Kids
🌈
Fun Musical Themes Coloring Pages for Kids
🎨
How to Draw a Mosaic Tile Pattern: A Step-by-Step Guide
🎨
A Family Financial Goal Chart: A Money Guide for Kids and Parents
👨👩👧
Coloring Ideas for Road Trip Activities
🧘
How Slow Coloring Practice Can Create a Quiet Moment
🎨
A Naked Egg Experiment: A Step-by-Step Science Guide for Kids
🎨
Icicle Formation Coloring Page: A Nature Learning Guide for Kids
🎨
Table Tennis Coloring Pages and Drawing Ideas for Kids
🎨
Exploring A Space Explorer: A Coloring and Learning Guide for Kids
🎨
A School Locker: A Classroom Coloring and Learning Guide
🔤
Drawing Activities for Opposites
🎨
A Garden Hose Reel: A Gardening Guide for Kids and Families
🎨
Making S'mores: Coloring Ideas for Your Next Family Adventure
💡
Building Visual Brainstorming Through Coloring and Drawing
🎨
A Superhero Symbol Design: A Superhero Coloring and Design Guide for Kids
🍂
Printable Halloween Coloring Pages for Kids
🎨
How to Draw a A Shape Made of Lines: A Step-by-Step Guide for Kids
🎨
Gymnastics Coloring Pages and Drawing Ideas for Kids
💗
How Drawing Supports Art for Stressful Days
🎨
A Substitute Teacher Day: A Classroom Coloring and Learning Guide
🎨
Watercolor Basics for Beginners: A Buying and Technique Guide
🧒
Understanding Ages 4-5 in Early Childhood
🎨
Smoke Detector Checks: A Family Safety Guide
🎨
Fencing Coloring Pages and Drawing Ideas for Kids
💗
Creative Approaches to Building Self-Esteem Through Art
🌈
Creative Ways to Color Animals
🎲
Drawing Challenges: A Creative Twist
🎨
Sample Collection on Mars: A Coloring and Space Mission Guide for Kids
🎨
How to Draw a Viola: A Coloring and Music Guide for Kids
💬
How Infographics Communicate Ideas
🌈
Fun Everyday Objects Coloring Pages for Kids
🎨
A Baby Triceratops Coloring Page: Fun Facts for Young Paleontologists
🏺
The History of Ancient Art Materials
🏺
What We Know About Ancient Pottery Art
🎨
Ancient Explorers Charting New Lands: An Ancient History Coloring Guide for Kids
🎨
Easy Community Helpers Drawing Ideas
🎨
How to Draw a Spiral: A Step-by-Step Guide for Kids
🎨
Fun Speedboat Coloring and Drawing Ideas for Kids
🎨
Wetland Marsh Coloring Page: A Nature Learning Guide for Kids
🖍️
How to Get Better at Applying Even Pressure
🧒
Fun Ways to Build Toddlers (Ages 1-2)
🍎
Simple Indoor Recess Activities for Busy Classrooms
🎨
How to Draw a Quilt Block Pattern: A Step-by-Step Guide
🎨
Dinosaurs Drawing Prompts for Beginners
📴
Why Coloring Beats Scrolling on Long Car Rides
💡
Why Creative Problem-Solving Matters for Young Artists
🎨
How to Draw a Marbling Pattern: A Step-by-Step Guide
🎨
Rose: A Coloring and Nature Guide for Kids
🎨
Three Blind Mice: A Nursery Rhyme Coloring Guide for Kids
🎨
A Report Card: A Classroom Coloring and Learning Guide
🎨
Fun Ambulance Coloring and Drawing Ideas for Kids
🎨
Castles Drawing Prompts for Beginners
🎨
A Static Electricity Cereal Trick: A Step-by-Step Science Guide for Kids
🎨
A Family Emergency Kit: A Family Safety Guide
🎨
A School Play: A Classroom Coloring and Learning Guide
🎨
A Turkish Traditional Dress: A Coloring and Culture Guide for Kids
🎨
A Dim Sum Cart: Coloring Ideas and Fun Facts for Kids
🔤
How Pictures Help Children Learn New Vocabulary Words
💗
Understanding Processing Big Feelings
🎨
Carnotaurus Coloring Page: Fun Facts for Young Paleontologists
🎨
A Bee Visiting a Flower: A Gardening Guide for Kids and Families
🎨
A Kids' Job Board at Home: A Money Guide for Kids and Parents
📐
How Children Understand Geometry With Art
🔬
Understanding Color Theory Basics
🎨
Sailing Coloring Pages and Drawing Ideas for Kids
🔤
Drawing Activities for Question Words
🎨
A Lighthouse on a Cliff Coloring and Drawing Ideas for Kids
🖍️
Simple Techniques for Coloring Animals Realistically
🖍️
A Beginner's Guide to Choosing Your First Coloring Pencils
🎨
A Karaoke Night: A Coloring and Movement Guide for Kids
🖍️
Why Layering Colors Makes a Difference
A Beginner's Guide to Drawing Paper Types
🎨
A Boardwalk Arcade Coloring and Drawing Ideas for Kids
🎨
A Simple Machine Pulley: A Coloring and STEM Guide for Kids
🎨
An Amber Fossil Coloring Page: Fun Facts for Young Paleontologists
🎨
How to Draw Original Superhero Characters Step by Step
🏺
What We Know About Ancient Storytelling Through Pictures
📐
How Children Understand Number Lines With Art
🎨
A Spacewalk Tether: A Coloring and Space Mission Guide for Kids
🎨
Washing Hands Thoroughly: A Simple Life Skill for Kids
🎨
Cricket Coloring and Drawing Ideas for Kids
✏️
Easy Steps to Practice Drawing Curved Lines
🧒
Fun Ways to Build Kindergarteners
🎨
Coloring Subscription Boxes: A Buying and Technique Guide
🎨
Basketball Coloring Pages and Drawing Ideas for Kids
🎨
Summer Meadow Coloring Page: A Nature Learning Guide for Kids
🎨
A Saucepan: A Kitchen Guide for Kids and Parents
🧠
The Link Between Drawing and Spatial Awareness
🎨
Coral Reef Coloring and Drawing Ideas for Kids
👨👩👧
Creative Morning Routine Activities for Kids
🎨
A Bake Sale Stand: A Money Guide for Kids and Parents
🎨
A Medieval Archer: A Medieval Coloring and History Guide for Kids
🌈
Robots and Machines Coloring Ideas for Classrooms
🎨
An Excavator Digging Coloring and Drawing Ideas for Kids
🍎
A Teacher's Guide to End-of-Year Activities
🎨
Invitation Card Coloring: Free Ideas for Your Next Celebration
🎨
A Sailor Went to Sea: A Nursery Rhyme Coloring Guide for Kids
🎨
Pet Mouse Coloring and Drawing Ideas for Kids
🌈
Fun Musical Themes Coloring Pages for Kids
🎨
How to Draw a Mosaic Tile Pattern: A Step-by-Step Guide
🎨
A Family Financial Goal Chart: A Money Guide for Kids and Parents
👨👩👧
Coloring Ideas for Road Trip Activities
🧘
How Slow Coloring Practice Can Create a Quiet Moment
🎨
A Naked Egg Experiment: A Step-by-Step Science Guide for Kids
🎨
Icicle Formation Coloring Page: A Nature Learning Guide for Kids
🎨
Table Tennis Coloring Pages and Drawing Ideas for Kids
🎨
Exploring A Space Explorer: A Coloring and Learning Guide for Kids
🎨
A School Locker: A Classroom Coloring and Learning Guide
🔤
Drawing Activities for Opposites
🎨
A Garden Hose Reel: A Gardening Guide for Kids and Families
🎨
Making S'mores: Coloring Ideas for Your Next Family Adventure
💡
Building Visual Brainstorming Through Coloring and Drawing
🎨
A Superhero Symbol Design: A Superhero Coloring and Design Guide for Kids
🍂
Printable Halloween Coloring Pages for Kids
🎨
How to Draw a A Shape Made of Lines: A Step-by-Step Guide for Kids
🎨
Gymnastics Coloring Pages and Drawing Ideas for Kids
💗
How Drawing Supports Art for Stressful Days
🎨
A Substitute Teacher Day: A Classroom Coloring and Learning Guide
🎨
Watercolor Basics for Beginners: A Buying and Technique Guide
🧒
Understanding Ages 4-5 in Early Childhood
🎨
Smoke Detector Checks: A Family Safety Guide
🎨
Fencing Coloring Pages and Drawing Ideas for Kids
💗
Creative Approaches to Building Self-Esteem Through Art
🌈
Creative Ways to Color Animals
🎲
Drawing Challenges: A Creative Twist
🎨
Sample Collection on Mars: A Coloring and Space Mission Guide for Kids
🎨
How to Draw a Viola: A Coloring and Music Guide for Kids
💬
How Infographics Communicate Ideas
🌈
Fun Everyday Objects Coloring Pages for Kids
🎨
A Baby Triceratops Coloring Page: Fun Facts for Young Paleontologists
🏺
The History of Ancient Art Materials
🏺
What We Know About Ancient Pottery Art
🎨
Ancient Explorers Charting New Lands: An Ancient History Coloring Guide for Kids
🎨
Easy Community Helpers Drawing Ideas
🎨
How to Draw a Spiral: A Step-by-Step Guide for Kids
🎨
Fun Speedboat Coloring and Drawing Ideas for Kids
🎨
Wetland Marsh Coloring Page: A Nature Learning Guide for Kids
🖍️
How to Get Better at Applying Even Pressure
🧒
Fun Ways to Build Toddlers (Ages 1-2)
🍎
Simple Indoor Recess Activities for Busy Classrooms
🎨
How to Draw a Quilt Block Pattern: A Step-by-Step Guide
🎨
Dinosaurs Drawing Prompts for Beginners
📴
Why Coloring Beats Scrolling on Long Car Rides
💡
Why Creative Problem-Solving Matters for Young Artists
🎨
How to Draw a Marbling Pattern: A Step-by-Step Guide
🎨
Rose: A Coloring and Nature Guide for Kids
🎨
Three Blind Mice: A Nursery Rhyme Coloring Guide for Kids
🎨
A Report Card: A Classroom Coloring and Learning Guide
🎨
Fun Ambulance Coloring and Drawing Ideas for Kids
🎨
Castles Drawing Prompts for Beginners
🎨
A Static Electricity Cereal Trick: A Step-by-Step Science Guide for Kids
🎨
A Family Emergency Kit: A Family Safety Guide
🎨
A School Play: A Classroom Coloring and Learning Guide
🎨
A Turkish Traditional Dress: A Coloring and Culture Guide for Kids
🎨
A Dim Sum Cart: Coloring Ideas and Fun Facts for Kids
🔤
How Pictures Help Children Learn New Vocabulary Words
💗
Understanding Processing Big Feelings
🎨
Carnotaurus Coloring Page: Fun Facts for Young Paleontologists
🎨
A Bee Visiting a Flower: A Gardening Guide for Kids and Families
🎨
A Kids' Job Board at Home: A Money Guide for Kids and Parents
📐
How Children Understand Geometry With Art
🔬
Understanding Color Theory Basics
🎨
Sailing Coloring Pages and Drawing Ideas for Kids
🔤
Drawing Activities for Question Words
🎨
A Lighthouse on a Cliff Coloring and Drawing Ideas for Kids
🖍️
Simple Techniques for Coloring Animals Realistically
🖍️
A Beginner's Guide to Choosing Your First Coloring Pencils
🎨
A Karaoke Night: A Coloring and Movement Guide for Kids
🖍️
Why Layering Colors Makes a Difference
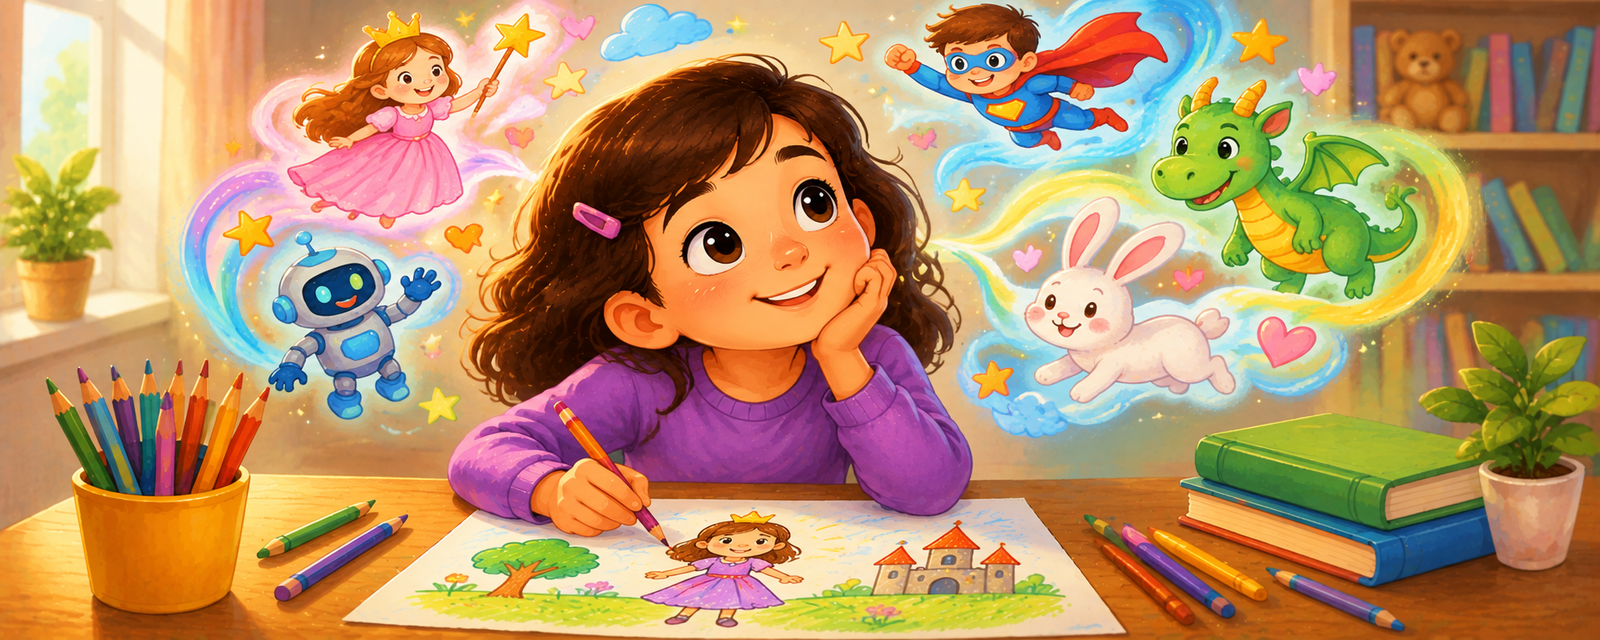 How Drawing Encourages Imaginary Worlds
🎨
The North Wind and the Sun: A Classic Story Coloring Guide for Kids
🎨
Tornado Coloring Page: A Nature Learning Guide for Kids
🎨
Cow Milking: A Coloring and Food Science Guide for Kids
🎨
American Football Coloring Pages and Drawing Ideas for Kids
🎨
A Sink or Float Test: A Step-by-Step Science Guide for Kids
💗
Exploring Art and Relaxation Through Art
✏️
Fun Exercises for Warm-Up Drawing Exercises
🎨
Canyon Layers Coloring Page: A Nature Learning Guide for Kids
🔤
Using Coloring Pages to Teach Opposites
🎨
Witch Coloring and Drawing Ideas for Kids
🎨
Writing a Thank You Note: A Simple Life Skill for Kids
🧘
Why Mindful Coloring for Beginners Feels Calming
🎨
Sagrada Familia: Coloring Page and Fun Facts for Kids
🎨
Rumpelstiltskin: A Classic Story Coloring Guide for Kids
🎨
Choosing a Coloring Book for Adults: A Buying and Technique Guide
🎨
Sports Drawing Prompts for Beginners
🏺
How Ancient Art Materials Shaped Human Communication
🎨
A Ship's Cannon Coloring and Drawing Ideas for Kids
🧠
Why Drawing Can Help With Critical Thinking
🎨
Pufferfish Coloring and Drawing Ideas for Kids
🎨
A Castle Under a Full Moon: A Medieval Coloring and History Guide for Kids
🎨
A Sailboat Race Coloring and Drawing Ideas for Kids
🎨
How to Draw Farm Life Step by Step
🎨
A Robot Orchestra: A Coloring and Invention Guide for Kids
🍂
Seasonal Coloring Guide: Winter
🎨
Farm Tractor Scene Coloring and Drawing Ideas for Kids
🎨
A Deserted Island Hut Coloring and Drawing Ideas for Kids
🎨
Sphinx Coloring and Drawing Ideas for Kids
💡
Nurturing Inventing New Ideas at Home
🧘
Why Quiet Morning Coloring Feels Calming
🎨
Mount Fuji: Coloring Page and Fun Facts for Kids
🎨
Erasable Colored Pencils: A Buying and Technique Guide
🔎
Exploring Storyboarding for Projects for Students
🎨
A Carnival Mask Coloring and Drawing Ideas for Kids
🎨
An Oven Mitt: A Kitchen Guide for Kids and Parents
🎨
A Toaster: A Kitchen Guide for Kids and Parents
🎨
A Simple Machine Inclined Plane: A Coloring and STEM Guide for Kids
💡
The Role of Artistic Risk-Taking in Children's Art
🌈
Creative Ways to Color Seasonal Scenes
💬
Why Wordless Storytelling Matter in Everyday Life
🎨
A Walking Water Experiment: A Step-by-Step Science Guide for Kids
🎨
a Welcome Home Sign: Free Ideas for Your Next Celebration
🎨
Celery Coloring and Drawing Ideas for Kids
🌈
Printable Fairy Tale Scenes Coloring Activities
🎨
Mahjong Tile Coloring and Drawing Ideas for Kids
🎨
Garter Snake Coloring and Drawing Ideas for Kids
🎨
Millipede Coloring and Drawing Ideas for Kids
💬
How Visual Storytelling Communicate Ideas
🎨
Winter Fireplace Reading: Coloring Ideas and Activities for the Whole Family
🎨
Exploring Brazil: A Coloring and Culture Guide for Kids
🎨
Ocean Wave Breathing: A Simple Mindfulness Activity for Kids
🎨
A Thanksgiving Feast Table: Coloring Ideas and Fun Facts for Kids
💡
Nurturing Making Mistakes in Art at Home
🎨
Chicken Little: A Classic Story Coloring Guide for Kids
🍎
A Teacher's Guide to Differentiated Art Instruction
🎨
Sugar Making: A Coloring and Food Science Guide for Kids
🖍️
Simple Techniques for Avoiding Smudges While Coloring
🎨
Teaching Open-Mindedness: A Simple Activity for Kids
🔬
The Science Behind Additive Color Mixing
🖍️
Tips for Using Complementary Colors
🎨
Farm Pond Coloring and Drawing Ideas for Kids
🎨
Golem Coloring and Drawing Ideas for Kids
🌈
Relaxing Food and Treats Coloring Activities
🔎
Using Idea Webs to Solve Problems
🎨
How to Draw a Tessellation Pattern: A Step-by-Step Guide
🧠
Exploring Drawing and Attention to Detail
🔎
A Beginner's Guide to Data Visualization Basics
🎨
How to Draw Sports Step by Step
🎨
Fish Harvesting: A Coloring and Food Science Guide for Kids
🔤
Learning Sentence Building Through Drawing
🎨
A Maypole Dance: A Coloring and Movement Guide for Kids
🎨
Drinking Enough Water: A Coloring and Health Guide for Kids
🎨
A Kickball Game: A Coloring and Playtime Guide for Kids
🎨
A Raccoon at the Campsite: Coloring Ideas for Your Next Family Adventure
🎲
Step-by-Step Tic-Tac-Toe Variations
🧒
How Drawing Supports Kindergarteners
🔬
Understanding Why Screens Use RGB
🎨
Neon Markers: A Buying and Technique Guide
🔬
Why Printers Use CMYK Explained for Kids
🎨
Creative Self-Portraits Drawing Exercises
🎨
Leopard Coloring and Drawing Ideas for Kids
🎨
Filling a Water Bowl: A Simple Pet Care Guide for Kids
How Drawing Encourages Imaginary Worlds
🎨
The North Wind and the Sun: A Classic Story Coloring Guide for Kids
🎨
Tornado Coloring Page: A Nature Learning Guide for Kids
🎨
Cow Milking: A Coloring and Food Science Guide for Kids
🎨
American Football Coloring Pages and Drawing Ideas for Kids
🎨
A Sink or Float Test: A Step-by-Step Science Guide for Kids
💗
Exploring Art and Relaxation Through Art
✏️
Fun Exercises for Warm-Up Drawing Exercises
🎨
Canyon Layers Coloring Page: A Nature Learning Guide for Kids
🔤
Using Coloring Pages to Teach Opposites
🎨
Witch Coloring and Drawing Ideas for Kids
🎨
Writing a Thank You Note: A Simple Life Skill for Kids
🧘
Why Mindful Coloring for Beginners Feels Calming
🎨
Sagrada Familia: Coloring Page and Fun Facts for Kids
🎨
Rumpelstiltskin: A Classic Story Coloring Guide for Kids
🎨
Choosing a Coloring Book for Adults: A Buying and Technique Guide
🎨
Sports Drawing Prompts for Beginners
🏺
How Ancient Art Materials Shaped Human Communication
🎨
A Ship's Cannon Coloring and Drawing Ideas for Kids
🧠
Why Drawing Can Help With Critical Thinking
🎨
Pufferfish Coloring and Drawing Ideas for Kids
🎨
A Castle Under a Full Moon: A Medieval Coloring and History Guide for Kids
🎨
A Sailboat Race Coloring and Drawing Ideas for Kids
🎨
How to Draw Farm Life Step by Step
🎨
A Robot Orchestra: A Coloring and Invention Guide for Kids
🍂
Seasonal Coloring Guide: Winter
🎨
Farm Tractor Scene Coloring and Drawing Ideas for Kids
🎨
A Deserted Island Hut Coloring and Drawing Ideas for Kids
🎨
Sphinx Coloring and Drawing Ideas for Kids
💡
Nurturing Inventing New Ideas at Home
🧘
Why Quiet Morning Coloring Feels Calming
🎨
Mount Fuji: Coloring Page and Fun Facts for Kids
🎨
Erasable Colored Pencils: A Buying and Technique Guide
🔎
Exploring Storyboarding for Projects for Students
🎨
A Carnival Mask Coloring and Drawing Ideas for Kids
🎨
An Oven Mitt: A Kitchen Guide for Kids and Parents
🎨
A Toaster: A Kitchen Guide for Kids and Parents
🎨
A Simple Machine Inclined Plane: A Coloring and STEM Guide for Kids
💡
The Role of Artistic Risk-Taking in Children's Art
🌈
Creative Ways to Color Seasonal Scenes
💬
Why Wordless Storytelling Matter in Everyday Life
🎨
A Walking Water Experiment: A Step-by-Step Science Guide for Kids
🎨
a Welcome Home Sign: Free Ideas for Your Next Celebration
🎨
Celery Coloring and Drawing Ideas for Kids
🌈
Printable Fairy Tale Scenes Coloring Activities
🎨
Mahjong Tile Coloring and Drawing Ideas for Kids
🎨
Garter Snake Coloring and Drawing Ideas for Kids
🎨
Millipede Coloring and Drawing Ideas for Kids
💬
How Visual Storytelling Communicate Ideas
🎨
Winter Fireplace Reading: Coloring Ideas and Activities for the Whole Family
🎨
Exploring Brazil: A Coloring and Culture Guide for Kids
🎨
Ocean Wave Breathing: A Simple Mindfulness Activity for Kids
🎨
A Thanksgiving Feast Table: Coloring Ideas and Fun Facts for Kids
💡
Nurturing Making Mistakes in Art at Home
🎨
Chicken Little: A Classic Story Coloring Guide for Kids
🍎
A Teacher's Guide to Differentiated Art Instruction
🎨
Sugar Making: A Coloring and Food Science Guide for Kids
🖍️
Simple Techniques for Avoiding Smudges While Coloring
🎨
Teaching Open-Mindedness: A Simple Activity for Kids
🔬
The Science Behind Additive Color Mixing
🖍️
Tips for Using Complementary Colors
🎨
Farm Pond Coloring and Drawing Ideas for Kids
🎨
Golem Coloring and Drawing Ideas for Kids
🌈
Relaxing Food and Treats Coloring Activities
🔎
Using Idea Webs to Solve Problems
🎨
How to Draw a Tessellation Pattern: A Step-by-Step Guide
🧠
Exploring Drawing and Attention to Detail
🔎
A Beginner's Guide to Data Visualization Basics
🎨
How to Draw Sports Step by Step
🎨
Fish Harvesting: A Coloring and Food Science Guide for Kids
🔤
Learning Sentence Building Through Drawing
🎨
A Maypole Dance: A Coloring and Movement Guide for Kids
🎨
Drinking Enough Water: A Coloring and Health Guide for Kids
🎨
A Kickball Game: A Coloring and Playtime Guide for Kids
🎨
A Raccoon at the Campsite: Coloring Ideas for Your Next Family Adventure
🎲
Step-by-Step Tic-Tac-Toe Variations
🧒
How Drawing Supports Kindergarteners
🔬
Understanding Why Screens Use RGB
🎨
Neon Markers: A Buying and Technique Guide
🔬
Why Printers Use CMYK Explained for Kids
🎨
Creative Self-Portraits Drawing Exercises
🎨
Leopard Coloring and Drawing Ideas for Kids
🎨
Filling a Water Bowl: A Simple Pet Care Guide for Kids
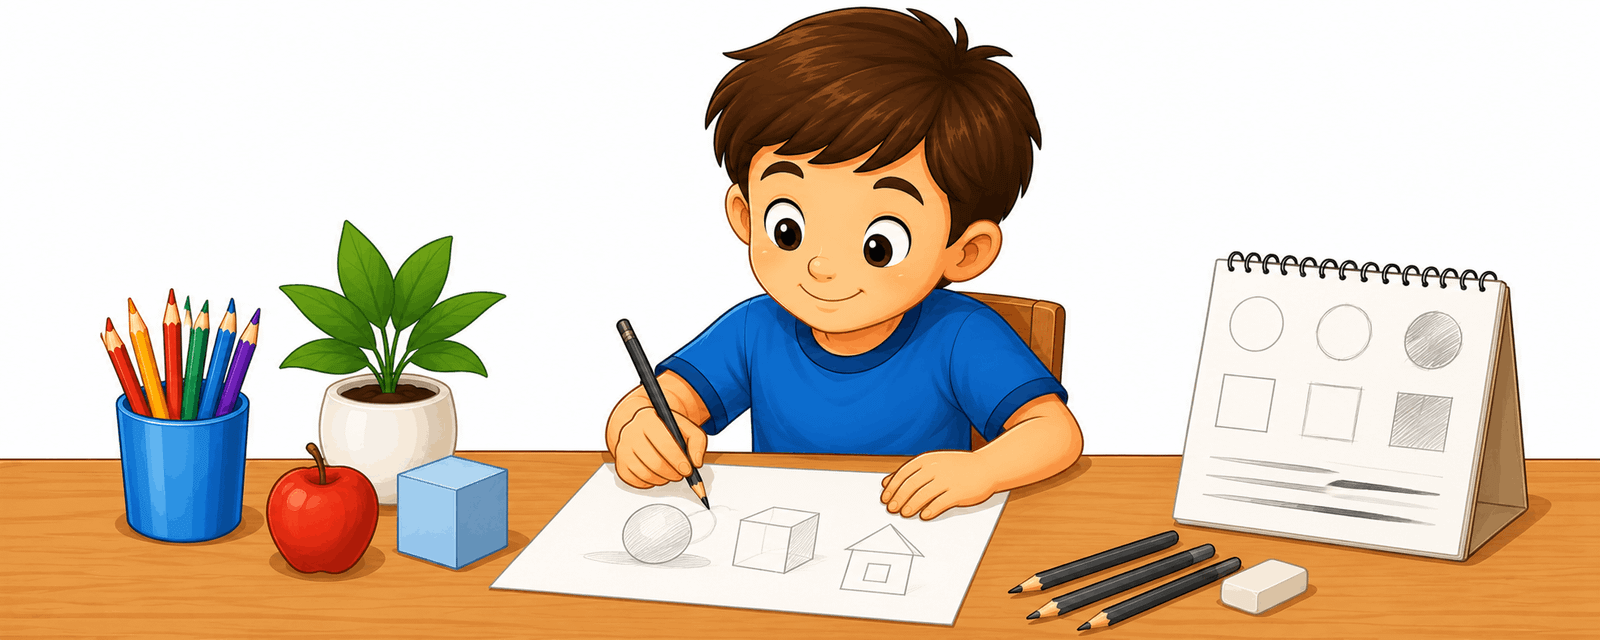 A Beginner's Guide to Sketching Basics
🎨
Easy Vehicles Drawing Ideas
🎨
How to Draw a Kalimba: A Coloring and Music Guide for Kids
🔤
How Pictures Help Children Learn Descriptive Words
🔤
Using Coloring Pages to Teach Emotions and Feelings Words
📴
Making the Most of Outdoor Picnics Without Screens
🎨
Shipwreck Scene Coloring and Drawing Ideas for Kids
🎨
A Working Beehive: A Coloring and Food Science Guide for Kids
💗
The Role of Coloring in Art for Stressful Days
🔤
Visual Vocabulary: Colors in a New Language
🎨
Golden Gate Bridge: Coloring Page and Fun Facts for Kids
🧒
How Drawing Supports The Scribbling Stage
🎨
Brooklyn Bridge: Coloring Page and Fun Facts for Kids
🎨
Breathing Exercise Cards: A Simple Mindfulness Activity for Kids
🎨
Ancient Greek Pottery Art: An Ancient History Coloring Guide for Kids
🔬
What Is Color Theory Basics?
🎨
Farmers Market Stand Coloring Ideas for Kids Who Love to Create
📴
Why Coloring Beats Scrolling on Quiet Time Before Bed
🎨
How to Draw a Batik Pattern: A Step-by-Step Guide
🎨
How to Draw a Cylinder: A Step-by-Step Guide for Kids
✏️
How to Improve Your Drawing Squares and Rectangles
🎲
Fun Sketch Relay Games for Kids
🎨
An Underwater Robot: A Coloring and Invention Guide for Kids
🎨
Spider Coloring and Drawing Ideas for Kids
🧒
Fun Ways to Build Shape Recognition
🔬
The Science Behind Color Theory Basics
🍂
Fun Summer Classroom Coloring Ideas
✏️
Easy Steps to Practice Drawing From Imagination
💡
How Drawing Encourages Creative Confidence
📴
Screen-Free Coloring Ideas for Family Game Nights
🎨
A Spring Umbrella Walk: Coloring Ideas and Activities for the Whole Family
🎨
Sunset Over the Ocean Coloring Page: A Nature Learning Guide for Kids
🎨
A Sushi Platter: Coloring Ideas and Fun Facts for Kids
🎨
A Parrot on a Shoulder Coloring and Drawing Ideas for Kids
🎨
Beach Flip-Flops: Coloring Ideas and Activities for the Whole Family
🎨
Rhino Coloring and Drawing Ideas for Kids
👨👩👧
Coloring Ideas for Travel-Friendly Activities
🧠
How Drawing May Support Attention to Detail
🎨
A Cleaning Robot: A Coloring and Invention Guide for Kids
🎨
A Circus Band Coloring and Drawing Ideas for Kids
🔤
How Pictures Help Children Learn Action Words
🎨
Sushi Coloring Ideas for Kids Who Love to Create
🎨
A Shape-Shifting Superhero: A Superhero Coloring and Design Guide for Kids
🎨
Cockroach Coloring and Drawing Ideas for Kids
🎨
Ergonomic Grip Tools: A Buying and Technique Guide
👨👩👧
Creative Birthday Party Activities for Kids
🧒
A Parent's Guide to Ages 6-7
🎨
Old King Cole: A Nursery Rhyme Coloring Guide for Kids
🎨
A Sailboat on the Horizon Coloring and Drawing Ideas for Kids
🍎
Classroom Ideas: Cross-Curricular Art Lessons
💬
Why Symbols and Icons Matter in Everyday Life
🎨
Muffins Coloring Ideas for Kids Who Love to Create
🎨
Brushing and Flossing: A Coloring and Health Guide for Kids
🎨
A Campfire Sing-Along: Coloring Ideas for Your Next Family Adventure
🍂
Celebrate Summer With Coloring Activities
🎨
A Beach Bonfire Sing-Along Coloring and Drawing Ideas for Kids
💬
From Cave Drawings to Visual Instructions
💡
The Role of Character Design in Children's Art
🎨
Eel Coloring and Drawing Ideas for Kids
👨👩👧
Coloring Ideas for Outdoor-Inspired Drawing
🎨
Elf Coloring and Drawing Ideas for Kids
🎨
A Weather Satellite: A Coloring and Space Mission Guide for Kids
💗
How Drawing Supports Creative Outlets for Teens
💡
How Drawing Encourages Making Mistakes in Art
🎨
A Barrel of Supplies Coloring and Drawing Ideas for Kids
📴
Why Coloring Beats Scrolling on Family Game Nights
🎨
Petra: Coloring Page and Fun Facts for Kids
🎨
Meet Art Deco Style: An Art Appreciation Guide for Kids
🎨
Creative Original Superhero Characters Drawing Exercises
🎨
A Carnival Photo Booth Coloring and Drawing Ideas for Kids
🍎
How Teachers Can Use Classroom Management Through Art
🌈
Relaxing Insects and Bugs Coloring Activities
🎨
Gradient Blending Technique: A Buying and Technique Guide
🎨
Everyday Objects Drawing Prompts for Beginners
🍎
How Teachers Can Use Differentiated Art Instruction
💗
Understanding Emotional Expression
🎨
London Bridge: A Coloring and Playtime Guide for Kids
🧘
Why Deep Breathing and Coloring Feels Calming
🎨
Aztec Warriors: An Ancient History Coloring Guide for Kids
🎨
A Tutu and Ballet Shoes: A Coloring and Movement Guide for Kids
🎨
Cardstock vs. Regular Paper: A Practical Guide
🎨
Pasta Bowl Coloring Ideas for Kids Who Love to Create
✏️
Fun Exercises for Drawing Squares and Rectangles
🎨
Meet Impressionism: An Art Appreciation Guide for Kids
🎨
Gingerbread House Coloring Ideas for Kids Who Love to Create
💗
Creative Approaches to Creative Journaling
🎨
A Balanced Meal: A Coloring and Health Guide for Kids
💡
Why Visual Brainstorming Matters for Young Artists
🧘
Why Repetitive Pattern Coloring Feels Calming
🎨
Metallic Gel Pens: A Buying and Technique Guide
🎨
Hula Hoop Coloring Pages and Drawing Ideas for Kids
🎨
Platypus Coloring and Drawing Ideas for Kids
🎨
Teaching Creativity: A Simple Activity for Kids
🎨
Teaching Flexibility: A Simple Activity for Kids
🎨
A Plant-Power Superhero: A Superhero Coloring and Design Guide for Kids
🎨
Ancient Celtic Warriors: An Ancient History Coloring Guide for Kids
🧒
Fun Ways to Build Children Who Dislike Drawing
🎨
a Puzzle Activity Sheet: Free Ideas for Your Next Celebration
🎨
Exploring A Rocket Launch: A Coloring and Learning Guide for Kids
🔬
A Simple Guide to Warm and Cool Colors
🎨
Mango Coloring and Drawing Ideas for Kids
🎨
A Building Challenge with Blocks: A Coloring and STEM Guide for Kids
🖌️
Simple Steps for Working With Light and Shadow
✏️
Fun Exercises for Drawing Simple Animals
🎨
A Sunny Beach Day Picnic Basket Coloring and Drawing Ideas for Kids
🍎
Simple Art Lessons for History Class for Busy Classrooms
🎨
Exercise and Moving Your Body: A Coloring and Health Guide for Kids
🎲
Fun Drawing Challenges for Kids
🧠
Exploring Drawing and Hand-Eye Coordination
🎨
A Rainbow in a Jar: A Step-by-Step Science Guide for Kids
🏺
Exploring Petroglyphs and Rock Art
🎨
a Dot-to-Dot Printable: Free Ideas for Your Next Celebration
🎨
A Dodgeball Match: A Coloring and Playtime Guide for Kids
🎨
Hibiscus Flower: A Coloring and Nature Guide for Kids
✏️
Easy Steps to Practice Choosing Your First Pencil
🍂
Printable Birthday Celebrations Coloring Pages for Kids
🎨
Cleaning a Hamster Cage: A Simple Pet Care Guide for Kids
🎨
Aladdin and the Magic Lamp: A Classic Story Coloring Guide for Kids
🧘
Exploring Deep Breathing and Coloring
🎨
This Little Piggy: A Nursery Rhyme Coloring Guide for Kids
🎨
A Beach Ball Coloring and Drawing Ideas for Kids
🎨
A School Bus Ride: A Classroom Coloring and Learning Guide
🎨
Chicken Egg Laying: A Coloring and Food Science Guide for Kids
🎨
The Heart and How It Beats: A Coloring and Health Guide for Kids
🎨
Fruit Smoothie Bar Coloring Ideas for Kids Who Love to Create
🎨
A Winter Frosty Window: Coloring Ideas and Activities for the Whole Family
👨👩👧
Why Parents Love Birthday Party Activities
🎨
Humpback Whale Coloring and Drawing Ideas for Kids
🎨
The Roman Colosseum: An Ancient History Coloring Guide for Kids
🎨
Puppy Coloring and Drawing Ideas for Kids
🎨
Follow the Leader: A Coloring and Playtime Guide for Kids
🔎
Exploring Organizing Research With Sketches for Students
🔬
The Science Behind Color Contrast
🎨
Rowing Coloring Pages and Drawing Ideas for Kids
🎨
Tyrannosaurus Rex Coloring Page: Fun Facts for Young Paleontologists
🎨
Pterodactyl Coloring Page: Fun Facts for Young Paleontologists
🎨
Meet the Dentist: A Community Helper Coloring Guide
🔎
Using Sketch Journaling to Solve Problems
🔬
How Light Creates Color Explained for Kids
🏺
Why Ancient Art Materials Matter to Historians
🧠
The Link Between Drawing and Concentration and Focus
🎨
An Engineering Challenge Bridge: A Coloring and STEM Guide for Kids
🎨
A Pet's Cozy Blanket: A Simple Pet Care Guide for Kids
🔬
Understanding Subtractive Color Mixing
🧘
How Deep Breathing and Coloring Can Create a Quiet Moment
🎨
How to Draw a Chevron Pattern: A Step-by-Step Guide
👨👩👧
Making the Most of Sibling Bonding Activities
📐
Teaching Angles Through Coloring and Drawing
🔬
A Simple Guide to Digital vs Traditional Color
🍎
How Teachers Can Use Substitute Teacher Activities
🎨
A Kids' Garden Club: A Gardening Guide for Kids and Families
🎨
Teaching Honesty: A Simple Activity for Kids
🎨
A Medieval Fair with Jugglers: A Medieval Coloring and History Guide for Kids
🎨
The Monkey and the Crocodile: A Classic Story Coloring Guide for Kids
🎨
Easy Castles Drawing Ideas
✏️
Fun Exercises for Drawing Curved Lines
🎨
Grocery Food Delivery: A Coloring and Food Science Guide for Kids
🍎
Simple Substitute Teacher Activities for Busy Classrooms
🎨
A Butterfly Garden: A Gardening Guide for Kids and Families
🧒
Drawing Activities for Pencil Grip Development
💡
Nurturing Creative Problem-Solving at Home
🎨
Curly Locks: A Nursery Rhyme Coloring Guide for Kids
🎨
A Kids' Emergency Contact Bracelet: A Family Safety Guide
🎨
Goldfish Coloring and Drawing Ideas for Kids
💡
How Drawing Encourages Combining Ideas
🎨
Toy Robot Coloring and Drawing Ideas for Kids
A Beginner's Guide to Sketching Basics
🎨
Easy Vehicles Drawing Ideas
🎨
How to Draw a Kalimba: A Coloring and Music Guide for Kids
🔤
How Pictures Help Children Learn Descriptive Words
🔤
Using Coloring Pages to Teach Emotions and Feelings Words
📴
Making the Most of Outdoor Picnics Without Screens
🎨
Shipwreck Scene Coloring and Drawing Ideas for Kids
🎨
A Working Beehive: A Coloring and Food Science Guide for Kids
💗
The Role of Coloring in Art for Stressful Days
🔤
Visual Vocabulary: Colors in a New Language
🎨
Golden Gate Bridge: Coloring Page and Fun Facts for Kids
🧒
How Drawing Supports The Scribbling Stage
🎨
Brooklyn Bridge: Coloring Page and Fun Facts for Kids
🎨
Breathing Exercise Cards: A Simple Mindfulness Activity for Kids
🎨
Ancient Greek Pottery Art: An Ancient History Coloring Guide for Kids
🔬
What Is Color Theory Basics?
🎨
Farmers Market Stand Coloring Ideas for Kids Who Love to Create
📴
Why Coloring Beats Scrolling on Quiet Time Before Bed
🎨
How to Draw a Batik Pattern: A Step-by-Step Guide
🎨
How to Draw a Cylinder: A Step-by-Step Guide for Kids
✏️
How to Improve Your Drawing Squares and Rectangles
🎲
Fun Sketch Relay Games for Kids
🎨
An Underwater Robot: A Coloring and Invention Guide for Kids
🎨
Spider Coloring and Drawing Ideas for Kids
🧒
Fun Ways to Build Shape Recognition
🔬
The Science Behind Color Theory Basics
🍂
Fun Summer Classroom Coloring Ideas
✏️
Easy Steps to Practice Drawing From Imagination
💡
How Drawing Encourages Creative Confidence
📴
Screen-Free Coloring Ideas for Family Game Nights
🎨
A Spring Umbrella Walk: Coloring Ideas and Activities for the Whole Family
🎨
Sunset Over the Ocean Coloring Page: A Nature Learning Guide for Kids
🎨
A Sushi Platter: Coloring Ideas and Fun Facts for Kids
🎨
A Parrot on a Shoulder Coloring and Drawing Ideas for Kids
🎨
Beach Flip-Flops: Coloring Ideas and Activities for the Whole Family
🎨
Rhino Coloring and Drawing Ideas for Kids
👨👩👧
Coloring Ideas for Travel-Friendly Activities
🧠
How Drawing May Support Attention to Detail
🎨
A Cleaning Robot: A Coloring and Invention Guide for Kids
🎨
A Circus Band Coloring and Drawing Ideas for Kids
🔤
How Pictures Help Children Learn Action Words
🎨
Sushi Coloring Ideas for Kids Who Love to Create
🎨
A Shape-Shifting Superhero: A Superhero Coloring and Design Guide for Kids
🎨
Cockroach Coloring and Drawing Ideas for Kids
🎨
Ergonomic Grip Tools: A Buying and Technique Guide
👨👩👧
Creative Birthday Party Activities for Kids
🧒
A Parent's Guide to Ages 6-7
🎨
Old King Cole: A Nursery Rhyme Coloring Guide for Kids
🎨
A Sailboat on the Horizon Coloring and Drawing Ideas for Kids
🍎
Classroom Ideas: Cross-Curricular Art Lessons
💬
Why Symbols and Icons Matter in Everyday Life
🎨
Muffins Coloring Ideas for Kids Who Love to Create
🎨
Brushing and Flossing: A Coloring and Health Guide for Kids
🎨
A Campfire Sing-Along: Coloring Ideas for Your Next Family Adventure
🍂
Celebrate Summer With Coloring Activities
🎨
A Beach Bonfire Sing-Along Coloring and Drawing Ideas for Kids
💬
From Cave Drawings to Visual Instructions
💡
The Role of Character Design in Children's Art
🎨
Eel Coloring and Drawing Ideas for Kids
👨👩👧
Coloring Ideas for Outdoor-Inspired Drawing
🎨
Elf Coloring and Drawing Ideas for Kids
🎨
A Weather Satellite: A Coloring and Space Mission Guide for Kids
💗
How Drawing Supports Creative Outlets for Teens
💡
How Drawing Encourages Making Mistakes in Art
🎨
A Barrel of Supplies Coloring and Drawing Ideas for Kids
📴
Why Coloring Beats Scrolling on Family Game Nights
🎨
Petra: Coloring Page and Fun Facts for Kids
🎨
Meet Art Deco Style: An Art Appreciation Guide for Kids
🎨
Creative Original Superhero Characters Drawing Exercises
🎨
A Carnival Photo Booth Coloring and Drawing Ideas for Kids
🍎
How Teachers Can Use Classroom Management Through Art
🌈
Relaxing Insects and Bugs Coloring Activities
🎨
Gradient Blending Technique: A Buying and Technique Guide
🎨
Everyday Objects Drawing Prompts for Beginners
🍎
How Teachers Can Use Differentiated Art Instruction
💗
Understanding Emotional Expression
🎨
London Bridge: A Coloring and Playtime Guide for Kids
🧘
Why Deep Breathing and Coloring Feels Calming
🎨
Aztec Warriors: An Ancient History Coloring Guide for Kids
🎨
A Tutu and Ballet Shoes: A Coloring and Movement Guide for Kids
🎨
Cardstock vs. Regular Paper: A Practical Guide
🎨
Pasta Bowl Coloring Ideas for Kids Who Love to Create
✏️
Fun Exercises for Drawing Squares and Rectangles
🎨
Meet Impressionism: An Art Appreciation Guide for Kids
🎨
Gingerbread House Coloring Ideas for Kids Who Love to Create
💗
Creative Approaches to Creative Journaling
🎨
A Balanced Meal: A Coloring and Health Guide for Kids
💡
Why Visual Brainstorming Matters for Young Artists
🧘
Why Repetitive Pattern Coloring Feels Calming
🎨
Metallic Gel Pens: A Buying and Technique Guide
🎨
Hula Hoop Coloring Pages and Drawing Ideas for Kids
🎨
Platypus Coloring and Drawing Ideas for Kids
🎨
Teaching Creativity: A Simple Activity for Kids
🎨
Teaching Flexibility: A Simple Activity for Kids
🎨
A Plant-Power Superhero: A Superhero Coloring and Design Guide for Kids
🎨
Ancient Celtic Warriors: An Ancient History Coloring Guide for Kids
🧒
Fun Ways to Build Children Who Dislike Drawing
🎨
a Puzzle Activity Sheet: Free Ideas for Your Next Celebration
🎨
Exploring A Rocket Launch: A Coloring and Learning Guide for Kids
🔬
A Simple Guide to Warm and Cool Colors
🎨
Mango Coloring and Drawing Ideas for Kids
🎨
A Building Challenge with Blocks: A Coloring and STEM Guide for Kids
🖌️
Simple Steps for Working With Light and Shadow
✏️
Fun Exercises for Drawing Simple Animals
🎨
A Sunny Beach Day Picnic Basket Coloring and Drawing Ideas for Kids
🍎
Simple Art Lessons for History Class for Busy Classrooms
🎨
Exercise and Moving Your Body: A Coloring and Health Guide for Kids
🎲
Fun Drawing Challenges for Kids
🧠
Exploring Drawing and Hand-Eye Coordination
🎨
A Rainbow in a Jar: A Step-by-Step Science Guide for Kids
🏺
Exploring Petroglyphs and Rock Art
🎨
a Dot-to-Dot Printable: Free Ideas for Your Next Celebration
🎨
A Dodgeball Match: A Coloring and Playtime Guide for Kids
🎨
Hibiscus Flower: A Coloring and Nature Guide for Kids
✏️
Easy Steps to Practice Choosing Your First Pencil
🍂
Printable Birthday Celebrations Coloring Pages for Kids
🎨
Cleaning a Hamster Cage: A Simple Pet Care Guide for Kids
🎨
Aladdin and the Magic Lamp: A Classic Story Coloring Guide for Kids
🧘
Exploring Deep Breathing and Coloring
🎨
This Little Piggy: A Nursery Rhyme Coloring Guide for Kids
🎨
A Beach Ball Coloring and Drawing Ideas for Kids
🎨
A School Bus Ride: A Classroom Coloring and Learning Guide
🎨
Chicken Egg Laying: A Coloring and Food Science Guide for Kids
🎨
The Heart and How It Beats: A Coloring and Health Guide for Kids
🎨
Fruit Smoothie Bar Coloring Ideas for Kids Who Love to Create
🎨
A Winter Frosty Window: Coloring Ideas and Activities for the Whole Family
👨👩👧
Why Parents Love Birthday Party Activities
🎨
Humpback Whale Coloring and Drawing Ideas for Kids
🎨
The Roman Colosseum: An Ancient History Coloring Guide for Kids
🎨
Puppy Coloring and Drawing Ideas for Kids
🎨
Follow the Leader: A Coloring and Playtime Guide for Kids
🔎
Exploring Organizing Research With Sketches for Students
🔬
The Science Behind Color Contrast
🎨
Rowing Coloring Pages and Drawing Ideas for Kids
🎨
Tyrannosaurus Rex Coloring Page: Fun Facts for Young Paleontologists
🎨
Pterodactyl Coloring Page: Fun Facts for Young Paleontologists
🎨
Meet the Dentist: A Community Helper Coloring Guide
🔎
Using Sketch Journaling to Solve Problems
🔬
How Light Creates Color Explained for Kids
🏺
Why Ancient Art Materials Matter to Historians
🧠
The Link Between Drawing and Concentration and Focus
🎨
An Engineering Challenge Bridge: A Coloring and STEM Guide for Kids
🎨
A Pet's Cozy Blanket: A Simple Pet Care Guide for Kids
🔬
Understanding Subtractive Color Mixing
🧘
How Deep Breathing and Coloring Can Create a Quiet Moment
🎨
How to Draw a Chevron Pattern: A Step-by-Step Guide
👨👩👧
Making the Most of Sibling Bonding Activities
📐
Teaching Angles Through Coloring and Drawing
🔬
A Simple Guide to Digital vs Traditional Color
🍎
How Teachers Can Use Substitute Teacher Activities
🎨
A Kids' Garden Club: A Gardening Guide for Kids and Families
🎨
Teaching Honesty: A Simple Activity for Kids
🎨
A Medieval Fair with Jugglers: A Medieval Coloring and History Guide for Kids
🎨
The Monkey and the Crocodile: A Classic Story Coloring Guide for Kids
🎨
Easy Castles Drawing Ideas
✏️
Fun Exercises for Drawing Curved Lines
🎨
Grocery Food Delivery: A Coloring and Food Science Guide for Kids
🍎
Simple Substitute Teacher Activities for Busy Classrooms
🎨
A Butterfly Garden: A Gardening Guide for Kids and Families
🧒
Drawing Activities for Pencil Grip Development
💡
Nurturing Creative Problem-Solving at Home
🎨
Curly Locks: A Nursery Rhyme Coloring Guide for Kids
🎨
A Kids' Emergency Contact Bracelet: A Family Safety Guide
🎨
Goldfish Coloring and Drawing Ideas for Kids
💡
How Drawing Encourages Combining Ideas
🎨
Toy Robot Coloring and Drawing Ideas for Kids
 A Beginner's Guide to Drawing Straight Lines
🎨
Pheasant Coloring Page Ideas for Kids
🔬
Color Contrast Explained for Kids
🎨
The Letter U: An Alphabet and Number Coloring Page
🎨
Chess Piece Coloring and Drawing Ideas for Kids
🎨
A Kids' First Purchase Decision: A Money Guide for Kids and Parents
🎨
Exploring Scotland: A Coloring and Culture Guide for Kids
🎨
Building a Coloring Page Rotation System: A Practical Guide
🎨
A Vet Check-Up for a Pet: A Simple Pet Care Guide for Kids
🌈
Relaxing Weather Scenes Coloring Activities
🎨
The Lantern Festival: Coloring Ideas and Fun Facts for Kids
🎨
Resting When You're Sick: A Coloring and Health Guide for Kids
🎨
Swimming Coloring Pages and Drawing Ideas for Kids
🎨
A Beginner's Guide to Drawing Vehicles
🍂
Seasonal Coloring Guide: Independence Day
🎨
A Simple Maze Algorithm: A Coloring and STEM Guide for Kids
🍂
Creative Autumn Coloring Projects for Classrooms
💡
Building Daydreaming Through Coloring and Drawing
🎨
Meet Frida Kahlo: An Art Appreciation Guide for Kids
A Beginner's Guide to Drawing Straight Lines
🎨
Pheasant Coloring Page Ideas for Kids
🔬
Color Contrast Explained for Kids
🎨
The Letter U: An Alphabet and Number Coloring Page
🎨
Chess Piece Coloring and Drawing Ideas for Kids
🎨
A Kids' First Purchase Decision: A Money Guide for Kids and Parents
🎨
Exploring Scotland: A Coloring and Culture Guide for Kids
🎨
Building a Coloring Page Rotation System: A Practical Guide
🎨
A Vet Check-Up for a Pet: A Simple Pet Care Guide for Kids
🌈
Relaxing Weather Scenes Coloring Activities
🎨
The Lantern Festival: Coloring Ideas and Fun Facts for Kids
🎨
Resting When You're Sick: A Coloring and Health Guide for Kids
🎨
Swimming Coloring Pages and Drawing Ideas for Kids
🎨
A Beginner's Guide to Drawing Vehicles
🍂
Seasonal Coloring Guide: Independence Day
🎨
A Simple Maze Algorithm: A Coloring and STEM Guide for Kids
🍂
Creative Autumn Coloring Projects for Classrooms
💡
Building Daydreaming Through Coloring and Drawing
🎨
Meet Frida Kahlo: An Art Appreciation Guide for Kids
 A Beginner's Guide to Drawing Squares and Rectangles
🎨
Exploring A Mars Rover: A Coloring and Learning Guide for Kids
🎨
A Garden Trellis: A Gardening Guide for Kids and Families
🎨
A Pet's Vaccination Visit: A Simple Pet Care Guide for Kids
🎨
Lizard Coloring and Drawing Ideas for Kids
🎨
Bye Baby Bunting: A Nursery Rhyme Coloring Guide for Kids
🔤
Learning Everyday Objects Through Drawing
💡
Why Creative Confidence Matters for Young Artists
👨👩👧
Easy After-School Activities With Coloring Pages
👨👩👧
Coloring Ideas for Birthday Party Activities
🎨
A Dutch Traditional Clogs and Cap: A Coloring and Culture Guide for Kids
🏺
Why Prehistoric Drawing Tools Matter to Historians
🍎
Classroom Ideas: Group Art Projects
🧠
How Drawing May Support Creative Thinking
🎨
A Hand of Playing Cards Coloring and Drawing Ideas for Kids
🎨
A Camping Hammock: Coloring Ideas for Your Next Family Adventure
🎨
Meet Sketching Outdoors: An Art Appreciation Guide for Kids
🎨
Respecting a Teacher's Instructions: A Simple Social Skill for Kids
🎨
White House: Coloring Page and Fun Facts for Kids
🎨
A Superhero Sidekick: A Superhero Coloring and Design Guide for Kids
🎨
Onion Coloring and Drawing Ideas for Kids
🎨
Iguanodon Coloring Page: Fun Facts for Young Paleontologists
🎨
Summer Sprinkler Play: Coloring Ideas and Activities for the Whole Family
👨👩👧
Easy Summer Break Activities With Coloring Pages
🧒
A Parent's Guide to First-Time Artists
🍂
Seasonal Coloring Guide: Christmas
🎨
A Space Garden Experiment: A Coloring and Space Mission Guide for Kids
🎨
Teaching Thoughtfulness: A Simple Activity for Kids
🌈
Emotions and Faces Coloring Ideas for Classrooms
🎨
Creative Space and Planets Drawing Exercises
🎨
A Hanukkah Menorah: Coloring Ideas and Fun Facts for Kids
🎨
Creative Fantasy Creatures Drawing Exercises
🎨
A Classroom Chalkboard: A Classroom Coloring and Learning Guide
🎨
Apple Orchard Coloring and Drawing Ideas for Kids
🎨
A Potted Herb Garden: A Coloring and Nature Guide for Kids
🎨
A Prairie Homestead: A Wild West Coloring and History Guide for Kids
🎨
Fun Sailboat Coloring and Drawing Ideas for Kids
✏️
Easy Steps to Practice Drawing Paper Types
🎨
A Kite Flying Over the Beach Coloring and Drawing Ideas for Kids
🎨
The Letter A: An Alphabet and Number Coloring Page
💡
How Drawing Encourages Artistic Risk-Taking
🎨
Chinese New Year Coloring Ideas and Activities for the Whole Family
🖍️
Simple Techniques for Coloring Inside the Lines
👨👩👧
Creative Grandparent and Grandchild Activities for Kids
🔬
RGB Color Mixing Explained for Kids
🏺
Exploring Ancient Cave Pigments
💬
Understanding Visual Instructions
🎨
A Coding Camp Classroom: A Coloring and STEM Guide for Kids
🎨
Sea Turtle Coloring and Drawing Ideas for Kids
🎨
Tuatara Coloring and Drawing Ideas for Kids
🎨
Choosing a Coloring Book for Kids: A Buying and Technique Guide
🎨
A Popcorn Cart Coloring and Drawing Ideas for Kids
🎨
An Ancient King's Throne Room: An Ancient History Coloring Guide for Kids
🎨
A Holi Color Festival: Coloring Ideas and Fun Facts for Kids
🎨
A Jollof Rice Pot: Coloring Ideas and Fun Facts for Kids
🌈
Mandalas Coloring Ideas for Classrooms
🎨
Meet Yayoi Kusama: An Art Appreciation Guide for Kids
🎨
Skink Coloring and Drawing Ideas for Kids
🎨
Meet the Baker: A Community Helper Coloring Guide
🎨
A Rooftop Under Construction Coloring and Drawing Ideas for Kids
✏️
Easy Steps to Practice Drawing Circles
🎨
How to Draw a A Shape Inside a Shape: A Step-by-Step Guide for Kids
💬
Understanding Emojis and Modern Pictograms
🎨
A Garden Path of Stepping Stones: A Gardening Guide for Kids and Families
🎨
Polar Bear Coloring and Drawing Ideas for Kids
🎨
A Friendly Android: A Coloring and Invention Guide for Kids
🏺
How Ancient Pottery Art Shaped Human Communication
🎨
A Garden Gnome: A Gardening Guide for Kids and Families
🌈
Fun Animals Coloring Pages for Kids
🧠
Exploring Drawing and Creative Thinking
🎨
A Tumbleweed Rolling By: A Wild West Coloring and History Guide for Kids
🎨
A Boardwalk Cotton Candy Stand Coloring and Drawing Ideas for Kids
💗
Exploring Family Art Time and Connection Through Art
🎨
Curling Coloring Pages and Drawing Ideas for Kids
🎨
Chinchilla Coloring and Drawing Ideas for Kids
✏️
Fun Exercises for Holding a Pencil Correctly
🎨
A Spacewalk Repair: A Coloring and Space Mission Guide for Kids
🎨
A Friendly Robot: A Coloring and Invention Guide for Kids
🖍️
A Beginner's Guide to Coloring Small Details
🖍️
Why Choosing a Color Palette Makes a Difference
🎨
Fun Cable Car Coloring and Drawing Ideas for Kids
🎨
A Rube Goldberg Contraption: A Coloring and STEM Guide for Kids
🎨
Mother's Day Coloring Ideas and Activities for the Whole Family
🎨
A Kids' Budgeting Notebook: A Money Guide for Kids and Parents
🎨
Alligator Coloring and Drawing Ideas for Kids
🎨
A Beach Towel and Cooler Coloring and Drawing Ideas for Kids
🎨
How to Draw a Double Bass: A Coloring and Music Guide for Kids
🎨
A Home Emergency Supply List: A Family Safety Guide
🎨
a Thinking of You Card: Free Ideas for Your Next Celebration
💗
Exploring Creative Outlets for Teens Through Art
🍎
Simple Differentiated Art Instruction for Busy Classrooms
🎲
Fun Storyboard Games for Kids
📐
Fun Drawing Activities for Geometry
🎨
A Cowboy on a Horse: A Wild West Coloring and History Guide for Kids
🎨
An Inuit Traditional Parka: A Coloring and Culture Guide for Kids
🎨
The Brain and Thinking: A Coloring and Health Guide for Kids
🎨
Croissant Coloring Ideas for Kids Who Love to Create
🌈
Fun Emotions and Faces Coloring Pages for Kids
🎨
A Mountain Overlook: Coloring Ideas for Your Next Family Adventure
🎨
Meet Piet Mondrian: An Art Appreciation Guide for Kids
🔎
How Brainstorming With Pictures Support Learning
🎨
Digital Coloring Apps: A Buying and Technique Guide
🎨
A Funhouse Slide Coloring and Drawing Ideas for Kids
🎨
Counting Coins: A Simple Life Skill for Kids
🧒
What to Expect When Teaching Children Who Dislike Drawing
🧒
Understanding Preschoolers in Early Childhood
🏺
Exploring Ancient Art Materials
🎨
A 3D Printer at Work: A Coloring and STEM Guide for Kids
🎨
Fun Garbage Truck Coloring and Drawing Ideas for Kids
🎨
Therizinosaurus Coloring Page: Fun Facts for Young Paleontologists
🎨
Judging Criteria for Coloring Contests: A Practical Guide
🔤
Using Coloring Pages to Teach Numbers in a New Language
🎨
Vaccines and Staying Healthy: A Coloring and Health Guide for Kids
🎨
Forest Guardian Coloring and Drawing Ideas for Kids
🎨
Healthy Teeth and Brushing: A Coloring and Health Guide for Kids
🧒
Drawing Activities for First-Time Artists
📴
Making the Most of Weekend Mornings Without Screens
🎨
Mission Control: A Coloring and Space Mission Guide for Kids
🎨
A Robot Arm: A Coloring and Invention Guide for Kids
✏️
Fun Exercises for Choosing Your First Pencil
💬
Understanding Sign Language and Gesture
🧠
Can Drawing Improve Attention to Detail?
🌈
Creative Ways to Color Everyday Objects
📐
How Children Understand Proportion With Art
🔬
Understanding RGB Color Mixing
🍂
Creative Summer Coloring Projects for Classrooms
🎨
How to Draw a Sun Mandala: A Step-by-Step Guide
🎨
Bubble Wrap Coloring and Drawing Ideas for Kids
🎨
A Castle Chapel: A Medieval Coloring and History Guide for Kids
🎨
How to Draw Self-Portraits Step by Step
🔎
Exploring Brainstorming With Pictures for Students
🎨
How to Draw a Counting to Ten with Shapes: A Step-by-Step Guide for Kids
🎨
Creative Insects Drawing Exercises
🎨
Kids Yoga Poses Coloring Pages and Drawing Ideas for Kids
🎨
Piglet Coloring and Drawing Ideas for Kids
🧒
A Parent's Guide to Drawing Milestones
🎨
Head Shoulders Knees and Toes: A Nursery Rhyme Coloring Guide for Kids
📴
Screen-Free Coloring Ideas for Device-Free Evenings
🎨
Teaching Humility: A Simple Activity for Kids
🎨
Thunderbird Coloring and Drawing Ideas for Kids
🎨
A Traffic Cone Row Coloring and Drawing Ideas for Kids
🎨
Easy Musical Instruments Drawing Ideas
🎨
Exploring A Comet: A Coloring and Learning Guide for Kids
💗
Understanding Building Self-Esteem Through Art
🎨
Brachiosaurus Coloring Page: Fun Facts for Young Paleontologists
🎨
A Beginner's Guide to Drawing Farm Life
🍂
Creative Halloween Coloring Projects for Classrooms
🎨
Compsognathus Coloring Page: Fun Facts for Young Paleontologists
🎨
Salad Bowl Coloring Ideas for Kids Who Love to Create
🎨
Kiwi Bird Coloring Page Ideas for Kids
A Beginner's Guide to Drawing Squares and Rectangles
🎨
Exploring A Mars Rover: A Coloring and Learning Guide for Kids
🎨
A Garden Trellis: A Gardening Guide for Kids and Families
🎨
A Pet's Vaccination Visit: A Simple Pet Care Guide for Kids
🎨
Lizard Coloring and Drawing Ideas for Kids
🎨
Bye Baby Bunting: A Nursery Rhyme Coloring Guide for Kids
🔤
Learning Everyday Objects Through Drawing
💡
Why Creative Confidence Matters for Young Artists
👨👩👧
Easy After-School Activities With Coloring Pages
👨👩👧
Coloring Ideas for Birthday Party Activities
🎨
A Dutch Traditional Clogs and Cap: A Coloring and Culture Guide for Kids
🏺
Why Prehistoric Drawing Tools Matter to Historians
🍎
Classroom Ideas: Group Art Projects
🧠
How Drawing May Support Creative Thinking
🎨
A Hand of Playing Cards Coloring and Drawing Ideas for Kids
🎨
A Camping Hammock: Coloring Ideas for Your Next Family Adventure
🎨
Meet Sketching Outdoors: An Art Appreciation Guide for Kids
🎨
Respecting a Teacher's Instructions: A Simple Social Skill for Kids
🎨
White House: Coloring Page and Fun Facts for Kids
🎨
A Superhero Sidekick: A Superhero Coloring and Design Guide for Kids
🎨
Onion Coloring and Drawing Ideas for Kids
🎨
Iguanodon Coloring Page: Fun Facts for Young Paleontologists
🎨
Summer Sprinkler Play: Coloring Ideas and Activities for the Whole Family
👨👩👧
Easy Summer Break Activities With Coloring Pages
🧒
A Parent's Guide to First-Time Artists
🍂
Seasonal Coloring Guide: Christmas
🎨
A Space Garden Experiment: A Coloring and Space Mission Guide for Kids
🎨
Teaching Thoughtfulness: A Simple Activity for Kids
🌈
Emotions and Faces Coloring Ideas for Classrooms
🎨
Creative Space and Planets Drawing Exercises
🎨
A Hanukkah Menorah: Coloring Ideas and Fun Facts for Kids
🎨
Creative Fantasy Creatures Drawing Exercises
🎨
A Classroom Chalkboard: A Classroom Coloring and Learning Guide
🎨
Apple Orchard Coloring and Drawing Ideas for Kids
🎨
A Potted Herb Garden: A Coloring and Nature Guide for Kids
🎨
A Prairie Homestead: A Wild West Coloring and History Guide for Kids
🎨
Fun Sailboat Coloring and Drawing Ideas for Kids
✏️
Easy Steps to Practice Drawing Paper Types
🎨
A Kite Flying Over the Beach Coloring and Drawing Ideas for Kids
🎨
The Letter A: An Alphabet and Number Coloring Page
💡
How Drawing Encourages Artistic Risk-Taking
🎨
Chinese New Year Coloring Ideas and Activities for the Whole Family
🖍️
Simple Techniques for Coloring Inside the Lines
👨👩👧
Creative Grandparent and Grandchild Activities for Kids
🔬
RGB Color Mixing Explained for Kids
🏺
Exploring Ancient Cave Pigments
💬
Understanding Visual Instructions
🎨
A Coding Camp Classroom: A Coloring and STEM Guide for Kids
🎨
Sea Turtle Coloring and Drawing Ideas for Kids
🎨
Tuatara Coloring and Drawing Ideas for Kids
🎨
Choosing a Coloring Book for Kids: A Buying and Technique Guide
🎨
A Popcorn Cart Coloring and Drawing Ideas for Kids
🎨
An Ancient King's Throne Room: An Ancient History Coloring Guide for Kids
🎨
A Holi Color Festival: Coloring Ideas and Fun Facts for Kids
🎨
A Jollof Rice Pot: Coloring Ideas and Fun Facts for Kids
🌈
Mandalas Coloring Ideas for Classrooms
🎨
Meet Yayoi Kusama: An Art Appreciation Guide for Kids
🎨
Skink Coloring and Drawing Ideas for Kids
🎨
Meet the Baker: A Community Helper Coloring Guide
🎨
A Rooftop Under Construction Coloring and Drawing Ideas for Kids
✏️
Easy Steps to Practice Drawing Circles
🎨
How to Draw a A Shape Inside a Shape: A Step-by-Step Guide for Kids
💬
Understanding Emojis and Modern Pictograms
🎨
A Garden Path of Stepping Stones: A Gardening Guide for Kids and Families
🎨
Polar Bear Coloring and Drawing Ideas for Kids
🎨
A Friendly Android: A Coloring and Invention Guide for Kids
🏺
How Ancient Pottery Art Shaped Human Communication
🎨
A Garden Gnome: A Gardening Guide for Kids and Families
🌈
Fun Animals Coloring Pages for Kids
🧠
Exploring Drawing and Creative Thinking
🎨
A Tumbleweed Rolling By: A Wild West Coloring and History Guide for Kids
🎨
A Boardwalk Cotton Candy Stand Coloring and Drawing Ideas for Kids
💗
Exploring Family Art Time and Connection Through Art
🎨
Curling Coloring Pages and Drawing Ideas for Kids
🎨
Chinchilla Coloring and Drawing Ideas for Kids
✏️
Fun Exercises for Holding a Pencil Correctly
🎨
A Spacewalk Repair: A Coloring and Space Mission Guide for Kids
🎨
A Friendly Robot: A Coloring and Invention Guide for Kids
🖍️
A Beginner's Guide to Coloring Small Details
🖍️
Why Choosing a Color Palette Makes a Difference
🎨
Fun Cable Car Coloring and Drawing Ideas for Kids
🎨
A Rube Goldberg Contraption: A Coloring and STEM Guide for Kids
🎨
Mother's Day Coloring Ideas and Activities for the Whole Family
🎨
A Kids' Budgeting Notebook: A Money Guide for Kids and Parents
🎨
Alligator Coloring and Drawing Ideas for Kids
🎨
A Beach Towel and Cooler Coloring and Drawing Ideas for Kids
🎨
How to Draw a Double Bass: A Coloring and Music Guide for Kids
🎨
A Home Emergency Supply List: A Family Safety Guide
🎨
a Thinking of You Card: Free Ideas for Your Next Celebration
💗
Exploring Creative Outlets for Teens Through Art
🍎
Simple Differentiated Art Instruction for Busy Classrooms
🎲
Fun Storyboard Games for Kids
📐
Fun Drawing Activities for Geometry
🎨
A Cowboy on a Horse: A Wild West Coloring and History Guide for Kids
🎨
An Inuit Traditional Parka: A Coloring and Culture Guide for Kids
🎨
The Brain and Thinking: A Coloring and Health Guide for Kids
🎨
Croissant Coloring Ideas for Kids Who Love to Create
🌈
Fun Emotions and Faces Coloring Pages for Kids
🎨
A Mountain Overlook: Coloring Ideas for Your Next Family Adventure
🎨
Meet Piet Mondrian: An Art Appreciation Guide for Kids
🔎
How Brainstorming With Pictures Support Learning
🎨
Digital Coloring Apps: A Buying and Technique Guide
🎨
A Funhouse Slide Coloring and Drawing Ideas for Kids
🎨
Counting Coins: A Simple Life Skill for Kids
🧒
What to Expect When Teaching Children Who Dislike Drawing
🧒
Understanding Preschoolers in Early Childhood
🏺
Exploring Ancient Art Materials
🎨
A 3D Printer at Work: A Coloring and STEM Guide for Kids
🎨
Fun Garbage Truck Coloring and Drawing Ideas for Kids
🎨
Therizinosaurus Coloring Page: Fun Facts for Young Paleontologists
🎨
Judging Criteria for Coloring Contests: A Practical Guide
🔤
Using Coloring Pages to Teach Numbers in a New Language
🎨
Vaccines and Staying Healthy: A Coloring and Health Guide for Kids
🎨
Forest Guardian Coloring and Drawing Ideas for Kids
🎨
Healthy Teeth and Brushing: A Coloring and Health Guide for Kids
🧒
Drawing Activities for First-Time Artists
📴
Making the Most of Weekend Mornings Without Screens
🎨
Mission Control: A Coloring and Space Mission Guide for Kids
🎨
A Robot Arm: A Coloring and Invention Guide for Kids
✏️
Fun Exercises for Choosing Your First Pencil
💬
Understanding Sign Language and Gesture
🧠
Can Drawing Improve Attention to Detail?
🌈
Creative Ways to Color Everyday Objects
📐
How Children Understand Proportion With Art
🔬
Understanding RGB Color Mixing
🍂
Creative Summer Coloring Projects for Classrooms
🎨
How to Draw a Sun Mandala: A Step-by-Step Guide
🎨
Bubble Wrap Coloring and Drawing Ideas for Kids
🎨
A Castle Chapel: A Medieval Coloring and History Guide for Kids
🎨
How to Draw Self-Portraits Step by Step
🔎
Exploring Brainstorming With Pictures for Students
🎨
How to Draw a Counting to Ten with Shapes: A Step-by-Step Guide for Kids
🎨
Creative Insects Drawing Exercises
🎨
Kids Yoga Poses Coloring Pages and Drawing Ideas for Kids
🎨
Piglet Coloring and Drawing Ideas for Kids
🧒
A Parent's Guide to Drawing Milestones
🎨
Head Shoulders Knees and Toes: A Nursery Rhyme Coloring Guide for Kids
📴
Screen-Free Coloring Ideas for Device-Free Evenings
🎨
Teaching Humility: A Simple Activity for Kids
🎨
Thunderbird Coloring and Drawing Ideas for Kids
🎨
A Traffic Cone Row Coloring and Drawing Ideas for Kids
🎨
Easy Musical Instruments Drawing Ideas
🎨
Exploring A Comet: A Coloring and Learning Guide for Kids
💗
Understanding Building Self-Esteem Through Art
🎨
Brachiosaurus Coloring Page: Fun Facts for Young Paleontologists
🎨
A Beginner's Guide to Drawing Farm Life
🍂
Creative Halloween Coloring Projects for Classrooms
🎨
Compsognathus Coloring Page: Fun Facts for Young Paleontologists
🎨
Salad Bowl Coloring Ideas for Kids Who Love to Create
🎨
Kiwi Bird Coloring Page Ideas for Kids
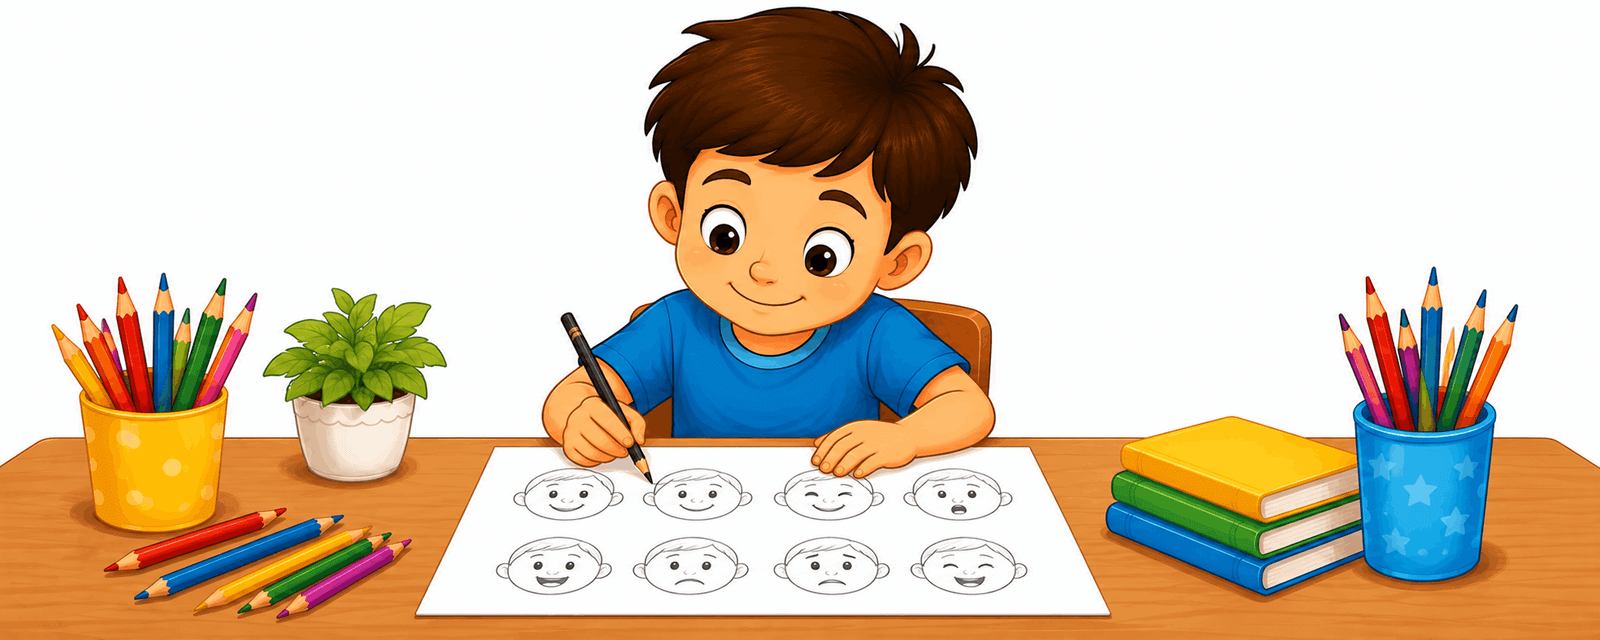 A Beginner's Guide to Drawing Simple Faces
🍎
A Teacher's Guide to Art Lessons for Science Class
🎨
Creative Robots Drawing Exercises
📴
Creative Alternatives to Screens During Sibling Playtime
🎨
How to Draw a Paisley Pattern: A Step-by-Step Guide
🎨
Wolf Coloring and Drawing Ideas for Kids
🎨
A Calm Bedtime Routine: A Coloring and Health Guide for Kids
👨👩👧
Easy Activities for Only Children With Coloring Pages
🎨
How to Draw a Drum Kit: A Coloring and Music Guide for Kids
🎨
Choosing the Best Paper for Coloring Pages: A Practical Guide
🍎
Simple Classroom Coloring Stations for Busy Classrooms
🧠
The Link Between Drawing and Critical Thinking
🎨
How to Draw a Peacock Pattern Mandala: A Step-by-Step Guide
📐
Learning Angles Through Drawing
🎨
A Wild West Mining Town: A Wild West Coloring and History Guide for Kids
🎨
Saving Allowance in a Jar: A Simple Life Skill for Kids
🎲
How to Play Drawing Challenges
🎨
A Re-Entry Capsule: A Coloring and Space Mission Guide for Kids
🎨
A Sheriff's Star Badge: A Wild West Coloring and History Guide for Kids
🎨
Training in a Pool for Zero-G: A Coloring and Space Mission Guide for Kids
🔬
Primary Colors Explained for Kids
🎨
How to Draw a Stripe Pattern: A Step-by-Step Guide
🎨
How to Draw a Star: A Step-by-Step Guide for Kids
🎨
A Hiking Trail: Coloring Ideas for Your Next Family Adventure
🎨
May Day Coloring Ideas and Activities for the Whole Family
🎨
A Space Tourism Rocket: A Coloring and Space Mission Guide for Kids
🎨
A Window Installer Coloring and Drawing Ideas for Kids
🎨
How to Draw a Cello: A Coloring and Music Guide for Kids
🎨
A Jazz Band: A Coloring and Movement Guide for Kids
🎨
Fun Helicopter Coloring and Drawing Ideas for Kids
✏️
How to Improve Your Drawing From Imagination
🎨
Printing in Grayscale: A Practical Guide
💬
The Power of Wordless Storytelling
🎨
A Bread Basket: A Kitchen Guide for Kids and Parents
📴
Screen-Free Coloring Ideas for Restaurant Wait Times
💡
Building Finding Inspiration Through Coloring and Drawing
🧒
A Parent's Guide to Left-Handed Children
🔬
How Eyes Perceive Color Explained for Kids
🧘
Simple Steps for Deep Breathing and Coloring
🧠
Exploring Drawing and Self-Expression
🎨
Sardines Hiding Game: A Coloring and Playtime Guide for Kids
👨👩👧
Easy Low-Mess Activities With Coloring Pages
🧒
A Parent's Guide to Hand-Eye Coordination
🎨
A Beginner's Guide to Drawing Space and Planets
🧠
Why Drawing Can Help With Observation Skills
🎨
Scarecrow Coloring and Drawing Ideas for Kids
🌈
Everyday Objects Coloring Ideas for Classrooms
🏺
The History of Cave Paintings
🎨
A Beginner's Guide to Drawing Family Portraits
📐
Why 3D Shapes and Drawing Go Together
🏺
The History of Hieroglyphics
🎨
Vineyard Grape Growing: A Coloring and Food Science Guide for Kids
🖍️
How to Get Better at Coloring Small Details
🎨
Family Portraits Drawing Prompts for Beginners
🎨
Creative Under the Sea Drawing Exercises
🎨
High Jump Coloring Pages and Drawing Ideas for Kids
🧠
Exploring Drawing and Critical Thinking
🎨
A Medieval Banquet Table: A Medieval Coloring and History Guide for Kids
🎨
Monarch Butterfly Coloring and Drawing Ideas for Kids
🧒
Fun Ways to Build Left-Handed Children
🎨
A Family Recipe Book: A Kitchen Guide for Kids and Parents
🧠
Can Drawing Improve Cognitive Development?
🎨
French Fries Coloring Ideas for Kids Who Love to Create
🎨
Teaching Perseverance: A Simple Activity for Kids
🎨
Anole Lizard Coloring and Drawing Ideas for Kids
🎨
Painted Turtle Coloring and Drawing Ideas for Kids
🌈
A Guide to Jungle Scenes Coloring Pages
🎨
Wizard Coloring and Drawing Ideas for Kids
🎨
A Pirates and Treasure Hunt Game: A Coloring and Playtime Guide for Kids
🎲
Step-by-Step Board Game Design
🎨
Hollywood Sign: Coloring Page and Fun Facts for Kids
🎨
A Force-Field Superhero: A Superhero Coloring and Design Guide for Kids
🎨
Eco-Friendly Coloring Supplies: A Buying and Technique Guide
🎨
A Hungarian Folk Costume: A Coloring and Culture Guide for Kids
🍎
Classroom Ideas: Indoor Recess Activities
🎨
Printing Coloring Pages as Posters: A Practical Guide
💬
From Cave Drawings to Symbols and Icons
🖍️
Tips for Coloring Animals Realistically
📴
Why Coloring Beats Scrolling on Camping Trips
🎨
Angelfish Coloring and Drawing Ideas for Kids
🎨
A Pet's Favorite Walk Route: A Simple Pet Care Guide for Kids
👨👩👧
Coloring Ideas for Rainy Day Activities
🔬
Color Wheels Explained for Kids
🎨
Exploring Finland: A Coloring and Culture Guide for Kids
💬
From Cave Drawings to Infographics
🎨
Archaeopteryx Coloring Page: Fun Facts for Young Paleontologists
🎨
A Family Grocery Budget Trip: A Money Guide for Kids and Parents
🎨
A Royal Procession: A Medieval Coloring and History Guide for Kids
🧘
Why Slow Coloring Practice Feels Calming
🔬
Secondary Colors Explained for Kids
🎨
Understanding the Color Wheel: A Buying and Technique Guide
🎨
Ancient Egyptian Boats on the Nile: An Ancient History Coloring Guide for Kids
🧠
How Drawing May Support Concentration and Focus
🖌️
A Beginner's Guide to Using Watercolor
🎨
Flashlight Tag: A Coloring and Playtime Guide for Kids
📐
Fun Drawing Activities for Spatial Relationships
🎨
Exploring Poland: A Coloring and Culture Guide for Kids
🎨
Exploring the Czech Republic: A Coloring and Culture Guide for Kids
🎨
Fun Cargo Ship Coloring and Drawing Ideas for Kids
🎨
Fun Tow Truck Coloring and Drawing Ideas for Kids
🎨
A Sunhat and Sunglasses: Coloring Ideas and Activities for the Whole Family
🎨
Dandelion: A Coloring and Nature Guide for Kids
🎨
A Frontier General Store: A Wild West Coloring and History Guide for Kids
🎨
Using Good Table Manners: A Simple Life Skill for Kids
🧘
Simple Steps for Coloring for Sensory Breaks
🧒
Understanding Encouraging Reluctant Artists in Early Childhood
🎨
Power Outage Preparedness: A Family Safety Guide
🧠
Can Drawing Improve Hand-Eye Coordination?
🎨
Lemonade Stand Coloring Ideas for Kids Who Love to Create
🎨
Bagel Coloring Ideas for Kids Who Love to Create
🎲
Using Drawing for Pictionary-Style Games
🎨
the Chinese Lantern Festival Coloring Ideas and Activities for the Whole Family
👨👩👧
Why Parents Love Quiet Time Activities
🎨
A Plumber's Pipe Wrench Coloring and Drawing Ideas for Kids
🎨
How to Draw Favorite Foods Step by Step
🧒
Understanding Building Drawing Confidence in Early Childhood
🎨
A Wild West Saloon: A Wild West Coloring and History Guide for Kids
🎨
Goldilocks and the Three Bears: A Classic Story Coloring Guide for Kids
🎨
Exploring Jamaica: A Coloring and Culture Guide for Kids
💗
The Role of Coloring in Drawing Feelings Instead of Words
🎨
A Fall Leaf Pile Jump: Coloring Ideas and Activities for the Whole Family
🎨
Great White Shark Coloring and Drawing Ideas for Kids
🧒
A Parent's Guide to The Pictorial Stage
🍎
How Teachers Can Use End-of-Year Activities
🎨
A Churro Cart: Coloring Ideas and Fun Facts for Kids
🎨
a Pumpkin Patch Trip Coloring Ideas and Activities for the Whole Family
🎨
A Swiss Traditional Dress: A Coloring and Culture Guide for Kids
🎨
Row Row Row Your Boat: A Nursery Rhyme Coloring Guide for Kids
🎲
Drawing Prompt Games: A Creative Twist
🎨
Tortoise Coloring and Drawing Ideas for Kids
🎨
Jackalope Coloring and Drawing Ideas for Kids
🎨
A Sleeping Bag in Space: A Coloring and Space Mission Guide for Kids
🎨
A Ranch with a Windmill: A Wild West Coloring and History Guide for Kids
🎨
Fun Space and Planets Drawing Activities for Kids
A Beginner's Guide to Drawing Simple Faces
🍎
A Teacher's Guide to Art Lessons for Science Class
🎨
Creative Robots Drawing Exercises
📴
Creative Alternatives to Screens During Sibling Playtime
🎨
How to Draw a Paisley Pattern: A Step-by-Step Guide
🎨
Wolf Coloring and Drawing Ideas for Kids
🎨
A Calm Bedtime Routine: A Coloring and Health Guide for Kids
👨👩👧
Easy Activities for Only Children With Coloring Pages
🎨
How to Draw a Drum Kit: A Coloring and Music Guide for Kids
🎨
Choosing the Best Paper for Coloring Pages: A Practical Guide
🍎
Simple Classroom Coloring Stations for Busy Classrooms
🧠
The Link Between Drawing and Critical Thinking
🎨
How to Draw a Peacock Pattern Mandala: A Step-by-Step Guide
📐
Learning Angles Through Drawing
🎨
A Wild West Mining Town: A Wild West Coloring and History Guide for Kids
🎨
Saving Allowance in a Jar: A Simple Life Skill for Kids
🎲
How to Play Drawing Challenges
🎨
A Re-Entry Capsule: A Coloring and Space Mission Guide for Kids
🎨
A Sheriff's Star Badge: A Wild West Coloring and History Guide for Kids
🎨
Training in a Pool for Zero-G: A Coloring and Space Mission Guide for Kids
🔬
Primary Colors Explained for Kids
🎨
How to Draw a Stripe Pattern: A Step-by-Step Guide
🎨
How to Draw a Star: A Step-by-Step Guide for Kids
🎨
A Hiking Trail: Coloring Ideas for Your Next Family Adventure
🎨
May Day Coloring Ideas and Activities for the Whole Family
🎨
A Space Tourism Rocket: A Coloring and Space Mission Guide for Kids
🎨
A Window Installer Coloring and Drawing Ideas for Kids
🎨
How to Draw a Cello: A Coloring and Music Guide for Kids
🎨
A Jazz Band: A Coloring and Movement Guide for Kids
🎨
Fun Helicopter Coloring and Drawing Ideas for Kids
✏️
How to Improve Your Drawing From Imagination
🎨
Printing in Grayscale: A Practical Guide
💬
The Power of Wordless Storytelling
🎨
A Bread Basket: A Kitchen Guide for Kids and Parents
📴
Screen-Free Coloring Ideas for Restaurant Wait Times
💡
Building Finding Inspiration Through Coloring and Drawing
🧒
A Parent's Guide to Left-Handed Children
🔬
How Eyes Perceive Color Explained for Kids
🧘
Simple Steps for Deep Breathing and Coloring
🧠
Exploring Drawing and Self-Expression
🎨
Sardines Hiding Game: A Coloring and Playtime Guide for Kids
👨👩👧
Easy Low-Mess Activities With Coloring Pages
🧒
A Parent's Guide to Hand-Eye Coordination
🎨
A Beginner's Guide to Drawing Space and Planets
🧠
Why Drawing Can Help With Observation Skills
🎨
Scarecrow Coloring and Drawing Ideas for Kids
🌈
Everyday Objects Coloring Ideas for Classrooms
🏺
The History of Cave Paintings
🎨
A Beginner's Guide to Drawing Family Portraits
📐
Why 3D Shapes and Drawing Go Together
🏺
The History of Hieroglyphics
🎨
Vineyard Grape Growing: A Coloring and Food Science Guide for Kids
🖍️
How to Get Better at Coloring Small Details
🎨
Family Portraits Drawing Prompts for Beginners
🎨
Creative Under the Sea Drawing Exercises
🎨
High Jump Coloring Pages and Drawing Ideas for Kids
🧠
Exploring Drawing and Critical Thinking
🎨
A Medieval Banquet Table: A Medieval Coloring and History Guide for Kids
🎨
Monarch Butterfly Coloring and Drawing Ideas for Kids
🧒
Fun Ways to Build Left-Handed Children
🎨
A Family Recipe Book: A Kitchen Guide for Kids and Parents
🧠
Can Drawing Improve Cognitive Development?
🎨
French Fries Coloring Ideas for Kids Who Love to Create
🎨
Teaching Perseverance: A Simple Activity for Kids
🎨
Anole Lizard Coloring and Drawing Ideas for Kids
🎨
Painted Turtle Coloring and Drawing Ideas for Kids
🌈
A Guide to Jungle Scenes Coloring Pages
🎨
Wizard Coloring and Drawing Ideas for Kids
🎨
A Pirates and Treasure Hunt Game: A Coloring and Playtime Guide for Kids
🎲
Step-by-Step Board Game Design
🎨
Hollywood Sign: Coloring Page and Fun Facts for Kids
🎨
A Force-Field Superhero: A Superhero Coloring and Design Guide for Kids
🎨
Eco-Friendly Coloring Supplies: A Buying and Technique Guide
🎨
A Hungarian Folk Costume: A Coloring and Culture Guide for Kids
🍎
Classroom Ideas: Indoor Recess Activities
🎨
Printing Coloring Pages as Posters: A Practical Guide
💬
From Cave Drawings to Symbols and Icons
🖍️
Tips for Coloring Animals Realistically
📴
Why Coloring Beats Scrolling on Camping Trips
🎨
Angelfish Coloring and Drawing Ideas for Kids
🎨
A Pet's Favorite Walk Route: A Simple Pet Care Guide for Kids
👨👩👧
Coloring Ideas for Rainy Day Activities
🔬
Color Wheels Explained for Kids
🎨
Exploring Finland: A Coloring and Culture Guide for Kids
💬
From Cave Drawings to Infographics
🎨
Archaeopteryx Coloring Page: Fun Facts for Young Paleontologists
🎨
A Family Grocery Budget Trip: A Money Guide for Kids and Parents
🎨
A Royal Procession: A Medieval Coloring and History Guide for Kids
🧘
Why Slow Coloring Practice Feels Calming
🔬
Secondary Colors Explained for Kids
🎨
Understanding the Color Wheel: A Buying and Technique Guide
🎨
Ancient Egyptian Boats on the Nile: An Ancient History Coloring Guide for Kids
🧠
How Drawing May Support Concentration and Focus
🖌️
A Beginner's Guide to Using Watercolor
🎨
Flashlight Tag: A Coloring and Playtime Guide for Kids
📐
Fun Drawing Activities for Spatial Relationships
🎨
Exploring Poland: A Coloring and Culture Guide for Kids
🎨
Exploring the Czech Republic: A Coloring and Culture Guide for Kids
🎨
Fun Cargo Ship Coloring and Drawing Ideas for Kids
🎨
Fun Tow Truck Coloring and Drawing Ideas for Kids
🎨
A Sunhat and Sunglasses: Coloring Ideas and Activities for the Whole Family
🎨
Dandelion: A Coloring and Nature Guide for Kids
🎨
A Frontier General Store: A Wild West Coloring and History Guide for Kids
🎨
Using Good Table Manners: A Simple Life Skill for Kids
🧘
Simple Steps for Coloring for Sensory Breaks
🧒
Understanding Encouraging Reluctant Artists in Early Childhood
🎨
Power Outage Preparedness: A Family Safety Guide
🧠
Can Drawing Improve Hand-Eye Coordination?
🎨
Lemonade Stand Coloring Ideas for Kids Who Love to Create
🎨
Bagel Coloring Ideas for Kids Who Love to Create
🎲
Using Drawing for Pictionary-Style Games
🎨
the Chinese Lantern Festival Coloring Ideas and Activities for the Whole Family
👨👩👧
Why Parents Love Quiet Time Activities
🎨
A Plumber's Pipe Wrench Coloring and Drawing Ideas for Kids
🎨
How to Draw Favorite Foods Step by Step
🧒
Understanding Building Drawing Confidence in Early Childhood
🎨
A Wild West Saloon: A Wild West Coloring and History Guide for Kids
🎨
Goldilocks and the Three Bears: A Classic Story Coloring Guide for Kids
🎨
Exploring Jamaica: A Coloring and Culture Guide for Kids
💗
The Role of Coloring in Drawing Feelings Instead of Words
🎨
A Fall Leaf Pile Jump: Coloring Ideas and Activities for the Whole Family
🎨
Great White Shark Coloring and Drawing Ideas for Kids
🧒
A Parent's Guide to The Pictorial Stage
🍎
How Teachers Can Use End-of-Year Activities
🎨
A Churro Cart: Coloring Ideas and Fun Facts for Kids
🎨
a Pumpkin Patch Trip Coloring Ideas and Activities for the Whole Family
🎨
A Swiss Traditional Dress: A Coloring and Culture Guide for Kids
🎨
Row Row Row Your Boat: A Nursery Rhyme Coloring Guide for Kids
🎲
Drawing Prompt Games: A Creative Twist
🎨
Tortoise Coloring and Drawing Ideas for Kids
🎨
Jackalope Coloring and Drawing Ideas for Kids
🎨
A Sleeping Bag in Space: A Coloring and Space Mission Guide for Kids
🎨
A Ranch with a Windmill: A Wild West Coloring and History Guide for Kids
🎨
Fun Space and Planets Drawing Activities for Kids
 A Beginner's Guide to Pencil Control
🎨
Sending a Letter: A Simple Life Skill for Kids
🧒
What to Expect When Teaching Pattern Recognition
🎨
Exploring Kenya: A Coloring and Culture Guide for Kids
🌈
Creative Ways to Color Food and Treats
🎨
Teaching Friendliness: A Simple Activity for Kids
🧘
A Beginner's Guide to Coloring for Focus
🏺
Why Early Human Communication Matter to Historians
🔬
A Simple Guide to Color Contrast
🎨
Making a Coloring Page Booklet: A Practical Guide
🎨
A Bowl of Pho: Coloring Ideas and Fun Facts for Kids
🎨
Blueberry Coloring and Drawing Ideas for Kids
🎨
Hedgehog Coloring and Drawing Ideas for Kids
🎨
A Medieval Guild Hall: A Medieval Coloring and History Guide for Kids
🎨
A Whisk: A Kitchen Guide for Kids and Parents
🔎
A Beginner's Guide to Idea Webs
🎨
London Eye: Coloring Page and Fun Facts for Kids
🎨
Exploring Egypt: A Coloring and Culture Guide for Kids
💗
The Role of Coloring in Creative Outlets for Teens
🎨
A Trip to the Eye Doctor: A Coloring and Health Guide for Kids
🎨
Macaw Coloring Page Ideas for Kids
🎨
Weaver Bird Coloring Page Ideas for Kids
🎨
Tidying a Bedroom: A Simple Life Skill for Kids
🎨
How to Draw Nature Scenes Step by Step
🏺
What We Know About Early Human Communication
🎨
A Mixing Bowl: A Kitchen Guide for Kids and Parents
🎨
Exploring A Shooting Star: A Coloring and Learning Guide for Kids
🎨
Water Safety During a Flood: A Family Safety Guide
🖍️
Tips for Coloring With Crayons
🍂
Creative Mother's Day Coloring Projects for Classrooms
🎨
Meet the Teacher: A Community Helper Coloring Guide
🎨
Boiling Water Safety After a Storm: A Family Safety Guide
🎲
Dot-to-Dot Games: A Creative Twist
🎨
A Medieval Farmer's Field: A Medieval Coloring and History Guide for Kids
🧒
Fun Ways to Build Ages 6-7
🎲
Using Drawing for Strategy Sketching for Sports
🍎
Using Coloring Pages for Substitute Teacher Activities
🖍️
How to Get Better at Blending Colors Smoothly
🎨
A Superhero Graduation Day: A Superhero Coloring and Design Guide for Kids
🎨
Exploring A Black Hole: A Coloring and Learning Guide for Kids
🎨
Ferret Coloring and Drawing Ideas for Kids
🔬
The Science Behind How Eyes Perceive Color
🎨
Printer Settings for Best Color: A Practical Guide
🔎
How Idea Webs Support Learning
🎲
Step-by-Step Scavenger Hunt Drawings
🎨
Albatross Coloring Page Ideas for Kids
🏺
The History of Early Human Communication
🎨
A Robot Painter: A Coloring and Invention Guide for Kids
🏺
What We Know About Cave Paintings
🎨
A Snorkel and Mask Coloring and Drawing Ideas for Kids
💗
Exploring Creative Journaling Through Art
🎨
Self-Esteem Affirmation Cards: A Simple Mindfulness Activity for Kids
🎨
A Homemade Barometer: A Step-by-Step Science Guide for Kids
🎨
A Disappearing Act Coloring and Drawing Ideas for Kids
🎨
A Snowball Fight: Coloring Ideas and Activities for the Whole Family
🎨
a Fireworks Night Coloring Ideas and Activities for the Whole Family
🎨
Meet the Garbage Collector: A Community Helper Coloring Guide
🧘
A Beginner's Guide to Guided Mindful Coloring
🎨
A Buried Treasure X Mark Coloring and Drawing Ideas for Kids
🎨
Farm Fence Line Coloring and Drawing Ideas for Kids
🎨
Spring Puddle Jumping: Coloring Ideas and Activities for the Whole Family
🎨
A Medieval Stone Bridge: A Medieval Coloring and History Guide for Kids
📐
Teaching Patterns Through Coloring and Drawing
🎨
How to Draw Fantasy Creatures Step by Step
🧒
A Parent's Guide to Ages 2-3
🎨
A Bouncy Egg Experiment: A Step-by-Step Science Guide for Kids
🎨
Exploring A Space Walk: A Coloring and Learning Guide for Kids
🎨
Corn on the Cob Coloring and Drawing Ideas for Kids
🔤
How Pictures Help Children Learn Sentence Building
🎨
Antelope Coloring and Drawing Ideas for Kids
🎨
A Mind-Reading Superhero: A Superhero Coloring and Design Guide for Kids
🎨
Icarus and the Wax Wings: A Classic Story Coloring Guide for Kids
🧘
Simple Steps for Coloring During Travel
🎨
Cycling Coloring Pages and Drawing Ideas for Kids
🏺
The History of Petroglyphs and Rock Art
🎨
Centipede Coloring and Drawing Ideas for Kids
🍂
Celebrate St. Patrick's Day With Coloring Activities
🖍️
Why Coloring Mandalas Makes a Difference
🖌️
A Beginner's Guide to Working With Light and Shadow
📴
Why Coloring Beats Scrolling on Summer Vacations
🎨
A Winter Snow Fort: Coloring Ideas and Activities for the Whole Family
🎨
Toad Coloring and Drawing Ideas for Kids
🎨
Jack and the Beanstalk: A Classic Story Coloring Guide for Kids
🎨
A Family Building a Sandcastle Together Coloring and Drawing Ideas for Kids
🔎
How Concept Mapping Support Learning
🎨
Exploring Argentina: A Coloring and Culture Guide for Kids
🎨
Pancakes Coloring Ideas for Kids Who Love to Create
🎨
Swapping Coloring Pages With Friends: A Practical Guide
🎨
Docking with a Space Station: A Coloring and Space Mission Guide for Kids
🧒
How Drawing Supports Children Who Dislike Drawing
🎨
A Cotton Candy Machine Coloring and Drawing Ideas for Kids
🎨
A Beach Sandcastle with a Moat Coloring and Drawing Ideas for Kids
🎨
A Math Puzzle Grid: A Coloring and STEM Guide for Kids
🌈
Buildings and Castles Coloring Ideas for Classrooms
🎨
Celebrating a Friend's Success: A Simple Social Skill for Kids
🧘
Exploring Quiet Morning Coloring
🎨
How to Draw a Tambourine: A Coloring and Music Guide for Kids
✏️
Fun Exercises for Sketching Basics
🔤
Learning Opposites Through Drawing
🎨
Oasis in a Desert Coloring Page: A Nature Learning Guide for Kids
💬
From Cave Drawings to Maps and Wayfinding Symbols
🎨
Vegetable Basket Coloring Ideas for Kids Who Love to Create
🎨
Nymph Coloring and Drawing Ideas for Kids
🎲
Sketch Relay Games: A Creative Twist
🧘
Why Coloring During Travel Feels Calming
🔎
Why Visual Thinkers Use Organizing Research With Sketches
🧘
Why Coloring With Soft Music Feels Calming
🎨
Comparing Colored Pencil Brands: A Buying and Technique Guide
🌈
Printable Emotions and Faces Coloring Activities
💡
Building Original Thinking Through Coloring and Drawing
🎨
a Gratitude Tree: A Simple Mindfulness Activity for Kids
A Beginner's Guide to Pencil Control
🎨
Sending a Letter: A Simple Life Skill for Kids
🧒
What to Expect When Teaching Pattern Recognition
🎨
Exploring Kenya: A Coloring and Culture Guide for Kids
🌈
Creative Ways to Color Food and Treats
🎨
Teaching Friendliness: A Simple Activity for Kids
🧘
A Beginner's Guide to Coloring for Focus
🏺
Why Early Human Communication Matter to Historians
🔬
A Simple Guide to Color Contrast
🎨
Making a Coloring Page Booklet: A Practical Guide
🎨
A Bowl of Pho: Coloring Ideas and Fun Facts for Kids
🎨
Blueberry Coloring and Drawing Ideas for Kids
🎨
Hedgehog Coloring and Drawing Ideas for Kids
🎨
A Medieval Guild Hall: A Medieval Coloring and History Guide for Kids
🎨
A Whisk: A Kitchen Guide for Kids and Parents
🔎
A Beginner's Guide to Idea Webs
🎨
London Eye: Coloring Page and Fun Facts for Kids
🎨
Exploring Egypt: A Coloring and Culture Guide for Kids
💗
The Role of Coloring in Creative Outlets for Teens
🎨
A Trip to the Eye Doctor: A Coloring and Health Guide for Kids
🎨
Macaw Coloring Page Ideas for Kids
🎨
Weaver Bird Coloring Page Ideas for Kids
🎨
Tidying a Bedroom: A Simple Life Skill for Kids
🎨
How to Draw Nature Scenes Step by Step
🏺
What We Know About Early Human Communication
🎨
A Mixing Bowl: A Kitchen Guide for Kids and Parents
🎨
Exploring A Shooting Star: A Coloring and Learning Guide for Kids
🎨
Water Safety During a Flood: A Family Safety Guide
🖍️
Tips for Coloring With Crayons
🍂
Creative Mother's Day Coloring Projects for Classrooms
🎨
Meet the Teacher: A Community Helper Coloring Guide
🎨
Boiling Water Safety After a Storm: A Family Safety Guide
🎲
Dot-to-Dot Games: A Creative Twist
🎨
A Medieval Farmer's Field: A Medieval Coloring and History Guide for Kids
🧒
Fun Ways to Build Ages 6-7
🎲
Using Drawing for Strategy Sketching for Sports
🍎
Using Coloring Pages for Substitute Teacher Activities
🖍️
How to Get Better at Blending Colors Smoothly
🎨
A Superhero Graduation Day: A Superhero Coloring and Design Guide for Kids
🎨
Exploring A Black Hole: A Coloring and Learning Guide for Kids
🎨
Ferret Coloring and Drawing Ideas for Kids
🔬
The Science Behind How Eyes Perceive Color
🎨
Printer Settings for Best Color: A Practical Guide
🔎
How Idea Webs Support Learning
🎲
Step-by-Step Scavenger Hunt Drawings
🎨
Albatross Coloring Page Ideas for Kids
🏺
The History of Early Human Communication
🎨
A Robot Painter: A Coloring and Invention Guide for Kids
🏺
What We Know About Cave Paintings
🎨
A Snorkel and Mask Coloring and Drawing Ideas for Kids
💗
Exploring Creative Journaling Through Art
🎨
Self-Esteem Affirmation Cards: A Simple Mindfulness Activity for Kids
🎨
A Homemade Barometer: A Step-by-Step Science Guide for Kids
🎨
A Disappearing Act Coloring and Drawing Ideas for Kids
🎨
A Snowball Fight: Coloring Ideas and Activities for the Whole Family
🎨
a Fireworks Night Coloring Ideas and Activities for the Whole Family
🎨
Meet the Garbage Collector: A Community Helper Coloring Guide
🧘
A Beginner's Guide to Guided Mindful Coloring
🎨
A Buried Treasure X Mark Coloring and Drawing Ideas for Kids
🎨
Farm Fence Line Coloring and Drawing Ideas for Kids
🎨
Spring Puddle Jumping: Coloring Ideas and Activities for the Whole Family
🎨
A Medieval Stone Bridge: A Medieval Coloring and History Guide for Kids
📐
Teaching Patterns Through Coloring and Drawing
🎨
How to Draw Fantasy Creatures Step by Step
🧒
A Parent's Guide to Ages 2-3
🎨
A Bouncy Egg Experiment: A Step-by-Step Science Guide for Kids
🎨
Exploring A Space Walk: A Coloring and Learning Guide for Kids
🎨
Corn on the Cob Coloring and Drawing Ideas for Kids
🔤
How Pictures Help Children Learn Sentence Building
🎨
Antelope Coloring and Drawing Ideas for Kids
🎨
A Mind-Reading Superhero: A Superhero Coloring and Design Guide for Kids
🎨
Icarus and the Wax Wings: A Classic Story Coloring Guide for Kids
🧘
Simple Steps for Coloring During Travel
🎨
Cycling Coloring Pages and Drawing Ideas for Kids
🏺
The History of Petroglyphs and Rock Art
🎨
Centipede Coloring and Drawing Ideas for Kids
🍂
Celebrate St. Patrick's Day With Coloring Activities
🖍️
Why Coloring Mandalas Makes a Difference
🖌️
A Beginner's Guide to Working With Light and Shadow
📴
Why Coloring Beats Scrolling on Summer Vacations
🎨
A Winter Snow Fort: Coloring Ideas and Activities for the Whole Family
🎨
Toad Coloring and Drawing Ideas for Kids
🎨
Jack and the Beanstalk: A Classic Story Coloring Guide for Kids
🎨
A Family Building a Sandcastle Together Coloring and Drawing Ideas for Kids
🔎
How Concept Mapping Support Learning
🎨
Exploring Argentina: A Coloring and Culture Guide for Kids
🎨
Pancakes Coloring Ideas for Kids Who Love to Create
🎨
Swapping Coloring Pages With Friends: A Practical Guide
🎨
Docking with a Space Station: A Coloring and Space Mission Guide for Kids
🧒
How Drawing Supports Children Who Dislike Drawing
🎨
A Cotton Candy Machine Coloring and Drawing Ideas for Kids
🎨
A Beach Sandcastle with a Moat Coloring and Drawing Ideas for Kids
🎨
A Math Puzzle Grid: A Coloring and STEM Guide for Kids
🌈
Buildings and Castles Coloring Ideas for Classrooms
🎨
Celebrating a Friend's Success: A Simple Social Skill for Kids
🧘
Exploring Quiet Morning Coloring
🎨
How to Draw a Tambourine: A Coloring and Music Guide for Kids
✏️
Fun Exercises for Sketching Basics
🔤
Learning Opposites Through Drawing
🎨
Oasis in a Desert Coloring Page: A Nature Learning Guide for Kids
💬
From Cave Drawings to Maps and Wayfinding Symbols
🎨
Vegetable Basket Coloring Ideas for Kids Who Love to Create
🎨
Nymph Coloring and Drawing Ideas for Kids
🎲
Sketch Relay Games: A Creative Twist
🧘
Why Coloring During Travel Feels Calming
🔎
Why Visual Thinkers Use Organizing Research With Sketches
🧘
Why Coloring With Soft Music Feels Calming
🎨
Comparing Colored Pencil Brands: A Buying and Technique Guide
🌈
Printable Emotions and Faces Coloring Activities
💡
Building Original Thinking Through Coloring and Drawing
🎨
a Gratitude Tree: A Simple Mindfulness Activity for Kids
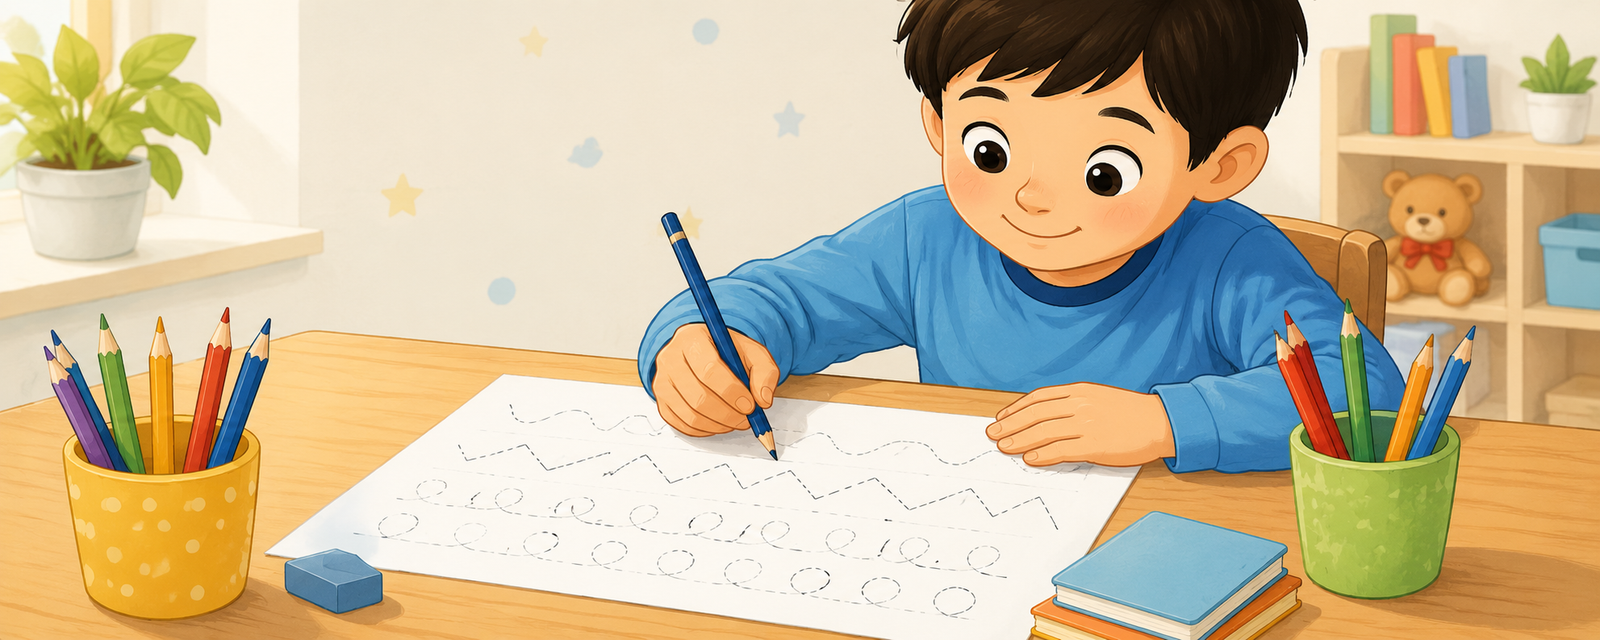 How to Improve Your Pencil Control
🎨
Archery Coloring Pages and Drawing Ideas for Kids
🎨
A Beginner's Guide to Drawing Animals
👨👩👧
Creative Outdoor-Inspired Drawing for Kids
🎲
Drawing-Based Party Games: A Creative Twist
🎨
Meet the Hairdresser: A Community Helper Coloring Guide
✏️
How to Improve Your Choosing Your First Pencil
💗
Exploring Coping With Change Through Drawing Through Art
🎨
Sand Dune Ripples Coloring Page: A Nature Learning Guide for Kids
🎨
A Data Chart and Graph: A Coloring and STEM Guide for Kids
🎨
Giraffe Coloring and Drawing Ideas for Kids
📐
Why Angles and Drawing Go Together
🎨
A Castle Watchtower: A Medieval Coloring and History Guide for Kids
📐
Learning Spatial Relationships Through Drawing
🎨
A Kids' Entrepreneur Fair: A Money Guide for Kids and Parents
🎨
Water Lily: A Coloring and Nature Guide for Kids
🎨
Scorpion Coloring and Drawing Ideas for Kids
🎨
Elephant Coloring and Drawing Ideas for Kids
🎨
A Wind Turbine: A Coloring and Invention Guide for Kids
🎨
A Growing Crystal Garden: A Step-by-Step Science Guide for Kids
🎨
House Fly Coloring and Drawing Ideas for Kids
🎨
Safe Sheltering in a Storm: A Family Safety Guide
🎨
Creative Gardens and Flowers Drawing Exercises
🎨
Needs vs. Wants Sorting: A Money Guide for Kids and Parents
🎨
Teaching Helpfulness: A Simple Activity for Kids
🎨
An Ancient Trading Marketplace: An Ancient History Coloring Guide for Kids
🎨
A Floating Paperclip Trick: A Step-by-Step Science Guide for Kids
🍎
Classroom Ideas: Bulletin Board Ideas
🎨
A Hula Dancer: A Coloring and Movement Guide for Kids
🎨
The Number 11: An Alphabet and Number Coloring Page
🎲
How to Play Pictionary-Style Games
🎨
Dragon Coloring and Drawing Ideas for Kids
👨👩👧
Why Parents Love Activities for Only Children
🎨
A Flight Simulator: A Coloring and Space Mission Guide for Kids
🧒
What to Expect When Teaching Toddlers (Ages 1-2)
🎨
Exploring Saudi Arabia: A Coloring and Culture Guide for Kids
🎨
Smoothie Coloring Ideas for Kids Who Love to Create
🎨
A Weekly Chore Chart with Pay: A Money Guide for Kids and Parents
🎨
Ice Dragon Coloring and Drawing Ideas for Kids
🧒
What to Expect When Teaching The Scribbling Stage
🎨
A Superhero Team Meeting: A Superhero Coloring and Design Guide for Kids
🎨
A Homemade Wind Vane: A Step-by-Step Science Guide for Kids
🎨
an Advanced Connect-the-Dots: Free Ideas for Your Next Celebration
🎨
Exploring The Asteroid Belt: A Coloring and Learning Guide for Kids
🍎
How Teachers Can Use Art Lessons for Math Class
✏️
How to Improve Your Drawing Triangles
🎨
A Backpack Full of Books: A Classroom Coloring and Learning Guide
🖌️
Exploring Blending Techniques
🎨
A Greek Mythology Scene: An Ancient History Coloring Guide for Kids
🌈
Printable Birds Coloring Activities
🎨
An Escape Room Puzzle: A Coloring and STEM Guide for Kids
🎨
Fun Bulldozer Coloring and Drawing Ideas for Kids
💗
Understanding Creative Journaling
How to Improve Your Pencil Control
🎨
Archery Coloring Pages and Drawing Ideas for Kids
🎨
A Beginner's Guide to Drawing Animals
👨👩👧
Creative Outdoor-Inspired Drawing for Kids
🎲
Drawing-Based Party Games: A Creative Twist
🎨
Meet the Hairdresser: A Community Helper Coloring Guide
✏️
How to Improve Your Choosing Your First Pencil
💗
Exploring Coping With Change Through Drawing Through Art
🎨
Sand Dune Ripples Coloring Page: A Nature Learning Guide for Kids
🎨
A Data Chart and Graph: A Coloring and STEM Guide for Kids
🎨
Giraffe Coloring and Drawing Ideas for Kids
📐
Why Angles and Drawing Go Together
🎨
A Castle Watchtower: A Medieval Coloring and History Guide for Kids
📐
Learning Spatial Relationships Through Drawing
🎨
A Kids' Entrepreneur Fair: A Money Guide for Kids and Parents
🎨
Water Lily: A Coloring and Nature Guide for Kids
🎨
Scorpion Coloring and Drawing Ideas for Kids
🎨
Elephant Coloring and Drawing Ideas for Kids
🎨
A Wind Turbine: A Coloring and Invention Guide for Kids
🎨
A Growing Crystal Garden: A Step-by-Step Science Guide for Kids
🎨
House Fly Coloring and Drawing Ideas for Kids
🎨
Safe Sheltering in a Storm: A Family Safety Guide
🎨
Creative Gardens and Flowers Drawing Exercises
🎨
Needs vs. Wants Sorting: A Money Guide for Kids and Parents
🎨
Teaching Helpfulness: A Simple Activity for Kids
🎨
An Ancient Trading Marketplace: An Ancient History Coloring Guide for Kids
🎨
A Floating Paperclip Trick: A Step-by-Step Science Guide for Kids
🍎
Classroom Ideas: Bulletin Board Ideas
🎨
A Hula Dancer: A Coloring and Movement Guide for Kids
🎨
The Number 11: An Alphabet and Number Coloring Page
🎲
How to Play Pictionary-Style Games
🎨
Dragon Coloring and Drawing Ideas for Kids
👨👩👧
Why Parents Love Activities for Only Children
🎨
A Flight Simulator: A Coloring and Space Mission Guide for Kids
🧒
What to Expect When Teaching Toddlers (Ages 1-2)
🎨
Exploring Saudi Arabia: A Coloring and Culture Guide for Kids
🎨
Smoothie Coloring Ideas for Kids Who Love to Create
🎨
A Weekly Chore Chart with Pay: A Money Guide for Kids and Parents
🎨
Ice Dragon Coloring and Drawing Ideas for Kids
🧒
What to Expect When Teaching The Scribbling Stage
🎨
A Superhero Team Meeting: A Superhero Coloring and Design Guide for Kids
🎨
A Homemade Wind Vane: A Step-by-Step Science Guide for Kids
🎨
an Advanced Connect-the-Dots: Free Ideas for Your Next Celebration
🎨
Exploring The Asteroid Belt: A Coloring and Learning Guide for Kids
🍎
How Teachers Can Use Art Lessons for Math Class
✏️
How to Improve Your Drawing Triangles
🎨
A Backpack Full of Books: A Classroom Coloring and Learning Guide
🖌️
Exploring Blending Techniques
🎨
A Greek Mythology Scene: An Ancient History Coloring Guide for Kids
🌈
Printable Birds Coloring Activities
🎨
An Escape Room Puzzle: A Coloring and STEM Guide for Kids
🎨
Fun Bulldozer Coloring and Drawing Ideas for Kids
💗
Understanding Creative Journaling
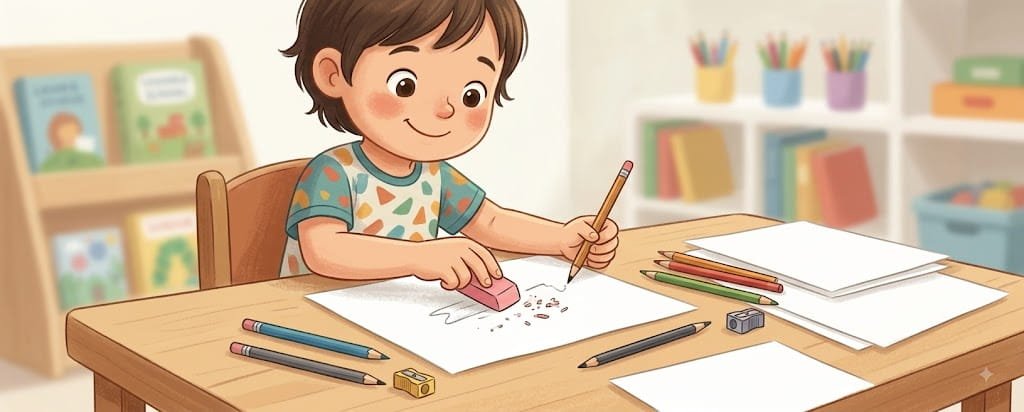 A Beginner's Guide to Using an Eraser Effectively
🎨
A Homemade Sundial: A Step-by-Step Science Guide for Kids
🍎
How Teachers Can Use Art Lessons for Science Class
🎨
The Letter D: An Alphabet and Number Coloring Page
🎨
Exploring The Moon: A Coloring and Learning Guide for Kids
🎨
Staying Calm During a Storm: A Family Safety Guide
🏺
What We Know About Ancient Egyptian Art
🎨
Dilophosaurus Coloring Page: Fun Facts for Young Paleontologists
🎨
A Giant Ground Sloth Coloring Page: Fun Facts for Young Paleontologists
🎨
A Kids' Cash Register Toy: A Money Guide for Kids and Parents
🎨
Setting a Table: A Simple Life Skill for Kids
🎨
A Transforming Robot: A Coloring and Invention Guide for Kids
🎨
A Lantern Parade at Night: Coloring Ideas and Fun Facts for Kids
🍎
Simple Morning Work Activities for Busy Classrooms
🎨
Friendly Vampire Coloring and Drawing Ideas for Kids
🎨
Pogo Stick Coloring and Drawing Ideas for Kids
🎲
Step-by-Step Strategy Sketching for Sports
🎨
Choosing Sketchbooks for Kids: A Buying and Technique Guide
🧘
Simple Steps for Slow Coloring Practice
🎨
Ancient Astronomers Studying Stars: An Ancient History Coloring Guide for Kids
💗
The Role of Coloring in Expressing Gratitude Through Art
🎨
Banana Coloring and Drawing Ideas for Kids
🎨
A Printable Coloring Page Calendar: A Practical Guide
🎨
Picnic Basket Coloring Ideas for Kids Who Love to Create
🎨
Toy Xylophone Coloring and Drawing Ideas for Kids
🎨
an Anger Thermometer: A Simple Mindfulness Activity for Kids
🎨
Olive Oil Pressing: A Coloring and Food Science Guide for Kids
🎨
The Letter L: An Alphabet and Number Coloring Page
🎨
Fundraising With Coloring Pages: A Practical Guide
🎨
A Pet Adoption Day: A Simple Pet Care Guide for Kids
🎨
Snake Coloring and Drawing Ideas for Kids
🎨
Tree Frog Coloring and Drawing Ideas for Kids
🎨
Meet Edvard Munch: An Art Appreciation Guide for Kids
🧒
What to Expect When Teaching Drawing Milestones
🎨
Blizzard and Snowstorm Prep: A Family Safety Guide
🎨
An Irish Step Dancer: A Coloring and Movement Guide for Kids
📴
Creative Alternatives to Screens During Rainy Afternoons
🎨
The Town Musicians of Bremen: A Classic Story Coloring Guide for Kids
🧘
A Beginner's Guide to Coloring Before Exams
🎨
Beetle Coloring and Drawing Ideas for Kids
🎨
Rain Rain Go Away: A Nursery Rhyme Coloring Guide for Kids
🎨
Exploring The Sun: A Coloring and Learning Guide for Kids
🎨
A Classroom Science Experiment: A Classroom Coloring and Learning Guide
💡
The Role of Original Thinking in Children's Art
🎨
Lemur Coloring and Drawing Ideas for Kids
🎨
Bamboo Stalk: A Coloring and Nature Guide for Kids
📐
How Children Understand Spatial Relationships With Art
🎨
Buttoning a Shirt: A Simple Life Skill for Kids
🔎
A Beginner's Guide to Connecting Ideas Through Drawing
🍂
Seasonal Coloring Guide: Valentine's Day
🎨
An Acorn and Oak Leaf: A Coloring and Nature Guide for Kids
🎨
A Tap Dancer: A Coloring and Movement Guide for Kids
🎲
Using Drawing for Storyboard Games
🎨
A Cowboy Campout Under the Stars: A Wild West Coloring and History Guide for Kids
🎨
a Feelings Journal: A Simple Mindfulness Activity for Kids
💡
Why Imaginative Play Matters for Young Artists
📐
Teaching Fractions Through Coloring and Drawing
🎨
An Ice Age Scene Coloring Page: Fun Facts for Young Paleontologists
🎨
A Summer Treehouse: Coloring Ideas and Activities for the Whole Family
🎨
A Sandbox Construction Site Toy Coloring and Drawing Ideas for Kids
✏️
How to Improve Your Shading Basics
🎨
a Bingo Card Printable: Free Ideas for Your Next Celebration
🖍️
Why Coloring Small Details Makes a Difference
🎨
Teaching Empathy: A Simple Activity for Kids
📴
Screen-Free Coloring Ideas for Summer Vacations
🎨
Oktoberfest Coloring Ideas and Activities for the Whole Family
🌈
Creative Ways to Color Nature Landscapes
🌈
Space Coloring Ideas for Classrooms
👨👩👧
Fun and Simple Weekend Family Activities
🎨
Coloring Book Binding Types: A Buying and Technique Guide
🎨
A Juggler Coloring and Drawing Ideas for Kids
🎨
Hailstorm Coloring Page: A Nature Learning Guide for Kids
🌈
Printable Space Coloring Activities
🎨
Backyard Fox Coloring and Drawing Ideas for Kids
🎨
A Coral Reef Below the Waves Coloring and Drawing Ideas for Kids
👨👩👧
Why Parents Love After-School Activities
💡
Building Making Mistakes in Art Through Coloring and Drawing
🎨
A Pet-Friendly Backyard: A Simple Pet Care Guide for Kids
🎨
A Ramadan Lantern: Coloring Ideas and Fun Facts for Kids
🎨
A Wheelbarrow Full of Soil: A Gardening Guide for Kids and Families
🎨
Snow White: A Classic Story Coloring Guide for Kids
🎨
Exploring South Korea: A Coloring and Culture Guide for Kids
🎨
A Countdown Clock: A Coloring and Space Mission Guide for Kids
🎨
A Pet Rabbit's Hutch: A Simple Pet Care Guide for Kids
🎨
A Bug Spray and Sunscreen Kit: Coloring Ideas for Your Next Family Adventure
🔎
A Beginner's Guide to Timeline Diagrams
🎨
An Ancient Roman Aqueduct: An Ancient History Coloring Guide for Kids
🎨
Coloring Contest Ideas for Classrooms: A Practical Guide
🎨
A Pirate's Hat Coloring and Drawing Ideas for Kids
🔤
Visual Vocabulary: Numbers in a New Language
A Beginner's Guide to Using an Eraser Effectively
🎨
A Homemade Sundial: A Step-by-Step Science Guide for Kids
🍎
How Teachers Can Use Art Lessons for Science Class
🎨
The Letter D: An Alphabet and Number Coloring Page
🎨
Exploring The Moon: A Coloring and Learning Guide for Kids
🎨
Staying Calm During a Storm: A Family Safety Guide
🏺
What We Know About Ancient Egyptian Art
🎨
Dilophosaurus Coloring Page: Fun Facts for Young Paleontologists
🎨
A Giant Ground Sloth Coloring Page: Fun Facts for Young Paleontologists
🎨
A Kids' Cash Register Toy: A Money Guide for Kids and Parents
🎨
Setting a Table: A Simple Life Skill for Kids
🎨
A Transforming Robot: A Coloring and Invention Guide for Kids
🎨
A Lantern Parade at Night: Coloring Ideas and Fun Facts for Kids
🍎
Simple Morning Work Activities for Busy Classrooms
🎨
Friendly Vampire Coloring and Drawing Ideas for Kids
🎨
Pogo Stick Coloring and Drawing Ideas for Kids
🎲
Step-by-Step Strategy Sketching for Sports
🎨
Choosing Sketchbooks for Kids: A Buying and Technique Guide
🧘
Simple Steps for Slow Coloring Practice
🎨
Ancient Astronomers Studying Stars: An Ancient History Coloring Guide for Kids
💗
The Role of Coloring in Expressing Gratitude Through Art
🎨
Banana Coloring and Drawing Ideas for Kids
🎨
A Printable Coloring Page Calendar: A Practical Guide
🎨
Picnic Basket Coloring Ideas for Kids Who Love to Create
🎨
Toy Xylophone Coloring and Drawing Ideas for Kids
🎨
an Anger Thermometer: A Simple Mindfulness Activity for Kids
🎨
Olive Oil Pressing: A Coloring and Food Science Guide for Kids
🎨
The Letter L: An Alphabet and Number Coloring Page
🎨
Fundraising With Coloring Pages: A Practical Guide
🎨
A Pet Adoption Day: A Simple Pet Care Guide for Kids
🎨
Snake Coloring and Drawing Ideas for Kids
🎨
Tree Frog Coloring and Drawing Ideas for Kids
🎨
Meet Edvard Munch: An Art Appreciation Guide for Kids
🧒
What to Expect When Teaching Drawing Milestones
🎨
Blizzard and Snowstorm Prep: A Family Safety Guide
🎨
An Irish Step Dancer: A Coloring and Movement Guide for Kids
📴
Creative Alternatives to Screens During Rainy Afternoons
🎨
The Town Musicians of Bremen: A Classic Story Coloring Guide for Kids
🧘
A Beginner's Guide to Coloring Before Exams
🎨
Beetle Coloring and Drawing Ideas for Kids
🎨
Rain Rain Go Away: A Nursery Rhyme Coloring Guide for Kids
🎨
Exploring The Sun: A Coloring and Learning Guide for Kids
🎨
A Classroom Science Experiment: A Classroom Coloring and Learning Guide
💡
The Role of Original Thinking in Children's Art
🎨
Lemur Coloring and Drawing Ideas for Kids
🎨
Bamboo Stalk: A Coloring and Nature Guide for Kids
📐
How Children Understand Spatial Relationships With Art
🎨
Buttoning a Shirt: A Simple Life Skill for Kids
🔎
A Beginner's Guide to Connecting Ideas Through Drawing
🍂
Seasonal Coloring Guide: Valentine's Day
🎨
An Acorn and Oak Leaf: A Coloring and Nature Guide for Kids
🎨
A Tap Dancer: A Coloring and Movement Guide for Kids
🎲
Using Drawing for Storyboard Games
🎨
A Cowboy Campout Under the Stars: A Wild West Coloring and History Guide for Kids
🎨
a Feelings Journal: A Simple Mindfulness Activity for Kids
💡
Why Imaginative Play Matters for Young Artists
📐
Teaching Fractions Through Coloring and Drawing
🎨
An Ice Age Scene Coloring Page: Fun Facts for Young Paleontologists
🎨
A Summer Treehouse: Coloring Ideas and Activities for the Whole Family
🎨
A Sandbox Construction Site Toy Coloring and Drawing Ideas for Kids
✏️
How to Improve Your Shading Basics
🎨
a Bingo Card Printable: Free Ideas for Your Next Celebration
🖍️
Why Coloring Small Details Makes a Difference
🎨
Teaching Empathy: A Simple Activity for Kids
📴
Screen-Free Coloring Ideas for Summer Vacations
🎨
Oktoberfest Coloring Ideas and Activities for the Whole Family
🌈
Creative Ways to Color Nature Landscapes
🌈
Space Coloring Ideas for Classrooms
👨👩👧
Fun and Simple Weekend Family Activities
🎨
Coloring Book Binding Types: A Buying and Technique Guide
🎨
A Juggler Coloring and Drawing Ideas for Kids
🎨
Hailstorm Coloring Page: A Nature Learning Guide for Kids
🌈
Printable Space Coloring Activities
🎨
Backyard Fox Coloring and Drawing Ideas for Kids
🎨
A Coral Reef Below the Waves Coloring and Drawing Ideas for Kids
👨👩👧
Why Parents Love After-School Activities
💡
Building Making Mistakes in Art Through Coloring and Drawing
🎨
A Pet-Friendly Backyard: A Simple Pet Care Guide for Kids
🎨
A Ramadan Lantern: Coloring Ideas and Fun Facts for Kids
🎨
A Wheelbarrow Full of Soil: A Gardening Guide for Kids and Families
🎨
Snow White: A Classic Story Coloring Guide for Kids
🎨
Exploring South Korea: A Coloring and Culture Guide for Kids
🎨
A Countdown Clock: A Coloring and Space Mission Guide for Kids
🎨
A Pet Rabbit's Hutch: A Simple Pet Care Guide for Kids
🎨
A Bug Spray and Sunscreen Kit: Coloring Ideas for Your Next Family Adventure
🔎
A Beginner's Guide to Timeline Diagrams
🎨
An Ancient Roman Aqueduct: An Ancient History Coloring Guide for Kids
🎨
Coloring Contest Ideas for Classrooms: A Practical Guide
🎨
A Pirate's Hat Coloring and Drawing Ideas for Kids
🔤
Visual Vocabulary: Numbers in a New Language
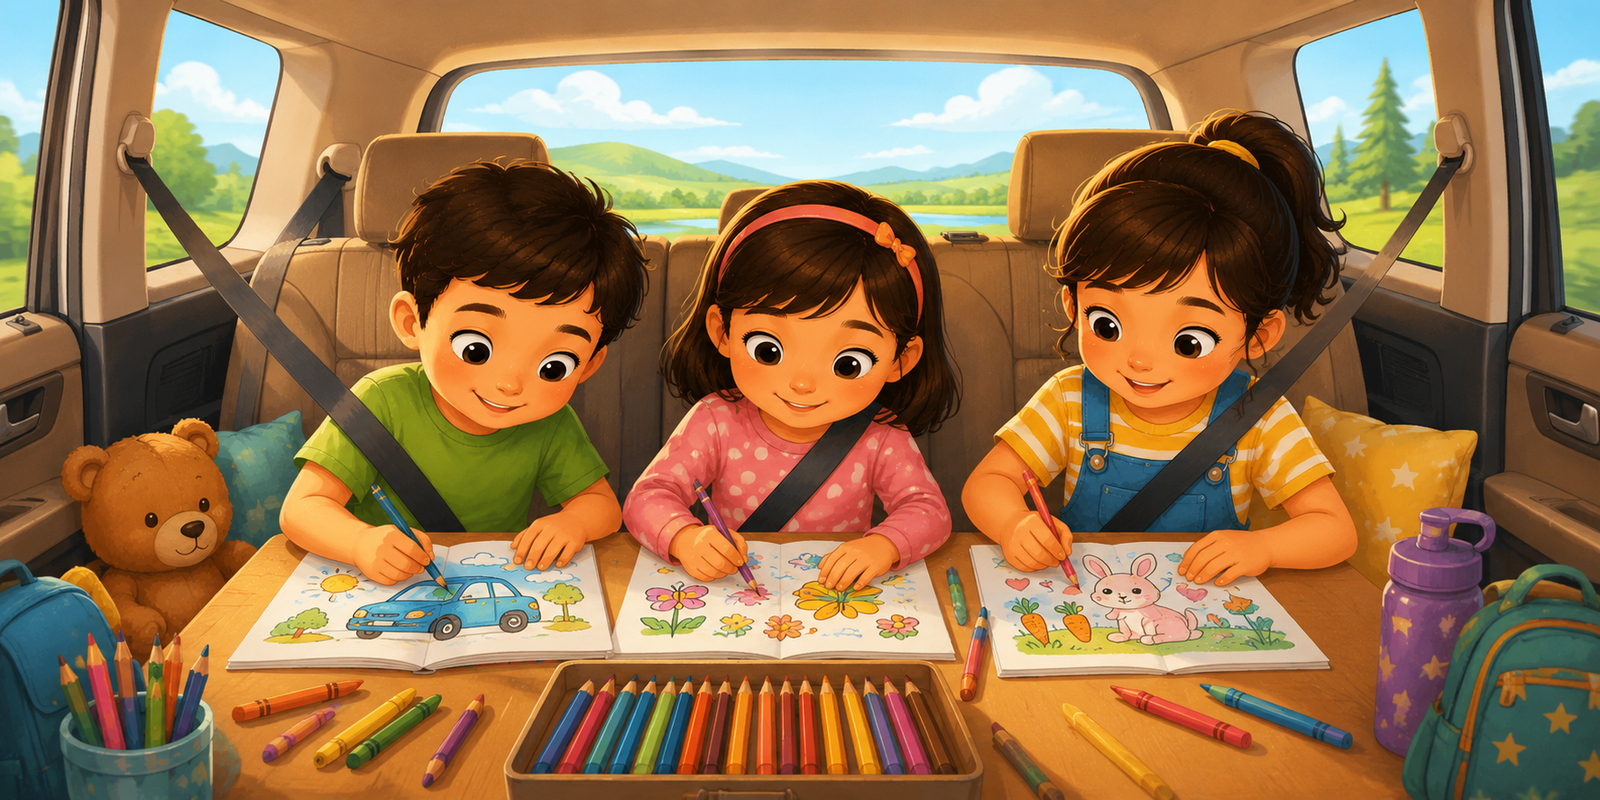 Creative Alternatives to Screens During Long Car Rides
🎨
A Knight's Squire: A Medieval Coloring and History Guide for Kids
🎨
Teaching Punctuality: A Simple Activity for Kids
🎨
Organizing a Toy Shelf: A Simple Life Skill for Kids
🎨
Easy Birds Drawing Ideas
✏️
How to Improve Your Drawing Circles
🎨
A Sunscreen and Beach Bag Coloring and Drawing Ideas for Kids
🍂
Creative New Year Coloring Projects for Classrooms
🎨
How to Draw a Concentric Circles Pattern: A Step-by-Step Guide
🎨
Iguana Coloring and Drawing Ideas for Kids
🎨
A Humanoid Robot: A Coloring and Invention Guide for Kids
🎨
Fun Tractor Coloring and Drawing Ideas for Kids
🎨
Mary Had a Little Lamb: A Nursery Rhyme Coloring Guide for Kids
🧒
Fun Ways to Build Preschoolers
🍎
A Teacher's Guide to Bulletin Board Ideas
🖍️
A Beginner's Guide to Applying Even Pressure
🎨
Skiing Coloring Pages and Drawing Ideas for Kids
📐
Learning Grids and Coordinates Through Drawing
🎨
A Knight's Quest Scroll: A Medieval Coloring and History Guide for Kids
👨👩👧
Fun and Simple Activities for Twins
🎨
A Scarecrow in the Garden: A Gardening Guide for Kids and Families
🎨
Kangaroo Coloring and Drawing Ideas for Kids
🌈
Fun Fairy Tale Scenes Coloring Pages for Kids
🎨
The Letter V: An Alphabet and Number Coloring Page
💗
Creative Approaches to Coping With Change Through Drawing
🎨
A Dodo Bird Coloring Page: Fun Facts for Young Paleontologists
📴
Why Coloring Beats Scrolling on Holiday Travel
🎨
Collecting Pinecones and Leaves: Coloring Ideas for Your Next Family Adventure
🎨
A Castle Silhouette at Sunset: A Medieval Coloring and History Guide for Kids
🍎
Using Coloring Pages for Classroom Management Through Art
Creative Alternatives to Screens During Long Car Rides
🎨
A Knight's Squire: A Medieval Coloring and History Guide for Kids
🎨
Teaching Punctuality: A Simple Activity for Kids
🎨
Organizing a Toy Shelf: A Simple Life Skill for Kids
🎨
Easy Birds Drawing Ideas
✏️
How to Improve Your Drawing Circles
🎨
A Sunscreen and Beach Bag Coloring and Drawing Ideas for Kids
🍂
Creative New Year Coloring Projects for Classrooms
🎨
How to Draw a Concentric Circles Pattern: A Step-by-Step Guide
🎨
Iguana Coloring and Drawing Ideas for Kids
🎨
A Humanoid Robot: A Coloring and Invention Guide for Kids
🎨
Fun Tractor Coloring and Drawing Ideas for Kids
🎨
Mary Had a Little Lamb: A Nursery Rhyme Coloring Guide for Kids
🧒
Fun Ways to Build Preschoolers
🍎
A Teacher's Guide to Bulletin Board Ideas
🖍️
A Beginner's Guide to Applying Even Pressure
🎨
Skiing Coloring Pages and Drawing Ideas for Kids
📐
Learning Grids and Coordinates Through Drawing
🎨
A Knight's Quest Scroll: A Medieval Coloring and History Guide for Kids
👨👩👧
Fun and Simple Activities for Twins
🎨
A Scarecrow in the Garden: A Gardening Guide for Kids and Families
🎨
Kangaroo Coloring and Drawing Ideas for Kids
🌈
Fun Fairy Tale Scenes Coloring Pages for Kids
🎨
The Letter V: An Alphabet and Number Coloring Page
💗
Creative Approaches to Coping With Change Through Drawing
🎨
A Dodo Bird Coloring Page: Fun Facts for Young Paleontologists
📴
Why Coloring Beats Scrolling on Holiday Travel
🎨
Collecting Pinecones and Leaves: Coloring Ideas for Your Next Family Adventure
🎨
A Castle Silhouette at Sunset: A Medieval Coloring and History Guide for Kids
🍎
Using Coloring Pages for Classroom Management Through Art
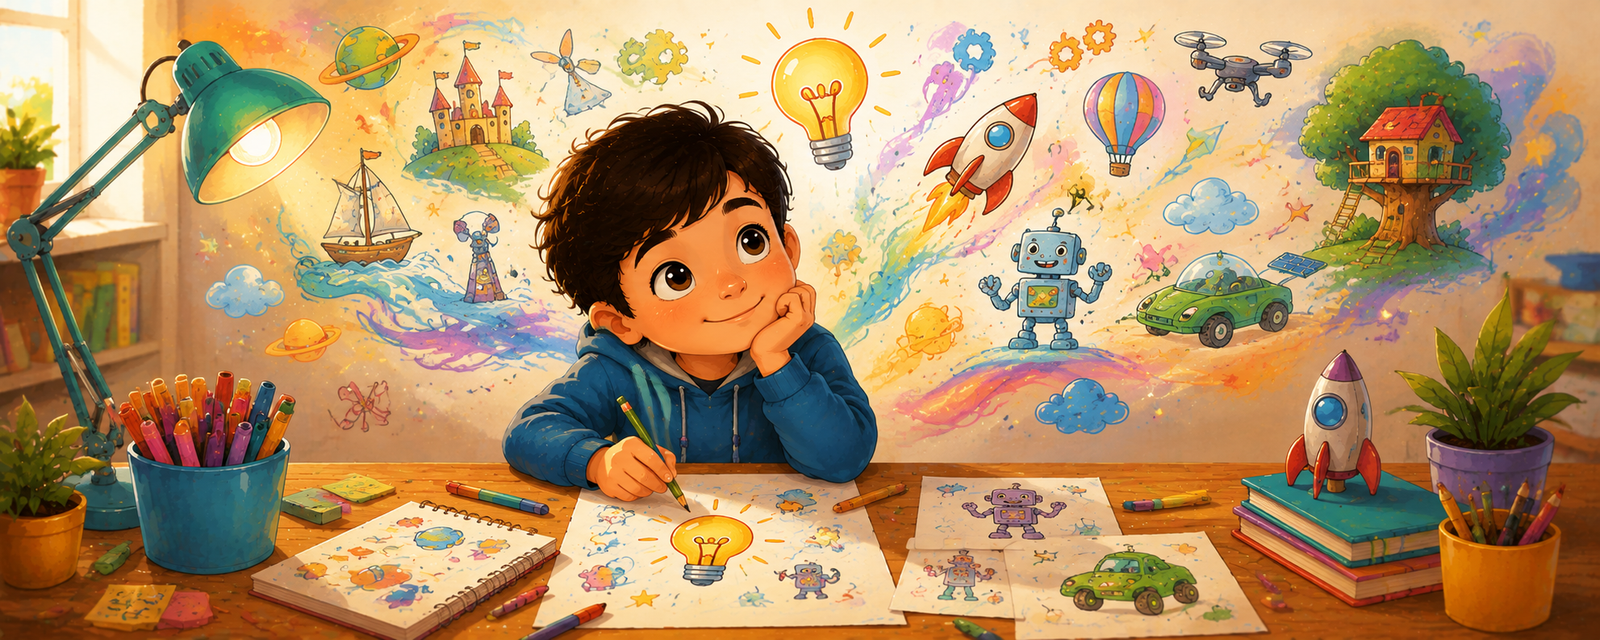 How Drawing Encourages Inventing New Ideas
👨👩👧
Why Parents Love Holiday Break Activities
💬
How Visual Instructions Communicate Ideas
🎨
Fjord Landscape Coloring Page: A Nature Learning Guide for Kids
🎨
The Letter O: An Alphabet and Number Coloring Page
🎨
Exploring The International Space Station: A Coloring and Learning Guide for Kids
🎨
A Beginner's Guide to Drawing Buildings and Houses
🎨
A Court Jester: A Medieval Coloring and History Guide for Kids
🎲
Using Drawing for Dot-to-Dot Games
🎨
Wind-Up Toy Coloring and Drawing Ideas for Kids
🎨
Antarctica Ice Shelf: Coloring Page and Fun Facts for Kids
🔤
How Pictures Help Children Learn Sight Words
🎨
Swing Set Coloring and Drawing Ideas for Kids
👨👩👧
Easy Rainy Day Activities With Coloring Pages
🎨
The Ant and the Grasshopper: A Classic Story Coloring Guide for Kids
💬
How Maps and Wayfinding Symbols Communicate Ideas
🎨
Pteranodon Coloring Page: Fun Facts for Young Paleontologists
🎨
A Family Walk for Exercise: A Coloring and Health Guide for Kids
🎨
a Harvest Festival Coloring Ideas and Activities for the Whole Family
🎨
Exploring The Orion Constellation: A Coloring and Learning Guide for Kids
🎨
An App Icon Design: A Coloring and STEM Guide for Kids
🎲
How to Play Chess Strategy Diagrams
🖌️
Why Using Colored Pencils Matters for Young Artists
🎨
A Campground Shower House: Coloring Ideas for Your Next Family Adventure
🎨
A Camping Cookout: Coloring Ideas for Your Next Family Adventure
🎨
A Norwegian Bunad: A Coloring and Culture Guide for Kids
🖍️
A Beginner's Guide to Coloring With Crayons
💬
The Power of Comic Strips
🎨
Darts Coloring Pages and Drawing Ideas for Kids
🍂
Seasonal Coloring Guide: Halloween
🎨
There Was an Old Woman Who Lived in a Shoe: A Nursery Rhyme Coloring Guide for Kids
🎨
Iceberg Floating Coloring Page: A Nature Learning Guide for Kids
🎨
Prairie Grassland Coloring Page: A Nature Learning Guide for Kids
🖌️
Simple Steps for Cross-Hatching
👨👩👧
Making the Most of Activities for Twins
🔎
Using Visual Research Methods to Solve Problems
🎨
Lightning Bolt Coloring Page: A Nature Learning Guide for Kids
🎨
A Family Jumping Waves Coloring and Drawing Ideas for Kids
🧒
How Drawing Supports Ages 5-6
🎲
Step-by-Step Football Play Diagrams
💗
Exploring Emotional Expression Through Art
🎨
Day of the Dead Coloring Ideas and Activities for the Whole Family
🎨
A Ranch Hand at Work: A Wild West Coloring and History Guide for Kids
🎨
How to Draw a Ocean Wave Mandala: A Step-by-Step Guide
🎨
Space Ice Cream: A Coloring and Space Mission Guide for Kids
How Drawing Encourages Inventing New Ideas
👨👩👧
Why Parents Love Holiday Break Activities
💬
How Visual Instructions Communicate Ideas
🎨
Fjord Landscape Coloring Page: A Nature Learning Guide for Kids
🎨
The Letter O: An Alphabet and Number Coloring Page
🎨
Exploring The International Space Station: A Coloring and Learning Guide for Kids
🎨
A Beginner's Guide to Drawing Buildings and Houses
🎨
A Court Jester: A Medieval Coloring and History Guide for Kids
🎲
Using Drawing for Dot-to-Dot Games
🎨
Wind-Up Toy Coloring and Drawing Ideas for Kids
🎨
Antarctica Ice Shelf: Coloring Page and Fun Facts for Kids
🔤
How Pictures Help Children Learn Sight Words
🎨
Swing Set Coloring and Drawing Ideas for Kids
👨👩👧
Easy Rainy Day Activities With Coloring Pages
🎨
The Ant and the Grasshopper: A Classic Story Coloring Guide for Kids
💬
How Maps and Wayfinding Symbols Communicate Ideas
🎨
Pteranodon Coloring Page: Fun Facts for Young Paleontologists
🎨
A Family Walk for Exercise: A Coloring and Health Guide for Kids
🎨
a Harvest Festival Coloring Ideas and Activities for the Whole Family
🎨
Exploring The Orion Constellation: A Coloring and Learning Guide for Kids
🎨
An App Icon Design: A Coloring and STEM Guide for Kids
🎲
How to Play Chess Strategy Diagrams
🖌️
Why Using Colored Pencils Matters for Young Artists
🎨
A Campground Shower House: Coloring Ideas for Your Next Family Adventure
🎨
A Camping Cookout: Coloring Ideas for Your Next Family Adventure
🎨
A Norwegian Bunad: A Coloring and Culture Guide for Kids
🖍️
A Beginner's Guide to Coloring With Crayons
💬
The Power of Comic Strips
🎨
Darts Coloring Pages and Drawing Ideas for Kids
🍂
Seasonal Coloring Guide: Halloween
🎨
There Was an Old Woman Who Lived in a Shoe: A Nursery Rhyme Coloring Guide for Kids
🎨
Iceberg Floating Coloring Page: A Nature Learning Guide for Kids
🎨
Prairie Grassland Coloring Page: A Nature Learning Guide for Kids
🖌️
Simple Steps for Cross-Hatching
👨👩👧
Making the Most of Activities for Twins
🔎
Using Visual Research Methods to Solve Problems
🎨
Lightning Bolt Coloring Page: A Nature Learning Guide for Kids
🎨
A Family Jumping Waves Coloring and Drawing Ideas for Kids
🧒
How Drawing Supports Ages 5-6
🎲
Step-by-Step Football Play Diagrams
💗
Exploring Emotional Expression Through Art
🎨
Day of the Dead Coloring Ideas and Activities for the Whole Family
🎨
A Ranch Hand at Work: A Wild West Coloring and History Guide for Kids
🎨
How to Draw a Ocean Wave Mandala: A Step-by-Step Guide
🎨
Space Ice Cream: A Coloring and Space Mission Guide for Kids
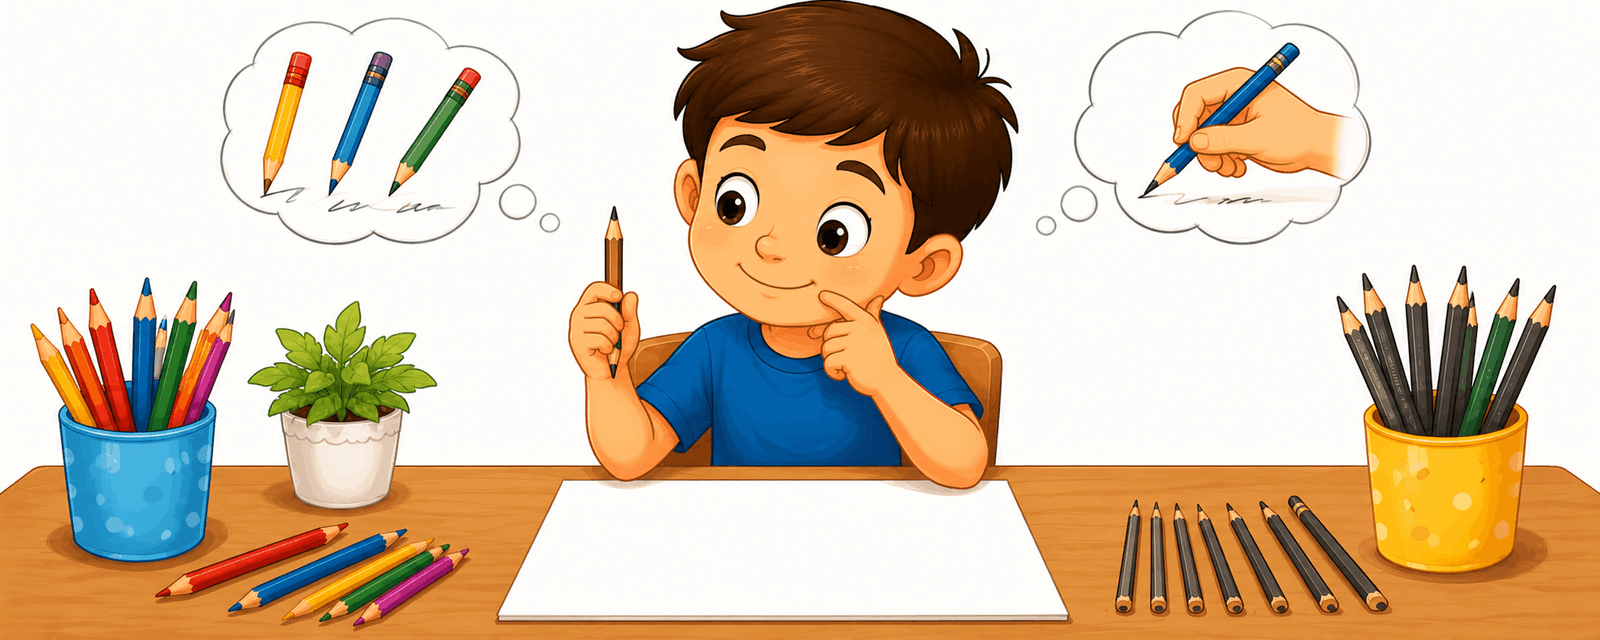 A Beginner's Guide to Choosing Your First Pencil
🎨
How to Draw a Bass Guitar: A Coloring and Music Guide for Kids
🎨
Coral Reef Ecosystem Coloring Page: A Nature Learning Guide for Kids
🎨
A Beach Kite Festival Coloring and Drawing Ideas for Kids
💗
The Role of Coloring in Art as a Creative Outlet
🍎
A Teacher's Guide to Classroom Reward Activities
🎨
Exploring An Astronaut Helmet: A Coloring and Learning Guide for Kids
🎨
A Family Disaster Plan Map: A Family Safety Guide
🎨
A Robot Helper: A Coloring and Invention Guide for Kids
🎨
Volcano Eruption Coloring Page: A Nature Learning Guide for Kids
🎨
A Cupcake Wrapper Set: A Kitchen Guide for Kids and Parents
🎨
A Class Photo Day: A Classroom Coloring and Learning Guide
🍎
Simple End-of-Year Activities for Busy Classrooms
🎨
Cobra Coloring and Drawing Ideas for Kids
🎨
An Acrobat Coloring and Drawing Ideas for Kids
🎨
A Beach Sunset Coloring and Drawing Ideas for Kids
🎨
A Food Truck: A Coloring and Food Science Guide for Kids
🎨
Watermelon Coloring and Drawing Ideas for Kids
🎨
A Knight on Horseback: A Medieval Coloring and History Guide for Kids
🎨
Blind Man's Bluff: A Coloring and Playtime Guide for Kids
🎨
A Kayak on Calm Water: Coloring Ideas for Your Next Family Adventure
🎨
A Freeze-Dried Space Food Tray: A Coloring and Space Mission Guide for Kids
👨👩👧
Making the Most of Holiday Break Activities
🎨
A Castle Flag on a Tower: A Medieval Coloring and History Guide for Kids
🎨
An Ancient Roman Chariot Race: An Ancient History Coloring Guide for Kids
🎨
Grape Cluster Coloring and Drawing Ideas for Kids
🎨
A Drone Being Programmed: A Coloring and STEM Guide for Kids
🎨
How to Draw a Radial Symmetry Design: A Step-by-Step Guide
🎨
Teaching Self-Control: A Simple Activity for Kids
🎨
A Jet Pack: A Coloring and Invention Guide for Kids
🎨
Sensory Play Ideas: A Simple Mindfulness Activity for Kids
🧠
Can Drawing Improve Fine Motor Coordination?
🎨
Backyard Raccoon Coloring and Drawing Ideas for Kids
🧠
Why Drawing Can Help With Visual Thinking
🌈
Fun Jungle Scenes Coloring Pages for Kids
🎨
Pill Bug Coloring and Drawing Ideas for Kids
🍂
Fun Christmas Classroom Coloring Ideas
🎨
Cucumber Coloring and Drawing Ideas for Kids
💬
The Power of Symbols and Icons
🎨
A Group Project: A Classroom Coloring and Learning Guide
🎨
A Russian Sarafan: A Coloring and Culture Guide for Kids
🎨
A Superhero City Parade: A Superhero Coloring and Design Guide for Kids
🧘
Exploring Coloring With Soft Music
🎨
How to Draw a Henna-Inspired Pattern: A Step-by-Step Guide
👨👩👧
Making the Most of Budget-Friendly Activities
🎨
How to Draw Everyday Objects Step by Step
🎨
How to Draw a Piano: A Coloring and Music Guide for Kids
🎨
A Balancing Act Coloring and Drawing Ideas for Kids
🎨
An Orchestra Performance: A Coloring and Movement Guide for Kids
🎨
A Rock Band on Stage: A Coloring and Movement Guide for Kids
🎨
A Cowboy Campfire: A Wild West Coloring and History Guide for Kids
🎨
A Hard Hat and Safety Vest Coloring and Drawing Ideas for Kids
🎨
How to Draw a Mandolin: A Coloring and Music Guide for Kids
🎨
A Belly Dancer: A Coloring and Movement Guide for Kids
🖌️
How to Practice Outlining Techniques
🎨
Alcatraz Island: Coloring Page and Fun Facts for Kids
🎨
An Indian Sari: A Coloring and Culture Guide for Kids
🎨
Exploring Israel: A Coloring and Culture Guide for Kids
🌈
Creative Ways to Color Robots and Machines
🎲
Tic-Tac-Toe Variations: A Creative Twist
🎨
Wyvern Coloring and Drawing Ideas for Kids
📐
Teaching Tessellations Through Coloring and Drawing
🎨
Ancient Roman Gladiators: An Ancient History Coloring Guide for Kids
💗
How Drawing Supports Stress Relief
✏️
Fun Exercises for Using an Eraser Effectively
🖌️
Exploring Using Watercolor
🎲
Step-by-Step Chess Strategy Diagrams
🧒
A Parent's Guide to The Scribbling Stage
🎨
How to Draw a Cone: A Step-by-Step Guide for Kids
🎨
Coffee Roasting: A Coloring and Food Science Guide for Kids
🎨
Name Tag Coloring: Free Ideas for Your Next Celebration
🍂
Seasonal Coloring Guide: Hanukkah
🎨
The Letter W: An Alphabet and Number Coloring Page
🔤
Visual Vocabulary: New Vocabulary Words
🧒
How Drawing Supports The Pictorial Stage
🎨
A Robot Bird: A Coloring and Invention Guide for Kids
🔤
Learning Early Literacy Skills Through Drawing
📴
Screen-Free Coloring Ideas for Rainy Afternoons
🎨
Favorite Foods Drawing Prompts for Beginners
🎨
Wheat Harvesting: A Coloring and Food Science Guide for Kids
🎨
A Rock Garden: A Gardening Guide for Kids and Families
🎨
Sloth Coloring and Drawing Ideas for Kids
🎨
Zinnia: A Coloring and Nature Guide for Kids
🎨
Fun Rickshaw Coloring and Drawing Ideas for Kids
🎨
Exploring Moon Phases: A Coloring and Learning Guide for Kids
🎨
A School Talent Show: A Classroom Coloring and Learning Guide
🎨
Being Patient with a Younger Sibling: A Simple Social Skill for Kids
🎨
A Garden Sundial: A Gardening Guide for Kids and Families
🎨
A Pet Leash and Collar: A Simple Pet Care Guide for Kids
🎨
Glacier Landscape Coloring Page: A Nature Learning Guide for Kids
💬
How Symbols and Icons Communicate Ideas
🎨
Capoeira: A Coloring and Movement Guide for Kids
💬
Why Picture Books Matter in Everyday Life
🎨
A Litter Box: A Simple Pet Care Guide for Kids
🎨
Exploring France: A Coloring and Culture Guide for Kids
🎨
How to Draw Insects Step by Step
🎨
A Hawaiian Lei and Muumuu: A Coloring and Culture Guide for Kids
🎨
Wasp Coloring and Drawing Ideas for Kids
🎨
A Plant Growing Toward Light: A Step-by-Step Science Guide for Kids
🎨
Yo-Yo Coloring and Drawing Ideas for Kids
🎨
A Kids' Craft Sale Table: A Money Guide for Kids and Parents
🎨
Blue Mosque: Coloring Page and Fun Facts for Kids
🎨
Stag Beetle Coloring and Drawing Ideas for Kids
🎨
Chocolate Making: A Coloring and Food Science Guide for Kids
🎨
How to Draw a Bagpipes: A Coloring and Music Guide for Kids
🔤
How Pictures Help Children Learn Family Words
🎨
Gargoyle Coloring and Drawing Ideas for Kids
🧒
What to Expect When Teaching Ages 5-6
🧘
Simple Steps for Mindful Coloring for Beginners
🎨
The Venice Carnival Masks: Coloring Ideas and Fun Facts for Kids
🎨
A Basting Brush: A Kitchen Guide for Kids and Parents
🎨
Getting a Check-Up: A Coloring and Health Guide for Kids
👨👩👧
Coloring Ideas for Screen-Free Afternoons
🔬
Understanding How Eyes Perceive Color
🔬
What Is RGB Color Mixing?
🎨
Soccer Coloring Pages and Drawing Ideas for Kids
💬
Understanding Wordless Storytelling
🎲
Visual Puzzle Games: A Creative Twist
💡
Nurturing Doodling at Home
🎨
Flying Lizard Coloring and Drawing Ideas for Kids
🎨
Meet the Referee: A Community Helper Coloring Guide
🧘
A Beginner's Guide to Quiet Morning Coloring
🎨
Weather Drawing Prompts for Beginners
🧒
Understanding Kindergarteners in Early Childhood
🎨
A Sakura Branch: A Coloring and Nature Guide for Kids
A Beginner's Guide to Choosing Your First Pencil
🎨
How to Draw a Bass Guitar: A Coloring and Music Guide for Kids
🎨
Coral Reef Ecosystem Coloring Page: A Nature Learning Guide for Kids
🎨
A Beach Kite Festival Coloring and Drawing Ideas for Kids
💗
The Role of Coloring in Art as a Creative Outlet
🍎
A Teacher's Guide to Classroom Reward Activities
🎨
Exploring An Astronaut Helmet: A Coloring and Learning Guide for Kids
🎨
A Family Disaster Plan Map: A Family Safety Guide
🎨
A Robot Helper: A Coloring and Invention Guide for Kids
🎨
Volcano Eruption Coloring Page: A Nature Learning Guide for Kids
🎨
A Cupcake Wrapper Set: A Kitchen Guide for Kids and Parents
🎨
A Class Photo Day: A Classroom Coloring and Learning Guide
🍎
Simple End-of-Year Activities for Busy Classrooms
🎨
Cobra Coloring and Drawing Ideas for Kids
🎨
An Acrobat Coloring and Drawing Ideas for Kids
🎨
A Beach Sunset Coloring and Drawing Ideas for Kids
🎨
A Food Truck: A Coloring and Food Science Guide for Kids
🎨
Watermelon Coloring and Drawing Ideas for Kids
🎨
A Knight on Horseback: A Medieval Coloring and History Guide for Kids
🎨
Blind Man's Bluff: A Coloring and Playtime Guide for Kids
🎨
A Kayak on Calm Water: Coloring Ideas for Your Next Family Adventure
🎨
A Freeze-Dried Space Food Tray: A Coloring and Space Mission Guide for Kids
👨👩👧
Making the Most of Holiday Break Activities
🎨
A Castle Flag on a Tower: A Medieval Coloring and History Guide for Kids
🎨
An Ancient Roman Chariot Race: An Ancient History Coloring Guide for Kids
🎨
Grape Cluster Coloring and Drawing Ideas for Kids
🎨
A Drone Being Programmed: A Coloring and STEM Guide for Kids
🎨
How to Draw a Radial Symmetry Design: A Step-by-Step Guide
🎨
Teaching Self-Control: A Simple Activity for Kids
🎨
A Jet Pack: A Coloring and Invention Guide for Kids
🎨
Sensory Play Ideas: A Simple Mindfulness Activity for Kids
🧠
Can Drawing Improve Fine Motor Coordination?
🎨
Backyard Raccoon Coloring and Drawing Ideas for Kids
🧠
Why Drawing Can Help With Visual Thinking
🌈
Fun Jungle Scenes Coloring Pages for Kids
🎨
Pill Bug Coloring and Drawing Ideas for Kids
🍂
Fun Christmas Classroom Coloring Ideas
🎨
Cucumber Coloring and Drawing Ideas for Kids
💬
The Power of Symbols and Icons
🎨
A Group Project: A Classroom Coloring and Learning Guide
🎨
A Russian Sarafan: A Coloring and Culture Guide for Kids
🎨
A Superhero City Parade: A Superhero Coloring and Design Guide for Kids
🧘
Exploring Coloring With Soft Music
🎨
How to Draw a Henna-Inspired Pattern: A Step-by-Step Guide
👨👩👧
Making the Most of Budget-Friendly Activities
🎨
How to Draw Everyday Objects Step by Step
🎨
How to Draw a Piano: A Coloring and Music Guide for Kids
🎨
A Balancing Act Coloring and Drawing Ideas for Kids
🎨
An Orchestra Performance: A Coloring and Movement Guide for Kids
🎨
A Rock Band on Stage: A Coloring and Movement Guide for Kids
🎨
A Cowboy Campfire: A Wild West Coloring and History Guide for Kids
🎨
A Hard Hat and Safety Vest Coloring and Drawing Ideas for Kids
🎨
How to Draw a Mandolin: A Coloring and Music Guide for Kids
🎨
A Belly Dancer: A Coloring and Movement Guide for Kids
🖌️
How to Practice Outlining Techniques
🎨
Alcatraz Island: Coloring Page and Fun Facts for Kids
🎨
An Indian Sari: A Coloring and Culture Guide for Kids
🎨
Exploring Israel: A Coloring and Culture Guide for Kids
🌈
Creative Ways to Color Robots and Machines
🎲
Tic-Tac-Toe Variations: A Creative Twist
🎨
Wyvern Coloring and Drawing Ideas for Kids
📐
Teaching Tessellations Through Coloring and Drawing
🎨
Ancient Roman Gladiators: An Ancient History Coloring Guide for Kids
💗
How Drawing Supports Stress Relief
✏️
Fun Exercises for Using an Eraser Effectively
🖌️
Exploring Using Watercolor
🎲
Step-by-Step Chess Strategy Diagrams
🧒
A Parent's Guide to The Scribbling Stage
🎨
How to Draw a Cone: A Step-by-Step Guide for Kids
🎨
Coffee Roasting: A Coloring and Food Science Guide for Kids
🎨
Name Tag Coloring: Free Ideas for Your Next Celebration
🍂
Seasonal Coloring Guide: Hanukkah
🎨
The Letter W: An Alphabet and Number Coloring Page
🔤
Visual Vocabulary: New Vocabulary Words
🧒
How Drawing Supports The Pictorial Stage
🎨
A Robot Bird: A Coloring and Invention Guide for Kids
🔤
Learning Early Literacy Skills Through Drawing
📴
Screen-Free Coloring Ideas for Rainy Afternoons
🎨
Favorite Foods Drawing Prompts for Beginners
🎨
Wheat Harvesting: A Coloring and Food Science Guide for Kids
🎨
A Rock Garden: A Gardening Guide for Kids and Families
🎨
Sloth Coloring and Drawing Ideas for Kids
🎨
Zinnia: A Coloring and Nature Guide for Kids
🎨
Fun Rickshaw Coloring and Drawing Ideas for Kids
🎨
Exploring Moon Phases: A Coloring and Learning Guide for Kids
🎨
A School Talent Show: A Classroom Coloring and Learning Guide
🎨
Being Patient with a Younger Sibling: A Simple Social Skill for Kids
🎨
A Garden Sundial: A Gardening Guide for Kids and Families
🎨
A Pet Leash and Collar: A Simple Pet Care Guide for Kids
🎨
Glacier Landscape Coloring Page: A Nature Learning Guide for Kids
💬
How Symbols and Icons Communicate Ideas
🎨
Capoeira: A Coloring and Movement Guide for Kids
💬
Why Picture Books Matter in Everyday Life
🎨
A Litter Box: A Simple Pet Care Guide for Kids
🎨
Exploring France: A Coloring and Culture Guide for Kids
🎨
How to Draw Insects Step by Step
🎨
A Hawaiian Lei and Muumuu: A Coloring and Culture Guide for Kids
🎨
Wasp Coloring and Drawing Ideas for Kids
🎨
A Plant Growing Toward Light: A Step-by-Step Science Guide for Kids
🎨
Yo-Yo Coloring and Drawing Ideas for Kids
🎨
A Kids' Craft Sale Table: A Money Guide for Kids and Parents
🎨
Blue Mosque: Coloring Page and Fun Facts for Kids
🎨
Stag Beetle Coloring and Drawing Ideas for Kids
🎨
Chocolate Making: A Coloring and Food Science Guide for Kids
🎨
How to Draw a Bagpipes: A Coloring and Music Guide for Kids
🔤
How Pictures Help Children Learn Family Words
🎨
Gargoyle Coloring and Drawing Ideas for Kids
🧒
What to Expect When Teaching Ages 5-6
🧘
Simple Steps for Mindful Coloring for Beginners
🎨
The Venice Carnival Masks: Coloring Ideas and Fun Facts for Kids
🎨
A Basting Brush: A Kitchen Guide for Kids and Parents
🎨
Getting a Check-Up: A Coloring and Health Guide for Kids
👨👩👧
Coloring Ideas for Screen-Free Afternoons
🔬
Understanding How Eyes Perceive Color
🔬
What Is RGB Color Mixing?
🎨
Soccer Coloring Pages and Drawing Ideas for Kids
💬
Understanding Wordless Storytelling
🎲
Visual Puzzle Games: A Creative Twist
💡
Nurturing Doodling at Home
🎨
Flying Lizard Coloring and Drawing Ideas for Kids
🎨
Meet the Referee: A Community Helper Coloring Guide
🧘
A Beginner's Guide to Quiet Morning Coloring
🎨
Weather Drawing Prompts for Beginners
🧒
Understanding Kindergarteners in Early Childhood
🎨
A Sakura Branch: A Coloring and Nature Guide for Kids
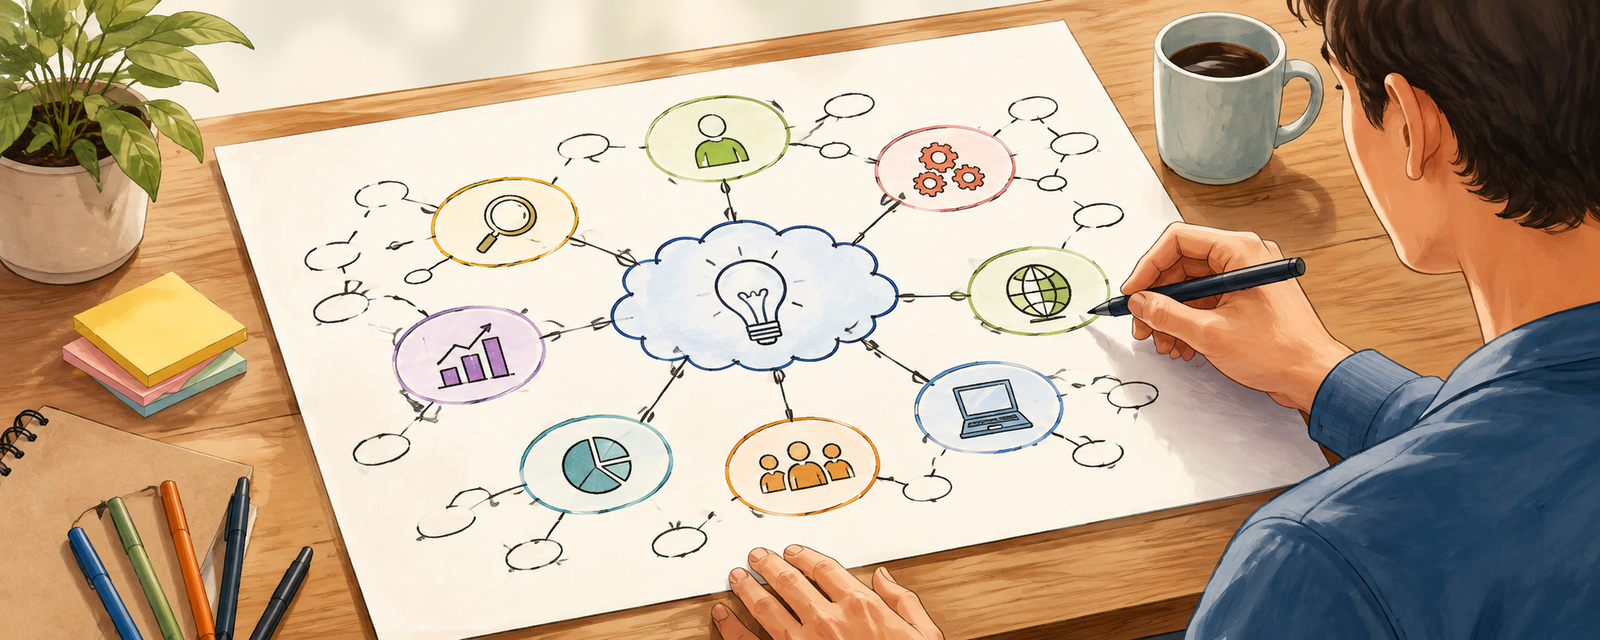 Why Visual Thinkers Use Concept Mapping
🎨
A Ranch Windmill Pump: A Wild West Coloring and History Guide for Kids
🎨
Watering the Garden: A Simple Life Skill for Kids
🎨
Eggplant Coloring and Drawing Ideas for Kids
📴
Hands-On Activities for Device-Free Evenings
🎨
A Prairie Sunset: A Wild West Coloring and History Guide for Kids
🎨
Ancient Babylonian Hanging Gardens: An Ancient History Coloring Guide for Kids
✏️
Fun Exercises for Drawing Simple Objects
🌈
Printable Dinosaurs Coloring Activities
🎨
Recycling Old Coloring Pages: A Practical Guide
🎨
Kiwi Fruit Coloring and Drawing Ideas for Kids
🌈
Fun Weather Scenes Coloring Pages for Kids
🎨
St. Nicholas Day Coloring Ideas and Activities for the Whole Family
🎨
Leprechaun Coloring and Drawing Ideas for Kids
🧒
How Drawing Supports Pattern Recognition
🎨
A Wild Horse Herd: A Wild West Coloring and History Guide for Kids
🧠
How Drawing May Support Problem-Solving
🎨
Megalodon Shark Coloring Page: Fun Facts for Young Paleontologists
🌈
Fun Buildings and Castles Coloring Pages for Kids
🌈
Creative Ways to Color Jungle Scenes
🎨
Python Coloring and Drawing Ideas for Kids
🍂
Printable Easter Coloring Pages for Kids
🎨
a County Fair Day Coloring Ideas and Activities for the Whole Family
Why Visual Thinkers Use Concept Mapping
🎨
A Ranch Windmill Pump: A Wild West Coloring and History Guide for Kids
🎨
Watering the Garden: A Simple Life Skill for Kids
🎨
Eggplant Coloring and Drawing Ideas for Kids
📴
Hands-On Activities for Device-Free Evenings
🎨
A Prairie Sunset: A Wild West Coloring and History Guide for Kids
🎨
Ancient Babylonian Hanging Gardens: An Ancient History Coloring Guide for Kids
✏️
Fun Exercises for Drawing Simple Objects
🌈
Printable Dinosaurs Coloring Activities
🎨
Recycling Old Coloring Pages: A Practical Guide
🎨
Kiwi Fruit Coloring and Drawing Ideas for Kids
🌈
Fun Weather Scenes Coloring Pages for Kids
🎨
St. Nicholas Day Coloring Ideas and Activities for the Whole Family
🎨
Leprechaun Coloring and Drawing Ideas for Kids
🧒
How Drawing Supports Pattern Recognition
🎨
A Wild Horse Herd: A Wild West Coloring and History Guide for Kids
🧠
How Drawing May Support Problem-Solving
🎨
Megalodon Shark Coloring Page: Fun Facts for Young Paleontologists
🌈
Fun Buildings and Castles Coloring Pages for Kids
🌈
Creative Ways to Color Jungle Scenes
🎨
Python Coloring and Drawing Ideas for Kids
🍂
Printable Easter Coloring Pages for Kids
🎨
a County Fair Day Coloring Ideas and Activities for the Whole Family
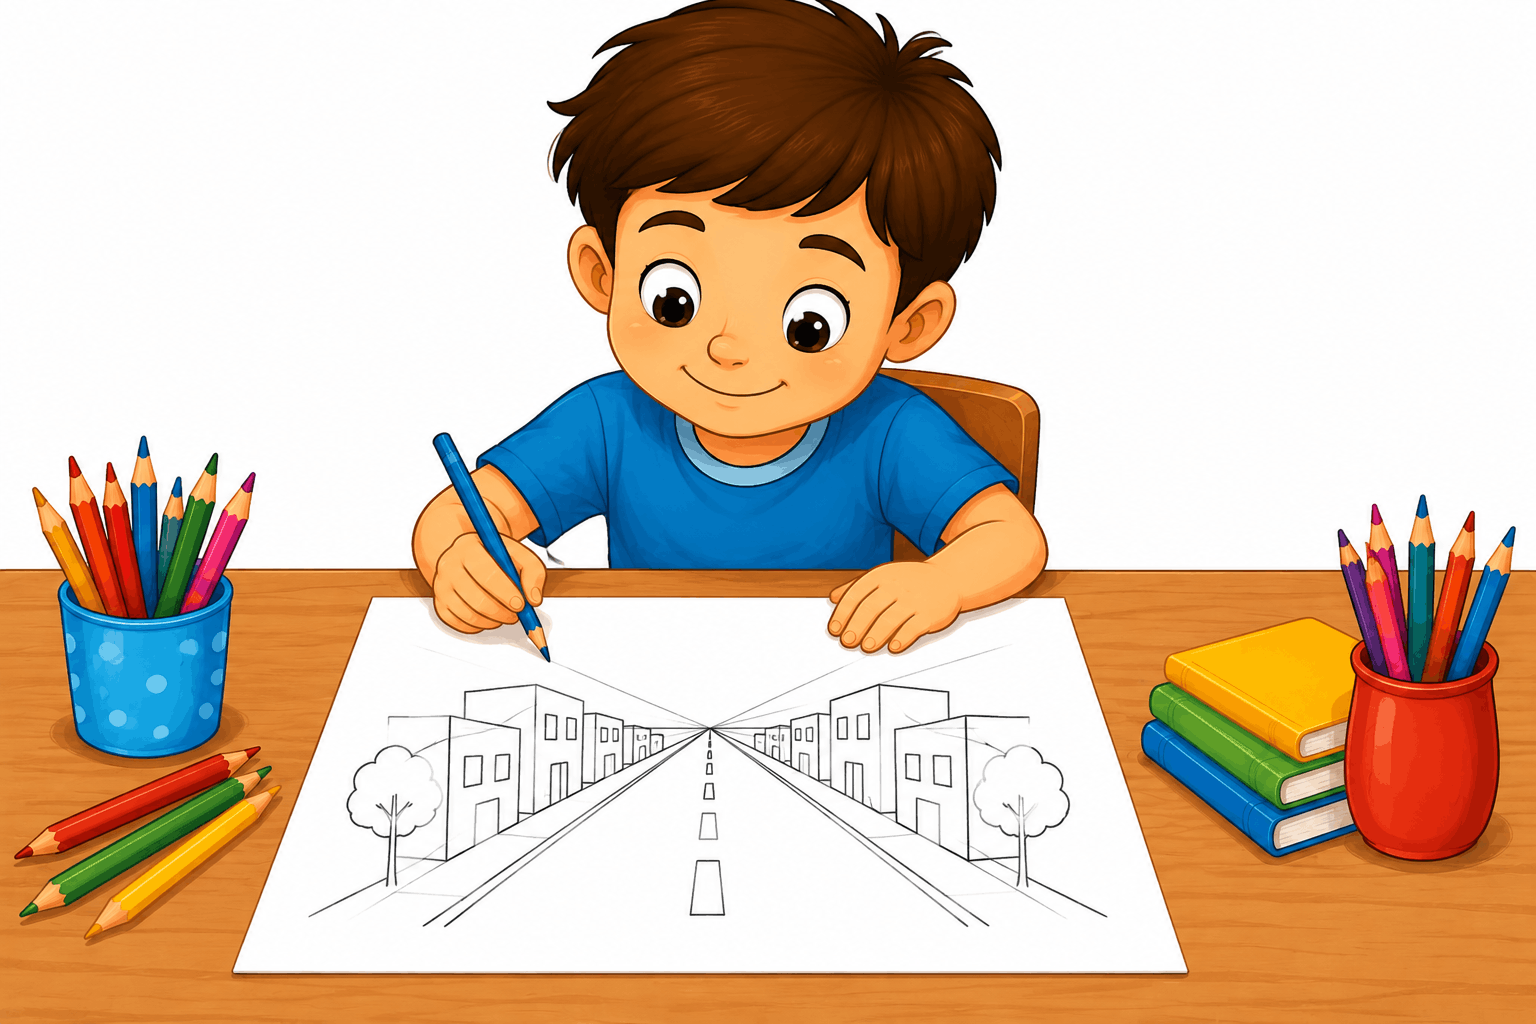 A Beginner's Guide to Basic Perspective
🎨
A Merry-Go-Round Ride: A Coloring and Playtime Guide for Kids
🍂
Seasonal Coloring Guide: Autumn
🎨
A Video Game Character Design: A Coloring and STEM Guide for Kids
🎨
Being a Gracious Host: A Simple Social Skill for Kids
🎨
Offering to Share Your Snack: A Simple Social Skill for Kids
🎨
A Garage Sale Stand: A Money Guide for Kids and Parents
🎨
How to Draw a Ikat Pattern: A Step-by-Step Guide
📐
Fun Drawing Activities for Number Lines
🎨
A Paper Bridge Strength Test: A Step-by-Step Science Guide for Kids
🍎
How Teachers Can Use Art Lessons for History Class
🔎
How Flowcharts Support Learning
🎨
Christ the Redeemer: Coloring Page and Fun Facts for Kids
🌈
Relaxing Flowers and Gardens Coloring Activities
✏️
How to Improve Your Drawing Simple Objects
🎨
A Pirate's Eye Patch Coloring and Drawing Ideas for Kids
🌈
Relaxing Birds Coloring Activities
🍂
Seasonal Coloring Guide: Thanksgiving
💡
Why Open-Ended Play Matters for Young Artists
💡
Why Finding Inspiration Matters for Young Artists
📴
Making the Most of Summer Vacations Without Screens
🎨
The Grand Old Duke of York: A Nursery Rhyme Coloring Guide for Kids
🎨
Peach Coloring and Drawing Ideas for Kids
🎨
Blue Whale Coloring and Drawing Ideas for Kids
👨👩👧
Coloring Ideas for Weekend Family Activities
🎨
Bearded Dragon Coloring and Drawing Ideas for Kids
🎨
A Beginner's Guide to Drawing Favorite Foods
🎨
The Letter I: An Alphabet and Number Coloring Page
🎲
How to Play Mazes
🎨
A Backpack and Walking Stick: Coloring Ideas for Your Next Family Adventure
🎨
Whirligig Coloring and Drawing Ideas for Kids
🎨
Pouring a Drink: A Simple Life Skill for Kids
✏️
Why Shading Basics Matters for New Artists
🎨
a Vision Board for Kids: Free Ideas for Your Next Celebration
🎨
Stretching Before Play: A Coloring and Health Guide for Kids
🎨
Positive Self-Talk Cards: A Simple Mindfulness Activity for Kids
🎨
An Invention Workshop Scene: A Coloring and Invention Guide for Kids
💡
How Drawing Encourages Daydreaming
🌈
Printable Food and Treats Coloring Activities
🎨
Covering a Cough: A Coloring and Health Guide for Kids
🎨
Magic 8 Ball Coloring and Drawing Ideas for Kids
🎨
Best Paper Weight for Markers: A Buying and Technique Guide
🎨
Ali Baba and the Forty Thieves: A Classic Story Coloring Guide for Kids
🎨
Mosquito Coloring and Drawing Ideas for Kids
🎨
Cherry Coloring and Drawing Ideas for Kids
🎨
A Message Written in Sand Coloring and Drawing Ideas for Kids
👨👩👧
Why Parents Love Summer Break Activities
🎨
Meet Cubism: An Art Appreciation Guide for Kids
🎨
A Sami Traditional Dress: A Coloring and Culture Guide for Kids
🎨
Thank You Card Coloring: Free Ideas for Your Next Celebration
🎨
A World Cuisine Cooking Class: Coloring Ideas and Fun Facts for Kids
💬
From Cave Drawings to Sign Language and Gesture
🔤
Using Coloring Pages to Teach Story Sequencing
🎨
Fun Self-Portraits Drawing Activities for Kids
🎨
Centaur Coloring and Drawing Ideas for Kids
🎨
A Pet Chart for Chores: A Simple Pet Care Guide for Kids
📐
Why Counting and Drawing Go Together
🎨
Fun Fantasy Creatures Drawing Activities for Kids
🎨
A Superhero Team Photo: A Superhero Coloring and Design Guide for Kids
🔬
What Is Digital vs Traditional Color?
🍂
Fun Thanksgiving Classroom Coloring Ideas
🍎
Classroom Ideas: Art Lessons for Math Class
🎨
Exploring Norway: A Coloring and Culture Guide for Kids
🎨
How to Draw a Butterfly Mandala: A Step-by-Step Guide
✏️
Why Drawing Triangles Matters for New Artists
🎨
Community Helpers Drawing Prompts for Beginners
🎨
Exploring Zero Gravity: A Coloring and Learning Guide for Kids
🎨
A Starfish on the Beach Coloring and Drawing Ideas for Kids
🧒
A Parent's Guide to Building Drawing Confidence
🌈
Printable Flowers and Gardens Coloring Activities
🎨
The Number 5: An Alphabet and Number Coloring Page
🎨
A Visit to the Dentist: A Coloring and Health Guide for Kids
🎨
A Growth Chart: A Coloring and Health Guide for Kids
🎨
Using an Umbrella: A Simple Life Skill for Kids
🎨
A Drum Circle: A Coloring and Movement Guide for Kids
🎨
A Wild West Sheriff: A Wild West Coloring and History Guide for Kids
🎨
Cardinal Coloring Page Ideas for Kids
🎨
Spinach Coloring and Drawing Ideas for Kids
🎨
A Dinosaur Guarding Its Nest Coloring Page: Fun Facts for Young Paleontologists
👨👩👧
Why Parents Love Budget-Friendly Activities
✏️
How to Improve Your Drawing Simple Faces
🎨
Food Canning and Preserving: A Coloring and Food Science Guide for Kids
🎨
A Bread Loaf Pan: A Kitchen Guide for Kids and Parents
🎨
The Letter B: An Alphabet and Number Coloring Page
🎨
Sun Safety and Sunscreen: A Coloring and Health Guide for Kids
🎨
Tetherball: A Coloring and Playtime Guide for Kids
🎨
Meet the Postal Worker: A Community Helper Coloring Guide
🎨
Exploring New Zealand: A Coloring and Culture Guide for Kids
🎨
Thunderstorm Safety: A Family Safety Guide
🎨
Strawberry Coloring and Drawing Ideas for Kids
🎨
The Number 14: An Alphabet and Number Coloring Page
🧒
Understanding Toddlers (Ages 1-2) in Early Childhood
🍂
Fun Mother's Day Classroom Coloring Ideas
🎨
Pop Goes the Weasel: A Nursery Rhyme Coloring Guide for Kids
🧠
Exploring Drawing and Cognitive Development
🎲
How to Play Sketch Relay Games
🎨
The Steadfast Tin Soldier: A Classic Story Coloring Guide for Kids
🎨
Popcorn Popping: A Coloring and Food Science Guide for Kids
A Beginner's Guide to Basic Perspective
🎨
A Merry-Go-Round Ride: A Coloring and Playtime Guide for Kids
🍂
Seasonal Coloring Guide: Autumn
🎨
A Video Game Character Design: A Coloring and STEM Guide for Kids
🎨
Being a Gracious Host: A Simple Social Skill for Kids
🎨
Offering to Share Your Snack: A Simple Social Skill for Kids
🎨
A Garage Sale Stand: A Money Guide for Kids and Parents
🎨
How to Draw a Ikat Pattern: A Step-by-Step Guide
📐
Fun Drawing Activities for Number Lines
🎨
A Paper Bridge Strength Test: A Step-by-Step Science Guide for Kids
🍎
How Teachers Can Use Art Lessons for History Class
🔎
How Flowcharts Support Learning
🎨
Christ the Redeemer: Coloring Page and Fun Facts for Kids
🌈
Relaxing Flowers and Gardens Coloring Activities
✏️
How to Improve Your Drawing Simple Objects
🎨
A Pirate's Eye Patch Coloring and Drawing Ideas for Kids
🌈
Relaxing Birds Coloring Activities
🍂
Seasonal Coloring Guide: Thanksgiving
💡
Why Open-Ended Play Matters for Young Artists
💡
Why Finding Inspiration Matters for Young Artists
📴
Making the Most of Summer Vacations Without Screens
🎨
The Grand Old Duke of York: A Nursery Rhyme Coloring Guide for Kids
🎨
Peach Coloring and Drawing Ideas for Kids
🎨
Blue Whale Coloring and Drawing Ideas for Kids
👨👩👧
Coloring Ideas for Weekend Family Activities
🎨
Bearded Dragon Coloring and Drawing Ideas for Kids
🎨
A Beginner's Guide to Drawing Favorite Foods
🎨
The Letter I: An Alphabet and Number Coloring Page
🎲
How to Play Mazes
🎨
A Backpack and Walking Stick: Coloring Ideas for Your Next Family Adventure
🎨
Whirligig Coloring and Drawing Ideas for Kids
🎨
Pouring a Drink: A Simple Life Skill for Kids
✏️
Why Shading Basics Matters for New Artists
🎨
a Vision Board for Kids: Free Ideas for Your Next Celebration
🎨
Stretching Before Play: A Coloring and Health Guide for Kids
🎨
Positive Self-Talk Cards: A Simple Mindfulness Activity for Kids
🎨
An Invention Workshop Scene: A Coloring and Invention Guide for Kids
💡
How Drawing Encourages Daydreaming
🌈
Printable Food and Treats Coloring Activities
🎨
Covering a Cough: A Coloring and Health Guide for Kids
🎨
Magic 8 Ball Coloring and Drawing Ideas for Kids
🎨
Best Paper Weight for Markers: A Buying and Technique Guide
🎨
Ali Baba and the Forty Thieves: A Classic Story Coloring Guide for Kids
🎨
Mosquito Coloring and Drawing Ideas for Kids
🎨
Cherry Coloring and Drawing Ideas for Kids
🎨
A Message Written in Sand Coloring and Drawing Ideas for Kids
👨👩👧
Why Parents Love Summer Break Activities
🎨
Meet Cubism: An Art Appreciation Guide for Kids
🎨
A Sami Traditional Dress: A Coloring and Culture Guide for Kids
🎨
Thank You Card Coloring: Free Ideas for Your Next Celebration
🎨
A World Cuisine Cooking Class: Coloring Ideas and Fun Facts for Kids
💬
From Cave Drawings to Sign Language and Gesture
🔤
Using Coloring Pages to Teach Story Sequencing
🎨
Fun Self-Portraits Drawing Activities for Kids
🎨
Centaur Coloring and Drawing Ideas for Kids
🎨
A Pet Chart for Chores: A Simple Pet Care Guide for Kids
📐
Why Counting and Drawing Go Together
🎨
Fun Fantasy Creatures Drawing Activities for Kids
🎨
A Superhero Team Photo: A Superhero Coloring and Design Guide for Kids
🔬
What Is Digital vs Traditional Color?
🍂
Fun Thanksgiving Classroom Coloring Ideas
🍎
Classroom Ideas: Art Lessons for Math Class
🎨
Exploring Norway: A Coloring and Culture Guide for Kids
🎨
How to Draw a Butterfly Mandala: A Step-by-Step Guide
✏️
Why Drawing Triangles Matters for New Artists
🎨
Community Helpers Drawing Prompts for Beginners
🎨
Exploring Zero Gravity: A Coloring and Learning Guide for Kids
🎨
A Starfish on the Beach Coloring and Drawing Ideas for Kids
🧒
A Parent's Guide to Building Drawing Confidence
🌈
Printable Flowers and Gardens Coloring Activities
🎨
The Number 5: An Alphabet and Number Coloring Page
🎨
A Visit to the Dentist: A Coloring and Health Guide for Kids
🎨
A Growth Chart: A Coloring and Health Guide for Kids
🎨
Using an Umbrella: A Simple Life Skill for Kids
🎨
A Drum Circle: A Coloring and Movement Guide for Kids
🎨
A Wild West Sheriff: A Wild West Coloring and History Guide for Kids
🎨
Cardinal Coloring Page Ideas for Kids
🎨
Spinach Coloring and Drawing Ideas for Kids
🎨
A Dinosaur Guarding Its Nest Coloring Page: Fun Facts for Young Paleontologists
👨👩👧
Why Parents Love Budget-Friendly Activities
✏️
How to Improve Your Drawing Simple Faces
🎨
Food Canning and Preserving: A Coloring and Food Science Guide for Kids
🎨
A Bread Loaf Pan: A Kitchen Guide for Kids and Parents
🎨
The Letter B: An Alphabet and Number Coloring Page
🎨
Sun Safety and Sunscreen: A Coloring and Health Guide for Kids
🎨
Tetherball: A Coloring and Playtime Guide for Kids
🎨
Meet the Postal Worker: A Community Helper Coloring Guide
🎨
Exploring New Zealand: A Coloring and Culture Guide for Kids
🎨
Thunderstorm Safety: A Family Safety Guide
🎨
Strawberry Coloring and Drawing Ideas for Kids
🎨
The Number 14: An Alphabet and Number Coloring Page
🧒
Understanding Toddlers (Ages 1-2) in Early Childhood
🍂
Fun Mother's Day Classroom Coloring Ideas
🎨
Pop Goes the Weasel: A Nursery Rhyme Coloring Guide for Kids
🧠
Exploring Drawing and Cognitive Development
🎲
How to Play Sketch Relay Games
🎨
The Steadfast Tin Soldier: A Classic Story Coloring Guide for Kids
🎨
Popcorn Popping: A Coloring and Food Science Guide for Kids
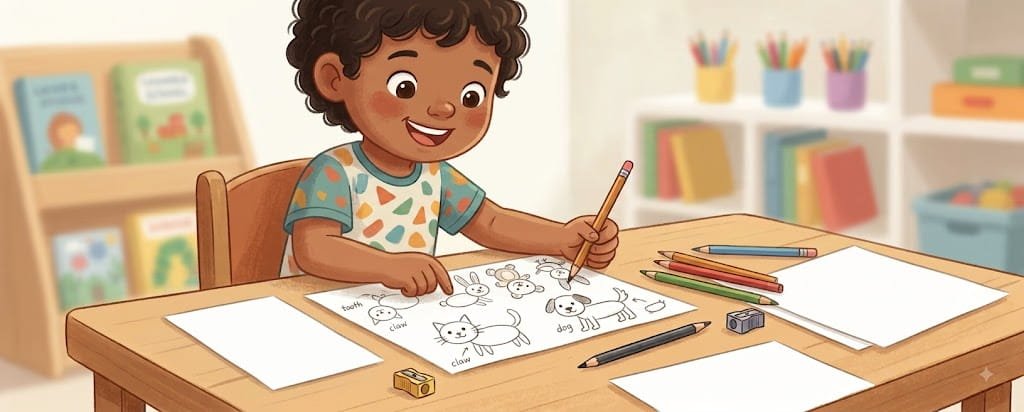 A Beginner's Guide to Drawing Simple Animals
🎨
Little Bo Peep: A Nursery Rhyme Coloring Guide for Kids
🔬
The Science Behind Why Printers Use CMYK
🎨
Hurricane Preparedness: A Family Safety Guide
🖌️
Why Using Watercolor Matters for Young Artists
🎨
Sydney Opera House: Coloring Page and Fun Facts for Kids
🎨
Washing Dishes: A Simple Life Skill for Kids
🍂
Fun Valentine's Day Classroom Coloring Ideas
🎨
Watering Can: A Gardening Guide for Kids and Families
🎨
Group Coloring Project Ideas: A Practical Guide
🎨
A Kids' Investing Concept (Growing a Plant as Metaphor): A Money Guide for Kids and Parents
🎨
Beauty and the Beast: A Classic Story Coloring Guide for Kids
🧒
A Parent's Guide to The Symbol-Making Stage
🍎
Using Coloring Pages for Assessing Creativity in the Classroom
🧠
Why Drawing Can Help With Organizing Ideas
🎨
A Campfire Story Circle: Coloring Ideas for Your Next Family Adventure
🎨
Exploring Nigeria: A Coloring and Culture Guide for Kids
🎨
Earwig Coloring and Drawing Ideas for Kids
🧒
Fun Ways to Build The Symbol-Making Stage
🧒
Understanding Ages 6-7 in Early Childhood
🎨
Ice Cream Sundae Coloring Ideas for Kids Who Love to Create
💬
From Cave Drawings to Traffic and Safety Signs
🎨
A Garden Journal: A Gardening Guide for Kids and Families
📴
Making the Most of Sibling Playtime Without Screens
🏺
How Prehistoric Drawing Tools Shaped Human Communication
🍂
Celebrate Thanksgiving With Coloring Activities
🍎
How Teachers Can Use Classroom Coloring Stations
🎨
A Flowchart of Steps: A Coloring and STEM Guide for Kids
🎨
Apple Coloring and Drawing Ideas for Kids
🎨
Jenga Tower Coloring and Drawing Ideas for Kids
💡
The Role of Open-Ended Play in Children's Art
🎨
Poison Dart Frog Coloring and Drawing Ideas for Kids
👨👩👧
Fun and Simple Budget-Friendly Activities
🎨
Fun Scooter Coloring and Drawing Ideas for Kids
🖍️
Tips for Coloring Mandalas
🎨
A Guinea Pig's Cage: A Simple Pet Care Guide for Kids
🎨
A Superhero Disguised as an Ordinary Person: A Superhero Coloring and Design Guide for Kids
🎨
Hammerhead Shark Coloring and Drawing Ideas for Kids
🎨
A Carnival Strongman Bell Coloring and Drawing Ideas for Kids
🎨
Creative Seasons Drawing Exercises
🎨
Doll House Coloring and Drawing Ideas for Kids
🎨
A Water Balloon Toss: A Coloring and Playtime Guide for Kids
👨👩👧
Fun and Simple Morning Routine Activities
🎨
A Neighborhood Bakery: A Coloring and Food Science Guide for Kids
🎨
Harbor Seal Coloring and Drawing Ideas for Kids
🎨
A Family Choosing a New Pet: A Simple Pet Care Guide for Kids
🎨
Cleaning Up After Play: A Simple Life Skill for Kids
🎨
Easy Family Portraits Drawing Ideas
🎨
A Circus Clown Coloring and Drawing Ideas for Kids
🎨
An Injera Platter: Coloring Ideas and Fun Facts for Kids
🧘
A Beginner's Guide to Slow Coloring Practice
🎨
Creative Musical Instruments Drawing Exercises
🧠
The Link Between Drawing and Cognitive Development
🎨
Birthday Party Printables: Free Ideas for Your Next Celebration
💗
How Drawing Supports Building Self-Esteem Through Art
🎨
Washing Your Hands: A Coloring and Health Guide for Kids
🎨
Fun Animals Drawing Activities for Kids
🎨
The Fisherman and His Wife: A Classic Story Coloring Guide for Kids
🎨
A Superhero Headquarters: A Superhero Coloring and Design Guide for Kids
🎨
A Pirate Crew Coloring and Drawing Ideas for Kids
🧠
Why Drawing Can Help With Planning Skills
🎨
A Dollar Bill: A Money Guide for Kids and Parents
🎨
A Wheelbarrow Race: A Coloring and Playtime Guide for Kids
📴
Hands-On Activities for Waiting Rooms
🌈
Farm Scenes Coloring Ideas for Classrooms
📐
Why Number Lines and Drawing Go Together
🔎
Why Visual Thinkers Use Idea Webs
👨👩👧
Fun and Simple Bedtime Wind-Down Routines
✏️
Why Drawing Simple Animals Matters for New Artists
🧠
Why Drawing Can Help With Working Memory
🖍️
How to Get Better at Coloring Skies and Backgrounds
🖌️
Why Blending Techniques Matters for Young Artists
🧒
A Parent's Guide to Pattern Recognition
🧒
A Parent's Guide to Encouraging Reluctant Artists
🎨
How to Draw a Octagon: A Step-by-Step Guide for Kids
🧘
Simple Steps for Coloring as a Calm-Down Tool
🌈
Fun Fantasy Creatures Coloring Pages for Kids
🎲
Using Drawing for Scavenger Hunt Drawings
🎨
Chameleon Coloring and Drawing Ideas for Kids
🔬
Understanding Primary Colors
🎨
A Seed Germination Jar: A Step-by-Step Science Guide for Kids
🧠
Can Drawing Improve Observation Skills?
💡
Building Divergent Thinking Through Coloring and Drawing
🎨
Jumbo Crayons for Toddlers: A Buying and Technique Guide
🎨
An Irish Traditional Dance Dress: A Coloring and Culture Guide for Kids
🎨
A Homemade Slime: A Step-by-Step Science Guide for Kids
🎨
Walking Stick Bug Coloring and Drawing Ideas for Kids
🎨
A Beach Bonfire Coloring and Drawing Ideas for Kids
🏺
How Hieroglyphics Shaped Human Communication
🎨
A Recipe Card: A Kitchen Guide for Kids and Parents
🎨
The Number 20: An Alphabet and Number Coloring Page
🖌️
Simple Steps for Creating Texture
👨👩👧
Creative Bedtime Wind-Down Routines for Kids
🎨
A New Playground Being Built Coloring and Drawing Ideas for Kids
🎨
Fun Dump Truck Coloring and Drawing Ideas for Kids
🎨
The Number 7: An Alphabet and Number Coloring Page
🎨
Spring Kite Flying: Coloring Ideas and Activities for the Whole Family
🎨
Kwanzaa Coloring Ideas and Activities for the Whole Family
🎨
Oktoberfest Pretzels: Coloring Ideas and Fun Facts for Kids
🎨
A Piano Recital: A Coloring and Movement Guide for Kids
🌈
Creative Ways to Color Dinosaurs
🎨
Willow Tree: A Coloring and Nature Guide for Kids
🧒
How Drawing Supports Preschoolers
👨👩👧
Making the Most of Weekend Family Activities
🎨
A Unicyclist Coloring and Drawing Ideas for Kids
🍎
How Teachers Can Use Bulletin Board Ideas
🖍️
Tips for Coloring Large Areas
🎨
Lamb Coloring and Drawing Ideas for Kids
🎨
a Family Reunion Picnic Coloring Ideas and Activities for the Whole Family
🧒
How Drawing Supports Ages 6-7
🎨
Axolotl Coloring and Drawing Ideas for Kids
🎨
Roadrunner Coloring Page Ideas for Kids
🎨
Thunderstorm Coloring Page: A Nature Learning Guide for Kids
🍎
Classroom Ideas: Art Lessons for Science Class
🎨
A Dish Towel: A Kitchen Guide for Kids and Parents
🧠
Can Drawing Improve Memory?
🎨
Plesiosaurus Coloring Page: Fun Facts for Young Paleontologists
🔬
What Is How Eyes Perceive Color?
🎨
How to Draw a Cymbals: A Coloring and Music Guide for Kids
🍎
Simple Art Lessons for Math Class for Busy Classrooms
🧠
Why Drawing Can Help With Creative Thinking
🎨
Writing a Thank You Card: A Simple Social Skill for Kids
🎨
Fun Castles Drawing Activities for Kids
🧠
The Link Between Drawing and Organizing Ideas
🎨
Chimera Coloring and Drawing Ideas for Kids
🎨
A Kids' Garden Plot: A Gardening Guide for Kids and Families
🎨
Cyclops Coloring and Drawing Ideas for Kids
🎨
The Wise Old Owl: A Classic Story Coloring Guide for Kids
🎨
Building a Color Mixing Chart: A Buying and Technique Guide
✏️
How to Improve Your Holding a Pencil Correctly
🎨
Pasta Making: A Coloring and Food Science Guide for Kids
🎨
A Recess Bell: A Classroom Coloring and Learning Guide
🎨
An Easter Basket: Coloring Ideas and Fun Facts for Kids
🎨
Clog Dancing: A Coloring and Movement Guide for Kids
🎨
Card Game Deck Coloring and Drawing Ideas for Kids
🎨
A Superhero Flying Pose: A Superhero Coloring and Design Guide for Kids
🧘
Exploring Coloring During Travel
🎨
A Homemade Thermometer: A Step-by-Step Science Guide for Kids
🎨
A Fall Hayride: Coloring Ideas and Activities for the Whole Family
🎨
Crocodile Coloring and Drawing Ideas for Kids
🎨
Hawk Coloring Page Ideas for Kids
🎨
Crow Coloring Page Ideas for Kids
🎨
How to Draw a Zigzag Line: A Step-by-Step Guide for Kids
🖍️
How to Get Better at Coloring With Watercolor Pencils
🎨
Musical Chairs: A Coloring and Playtime Guide for Kids
👨👩👧
Why Parents Love Bedtime Wind-Down Routines
🎨
Donkey Coloring and Drawing Ideas for Kids
🎨
A Seasonal Coloring Page Rotation: A Practical Guide
🎨
A Good Night's Sleep: A Coloring and Health Guide for Kids
🎨
Sparrow Coloring Page Ideas for Kids
🖌️
A Beginner's Guide to Cross-Hatching
🎨
Washing Fruits and Vegetables: A Coloring and Health Guide for Kids
🔎
How Visual Problem-Solving Support Learning
🎨
A Road Being Paved Coloring and Drawing Ideas for Kids
🏺
Why Hieroglyphics Matter to Historians
🎨
A Carnival Ticket Booth Coloring and Drawing Ideas for Kids
🎨
How to Draw a A 3D Cube Drawing: A Step-by-Step Guide for Kids
🎨
a Valentine Card Exchange: Free Ideas for Your Next Celebration
🎨
A Blender: A Kitchen Guide for Kids and Parents
🎨
Mosasaurus Coloring Page: Fun Facts for Young Paleontologists
🎲
How to Play Drawing Battles
🎨
A Space Suit Fitting: A Coloring and Space Mission Guide for Kids
🧠
How Drawing May Support Self-Expression
🎨
Barn Cat Coloring and Drawing Ideas for Kids
🎨
A Kitchen Island: A Kitchen Guide for Kids and Parents
🍂
Creative Earth Day Coloring Projects for Classrooms
🔤
Drawing Activities for Descriptive Words
🎨
Ears and How We Hear: A Coloring and Health Guide for Kids
🎨
A Pirate Cove Hideout Coloring and Drawing Ideas for Kids
🎨
A Royal Wizard: A Medieval Coloring and History Guide for Kids
🎨
A Space Capsule Interior: A Coloring and Space Mission Guide for Kids
🔬
The Science Behind Primary Colors
🖍️
A Beginner's Guide to Coloring Inside the Lines
🎨
Meet Pablo Picasso: An Art Appreciation Guide for Kids
🎨
Choosing Marker Nib Sizes: A Buying and Technique Guide
🎨
A Villain's Redemption Moment: A Superhero Coloring and Design Guide for Kids
🎨
A Home Fire Extinguisher: A Family Safety Guide
🎨
A Trivet: A Kitchen Guide for Kids and Parents
🍂
Creative St. Patrick's Day Coloring Projects for Classrooms
🌈
Fun Birds Coloring Pages for Kids
🎨
The Tongue and Tasting: A Coloring and Health Guide for Kids
🔎
How Visual Research Methods Support Learning
🎨
Swan Coloring Page Ideas for Kids
🎨
Taking Turns: A Simple Life Skill for Kids
🧒
A Parent's Guide to Toddlers (Ages 1-2)
🎨
Teaching Initiative: A Simple Activity for Kids
🎨
A Carousel Horse Coloring and Drawing Ideas for Kids
🔬
What Is Why Screens Use RGB?
🎨
A Day of the Dead Sugar Skull: Coloring Ideas and Fun Facts for Kids
🎨
A Garden Trowel: A Gardening Guide for Kids and Families
📐
Learning Fractions Through Drawing
🎨
Kappa Coloring and Drawing Ideas for Kids
🎨
Apologizing Sincerely: A Simple Social Skill for Kids
🎨
How to Draw a Lute: A Coloring and Music Guide for Kids
🎨
A Beach Reading Under an Umbrella Coloring and Drawing Ideas for Kids
🎨
A Water Cycle in a Bag: A Step-by-Step Science Guide for Kids
🎨
Beet Coloring and Drawing Ideas for Kids
🎨
Billiards Coloring Pages and Drawing Ideas for Kids
💬
Why Traffic and Safety Signs Matter in Everyday Life
🔤
Visual Vocabulary: Emotions and Feelings Words
🔤
Learning Action Words Through Drawing
🎨
A Whiteboard Lesson: A Classroom Coloring and Learning Guide
🎨
Diplodocus Coloring Page: Fun Facts for Young Paleontologists
🎨
Milking a Cow Coloring and Drawing Ideas for Kids
🔎
A Beginner's Guide to Organizing Research With Sketches
🎨
A Jackhammer at Work Coloring and Drawing Ideas for Kids
🎨
Ancient Persian Palaces: An Ancient History Coloring Guide for Kids
🎨
Creative Community Helpers Drawing Exercises
🎨
A Weather App for Families: A Family Safety Guide
🖍️
How to Get Better at Coloring With Markers
🖌️
Simple Steps for Composition Basics
📴
Hands-On Activities for Sick Days at Home
🎨
Fox Spirit Coloring and Drawing Ideas for Kids
🍂
Celebrate Independence Day With Coloring Activities
🎨
Action Figure Coloring and Drawing Ideas for Kids
🎨
A Cat Scratching Post: A Simple Pet Care Guide for Kids
🎲
Step-by-Step Storyboard Games
🎨
A German Dirndl and Lederhosen: A Coloring and Culture Guide for Kids
🏺
How Petroglyphs and Rock Art Shaped Human Communication
🎨
A Castle Moat: A Medieval Coloring and History Guide for Kids
🎨
A Pet Carrier for Travel: A Simple Pet Care Guide for Kids
📐
Teaching Counting Through Coloring and Drawing
🎨
A Robot on Wheels: A Coloring and Invention Guide for Kids
🎨
How to Draw a Pentagon: A Step-by-Step Guide for Kids
🎨
A Lighthouse by the Shore Coloring and Drawing Ideas for Kids
🏺
How Early Human Communication Shaped Human Communication
🎨
Capybara Coloring and Drawing Ideas for Kids
🎨
Quokka Coloring and Drawing Ideas for Kids
🔬
The Science Behind Why Screens Use RGB
🎨
Self-Compassion Cards: A Simple Mindfulness Activity for Kids
🎨
A Pirate's Sword Coloring and Drawing Ideas for Kids
🎨
A Ship in a Storm Coloring and Drawing Ideas for Kids
🎨
Mixing Bowl Coloring Ideas for Kids Who Love to Create
📐
How Children Understand Tessellations With Art
🎨
Fun Hang Glider Coloring and Drawing Ideas for Kids
👨👩👧
Creative Screen-Free Afternoons for Kids
👨👩👧
Creative Quiet Time Activities for Kids
🌈
Animals Coloring Ideas for Classrooms
🌈
Ocean Life Coloring Ideas for Classrooms
🎨
Harpy Coloring and Drawing Ideas for Kids
🧘
How Quiet Morning Coloring Can Create a Quiet Moment
🎨
Ancient Olympic Games Torch: An Ancient History Coloring Guide for Kids
🎨
A Spice Market Stall: Coloring Ideas and Fun Facts for Kids
🎨
A Coloring Mural Wall: A Practical Guide
🔤
Visual Vocabulary: Early Literacy Skills
🌈
Birds Coloring Ideas for Classrooms
🎨
Anansi the Spider: A Classic Story Coloring Guide for Kids
🎨
A Fire Escape Plan: A Family Safety Guide
🔤
Using Coloring Pages to Teach Sight Words
💡
How Drawing Encourages Visual Brainstorming
🎨
How to Draw a Lotus Flower Mandala: A Step-by-Step Guide
🎨
A Campfire at Night: Coloring Ideas for Your Next Family Adventure
🎨
Troll Coloring and Drawing Ideas for Kids
🎨
Meet the Carpenter: A Community Helper Coloring Guide
🎨
An Exoskeleton Suit: A Coloring and Invention Guide for Kids
🎨
Tornado Safety at Home: A Family Safety Guide
🎨
Ballroom Dancers: A Coloring and Movement Guide for Kids
🎨
A Beach Sandcastle Contest Coloring and Drawing Ideas for Kids
🌈
Printable Musical Themes Coloring Activities
🎨
Peanut Butter Making: A Coloring and Food Science Guide for Kids
🎨
Potato Coloring and Drawing Ideas for Kids
💬
From Cave Drawings to Wordless Storytelling
🎨
A Hearing Check-Up: A Coloring and Health Guide for Kids
👨👩👧
Why Parents Love Road Trip Activities
🎨
Ancient Viking Longships: An Ancient History Coloring Guide for Kids
🎨
Cheerleading Coloring Pages and Drawing Ideas for Kids
🎨
How to Draw a Kazoo: A Coloring and Music Guide for Kids
🎨
A Herb Garden Window Sill: A Gardening Guide for Kids and Families
🎨
Jigsaw Puzzle Coloring and Drawing Ideas for Kids
🎨
Roasting Marshmallows: Coloring Ideas for Your Next Family Adventure
🎨
A Horseshoe: A Wild West Coloring and History Guide for Kids
📐
Teaching Symmetry Through Coloring and Drawing
🎨
A Bird Feeder in the Garden: A Gardening Guide for Kids and Families
🎨
A New Puppy Learning Tricks: A Simple Pet Care Guide for Kids
🏺
What We Know About Prehistoric Drawing Tools
🧒
Drawing Activities for Pre-Writing Skills
🎨
Aphid Coloring and Drawing Ideas for Kids
🍎
A Teacher's Guide to Early Finisher Activities
🏺
Exploring Early Writing Systems
🎨
Nature Scenes Drawing Prompts for Beginners
🎨
Digital vs. Printed Coloring Pages: A Practical Guide
🎨
Breakfast Plate Coloring Ideas for Kids Who Love to Create
🔤
Visual Vocabulary: Family Words
🎨
A Winter Snow Angel: Coloring Ideas and Activities for the Whole Family
🎨
Easy Animals Drawing Ideas
🔤
Learning Story Sequencing Through Drawing
🎨
A Kids' Invention Convention: A Coloring and STEM Guide for Kids
🎨
A Garden Shed: A Gardening Guide for Kids and Families
🧒
Drawing Activities for Left-Handed Children
🎨
How to Draw a Triangle: A Step-by-Step Guide for Kids
🎨
A Simple Pulley System: A Step-by-Step Science Guide for Kids
🧘
Simple Steps for Coloring With Soft Music
🎲
Fun Football Play Diagrams for Kids
🎨
Rapunzel: A Classic Story Coloring Guide for Kids
🌈
Relaxing Farm Scenes Coloring Activities
🎨
Cicada Coloring and Drawing Ideas for Kids
🎨
Twinkle Twinkle Little Star: A Nursery Rhyme Coloring Guide for Kids
💗
Exploring Drawing Feelings Instead of Words Through Art
🍂
Seasonal Coloring Guide: Back-to-School Season
🌈
Printable Weather Scenes Coloring Activities
🖍️
How to Get Better at Coloring Mandalas
🎨
TV Tag: A Coloring and Playtime Guide for Kids
👨👩👧
Coloring Ideas for Sibling Bonding Activities
🎨
The Brave Little Tailor: A Classic Story Coloring Guide for Kids
🎨
A Balloon-Powered Car: A Step-by-Step Science Guide for Kids
🍎
Using Coloring Pages for Art Lessons for Science Class
💬
The Power of Sign Language and Gesture
🎨
Bonsai Tree: A Coloring and Nature Guide for Kids
🎨
Ancient Chinese Terracotta Warriors: An Ancient History Coloring Guide for Kids
🎨
Rainbow Breathing: A Simple Mindfulness Activity for Kids
🎨
Ancient Farmers and the First Crops: An Ancient History Coloring Guide for Kids
🔤
How Pictures Help Children Learn Numbers in a New Language
🎨
Velociraptor Coloring Page: Fun Facts for Young Paleontologists
🧠
Can Drawing Improve Concentration and Focus?
🌈
Fun Insects and Bugs Coloring Pages for Kids
🎨
Waiting Patiently in Line: A Simple Social Skill for Kids
🎨
A Construction Site Fence Coloring and Drawing Ideas for Kids
🎨
A Wooden House Frame Coloring and Drawing Ideas for Kids
🎨
A Superhero Origin Story Moment: A Superhero Coloring and Design Guide for Kids
🎨
La Tomatina Tomato Festival: Coloring Ideas and Fun Facts for Kids
💬
The Power of Infographics
🎨
A Beginner's Guide to Drawing Insects
💡
The Role of Combining Ideas in Children's Art
🖌️
Simple Steps for Blending Techniques
📐
Learning Geometry Through Drawing
🎨
A Healing-Power Superhero: A Superhero Coloring and Design Guide for Kids
🧘
Exploring Slow Coloring Practice
🎨
Hey Diddle Diddle: A Nursery Rhyme Coloring Guide for Kids
🎨
A Magnet and Paperclip Test: A Step-by-Step Science Guide for Kids
🎨
How to Draw a Cube: A Step-by-Step Guide for Kids
🧒
Understanding Pre-Writing Skills in Early Childhood
🎨
A Pirate Ship Coloring and Drawing Ideas for Kids
🎨
A Royal Throne Room: A Medieval Coloring and History Guide for Kids
🎨
A Piggy Bank Full to the Brim: A Money Guide for Kids and Parents
🌈
Relaxing Animals Coloring Activities
🧒
Fun Ways to Build The Pictorial Stage
🏺
How Ancient Cave Pigments Shaped Human Communication
💬
How Picture Books Communicate Ideas
🎨
Hippo Coloring and Drawing Ideas for Kids
👨👩👧
Why Parents Love Travel-Friendly Activities
🎨
A Wild West Wanted Poster: A Wild West Coloring and History Guide for Kids
🎨
Asking Permission Before Acting: A Simple Social Skill for Kids
👨👩👧
Making the Most of Morning Routine Activities
✏️
Fun Exercises for Basic Perspective
🌈
Printable Holiday Scenes Coloring Activities
🖍️
Why Coloring With Watercolor Pencils Makes a Difference
🎨
Gila Monster Coloring and Drawing Ideas for Kids
🎨
Ice Hockey Coloring Pages and Drawing Ideas for Kids
🖍️
A Beginner's Guide to Coloring With Markers
🎨
Listening When Someone Is Talking: A Simple Social Skill for Kids
🎨
A Morning Campsite Breakfast: Coloring Ideas for Your Next Family Adventure
🎨
The Tortoise and the Hare: A Classic Story Coloring Guide for Kids
🎨
How to Draw Community Helpers Step by Step
🎨
Spiral vs. Perfect-Bound Coloring Books: A Buying and Technique Guide
🏺
Why Petroglyphs and Rock Art Matter to Historians
🎨
The Owl and the Pussycat: A Nursery Rhyme Coloring Guide for Kids
🎨
Meteor Shower Sky Coloring Page: A Nature Learning Guide for Kids
📴
Screen-Free Coloring Ideas for Sick Days at Home
🎨
Seahorse Coloring and Drawing Ideas for Kids
🧒
Drawing Activities for Kindergarteners
🎨
Swordfish Coloring and Drawing Ideas for Kids
💗
Exploring Expressing Gratitude Through Art Through Art
🍂
Creative Father's Day Coloring Projects for Classrooms
🎨
Canary Coloring Page Ideas for Kids
🍂
Printable Earth Day Coloring Pages for Kids
🎨
A Beginner's Guide to Drawing Weather
🎨
Duck Coloring and Drawing Ideas for Kids
🎨
A Summer Water Balloon Fight: Coloring Ideas and Activities for the Whole Family
🎨
A Wildflower Meadow Patch: A Gardening Guide for Kids and Families
🎨
A Garden Scarecrow Building Day: A Gardening Guide for Kids and Families
🎲
Using Drawing for Drawing-Based Party Games
🎨
Simon Says: A Coloring and Playtime Guide for Kids
🎨
Meet the Tour Guide: A Community Helper Coloring Guide
🎨
Stegosaurus Coloring Page: Fun Facts for Young Paleontologists
🎨
Taco Truck Coloring Ideas for Kids Who Love to Create
🎲
Using Drawing for Treasure Map Games
🎨
Monkey Bars: A Coloring and Playtime Guide for Kids
🎨
Washable Markers for Toddlers: A Buying and Technique Guide
🎨
A Message in a Bottle Washed Ashore Coloring and Drawing Ideas for Kids
🎨
A Global Flag Parade: Coloring Ideas and Fun Facts for Kids
🎨
Winter Mittens: Coloring Ideas and Activities for the Whole Family
🎨
How to Draw a Kaleidoscope Pattern: A Step-by-Step Guide
🧒
How Drawing Supports Toddlers (Ages 1-2)
🎨
The Three Little Pigs: A Classic Story Coloring Guide for Kids
💗
How Drawing Supports Emotional Expression
🍎
Classroom Ideas: End-of-Year Activities
🎨
Creative Sports Drawing Exercises
🎨
A Ladybug on a Leaf: A Gardening Guide for Kids and Families
🔤
Visual Vocabulary: Animal Names
🎨
The Golden Goose: A Classic Story Coloring Guide for Kids
🎨
Easy Gardens and Flowers Drawing Ideas
🎨
Meet Henri Rousseau: An Art Appreciation Guide for Kids
📐
Teaching Spatial Relationships Through Coloring and Drawing
🎨
How to Draw a Hexagon: A Step-by-Step Guide for Kids
🧒
Understanding Ages 3-4 in Early Childhood
🎨
A Carnival Prize Wall Coloring and Drawing Ideas for Kids
💗
Exploring Art for Stressful Days Through Art
🔎
Why Visual Thinkers Use Visual Research Methods
🎨
A Robot Following Instructions: A Coloring and STEM Guide for Kids
🎨
How to Draw a Sorting Shapes by Color: A Step-by-Step Guide for Kids
🎨
Building a Themed Coloring Library: A Practical Guide
💡
Nurturing Imaginary Worlds at Home
🎨
Meet Norman Rockwell: An Art Appreciation Guide for Kids
🎨
A Crane Lifting a Beam Coloring and Drawing Ideas for Kids
🎨
Waiting Patiently in Line: A Simple Life Skill for Kids
🧒
Fun Ways to Build Ages 5-6
🏺
Exploring Ancient Storytelling Through Pictures
🎨
How to Draw a Recorder: A Coloring and Music Guide for Kids
🎨
Fun Original Superhero Characters Drawing Activities for Kids
🎨
Mount Everest: Coloring Page and Fun Facts for Kids
🎨
Creative Dinosaurs Drawing Exercises
🎨
Recipe Card Coloring: Free Ideas for Your Next Celebration
💗
The Role of Coloring in Family Art Time and Connection
🖍️
Tips for Coloring Cartoon Characters
💗
Creative Approaches to Drawing Feelings Instead of Words
🎨
Flamingo Coloring Page Ideas for Kids
🌈
A Guide to Birds Coloring Pages
🎨
Apple Picking: A Coloring and Food Science Guide for Kids
🎨
How to Draw a Organ: A Coloring and Music Guide for Kids
🎨
A Traditional Folk Dance Costume: Coloring Ideas and Fun Facts for Kids
💡
The Role of Creative Problem-Solving in Children's Art
🎨
Water Strider Coloring and Drawing Ideas for Kids
🧠
The Link Between Drawing and Creative Thinking
🎨
Sea Otter Coloring and Drawing Ideas for Kids
🎨
Being Honest Even When It's Hard: A Simple Social Skill for Kids
A Beginner's Guide to Drawing Simple Animals
🎨
Little Bo Peep: A Nursery Rhyme Coloring Guide for Kids
🔬
The Science Behind Why Printers Use CMYK
🎨
Hurricane Preparedness: A Family Safety Guide
🖌️
Why Using Watercolor Matters for Young Artists
🎨
Sydney Opera House: Coloring Page and Fun Facts for Kids
🎨
Washing Dishes: A Simple Life Skill for Kids
🍂
Fun Valentine's Day Classroom Coloring Ideas
🎨
Watering Can: A Gardening Guide for Kids and Families
🎨
Group Coloring Project Ideas: A Practical Guide
🎨
A Kids' Investing Concept (Growing a Plant as Metaphor): A Money Guide for Kids and Parents
🎨
Beauty and the Beast: A Classic Story Coloring Guide for Kids
🧒
A Parent's Guide to The Symbol-Making Stage
🍎
Using Coloring Pages for Assessing Creativity in the Classroom
🧠
Why Drawing Can Help With Organizing Ideas
🎨
A Campfire Story Circle: Coloring Ideas for Your Next Family Adventure
🎨
Exploring Nigeria: A Coloring and Culture Guide for Kids
🎨
Earwig Coloring and Drawing Ideas for Kids
🧒
Fun Ways to Build The Symbol-Making Stage
🧒
Understanding Ages 6-7 in Early Childhood
🎨
Ice Cream Sundae Coloring Ideas for Kids Who Love to Create
💬
From Cave Drawings to Traffic and Safety Signs
🎨
A Garden Journal: A Gardening Guide for Kids and Families
📴
Making the Most of Sibling Playtime Without Screens
🏺
How Prehistoric Drawing Tools Shaped Human Communication
🍂
Celebrate Thanksgiving With Coloring Activities
🍎
How Teachers Can Use Classroom Coloring Stations
🎨
A Flowchart of Steps: A Coloring and STEM Guide for Kids
🎨
Apple Coloring and Drawing Ideas for Kids
🎨
Jenga Tower Coloring and Drawing Ideas for Kids
💡
The Role of Open-Ended Play in Children's Art
🎨
Poison Dart Frog Coloring and Drawing Ideas for Kids
👨👩👧
Fun and Simple Budget-Friendly Activities
🎨
Fun Scooter Coloring and Drawing Ideas for Kids
🖍️
Tips for Coloring Mandalas
🎨
A Guinea Pig's Cage: A Simple Pet Care Guide for Kids
🎨
A Superhero Disguised as an Ordinary Person: A Superhero Coloring and Design Guide for Kids
🎨
Hammerhead Shark Coloring and Drawing Ideas for Kids
🎨
A Carnival Strongman Bell Coloring and Drawing Ideas for Kids
🎨
Creative Seasons Drawing Exercises
🎨
Doll House Coloring and Drawing Ideas for Kids
🎨
A Water Balloon Toss: A Coloring and Playtime Guide for Kids
👨👩👧
Fun and Simple Morning Routine Activities
🎨
A Neighborhood Bakery: A Coloring and Food Science Guide for Kids
🎨
Harbor Seal Coloring and Drawing Ideas for Kids
🎨
A Family Choosing a New Pet: A Simple Pet Care Guide for Kids
🎨
Cleaning Up After Play: A Simple Life Skill for Kids
🎨
Easy Family Portraits Drawing Ideas
🎨
A Circus Clown Coloring and Drawing Ideas for Kids
🎨
An Injera Platter: Coloring Ideas and Fun Facts for Kids
🧘
A Beginner's Guide to Slow Coloring Practice
🎨
Creative Musical Instruments Drawing Exercises
🧠
The Link Between Drawing and Cognitive Development
🎨
Birthday Party Printables: Free Ideas for Your Next Celebration
💗
How Drawing Supports Building Self-Esteem Through Art
🎨
Washing Your Hands: A Coloring and Health Guide for Kids
🎨
Fun Animals Drawing Activities for Kids
🎨
The Fisherman and His Wife: A Classic Story Coloring Guide for Kids
🎨
A Superhero Headquarters: A Superhero Coloring and Design Guide for Kids
🎨
A Pirate Crew Coloring and Drawing Ideas for Kids
🧠
Why Drawing Can Help With Planning Skills
🎨
A Dollar Bill: A Money Guide for Kids and Parents
🎨
A Wheelbarrow Race: A Coloring and Playtime Guide for Kids
📴
Hands-On Activities for Waiting Rooms
🌈
Farm Scenes Coloring Ideas for Classrooms
📐
Why Number Lines and Drawing Go Together
🔎
Why Visual Thinkers Use Idea Webs
👨👩👧
Fun and Simple Bedtime Wind-Down Routines
✏️
Why Drawing Simple Animals Matters for New Artists
🧠
Why Drawing Can Help With Working Memory
🖍️
How to Get Better at Coloring Skies and Backgrounds
🖌️
Why Blending Techniques Matters for Young Artists
🧒
A Parent's Guide to Pattern Recognition
🧒
A Parent's Guide to Encouraging Reluctant Artists
🎨
How to Draw a Octagon: A Step-by-Step Guide for Kids
🧘
Simple Steps for Coloring as a Calm-Down Tool
🌈
Fun Fantasy Creatures Coloring Pages for Kids
🎲
Using Drawing for Scavenger Hunt Drawings
🎨
Chameleon Coloring and Drawing Ideas for Kids
🔬
Understanding Primary Colors
🎨
A Seed Germination Jar: A Step-by-Step Science Guide for Kids
🧠
Can Drawing Improve Observation Skills?
💡
Building Divergent Thinking Through Coloring and Drawing
🎨
Jumbo Crayons for Toddlers: A Buying and Technique Guide
🎨
An Irish Traditional Dance Dress: A Coloring and Culture Guide for Kids
🎨
A Homemade Slime: A Step-by-Step Science Guide for Kids
🎨
Walking Stick Bug Coloring and Drawing Ideas for Kids
🎨
A Beach Bonfire Coloring and Drawing Ideas for Kids
🏺
How Hieroglyphics Shaped Human Communication
🎨
A Recipe Card: A Kitchen Guide for Kids and Parents
🎨
The Number 20: An Alphabet and Number Coloring Page
🖌️
Simple Steps for Creating Texture
👨👩👧
Creative Bedtime Wind-Down Routines for Kids
🎨
A New Playground Being Built Coloring and Drawing Ideas for Kids
🎨
Fun Dump Truck Coloring and Drawing Ideas for Kids
🎨
The Number 7: An Alphabet and Number Coloring Page
🎨
Spring Kite Flying: Coloring Ideas and Activities for the Whole Family
🎨
Kwanzaa Coloring Ideas and Activities for the Whole Family
🎨
Oktoberfest Pretzels: Coloring Ideas and Fun Facts for Kids
🎨
A Piano Recital: A Coloring and Movement Guide for Kids
🌈
Creative Ways to Color Dinosaurs
🎨
Willow Tree: A Coloring and Nature Guide for Kids
🧒
How Drawing Supports Preschoolers
👨👩👧
Making the Most of Weekend Family Activities
🎨
A Unicyclist Coloring and Drawing Ideas for Kids
🍎
How Teachers Can Use Bulletin Board Ideas
🖍️
Tips for Coloring Large Areas
🎨
Lamb Coloring and Drawing Ideas for Kids
🎨
a Family Reunion Picnic Coloring Ideas and Activities for the Whole Family
🧒
How Drawing Supports Ages 6-7
🎨
Axolotl Coloring and Drawing Ideas for Kids
🎨
Roadrunner Coloring Page Ideas for Kids
🎨
Thunderstorm Coloring Page: A Nature Learning Guide for Kids
🍎
Classroom Ideas: Art Lessons for Science Class
🎨
A Dish Towel: A Kitchen Guide for Kids and Parents
🧠
Can Drawing Improve Memory?
🎨
Plesiosaurus Coloring Page: Fun Facts for Young Paleontologists
🔬
What Is How Eyes Perceive Color?
🎨
How to Draw a Cymbals: A Coloring and Music Guide for Kids
🍎
Simple Art Lessons for Math Class for Busy Classrooms
🧠
Why Drawing Can Help With Creative Thinking
🎨
Writing a Thank You Card: A Simple Social Skill for Kids
🎨
Fun Castles Drawing Activities for Kids
🧠
The Link Between Drawing and Organizing Ideas
🎨
Chimera Coloring and Drawing Ideas for Kids
🎨
A Kids' Garden Plot: A Gardening Guide for Kids and Families
🎨
Cyclops Coloring and Drawing Ideas for Kids
🎨
The Wise Old Owl: A Classic Story Coloring Guide for Kids
🎨
Building a Color Mixing Chart: A Buying and Technique Guide
✏️
How to Improve Your Holding a Pencil Correctly
🎨
Pasta Making: A Coloring and Food Science Guide for Kids
🎨
A Recess Bell: A Classroom Coloring and Learning Guide
🎨
An Easter Basket: Coloring Ideas and Fun Facts for Kids
🎨
Clog Dancing: A Coloring and Movement Guide for Kids
🎨
Card Game Deck Coloring and Drawing Ideas for Kids
🎨
A Superhero Flying Pose: A Superhero Coloring and Design Guide for Kids
🧘
Exploring Coloring During Travel
🎨
A Homemade Thermometer: A Step-by-Step Science Guide for Kids
🎨
A Fall Hayride: Coloring Ideas and Activities for the Whole Family
🎨
Crocodile Coloring and Drawing Ideas for Kids
🎨
Hawk Coloring Page Ideas for Kids
🎨
Crow Coloring Page Ideas for Kids
🎨
How to Draw a Zigzag Line: A Step-by-Step Guide for Kids
🖍️
How to Get Better at Coloring With Watercolor Pencils
🎨
Musical Chairs: A Coloring and Playtime Guide for Kids
👨👩👧
Why Parents Love Bedtime Wind-Down Routines
🎨
Donkey Coloring and Drawing Ideas for Kids
🎨
A Seasonal Coloring Page Rotation: A Practical Guide
🎨
A Good Night's Sleep: A Coloring and Health Guide for Kids
🎨
Sparrow Coloring Page Ideas for Kids
🖌️
A Beginner's Guide to Cross-Hatching
🎨
Washing Fruits and Vegetables: A Coloring and Health Guide for Kids
🔎
How Visual Problem-Solving Support Learning
🎨
A Road Being Paved Coloring and Drawing Ideas for Kids
🏺
Why Hieroglyphics Matter to Historians
🎨
A Carnival Ticket Booth Coloring and Drawing Ideas for Kids
🎨
How to Draw a A 3D Cube Drawing: A Step-by-Step Guide for Kids
🎨
a Valentine Card Exchange: Free Ideas for Your Next Celebration
🎨
A Blender: A Kitchen Guide for Kids and Parents
🎨
Mosasaurus Coloring Page: Fun Facts for Young Paleontologists
🎲
How to Play Drawing Battles
🎨
A Space Suit Fitting: A Coloring and Space Mission Guide for Kids
🧠
How Drawing May Support Self-Expression
🎨
Barn Cat Coloring and Drawing Ideas for Kids
🎨
A Kitchen Island: A Kitchen Guide for Kids and Parents
🍂
Creative Earth Day Coloring Projects for Classrooms
🔤
Drawing Activities for Descriptive Words
🎨
Ears and How We Hear: A Coloring and Health Guide for Kids
🎨
A Pirate Cove Hideout Coloring and Drawing Ideas for Kids
🎨
A Royal Wizard: A Medieval Coloring and History Guide for Kids
🎨
A Space Capsule Interior: A Coloring and Space Mission Guide for Kids
🔬
The Science Behind Primary Colors
🖍️
A Beginner's Guide to Coloring Inside the Lines
🎨
Meet Pablo Picasso: An Art Appreciation Guide for Kids
🎨
Choosing Marker Nib Sizes: A Buying and Technique Guide
🎨
A Villain's Redemption Moment: A Superhero Coloring and Design Guide for Kids
🎨
A Home Fire Extinguisher: A Family Safety Guide
🎨
A Trivet: A Kitchen Guide for Kids and Parents
🍂
Creative St. Patrick's Day Coloring Projects for Classrooms
🌈
Fun Birds Coloring Pages for Kids
🎨
The Tongue and Tasting: A Coloring and Health Guide for Kids
🔎
How Visual Research Methods Support Learning
🎨
Swan Coloring Page Ideas for Kids
🎨
Taking Turns: A Simple Life Skill for Kids
🧒
A Parent's Guide to Toddlers (Ages 1-2)
🎨
Teaching Initiative: A Simple Activity for Kids
🎨
A Carousel Horse Coloring and Drawing Ideas for Kids
🔬
What Is Why Screens Use RGB?
🎨
A Day of the Dead Sugar Skull: Coloring Ideas and Fun Facts for Kids
🎨
A Garden Trowel: A Gardening Guide for Kids and Families
📐
Learning Fractions Through Drawing
🎨
Kappa Coloring and Drawing Ideas for Kids
🎨
Apologizing Sincerely: A Simple Social Skill for Kids
🎨
How to Draw a Lute: A Coloring and Music Guide for Kids
🎨
A Beach Reading Under an Umbrella Coloring and Drawing Ideas for Kids
🎨
A Water Cycle in a Bag: A Step-by-Step Science Guide for Kids
🎨
Beet Coloring and Drawing Ideas for Kids
🎨
Billiards Coloring Pages and Drawing Ideas for Kids
💬
Why Traffic and Safety Signs Matter in Everyday Life
🔤
Visual Vocabulary: Emotions and Feelings Words
🔤
Learning Action Words Through Drawing
🎨
A Whiteboard Lesson: A Classroom Coloring and Learning Guide
🎨
Diplodocus Coloring Page: Fun Facts for Young Paleontologists
🎨
Milking a Cow Coloring and Drawing Ideas for Kids
🔎
A Beginner's Guide to Organizing Research With Sketches
🎨
A Jackhammer at Work Coloring and Drawing Ideas for Kids
🎨
Ancient Persian Palaces: An Ancient History Coloring Guide for Kids
🎨
Creative Community Helpers Drawing Exercises
🎨
A Weather App for Families: A Family Safety Guide
🖍️
How to Get Better at Coloring With Markers
🖌️
Simple Steps for Composition Basics
📴
Hands-On Activities for Sick Days at Home
🎨
Fox Spirit Coloring and Drawing Ideas for Kids
🍂
Celebrate Independence Day With Coloring Activities
🎨
Action Figure Coloring and Drawing Ideas for Kids
🎨
A Cat Scratching Post: A Simple Pet Care Guide for Kids
🎲
Step-by-Step Storyboard Games
🎨
A German Dirndl and Lederhosen: A Coloring and Culture Guide for Kids
🏺
How Petroglyphs and Rock Art Shaped Human Communication
🎨
A Castle Moat: A Medieval Coloring and History Guide for Kids
🎨
A Pet Carrier for Travel: A Simple Pet Care Guide for Kids
📐
Teaching Counting Through Coloring and Drawing
🎨
A Robot on Wheels: A Coloring and Invention Guide for Kids
🎨
How to Draw a Pentagon: A Step-by-Step Guide for Kids
🎨
A Lighthouse by the Shore Coloring and Drawing Ideas for Kids
🏺
How Early Human Communication Shaped Human Communication
🎨
Capybara Coloring and Drawing Ideas for Kids
🎨
Quokka Coloring and Drawing Ideas for Kids
🔬
The Science Behind Why Screens Use RGB
🎨
Self-Compassion Cards: A Simple Mindfulness Activity for Kids
🎨
A Pirate's Sword Coloring and Drawing Ideas for Kids
🎨
A Ship in a Storm Coloring and Drawing Ideas for Kids
🎨
Mixing Bowl Coloring Ideas for Kids Who Love to Create
📐
How Children Understand Tessellations With Art
🎨
Fun Hang Glider Coloring and Drawing Ideas for Kids
👨👩👧
Creative Screen-Free Afternoons for Kids
👨👩👧
Creative Quiet Time Activities for Kids
🌈
Animals Coloring Ideas for Classrooms
🌈
Ocean Life Coloring Ideas for Classrooms
🎨
Harpy Coloring and Drawing Ideas for Kids
🧘
How Quiet Morning Coloring Can Create a Quiet Moment
🎨
Ancient Olympic Games Torch: An Ancient History Coloring Guide for Kids
🎨
A Spice Market Stall: Coloring Ideas and Fun Facts for Kids
🎨
A Coloring Mural Wall: A Practical Guide
🔤
Visual Vocabulary: Early Literacy Skills
🌈
Birds Coloring Ideas for Classrooms
🎨
Anansi the Spider: A Classic Story Coloring Guide for Kids
🎨
A Fire Escape Plan: A Family Safety Guide
🔤
Using Coloring Pages to Teach Sight Words
💡
How Drawing Encourages Visual Brainstorming
🎨
How to Draw a Lotus Flower Mandala: A Step-by-Step Guide
🎨
A Campfire at Night: Coloring Ideas for Your Next Family Adventure
🎨
Troll Coloring and Drawing Ideas for Kids
🎨
Meet the Carpenter: A Community Helper Coloring Guide
🎨
An Exoskeleton Suit: A Coloring and Invention Guide for Kids
🎨
Tornado Safety at Home: A Family Safety Guide
🎨
Ballroom Dancers: A Coloring and Movement Guide for Kids
🎨
A Beach Sandcastle Contest Coloring and Drawing Ideas for Kids
🌈
Printable Musical Themes Coloring Activities
🎨
Peanut Butter Making: A Coloring and Food Science Guide for Kids
🎨
Potato Coloring and Drawing Ideas for Kids
💬
From Cave Drawings to Wordless Storytelling
🎨
A Hearing Check-Up: A Coloring and Health Guide for Kids
👨👩👧
Why Parents Love Road Trip Activities
🎨
Ancient Viking Longships: An Ancient History Coloring Guide for Kids
🎨
Cheerleading Coloring Pages and Drawing Ideas for Kids
🎨
How to Draw a Kazoo: A Coloring and Music Guide for Kids
🎨
A Herb Garden Window Sill: A Gardening Guide for Kids and Families
🎨
Jigsaw Puzzle Coloring and Drawing Ideas for Kids
🎨
Roasting Marshmallows: Coloring Ideas for Your Next Family Adventure
🎨
A Horseshoe: A Wild West Coloring and History Guide for Kids
📐
Teaching Symmetry Through Coloring and Drawing
🎨
A Bird Feeder in the Garden: A Gardening Guide for Kids and Families
🎨
A New Puppy Learning Tricks: A Simple Pet Care Guide for Kids
🏺
What We Know About Prehistoric Drawing Tools
🧒
Drawing Activities for Pre-Writing Skills
🎨
Aphid Coloring and Drawing Ideas for Kids
🍎
A Teacher's Guide to Early Finisher Activities
🏺
Exploring Early Writing Systems
🎨
Nature Scenes Drawing Prompts for Beginners
🎨
Digital vs. Printed Coloring Pages: A Practical Guide
🎨
Breakfast Plate Coloring Ideas for Kids Who Love to Create
🔤
Visual Vocabulary: Family Words
🎨
A Winter Snow Angel: Coloring Ideas and Activities for the Whole Family
🎨
Easy Animals Drawing Ideas
🔤
Learning Story Sequencing Through Drawing
🎨
A Kids' Invention Convention: A Coloring and STEM Guide for Kids
🎨
A Garden Shed: A Gardening Guide for Kids and Families
🧒
Drawing Activities for Left-Handed Children
🎨
How to Draw a Triangle: A Step-by-Step Guide for Kids
🎨
A Simple Pulley System: A Step-by-Step Science Guide for Kids
🧘
Simple Steps for Coloring With Soft Music
🎲
Fun Football Play Diagrams for Kids
🎨
Rapunzel: A Classic Story Coloring Guide for Kids
🌈
Relaxing Farm Scenes Coloring Activities
🎨
Cicada Coloring and Drawing Ideas for Kids
🎨
Twinkle Twinkle Little Star: A Nursery Rhyme Coloring Guide for Kids
💗
Exploring Drawing Feelings Instead of Words Through Art
🍂
Seasonal Coloring Guide: Back-to-School Season
🌈
Printable Weather Scenes Coloring Activities
🖍️
How to Get Better at Coloring Mandalas
🎨
TV Tag: A Coloring and Playtime Guide for Kids
👨👩👧
Coloring Ideas for Sibling Bonding Activities
🎨
The Brave Little Tailor: A Classic Story Coloring Guide for Kids
🎨
A Balloon-Powered Car: A Step-by-Step Science Guide for Kids
🍎
Using Coloring Pages for Art Lessons for Science Class
💬
The Power of Sign Language and Gesture
🎨
Bonsai Tree: A Coloring and Nature Guide for Kids
🎨
Ancient Chinese Terracotta Warriors: An Ancient History Coloring Guide for Kids
🎨
Rainbow Breathing: A Simple Mindfulness Activity for Kids
🎨
Ancient Farmers and the First Crops: An Ancient History Coloring Guide for Kids
🔤
How Pictures Help Children Learn Numbers in a New Language
🎨
Velociraptor Coloring Page: Fun Facts for Young Paleontologists
🧠
Can Drawing Improve Concentration and Focus?
🌈
Fun Insects and Bugs Coloring Pages for Kids
🎨
Waiting Patiently in Line: A Simple Social Skill for Kids
🎨
A Construction Site Fence Coloring and Drawing Ideas for Kids
🎨
A Wooden House Frame Coloring and Drawing Ideas for Kids
🎨
A Superhero Origin Story Moment: A Superhero Coloring and Design Guide for Kids
🎨
La Tomatina Tomato Festival: Coloring Ideas and Fun Facts for Kids
💬
The Power of Infographics
🎨
A Beginner's Guide to Drawing Insects
💡
The Role of Combining Ideas in Children's Art
🖌️
Simple Steps for Blending Techniques
📐
Learning Geometry Through Drawing
🎨
A Healing-Power Superhero: A Superhero Coloring and Design Guide for Kids
🧘
Exploring Slow Coloring Practice
🎨
Hey Diddle Diddle: A Nursery Rhyme Coloring Guide for Kids
🎨
A Magnet and Paperclip Test: A Step-by-Step Science Guide for Kids
🎨
How to Draw a Cube: A Step-by-Step Guide for Kids
🧒
Understanding Pre-Writing Skills in Early Childhood
🎨
A Pirate Ship Coloring and Drawing Ideas for Kids
🎨
A Royal Throne Room: A Medieval Coloring and History Guide for Kids
🎨
A Piggy Bank Full to the Brim: A Money Guide for Kids and Parents
🌈
Relaxing Animals Coloring Activities
🧒
Fun Ways to Build The Pictorial Stage
🏺
How Ancient Cave Pigments Shaped Human Communication
💬
How Picture Books Communicate Ideas
🎨
Hippo Coloring and Drawing Ideas for Kids
👨👩👧
Why Parents Love Travel-Friendly Activities
🎨
A Wild West Wanted Poster: A Wild West Coloring and History Guide for Kids
🎨
Asking Permission Before Acting: A Simple Social Skill for Kids
👨👩👧
Making the Most of Morning Routine Activities
✏️
Fun Exercises for Basic Perspective
🌈
Printable Holiday Scenes Coloring Activities
🖍️
Why Coloring With Watercolor Pencils Makes a Difference
🎨
Gila Monster Coloring and Drawing Ideas for Kids
🎨
Ice Hockey Coloring Pages and Drawing Ideas for Kids
🖍️
A Beginner's Guide to Coloring With Markers
🎨
Listening When Someone Is Talking: A Simple Social Skill for Kids
🎨
A Morning Campsite Breakfast: Coloring Ideas for Your Next Family Adventure
🎨
The Tortoise and the Hare: A Classic Story Coloring Guide for Kids
🎨
How to Draw Community Helpers Step by Step
🎨
Spiral vs. Perfect-Bound Coloring Books: A Buying and Technique Guide
🏺
Why Petroglyphs and Rock Art Matter to Historians
🎨
The Owl and the Pussycat: A Nursery Rhyme Coloring Guide for Kids
🎨
Meteor Shower Sky Coloring Page: A Nature Learning Guide for Kids
📴
Screen-Free Coloring Ideas for Sick Days at Home
🎨
Seahorse Coloring and Drawing Ideas for Kids
🧒
Drawing Activities for Kindergarteners
🎨
Swordfish Coloring and Drawing Ideas for Kids
💗
Exploring Expressing Gratitude Through Art Through Art
🍂
Creative Father's Day Coloring Projects for Classrooms
🎨
Canary Coloring Page Ideas for Kids
🍂
Printable Earth Day Coloring Pages for Kids
🎨
A Beginner's Guide to Drawing Weather
🎨
Duck Coloring and Drawing Ideas for Kids
🎨
A Summer Water Balloon Fight: Coloring Ideas and Activities for the Whole Family
🎨
A Wildflower Meadow Patch: A Gardening Guide for Kids and Families
🎨
A Garden Scarecrow Building Day: A Gardening Guide for Kids and Families
🎲
Using Drawing for Drawing-Based Party Games
🎨
Simon Says: A Coloring and Playtime Guide for Kids
🎨
Meet the Tour Guide: A Community Helper Coloring Guide
🎨
Stegosaurus Coloring Page: Fun Facts for Young Paleontologists
🎨
Taco Truck Coloring Ideas for Kids Who Love to Create
🎲
Using Drawing for Treasure Map Games
🎨
Monkey Bars: A Coloring and Playtime Guide for Kids
🎨
Washable Markers for Toddlers: A Buying and Technique Guide
🎨
A Message in a Bottle Washed Ashore Coloring and Drawing Ideas for Kids
🎨
A Global Flag Parade: Coloring Ideas and Fun Facts for Kids
🎨
Winter Mittens: Coloring Ideas and Activities for the Whole Family
🎨
How to Draw a Kaleidoscope Pattern: A Step-by-Step Guide
🧒
How Drawing Supports Toddlers (Ages 1-2)
🎨
The Three Little Pigs: A Classic Story Coloring Guide for Kids
💗
How Drawing Supports Emotional Expression
🍎
Classroom Ideas: End-of-Year Activities
🎨
Creative Sports Drawing Exercises
🎨
A Ladybug on a Leaf: A Gardening Guide for Kids and Families
🔤
Visual Vocabulary: Animal Names
🎨
The Golden Goose: A Classic Story Coloring Guide for Kids
🎨
Easy Gardens and Flowers Drawing Ideas
🎨
Meet Henri Rousseau: An Art Appreciation Guide for Kids
📐
Teaching Spatial Relationships Through Coloring and Drawing
🎨
How to Draw a Hexagon: A Step-by-Step Guide for Kids
🧒
Understanding Ages 3-4 in Early Childhood
🎨
A Carnival Prize Wall Coloring and Drawing Ideas for Kids
💗
Exploring Art for Stressful Days Through Art
🔎
Why Visual Thinkers Use Visual Research Methods
🎨
A Robot Following Instructions: A Coloring and STEM Guide for Kids
🎨
How to Draw a Sorting Shapes by Color: A Step-by-Step Guide for Kids
🎨
Building a Themed Coloring Library: A Practical Guide
💡
Nurturing Imaginary Worlds at Home
🎨
Meet Norman Rockwell: An Art Appreciation Guide for Kids
🎨
A Crane Lifting a Beam Coloring and Drawing Ideas for Kids
🎨
Waiting Patiently in Line: A Simple Life Skill for Kids
🧒
Fun Ways to Build Ages 5-6
🏺
Exploring Ancient Storytelling Through Pictures
🎨
How to Draw a Recorder: A Coloring and Music Guide for Kids
🎨
Fun Original Superhero Characters Drawing Activities for Kids
🎨
Mount Everest: Coloring Page and Fun Facts for Kids
🎨
Creative Dinosaurs Drawing Exercises
🎨
Recipe Card Coloring: Free Ideas for Your Next Celebration
💗
The Role of Coloring in Family Art Time and Connection
🖍️
Tips for Coloring Cartoon Characters
💗
Creative Approaches to Drawing Feelings Instead of Words
🎨
Flamingo Coloring Page Ideas for Kids
🌈
A Guide to Birds Coloring Pages
🎨
Apple Picking: A Coloring and Food Science Guide for Kids
🎨
How to Draw a Organ: A Coloring and Music Guide for Kids
🎨
A Traditional Folk Dance Costume: Coloring Ideas and Fun Facts for Kids
💡
The Role of Creative Problem-Solving in Children's Art
🎨
Water Strider Coloring and Drawing Ideas for Kids
🧠
The Link Between Drawing and Creative Thinking
🎨
Sea Otter Coloring and Drawing Ideas for Kids
🎨
Being Honest Even When It's Hard: A Simple Social Skill for Kids
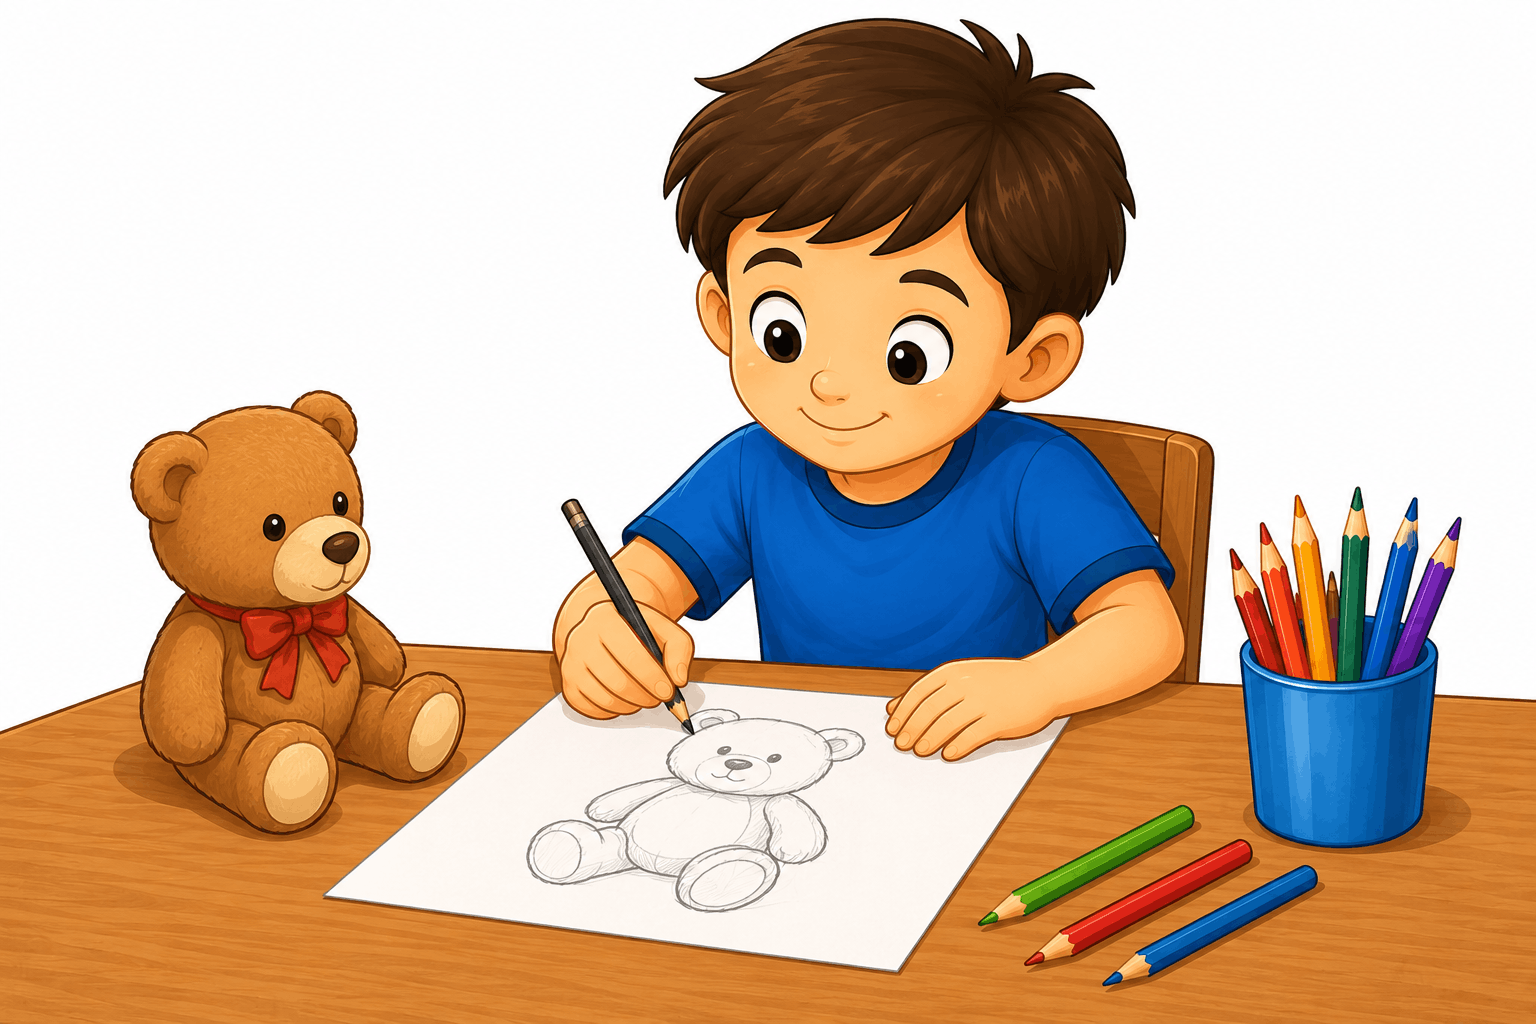 A Beginner's Guide to Drawing From Observation
🎨
Practicing Gratitude Out Loud: A Simple Social Skill for Kids
🔤
Learning Descriptive Words Through Drawing
🖍️
Tips for Avoiding Smudges While Coloring
💡
The Role of Imaginative Play in Children's Art
👨👩👧
Why Parents Love Waiting Room Activities
🎨
a Sensory Bottle Craft: A Simple Mindfulness Activity for Kids
🎨
How to Draw a Guitar: A Coloring and Music Guide for Kids
🎨
Easy Nature Scenes Drawing Ideas
🎨
Donuts Coloring Ideas for Kids Who Love to Create
🎨
A Summer Sunflower Field: Coloring Ideas and Activities for the Whole Family
🎨
A Canoe on a Lake: Coloring Ideas for Your Next Family Adventure
🔎
A Beginner's Guide to Mind Maps
🎨
A Curry Feast: Coloring Ideas and Fun Facts for Kids
🎨
Fruit Kabobs Coloring Ideas for Kids Who Love to Create
🎨
Sheep Shearing Coloring and Drawing Ideas for Kids
🖍️
Simple Techniques for Coloring Small Details
🌈
Creative Ways to Color Community Helpers
🎨
A Spring Rainbow After Rain: Coloring Ideas and Activities for the Whole Family
🎨
A Train Robbery Scene: A Wild West Coloring and History Guide for Kids
🎨
Meet the Truck Driver: A Community Helper Coloring Guide
🎨
A Surfboard Coloring and Drawing Ideas for Kids
🍎
Using Coloring Pages for Classroom Printable Activities
🎨
How to Draw a Marimba: A Coloring and Music Guide for Kids
🎨
A Climbing Wall: A Coloring and Playtime Guide for Kids
🎨
A Static Electricity Balloon Trick: A Step-by-Step Science Guide for Kids
🎨
Bumblebee Coloring and Drawing Ideas for Kids
🧒
Fun Ways to Build Drawing Development Stages
🍎
Using Coloring Pages for Bulletin Board Ideas
🎨
A Carnival Banner Coloring and Drawing Ideas for Kids
🎨
A Boardwalk Photo Booth Coloring and Drawing Ideas for Kids
🎨
Hellbender Salamander Coloring and Drawing Ideas for Kids
🎨
How to Draw a Rhombus: A Step-by-Step Guide for Kids
🍂
Fun Father's Day Classroom Coloring Ideas
💗
How Drawing Supports Expressing Gratitude Through Art
💗
How Drawing Supports Drawing Feelings Instead of Words
🎨
Winter Snowscape Coloring Page: A Nature Learning Guide for Kids
💗
The Role of Coloring in Processing Big Feelings
🎨
Skin and Touch: A Coloring and Health Guide for Kids
🖍️
Simple Techniques for Coloring With Watercolor Pencils
📴
Making the Most of Rainy Afternoons Without Screens
🧘
A Beginner's Guide to Mindful Coloring for Beginners
🎨
Coloring Tools for Left-Handers: A Buying and Technique Guide
🧘
Exploring Mindful Coloring for Beginners
🧒
Fun Ways to Build Ages 4-5
A Beginner's Guide to Drawing From Observation
🎨
Practicing Gratitude Out Loud: A Simple Social Skill for Kids
🔤
Learning Descriptive Words Through Drawing
🖍️
Tips for Avoiding Smudges While Coloring
💡
The Role of Imaginative Play in Children's Art
👨👩👧
Why Parents Love Waiting Room Activities
🎨
a Sensory Bottle Craft: A Simple Mindfulness Activity for Kids
🎨
How to Draw a Guitar: A Coloring and Music Guide for Kids
🎨
Easy Nature Scenes Drawing Ideas
🎨
Donuts Coloring Ideas for Kids Who Love to Create
🎨
A Summer Sunflower Field: Coloring Ideas and Activities for the Whole Family
🎨
A Canoe on a Lake: Coloring Ideas for Your Next Family Adventure
🔎
A Beginner's Guide to Mind Maps
🎨
A Curry Feast: Coloring Ideas and Fun Facts for Kids
🎨
Fruit Kabobs Coloring Ideas for Kids Who Love to Create
🎨
Sheep Shearing Coloring and Drawing Ideas for Kids
🖍️
Simple Techniques for Coloring Small Details
🌈
Creative Ways to Color Community Helpers
🎨
A Spring Rainbow After Rain: Coloring Ideas and Activities for the Whole Family
🎨
A Train Robbery Scene: A Wild West Coloring and History Guide for Kids
🎨
Meet the Truck Driver: A Community Helper Coloring Guide
🎨
A Surfboard Coloring and Drawing Ideas for Kids
🍎
Using Coloring Pages for Classroom Printable Activities
🎨
How to Draw a Marimba: A Coloring and Music Guide for Kids
🎨
A Climbing Wall: A Coloring and Playtime Guide for Kids
🎨
A Static Electricity Balloon Trick: A Step-by-Step Science Guide for Kids
🎨
Bumblebee Coloring and Drawing Ideas for Kids
🧒
Fun Ways to Build Drawing Development Stages
🍎
Using Coloring Pages for Bulletin Board Ideas
🎨
A Carnival Banner Coloring and Drawing Ideas for Kids
🎨
A Boardwalk Photo Booth Coloring and Drawing Ideas for Kids
🎨
Hellbender Salamander Coloring and Drawing Ideas for Kids
🎨
How to Draw a Rhombus: A Step-by-Step Guide for Kids
🍂
Fun Father's Day Classroom Coloring Ideas
💗
How Drawing Supports Expressing Gratitude Through Art
💗
How Drawing Supports Drawing Feelings Instead of Words
🎨
Winter Snowscape Coloring Page: A Nature Learning Guide for Kids
💗
The Role of Coloring in Processing Big Feelings
🎨
Skin and Touch: A Coloring and Health Guide for Kids
🖍️
Simple Techniques for Coloring With Watercolor Pencils
📴
Making the Most of Rainy Afternoons Without Screens
🧘
A Beginner's Guide to Mindful Coloring for Beginners
🎨
Coloring Tools for Left-Handers: A Buying and Technique Guide
🧘
Exploring Mindful Coloring for Beginners
🧒
Fun Ways to Build Ages 4-5
 How Drawing Supports Family Art Time and Connection
🎨
How to Draw a Ripple Pattern: A Step-by-Step Guide
🎨
Exploring India: A Coloring and Culture Guide for Kids
🧒
Fun Ways to Build First-Time Artists
🎨
Diddle Diddle Dumpling: A Nursery Rhyme Coloring Guide for Kids
📴
Creative Alternatives to Screens During Quiet Time Before Bed
🎨
Squid Coloring and Drawing Ideas for Kids
🎨
How to Draw a Trumpet: A Coloring and Music Guide for Kids
✏️
How to Improve Your Warm-Up Drawing Exercises
🖍️
Tips for Mixing Warm and Cool Colors
🎨
The Number 8: An Alphabet and Number Coloring Page
🎨
How to Draw a Symmetry Design: A Step-by-Step Guide
🧒
What to Expect When Teaching Shape Recognition
🎨
A Color-Changing Milk Experiment: A Step-by-Step Science Guide for Kids
✏️
Fun Exercises for Drawing From Imagination
🎨
Lacrosse Coloring Pages and Drawing Ideas for Kids
🎨
Octopus Tag: A Coloring and Playtime Guide for Kids
🎨
Fine Liner Pens: A Buying and Technique Guide
🎨
How to Draw a A Symmetrical Shape Pair: A Step-by-Step Guide for Kids
🧘
A Beginner's Guide to Mandala Coloring
🎨
A Native American Ceremonial Regalia (Respectfully Depicted): A Coloring and Culture Guide for Kids
🎨
Praying Mantis Coloring and Drawing Ideas for Kids
🎨
A Super-Hearing Superhero: A Superhero Coloring and Design Guide for Kids
🎨
Asparagus Coloring and Drawing Ideas for Kids
🎨
The Letter J: An Alphabet and Number Coloring Page
🎨
Meet the Farmer: A Community Helper Coloring Guide
🎨
Cupcake Coloring Ideas for Kids Who Love to Create
🎲
Fun Collaborative Drawing Games for Kids
🎨
Peony: A Coloring and Nature Guide for Kids
🎨
Glass Frog Coloring and Drawing Ideas for Kids
🎨
A Family Planting Day: A Gardening Guide for Kids and Families
🧒
Drawing Activities for Building Drawing Confidence
🎨
A Tent Zipper Closing at Dusk: Coloring Ideas for Your Next Family Adventure
🎨
A Clown Car Coloring and Drawing Ideas for Kids
🎨
Creative Animals Drawing Exercises
🎨
Treehouse Coloring and Drawing Ideas for Kids
🧒
A Parent's Guide to Ages 3-4
🎨
Fun Monster Truck Coloring and Drawing Ideas for Kids
How Drawing Supports Family Art Time and Connection
🎨
How to Draw a Ripple Pattern: A Step-by-Step Guide
🎨
Exploring India: A Coloring and Culture Guide for Kids
🧒
Fun Ways to Build First-Time Artists
🎨
Diddle Diddle Dumpling: A Nursery Rhyme Coloring Guide for Kids
📴
Creative Alternatives to Screens During Quiet Time Before Bed
🎨
Squid Coloring and Drawing Ideas for Kids
🎨
How to Draw a Trumpet: A Coloring and Music Guide for Kids
✏️
How to Improve Your Warm-Up Drawing Exercises
🖍️
Tips for Mixing Warm and Cool Colors
🎨
The Number 8: An Alphabet and Number Coloring Page
🎨
How to Draw a Symmetry Design: A Step-by-Step Guide
🧒
What to Expect When Teaching Shape Recognition
🎨
A Color-Changing Milk Experiment: A Step-by-Step Science Guide for Kids
✏️
Fun Exercises for Drawing From Imagination
🎨
Lacrosse Coloring Pages and Drawing Ideas for Kids
🎨
Octopus Tag: A Coloring and Playtime Guide for Kids
🎨
Fine Liner Pens: A Buying and Technique Guide
🎨
How to Draw a A Symmetrical Shape Pair: A Step-by-Step Guide for Kids
🧘
A Beginner's Guide to Mandala Coloring
🎨
A Native American Ceremonial Regalia (Respectfully Depicted): A Coloring and Culture Guide for Kids
🎨
Praying Mantis Coloring and Drawing Ideas for Kids
🎨
A Super-Hearing Superhero: A Superhero Coloring and Design Guide for Kids
🎨
Asparagus Coloring and Drawing Ideas for Kids
🎨
The Letter J: An Alphabet and Number Coloring Page
🎨
Meet the Farmer: A Community Helper Coloring Guide
🎨
Cupcake Coloring Ideas for Kids Who Love to Create
🎲
Fun Collaborative Drawing Games for Kids
🎨
Peony: A Coloring and Nature Guide for Kids
🎨
Glass Frog Coloring and Drawing Ideas for Kids
🎨
A Family Planting Day: A Gardening Guide for Kids and Families
🧒
Drawing Activities for Building Drawing Confidence
🎨
A Tent Zipper Closing at Dusk: Coloring Ideas for Your Next Family Adventure
🎨
A Clown Car Coloring and Drawing Ideas for Kids
🎨
Creative Animals Drawing Exercises
🎨
Treehouse Coloring and Drawing Ideas for Kids
🧒
A Parent's Guide to Ages 3-4
🎨
Fun Monster Truck Coloring and Drawing Ideas for Kids
 Fun Spring Classroom Coloring Ideas
🎨
A Beach Umbrella Coloring and Drawing Ideas for Kids
🎨
Sea Anemone Coloring and Drawing Ideas for Kids
🔎
A Beginner's Guide to Visual Research Methods
🎨
Using Indoor Voices: A Simple Social Skill for Kids
Fun Spring Classroom Coloring Ideas
🎨
A Beach Umbrella Coloring and Drawing Ideas for Kids
🎨
Sea Anemone Coloring and Drawing Ideas for Kids
🔎
A Beginner's Guide to Visual Research Methods
🎨
Using Indoor Voices: A Simple Social Skill for Kids
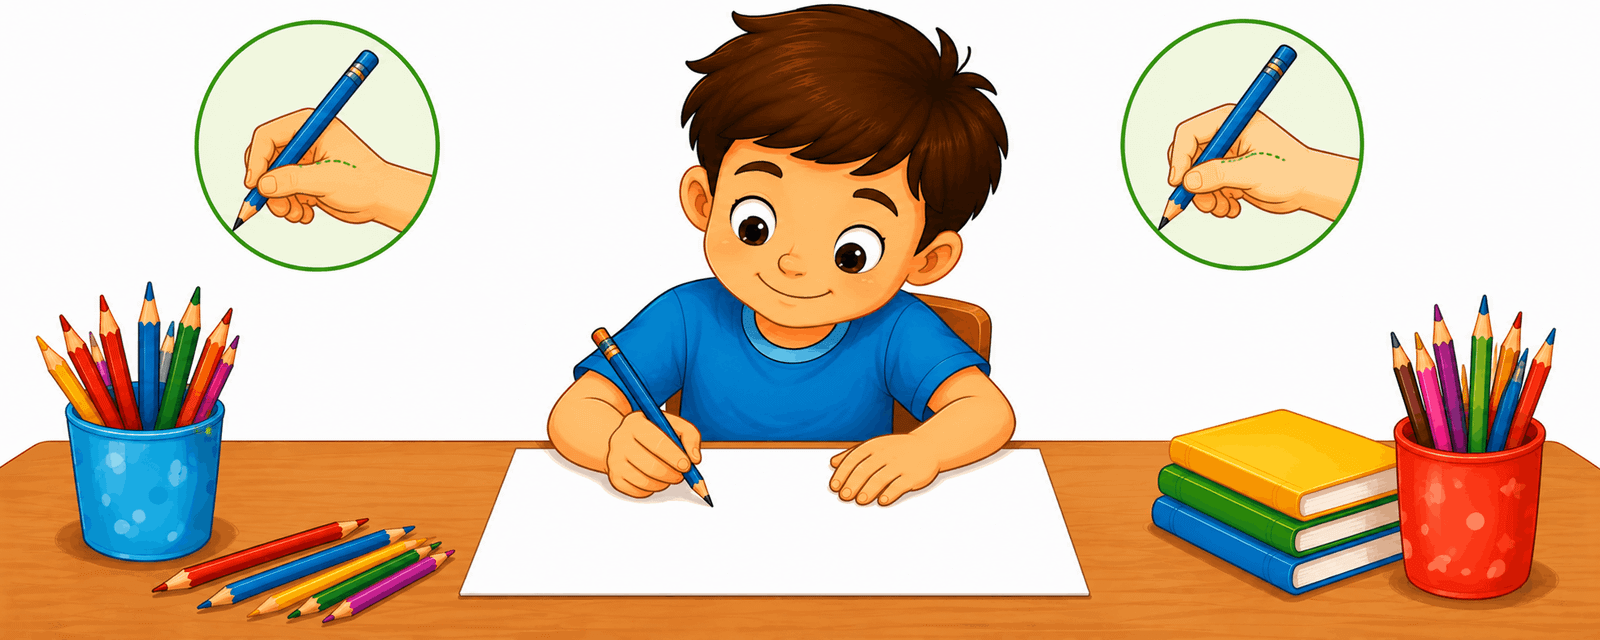 Why Holding a Pencil Correctly Matters for New Artists
👨👩👧
Fun and Simple Holiday Break Activities
✏️
Why Drawing Simple Faces Matters for New Artists
🎨
A Beach Day Sunburn Reminder Scene Coloring and Drawing Ideas for Kids
🎨
A Winter Snowsuit: Coloring Ideas and Activities for the Whole Family
🧠
Why Drawing Can Help With Memory
📐
How Children Understand Patterns With Art
💡
Building Creative Journaling Through Coloring and Drawing
🎨
Chrysanthemum: A Coloring and Nature Guide for Kids
🎨
Emu Coloring Page Ideas for Kids
🎨
Home Printer vs. Print Shop: A Practical Guide
💡
Why Making Mistakes in Art Matters for Young Artists
👨👩👧
Why Parents Love Grandparent and Grandchild Activities
🎨
Birds Drawing Prompts for Beginners
🎨
Exploring A Space Rover: A Coloring and Learning Guide for Kids
🎨
A Dance Studio Mirror: A Coloring and Movement Guide for Kids
🎨
A Record Player: A Coloring and Movement Guide for Kids
🖌️
A Beginner's Guide to Using Colored Pencils
🔤
Using Coloring Pages to Teach Family Words
🎨
The Number 19: An Alphabet and Number Coloring Page
🎨
How to Draw a Floral Mandala: A Step-by-Step Guide
🎨
A Kids' Savings Bond Concept: A Money Guide for Kids and Parents
🎨
Clover Leaf: A Coloring and Nature Guide for Kids
🎨
An Egg in Vinegar Experiment: A Step-by-Step Science Guide for Kids
🎨
Fun Skateboard Coloring and Drawing Ideas for Kids
🧠
How Drawing May Support Organizing Ideas
👨👩👧
Creative Weekend Family Activities for Kids
🎨
A Cat Napping in the Sun: A Simple Pet Care Guide for Kids
🌈
Sports Scenes Coloring Ideas for Classrooms
🎨
Morning Glory Vine: A Coloring and Nature Guide for Kids
🔎
Exploring Connecting Ideas Through Drawing for Students
🧘
Why Coloring for Sensory Breaks Feels Calming
📐
Learning Counting Through Drawing
🎨
Thumbelina: A Classic Story Coloring Guide for Kids
🎨
A Nepali Traditional Dress: A Coloring and Culture Guide for Kids
🎨
How to Draw a Accordion: A Coloring and Music Guide for Kids
🍎
How Teachers Can Use Back-to-School Activities
🎨
A Coding Block Puzzle: A Coloring and STEM Guide for Kids
🎨
Manta Ray Coloring and Drawing Ideas for Kids
🎨
A Knight's Coat of Arms: A Medieval Coloring and History Guide for Kids
🎨
Meet the Firefighter: A Community Helper Coloring Guide
🎨
The Wolf and the Seven Young Goats: A Classic Story Coloring Guide for Kids
✏️
Fun Exercises for Drawing From Observation
🍎
Simple Classroom Reward Activities for Busy Classrooms
🖍️
How to Get Better at Layering Colors
🎨
Marbles Coloring and Drawing Ideas for Kids
🎨
How to Draw a Celtic Knot Pattern: A Step-by-Step Guide
🎨
Snack Tray Coloring Ideas for Kids Who Love to Create
🎨
Trimming a Pet's Nails: A Simple Pet Care Guide for Kids
🔬
The Science Behind How Light Creates Color
🎨
Exploring The Space Station: A Coloring and Learning Guide for Kids
🎨
The Nose and Smelling: A Coloring and Health Guide for Kids
🎨
A Blacksmith's Forge: A Medieval Coloring and History Guide for Kids
👨👩👧
Why Parents Love Outdoor-Inspired Drawing
🎨
An Architect at a Drafting Table Coloring and Drawing Ideas for Kids
✏️
Fun Exercises for Drawing Paper Types
🎨
Pumpkin Patch Farm Coloring and Drawing Ideas for Kids
🧠
Exploring Drawing and Concentration and Focus
🖌️
Why Working With Light and Shadow Matters for Young Artists
🎨
Meet Vincent van Gogh: An Art Appreciation Guide for Kids
🔎
A Beginner's Guide to Visual Note-Taking
🎨
Meet the Plumber: A Community Helper Coloring Guide
🎨
Non-Toxic Art Supplies: A Buying and Technique Guide
💗
How Drawing Supports The Difference Between Art Therapy and Coloring
🎨
A Circus Parade Coloring and Drawing Ideas for Kids
🎨
Butternut Squash Coloring and Drawing Ideas for Kids
📴
Making the Most of Holiday Travel Without Screens
🔎
A Beginner's Guide to Diagrams in Science
🧒
How Drawing Supports The Symbol-Making Stage
🧘
Simple Steps for Coloring Before Exams
💬
Understanding Comic Strips
🎨
Salsa Dancers: A Coloring and Movement Guide for Kids
🎨
A Show and Tell Table: A Classroom Coloring and Learning Guide
🖍️
Tips for Coloring With Watercolor Pencils
🎨
Coconut Coloring and Drawing Ideas for Kids
🎨
Monkey Coloring and Drawing Ideas for Kids
🎨
Kite Coloring and Drawing Ideas for Kids
📴
Creative Alternatives to Screens During Summer Vacations
🎨
A Space Rover Robot: A Coloring and Invention Guide for Kids
🎨
Fun Motorcycle Coloring and Drawing Ideas for Kids
🧒
Fun Ways to Build Pattern Recognition
🎨
A Farm-to-Table Restaurant: A Coloring and Food Science Guide for Kids
🎨
A Gym Class: A Classroom Coloring and Learning Guide
🎨
Corn Snake Coloring and Drawing Ideas for Kids
🧘
A Beginner's Guide to Nature-Inspired Calm Coloring
🏺
Exploring Early Human Communication
🌈
Seasonal Scenes Coloring Ideas for Classrooms
🎨
Classroom Party Printables: Free Ideas for Your Next Celebration
🔬
A Simple Guide to CMYK Printing Colors
🎲
Fun Drawing Prompt Games for Kids
🎨
A Homemade Rain Cloud in a Jar: A Step-by-Step Science Guide for Kids
🎨
Exploring Austria: A Coloring and Culture Guide for Kids
🎨
Bamboo Forest Coloring Page: A Nature Learning Guide for Kids
🎨
A Science Fair Project Board: A Coloring and STEM Guide for Kids
🎨
Snow Boots: Coloring Ideas and Activities for the Whole Family
🎨
A Pack of Raptors Coloring Page: Fun Facts for Young Paleontologists
🌈
Printable Everyday Objects Coloring Activities
🎨
Chicken Coop Coloring and Drawing Ideas for Kids
🎨
a Calm-Down Glitter Jar: A Simple Mindfulness Activity for Kids
💬
How Traffic and Safety Signs Communicate Ideas
🎨
Limbo: A Coloring and Playtime Guide for Kids
🎨
Cherry Blossom Branch: A Coloring and Nature Guide for Kids
🎨
Meet M.C. Escher: An Art Appreciation Guide for Kids
🧒
Fun Ways to Build Pencil Grip Development
🎨
Backup Battery and Flashlight Kit: A Family Safety Guide
🖍️
Tips for Applying Even Pressure
🎨
A Knight Defending a Castle Gate: A Medieval Coloring and History Guide for Kids
💡
Nurturing Creative Journaling at Home
🎨
A Ferris Wheel Coloring and Drawing Ideas for Kids
💬
Understanding Traffic and Safety Signs
🎨
A Binary Code Pattern: A Coloring and STEM Guide for Kids
🔤
Drawing Activities for Story Sequencing
🎨
A Dew-Covered Spiderweb: Coloring Ideas for Your Next Family Adventure
🎨
A Frying Pan: A Kitchen Guide for Kids and Parents
🎨
Exploring A Rocket Blast Off: A Coloring and Learning Guide for Kids
🧒
Drawing Activities for Drawing Milestones
🎨
Morning Mindfulness: A Simple Mindfulness Activity for Kids
🎨
How to Draw a Tuba: A Coloring and Music Guide for Kids
🎨
How to Draw a Bongo Drums: A Coloring and Music Guide for Kids
🎨
Mushroom Farming: A Coloring and Food Science Guide for Kids
🎨
Frisbee Coloring Pages and Drawing Ideas for Kids
🎲
Fun Dot-to-Dot Games for Kids
🎨
Boxing Day Coloring Ideas and Activities for the Whole Family
🎨
an Easter Egg Hunt Coloring Ideas and Activities for the Whole Family
🎨
Respecting Someone's Belongings: A Simple Social Skill for Kids
🧒
A Parent's Guide to Drawing Development Stages
🎨
Original Superhero Characters Drawing Prompts for Beginners
🖌️
How to Practice Using Colored Pencils
📴
Making the Most of Family Game Nights Without Screens
🎨
Satellite Deployment: A Coloring and Space Mission Guide for Kids
🎨
a Feelings Detective Game: A Simple Mindfulness Activity for Kids
🎨
A Seashell Collection Coloring and Drawing Ideas for Kids
🎨
A Boardwalk Souvenir Shop Coloring and Drawing Ideas for Kids
💗
Creative Approaches to The Difference Between Art Therapy and Coloring
📐
Learning Measurement Through Drawing
🎨
Back to School Shopping Coloring Ideas and Activities for the Whole Family
🎨
Pelican Coloring and Drawing Ideas for Kids
🎨
Exploring Greece: A Coloring and Culture Guide for Kids
🎨
Kaleidoscope Coloring and Drawing Ideas for Kids
📐
Why Shapes and Drawing Go Together
🎨
Meet Surrealism: An Art Appreciation Guide for Kids
🎨
A Wheelbarrow of Bricks Coloring and Drawing Ideas for Kids
🎨
Exploring A Space Colony: A Coloring and Learning Guide for Kids
🎨
A Classroom Reading Corner: A Classroom Coloring and Learning Guide
🎨
Teaching Kindness: A Simple Activity for Kids
🎨
A Reptile Terrarium: A Simple Pet Care Guide for Kids
🎨
Gecko Coloring and Drawing Ideas for Kids
🎨
Water Dragon Lizard Coloring and Drawing Ideas for Kids
🎨
Relaxation Story Time: A Simple Mindfulness Activity for Kids
👨👩👧
Easy Screen-Free Afternoons With Coloring Pages
🎨
Being Patient While Waiting Your Turn: A Simple Social Skill for Kids
🎨
How to Draw Gardens and Flowers Step by Step
🎨
A Baobab Tree: A Coloring and Nature Guide for Kids
🎨
Giving a Genuine Compliment: A Simple Social Skill for Kids
🎨
How to Draw Family Portraits Step by Step
👨👩👧
Fun and Simple Quiet Time Activities
✏️
Why Drawing Paper Types Matters for New Artists
🍎
How Teachers Can Use Group Art Projects
🎨
Tic Tac Toe Board Coloring and Drawing Ideas for Kids
🎨
Burj Khalifa: Coloring Page and Fun Facts for Kids
📐
Teaching Geometry Through Coloring and Drawing
🎨
Mindful Breathing Balloon: A Simple Mindfulness Activity for Kids
💗
How Drawing Supports Art for Quiet Reflection
🔬
A Simple Guide to How Eyes Perceive Color
🎨
A Nature Scavenger Hunt: Coloring Ideas for Your Next Family Adventure
🎨
Succulent Plant: A Coloring and Nature Guide for Kids
🎨
A Turtle's Habitat: A Simple Pet Care Guide for Kids
🎨
A Horse Corral: A Wild West Coloring and History Guide for Kids
🔎
Why Visual Thinkers Use Brainstorming With Pictures
🔤
Using Coloring Pages to Teach Descriptive Words
📴
Screen-Free Coloring Ideas for Camping Trips
🎨
Fairy Coloring and Drawing Ideas for Kids
🎨
Falcon Coloring Page Ideas for Kids
🎨
Stork Coloring Page Ideas for Kids
🎨
Putting on Shoes Independently: A Simple Life Skill for Kids
🎨
Simple Simon: A Nursery Rhyme Coloring Guide for Kids
🎨
a Matching Game Printable: Free Ideas for Your Next Celebration
🎨
Carnival Lights at Night Coloring and Drawing Ideas for Kids
🎨
Long Jump Coloring Pages and Drawing Ideas for Kids
💗
Creative Approaches to Creative Outlets for Teens
🎨
Seesaw Coloring and Drawing Ideas for Kids
👨👩👧
Creative Waiting Room Activities for Kids
🧠
Exploring Drawing and Fine Motor Coordination
👨👩👧
Fun and Simple Summer Break Activities
🎨
Itsy Bitsy Spider: A Nursery Rhyme Coloring Guide for Kids
🎨
How to Draw a Trombone: A Coloring and Music Guide for Kids
🎨
How to Draw a Bassoon: A Coloring and Music Guide for Kids
🎨
The Letter F: An Alphabet and Number Coloring Page
🖍️
Why Coloring Skin Tones Makes a Difference
🎨
A Superhero Training Montage: A Superhero Coloring and Design Guide for Kids
🎨
Statue of Liberty: Coloring Page and Fun Facts for Kids
Why Holding a Pencil Correctly Matters for New Artists
👨👩👧
Fun and Simple Holiday Break Activities
✏️
Why Drawing Simple Faces Matters for New Artists
🎨
A Beach Day Sunburn Reminder Scene Coloring and Drawing Ideas for Kids
🎨
A Winter Snowsuit: Coloring Ideas and Activities for the Whole Family
🧠
Why Drawing Can Help With Memory
📐
How Children Understand Patterns With Art
💡
Building Creative Journaling Through Coloring and Drawing
🎨
Chrysanthemum: A Coloring and Nature Guide for Kids
🎨
Emu Coloring Page Ideas for Kids
🎨
Home Printer vs. Print Shop: A Practical Guide
💡
Why Making Mistakes in Art Matters for Young Artists
👨👩👧
Why Parents Love Grandparent and Grandchild Activities
🎨
Birds Drawing Prompts for Beginners
🎨
Exploring A Space Rover: A Coloring and Learning Guide for Kids
🎨
A Dance Studio Mirror: A Coloring and Movement Guide for Kids
🎨
A Record Player: A Coloring and Movement Guide for Kids
🖌️
A Beginner's Guide to Using Colored Pencils
🔤
Using Coloring Pages to Teach Family Words
🎨
The Number 19: An Alphabet and Number Coloring Page
🎨
How to Draw a Floral Mandala: A Step-by-Step Guide
🎨
A Kids' Savings Bond Concept: A Money Guide for Kids and Parents
🎨
Clover Leaf: A Coloring and Nature Guide for Kids
🎨
An Egg in Vinegar Experiment: A Step-by-Step Science Guide for Kids
🎨
Fun Skateboard Coloring and Drawing Ideas for Kids
🧠
How Drawing May Support Organizing Ideas
👨👩👧
Creative Weekend Family Activities for Kids
🎨
A Cat Napping in the Sun: A Simple Pet Care Guide for Kids
🌈
Sports Scenes Coloring Ideas for Classrooms
🎨
Morning Glory Vine: A Coloring and Nature Guide for Kids
🔎
Exploring Connecting Ideas Through Drawing for Students
🧘
Why Coloring for Sensory Breaks Feels Calming
📐
Learning Counting Through Drawing
🎨
Thumbelina: A Classic Story Coloring Guide for Kids
🎨
A Nepali Traditional Dress: A Coloring and Culture Guide for Kids
🎨
How to Draw a Accordion: A Coloring and Music Guide for Kids
🍎
How Teachers Can Use Back-to-School Activities
🎨
A Coding Block Puzzle: A Coloring and STEM Guide for Kids
🎨
Manta Ray Coloring and Drawing Ideas for Kids
🎨
A Knight's Coat of Arms: A Medieval Coloring and History Guide for Kids
🎨
Meet the Firefighter: A Community Helper Coloring Guide
🎨
The Wolf and the Seven Young Goats: A Classic Story Coloring Guide for Kids
✏️
Fun Exercises for Drawing From Observation
🍎
Simple Classroom Reward Activities for Busy Classrooms
🖍️
How to Get Better at Layering Colors
🎨
Marbles Coloring and Drawing Ideas for Kids
🎨
How to Draw a Celtic Knot Pattern: A Step-by-Step Guide
🎨
Snack Tray Coloring Ideas for Kids Who Love to Create
🎨
Trimming a Pet's Nails: A Simple Pet Care Guide for Kids
🔬
The Science Behind How Light Creates Color
🎨
Exploring The Space Station: A Coloring and Learning Guide for Kids
🎨
The Nose and Smelling: A Coloring and Health Guide for Kids
🎨
A Blacksmith's Forge: A Medieval Coloring and History Guide for Kids
👨👩👧
Why Parents Love Outdoor-Inspired Drawing
🎨
An Architect at a Drafting Table Coloring and Drawing Ideas for Kids
✏️
Fun Exercises for Drawing Paper Types
🎨
Pumpkin Patch Farm Coloring and Drawing Ideas for Kids
🧠
Exploring Drawing and Concentration and Focus
🖌️
Why Working With Light and Shadow Matters for Young Artists
🎨
Meet Vincent van Gogh: An Art Appreciation Guide for Kids
🔎
A Beginner's Guide to Visual Note-Taking
🎨
Meet the Plumber: A Community Helper Coloring Guide
🎨
Non-Toxic Art Supplies: A Buying and Technique Guide
💗
How Drawing Supports The Difference Between Art Therapy and Coloring
🎨
A Circus Parade Coloring and Drawing Ideas for Kids
🎨
Butternut Squash Coloring and Drawing Ideas for Kids
📴
Making the Most of Holiday Travel Without Screens
🔎
A Beginner's Guide to Diagrams in Science
🧒
How Drawing Supports The Symbol-Making Stage
🧘
Simple Steps for Coloring Before Exams
💬
Understanding Comic Strips
🎨
Salsa Dancers: A Coloring and Movement Guide for Kids
🎨
A Show and Tell Table: A Classroom Coloring and Learning Guide
🖍️
Tips for Coloring With Watercolor Pencils
🎨
Coconut Coloring and Drawing Ideas for Kids
🎨
Monkey Coloring and Drawing Ideas for Kids
🎨
Kite Coloring and Drawing Ideas for Kids
📴
Creative Alternatives to Screens During Summer Vacations
🎨
A Space Rover Robot: A Coloring and Invention Guide for Kids
🎨
Fun Motorcycle Coloring and Drawing Ideas for Kids
🧒
Fun Ways to Build Pattern Recognition
🎨
A Farm-to-Table Restaurant: A Coloring and Food Science Guide for Kids
🎨
A Gym Class: A Classroom Coloring and Learning Guide
🎨
Corn Snake Coloring and Drawing Ideas for Kids
🧘
A Beginner's Guide to Nature-Inspired Calm Coloring
🏺
Exploring Early Human Communication
🌈
Seasonal Scenes Coloring Ideas for Classrooms
🎨
Classroom Party Printables: Free Ideas for Your Next Celebration
🔬
A Simple Guide to CMYK Printing Colors
🎲
Fun Drawing Prompt Games for Kids
🎨
A Homemade Rain Cloud in a Jar: A Step-by-Step Science Guide for Kids
🎨
Exploring Austria: A Coloring and Culture Guide for Kids
🎨
Bamboo Forest Coloring Page: A Nature Learning Guide for Kids
🎨
A Science Fair Project Board: A Coloring and STEM Guide for Kids
🎨
Snow Boots: Coloring Ideas and Activities for the Whole Family
🎨
A Pack of Raptors Coloring Page: Fun Facts for Young Paleontologists
🌈
Printable Everyday Objects Coloring Activities
🎨
Chicken Coop Coloring and Drawing Ideas for Kids
🎨
a Calm-Down Glitter Jar: A Simple Mindfulness Activity for Kids
💬
How Traffic and Safety Signs Communicate Ideas
🎨
Limbo: A Coloring and Playtime Guide for Kids
🎨
Cherry Blossom Branch: A Coloring and Nature Guide for Kids
🎨
Meet M.C. Escher: An Art Appreciation Guide for Kids
🧒
Fun Ways to Build Pencil Grip Development
🎨
Backup Battery and Flashlight Kit: A Family Safety Guide
🖍️
Tips for Applying Even Pressure
🎨
A Knight Defending a Castle Gate: A Medieval Coloring and History Guide for Kids
💡
Nurturing Creative Journaling at Home
🎨
A Ferris Wheel Coloring and Drawing Ideas for Kids
💬
Understanding Traffic and Safety Signs
🎨
A Binary Code Pattern: A Coloring and STEM Guide for Kids
🔤
Drawing Activities for Story Sequencing
🎨
A Dew-Covered Spiderweb: Coloring Ideas for Your Next Family Adventure
🎨
A Frying Pan: A Kitchen Guide for Kids and Parents
🎨
Exploring A Rocket Blast Off: A Coloring and Learning Guide for Kids
🧒
Drawing Activities for Drawing Milestones
🎨
Morning Mindfulness: A Simple Mindfulness Activity for Kids
🎨
How to Draw a Tuba: A Coloring and Music Guide for Kids
🎨
How to Draw a Bongo Drums: A Coloring and Music Guide for Kids
🎨
Mushroom Farming: A Coloring and Food Science Guide for Kids
🎨
Frisbee Coloring Pages and Drawing Ideas for Kids
🎲
Fun Dot-to-Dot Games for Kids
🎨
Boxing Day Coloring Ideas and Activities for the Whole Family
🎨
an Easter Egg Hunt Coloring Ideas and Activities for the Whole Family
🎨
Respecting Someone's Belongings: A Simple Social Skill for Kids
🧒
A Parent's Guide to Drawing Development Stages
🎨
Original Superhero Characters Drawing Prompts for Beginners
🖌️
How to Practice Using Colored Pencils
📴
Making the Most of Family Game Nights Without Screens
🎨
Satellite Deployment: A Coloring and Space Mission Guide for Kids
🎨
a Feelings Detective Game: A Simple Mindfulness Activity for Kids
🎨
A Seashell Collection Coloring and Drawing Ideas for Kids
🎨
A Boardwalk Souvenir Shop Coloring and Drawing Ideas for Kids
💗
Creative Approaches to The Difference Between Art Therapy and Coloring
📐
Learning Measurement Through Drawing
🎨
Back to School Shopping Coloring Ideas and Activities for the Whole Family
🎨
Pelican Coloring and Drawing Ideas for Kids
🎨
Exploring Greece: A Coloring and Culture Guide for Kids
🎨
Kaleidoscope Coloring and Drawing Ideas for Kids
📐
Why Shapes and Drawing Go Together
🎨
Meet Surrealism: An Art Appreciation Guide for Kids
🎨
A Wheelbarrow of Bricks Coloring and Drawing Ideas for Kids
🎨
Exploring A Space Colony: A Coloring and Learning Guide for Kids
🎨
A Classroom Reading Corner: A Classroom Coloring and Learning Guide
🎨
Teaching Kindness: A Simple Activity for Kids
🎨
A Reptile Terrarium: A Simple Pet Care Guide for Kids
🎨
Gecko Coloring and Drawing Ideas for Kids
🎨
Water Dragon Lizard Coloring and Drawing Ideas for Kids
🎨
Relaxation Story Time: A Simple Mindfulness Activity for Kids
👨👩👧
Easy Screen-Free Afternoons With Coloring Pages
🎨
Being Patient While Waiting Your Turn: A Simple Social Skill for Kids
🎨
How to Draw Gardens and Flowers Step by Step
🎨
A Baobab Tree: A Coloring and Nature Guide for Kids
🎨
Giving a Genuine Compliment: A Simple Social Skill for Kids
🎨
How to Draw Family Portraits Step by Step
👨👩👧
Fun and Simple Quiet Time Activities
✏️
Why Drawing Paper Types Matters for New Artists
🍎
How Teachers Can Use Group Art Projects
🎨
Tic Tac Toe Board Coloring and Drawing Ideas for Kids
🎨
Burj Khalifa: Coloring Page and Fun Facts for Kids
📐
Teaching Geometry Through Coloring and Drawing
🎨
Mindful Breathing Balloon: A Simple Mindfulness Activity for Kids
💗
How Drawing Supports Art for Quiet Reflection
🔬
A Simple Guide to How Eyes Perceive Color
🎨
A Nature Scavenger Hunt: Coloring Ideas for Your Next Family Adventure
🎨
Succulent Plant: A Coloring and Nature Guide for Kids
🎨
A Turtle's Habitat: A Simple Pet Care Guide for Kids
🎨
A Horse Corral: A Wild West Coloring and History Guide for Kids
🔎
Why Visual Thinkers Use Brainstorming With Pictures
🔤
Using Coloring Pages to Teach Descriptive Words
📴
Screen-Free Coloring Ideas for Camping Trips
🎨
Fairy Coloring and Drawing Ideas for Kids
🎨
Falcon Coloring Page Ideas for Kids
🎨
Stork Coloring Page Ideas for Kids
🎨
Putting on Shoes Independently: A Simple Life Skill for Kids
🎨
Simple Simon: A Nursery Rhyme Coloring Guide for Kids
🎨
a Matching Game Printable: Free Ideas for Your Next Celebration
🎨
Carnival Lights at Night Coloring and Drawing Ideas for Kids
🎨
Long Jump Coloring Pages and Drawing Ideas for Kids
💗
Creative Approaches to Creative Outlets for Teens
🎨
Seesaw Coloring and Drawing Ideas for Kids
👨👩👧
Creative Waiting Room Activities for Kids
🧠
Exploring Drawing and Fine Motor Coordination
👨👩👧
Fun and Simple Summer Break Activities
🎨
Itsy Bitsy Spider: A Nursery Rhyme Coloring Guide for Kids
🎨
How to Draw a Trombone: A Coloring and Music Guide for Kids
🎨
How to Draw a Bassoon: A Coloring and Music Guide for Kids
🎨
The Letter F: An Alphabet and Number Coloring Page
🖍️
Why Coloring Skin Tones Makes a Difference
🎨
A Superhero Training Montage: A Superhero Coloring and Design Guide for Kids
🎨
Statue of Liberty: Coloring Page and Fun Facts for Kids
 A Beginner's Guide to Holding a Pencil Correctly
🔬
A Simple Guide to Secondary Colors
🍎
How Teachers Can Use Transition Time Activities
🎨
Figure Skating Coloring Pages and Drawing Ideas for Kids
👨👩👧
Creative Road Trip Activities for Kids
🎨
A Building Under Construction Coloring and Drawing Ideas for Kids
🎨
Meet the Lawyer: A Community Helper Coloring Guide
🧒
What to Expect When Teaching Preschoolers
🔎
Exploring Data Visualization Basics for Students
🔬
What Is Color Psychology?
🎨
A Wave Rolling onto Shore Coloring and Drawing Ideas for Kids
💬
How Sign Language and Gesture Communicate Ideas
🧠
Exploring Drawing and Imagination
📴
Hands-On Activities for Sibling Playtime
🎨
A Nature Journal: Coloring Ideas for Your Next Family Adventure
🎨
Sleeping Beauty: A Classic Story Coloring Guide for Kids
🎨
Fun Farm Life Drawing Activities for Kids
🎨
How to Draw a Saxophone: A Coloring and Music Guide for Kids
🎨
A St. Patrick's Day Parade: Coloring Ideas and Fun Facts for Kids
🎨
Creative Castles Drawing Exercises
🎨
Leek Coloring and Drawing Ideas for Kids
🎨
Brontosaurus Coloring Page: Fun Facts for Young Paleontologists
🎨
Gharial Coloring and Drawing Ideas for Kids
🧘
Simple Steps for Repetitive Pattern Coloring
🎨
Spring Blossoms Coloring Page: A Nature Learning Guide for Kids
🍂
Celebrate Earth Day With Coloring Activities
🎨
Board Game Box Coloring and Drawing Ideas for Kids
🎨
Fern: A Coloring and Nature Guide for Kids
🧒
What to Expect When Teaching Encouraging Reluctant Artists
🎨
Packing for a Trip: A Simple Life Skill for Kids
🧘
How Coloring With Soft Music Can Create a Quiet Moment
🔬
The Science Behind Digital vs Traditional Color
💡
The Role of Daydreaming in Children's Art
🎨
A Camping Cooler: Coloring Ideas for Your Next Family Adventure
✏️
Why Drawing From Imagination Matters for New Artists
🏺
The History of Ancient Cave Pigments
🎨
A Cinco de Mayo Fiesta: Coloring Ideas and Fun Facts for Kids
🎨
Organic Farming: A Coloring and Food Science Guide for Kids
🎨
How to Draw a Circle: A Step-by-Step Guide for Kids
🎨
The Indus Valley Civilization: An Ancient History Coloring Guide for Kids
🧠
Can Drawing Improve Organizing Ideas?
🎨
Hay Bale Field Coloring and Drawing Ideas for Kids
🎨
The Rio Carnival: Coloring Ideas and Fun Facts for Kids
💡
How Drawing Encourages Original Thinking
🧠
Exploring Drawing and Patience
💡
Building Open-Ended Play Through Coloring and Drawing
🌈
Relaxing Vehicles Coloring Activities
🎨
Fun Cable Ski Lift Coloring and Drawing Ideas for Kids
🎨
Emergency Contact Card for Kids: A Family Safety Guide
🎨
Printing in Bulk for Classrooms: A Practical Guide
🔤
Using Coloring Pages to Teach Action Words
🧘
How Bedtime Coloring Routines Can Create a Quiet Moment
🎨
How to Draw a Square: A Step-by-Step Guide for Kids
🎨
Coloring Aprons and Smocks: A Buying and Technique Guide
🎨
Fun Trolley Coloring and Drawing Ideas for Kids
🎨
A Baking Sheet: A Kitchen Guide for Kids and Parents
🎨
Whale Coloring and Drawing Ideas for Kids
💡
Why Daydreaming Matters for Young Artists
🧒
How Drawing Supports Ages 4-5
🎨
Meet Printmaking Art: An Art Appreciation Guide for Kids
🎨
Walking a Dog: A Simple Pet Care Guide for Kids
🎨
Putting Away Groceries: A Simple Life Skill for Kids
🎨
A Spanish Flamenco Dress: A Coloring and Culture Guide for Kids
🎨
A Coin Cleaning Chemistry Test: A Step-by-Step Science Guide for Kids
🌈
Printable Sports Scenes Coloring Activities
🌈
Relaxing Emotions and Faces Coloring Activities
🏺
Why Ancient Storytelling Through Pictures Matter to Historians
🍎
Using Coloring Pages for Indoor Recess Activities
🎨
A Storm Shelter Basement: A Family Safety Guide
🌈
Printable Community Helpers Coloring Activities
🎨
The Number 4: An Alphabet and Number Coloring Page
🎨
A Cowboy Hat and Boots: A Wild West Coloring and History Guide for Kids
🔎
Using Mind Maps to Solve Problems
🎨
Toucan Coloring Page Ideas for Kids
🎨
A Balloon and Bottle Air Pressure Trick: A Step-by-Step Science Guide for Kids
🎨
A Message in a Bottle Coloring and Drawing Ideas for Kids
🖍️
How to Get Better at Choosing Paper for Coloring
🎨
Stuffed Animal Coloring and Drawing Ideas for Kids
🎨
Summer Sunscreen and a Towel: Coloring Ideas and Activities for the Whole Family
💡
Why Original Thinking Matters for Young Artists
🎲
Step-by-Step Drawing Battles
🎨
Puffin Coloring Page Ideas for Kids
🎨
Meet the Scientist in a Lab: A Community Helper Coloring Guide
🍂
Printable Cultural Festivals Coloring Pages for Kids
🎨
Rugby Coloring Pages and Drawing Ideas for Kids
🎨
A Pirate's Telescope Coloring and Drawing Ideas for Kids
🎨
Backyard BBQ Grill Coloring Ideas for Kids Who Love to Create
🌈
Fun Nature Landscapes Coloring Pages for Kids
🌈
Creative Ways to Color Birds
👨👩👧
Making the Most of Road Trip Activities
🎨
A Superhero Running at Super Speed: A Superhero Coloring and Design Guide for Kids
🎨
Root Vegetable Growing: A Coloring and Food Science Guide for Kids
🍎
Classroom Ideas: Back-to-School Activities
🎨
Exploring A Cosmic Rainbow: A Coloring and Learning Guide for Kids
🔤
Drawing Activities for Everyday Objects
💡
The Role of Imaginary Worlds in Children's Art
👨👩👧
Why Parents Love Morning Routine Activities
🎨
Cock-a-Doodle-Doo: A Nursery Rhyme Coloring Guide for Kids
🎲
Fun Mazes for Kids
📴
Screen-Free Coloring Ideas for Quiet Time Before Bed
🎨
Giving a Dog a Bath: A Simple Pet Care Guide for Kids
🧒
Drawing Activities for Ages 3-4
🌈
Fantasy Creatures Coloring Ideas for Classrooms
🧘
Why Mandala Coloring Feels Calming
🎨
London Bridge Is Falling Down: A Nursery Rhyme Coloring Guide for Kids
🎨
A Mongolian Deel: A Coloring and Culture Guide for Kids
🍎
Using Coloring Pages for Back-to-School Activities
🎨
Tractor Seed Planting: A Coloring and Food Science Guide for Kids
🖍️
Tips for Coloring Inside the Lines
🎨
Barn Owl Coloring and Drawing Ideas for Kids
🎨
Corn Field Coloring and Drawing Ideas for Kids
🔤
Visual Vocabulary: Action Words
🎨
A Trailhead Sign: Coloring Ideas for Your Next Family Adventure
🎨
Exploring Switzerland: A Coloring and Culture Guide for Kids
💗
How Drawing Supports Coping With Change Through Drawing
🎨
A Bastille Day Fireworks Show: Coloring Ideas and Fun Facts for Kids
🎨
Redwood Forest Coloring Page: A Nature Learning Guide for Kids
🍂
Creative Graduation Season Coloring Projects for Classrooms
🌈
Food and Treats Coloring Ideas for Classrooms
🧒
A Parent's Guide to Pre-Writing Skills
🍎
Using Coloring Pages for Art Lessons for Math Class
🖍️
A Beginner's Guide to Coloring Mandalas
🎨
A Treasure Chest Coloring and Drawing Ideas for Kids
🖌️
How to Practice Layering Techniques
🎨
Rosh Hashanah Coloring Ideas and Activities for the Whole Family
🎨
A Fortune Teller's Tent Coloring and Drawing Ideas for Kids
🎨
A Coloring Page Time Capsule: A Practical Guide
🎨
Bastille Day Coloring Ideas and Activities for the Whole Family
🎨
A Robot Builder: A Coloring and Invention Guide for Kids
🔬
What Is CMYK Printing Colors?
🎨
Juggling Pins Coloring and Drawing Ideas for Kids
🎨
A Pattern Recognition Game: A Coloring and STEM Guide for Kids
🌈
A Guide to Robots and Machines Coloring Pages
💗
Exploring Building Self-Esteem Through Art Through Art
💗
Creative Approaches to Stress Relief
🧠
Why Drawing Can Help With Spatial Awareness
🎨
A Pet Food Bowl Set: A Simple Pet Care Guide for Kids
🎨
A Family Vacation Savings Jar: A Money Guide for Kids and Parents
🏺
What We Know About Early Writing Systems
🎨
Fun Toy Tank Coloring and Drawing Ideas for Kids
🎨
Creative Family Portraits Drawing Exercises
🎨
A Pet's Favorite Toy: A Simple Pet Care Guide for Kids
🔬
The Science Behind Color Psychology
🔬
A Simple Guide to Additive Color Mixing
🎨
Raspberry Coloring and Drawing Ideas for Kids
🎨
Shark Coloring and Drawing Ideas for Kids
🎨
Using Kind Words: A Simple Social Skill for Kids
🎨
Offering to Help Someone: A Simple Social Skill for Kids
🧘
A Beginner's Guide to Bedtime Coloring Routines
🧘
A Beginner's Guide to Coloring for Sensory Breaks
🎨
Rock Climbing Coloring Pages and Drawing Ideas for Kids
💬
How Comic Strips Communicate Ideas
🎲
Fun Pictionary-Style Games for Kids
🔤
Using Coloring Pages to Teach Question Words
🎨
Teaching Confidence: A Simple Activity for Kids
🎨
Chalk Pastels: A Buying and Technique Guide
🎨
Exploring Cuba: A Coloring and Culture Guide for Kids
🎨
Fun Cruise Ship Coloring and Drawing Ideas for Kids
💗
Understanding What Art Therapy Actually Is
🎨
Pony Coloring and Drawing Ideas for Kids
🎲
How to Play Visual Puzzle Games
🌈
A Guide to Ocean Life Coloring Pages
🎨
A Robot Teacher: A Coloring and Invention Guide for Kids
🎨
A Beginner's Guide to Drawing Seasons
🎨
Staying Active Indoors: A Coloring and Health Guide for Kids
🎨
Meet Self-Portrait Art: An Art Appreciation Guide for Kids
✏️
How to Improve Your Drawing Straight Lines
📴
Screen-Free Coloring Ideas for Outdoor Picnics
🎨
Fourth of July Coloring Ideas and Activities for the Whole Family
🎨
A Korean Hanbok: A Coloring and Culture Guide for Kids
🎨
Exploring South Africa: A Coloring and Culture Guide for Kids
🧘
How Coloring During Travel Can Create a Quiet Moment
🎨
Foggy Morning Meadow Coloring Page: A Nature Learning Guide for Kids
🎨
The Number 9: An Alphabet and Number Coloring Page
🎨
Dolphin Coloring and Drawing Ideas for Kids
🎨
Notre-Dame Cathedral: Coloring Page and Fun Facts for Kids
🎨
A Nigerian Agbada: A Coloring and Culture Guide for Kids
✏️
Easy Steps to Practice Drawing From Observation
🔬
The Science Behind Warm and Cool Colors
🎨
A Kindness-Power Superhero: A Superhero Coloring and Design Guide for Kids
🎨
a Paper Doll Printable: Free Ideas for Your Next Celebration
🎨
Printing Coloring Pages at Home: A Practical Guide
🎨
A Beginner's Guide to Drawing Robots
💡
Building Creative Problem-Solving Through Coloring and Drawing
🎨
A Camping Trip Photo Album: Coloring Ideas for Your Next Family Adventure
🎨
Meet the Sports Coach: A Community Helper Coloring Guide
🎨
The Great Zimbabwe Ruins: An Ancient History Coloring Guide for Kids
🎨
Allosaurus Coloring Page: Fun Facts for Young Paleontologists
🎨
The Number 3: An Alphabet and Number Coloring Page
🎨
A Family Camping Trailer: Coloring Ideas for Your Next Family Adventure
🎨
A Piggy Bank Labeled Save, Spend, Share: A Money Guide for Kids and Parents
📴
Hands-On Activities for Long Car Rides
🎨
Teaching Adaptability: A Simple Activity for Kids
🎨
A Zero Gravity Floating Object Demo: A Coloring and Space Mission Guide for Kids
🎨
How to Draw a Pyramid: A Step-by-Step Guide for Kids
🖌️
How to Practice Cross-Hatching
📴
Creative Alternatives to Screens During Holiday Travel
🧒
Drawing Activities for The Scribbling Stage
🎨
Fun Hovercraft Coloring and Drawing Ideas for Kids
🧒
Understanding Pencil Grip Development in Early Childhood
🎨
How to Draw a Keyboard: A Coloring and Music Guide for Kids
🌈
Fun Space Coloring Pages for Kids
🎨
Flying a Kite in Spring: Coloring Ideas and Activities for the Whole Family
🎨
Backgammon Board Coloring and Drawing Ideas for Kids
🎨
A Robot Chef: A Coloring and Invention Guide for Kids
🎨
How to Draw Dinosaurs Step by Step
🎨
An Ancient Library of Scrolls: An Ancient History Coloring Guide for Kids
🎨
Mud Turtle Coloring and Drawing Ideas for Kids
🎨
Fun Crane Truck Coloring and Drawing Ideas for Kids
🎨
A Robot Learning to Walk: A Coloring and Invention Guide for Kids
🎨
A Cookie Cutter: A Kitchen Guide for Kids and Parents
🎨
A Backyard Camping Night: Coloring Ideas for Your Next Family Adventure
🎨
A Parachute Landing: A Coloring and Space Mission Guide for Kids
👨👩👧
Making the Most of Rainy Day Activities
🎨
Star Light Star Bright: A Nursery Rhyme Coloring Guide for Kids
🍂
Celebrate Autumn With Coloring Activities
🎨
A Sea Monster Legend Coloring and Drawing Ideas for Kids
🎨
A Dinosaur Jungle Scene Coloring Page: Fun Facts for Young Paleontologists
🧘
Exploring Coloring Before Exams
🍂
Printable St. Patrick's Day Coloring Pages for Kids
🎨
Pat-a-Cake: A Nursery Rhyme Coloring Guide for Kids
🎨
Friendly Banshee Coloring and Drawing Ideas for Kids
🧒
How Drawing Supports Fine Motor Skills
🎨
Introducing Yourself Politely: A Simple Life Skill for Kids
🎨
A Robot Gardener: A Coloring and Invention Guide for Kids
🧒
Fun Ways to Build Ages 2-3
🎨
Sinkhole Coloring Page: A Nature Learning Guide for Kids
🍂
Seasonal Coloring Guide: Graduation Season
🎨
a Snow Day Coloring Ideas and Activities for the Whole Family
🎨
How to Draw Birds Step by Step
🎨
A Saber-Tooth Cat Coloring Page: Fun Facts for Young Paleontologists
🎨
Exploring Mexico: A Coloring and Culture Guide for Kids
🔎
Why Visual Thinkers Use Visual Problem-Solving
🧒
What to Expect When Teaching Building Drawing Confidence
🎨
A Coloring Page Art Show: A Practical Guide
🎨
A Sack Race: A Coloring and Playtime Guide for Kids
💡
Why Inventing New Ideas Matters for Young Artists
🎨
A Family Coupon Clipping Session: A Money Guide for Kids and Parents
🌈
A Guide to Musical Themes Coloring Pages
🎨
Duck Coloring Page Ideas for Kids
🍂
Fun Cultural Festivals Classroom Coloring Ideas
✏️
Fun Exercises for Drawing Stick Figures
🔤
Using Coloring Pages to Teach Everyday Objects
🎲
Using Drawing for Mazes
🎨
A Royal Princess Tower: A Medieval Coloring and History Guide for Kids
🎨
Meet Georgia O'Keeffe: An Art Appreciation Guide for Kids
🎨
Meet the Engineer: A Community Helper Coloring Guide
🧒
Fun Ways to Build Hand-Eye Coordination
🧒
Fun Ways to Build Building Drawing Confidence
🎨
An Invention Notebook: A Coloring and STEM Guide for Kids
🎨
A Garden Fence: A Gardening Guide for Kids and Families
🎨
Swallowtail Butterfly Coloring and Drawing Ideas for Kids
🎨
The Letter H: An Alphabet and Number Coloring Page
🎨
How to Draw a Animal-Print Mandala: A Step-by-Step Guide
🎨
Panda Coloring and Drawing Ideas for Kids
A Beginner's Guide to Holding a Pencil Correctly
🔬
A Simple Guide to Secondary Colors
🍎
How Teachers Can Use Transition Time Activities
🎨
Figure Skating Coloring Pages and Drawing Ideas for Kids
👨👩👧
Creative Road Trip Activities for Kids
🎨
A Building Under Construction Coloring and Drawing Ideas for Kids
🎨
Meet the Lawyer: A Community Helper Coloring Guide
🧒
What to Expect When Teaching Preschoolers
🔎
Exploring Data Visualization Basics for Students
🔬
What Is Color Psychology?
🎨
A Wave Rolling onto Shore Coloring and Drawing Ideas for Kids
💬
How Sign Language and Gesture Communicate Ideas
🧠
Exploring Drawing and Imagination
📴
Hands-On Activities for Sibling Playtime
🎨
A Nature Journal: Coloring Ideas for Your Next Family Adventure
🎨
Sleeping Beauty: A Classic Story Coloring Guide for Kids
🎨
Fun Farm Life Drawing Activities for Kids
🎨
How to Draw a Saxophone: A Coloring and Music Guide for Kids
🎨
A St. Patrick's Day Parade: Coloring Ideas and Fun Facts for Kids
🎨
Creative Castles Drawing Exercises
🎨
Leek Coloring and Drawing Ideas for Kids
🎨
Brontosaurus Coloring Page: Fun Facts for Young Paleontologists
🎨
Gharial Coloring and Drawing Ideas for Kids
🧘
Simple Steps for Repetitive Pattern Coloring
🎨
Spring Blossoms Coloring Page: A Nature Learning Guide for Kids
🍂
Celebrate Earth Day With Coloring Activities
🎨
Board Game Box Coloring and Drawing Ideas for Kids
🎨
Fern: A Coloring and Nature Guide for Kids
🧒
What to Expect When Teaching Encouraging Reluctant Artists
🎨
Packing for a Trip: A Simple Life Skill for Kids
🧘
How Coloring With Soft Music Can Create a Quiet Moment
🔬
The Science Behind Digital vs Traditional Color
💡
The Role of Daydreaming in Children's Art
🎨
A Camping Cooler: Coloring Ideas for Your Next Family Adventure
✏️
Why Drawing From Imagination Matters for New Artists
🏺
The History of Ancient Cave Pigments
🎨
A Cinco de Mayo Fiesta: Coloring Ideas and Fun Facts for Kids
🎨
Organic Farming: A Coloring and Food Science Guide for Kids
🎨
How to Draw a Circle: A Step-by-Step Guide for Kids
🎨
The Indus Valley Civilization: An Ancient History Coloring Guide for Kids
🧠
Can Drawing Improve Organizing Ideas?
🎨
Hay Bale Field Coloring and Drawing Ideas for Kids
🎨
The Rio Carnival: Coloring Ideas and Fun Facts for Kids
💡
How Drawing Encourages Original Thinking
🧠
Exploring Drawing and Patience
💡
Building Open-Ended Play Through Coloring and Drawing
🌈
Relaxing Vehicles Coloring Activities
🎨
Fun Cable Ski Lift Coloring and Drawing Ideas for Kids
🎨
Emergency Contact Card for Kids: A Family Safety Guide
🎨
Printing in Bulk for Classrooms: A Practical Guide
🔤
Using Coloring Pages to Teach Action Words
🧘
How Bedtime Coloring Routines Can Create a Quiet Moment
🎨
How to Draw a Square: A Step-by-Step Guide for Kids
🎨
Coloring Aprons and Smocks: A Buying and Technique Guide
🎨
Fun Trolley Coloring and Drawing Ideas for Kids
🎨
A Baking Sheet: A Kitchen Guide for Kids and Parents
🎨
Whale Coloring and Drawing Ideas for Kids
💡
Why Daydreaming Matters for Young Artists
🧒
How Drawing Supports Ages 4-5
🎨
Meet Printmaking Art: An Art Appreciation Guide for Kids
🎨
Walking a Dog: A Simple Pet Care Guide for Kids
🎨
Putting Away Groceries: A Simple Life Skill for Kids
🎨
A Spanish Flamenco Dress: A Coloring and Culture Guide for Kids
🎨
A Coin Cleaning Chemistry Test: A Step-by-Step Science Guide for Kids
🌈
Printable Sports Scenes Coloring Activities
🌈
Relaxing Emotions and Faces Coloring Activities
🏺
Why Ancient Storytelling Through Pictures Matter to Historians
🍎
Using Coloring Pages for Indoor Recess Activities
🎨
A Storm Shelter Basement: A Family Safety Guide
🌈
Printable Community Helpers Coloring Activities
🎨
The Number 4: An Alphabet and Number Coloring Page
🎨
A Cowboy Hat and Boots: A Wild West Coloring and History Guide for Kids
🔎
Using Mind Maps to Solve Problems
🎨
Toucan Coloring Page Ideas for Kids
🎨
A Balloon and Bottle Air Pressure Trick: A Step-by-Step Science Guide for Kids
🎨
A Message in a Bottle Coloring and Drawing Ideas for Kids
🖍️
How to Get Better at Choosing Paper for Coloring
🎨
Stuffed Animal Coloring and Drawing Ideas for Kids
🎨
Summer Sunscreen and a Towel: Coloring Ideas and Activities for the Whole Family
💡
Why Original Thinking Matters for Young Artists
🎲
Step-by-Step Drawing Battles
🎨
Puffin Coloring Page Ideas for Kids
🎨
Meet the Scientist in a Lab: A Community Helper Coloring Guide
🍂
Printable Cultural Festivals Coloring Pages for Kids
🎨
Rugby Coloring Pages and Drawing Ideas for Kids
🎨
A Pirate's Telescope Coloring and Drawing Ideas for Kids
🎨
Backyard BBQ Grill Coloring Ideas for Kids Who Love to Create
🌈
Fun Nature Landscapes Coloring Pages for Kids
🌈
Creative Ways to Color Birds
👨👩👧
Making the Most of Road Trip Activities
🎨
A Superhero Running at Super Speed: A Superhero Coloring and Design Guide for Kids
🎨
Root Vegetable Growing: A Coloring and Food Science Guide for Kids
🍎
Classroom Ideas: Back-to-School Activities
🎨
Exploring A Cosmic Rainbow: A Coloring and Learning Guide for Kids
🔤
Drawing Activities for Everyday Objects
💡
The Role of Imaginary Worlds in Children's Art
👨👩👧
Why Parents Love Morning Routine Activities
🎨
Cock-a-Doodle-Doo: A Nursery Rhyme Coloring Guide for Kids
🎲
Fun Mazes for Kids
📴
Screen-Free Coloring Ideas for Quiet Time Before Bed
🎨
Giving a Dog a Bath: A Simple Pet Care Guide for Kids
🧒
Drawing Activities for Ages 3-4
🌈
Fantasy Creatures Coloring Ideas for Classrooms
🧘
Why Mandala Coloring Feels Calming
🎨
London Bridge Is Falling Down: A Nursery Rhyme Coloring Guide for Kids
🎨
A Mongolian Deel: A Coloring and Culture Guide for Kids
🍎
Using Coloring Pages for Back-to-School Activities
🎨
Tractor Seed Planting: A Coloring and Food Science Guide for Kids
🖍️
Tips for Coloring Inside the Lines
🎨
Barn Owl Coloring and Drawing Ideas for Kids
🎨
Corn Field Coloring and Drawing Ideas for Kids
🔤
Visual Vocabulary: Action Words
🎨
A Trailhead Sign: Coloring Ideas for Your Next Family Adventure
🎨
Exploring Switzerland: A Coloring and Culture Guide for Kids
💗
How Drawing Supports Coping With Change Through Drawing
🎨
A Bastille Day Fireworks Show: Coloring Ideas and Fun Facts for Kids
🎨
Redwood Forest Coloring Page: A Nature Learning Guide for Kids
🍂
Creative Graduation Season Coloring Projects for Classrooms
🌈
Food and Treats Coloring Ideas for Classrooms
🧒
A Parent's Guide to Pre-Writing Skills
🍎
Using Coloring Pages for Art Lessons for Math Class
🖍️
A Beginner's Guide to Coloring Mandalas
🎨
A Treasure Chest Coloring and Drawing Ideas for Kids
🖌️
How to Practice Layering Techniques
🎨
Rosh Hashanah Coloring Ideas and Activities for the Whole Family
🎨
A Fortune Teller's Tent Coloring and Drawing Ideas for Kids
🎨
A Coloring Page Time Capsule: A Practical Guide
🎨
Bastille Day Coloring Ideas and Activities for the Whole Family
🎨
A Robot Builder: A Coloring and Invention Guide for Kids
🔬
What Is CMYK Printing Colors?
🎨
Juggling Pins Coloring and Drawing Ideas for Kids
🎨
A Pattern Recognition Game: A Coloring and STEM Guide for Kids
🌈
A Guide to Robots and Machines Coloring Pages
💗
Exploring Building Self-Esteem Through Art Through Art
💗
Creative Approaches to Stress Relief
🧠
Why Drawing Can Help With Spatial Awareness
🎨
A Pet Food Bowl Set: A Simple Pet Care Guide for Kids
🎨
A Family Vacation Savings Jar: A Money Guide for Kids and Parents
🏺
What We Know About Early Writing Systems
🎨
Fun Toy Tank Coloring and Drawing Ideas for Kids
🎨
Creative Family Portraits Drawing Exercises
🎨
A Pet's Favorite Toy: A Simple Pet Care Guide for Kids
🔬
The Science Behind Color Psychology
🔬
A Simple Guide to Additive Color Mixing
🎨
Raspberry Coloring and Drawing Ideas for Kids
🎨
Shark Coloring and Drawing Ideas for Kids
🎨
Using Kind Words: A Simple Social Skill for Kids
🎨
Offering to Help Someone: A Simple Social Skill for Kids
🧘
A Beginner's Guide to Bedtime Coloring Routines
🧘
A Beginner's Guide to Coloring for Sensory Breaks
🎨
Rock Climbing Coloring Pages and Drawing Ideas for Kids
💬
How Comic Strips Communicate Ideas
🎲
Fun Pictionary-Style Games for Kids
🔤
Using Coloring Pages to Teach Question Words
🎨
Teaching Confidence: A Simple Activity for Kids
🎨
Chalk Pastels: A Buying and Technique Guide
🎨
Exploring Cuba: A Coloring and Culture Guide for Kids
🎨
Fun Cruise Ship Coloring and Drawing Ideas for Kids
💗
Understanding What Art Therapy Actually Is
🎨
Pony Coloring and Drawing Ideas for Kids
🎲
How to Play Visual Puzzle Games
🌈
A Guide to Ocean Life Coloring Pages
🎨
A Robot Teacher: A Coloring and Invention Guide for Kids
🎨
A Beginner's Guide to Drawing Seasons
🎨
Staying Active Indoors: A Coloring and Health Guide for Kids
🎨
Meet Self-Portrait Art: An Art Appreciation Guide for Kids
✏️
How to Improve Your Drawing Straight Lines
📴
Screen-Free Coloring Ideas for Outdoor Picnics
🎨
Fourth of July Coloring Ideas and Activities for the Whole Family
🎨
A Korean Hanbok: A Coloring and Culture Guide for Kids
🎨
Exploring South Africa: A Coloring and Culture Guide for Kids
🧘
How Coloring During Travel Can Create a Quiet Moment
🎨
Foggy Morning Meadow Coloring Page: A Nature Learning Guide for Kids
🎨
The Number 9: An Alphabet and Number Coloring Page
🎨
Dolphin Coloring and Drawing Ideas for Kids
🎨
Notre-Dame Cathedral: Coloring Page and Fun Facts for Kids
🎨
A Nigerian Agbada: A Coloring and Culture Guide for Kids
✏️
Easy Steps to Practice Drawing From Observation
🔬
The Science Behind Warm and Cool Colors
🎨
A Kindness-Power Superhero: A Superhero Coloring and Design Guide for Kids
🎨
a Paper Doll Printable: Free Ideas for Your Next Celebration
🎨
Printing Coloring Pages at Home: A Practical Guide
🎨
A Beginner's Guide to Drawing Robots
💡
Building Creative Problem-Solving Through Coloring and Drawing
🎨
A Camping Trip Photo Album: Coloring Ideas for Your Next Family Adventure
🎨
Meet the Sports Coach: A Community Helper Coloring Guide
🎨
The Great Zimbabwe Ruins: An Ancient History Coloring Guide for Kids
🎨
Allosaurus Coloring Page: Fun Facts for Young Paleontologists
🎨
The Number 3: An Alphabet and Number Coloring Page
🎨
A Family Camping Trailer: Coloring Ideas for Your Next Family Adventure
🎨
A Piggy Bank Labeled Save, Spend, Share: A Money Guide for Kids and Parents
📴
Hands-On Activities for Long Car Rides
🎨
Teaching Adaptability: A Simple Activity for Kids
🎨
A Zero Gravity Floating Object Demo: A Coloring and Space Mission Guide for Kids
🎨
How to Draw a Pyramid: A Step-by-Step Guide for Kids
🖌️
How to Practice Cross-Hatching
📴
Creative Alternatives to Screens During Holiday Travel
🧒
Drawing Activities for The Scribbling Stage
🎨
Fun Hovercraft Coloring and Drawing Ideas for Kids
🧒
Understanding Pencil Grip Development in Early Childhood
🎨
How to Draw a Keyboard: A Coloring and Music Guide for Kids
🌈
Fun Space Coloring Pages for Kids
🎨
Flying a Kite in Spring: Coloring Ideas and Activities for the Whole Family
🎨
Backgammon Board Coloring and Drawing Ideas for Kids
🎨
A Robot Chef: A Coloring and Invention Guide for Kids
🎨
How to Draw Dinosaurs Step by Step
🎨
An Ancient Library of Scrolls: An Ancient History Coloring Guide for Kids
🎨
Mud Turtle Coloring and Drawing Ideas for Kids
🎨
Fun Crane Truck Coloring and Drawing Ideas for Kids
🎨
A Robot Learning to Walk: A Coloring and Invention Guide for Kids
🎨
A Cookie Cutter: A Kitchen Guide for Kids and Parents
🎨
A Backyard Camping Night: Coloring Ideas for Your Next Family Adventure
🎨
A Parachute Landing: A Coloring and Space Mission Guide for Kids
👨👩👧
Making the Most of Rainy Day Activities
🎨
Star Light Star Bright: A Nursery Rhyme Coloring Guide for Kids
🍂
Celebrate Autumn With Coloring Activities
🎨
A Sea Monster Legend Coloring and Drawing Ideas for Kids
🎨
A Dinosaur Jungle Scene Coloring Page: Fun Facts for Young Paleontologists
🧘
Exploring Coloring Before Exams
🍂
Printable St. Patrick's Day Coloring Pages for Kids
🎨
Pat-a-Cake: A Nursery Rhyme Coloring Guide for Kids
🎨
Friendly Banshee Coloring and Drawing Ideas for Kids
🧒
How Drawing Supports Fine Motor Skills
🎨
Introducing Yourself Politely: A Simple Life Skill for Kids
🎨
A Robot Gardener: A Coloring and Invention Guide for Kids
🧒
Fun Ways to Build Ages 2-3
🎨
Sinkhole Coloring Page: A Nature Learning Guide for Kids
🍂
Seasonal Coloring Guide: Graduation Season
🎨
a Snow Day Coloring Ideas and Activities for the Whole Family
🎨
How to Draw Birds Step by Step
🎨
A Saber-Tooth Cat Coloring Page: Fun Facts for Young Paleontologists
🎨
Exploring Mexico: A Coloring and Culture Guide for Kids
🔎
Why Visual Thinkers Use Visual Problem-Solving
🧒
What to Expect When Teaching Building Drawing Confidence
🎨
A Coloring Page Art Show: A Practical Guide
🎨
A Sack Race: A Coloring and Playtime Guide for Kids
💡
Why Inventing New Ideas Matters for Young Artists
🎨
A Family Coupon Clipping Session: A Money Guide for Kids and Parents
🌈
A Guide to Musical Themes Coloring Pages
🎨
Duck Coloring Page Ideas for Kids
🍂
Fun Cultural Festivals Classroom Coloring Ideas
✏️
Fun Exercises for Drawing Stick Figures
🔤
Using Coloring Pages to Teach Everyday Objects
🎲
Using Drawing for Mazes
🎨
A Royal Princess Tower: A Medieval Coloring and History Guide for Kids
🎨
Meet Georgia O'Keeffe: An Art Appreciation Guide for Kids
🎨
Meet the Engineer: A Community Helper Coloring Guide
🧒
Fun Ways to Build Hand-Eye Coordination
🧒
Fun Ways to Build Building Drawing Confidence
🎨
An Invention Notebook: A Coloring and STEM Guide for Kids
🎨
A Garden Fence: A Gardening Guide for Kids and Families
🎨
Swallowtail Butterfly Coloring and Drawing Ideas for Kids
🎨
The Letter H: An Alphabet and Number Coloring Page
🎨
How to Draw a Animal-Print Mandala: A Step-by-Step Guide
🎨
Panda Coloring and Drawing Ideas for Kids
 A Beginner's Guide to Drawing Simple Objects
💬
The Power of Traffic and Safety Signs
💗
Creative Approaches to Art and Relaxation
🎨
A Coloring Page Portfolio for Kids: A Practical Guide
🎨
The Number 16: An Alphabet and Number Coloring Page
🎨
Chocolate Bar Coloring Ideas for Kids Who Love to Create
📴
Making the Most of Long Car Rides Without Screens
✏️
Easy Steps to Practice Sketching Basics
🎨
The Muffin Man: A Nursery Rhyme Coloring Guide for Kids
🎨
A Beach Cabana Coloring and Drawing Ideas for Kids
🎨
A Salad Spinner: A Kitchen Guide for Kids and Parents
🎲
Fun Drawing Battles for Kids
🎨
Building a Sandcastle: Coloring Ideas and Activities for the Whole Family
🖌️
Exploring Composition Basics
💡
Nurturing Finding Inspiration at Home
🏺
The History of Ancient Symbols
🎨
How to Draw a Snowflake Mandala: A Step-by-Step Guide
🎨
Meet the Train Conductor: A Community Helper Coloring Guide
A Beginner's Guide to Drawing Simple Objects
💬
The Power of Traffic and Safety Signs
💗
Creative Approaches to Art and Relaxation
🎨
A Coloring Page Portfolio for Kids: A Practical Guide
🎨
The Number 16: An Alphabet and Number Coloring Page
🎨
Chocolate Bar Coloring Ideas for Kids Who Love to Create
📴
Making the Most of Long Car Rides Without Screens
✏️
Easy Steps to Practice Sketching Basics
🎨
The Muffin Man: A Nursery Rhyme Coloring Guide for Kids
🎨
A Beach Cabana Coloring and Drawing Ideas for Kids
🎨
A Salad Spinner: A Kitchen Guide for Kids and Parents
🎲
Fun Drawing Battles for Kids
🎨
Building a Sandcastle: Coloring Ideas and Activities for the Whole Family
🖌️
Exploring Composition Basics
💡
Nurturing Finding Inspiration at Home
🏺
The History of Ancient Symbols
🎨
How to Draw a Snowflake Mandala: A Step-by-Step Guide
🎨
Meet the Train Conductor: A Community Helper Coloring Guide
 Why Drawing Straight Lines Matters for New Artists
🎨
Kitten Coloring and Drawing Ideas for Kids
🎨
A Rescue Robot: A Coloring and Invention Guide for Kids
🎨
A Chinese Traditional Qipao: A Coloring and Culture Guide for Kids
💗
Exploring Stress Relief Through Art
🍂
Celebrate Birthday Celebrations With Coloring Activities
🎨
A Healthy Breakfast: A Coloring and Health Guide for Kids
🖍️
Simple Techniques for Coloring Large Areas
🎨
Pegacorn Coloring and Drawing Ideas for Kids
🎨
Baby Dragon Coloring and Drawing Ideas for Kids
🌈
A Guide to Space Coloring Pages
🎨
A Superhero City Skyline: A Superhero Coloring and Design Guide for Kids
🎨
Exploring Morocco: A Coloring and Culture Guide for Kids
🎨
Setting Up a Coloring Desk: A Buying and Technique Guide
🍂
Printable Mother's Day Coloring Pages for Kids
🧘
Simple Steps for Mandala Coloring
🎨
Paper Airplane Coloring and Drawing Ideas for Kids
🏺
Exploring Cave Paintings
💡
The Role of Storytelling in Children's Art
🎨
A Bird-Watching Walk: Coloring Ideas for Your Next Family Adventure
🎨
Cleaning Up a Shared Space: A Simple Social Skill for Kids
🎨
A Wild West Trading Post: A Wild West Coloring and History Guide for Kids
🎨
Luna Moth Coloring and Drawing Ideas for Kids
🎨
Cherry Blossom Grove Coloring Page: A Nature Learning Guide for Kids
🎨
A Savings Jar: A Money Guide for Kids and Parents
🧒
Drawing Activities for Ages 4-5
🎨
Frog Coloring and Drawing Ideas for Kids
🌈
Insects and Bugs Coloring Ideas for Classrooms
🎨
A Cargo Resupply Ship: A Coloring and Space Mission Guide for Kids
🎨
A Simple If-Then Decision: A Coloring and STEM Guide for Kids
🎲
Scavenger Hunt Drawings: A Creative Twist
🎨
Meet the Musician: A Community Helper Coloring Guide
🎨
Kookaburra Coloring Page Ideas for Kids
🎨
A Robot Spider: A Coloring and Invention Guide for Kids
🎨
How to Draw a Oboe: A Coloring and Music Guide for Kids
🧠
Why Drawing Can Help With Patience
📐
Why Symmetry and Drawing Go Together
🔎
A Beginner's Guide to Flowcharts
🎨
A DJ at Turntables: A Coloring and Movement Guide for Kids
🎨
A Fish and Chips Basket: Coloring Ideas and Fun Facts for Kids
💬
How Diagrams Communicate Ideas
🎨
A Boombox: A Coloring and Movement Guide for Kids
🎲
Fun Memory Matching Games for Kids
💡
Why Divergent Thinking Matters for Young Artists
🎨
How to Draw a Rangoli Design: A Step-by-Step Guide
🔎
Using Sketching to Understand Complex Ideas to Solve Problems
🎨
Fun Forklift Coloring and Drawing Ideas for Kids
🎨
A Bird Being Given Fresh Seed: A Simple Pet Care Guide for Kids
🎨
Under the Sea Drawing Prompts for Beginners
🎨
A Portable Camp Stove: Coloring Ideas for Your Next Family Adventure
🔎
Exploring Timeline Diagrams for Students
🎨
Goat Coloring and Drawing Ideas for Kids
🎨
Cauliflower Coloring and Drawing Ideas for Kids
📴
Hands-On Activities for Rainy Afternoons
🎨
Meet Andy Warhol: An Art Appreciation Guide for Kids
🍎
Using Coloring Pages for Circle Time Activities
🎨
Exploring A UFO: A Coloring and Learning Guide for Kids
🎨
A Watering Hose: A Gardening Guide for Kids and Families
🧠
Why Drawing Can Help With Hand-Eye Coordination
🧒
How Drawing Supports Drawing Development Stages
✏️
Why Drawing Circles Matters for New Artists
🎨
A Barn Raising Coloring and Drawing Ideas for Kids
🎨
A Homemade Volcano Eruption: A Step-by-Step Science Guide for Kids
🎨
a Road Trip Activity Pack: Free Ideas for Your Next Celebration
🎨
A Spice Rack: A Kitchen Guide for Kids and Parents
🌈
Printable Insects and Bugs Coloring Activities
🧠
Why Drawing Can Help With Problem-Solving
👨👩👧
Easy Bedtime Wind-Down Routines With Coloring Pages
🎨
How to Draw Vehicles Step by Step
👨👩👧
Fun and Simple Rainy Day Activities
🎨
Dragonfly Coloring and Drawing Ideas for Kids
🎨
Fun Fighter Jet Coloring and Drawing Ideas for Kids
🍎
Using Coloring Pages for Morning Work Activities
✏️
How to Improve Your Drawing From Observation
🎨
Tea Picking: A Coloring and Food Science Guide for Kids
👨👩👧
Why Parents Love Rainy Day Activities
📐
Teaching 3D Shapes Through Coloring and Drawing
🎨
A Ghanaian Kente Cloth: A Coloring and Culture Guide for Kids
🎨
How to Draw a Harmonica: A Coloring and Music Guide for Kids
📴
Creative Alternatives to Screens During Restaurant Wait Times
🎨
Exploring Ghana: A Coloring and Culture Guide for Kids
🎨
Katydid Coloring and Drawing Ideas for Kids
🎨
Coral Atoll Coloring Page: A Nature Learning Guide for Kids
🧒
Drawing Activities for Shape Recognition
🎨
Watering a Plant: A Simple Life Skill for Kids
🎨
Easy Seasons Drawing Ideas
🧘
Exploring Nature-Inspired Calm Coloring
🎨
A Kids' Hackathon Team: A Coloring and STEM Guide for Kids
🎨
A Fish Being Fed Flakes: A Simple Pet Care Guide for Kids
🌈
Relaxing Fantasy Creatures Coloring Activities
🧘
Exploring Repetitive Pattern Coloring
🎨
A Hip Hop Dancer: A Coloring and Movement Guide for Kids
🧠
Can Drawing Improve Creative Thinking?
🌈
Printable Mandalas Coloring Activities
🎨
A Winter Sledding Hill: Coloring Ideas and Activities for the Whole Family
🌈
A Guide to Vehicles Coloring Pages
🍂
Fun Earth Day Classroom Coloring Ideas
🎨
Exploring Saturn: A Coloring and Learning Guide for Kids
🎨
A Pirate's Golden Coin Coloring and Drawing Ideas for Kids
🎨
How to Draw a Damask Pattern: A Step-by-Step Guide
🎨
A Simple Money Math Worksheet: A Money Guide for Kids and Parents
🎨
Charcoal Pencils: A Buying and Technique Guide
🎲
Guess-the-Drawing Games: A Creative Twist
🎨
Leaning Tower of Pisa: Coloring Page and Fun Facts for Kids
🎨
a Body Awareness Chart: A Simple Mindfulness Activity for Kids
🎨
a Get Well Soon Card: Free Ideas for Your Next Celebration
🎨
Garlic Bulb Coloring and Drawing Ideas for Kids
🎨
A Class Newsletter: A Classroom Coloring and Learning Guide
🎨
Pet Turtle Coloring and Drawing Ideas for Kids
🎨
Fig Coloring and Drawing Ideas for Kids
👨👩👧
Easy Quiet Time Activities With Coloring Pages
🎨
Meet the Flight Attendant: A Community Helper Coloring Guide
🎨
A Kenyan Maasai Shuka: A Coloring and Culture Guide for Kids
🧠
How Drawing May Support Confidence Building
🎨
Cloud Dragon Coloring and Drawing Ideas for Kids
🌈
Relaxing Robots and Machines Coloring Activities
Why Drawing Straight Lines Matters for New Artists
🎨
Kitten Coloring and Drawing Ideas for Kids
🎨
A Rescue Robot: A Coloring and Invention Guide for Kids
🎨
A Chinese Traditional Qipao: A Coloring and Culture Guide for Kids
💗
Exploring Stress Relief Through Art
🍂
Celebrate Birthday Celebrations With Coloring Activities
🎨
A Healthy Breakfast: A Coloring and Health Guide for Kids
🖍️
Simple Techniques for Coloring Large Areas
🎨
Pegacorn Coloring and Drawing Ideas for Kids
🎨
Baby Dragon Coloring and Drawing Ideas for Kids
🌈
A Guide to Space Coloring Pages
🎨
A Superhero City Skyline: A Superhero Coloring and Design Guide for Kids
🎨
Exploring Morocco: A Coloring and Culture Guide for Kids
🎨
Setting Up a Coloring Desk: A Buying and Technique Guide
🍂
Printable Mother's Day Coloring Pages for Kids
🧘
Simple Steps for Mandala Coloring
🎨
Paper Airplane Coloring and Drawing Ideas for Kids
🏺
Exploring Cave Paintings
💡
The Role of Storytelling in Children's Art
🎨
A Bird-Watching Walk: Coloring Ideas for Your Next Family Adventure
🎨
Cleaning Up a Shared Space: A Simple Social Skill for Kids
🎨
A Wild West Trading Post: A Wild West Coloring and History Guide for Kids
🎨
Luna Moth Coloring and Drawing Ideas for Kids
🎨
Cherry Blossom Grove Coloring Page: A Nature Learning Guide for Kids
🎨
A Savings Jar: A Money Guide for Kids and Parents
🧒
Drawing Activities for Ages 4-5
🎨
Frog Coloring and Drawing Ideas for Kids
🌈
Insects and Bugs Coloring Ideas for Classrooms
🎨
A Cargo Resupply Ship: A Coloring and Space Mission Guide for Kids
🎨
A Simple If-Then Decision: A Coloring and STEM Guide for Kids
🎲
Scavenger Hunt Drawings: A Creative Twist
🎨
Meet the Musician: A Community Helper Coloring Guide
🎨
Kookaburra Coloring Page Ideas for Kids
🎨
A Robot Spider: A Coloring and Invention Guide for Kids
🎨
How to Draw a Oboe: A Coloring and Music Guide for Kids
🧠
Why Drawing Can Help With Patience
📐
Why Symmetry and Drawing Go Together
🔎
A Beginner's Guide to Flowcharts
🎨
A DJ at Turntables: A Coloring and Movement Guide for Kids
🎨
A Fish and Chips Basket: Coloring Ideas and Fun Facts for Kids
💬
How Diagrams Communicate Ideas
🎨
A Boombox: A Coloring and Movement Guide for Kids
🎲
Fun Memory Matching Games for Kids
💡
Why Divergent Thinking Matters for Young Artists
🎨
How to Draw a Rangoli Design: A Step-by-Step Guide
🔎
Using Sketching to Understand Complex Ideas to Solve Problems
🎨
Fun Forklift Coloring and Drawing Ideas for Kids
🎨
A Bird Being Given Fresh Seed: A Simple Pet Care Guide for Kids
🎨
Under the Sea Drawing Prompts for Beginners
🎨
A Portable Camp Stove: Coloring Ideas for Your Next Family Adventure
🔎
Exploring Timeline Diagrams for Students
🎨
Goat Coloring and Drawing Ideas for Kids
🎨
Cauliflower Coloring and Drawing Ideas for Kids
📴
Hands-On Activities for Rainy Afternoons
🎨
Meet Andy Warhol: An Art Appreciation Guide for Kids
🍎
Using Coloring Pages for Circle Time Activities
🎨
Exploring A UFO: A Coloring and Learning Guide for Kids
🎨
A Watering Hose: A Gardening Guide for Kids and Families
🧠
Why Drawing Can Help With Hand-Eye Coordination
🧒
How Drawing Supports Drawing Development Stages
✏️
Why Drawing Circles Matters for New Artists
🎨
A Barn Raising Coloring and Drawing Ideas for Kids
🎨
A Homemade Volcano Eruption: A Step-by-Step Science Guide for Kids
🎨
a Road Trip Activity Pack: Free Ideas for Your Next Celebration
🎨
A Spice Rack: A Kitchen Guide for Kids and Parents
🌈
Printable Insects and Bugs Coloring Activities
🧠
Why Drawing Can Help With Problem-Solving
👨👩👧
Easy Bedtime Wind-Down Routines With Coloring Pages
🎨
How to Draw Vehicles Step by Step
👨👩👧
Fun and Simple Rainy Day Activities
🎨
Dragonfly Coloring and Drawing Ideas for Kids
🎨
Fun Fighter Jet Coloring and Drawing Ideas for Kids
🍎
Using Coloring Pages for Morning Work Activities
✏️
How to Improve Your Drawing From Observation
🎨
Tea Picking: A Coloring and Food Science Guide for Kids
👨👩👧
Why Parents Love Rainy Day Activities
📐
Teaching 3D Shapes Through Coloring and Drawing
🎨
A Ghanaian Kente Cloth: A Coloring and Culture Guide for Kids
🎨
How to Draw a Harmonica: A Coloring and Music Guide for Kids
📴
Creative Alternatives to Screens During Restaurant Wait Times
🎨
Exploring Ghana: A Coloring and Culture Guide for Kids
🎨
Katydid Coloring and Drawing Ideas for Kids
🎨
Coral Atoll Coloring Page: A Nature Learning Guide for Kids
🧒
Drawing Activities for Shape Recognition
🎨
Watering a Plant: A Simple Life Skill for Kids
🎨
Easy Seasons Drawing Ideas
🧘
Exploring Nature-Inspired Calm Coloring
🎨
A Kids' Hackathon Team: A Coloring and STEM Guide for Kids
🎨
A Fish Being Fed Flakes: A Simple Pet Care Guide for Kids
🌈
Relaxing Fantasy Creatures Coloring Activities
🧘
Exploring Repetitive Pattern Coloring
🎨
A Hip Hop Dancer: A Coloring and Movement Guide for Kids
🧠
Can Drawing Improve Creative Thinking?
🌈
Printable Mandalas Coloring Activities
🎨
A Winter Sledding Hill: Coloring Ideas and Activities for the Whole Family
🌈
A Guide to Vehicles Coloring Pages
🍂
Fun Earth Day Classroom Coloring Ideas
🎨
Exploring Saturn: A Coloring and Learning Guide for Kids
🎨
A Pirate's Golden Coin Coloring and Drawing Ideas for Kids
🎨
How to Draw a Damask Pattern: A Step-by-Step Guide
🎨
A Simple Money Math Worksheet: A Money Guide for Kids and Parents
🎨
Charcoal Pencils: A Buying and Technique Guide
🎲
Guess-the-Drawing Games: A Creative Twist
🎨
Leaning Tower of Pisa: Coloring Page and Fun Facts for Kids
🎨
a Body Awareness Chart: A Simple Mindfulness Activity for Kids
🎨
a Get Well Soon Card: Free Ideas for Your Next Celebration
🎨
Garlic Bulb Coloring and Drawing Ideas for Kids
🎨
A Class Newsletter: A Classroom Coloring and Learning Guide
🎨
Pet Turtle Coloring and Drawing Ideas for Kids
🎨
Fig Coloring and Drawing Ideas for Kids
👨👩👧
Easy Quiet Time Activities With Coloring Pages
🎨
Meet the Flight Attendant: A Community Helper Coloring Guide
🎨
A Kenyan Maasai Shuka: A Coloring and Culture Guide for Kids
🧠
How Drawing May Support Confidence Building
🎨
Cloud Dragon Coloring and Drawing Ideas for Kids
🌈
Relaxing Robots and Machines Coloring Activities
 A Beginner's Guide to Mixing Warm and Cool Colors
🧠
Can Drawing Improve Spatial Awareness?
🎨
A Royal Banner: A Medieval Coloring and History Guide for Kids
🎨
Teaching Diligence: A Simple Activity for Kids
🎨
Meet the Lifeguard: A Community Helper Coloring Guide
🍎
Classroom Ideas: Classroom Reward Activities
🎨
A Robotic Arm on the Space Station: A Coloring and Space Mission Guide for Kids
🔎
Why Visual Thinkers Use Timeline Diagrams
🎨
How to Draw Emotions and Faces Step by Step
🎨
Apologizing Sincerely: A Simple Life Skill for Kids
🎨
Caterpillar Coloring and Drawing Ideas for Kids
A Beginner's Guide to Mixing Warm and Cool Colors
🧠
Can Drawing Improve Spatial Awareness?
🎨
A Royal Banner: A Medieval Coloring and History Guide for Kids
🎨
Teaching Diligence: A Simple Activity for Kids
🎨
Meet the Lifeguard: A Community Helper Coloring Guide
🍎
Classroom Ideas: Classroom Reward Activities
🎨
A Robotic Arm on the Space Station: A Coloring and Space Mission Guide for Kids
🔎
Why Visual Thinkers Use Timeline Diagrams
🎨
How to Draw Emotions and Faces Step by Step
🎨
Apologizing Sincerely: A Simple Life Skill for Kids
🎨
Caterpillar Coloring and Drawing Ideas for Kids
 Fun Independence Day Classroom Coloring Ideas
🎨
A Balloon-Powered Invention: A Coloring and STEM Guide for Kids
🎲
Fun Chess Strategy Diagrams for Kids
🎨
Printing Tips for Home Preschool: A Practical Guide
🌈
Nature Landscapes Coloring Ideas for Classrooms
🎲
Step-by-Step Sketch Relay Games
🎨
The Great Wall of China Builders: An Ancient History Coloring Guide for Kids
🎨
a Scavenger Hunt Printable: Free Ideas for Your Next Celebration
🖌️
How to Practice Creating Texture
🎨
A Logic Puzzle Box: A Coloring and STEM Guide for Kids
🎨
Meet Henri Matisse: An Art Appreciation Guide for Kids
🎨
A Superhero's Vehicle: A Superhero Coloring and Design Guide for Kids
🖍️
Simple Techniques for Coloring With Markers
🎨
A Castle Siege Tower: A Medieval Coloring and History Guide for Kids
🔎
Using Data Visualization Basics to Solve Problems
🎨
A Family Weather Journal: A Family Safety Guide
🧠
Can Drawing Improve Visual Thinking?
🎨
Teaching Curiosity: A Simple Activity for Kids
🎨
Newt Coloring and Drawing Ideas for Kids
🎨
A Blueprint and Ruler Coloring and Drawing Ideas for Kids
✏️
Why Choosing Your First Pencil Matters for New Artists
🎨
Winter Ice Fishing: Coloring Ideas and Activities for the Whole Family
🎨
Stingray Coloring and Drawing Ideas for Kids
📐
Fun Drawing Activities for Measurement
📐
Fun Drawing Activities for Angles
🎨
Meet Collage Art: An Art Appreciation Guide for Kids
🎨
Fun Race Car Coloring and Drawing Ideas for Kids
🎨
A Polish Traditional Folk Costume: A Coloring and Culture Guide for Kids
🎨
How to Draw a A Shape and Its Mirror Image: A Step-by-Step Guide for Kids
🎨
A Cutting Board: A Kitchen Guide for Kids and Parents
🎨
The Letter R: An Alphabet and Number Coloring Page
🎨
A Rock Climbing Wall: Coloring Ideas for Your Next Family Adventure
🎨
A Superhero Rescue Mission: A Superhero Coloring and Design Guide for Kids
🎨
A Balinese Traditional Dress: A Coloring and Culture Guide for Kids
🎨
Bakery Window Coloring Ideas for Kids Who Love to Create
🎨
Anteater Coloring and Drawing Ideas for Kids
🎨
Covering Your Mouth When You Cough: A Simple Social Skill for Kids
🎨
Riding a Bike: A Simple Life Skill for Kids
🔬
Additive Color Mixing Explained for Kids
🎨
Creative Favorite Foods Drawing Exercises
💬
From Cave Drawings to Visual Storytelling
🧠
Can Drawing Improve Sequential Thinking?
📴
Hands-On Activities for Quiet Time Before Bed
🎨
Exploring Spain: A Coloring and Culture Guide for Kids
✏️
Easy Steps to Practice Drawing Straight Lines
🍎
Using Coloring Pages for Group Art Projects
🖌️
Simple Steps for Stippling
🎨
Fun Community Helpers Drawing Activities for Kids
🎨
The Emperor's New Clothes: A Classic Story Coloring Guide for Kids
🔬
Understanding Why Printers Use CMYK
🎨
Orange Juice Making: A Coloring and Food Science Guide for Kids
🎨
A Sifter: A Kitchen Guide for Kids and Parents
🎨
The Letter C: An Alphabet and Number Coloring Page
🎨
Birthday Cake Coloring Ideas for Kids Who Love to Create
💬
Why Sign Language and Gesture Matter in Everyday Life
🔤
Using Coloring Pages to Teach Early Literacy Skills
🎨
Soup Pot Coloring Ideas for Kids Who Love to Create
🎨
A Crew Handshake in Space: A Coloring and Space Mission Guide for Kids
🎨
How to Draw a Violin: A Coloring and Music Guide for Kids
🎨
The Kremlin: Coloring Page and Fun Facts for Kids
🎨
A Steel Beam Delivery Coloring and Drawing Ideas for Kids
🍂
Printable Back-to-School Season Coloring Pages for Kids
🎨
How to Draw a Banjo: A Coloring and Music Guide for Kids
🎨
Flour Milling: A Coloring and Food Science Guide for Kids
🧠
How Drawing May Support Imagination
🎨
Brushing a Pet's Fur: A Simple Pet Care Guide for Kids
🎨
Bluebell Flowers: A Coloring and Nature Guide for Kids
🎨
A Secret Identity Reveal: A Superhero Coloring and Design Guide for Kids
🎨
Fruit Tree Pollination: A Coloring and Food Science Guide for Kids
🔤
Drawing Activities for Family Words
🧘
A Beginner's Guide to Coloring During Travel
🎨
Satyr Coloring and Drawing Ideas for Kids
🔎
How Storyboarding for Projects Support Learning
🎨
An Autumn Maple Leaf: A Coloring and Nature Guide for Kids
🎨
A Mission Patch Design: A Coloring and Space Mission Guide for Kids
🏺
What We Know About Ancient Cave Pigments
🎨
A Pie Dish: A Kitchen Guide for Kids and Parents
🎨
A Sticker Chart: A Classroom Coloring and Learning Guide
🎨
Pear Coloring and Drawing Ideas for Kids
🔤
Visual Vocabulary: the Alphabet
🎲
Memory Matching Games: A Creative Twist
📴
Making the Most of Camping Trips Without Screens
🧘
How Nature-Inspired Calm Coloring Can Create a Quiet Moment
🎨
Old MacDonald Had a Farm: A Nursery Rhyme Coloring Guide for Kids
🎨
Maple Syrup Tapping: A Coloring and Food Science Guide for Kids
🧒
Understanding First-Time Artists in Early Childhood
🎨
A Beach Volleyball Tournament Coloring and Drawing Ideas for Kids
🎨
A Pastry Brush: A Kitchen Guide for Kids and Parents
🎨
Sheep Coloring and Drawing Ideas for Kids
🌈
Vehicles Coloring Ideas for Classrooms
🎨
Seagull Coloring and Drawing Ideas for Kids
🌈
A Guide to Fantasy Creatures Coloring Pages
🌈
Fun Dinosaurs Coloring Pages for Kids
🎨
Peacock Coloring Page Ideas for Kids
🎨
A Bavarian Traditional Outfit: A Coloring and Culture Guide for Kids
🎨
Taj Mahal: Coloring Page and Fun Facts for Kids
🎨
Rhinoceros Beetle Coloring and Drawing Ideas for Kids
🎨
Autumn Leaves Falling Coloring Page: A Nature Learning Guide for Kids
🎨
Exploring The Moon Landing: A Coloring and Learning Guide for Kids
🎨
Spinosaurus Coloring Page: Fun Facts for Young Paleontologists
🎨
Feeding a Cat: A Simple Pet Care Guide for Kids
🎨
Palm Tree: A Coloring and Nature Guide for Kids
🎨
An Ancient Fortress Wall: An Ancient History Coloring Guide for Kids
🎨
A Reward System Built Around Coloring: A Practical Guide
🎨
Parasaurolophus Coloring Page: Fun Facts for Young Paleontologists
🎨
Meet Ansel Adams: An Art Appreciation Guide for Kids
🎨
Exploring Vietnam: A Coloring and Culture Guide for Kids
🎨
Hornet Coloring and Drawing Ideas for Kids
🎨
Peaceful Garden Visualization: A Simple Mindfulness Activity for Kids
🎨
A Space Telescope Repair Mission: A Coloring and Space Mission Guide for Kids
🎨
Meet Color Field Painting: An Art Appreciation Guide for Kids
🎨
A Time-Control Superhero: A Superhero Coloring and Design Guide for Kids
🎨
How to Draw a Stained Glass Pattern: A Step-by-Step Guide
🎨
Meet Salvador Dali: An Art Appreciation Guide for Kids
🧘
Why Coloring for Focus Feels Calming
🎨
Meet the Tailor: A Community Helper Coloring Guide
🎨
Sinbad the Sailor: A Classic Story Coloring Guide for Kids
🎨
Exploring Colombia: A Coloring and Culture Guide for Kids
🎨
Termite Coloring and Drawing Ideas for Kids
🎨
A Boardwalk Carousel Coloring and Drawing Ideas for Kids
🎨
A Class Pet: A Classroom Coloring and Learning Guide
🎨
Spring Flower Planting: Coloring Ideas and Activities for the Whole Family
🎨
Fishing by a Riverbank: Coloring Ideas for Your Next Family Adventure
🎨
A School Playground: A Classroom Coloring and Learning Guide
🎨
A Skull and Crossbones Flag Coloring and Drawing Ideas for Kids
🎨
A Deer Spotted in the Woods: Coloring Ideas for Your Next Family Adventure
✏️
Why Using an Eraser Effectively Matters for New Artists
🎨
A Baking Soda and Vinegar Volcano: A Step-by-Step Science Guide for Kids
🎨
Fun Bullet Train Coloring and Drawing Ideas for Kids
🎨
How to Draw a Sphere: A Step-by-Step Guide for Kids
🎨
The Number 6: An Alphabet and Number Coloring Page
🎨
The Number 17: An Alphabet and Number Coloring Page
🎨
A Royal Crown: A Medieval Coloring and History Guide for Kids
Fun Independence Day Classroom Coloring Ideas
🎨
A Balloon-Powered Invention: A Coloring and STEM Guide for Kids
🎲
Fun Chess Strategy Diagrams for Kids
🎨
Printing Tips for Home Preschool: A Practical Guide
🌈
Nature Landscapes Coloring Ideas for Classrooms
🎲
Step-by-Step Sketch Relay Games
🎨
The Great Wall of China Builders: An Ancient History Coloring Guide for Kids
🎨
a Scavenger Hunt Printable: Free Ideas for Your Next Celebration
🖌️
How to Practice Creating Texture
🎨
A Logic Puzzle Box: A Coloring and STEM Guide for Kids
🎨
Meet Henri Matisse: An Art Appreciation Guide for Kids
🎨
A Superhero's Vehicle: A Superhero Coloring and Design Guide for Kids
🖍️
Simple Techniques for Coloring With Markers
🎨
A Castle Siege Tower: A Medieval Coloring and History Guide for Kids
🔎
Using Data Visualization Basics to Solve Problems
🎨
A Family Weather Journal: A Family Safety Guide
🧠
Can Drawing Improve Visual Thinking?
🎨
Teaching Curiosity: A Simple Activity for Kids
🎨
Newt Coloring and Drawing Ideas for Kids
🎨
A Blueprint and Ruler Coloring and Drawing Ideas for Kids
✏️
Why Choosing Your First Pencil Matters for New Artists
🎨
Winter Ice Fishing: Coloring Ideas and Activities for the Whole Family
🎨
Stingray Coloring and Drawing Ideas for Kids
📐
Fun Drawing Activities for Measurement
📐
Fun Drawing Activities for Angles
🎨
Meet Collage Art: An Art Appreciation Guide for Kids
🎨
Fun Race Car Coloring and Drawing Ideas for Kids
🎨
A Polish Traditional Folk Costume: A Coloring and Culture Guide for Kids
🎨
How to Draw a A Shape and Its Mirror Image: A Step-by-Step Guide for Kids
🎨
A Cutting Board: A Kitchen Guide for Kids and Parents
🎨
The Letter R: An Alphabet and Number Coloring Page
🎨
A Rock Climbing Wall: Coloring Ideas for Your Next Family Adventure
🎨
A Superhero Rescue Mission: A Superhero Coloring and Design Guide for Kids
🎨
A Balinese Traditional Dress: A Coloring and Culture Guide for Kids
🎨
Bakery Window Coloring Ideas for Kids Who Love to Create
🎨
Anteater Coloring and Drawing Ideas for Kids
🎨
Covering Your Mouth When You Cough: A Simple Social Skill for Kids
🎨
Riding a Bike: A Simple Life Skill for Kids
🔬
Additive Color Mixing Explained for Kids
🎨
Creative Favorite Foods Drawing Exercises
💬
From Cave Drawings to Visual Storytelling
🧠
Can Drawing Improve Sequential Thinking?
📴
Hands-On Activities for Quiet Time Before Bed
🎨
Exploring Spain: A Coloring and Culture Guide for Kids
✏️
Easy Steps to Practice Drawing Straight Lines
🍎
Using Coloring Pages for Group Art Projects
🖌️
Simple Steps for Stippling
🎨
Fun Community Helpers Drawing Activities for Kids
🎨
The Emperor's New Clothes: A Classic Story Coloring Guide for Kids
🔬
Understanding Why Printers Use CMYK
🎨
Orange Juice Making: A Coloring and Food Science Guide for Kids
🎨
A Sifter: A Kitchen Guide for Kids and Parents
🎨
The Letter C: An Alphabet and Number Coloring Page
🎨
Birthday Cake Coloring Ideas for Kids Who Love to Create
💬
Why Sign Language and Gesture Matter in Everyday Life
🔤
Using Coloring Pages to Teach Early Literacy Skills
🎨
Soup Pot Coloring Ideas for Kids Who Love to Create
🎨
A Crew Handshake in Space: A Coloring and Space Mission Guide for Kids
🎨
How to Draw a Violin: A Coloring and Music Guide for Kids
🎨
The Kremlin: Coloring Page and Fun Facts for Kids
🎨
A Steel Beam Delivery Coloring and Drawing Ideas for Kids
🍂
Printable Back-to-School Season Coloring Pages for Kids
🎨
How to Draw a Banjo: A Coloring and Music Guide for Kids
🎨
Flour Milling: A Coloring and Food Science Guide for Kids
🧠
How Drawing May Support Imagination
🎨
Brushing a Pet's Fur: A Simple Pet Care Guide for Kids
🎨
Bluebell Flowers: A Coloring and Nature Guide for Kids
🎨
A Secret Identity Reveal: A Superhero Coloring and Design Guide for Kids
🎨
Fruit Tree Pollination: A Coloring and Food Science Guide for Kids
🔤
Drawing Activities for Family Words
🧘
A Beginner's Guide to Coloring During Travel
🎨
Satyr Coloring and Drawing Ideas for Kids
🔎
How Storyboarding for Projects Support Learning
🎨
An Autumn Maple Leaf: A Coloring and Nature Guide for Kids
🎨
A Mission Patch Design: A Coloring and Space Mission Guide for Kids
🏺
What We Know About Ancient Cave Pigments
🎨
A Pie Dish: A Kitchen Guide for Kids and Parents
🎨
A Sticker Chart: A Classroom Coloring and Learning Guide
🎨
Pear Coloring and Drawing Ideas for Kids
🔤
Visual Vocabulary: the Alphabet
🎲
Memory Matching Games: A Creative Twist
📴
Making the Most of Camping Trips Without Screens
🧘
How Nature-Inspired Calm Coloring Can Create a Quiet Moment
🎨
Old MacDonald Had a Farm: A Nursery Rhyme Coloring Guide for Kids
🎨
Maple Syrup Tapping: A Coloring and Food Science Guide for Kids
🧒
Understanding First-Time Artists in Early Childhood
🎨
A Beach Volleyball Tournament Coloring and Drawing Ideas for Kids
🎨
A Pastry Brush: A Kitchen Guide for Kids and Parents
🎨
Sheep Coloring and Drawing Ideas for Kids
🌈
Vehicles Coloring Ideas for Classrooms
🎨
Seagull Coloring and Drawing Ideas for Kids
🌈
A Guide to Fantasy Creatures Coloring Pages
🌈
Fun Dinosaurs Coloring Pages for Kids
🎨
Peacock Coloring Page Ideas for Kids
🎨
A Bavarian Traditional Outfit: A Coloring and Culture Guide for Kids
🎨
Taj Mahal: Coloring Page and Fun Facts for Kids
🎨
Rhinoceros Beetle Coloring and Drawing Ideas for Kids
🎨
Autumn Leaves Falling Coloring Page: A Nature Learning Guide for Kids
🎨
Exploring The Moon Landing: A Coloring and Learning Guide for Kids
🎨
Spinosaurus Coloring Page: Fun Facts for Young Paleontologists
🎨
Feeding a Cat: A Simple Pet Care Guide for Kids
🎨
Palm Tree: A Coloring and Nature Guide for Kids
🎨
An Ancient Fortress Wall: An Ancient History Coloring Guide for Kids
🎨
A Reward System Built Around Coloring: A Practical Guide
🎨
Parasaurolophus Coloring Page: Fun Facts for Young Paleontologists
🎨
Meet Ansel Adams: An Art Appreciation Guide for Kids
🎨
Exploring Vietnam: A Coloring and Culture Guide for Kids
🎨
Hornet Coloring and Drawing Ideas for Kids
🎨
Peaceful Garden Visualization: A Simple Mindfulness Activity for Kids
🎨
A Space Telescope Repair Mission: A Coloring and Space Mission Guide for Kids
🎨
Meet Color Field Painting: An Art Appreciation Guide for Kids
🎨
A Time-Control Superhero: A Superhero Coloring and Design Guide for Kids
🎨
How to Draw a Stained Glass Pattern: A Step-by-Step Guide
🎨
Meet Salvador Dali: An Art Appreciation Guide for Kids
🧘
Why Coloring for Focus Feels Calming
🎨
Meet the Tailor: A Community Helper Coloring Guide
🎨
Sinbad the Sailor: A Classic Story Coloring Guide for Kids
🎨
Exploring Colombia: A Coloring and Culture Guide for Kids
🎨
Termite Coloring and Drawing Ideas for Kids
🎨
A Boardwalk Carousel Coloring and Drawing Ideas for Kids
🎨
A Class Pet: A Classroom Coloring and Learning Guide
🎨
Spring Flower Planting: Coloring Ideas and Activities for the Whole Family
🎨
Fishing by a Riverbank: Coloring Ideas for Your Next Family Adventure
🎨
A School Playground: A Classroom Coloring and Learning Guide
🎨
A Skull and Crossbones Flag Coloring and Drawing Ideas for Kids
🎨
A Deer Spotted in the Woods: Coloring Ideas for Your Next Family Adventure
✏️
Why Using an Eraser Effectively Matters for New Artists
🎨
A Baking Soda and Vinegar Volcano: A Step-by-Step Science Guide for Kids
🎨
Fun Bullet Train Coloring and Drawing Ideas for Kids
🎨
How to Draw a Sphere: A Step-by-Step Guide for Kids
🎨
The Number 6: An Alphabet and Number Coloring Page
🎨
The Number 17: An Alphabet and Number Coloring Page
🎨
A Royal Crown: A Medieval Coloring and History Guide for Kids
Cross-hatching looks intricate, but it's built from something very simple: two sets of crossing lines. Once that basic idea clicks, it opens up a whole new way to add shading and texture to a drawing.
What Cross-Hatching Is
Cross-hatching is a shading technique made by drawing overlapping sets of parallel lines at different angles. The more lines that overlap in an area, the darker that area appears — giving the illusion of shadow and depth using only line work.
Why It's Worth Learning
Cross-hatching is a great introduction to shading without needing to blend or smudge pencil, which some beginners find messy or difficult to control. It's also a flexible technique that works with just a regular pencil or pen.
Simple Activity to Try
- Draw a simple shape, like a circle or a simple object.
- Add one set of parallel lines across part of the shape for a light shadow.
- Add a second set of lines crossing the first, at an angle, for a darker shadow.
- Repeat, adding more layers where the shadow should be darkest.
Tips for Parents and Teachers
- Start with straight lines before experimenting with curved cross-hatching.
- Practice on simple shapes before applying the technique to a full drawing.
- Combine with other pencil control basics for smoother results.
Frequently Asked Questions
Is cross-hatching hard to learn?
The basic concept is simple, though it takes some practice to control line spacing and pressure for smooth-looking shading.
What tools work best for cross-hatching?
A regular pencil or pen works well — no special tools are needed to get started.
How is cross-hatching different from regular shading?
Traditional shading often uses blending or smudging, while cross-hatching builds shadow purely from layered line work, giving a distinct textured look.
Conclusion
Cross-hatching turns simple crossing lines into a flexible shading technique. With a little practice on basic shapes, it's an accessible skill for beginner artists to add to their toolkit.
🔥 Popular Posts
Why Visual Thinkers Use Concept Mapping
68 views
Why Visual Thinkers Use Sketch Journaling
62 views
A Beginner's Guide to Holding a Pencil Correctly
50 views
A Beginner's Guide to Drawing Circles
50 views
🧒
Fun Ways to Build The Symbol-Making Stage
47 views
A Beginner's Guide to Drawing Paper Types
46 views