
A Beginner's Guide to Using Colored Pencils
📰 Quick Directory
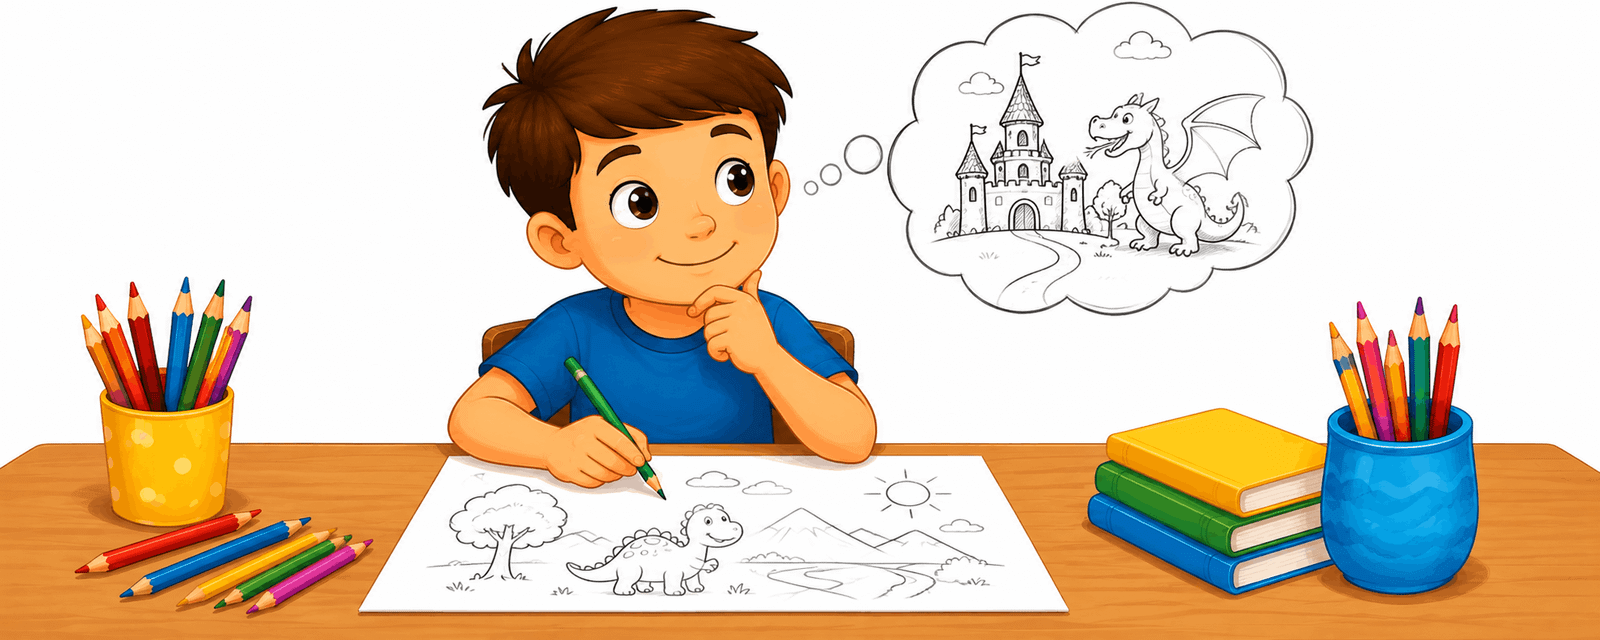 A Beginner's Guide to Drawing From Imagination
🧒
Understanding Drawing Development Stages in Early Childhood
🎨
Large-Format Poster Printing: A Practical Guide
💡
How Drawing Encourages Finding Inspiration
💡
The Role of Doodling in Children's Art
🎲
How to Play Board Game Design
🎨
A Construction Site Trailer Coloring and Drawing Ideas for Kids
🌈
Relaxing Musical Themes Coloring Activities
🎨
A Community Storm Siren: A Family Safety Guide
🎨
A Simple Machine Screw: A Coloring and STEM Guide for Kids
🧒
Drawing Activities for The Symbol-Making Stage
🎲
Step-by-Step Visual Puzzle Games
🎨
Being a Polite Guest: A Simple Social Skill for Kids
🎨
A Solar-Powered Robot: A Coloring and Invention Guide for Kids
🍂
Celebrate Winter With Coloring Activities
👨👩👧
Coloring Ideas for Activities for Only Children
🧠
How Drawing May Support Visual Thinking
🎨
Dodgeball Coloring Pages and Drawing Ideas for Kids
A Beginner's Guide to Drawing From Imagination
🧒
Understanding Drawing Development Stages in Early Childhood
🎨
Large-Format Poster Printing: A Practical Guide
💡
How Drawing Encourages Finding Inspiration
💡
The Role of Doodling in Children's Art
🎲
How to Play Board Game Design
🎨
A Construction Site Trailer Coloring and Drawing Ideas for Kids
🌈
Relaxing Musical Themes Coloring Activities
🎨
A Community Storm Siren: A Family Safety Guide
🎨
A Simple Machine Screw: A Coloring and STEM Guide for Kids
🧒
Drawing Activities for The Symbol-Making Stage
🎲
Step-by-Step Visual Puzzle Games
🎨
Being a Polite Guest: A Simple Social Skill for Kids
🎨
A Solar-Powered Robot: A Coloring and Invention Guide for Kids
🍂
Celebrate Winter With Coloring Activities
👨👩👧
Coloring Ideas for Activities for Only Children
🧠
How Drawing May Support Visual Thinking
🎨
Dodgeball Coloring Pages and Drawing Ideas for Kids
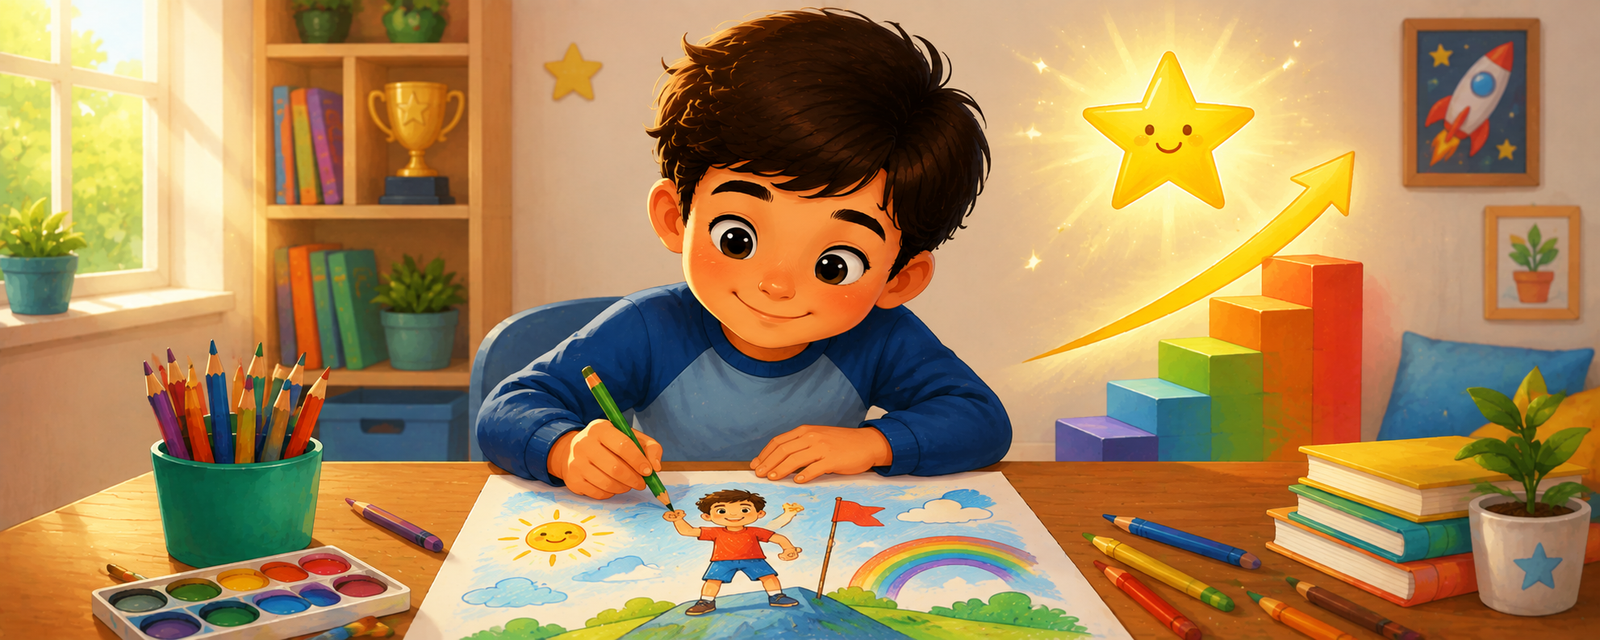 The Link Between Drawing and Confidence Building
💬
Why Diagrams Matter in Everyday Life
🖌️
A Beginner's Guide to Blending Techniques
🎨
Splashing in Puddles: Coloring Ideas and Activities for the Whole Family
🍂
Seasonal Coloring Guide: Easter
🎨
A Savings Account Passbook: A Money Guide for Kids and Parents
🎨
Leafhopper Coloring and Drawing Ideas for Kids
🧒
Drawing Activities for Ages 5-6
🎨
Meet the Software Developer: A Community Helper Coloring Guide
🎨
Stink Bug Coloring and Drawing Ideas for Kids
The Link Between Drawing and Confidence Building
💬
Why Diagrams Matter in Everyday Life
🖌️
A Beginner's Guide to Blending Techniques
🎨
Splashing in Puddles: Coloring Ideas and Activities for the Whole Family
🍂
Seasonal Coloring Guide: Easter
🎨
A Savings Account Passbook: A Money Guide for Kids and Parents
🎨
Leafhopper Coloring and Drawing Ideas for Kids
🧒
Drawing Activities for Ages 5-6
🎨
Meet the Software Developer: A Community Helper Coloring Guide
🎨
Stink Bug Coloring and Drawing Ideas for Kids
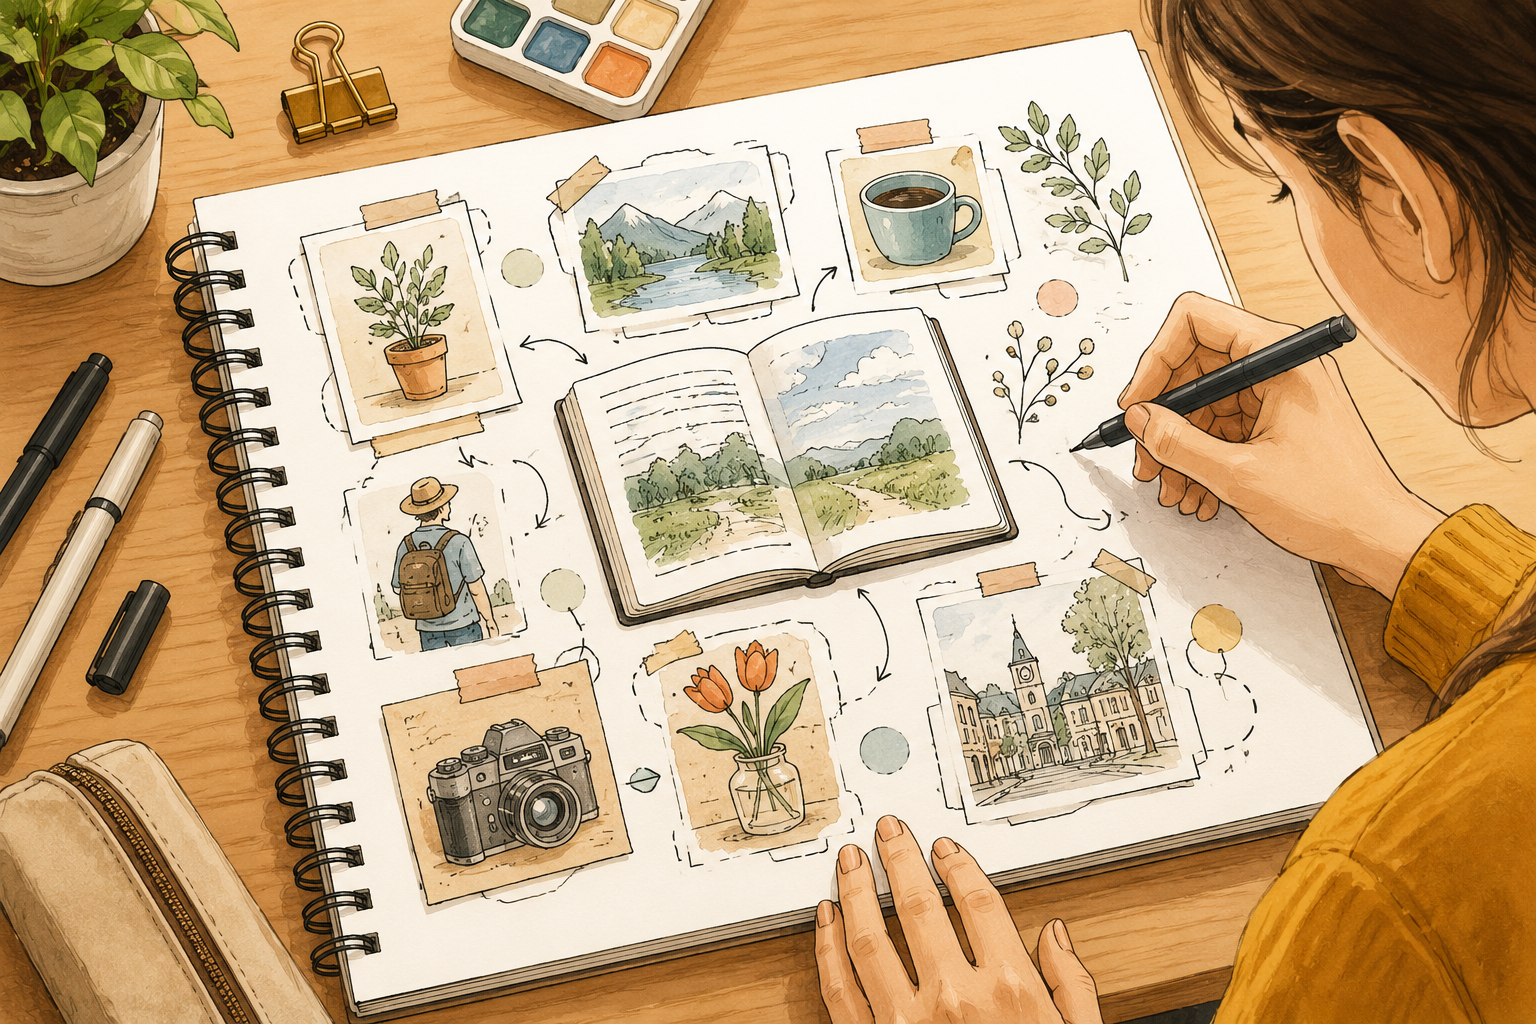 Why Visual Thinkers Use Sketch Journaling
🎨
an Emotion Faces Chart: A Simple Mindfulness Activity for Kids
🧒
Fun Ways to Build Encouraging Reluctant Artists
🎨
Wee Willie Winkie: A Nursery Rhyme Coloring Guide for Kids
🏺
Exploring Hieroglyphics
🔬
A Simple Guide to RGB Color Mixing
🎨
Feeding a Dog: A Simple Pet Care Guide for Kids
🎨
A Talking Robot: A Coloring and Invention Guide for Kids
🔎
Why Visual Thinkers Use Sketching to Understand Complex Ideas
📐
Teaching Graphs and Charts Through Coloring and Drawing
🎨
How to Draw a Ukulele: A Coloring and Music Guide for Kids
🍎
Using Coloring Pages for Differentiated Art Instruction
💬
Why Visual Instructions Matter in Everyday Life
💡
Why Storytelling Matters for Young Artists
🎨
A Dog Toy Basket: A Simple Pet Care Guide for Kids
🌈
Jungle Scenes Coloring Ideas for Classrooms
🎨
Meet Pop Art: An Art Appreciation Guide for Kids
🎨
A Face Painting Booth Coloring and Drawing Ideas for Kids
🎨
A Circus Poodle Coloring and Drawing Ideas for Kids
🎨
How to Draw a Castanets: A Coloring and Music Guide for Kids
💬
The Power of Diagrams
🎨
A Wooden Ship's Wheel Coloring and Drawing Ideas for Kids
📐
Fun Drawing Activities for Shapes
🎨
Golden Pavilion: Coloring Page and Fun Facts for Kids
🎨
An Electric Car: A Coloring and Invention Guide for Kids
🎨
How to Draw a Drum: A Coloring and Music Guide for Kids
💡
Building Character Design Through Coloring and Drawing
🎨
Pyramids of Giza: Coloring Page and Fun Facts for Kids
🎨
Wildfire Awareness: A Family Safety Guide
🎨
A Swing Set Contest: A Coloring and Playtime Guide for Kids
🔬
Why Screens Use RGB Explained for Kids
🎨
Ancient Phoenician Sailors and Traders: An Ancient History Coloring Guide for Kids
🎨
Fun Unicycle Coloring and Drawing Ideas for Kids
🎨
Severe Weather Alerts on a Phone: A Family Safety Guide
🎨
A Classroom Weather Chart: A Classroom Coloring and Learning Guide
🎲
Fun Visual Puzzle Games for Kids
🖌️
Simple Steps for Using Watercolor
🎨
A Coin Sorting Jar: A Money Guide for Kids and Parents
🎨
Genie Coloring and Drawing Ideas for Kids
💡
Building Personal Artistic Style Through Coloring and Drawing
🎨
A Family Pet Portrait: A Simple Pet Care Guide for Kids
🎨
A Robotic Vacuum: A Coloring and Invention Guide for Kids
🎨
Exploring A Star Cluster: A Coloring and Learning Guide for Kids
🎨
Exploring A Space Dust Cloud: A Coloring and Learning Guide for Kids
🎨
Freeze Dance: A Coloring and Playtime Guide for Kids
🍎
A Teacher's Guide to Art Lessons for History Class
🎨
A School Assembly: A Classroom Coloring and Learning Guide
🎨
Pandora's Box: A Classic Story Coloring Guide for Kids
🏺
What We Know About Petroglyphs and Rock Art
✏️
Fun Exercises for Drawing Simple Faces
🎨
Woolly Mammoth Coloring Page: Fun Facts for Young Paleontologists
🎨
The Pied Piper: A Classic Story Coloring Guide for Kids
🎨
Five Senses Grounding: A Simple Mindfulness Activity for Kids
🍂
Fun Easter Classroom Coloring Ideas
🎨
Popcorn Coloring Ideas for Kids Who Love to Create
🔤
Using Coloring Pages to Teach Sentence Building
🎨
A Simple Loan Between Siblings: A Money Guide for Kids and Parents
🎨
Saying Please and Thank You: A Simple Social Skill for Kids
🎨
an Emotion Check-In Chart: A Simple Mindfulness Activity for Kids
✏️
Easy Steps to Practice Basic Perspective
🎨
The Number 12: An Alphabet and Number Coloring Page
🖌️
A Beginner's Guide to Outlining Techniques
📴
Creative Alternatives to Screens During Family Game Nights
💡
Why Artistic Risk-Taking Matters for Young Artists
🖌️
Exploring Using Colored Pencils
🔎
Why Visual Thinkers Use Connecting Ideas Through Drawing
💬
The Power of Maps and Wayfinding Symbols
🎨
A Shrinking-Power Superhero: A Superhero Coloring and Design Guide for Kids
🎨
Exploring Indonesia: A Coloring and Culture Guide for Kids
🖍️
A Beginner's Guide to Coloring With Watercolor Pencils
🔤
Drawing Activities for Sentence Building
🎨
A Knight in Shining Armor: A Medieval Coloring and History Guide for Kids
🎨
Jack-in-the-Box Coloring and Drawing Ideas for Kids
🎨
A Kids' Fundraiser Table: A Money Guide for Kids and Parents
🎨
Meet the Painter and Decorator: A Community Helper Coloring Guide
🎨
A Robot Pet: A Coloring and Invention Guide for Kids
🎨
How to Draw a Semicircle: A Step-by-Step Guide for Kids
🎨
Weekly Planner Doodles: Free Ideas for Your Next Celebration
🧒
Understanding Color Recognition in Early Childhood
🧒
Drawing Activities for Toddlers (Ages 1-2)
🔬
Color Psychology Explained for Kids
🎨
How to Draw a Steel Drum: A Coloring and Music Guide for Kids
💬
How Wordless Storytelling Communicate Ideas
🖌️
Why Layering Techniques Matters for Young Artists
🎨
Fun Camper Van Coloring and Drawing Ideas for Kids
🎨
A Farmers Market: A Coloring and Food Science Guide for Kids
🎨
A Pumpkin Patch Growing: A Gardening Guide for Kids and Families
🎨
King Snake Coloring and Drawing Ideas for Kids
🎨
Puss in Boots: A Classic Story Coloring Guide for Kids
🧒
What to Expect When Teaching Color Recognition
🌈
Relaxing Jungle Scenes Coloring Activities
🎨
Calm Breathing Star Cards: A Simple Mindfulness Activity for Kids
🧘
How Repetitive Pattern Coloring Can Create a Quiet Moment
🎨
A Cooling Rack: A Kitchen Guide for Kids and Parents
🖍️
A Beginner's Guide to Coloring Animals Realistically
🖍️
Why Coloring Large Areas Makes a Difference
🔎
Using Connecting Ideas Through Drawing to Solve Problems
🏺
Exploring Ancient Egyptian Art
✏️
How to Improve Your Using an Eraser Effectively
🔤
Using Coloring Pages to Teach the Alphabet
🧠
Why Drawing Can Help With Concentration and Focus
🎨
Bubbles Coloring and Drawing Ideas for Kids
🎨
Organizing Coloring Supplies: A Buying and Technique Guide
🎨
A Seagull on the Boardwalk Railing Coloring and Drawing Ideas for Kids
💗
Creative Approaches to Processing Big Feelings
🎨
a Beach Vacation Day Coloring Ideas and Activities for the Whole Family
🧘
Why Bedtime Coloring Routines Feels Calming
🎨
Angkor Wat: Coloring Page and Fun Facts for Kids
🎨
A Cape and Mask Design: A Superhero Coloring and Design Guide for Kids
🎨
A Greek Traditional Folk Costume: A Coloring and Culture Guide for Kids
🎨
Creative Birds Drawing Exercises
🍂
Seasonal Coloring Guide: Summer
💬
Why Visual Storytelling Matter in Everyday Life
💗
Creative Approaches to Art for Stressful Days
🖌️
How to Practice Stippling
📴
Hands-On Activities for Restaurant Wait Times
🎨
How to Draw a Argyle Pattern: A Step-by-Step Guide
🎨
Great Wall of China: Coloring Page and Fun Facts for Kids
🎨
CN Tower: Coloring Page and Fun Facts for Kids
🎨
A Pile of Lumber Coloring and Drawing Ideas for Kids
🎨
Reward Chart Coloring: Free Ideas for Your Next Celebration
🧘
Why Coloring as a Calm-Down Tool Feels Calming
👨👩👧
Making the Most of Activities for Only Children
🎨
A Superhero Helping an Elderly Neighbor: A Superhero Coloring and Design Guide for Kids
💬
Understanding Visual Storytelling
🖍️
Tips for Choosing Your First Coloring Pencils
🎨
Connect Four Board Coloring and Drawing Ideas for Kids
📐
Fun Drawing Activities for Proportion
🎨
A Treehouse Construction Coloring and Drawing Ideas for Kids
🎨
Spaghetti Coloring Ideas for Kids Who Love to Create
🧠
Can Drawing Improve Working Memory?
🎨
How to Draw a Star Mandala: A Step-by-Step Guide
🎲
Step-by-Step Collaborative Drawing Games
🎨
Empire State Building: Coloring Page and Fun Facts for Kids
🎨
The Elves and the Shoemaker: A Classic Story Coloring Guide for Kids
🎨
A Tightrope Walker Coloring and Drawing Ideas for Kids
🎨
Baa Baa Black Sheep: A Nursery Rhyme Coloring Guide for Kids
🧘
Simple Steps for Coloring for Focus
🎨
A Last Day of School Countdown: A Classroom Coloring and Learning Guide
🎨
A Cold Frame for Seedlings: A Gardening Guide for Kids and Families
🎨
Table Mountain: Coloring Page and Fun Facts for Kids
🎨
Humpty Dumpty: A Nursery Rhyme Coloring Guide for Kids
🎨
How to Draw a Heart: A Step-by-Step Guide for Kids
🔤
Learning Emotions and Feelings Words Through Drawing
🎨
How to Draw a Herringbone Pattern: A Step-by-Step Guide
🎨
Practicing Eye Contact While Talking: A Simple Social Skill for Kids
🔬
Understanding Color Contrast
🧠
How Drawing May Support Critical Thinking
🎨
The Letter K: An Alphabet and Number Coloring Page
🎨
Building a Snowman: Coloring Ideas and Activities for the Whole Family
🎨
A Dump Truck Unloading Coloring and Drawing Ideas for Kids
🎨
A Japanese Kimono: A Coloring and Culture Guide for Kids
🎨
a Safe Space Poster: A Simple Mindfulness Activity for Kids
🎨
A Beginner's Guide to Drawing Original Superhero Characters
🖍️
Tips for Coloring Skies and Backgrounds
📴
Creative Alternatives to Screens During Sick Days at Home
🖌️
Why Stippling Matters for Young Artists
💗
The Role of Coloring in Building Self-Esteem Through Art
🎨
Hamburger Coloring Ideas for Kids Who Love to Create
👨👩👧
Creative Rainy Day Activities for Kids
🎨
Jaguar Coloring and Drawing Ideas for Kids
🎨
Santa's Workshop Coloring Ideas and Activities for the Whole Family
💡
Nurturing Divergent Thinking at Home
🧒
How Drawing Supports Building Drawing Confidence
🎨
Easy Emotions and Faces Drawing Ideas
🍂
Creative Christmas Coloring Projects for Classrooms
🔤
Visual Vocabulary: Sight Words
🎨
Eagle Coloring Page Ideas for Kids
🌈
A Guide to Mandalas Coloring Pages
🎨
A Rodeo Bull Rider: A Wild West Coloring and History Guide for Kids
🎨
A Cowboy Boot: A Wild West Coloring and History Guide for Kids
🧒
What to Expect When Teaching First-Time Artists
🎨
A Poutine Plate: Coloring Ideas and Fun Facts for Kids
🎨
Dimetrodon Coloring Page: Fun Facts for Young Paleontologists
🎨
Dice Coloring and Drawing Ideas for Kids
🎨
A Superhero Lifting a Car: A Superhero Coloring and Design Guide for Kids
🎨
Certificate of Achievement Coloring: Free Ideas for Your Next Celebration
🎨
Behavior Chart Printables: Free Ideas for Your Next Celebration
🎨
A Clown Juggling Torches Coloring and Drawing Ideas for Kids
📴
Why Coloring Beats Scrolling on Outdoor Picnics
🎨
Woodpecker Coloring Page Ideas for Kids
🎨
Fire-Bellied Toad Coloring and Drawing Ideas for Kids
🧠
The Link Between Drawing and Imagination
🎨
A Dog Park Visit: A Simple Pet Care Guide for Kids
🎨
Teaching Sincerity: A Simple Activity for Kids
🎨
Leopard Gecko Coloring and Drawing Ideas for Kids
🎨
Butterfly Coloring and Drawing Ideas for Kids
✏️
Why Drawing From Observation Matters for New Artists
🎨
A Family Communication Plan: A Family Safety Guide
🎨
Meet Wassily Kandinsky: An Art Appreciation Guide for Kids
🎨
Story Time Circle: A Classroom Coloring and Learning Guide
🔤
How Pictures Help Children Learn Story Sequencing
🎨
Calf Coloring and Drawing Ideas for Kids
🎲
How to Play Strategy Sketching for Sports
🎨
Exploring Italy: A Coloring and Culture Guide for Kids
🎨
Fun Cement Mixer Coloring and Drawing Ideas for Kids
🎨
Ordinal Numbers First to Tenth: An Alphabet and Number Coloring Page
🧠
Exploring Drawing and Memory
🎨
A Wild West Railroad Station: A Wild West Coloring and History Guide for Kids
🍎
A Teacher's Guide to Back-to-School Activities
🎨
Surfing Coloring Pages and Drawing Ideas for Kids
🎨
A Paella Pan: Coloring Ideas and Fun Facts for Kids
🎨
Ankylosaurus Coloring Page: Fun Facts for Young Paleontologists
🖍️
Tips for Choosing Paper for Coloring
🎲
Mazes: A Creative Twist
📴
Making the Most of Device-Free Evenings Without Screens
🎨
Greeting a Guest Politely: A Simple Social Skill for Kids
🎨
Ibis Coloring Page Ideas for Kids
🎨
A Reading Nook: A Classroom Coloring and Learning Guide
🖍️
Why Coloring Inside the Lines Makes a Difference
🎨
Introducing Yourself Politely: A Simple Social Skill for Kids
📐
Teaching Measurement Through Coloring and Drawing
🎨
Exploring the Netherlands: A Coloring and Culture Guide for Kids
🎨
Fun Segway Coloring and Drawing Ideas for Kids
👨👩👧
Why Parents Love Screen-Free Afternoons
📐
Learning Graphs and Charts Through Drawing
🎨
Daffodil: A Coloring and Nature Guide for Kids
🎨
Blue Jay Coloring Page Ideas for Kids
🎨
Snapdragon: A Coloring and Nature Guide for Kids
🎨
The Three Billy Goats Gruff: A Classic Story Coloring Guide for Kids
🔬
Understanding Color Psychology
🧒
Understanding Ages 5-6 in Early Childhood
🍂
Fun St. Patrick's Day Classroom Coloring Ideas
🎨
A Paleontologist Dig Site Coloring Page: Fun Facts for Young Paleontologists
📴
Making the Most of Restaurant Wait Times Without Screens
📐
Fun Drawing Activities for Tessellations
🔤
Learning Sight Words Through Drawing
💗
The Role of Coloring in Creative Journaling
🧘
A Beginner's Guide to Coloring as a Calm-Down Tool
🍂
Seasonal Coloring Guide: Earth Day
💡
How Drawing Encourages Creative Journaling
🎨
Warthog Coloring and Drawing Ideas for Kids
🎨
A Giant Redwood Tree: A Coloring and Nature Guide for Kids
🔎
A Beginner's Guide to Visual Problem-Solving
🎨
Doctor Foster: A Nursery Rhyme Coloring Guide for Kids
🎨
Creative Vehicles Drawing Exercises
🎨
Lettuce Coloring and Drawing Ideas for Kids
👨👩👧
Making the Most of Summer Break Activities
🎨
Lighting for Coloring Sessions: A Buying and Technique Guide
🎨
Holiday Card Making: Free Ideas for Your Next Celebration
🏺
How Ancient Egyptian Art Shaped Human Communication
🎨
A Ship's Anchor Coloring and Drawing Ideas for Kids
🎨
Sharing a Toy: A Simple Life Skill for Kids
🎨
Ancient Sumerian Writing Tablets: An Ancient History Coloring Guide for Kids
🎨
Farm Life Drawing Prompts for Beginners
🎨
a Congratulations Card: Free Ideas for Your Next Celebration
🎨
A Fruit Bowl on the Counter: A Kitchen Guide for Kids and Parents
🎨
An Austrian Traditional Dress: A Coloring and Culture Guide for Kids
🔬
What Is How Light Creates Color?
🔤
How Pictures Help Children Learn Question Words
🎨
A Programmer at a Desk: A Coloring and STEM Guide for Kids
🎨
Teaching Teamwork: A Simple Activity for Kids
🎨
Meet the Construction Worker: A Community Helper Coloring Guide
🏺
The History of Ancient Pottery Art
🎨
A Traditional Woven Textile Pattern: A Coloring and Culture Guide for Kids
🍂
Seasonal Coloring Guide: Father's Day
🎨
Orchid: A Coloring and Nature Guide for Kids
🎨
An Animal-Whisperer Superhero: A Superhero Coloring and Design Guide for Kids
🎨
A Cargo Robot: A Coloring and Invention Guide for Kids
🎨
Honey Making: A Coloring and Food Science Guide for Kids
💗
How Drawing Supports Creative Journaling
🧒
Understanding The Symbol-Making Stage in Early Childhood
🌈
Printable Nature Landscapes Coloring Activities
🎨
A Butterfly Waystation: A Gardening Guide for Kids and Families
🎨
Narwhal Coloring and Drawing Ideas for Kids
🎨
A Horse-Drawn Buggy: A Wild West Coloring and History Guide for Kids
🎨
A Frontier River Crossing: A Wild West Coloring and History Guide for Kids
🎨
A Factory Robot Arm: A Coloring and Invention Guide for Kids
🎨
The Letter N: An Alphabet and Number Coloring Page
🎨
A Family Baking Day: A Kitchen Guide for Kids and Parents
🌈
A Guide to Food and Treats Coloring Pages
🎨
How to Draw a A Cross Shape: A Step-by-Step Guide for Kids
🎨
Flash Flood Awareness: A Family Safety Guide
🎨
A Dairy Farm: A Coloring and Food Science Guide for Kids
🎨
A Vegetable Harvest Basket: A Gardening Guide for Kids and Families
🎨
A Potting Bench: A Gardening Guide for Kids and Families
🎨
Meerkat Coloring and Drawing Ideas for Kids
🎨
Trick or Treating Coloring Ideas and Activities for the Whole Family
🎨
Gnat Coloring and Drawing Ideas for Kids
🎨
Bookmark Printables: Free Ideas for Your Next Celebration
🎨
How Lungs Breathe: A Coloring and Health Guide for Kids
🔤
Using Coloring Pages to Teach Animal Names
🖍️
How to Get Better at Using Complementary Colors
🎨
Tapir Coloring and Drawing Ideas for Kids
🎲
Storyboard Games: A Creative Twist
🎨
Meet the Chef: A Community Helper Coloring Guide
🎨
Meet Sculpture Art: An Art Appreciation Guide for Kids
🍎
A Teacher's Guide to Circle Time Activities
🎨
Cave Formation Coloring Page: A Nature Learning Guide for Kids
✏️
How to Improve Your Drawing Stick Figures
🎨
A Lunch Tray: A Classroom Coloring and Learning Guide
🍎
Classroom Ideas: Assessing Creativity in the Classroom
🎨
Building Blocks Coloring and Drawing Ideas for Kids
🎨
An Ice Cream Stand on the Boardwalk Coloring and Drawing Ideas for Kids
🎨
Orange Coloring and Drawing Ideas for Kids
🧒
Fun Ways to Build Fine Motor Skills
🖌️
A Beginner's Guide to Stippling
🎨
A Long-Necked Herd at a Watering Hole Coloring Page: Fun Facts for Young Paleontologists
🎨
Geyser Eruption Coloring Page: A Nature Learning Guide for Kids
🎨
Staying Informed During a Storm Watch: A Family Safety Guide
💬
Why Infographics Matter in Everyday Life
🎨
A Bandage on a Scrape: A Coloring and Health Guide for Kids
🎨
Hand Puppet Coloring and Drawing Ideas for Kids
🎨
Ring Around the Rosie: A Coloring and Playtime Guide for Kids
🎨
A Medieval Feast: A Medieval Coloring and History Guide for Kids
🎨
Meet the Doctor: A Community Helper Coloring Guide
🎨
Ostrich Coloring Page Ideas for Kids
🎨
The Enormous Turnip: A Classic Story Coloring Guide for Kids
🎨
Ring Around the Rosie: A Nursery Rhyme Coloring Guide for Kids
🎨
Zucchini Coloring and Drawing Ideas for Kids
🎨
A Pirate Flag Skull Coloring and Drawing Ideas for Kids
🧠
Exploring Drawing and Sequential Thinking
🎨
A Knight's Training Yard: A Medieval Coloring and History Guide for Kids
🎨
Cinderella: A Classic Story Coloring Guide for Kids
🎨
A Beach Volleyball Game Coloring and Drawing Ideas for Kids
🖌️
Exploring Using Crayons Creatively
🧘
Simple Steps for Coloring in Silence
🎲
How to Play Treasure Map Games
🎨
A Balloon Toss: A Coloring and Playtime Guide for Kids
🎨
A Castle Dungeon: A Medieval Coloring and History Guide for Kids
🖍️
A Beginner's Guide to Using Complementary Colors
👨👩👧
Creative Low-Mess Activities for Kids
🎨
Ladybug Coloring and Drawing Ideas for Kids
✏️
Easy Steps to Practice Using an Eraser Effectively
🎨
Layering Colors: A Buying and Technique Guide
🎨
Exploring Uranus: A Coloring and Learning Guide for Kids
🎨
A Trail Map: Coloring Ideas for Your Next Family Adventure
🎨
A Royal Feast Hall Table: A Medieval Coloring and History Guide for Kids
🎨
A Camping Checklist: Coloring Ideas for Your Next Family Adventure
🧘
How Coloring as a Calm-Down Tool Can Create a Quiet Moment
🔬
The Science Behind Subtractive Color Mixing
🔬
What Is Additive Color Mixing?
💗
Understanding Expressing Gratitude Through Art
🎨
A Static Electricity Hair Test: A Step-by-Step Science Guide for Kids
🎨
Exploring A Nebula: A Coloring and Learning Guide for Kids
🎲
Drawing Battles: A Creative Twist
🌈
Relaxing Sports Scenes Coloring Activities
🎨
Using Fixative Spray: A Buying and Technique Guide
🎨
Pizza Dough Making: A Coloring and Food Science Guide for Kids
🍎
Simple Back-to-School Activities for Busy Classrooms
🔤
Drawing Activities for Numbers in a New Language
🎨
Armadillo Coloring and Drawing Ideas for Kids
🎨
Growing Plants in Space: A Coloring and Space Mission Guide for Kids
🎨
A Thank You Card for a Vet: A Simple Pet Care Guide for Kids
🎨
Exploring Peru: A Coloring and Culture Guide for Kids
🎨
Ice Cream Making: A Coloring and Food Science Guide for Kids
🍂
Creative Winter Coloring Projects for Classrooms
🌈
Printable Animals Coloring Activities
🎨
A Rowboat to Shore Coloring and Drawing Ideas for Kids
🎨
A Solar-Powered Gadget: A Coloring and STEM Guide for Kids
🎨
Teaching Compassion: A Simple Activity for Kids
🎨
A Snake Shedding Its Skin Coloring and Drawing Ideas for Kids
🎨
Deep Breathing to Relax: A Coloring and Health Guide for Kids
🎨
Pixie Coloring and Drawing Ideas for Kids
🎨
Terrapin Coloring and Drawing Ideas for Kids
🎨
Ant Coloring and Drawing Ideas for Kids
🧘
Exploring Coloring for Sensory Breaks
💡
The Role of Divergent Thinking in Children's Art
🎨
Oak Tree: A Coloring and Nature Guide for Kids
🧠
The Link Between Drawing and Problem-Solving
🎲
How to Play Drawing Prompt Games
🎨
A Splashdown Landing: A Coloring and Space Mission Guide for Kids
🧒
What to Expect When Teaching Ages 3-4
🎨
The Number 10: An Alphabet and Number Coloring Page
🎨
Lavender: A Coloring and Nature Guide for Kids
🎨
Meet the Mechanic: A Community Helper Coloring Guide
🎨
A Banyan Tree: A Coloring and Nature Guide for Kids
🌈
A Guide to Farm Scenes Coloring Pages
🌈
A Guide to Weather Scenes Coloring Pages
🎨
A Portable Site Office Coloring and Drawing Ideas for Kids
🎨
Placemat Coloring Sheets: Free Ideas for Your Next Celebration
🎲
How to Play Scavenger Hunt Drawings
📐
Learning Shapes Through Drawing
🎨
Lily: A Coloring and Nature Guide for Kids
🎨
Marigold: A Coloring and Nature Guide for Kids
🎨
A Melting Ice Race: A Step-by-Step Science Guide for Kids
🎨
A Pencil Case: A Classroom Coloring and Learning Guide
🎨
A Teacher's Desk: A Classroom Coloring and Learning Guide
🎨
Origami Crane Coloring and Drawing Ideas for Kids
💡
Building Combining Ideas Through Coloring and Drawing
🎨
A Wild West Blacksmith: A Wild West Coloring and History Guide for Kids
🎨
A Colombian Traditional Dress: A Coloring and Culture Guide for Kids
🧘
Exploring Guided Mindful Coloring
🎨
Sand Storm Coloring Page: A Nature Learning Guide for Kids
🎨
Goblin Coloring and Drawing Ideas for Kids
🎨
A Heat Shield During Re-Entry: A Coloring and Space Mission Guide for Kids
🎨
A Level and Tape Measure Coloring and Drawing Ideas for Kids
🔎
Using Organizing Research With Sketches to Solve Problems
💗
Understanding Art for Quiet Reflection
🎨
Saving Coloring Pages as PDFs: A Practical Guide
🎨
A Dinosaur Herd Coloring Page: Fun Facts for Young Paleontologists
🎨
A STEM Career Computer Programmer: A Coloring and STEM Guide for Kids
🎨
Remote Control Car Coloring and Drawing Ideas for Kids
💡
Why Personal Artistic Style Matters for Young Artists
🎨
Rocket Stages Separating: A Coloring and Space Mission Guide for Kids
🎨
Skip Counting by Twos: An Alphabet and Number Coloring Page
🎨
Gnome Coloring and Drawing Ideas for Kids
🎨
Weasel Coloring and Drawing Ideas for Kids
🎨
Weeping Willow: A Coloring and Nature Guide for Kids
🎨
Congratulating a Winner: A Simple Social Skill for Kids
🎨
Easy Space and Planets Drawing Ideas
🎨
Stick Insect Coloring and Drawing Ideas for Kids
🍎
A Teacher's Guide to Morning Work Activities
🎨
A Fishing Pier Coloring and Drawing Ideas for Kids
🎨
A Chef's Apron: A Kitchen Guide for Kids and Parents
📴
Hands-On Activities for Camping Trips
🎨
A Rustic Log Cabin: Coloring Ideas for Your Next Family Adventure
🎨
Mountain Peak Coloring Page: A Nature Learning Guide for Kids
🧠
Why Drawing Can Help With Self-Expression
🖌️
Simple Steps for Layering Techniques
🎨
A Moroccan Kaftan: A Coloring and Culture Guide for Kids
🎨
A Density Tower: A Step-by-Step Science Guide for Kids
🎲
How to Play Guess-the-Drawing Games
🎨
Baboon Coloring and Drawing Ideas for Kids
📐
Fun Drawing Activities for Counting
🎨
Great Barrier Reef: Coloring Page and Fun Facts for Kids
🎨
Turnip Coloring and Drawing Ideas for Kids
💗
Creative Approaches to Art for Quiet Reflection
🎨
A Prehistoric Swamp Coloring Page: Fun Facts for Young Paleontologists
🎨
Gift Tag Coloring: Free Ideas for Your Next Celebration
🎨
a Puppet Cutout Printable: Free Ideas for Your Next Celebration
🔤
Drawing Activities for the Alphabet
📴
Hands-On Activities for Summer Vacations
👨👩👧
Easy Morning Routine Activities With Coloring Pages
🎨
A Homemade Periscope: A Step-by-Step Science Guide for Kids
🌈
Fun Sports Scenes Coloring Pages for Kids
🎨
Moth Coloring and Drawing Ideas for Kids
🎨
Cliff Face Coloring Page: A Nature Learning Guide for Kids
💗
Creative Approaches to Expressing Gratitude Through Art
🎨
Fruit Pie Coloring Ideas for Kids Who Love to Create
🎲
Chess Strategy Diagrams: A Creative Twist
🎲
Strategy Sketching for Sports: A Creative Twist
🎨
How to Draw Space and Planets Step by Step
🎨
Boa Constrictor Coloring and Drawing Ideas for Kids
🎨
A Robot Band: A Coloring and Invention Guide for Kids
🏺
What We Know About Hieroglyphics
🎨
Exploring A Meteor Shower: A Coloring and Learning Guide for Kids
🎨
Exploring A Friendly Alien Spaceship: A Coloring and Learning Guide for Kids
🎨
A Circus Tightrope Net Coloring and Drawing Ideas for Kids
👨👩👧
Easy Road Trip Activities With Coloring Pages
🎨
A Lasso Rope: A Wild West Coloring and History Guide for Kids
🔎
Exploring Concept Mapping for Students
🎨
Koala Coloring and Drawing Ideas for Kids
🎨
Valentine's Day Coloring Ideas and Activities for the Whole Family
🎨
Dingo Coloring and Drawing Ideas for Kids
🔬
Understanding Additive Color Mixing
🎨
Artichoke Coloring and Drawing Ideas for Kids
🎨
A Ship Sailing into a Sunset Coloring and Drawing Ideas for Kids
🧒
Drawing Activities for Preschoolers
🎨
A Basket of Croissants: Coloring Ideas and Fun Facts for Kids
🎨
Crop Rotation: A Coloring and Food Science Guide for Kids
🎨
Comparing Tablet Coloring Apps: A Practical Guide
🎨
A Knight's Shield and Sword: A Medieval Coloring and History Guide for Kids
🍎
A Teacher's Guide to Classroom Coloring Stations
🎨
Heat Wave Safety: A Family Safety Guide
🎨
A Sleeping Bag Under the Stars: Coloring Ideas for Your Next Family Adventure
🎨
Choosing a Pencil Sharpener: A Buying and Technique Guide
🎨
Jack and Jill: A Nursery Rhyme Coloring Guide for Kids
🎨
A Trapeze Artist Coloring and Drawing Ideas for Kids
🎨
A Carnival Balloon Animal Coloring and Drawing Ideas for Kids
🎨
A Sound Vibration Experiment: A Step-by-Step Science Guide for Kids
🎨
Triceratops Coloring Page: Fun Facts for Young Paleontologists
🎨
Dryad Coloring and Drawing Ideas for Kids
🎨
First Steps on the Moon: A Coloring and Space Mission Guide for Kids
🎨
The Little Mermaid: A Classic Story Coloring Guide for Kids
🎨
a Calm-Down Corner: A Simple Mindfulness Activity for Kids
🎨
Scented Markers: A Buying and Technique Guide
🎨
A Safe Room at Home: A Family Safety Guide
🔤
How Pictures Help Children Learn Everyday Objects
🍎
How Teachers Can Use Assessing Creativity in the Classroom
🎨
Taking Turns in a Game: A Simple Social Skill for Kids
🎨
A Concrete Foundation Pour Coloring and Drawing Ideas for Kids
🎨
Easy Favorite Foods Drawing Ideas
🎨
How Muscles Work: A Coloring and Health Guide for Kids
🎨
Winter Earmuffs: Coloring Ideas and Activities for the Whole Family
🧘
Why Nature-Inspired Calm Coloring Feels Calming
🎨
How to Draw a Glockenspiel: A Coloring and Music Guide for Kids
🎨
Tag: A Coloring and Playtime Guide for Kids
🎨
Cinco de Mayo Coloring Ideas and Activities for the Whole Family
🎨
Siren Coloring and Drawing Ideas for Kids
🎨
A Simple Trade or Barter Scene: A Money Guide for Kids and Parents
🎨
Lotus Flower: A Coloring and Nature Guide for Kids
🎨
A Cowboy Guitar by the Campfire: A Wild West Coloring and History Guide for Kids
🧒
A Parent's Guide to Ages 5-6
🎨
Ancient Greek Columns: An Ancient History Coloring Guide for Kids
🎨
Hickory Dickory Dock: A Nursery Rhyme Coloring Guide for Kids
🔬
The Science Behind RGB Color Mixing
🎨
Preserving Finished Coloring Pages: A Buying and Technique Guide
🌈
Fun Vehicles Coloring Pages for Kids
🎨
Hopscotch: A Coloring and Playtime Guide for Kids
🎲
Football Play Diagrams: A Creative Twist
🔎
Using Timeline Diagrams to Solve Problems
🔤
How Pictures Help Children Learn the Alphabet
🎨
A Beginner's Guide to Drawing Sports
🎨
A Pair of Pruning Shears: A Gardening Guide for Kids and Families
🎨
Teaching Responsibility: A Simple Activity for Kids
🔬
Understanding CMYK Printing Colors
🎨
How to Draw a Parallelogram: A Step-by-Step Guide for Kids
🎨
Easy Farm Life Drawing Ideas
🎨
Fun Delivery Van Coloring and Drawing Ideas for Kids
🎨
A Beginner's Guide to Drawing Self-Portraits
🎨
A Piggy Bank: A Money Guide for Kids and Parents
🔎
Exploring Sketch Journaling for Students
🎨
Bowling Coloring Pages and Drawing Ideas for Kids
🎨
Avocado Coloring and Drawing Ideas for Kids
🧒
How Drawing Supports First-Time Artists
🎨
Extreme Cold Safety: A Family Safety Guide
🌈
Printable Jungle Scenes Coloring Activities
🎨
A Space Elevator Concept: A Coloring and Space Mission Guide for Kids
🎨
A Backhoe Loader Coloring and Drawing Ideas for Kids
🔎
Exploring Diagrams in Science for Students
🎨
Washing Hands Before Eating: A Coloring and Health Guide for Kids
🖌️
Why Composition Basics Matters for Young Artists
🎨
A Kids' Money Jar Labeled Goals: A Money Guide for Kids and Parents
👨👩👧
Coloring Ideas for Grandparent and Grandchild Activities
🏺
The History of Prehistoric Drawing Tools
🎨
A Cuban Guayabera Shirt: A Coloring and Culture Guide for Kids
🎨
Three Little Kittens: A Nursery Rhyme Coloring Guide for Kids
💡
How Drawing Encourages Open-Ended Play
🎨
Fun Family Portraits Drawing Activities for Kids
🎨
Ancient Egyptian Hieroglyphics: An Ancient History Coloring Guide for Kids
🧠
How Drawing May Support Observation Skills
🖌️
A Beginner's Guide to Layering Techniques
🎨
Cheetah Coloring and Drawing Ideas for Kids
💡
Nurturing Personal Artistic Style at Home
🌈
Relaxing Nature Landscapes Coloring Activities
🎨
Fun Bicycle Coloring and Drawing Ideas for Kids
🎨
A Ballet Barre Practice: A Coloring and Movement Guide for Kids
🍂
Creative Hanukkah Coloring Projects for Classrooms
🎨
Badger Coloring and Drawing Ideas for Kids
🎨
a Bedtime Wind-Down Routine: A Simple Mindfulness Activity for Kids
🎨
Fun Monorail Coloring and Drawing Ideas for Kids
🔬
A Simple Guide to How Light Creates Color
🎨
A Pierogi Plate: Coloring Ideas and Fun Facts for Kids
🌈
Creative Ways to Color Buildings and Castles
🔎
How Timeline Diagrams Support Learning
📐
Why Patterns and Drawing Go Together
🎨
Backyard Squirrel Coloring and Drawing Ideas for Kids
🎨
A Smartwatch: A Coloring and Invention Guide for Kids
🎨
A Homework Folder: A Classroom Coloring and Learning Guide
💗
Understanding Art and Relaxation
🎨
Meet Pointillism: An Art Appreciation Guide for Kids
🎨
Silverfish Coloring and Drawing Ideas for Kids
🎨
A Flamenco Dancer: A Coloring and Movement Guide for Kids
🎨
A Family Discussing a Big Purchase: A Money Guide for Kids and Parents
🔎
How Sketching to Understand Complex Ideas Support Learning
🎨
Fun Hot Air Balloon Coloring and Drawing Ideas for Kids
🧠
Exploring Drawing and Working Memory
🔎
Why Visual Thinkers Use Mind Maps
🌈
Relaxing Mandalas Coloring Activities
🎨
Chore Chart Printables: Free Ideas for Your Next Celebration
🎨
How to Draw a Zither: A Coloring and Music Guide for Kids
🧠
The Link Between Drawing and Sequential Thinking
🖌️
How to Practice Working With Light and Shadow
🎨
Fun Gardens and Flowers Drawing Activities for Kids
🍎
Classroom Ideas: Differentiated Art Instruction
🎨
A Class Election: A Classroom Coloring and Learning Guide
🎨
Cupcake Decorating Coloring Ideas for Kids Who Love to Create
🎨
Walrus Coloring and Drawing Ideas for Kids
🎨
How to Draw a A Grid of Squares: A Step-by-Step Guide for Kids
🌈
Creative Ways to Color Weather Scenes
👨👩👧
Easy Grandparent and Grandchild Activities With Coloring Pages
🎨
A Sandcastle Coloring and Drawing Ideas for Kids
🎨
Garden Composting: A Coloring and Food Science Guide for Kids
🔤
Drawing Activities for Early Literacy Skills
🖍️
Tips for Coloring Skin Tones
🎨
Hydra Coloring and Drawing Ideas for Kids
🎨
Building a Moon Base: A Coloring and Space Mission Guide for Kids
🎨
Fun Buildings and Houses Drawing Activities for Kids
🧒
Fun Ways to Build Ages 3-4
🎨
A Woolly Rhino Coloring Page: Fun Facts for Young Paleontologists
📴
Making the Most of Sick Days at Home Without Screens
📐
How Children Understand Graphs and Charts With Art
🎨
Caiman Coloring and Drawing Ideas for Kids
📐
Teaching Shapes Through Coloring and Drawing
🌈
Relaxing Community Helpers Coloring Activities
🎨
River Bend Coloring Page: A Nature Learning Guide for Kids
🎨
Cricket Coloring Pages and Drawing Ideas for Kids
👨👩👧
Creative After-School Activities for Kids
✏️
Easy Steps to Practice Holding a Pencil Correctly
🎨
A Row of Planted Seeds: A Gardening Guide for Kids and Families
🎨
Easy Everyday Objects Drawing Ideas
🎨
How to Draw a Wind Chimes: A Coloring and Music Guide for Kids
🎨
A Show-and-Tell Object: A Classroom Coloring and Learning Guide
🎨
How to Draw a Zentangle Pattern: A Step-by-Step Guide
🎨
A Pet Birthday Celebration: A Simple Pet Care Guide for Kids
🎨
A Launch Countdown: A Coloring and Space Mission Guide for Kids
🎨
A Carnival Game Booth Coloring and Drawing Ideas for Kids
🎨
Classroom Printing on a Budget: A Practical Guide
🎨
A Kids' Business Idea: A Money Guide for Kids and Parents
🎨
A Medieval Trade Caravan: A Medieval Coloring and History Guide for Kids
🎨
Meet Mosaic Art: An Art Appreciation Guide for Kids
🎨
A Wagon Ride on the Farm Coloring and Drawing Ideas for Kids
📐
How Children Understand Grids and Coordinates With Art
🧘
Why Coloring in Silence Feels Calming
📴
Creative Alternatives to Screens During Weekend Mornings
🎨
A Kids' Pretend Store: A Money Guide for Kids and Parents
💡
Building Creative Confidence Through Coloring and Drawing
🎨
Meet the Scientist: A Community Helper Coloring Guide
🎨
Winter Hot Cocoa by the Fire: Coloring Ideas and Activities for the Whole Family
🎲
Using Drawing for Collaborative Drawing Games
🧒
How Drawing Supports Hand-Eye Coordination
🍂
Fun Winter Classroom Coloring Ideas
🎨
Golf Coloring Pages and Drawing Ideas for Kids
🎨
A Beginner's Guide to Drawing Emotions and Faces
🎨
Kale Coloring and Drawing Ideas for Kids
👨👩👧
Creative Activities for Only Children for Kids
🎨
Marble Run Coloring and Drawing Ideas for Kids
👨👩👧
Coloring Ideas for Low-Mess Activities
🎨
A Solar Oven S'more: A Step-by-Step Science Guide for Kids
🎨
Creative Weather Drawing Exercises
🎨
The Letter Q: An Alphabet and Number Coloring Page
🎨
Fall Pumpkin Carving: Coloring Ideas and Activities for the Whole Family
📴
Creative Alternatives to Screens During Outdoor Picnics
🎨
A Savings Goal Thermometer: A Money Guide for Kids and Parents
🎨
Sea Sponge Coloring and Drawing Ideas for Kids
🎨
A Pet Sitter Visit: A Simple Pet Care Guide for Kids
👨👩👧
Fun and Simple After-School Activities
🎨
Color vs. Black-and-White Printing: A Practical Guide
🎨
Wearing Glasses: A Coloring and Health Guide for Kids
📐
Learning Patterns Through Drawing
🎲
Step-by-Step Drawing-Based Party Games
🍂
Fun Graduation Season Classroom Coloring Ideas
🎨
Tug of War Coloring Pages and Drawing Ideas for Kids
🍂
Creative Spring Coloring Projects for Classrooms
🖌️
Why Outlining Techniques Matters for Young Artists
🎨
A Pet's Name Tag: A Simple Pet Care Guide for Kids
🎨
Meet the Zookeeper: A Community Helper Coloring Guide
🎨
A Mars Rover Deployment: A Coloring and Space Mission Guide for Kids
🎨
An X-Ray Vision Superhero: A Superhero Coloring and Design Guide for Kids
🎨
Viking Explorers: An Ancient History Coloring Guide for Kids
🎨
Delta River Mouth Coloring Page: A Nature Learning Guide for Kids
🎲
Fun Treasure Map Games for Kids
🔎
A Beginner's Guide to Sketching to Understand Complex Ideas
🎨
A Wild Mustang Running Free: A Wild West Coloring and History Guide for Kids
🎨
Comforting a Sad Friend: A Simple Social Skill for Kids
🏺
Why Ancient Egyptian Art Matter to Historians
🎨
a Class Photo Frame: Free Ideas for Your Next Celebration
👨👩👧
Fun and Simple Grandparent and Grandchild Activities
🎨
Burnishing Technique: A Buying and Technique Guide
🎨
Choosing the Right Printer Ink: A Practical Guide
🎨
Wild Turkey Coloring and Drawing Ideas for Kids
🎨
Turning Coloring Pages Into Cards: A Practical Guide
🎨
Teaching Courage: A Simple Activity for Kids
🎨
Fun Vehicles Drawing Activities for Kids
🍎
A Teacher's Guide to Indoor Recess Activities
🎨
Exploring A Spiral Galaxy: A Coloring and Learning Guide for Kids
🎨
The Boy Who Called Wolf: A Classic Story Coloring Guide for Kids
🎨
Easy Dinosaurs Drawing Ideas
🎨
Fun Pickup Truck Coloring and Drawing Ideas for Kids
🍎
Classroom Ideas: Classroom Coloring Stations
🎨
Pumpkin Coloring and Drawing Ideas for Kids
🎨
A Treasure Map Coloring and Drawing Ideas for Kids
🎨
Rain Boots and an Umbrella: Coloring Ideas and Activities for the Whole Family
🎨
Holding the Door for Someone: A Simple Social Skill for Kids
🎨
A Sequoia Tree: A Coloring and Nature Guide for Kids
🎨
Rooster Coloring Page Ideas for Kids
🎨
a Worry Monster Craft: A Simple Mindfulness Activity for Kids
🎨
A Diwali Rangoli Design: Coloring Ideas and Fun Facts for Kids
🎨
A Loop of Repeated Steps: A Coloring and STEM Guide for Kids
🎨
Meet the Fisherman: A Community Helper Coloring Guide
🎨
A Wheelbarrow of Mulch: A Gardening Guide for Kids and Families
🖌️
Simple Steps for Using Colored Pencils
🎨
A Trail of Wildflowers: Coloring Ideas for Your Next Family Adventure
🎨
Teaching Dependability: A Simple Activity for Kids
🌈
A Guide to Fairy Tale Scenes Coloring Pages
🎨
Forbidden City: Coloring Page and Fun Facts for Kids
👨👩👧
Fun and Simple Sibling Bonding Activities
🔬
Understanding Digital vs Traditional Color
🎨
A Superhero Costume Design Contest: A Superhero Coloring and Design Guide for Kids
🎨
Baby Shower Coloring Sheets: Free Ideas for Your Next Celebration
🔤
Learning Animal Names Through Drawing
🧒
How Drawing Supports Ages 2-3
🎨
A Samoan Traditional Lavalava: A Coloring and Culture Guide for Kids
🔬
A Simple Guide to Color Wheels
🖍️
A Beginner's Guide to Coloring Skies and Backgrounds
🎲
Using Drawing for Chess Strategy Diagrams
🎨
Using Please and Thank You at a Restaurant: A Simple Social Skill for Kids
🎨
Sunrise Over Hills Coloring Page: A Nature Learning Guide for Kids
🎨
A Moon Cake for Mid-Autumn Festival: Coloring Ideas and Fun Facts for Kids
🎨
Farm Dog Coloring and Drawing Ideas for Kids
🎨
New Year's Eve Coloring Ideas and Activities for the Whole Family
🖍️
Simple Techniques for Coloring Skies and Backgrounds
🎨
Crystal Unicorn Coloring and Drawing Ideas for Kids
🎨
Zipping a Jacket: A Simple Life Skill for Kids
🎨
Alcohol Markers vs. Water-Based Markers: A Buying and Technique Guide
🎨
Rock-a-Bye Baby: A Nursery Rhyme Coloring Guide for Kids
🍂
Fun Autumn Classroom Coloring Ideas
🖍️
Tips for Coloring With Markers
🌈
Fun Robots and Machines Coloring Pages for Kids
💡
Why Creative Journaling Matters for Young Artists
🎨
A Skyscraper Being Built Coloring and Drawing Ideas for Kids
🎨
Bhangra Dancers: A Coloring and Movement Guide for Kids
🎨
An Allowance Chart: A Money Guide for Kids and Parents
🖌️
Exploring Cross-Hatching
🎨
the First Day of School Coloring Ideas and Activities for the Whole Family
🎨
Meet the Journalist: A Community Helper Coloring Guide
🎨
A Wild West Saddle: A Wild West Coloring and History Guide for Kids
🎨
A Delivery Drone: A Coloring and Invention Guide for Kids
🍂
Printable Spring Coloring Pages for Kids
🏺
Why Cave Paintings Matter to Historians
🎨
Preparing a Go-Bag: A Family Safety Guide
🎨
A Family Reunification Plan: A Family Safety Guide
💡
The Role of Creative Confidence in Children's Art
🎨
A Sea Chart and Compass Coloring and Drawing Ideas for Kids
🎨
Earth Day Coloring Ideas and Activities for the Whole Family
🎨
A Moon Buggy: A Coloring and Space Mission Guide for Kids
💡
Nurturing Free Drawing at Home
🎨
Quail Coloring Page Ideas for Kids
🎨
a Worry Jar Craft: A Simple Mindfulness Activity for Kids
🎨
Staying Positive During an Emergency: A Family Safety Guide
🎨
Sharks and Minnows: A Coloring and Playtime Guide for Kids
🌈
Relaxing Dinosaurs Coloring Activities
🎨
Fun Musical Instruments Drawing Activities for Kids
🔬
Understanding Warm and Cool Colors
🎨
Triangular Crayons for Grip: A Buying and Technique Guide
🎨
Asking for Help Politely: A Simple Life Skill for Kids
🎨
Exploring The Big Dipper: A Coloring and Learning Guide for Kids
🎨
A Dance Recital: A Coloring and Movement Guide for Kids
🎨
Backyard Deer Coloring and Drawing Ideas for Kids
🎨
A Dragon Guarding a Castle: A Medieval Coloring and History Guide for Kids
🎨
A Medieval Scribe Writing: A Medieval Coloring and History Guide for Kids
🎨
A Rocket Engine Ignition: A Coloring and Space Mission Guide for Kids
✏️
Why Drawing Curved Lines Matters for New Artists
🎨
Emotions and Faces Drawing Prompts for Beginners
🎨
A Tisket A Tasket: A Nursery Rhyme Coloring Guide for Kids
🖌️
Exploring Using Oil Pastels
🎨
A Castle Rose Garden: A Medieval Coloring and History Guide for Kids
🎨
Exploring Ireland: A Coloring and Culture Guide for Kids
🎨
Friendship Kindness Cards: A Simple Mindfulness Activity for Kids
✏️
Fun Exercises for Pencil Control
💗
Exploring What Art Therapy Actually Is Through Art
💗
Exploring Art for Quiet Reflection Through Art
🎨
A Boardwalk Bumper Cars Ride Coloring and Drawing Ideas for Kids
🧠
Exploring Drawing and Observation Skills
🎨
A Lantern-Lit Ship at Night Coloring and Drawing Ideas for Kids
🎨
A Tunnel Boring Machine Coloring and Drawing Ideas for Kids
🎨
The Maya Pyramid Temples: An Ancient History Coloring Guide for Kids
🎨
Daddy Long Legs Coloring and Drawing Ideas for Kids
✏️
How to Improve Your Drawing Paper Types
🎨
How to Draw a Gong: A Coloring and Music Guide for Kids
🧠
How Drawing May Support Patience
🎨
Concert Stage Lights: A Coloring and Movement Guide for Kids
🎨
Germs and Handwashing: A Coloring and Health Guide for Kids
🎨
Octopus Coloring and Drawing Ideas for Kids
💡
Nurturing Daydreaming at Home
👨👩👧
Fun and Simple Low-Mess Activities
🎨
A Forest Ranger Station: Coloring Ideas for Your Next Family Adventure
📐
How Children Understand Sequences With Art
🎨
Teaching Wisdom: A Simple Activity for Kids
🍂
Printable Summer Coloring Pages for Kids
🎨
Exploring Nepal: A Coloring and Culture Guide for Kids
🧠
How Drawing May Support Spatial Awareness
🎨
Double Rainbow Coloring Page: A Nature Learning Guide for Kids
🎲
Using Drawing for Visual Puzzle Games
🎨
Fun Birds Drawing Activities for Kids
🎨
Bubble Breathing: A Simple Mindfulness Activity for Kids
🎨
A Starfish on the Sand Coloring and Drawing Ideas for Kids
🧠
How Drawing May Support Fine Motor Coordination
🖌️
How to Practice Composition Basics
📴
Creative Alternatives to Screens During Camping Trips
💡
Nurturing Combining Ideas at Home
🖌️
Why Using Oil Pastels Matters for Young Artists
🎨
A Medieval Village Market: A Medieval Coloring and History Guide for Kids
🎨
Canada Day Coloring Ideas and Activities for the Whole Family
👨👩👧
Coloring Ideas for Bedtime Wind-Down Routines
💗
The Role of Coloring in Art for Quiet Reflection
🎨
The Number 13: An Alphabet and Number Coloring Page
📐
Fun Drawing Activities for Patterns
🎲
Step-by-Step Memory Matching Games
🎨
A Chameleon Changing Colors Coloring and Drawing Ideas for Kids
🎨
Mindful Eating: A Simple Mindfulness Activity for Kids
🍂
Creative Valentine's Day Coloring Projects for Classrooms
🎨
A Training Centrifuge: A Coloring and Space Mission Guide for Kids
🎨
Mindful Coloring Mandalas: A Simple Mindfulness Activity for Kids
🎨
Exploring the Philippines: A Coloring and Culture Guide for Kids
🔤
Learning the Alphabet Through Drawing
🎨
How to Draw a Moon Mandala: A Step-by-Step Guide
🎨
A Garden Fairy House: A Gardening Guide for Kids and Families
🔎
Why Visual Thinkers Use Flowcharts
🍂
Celebrate Hanukkah With Coloring Activities
🎨
Eco-Friendly Printing: A Practical Guide
💡
The Role of Free Drawing in Children's Art
🎲
Using Drawing for Tic-Tac-Toe Variations
🎨
A Medieval Falconer: A Medieval Coloring and History Guide for Kids
🎨
Meet the Architect: A Community Helper Coloring Guide
🎨
A House of Mirrors Coloring and Drawing Ideas for Kids
📴
Screen-Free Coloring Ideas for Holiday Travel
👨👩👧
Creative Sibling Bonding Activities for Kids
👨👩👧
Coloring Ideas for Quiet Time Activities
🖍️
Why Coloring Cartoon Characters Makes a Difference
🎨
The Number 18: An Alphabet and Number Coloring Page
💡
The Role of Making Mistakes in Art in Children's Art
🌈
Fun Seasonal Scenes Coloring Pages for Kids
🎨
A Castle Drawbridge: A Medieval Coloring and History Guide for Kids
🎨
Saying Please and Thank You: A Simple Life Skill for Kids
🎨
Milkshake Coloring Ideas for Kids Who Love to Create
🎨
Little Red Riding Hood: A Classic Story Coloring Guide for Kids
🧒
What to Expect When Teaching Pencil Grip Development
🎨
Making a Grocery List: A Simple Life Skill for Kids
🎨
Kids Yoga Poses for Calm: A Simple Mindfulness Activity for Kids
✏️
How to Improve Your Sketching Basics
🎨
A Classroom Aquarium: A Classroom Coloring and Learning Guide
🎨
A Summer Swimsuit: Coloring Ideas and Activities for the Whole Family
💡
The Role of Creative Journaling in Children's Art
🎨
Meet the Judge: A Community Helper Coloring Guide
👨👩👧
Making the Most of Outdoor-Inspired Drawing
🎨
A Superhero Training Obstacle Course: A Superhero Coloring and Design Guide for Kids
🍂
Printable Thanksgiving Coloring Pages for Kids
🎨
A Grater: A Kitchen Guide for Kids and Parents
🎨
Fun Nature Scenes Drawing Activities for Kids
🎨
a Growth Mindset Poster: A Simple Mindfulness Activity for Kids
🎨
A Circus Elephant Coloring and Drawing Ideas for Kids
📴
Making the Most of Waiting Rooms Without Screens
🎨
A Cowboy Bandit on Horseback: A Wild West Coloring and History Guide for Kids
🎨
Diwali Coloring Ideas and Activities for the Whole Family
🌈
Relaxing Space Coloring Activities
🎨
How to Draw Under the Sea Step by Step
🖍️
A Beginner's Guide to Choosing Paper for Coloring
🎨
A Kite Festival in the Sky: Coloring Ideas and Fun Facts for Kids
🎨
Teaching Generosity: A Simple Activity for Kids
🎨
an Emotional Regulation Toolkit: A Simple Mindfulness Activity for Kids
🧒
Understanding Fine Motor Skills in Early Childhood
🌈
Fun Ocean Life Coloring Pages for Kids
🌈
Fun Flowers and Gardens Coloring Pages for Kids
🎨
Being a Good Sport After Losing: A Simple Social Skill for Kids
🎨
A Frog on a Lily Pad Coloring and Drawing Ideas for Kids
🎨
Standing Up for a Friend: A Simple Social Skill for Kids
🎨
Packing a Lunch: A Simple Life Skill for Kids
🍎
A Teacher's Guide to Classroom Printable Activities
🎨
How to Draw a A Shape Puzzle Page: A Step-by-Step Guide for Kids
🎨
Cabbage Coloring and Drawing Ideas for Kids
🎨
A Violinist Performing: A Coloring and Movement Guide for Kids
🎨
A Kids' Cooking Class Scene: A Kitchen Guide for Kids and Parents
🎨
Pow Wow Dancers: A Coloring and Movement Guide for Kids
🎨
Moose Coloring and Drawing Ideas for Kids
🎨
Cactus: A Coloring and Nature Guide for Kids
🎨
Niagara Falls: Coloring Page and Fun Facts for Kids
🎨
Setting an Alarm Clock: A Simple Life Skill for Kids
📴
Why Coloring Beats Scrolling on Weekend Mornings
🎨
Australia Day Coloring Ideas and Activities for the Whole Family
🎨
A Camping Flashlight: Coloring Ideas for Your Next Family Adventure
🎨
A Dog Learning to Fetch: A Simple Pet Care Guide for Kids
📐
Fun Drawing Activities for Grids and Coordinates
🎨
Exploring Sweden: A Coloring and Culture Guide for Kids
🎨
A Science Fair Project: A Classroom Coloring and Learning Guide
🍎
Simple Assessing Creativity in the Classroom for Busy Classrooms
🧠
Exploring Drawing and Spatial Awareness
🎨
A Vertical Garden Wall: A Gardening Guide for Kids and Families
🍂
Celebrate Father's Day With Coloring Activities
🎨
Carrot Coloring and Drawing Ideas for Kids
🔤
Visual Vocabulary: Descriptive Words
🔤
Visual Vocabulary: Story Sequencing
📐
Fun Drawing Activities for Sequences
🎨
A Cowboy Campfire Sing-Along: A Wild West Coloring and History Guide for Kids
🎨
Solomon Grundy: A Nursery Rhyme Coloring Guide for Kids
🌈
Creative Ways to Color Emotions and Faces
🎨
Iguazu Falls: Coloring Page and Fun Facts for Kids
🎨
a Sticker Chart Printable: Free Ideas for Your Next Celebration
🎨
Eid al-Fitr Coloring Ideas and Activities for the Whole Family
🎨
Father's Day Coloring Ideas and Activities for the Whole Family
🎨
A Kitchen Apron for Kids: A Kitchen Guide for Kids and Parents
🎨
Okra Coloring and Drawing Ideas for Kids
🎨
A Marching Band Drumline: A Coloring and Movement Guide for Kids
🎨
An Egyptian Traditional Galabeya: A Coloring and Culture Guide for Kids
🎨
Sleepover Activity Ideas: Free Ideas for Your Next Celebration
🎨
Teaching Gratitude Journaling: A Simple Activity for Kids
🎨
A Homemade Bubble Solution: A Step-by-Step Science Guide for Kids
🎨
A Group Campfire Sing-Along: Coloring Ideas for Your Next Family Adventure
🌈
A Guide to Everyday Objects Coloring Pages
Why Visual Thinkers Use Sketch Journaling
🎨
an Emotion Faces Chart: A Simple Mindfulness Activity for Kids
🧒
Fun Ways to Build Encouraging Reluctant Artists
🎨
Wee Willie Winkie: A Nursery Rhyme Coloring Guide for Kids
🏺
Exploring Hieroglyphics
🔬
A Simple Guide to RGB Color Mixing
🎨
Feeding a Dog: A Simple Pet Care Guide for Kids
🎨
A Talking Robot: A Coloring and Invention Guide for Kids
🔎
Why Visual Thinkers Use Sketching to Understand Complex Ideas
📐
Teaching Graphs and Charts Through Coloring and Drawing
🎨
How to Draw a Ukulele: A Coloring and Music Guide for Kids
🍎
Using Coloring Pages for Differentiated Art Instruction
💬
Why Visual Instructions Matter in Everyday Life
💡
Why Storytelling Matters for Young Artists
🎨
A Dog Toy Basket: A Simple Pet Care Guide for Kids
🌈
Jungle Scenes Coloring Ideas for Classrooms
🎨
Meet Pop Art: An Art Appreciation Guide for Kids
🎨
A Face Painting Booth Coloring and Drawing Ideas for Kids
🎨
A Circus Poodle Coloring and Drawing Ideas for Kids
🎨
How to Draw a Castanets: A Coloring and Music Guide for Kids
💬
The Power of Diagrams
🎨
A Wooden Ship's Wheel Coloring and Drawing Ideas for Kids
📐
Fun Drawing Activities for Shapes
🎨
Golden Pavilion: Coloring Page and Fun Facts for Kids
🎨
An Electric Car: A Coloring and Invention Guide for Kids
🎨
How to Draw a Drum: A Coloring and Music Guide for Kids
💡
Building Character Design Through Coloring and Drawing
🎨
Pyramids of Giza: Coloring Page and Fun Facts for Kids
🎨
Wildfire Awareness: A Family Safety Guide
🎨
A Swing Set Contest: A Coloring and Playtime Guide for Kids
🔬
Why Screens Use RGB Explained for Kids
🎨
Ancient Phoenician Sailors and Traders: An Ancient History Coloring Guide for Kids
🎨
Fun Unicycle Coloring and Drawing Ideas for Kids
🎨
Severe Weather Alerts on a Phone: A Family Safety Guide
🎨
A Classroom Weather Chart: A Classroom Coloring and Learning Guide
🎲
Fun Visual Puzzle Games for Kids
🖌️
Simple Steps for Using Watercolor
🎨
A Coin Sorting Jar: A Money Guide for Kids and Parents
🎨
Genie Coloring and Drawing Ideas for Kids
💡
Building Personal Artistic Style Through Coloring and Drawing
🎨
A Family Pet Portrait: A Simple Pet Care Guide for Kids
🎨
A Robotic Vacuum: A Coloring and Invention Guide for Kids
🎨
Exploring A Star Cluster: A Coloring and Learning Guide for Kids
🎨
Exploring A Space Dust Cloud: A Coloring and Learning Guide for Kids
🎨
Freeze Dance: A Coloring and Playtime Guide for Kids
🍎
A Teacher's Guide to Art Lessons for History Class
🎨
A School Assembly: A Classroom Coloring and Learning Guide
🎨
Pandora's Box: A Classic Story Coloring Guide for Kids
🏺
What We Know About Petroglyphs and Rock Art
✏️
Fun Exercises for Drawing Simple Faces
🎨
Woolly Mammoth Coloring Page: Fun Facts for Young Paleontologists
🎨
The Pied Piper: A Classic Story Coloring Guide for Kids
🎨
Five Senses Grounding: A Simple Mindfulness Activity for Kids
🍂
Fun Easter Classroom Coloring Ideas
🎨
Popcorn Coloring Ideas for Kids Who Love to Create
🔤
Using Coloring Pages to Teach Sentence Building
🎨
A Simple Loan Between Siblings: A Money Guide for Kids and Parents
🎨
Saying Please and Thank You: A Simple Social Skill for Kids
🎨
an Emotion Check-In Chart: A Simple Mindfulness Activity for Kids
✏️
Easy Steps to Practice Basic Perspective
🎨
The Number 12: An Alphabet and Number Coloring Page
🖌️
A Beginner's Guide to Outlining Techniques
📴
Creative Alternatives to Screens During Family Game Nights
💡
Why Artistic Risk-Taking Matters for Young Artists
🖌️
Exploring Using Colored Pencils
🔎
Why Visual Thinkers Use Connecting Ideas Through Drawing
💬
The Power of Maps and Wayfinding Symbols
🎨
A Shrinking-Power Superhero: A Superhero Coloring and Design Guide for Kids
🎨
Exploring Indonesia: A Coloring and Culture Guide for Kids
🖍️
A Beginner's Guide to Coloring With Watercolor Pencils
🔤
Drawing Activities for Sentence Building
🎨
A Knight in Shining Armor: A Medieval Coloring and History Guide for Kids
🎨
Jack-in-the-Box Coloring and Drawing Ideas for Kids
🎨
A Kids' Fundraiser Table: A Money Guide for Kids and Parents
🎨
Meet the Painter and Decorator: A Community Helper Coloring Guide
🎨
A Robot Pet: A Coloring and Invention Guide for Kids
🎨
How to Draw a Semicircle: A Step-by-Step Guide for Kids
🎨
Weekly Planner Doodles: Free Ideas for Your Next Celebration
🧒
Understanding Color Recognition in Early Childhood
🧒
Drawing Activities for Toddlers (Ages 1-2)
🔬
Color Psychology Explained for Kids
🎨
How to Draw a Steel Drum: A Coloring and Music Guide for Kids
💬
How Wordless Storytelling Communicate Ideas
🖌️
Why Layering Techniques Matters for Young Artists
🎨
Fun Camper Van Coloring and Drawing Ideas for Kids
🎨
A Farmers Market: A Coloring and Food Science Guide for Kids
🎨
A Pumpkin Patch Growing: A Gardening Guide for Kids and Families
🎨
King Snake Coloring and Drawing Ideas for Kids
🎨
Puss in Boots: A Classic Story Coloring Guide for Kids
🧒
What to Expect When Teaching Color Recognition
🌈
Relaxing Jungle Scenes Coloring Activities
🎨
Calm Breathing Star Cards: A Simple Mindfulness Activity for Kids
🧘
How Repetitive Pattern Coloring Can Create a Quiet Moment
🎨
A Cooling Rack: A Kitchen Guide for Kids and Parents
🖍️
A Beginner's Guide to Coloring Animals Realistically
🖍️
Why Coloring Large Areas Makes a Difference
🔎
Using Connecting Ideas Through Drawing to Solve Problems
🏺
Exploring Ancient Egyptian Art
✏️
How to Improve Your Using an Eraser Effectively
🔤
Using Coloring Pages to Teach the Alphabet
🧠
Why Drawing Can Help With Concentration and Focus
🎨
Bubbles Coloring and Drawing Ideas for Kids
🎨
Organizing Coloring Supplies: A Buying and Technique Guide
🎨
A Seagull on the Boardwalk Railing Coloring and Drawing Ideas for Kids
💗
Creative Approaches to Processing Big Feelings
🎨
a Beach Vacation Day Coloring Ideas and Activities for the Whole Family
🧘
Why Bedtime Coloring Routines Feels Calming
🎨
Angkor Wat: Coloring Page and Fun Facts for Kids
🎨
A Cape and Mask Design: A Superhero Coloring and Design Guide for Kids
🎨
A Greek Traditional Folk Costume: A Coloring and Culture Guide for Kids
🎨
Creative Birds Drawing Exercises
🍂
Seasonal Coloring Guide: Summer
💬
Why Visual Storytelling Matter in Everyday Life
💗
Creative Approaches to Art for Stressful Days
🖌️
How to Practice Stippling
📴
Hands-On Activities for Restaurant Wait Times
🎨
How to Draw a Argyle Pattern: A Step-by-Step Guide
🎨
Great Wall of China: Coloring Page and Fun Facts for Kids
🎨
CN Tower: Coloring Page and Fun Facts for Kids
🎨
A Pile of Lumber Coloring and Drawing Ideas for Kids
🎨
Reward Chart Coloring: Free Ideas for Your Next Celebration
🧘
Why Coloring as a Calm-Down Tool Feels Calming
👨👩👧
Making the Most of Activities for Only Children
🎨
A Superhero Helping an Elderly Neighbor: A Superhero Coloring and Design Guide for Kids
💬
Understanding Visual Storytelling
🖍️
Tips for Choosing Your First Coloring Pencils
🎨
Connect Four Board Coloring and Drawing Ideas for Kids
📐
Fun Drawing Activities for Proportion
🎨
A Treehouse Construction Coloring and Drawing Ideas for Kids
🎨
Spaghetti Coloring Ideas for Kids Who Love to Create
🧠
Can Drawing Improve Working Memory?
🎨
How to Draw a Star Mandala: A Step-by-Step Guide
🎲
Step-by-Step Collaborative Drawing Games
🎨
Empire State Building: Coloring Page and Fun Facts for Kids
🎨
The Elves and the Shoemaker: A Classic Story Coloring Guide for Kids
🎨
A Tightrope Walker Coloring and Drawing Ideas for Kids
🎨
Baa Baa Black Sheep: A Nursery Rhyme Coloring Guide for Kids
🧘
Simple Steps for Coloring for Focus
🎨
A Last Day of School Countdown: A Classroom Coloring and Learning Guide
🎨
A Cold Frame for Seedlings: A Gardening Guide for Kids and Families
🎨
Table Mountain: Coloring Page and Fun Facts for Kids
🎨
Humpty Dumpty: A Nursery Rhyme Coloring Guide for Kids
🎨
How to Draw a Heart: A Step-by-Step Guide for Kids
🔤
Learning Emotions and Feelings Words Through Drawing
🎨
How to Draw a Herringbone Pattern: A Step-by-Step Guide
🎨
Practicing Eye Contact While Talking: A Simple Social Skill for Kids
🔬
Understanding Color Contrast
🧠
How Drawing May Support Critical Thinking
🎨
The Letter K: An Alphabet and Number Coloring Page
🎨
Building a Snowman: Coloring Ideas and Activities for the Whole Family
🎨
A Dump Truck Unloading Coloring and Drawing Ideas for Kids
🎨
A Japanese Kimono: A Coloring and Culture Guide for Kids
🎨
a Safe Space Poster: A Simple Mindfulness Activity for Kids
🎨
A Beginner's Guide to Drawing Original Superhero Characters
🖍️
Tips for Coloring Skies and Backgrounds
📴
Creative Alternatives to Screens During Sick Days at Home
🖌️
Why Stippling Matters for Young Artists
💗
The Role of Coloring in Building Self-Esteem Through Art
🎨
Hamburger Coloring Ideas for Kids Who Love to Create
👨👩👧
Creative Rainy Day Activities for Kids
🎨
Jaguar Coloring and Drawing Ideas for Kids
🎨
Santa's Workshop Coloring Ideas and Activities for the Whole Family
💡
Nurturing Divergent Thinking at Home
🧒
How Drawing Supports Building Drawing Confidence
🎨
Easy Emotions and Faces Drawing Ideas
🍂
Creative Christmas Coloring Projects for Classrooms
🔤
Visual Vocabulary: Sight Words
🎨
Eagle Coloring Page Ideas for Kids
🌈
A Guide to Mandalas Coloring Pages
🎨
A Rodeo Bull Rider: A Wild West Coloring and History Guide for Kids
🎨
A Cowboy Boot: A Wild West Coloring and History Guide for Kids
🧒
What to Expect When Teaching First-Time Artists
🎨
A Poutine Plate: Coloring Ideas and Fun Facts for Kids
🎨
Dimetrodon Coloring Page: Fun Facts for Young Paleontologists
🎨
Dice Coloring and Drawing Ideas for Kids
🎨
A Superhero Lifting a Car: A Superhero Coloring and Design Guide for Kids
🎨
Certificate of Achievement Coloring: Free Ideas for Your Next Celebration
🎨
Behavior Chart Printables: Free Ideas for Your Next Celebration
🎨
A Clown Juggling Torches Coloring and Drawing Ideas for Kids
📴
Why Coloring Beats Scrolling on Outdoor Picnics
🎨
Woodpecker Coloring Page Ideas for Kids
🎨
Fire-Bellied Toad Coloring and Drawing Ideas for Kids
🧠
The Link Between Drawing and Imagination
🎨
A Dog Park Visit: A Simple Pet Care Guide for Kids
🎨
Teaching Sincerity: A Simple Activity for Kids
🎨
Leopard Gecko Coloring and Drawing Ideas for Kids
🎨
Butterfly Coloring and Drawing Ideas for Kids
✏️
Why Drawing From Observation Matters for New Artists
🎨
A Family Communication Plan: A Family Safety Guide
🎨
Meet Wassily Kandinsky: An Art Appreciation Guide for Kids
🎨
Story Time Circle: A Classroom Coloring and Learning Guide
🔤
How Pictures Help Children Learn Story Sequencing
🎨
Calf Coloring and Drawing Ideas for Kids
🎲
How to Play Strategy Sketching for Sports
🎨
Exploring Italy: A Coloring and Culture Guide for Kids
🎨
Fun Cement Mixer Coloring and Drawing Ideas for Kids
🎨
Ordinal Numbers First to Tenth: An Alphabet and Number Coloring Page
🧠
Exploring Drawing and Memory
🎨
A Wild West Railroad Station: A Wild West Coloring and History Guide for Kids
🍎
A Teacher's Guide to Back-to-School Activities
🎨
Surfing Coloring Pages and Drawing Ideas for Kids
🎨
A Paella Pan: Coloring Ideas and Fun Facts for Kids
🎨
Ankylosaurus Coloring Page: Fun Facts for Young Paleontologists
🖍️
Tips for Choosing Paper for Coloring
🎲
Mazes: A Creative Twist
📴
Making the Most of Device-Free Evenings Without Screens
🎨
Greeting a Guest Politely: A Simple Social Skill for Kids
🎨
Ibis Coloring Page Ideas for Kids
🎨
A Reading Nook: A Classroom Coloring and Learning Guide
🖍️
Why Coloring Inside the Lines Makes a Difference
🎨
Introducing Yourself Politely: A Simple Social Skill for Kids
📐
Teaching Measurement Through Coloring and Drawing
🎨
Exploring the Netherlands: A Coloring and Culture Guide for Kids
🎨
Fun Segway Coloring and Drawing Ideas for Kids
👨👩👧
Why Parents Love Screen-Free Afternoons
📐
Learning Graphs and Charts Through Drawing
🎨
Daffodil: A Coloring and Nature Guide for Kids
🎨
Blue Jay Coloring Page Ideas for Kids
🎨
Snapdragon: A Coloring and Nature Guide for Kids
🎨
The Three Billy Goats Gruff: A Classic Story Coloring Guide for Kids
🔬
Understanding Color Psychology
🧒
Understanding Ages 5-6 in Early Childhood
🍂
Fun St. Patrick's Day Classroom Coloring Ideas
🎨
A Paleontologist Dig Site Coloring Page: Fun Facts for Young Paleontologists
📴
Making the Most of Restaurant Wait Times Without Screens
📐
Fun Drawing Activities for Tessellations
🔤
Learning Sight Words Through Drawing
💗
The Role of Coloring in Creative Journaling
🧘
A Beginner's Guide to Coloring as a Calm-Down Tool
🍂
Seasonal Coloring Guide: Earth Day
💡
How Drawing Encourages Creative Journaling
🎨
Warthog Coloring and Drawing Ideas for Kids
🎨
A Giant Redwood Tree: A Coloring and Nature Guide for Kids
🔎
A Beginner's Guide to Visual Problem-Solving
🎨
Doctor Foster: A Nursery Rhyme Coloring Guide for Kids
🎨
Creative Vehicles Drawing Exercises
🎨
Lettuce Coloring and Drawing Ideas for Kids
👨👩👧
Making the Most of Summer Break Activities
🎨
Lighting for Coloring Sessions: A Buying and Technique Guide
🎨
Holiday Card Making: Free Ideas for Your Next Celebration
🏺
How Ancient Egyptian Art Shaped Human Communication
🎨
A Ship's Anchor Coloring and Drawing Ideas for Kids
🎨
Sharing a Toy: A Simple Life Skill for Kids
🎨
Ancient Sumerian Writing Tablets: An Ancient History Coloring Guide for Kids
🎨
Farm Life Drawing Prompts for Beginners
🎨
a Congratulations Card: Free Ideas for Your Next Celebration
🎨
A Fruit Bowl on the Counter: A Kitchen Guide for Kids and Parents
🎨
An Austrian Traditional Dress: A Coloring and Culture Guide for Kids
🔬
What Is How Light Creates Color?
🔤
How Pictures Help Children Learn Question Words
🎨
A Programmer at a Desk: A Coloring and STEM Guide for Kids
🎨
Teaching Teamwork: A Simple Activity for Kids
🎨
Meet the Construction Worker: A Community Helper Coloring Guide
🏺
The History of Ancient Pottery Art
🎨
A Traditional Woven Textile Pattern: A Coloring and Culture Guide for Kids
🍂
Seasonal Coloring Guide: Father's Day
🎨
Orchid: A Coloring and Nature Guide for Kids
🎨
An Animal-Whisperer Superhero: A Superhero Coloring and Design Guide for Kids
🎨
A Cargo Robot: A Coloring and Invention Guide for Kids
🎨
Honey Making: A Coloring and Food Science Guide for Kids
💗
How Drawing Supports Creative Journaling
🧒
Understanding The Symbol-Making Stage in Early Childhood
🌈
Printable Nature Landscapes Coloring Activities
🎨
A Butterfly Waystation: A Gardening Guide for Kids and Families
🎨
Narwhal Coloring and Drawing Ideas for Kids
🎨
A Horse-Drawn Buggy: A Wild West Coloring and History Guide for Kids
🎨
A Frontier River Crossing: A Wild West Coloring and History Guide for Kids
🎨
A Factory Robot Arm: A Coloring and Invention Guide for Kids
🎨
The Letter N: An Alphabet and Number Coloring Page
🎨
A Family Baking Day: A Kitchen Guide for Kids and Parents
🌈
A Guide to Food and Treats Coloring Pages
🎨
How to Draw a A Cross Shape: A Step-by-Step Guide for Kids
🎨
Flash Flood Awareness: A Family Safety Guide
🎨
A Dairy Farm: A Coloring and Food Science Guide for Kids
🎨
A Vegetable Harvest Basket: A Gardening Guide for Kids and Families
🎨
A Potting Bench: A Gardening Guide for Kids and Families
🎨
Meerkat Coloring and Drawing Ideas for Kids
🎨
Trick or Treating Coloring Ideas and Activities for the Whole Family
🎨
Gnat Coloring and Drawing Ideas for Kids
🎨
Bookmark Printables: Free Ideas for Your Next Celebration
🎨
How Lungs Breathe: A Coloring and Health Guide for Kids
🔤
Using Coloring Pages to Teach Animal Names
🖍️
How to Get Better at Using Complementary Colors
🎨
Tapir Coloring and Drawing Ideas for Kids
🎲
Storyboard Games: A Creative Twist
🎨
Meet the Chef: A Community Helper Coloring Guide
🎨
Meet Sculpture Art: An Art Appreciation Guide for Kids
🍎
A Teacher's Guide to Circle Time Activities
🎨
Cave Formation Coloring Page: A Nature Learning Guide for Kids
✏️
How to Improve Your Drawing Stick Figures
🎨
A Lunch Tray: A Classroom Coloring and Learning Guide
🍎
Classroom Ideas: Assessing Creativity in the Classroom
🎨
Building Blocks Coloring and Drawing Ideas for Kids
🎨
An Ice Cream Stand on the Boardwalk Coloring and Drawing Ideas for Kids
🎨
Orange Coloring and Drawing Ideas for Kids
🧒
Fun Ways to Build Fine Motor Skills
🖌️
A Beginner's Guide to Stippling
🎨
A Long-Necked Herd at a Watering Hole Coloring Page: Fun Facts for Young Paleontologists
🎨
Geyser Eruption Coloring Page: A Nature Learning Guide for Kids
🎨
Staying Informed During a Storm Watch: A Family Safety Guide
💬
Why Infographics Matter in Everyday Life
🎨
A Bandage on a Scrape: A Coloring and Health Guide for Kids
🎨
Hand Puppet Coloring and Drawing Ideas for Kids
🎨
Ring Around the Rosie: A Coloring and Playtime Guide for Kids
🎨
A Medieval Feast: A Medieval Coloring and History Guide for Kids
🎨
Meet the Doctor: A Community Helper Coloring Guide
🎨
Ostrich Coloring Page Ideas for Kids
🎨
The Enormous Turnip: A Classic Story Coloring Guide for Kids
🎨
Ring Around the Rosie: A Nursery Rhyme Coloring Guide for Kids
🎨
Zucchini Coloring and Drawing Ideas for Kids
🎨
A Pirate Flag Skull Coloring and Drawing Ideas for Kids
🧠
Exploring Drawing and Sequential Thinking
🎨
A Knight's Training Yard: A Medieval Coloring and History Guide for Kids
🎨
Cinderella: A Classic Story Coloring Guide for Kids
🎨
A Beach Volleyball Game Coloring and Drawing Ideas for Kids
🖌️
Exploring Using Crayons Creatively
🧘
Simple Steps for Coloring in Silence
🎲
How to Play Treasure Map Games
🎨
A Balloon Toss: A Coloring and Playtime Guide for Kids
🎨
A Castle Dungeon: A Medieval Coloring and History Guide for Kids
🖍️
A Beginner's Guide to Using Complementary Colors
👨👩👧
Creative Low-Mess Activities for Kids
🎨
Ladybug Coloring and Drawing Ideas for Kids
✏️
Easy Steps to Practice Using an Eraser Effectively
🎨
Layering Colors: A Buying and Technique Guide
🎨
Exploring Uranus: A Coloring and Learning Guide for Kids
🎨
A Trail Map: Coloring Ideas for Your Next Family Adventure
🎨
A Royal Feast Hall Table: A Medieval Coloring and History Guide for Kids
🎨
A Camping Checklist: Coloring Ideas for Your Next Family Adventure
🧘
How Coloring as a Calm-Down Tool Can Create a Quiet Moment
🔬
The Science Behind Subtractive Color Mixing
🔬
What Is Additive Color Mixing?
💗
Understanding Expressing Gratitude Through Art
🎨
A Static Electricity Hair Test: A Step-by-Step Science Guide for Kids
🎨
Exploring A Nebula: A Coloring and Learning Guide for Kids
🎲
Drawing Battles: A Creative Twist
🌈
Relaxing Sports Scenes Coloring Activities
🎨
Using Fixative Spray: A Buying and Technique Guide
🎨
Pizza Dough Making: A Coloring and Food Science Guide for Kids
🍎
Simple Back-to-School Activities for Busy Classrooms
🔤
Drawing Activities for Numbers in a New Language
🎨
Armadillo Coloring and Drawing Ideas for Kids
🎨
Growing Plants in Space: A Coloring and Space Mission Guide for Kids
🎨
A Thank You Card for a Vet: A Simple Pet Care Guide for Kids
🎨
Exploring Peru: A Coloring and Culture Guide for Kids
🎨
Ice Cream Making: A Coloring and Food Science Guide for Kids
🍂
Creative Winter Coloring Projects for Classrooms
🌈
Printable Animals Coloring Activities
🎨
A Rowboat to Shore Coloring and Drawing Ideas for Kids
🎨
A Solar-Powered Gadget: A Coloring and STEM Guide for Kids
🎨
Teaching Compassion: A Simple Activity for Kids
🎨
A Snake Shedding Its Skin Coloring and Drawing Ideas for Kids
🎨
Deep Breathing to Relax: A Coloring and Health Guide for Kids
🎨
Pixie Coloring and Drawing Ideas for Kids
🎨
Terrapin Coloring and Drawing Ideas for Kids
🎨
Ant Coloring and Drawing Ideas for Kids
🧘
Exploring Coloring for Sensory Breaks
💡
The Role of Divergent Thinking in Children's Art
🎨
Oak Tree: A Coloring and Nature Guide for Kids
🧠
The Link Between Drawing and Problem-Solving
🎲
How to Play Drawing Prompt Games
🎨
A Splashdown Landing: A Coloring and Space Mission Guide for Kids
🧒
What to Expect When Teaching Ages 3-4
🎨
The Number 10: An Alphabet and Number Coloring Page
🎨
Lavender: A Coloring and Nature Guide for Kids
🎨
Meet the Mechanic: A Community Helper Coloring Guide
🎨
A Banyan Tree: A Coloring and Nature Guide for Kids
🌈
A Guide to Farm Scenes Coloring Pages
🌈
A Guide to Weather Scenes Coloring Pages
🎨
A Portable Site Office Coloring and Drawing Ideas for Kids
🎨
Placemat Coloring Sheets: Free Ideas for Your Next Celebration
🎲
How to Play Scavenger Hunt Drawings
📐
Learning Shapes Through Drawing
🎨
Lily: A Coloring and Nature Guide for Kids
🎨
Marigold: A Coloring and Nature Guide for Kids
🎨
A Melting Ice Race: A Step-by-Step Science Guide for Kids
🎨
A Pencil Case: A Classroom Coloring and Learning Guide
🎨
A Teacher's Desk: A Classroom Coloring and Learning Guide
🎨
Origami Crane Coloring and Drawing Ideas for Kids
💡
Building Combining Ideas Through Coloring and Drawing
🎨
A Wild West Blacksmith: A Wild West Coloring and History Guide for Kids
🎨
A Colombian Traditional Dress: A Coloring and Culture Guide for Kids
🧘
Exploring Guided Mindful Coloring
🎨
Sand Storm Coloring Page: A Nature Learning Guide for Kids
🎨
Goblin Coloring and Drawing Ideas for Kids
🎨
A Heat Shield During Re-Entry: A Coloring and Space Mission Guide for Kids
🎨
A Level and Tape Measure Coloring and Drawing Ideas for Kids
🔎
Using Organizing Research With Sketches to Solve Problems
💗
Understanding Art for Quiet Reflection
🎨
Saving Coloring Pages as PDFs: A Practical Guide
🎨
A Dinosaur Herd Coloring Page: Fun Facts for Young Paleontologists
🎨
A STEM Career Computer Programmer: A Coloring and STEM Guide for Kids
🎨
Remote Control Car Coloring and Drawing Ideas for Kids
💡
Why Personal Artistic Style Matters for Young Artists
🎨
Rocket Stages Separating: A Coloring and Space Mission Guide for Kids
🎨
Skip Counting by Twos: An Alphabet and Number Coloring Page
🎨
Gnome Coloring and Drawing Ideas for Kids
🎨
Weasel Coloring and Drawing Ideas for Kids
🎨
Weeping Willow: A Coloring and Nature Guide for Kids
🎨
Congratulating a Winner: A Simple Social Skill for Kids
🎨
Easy Space and Planets Drawing Ideas
🎨
Stick Insect Coloring and Drawing Ideas for Kids
🍎
A Teacher's Guide to Morning Work Activities
🎨
A Fishing Pier Coloring and Drawing Ideas for Kids
🎨
A Chef's Apron: A Kitchen Guide for Kids and Parents
📴
Hands-On Activities for Camping Trips
🎨
A Rustic Log Cabin: Coloring Ideas for Your Next Family Adventure
🎨
Mountain Peak Coloring Page: A Nature Learning Guide for Kids
🧠
Why Drawing Can Help With Self-Expression
🖌️
Simple Steps for Layering Techniques
🎨
A Moroccan Kaftan: A Coloring and Culture Guide for Kids
🎨
A Density Tower: A Step-by-Step Science Guide for Kids
🎲
How to Play Guess-the-Drawing Games
🎨
Baboon Coloring and Drawing Ideas for Kids
📐
Fun Drawing Activities for Counting
🎨
Great Barrier Reef: Coloring Page and Fun Facts for Kids
🎨
Turnip Coloring and Drawing Ideas for Kids
💗
Creative Approaches to Art for Quiet Reflection
🎨
A Prehistoric Swamp Coloring Page: Fun Facts for Young Paleontologists
🎨
Gift Tag Coloring: Free Ideas for Your Next Celebration
🎨
a Puppet Cutout Printable: Free Ideas for Your Next Celebration
🔤
Drawing Activities for the Alphabet
📴
Hands-On Activities for Summer Vacations
👨👩👧
Easy Morning Routine Activities With Coloring Pages
🎨
A Homemade Periscope: A Step-by-Step Science Guide for Kids
🌈
Fun Sports Scenes Coloring Pages for Kids
🎨
Moth Coloring and Drawing Ideas for Kids
🎨
Cliff Face Coloring Page: A Nature Learning Guide for Kids
💗
Creative Approaches to Expressing Gratitude Through Art
🎨
Fruit Pie Coloring Ideas for Kids Who Love to Create
🎲
Chess Strategy Diagrams: A Creative Twist
🎲
Strategy Sketching for Sports: A Creative Twist
🎨
How to Draw Space and Planets Step by Step
🎨
Boa Constrictor Coloring and Drawing Ideas for Kids
🎨
A Robot Band: A Coloring and Invention Guide for Kids
🏺
What We Know About Hieroglyphics
🎨
Exploring A Meteor Shower: A Coloring and Learning Guide for Kids
🎨
Exploring A Friendly Alien Spaceship: A Coloring and Learning Guide for Kids
🎨
A Circus Tightrope Net Coloring and Drawing Ideas for Kids
👨👩👧
Easy Road Trip Activities With Coloring Pages
🎨
A Lasso Rope: A Wild West Coloring and History Guide for Kids
🔎
Exploring Concept Mapping for Students
🎨
Koala Coloring and Drawing Ideas for Kids
🎨
Valentine's Day Coloring Ideas and Activities for the Whole Family
🎨
Dingo Coloring and Drawing Ideas for Kids
🔬
Understanding Additive Color Mixing
🎨
Artichoke Coloring and Drawing Ideas for Kids
🎨
A Ship Sailing into a Sunset Coloring and Drawing Ideas for Kids
🧒
Drawing Activities for Preschoolers
🎨
A Basket of Croissants: Coloring Ideas and Fun Facts for Kids
🎨
Crop Rotation: A Coloring and Food Science Guide for Kids
🎨
Comparing Tablet Coloring Apps: A Practical Guide
🎨
A Knight's Shield and Sword: A Medieval Coloring and History Guide for Kids
🍎
A Teacher's Guide to Classroom Coloring Stations
🎨
Heat Wave Safety: A Family Safety Guide
🎨
A Sleeping Bag Under the Stars: Coloring Ideas for Your Next Family Adventure
🎨
Choosing a Pencil Sharpener: A Buying and Technique Guide
🎨
Jack and Jill: A Nursery Rhyme Coloring Guide for Kids
🎨
A Trapeze Artist Coloring and Drawing Ideas for Kids
🎨
A Carnival Balloon Animal Coloring and Drawing Ideas for Kids
🎨
A Sound Vibration Experiment: A Step-by-Step Science Guide for Kids
🎨
Triceratops Coloring Page: Fun Facts for Young Paleontologists
🎨
Dryad Coloring and Drawing Ideas for Kids
🎨
First Steps on the Moon: A Coloring and Space Mission Guide for Kids
🎨
The Little Mermaid: A Classic Story Coloring Guide for Kids
🎨
a Calm-Down Corner: A Simple Mindfulness Activity for Kids
🎨
Scented Markers: A Buying and Technique Guide
🎨
A Safe Room at Home: A Family Safety Guide
🔤
How Pictures Help Children Learn Everyday Objects
🍎
How Teachers Can Use Assessing Creativity in the Classroom
🎨
Taking Turns in a Game: A Simple Social Skill for Kids
🎨
A Concrete Foundation Pour Coloring and Drawing Ideas for Kids
🎨
Easy Favorite Foods Drawing Ideas
🎨
How Muscles Work: A Coloring and Health Guide for Kids
🎨
Winter Earmuffs: Coloring Ideas and Activities for the Whole Family
🧘
Why Nature-Inspired Calm Coloring Feels Calming
🎨
How to Draw a Glockenspiel: A Coloring and Music Guide for Kids
🎨
Tag: A Coloring and Playtime Guide for Kids
🎨
Cinco de Mayo Coloring Ideas and Activities for the Whole Family
🎨
Siren Coloring and Drawing Ideas for Kids
🎨
A Simple Trade or Barter Scene: A Money Guide for Kids and Parents
🎨
Lotus Flower: A Coloring and Nature Guide for Kids
🎨
A Cowboy Guitar by the Campfire: A Wild West Coloring and History Guide for Kids
🧒
A Parent's Guide to Ages 5-6
🎨
Ancient Greek Columns: An Ancient History Coloring Guide for Kids
🎨
Hickory Dickory Dock: A Nursery Rhyme Coloring Guide for Kids
🔬
The Science Behind RGB Color Mixing
🎨
Preserving Finished Coloring Pages: A Buying and Technique Guide
🌈
Fun Vehicles Coloring Pages for Kids
🎨
Hopscotch: A Coloring and Playtime Guide for Kids
🎲
Football Play Diagrams: A Creative Twist
🔎
Using Timeline Diagrams to Solve Problems
🔤
How Pictures Help Children Learn the Alphabet
🎨
A Beginner's Guide to Drawing Sports
🎨
A Pair of Pruning Shears: A Gardening Guide for Kids and Families
🎨
Teaching Responsibility: A Simple Activity for Kids
🔬
Understanding CMYK Printing Colors
🎨
How to Draw a Parallelogram: A Step-by-Step Guide for Kids
🎨
Easy Farm Life Drawing Ideas
🎨
Fun Delivery Van Coloring and Drawing Ideas for Kids
🎨
A Beginner's Guide to Drawing Self-Portraits
🎨
A Piggy Bank: A Money Guide for Kids and Parents
🔎
Exploring Sketch Journaling for Students
🎨
Bowling Coloring Pages and Drawing Ideas for Kids
🎨
Avocado Coloring and Drawing Ideas for Kids
🧒
How Drawing Supports First-Time Artists
🎨
Extreme Cold Safety: A Family Safety Guide
🌈
Printable Jungle Scenes Coloring Activities
🎨
A Space Elevator Concept: A Coloring and Space Mission Guide for Kids
🎨
A Backhoe Loader Coloring and Drawing Ideas for Kids
🔎
Exploring Diagrams in Science for Students
🎨
Washing Hands Before Eating: A Coloring and Health Guide for Kids
🖌️
Why Composition Basics Matters for Young Artists
🎨
A Kids' Money Jar Labeled Goals: A Money Guide for Kids and Parents
👨👩👧
Coloring Ideas for Grandparent and Grandchild Activities
🏺
The History of Prehistoric Drawing Tools
🎨
A Cuban Guayabera Shirt: A Coloring and Culture Guide for Kids
🎨
Three Little Kittens: A Nursery Rhyme Coloring Guide for Kids
💡
How Drawing Encourages Open-Ended Play
🎨
Fun Family Portraits Drawing Activities for Kids
🎨
Ancient Egyptian Hieroglyphics: An Ancient History Coloring Guide for Kids
🧠
How Drawing May Support Observation Skills
🖌️
A Beginner's Guide to Layering Techniques
🎨
Cheetah Coloring and Drawing Ideas for Kids
💡
Nurturing Personal Artistic Style at Home
🌈
Relaxing Nature Landscapes Coloring Activities
🎨
Fun Bicycle Coloring and Drawing Ideas for Kids
🎨
A Ballet Barre Practice: A Coloring and Movement Guide for Kids
🍂
Creative Hanukkah Coloring Projects for Classrooms
🎨
Badger Coloring and Drawing Ideas for Kids
🎨
a Bedtime Wind-Down Routine: A Simple Mindfulness Activity for Kids
🎨
Fun Monorail Coloring and Drawing Ideas for Kids
🔬
A Simple Guide to How Light Creates Color
🎨
A Pierogi Plate: Coloring Ideas and Fun Facts for Kids
🌈
Creative Ways to Color Buildings and Castles
🔎
How Timeline Diagrams Support Learning
📐
Why Patterns and Drawing Go Together
🎨
Backyard Squirrel Coloring and Drawing Ideas for Kids
🎨
A Smartwatch: A Coloring and Invention Guide for Kids
🎨
A Homework Folder: A Classroom Coloring and Learning Guide
💗
Understanding Art and Relaxation
🎨
Meet Pointillism: An Art Appreciation Guide for Kids
🎨
Silverfish Coloring and Drawing Ideas for Kids
🎨
A Flamenco Dancer: A Coloring and Movement Guide for Kids
🎨
A Family Discussing a Big Purchase: A Money Guide for Kids and Parents
🔎
How Sketching to Understand Complex Ideas Support Learning
🎨
Fun Hot Air Balloon Coloring and Drawing Ideas for Kids
🧠
Exploring Drawing and Working Memory
🔎
Why Visual Thinkers Use Mind Maps
🌈
Relaxing Mandalas Coloring Activities
🎨
Chore Chart Printables: Free Ideas for Your Next Celebration
🎨
How to Draw a Zither: A Coloring and Music Guide for Kids
🧠
The Link Between Drawing and Sequential Thinking
🖌️
How to Practice Working With Light and Shadow
🎨
Fun Gardens and Flowers Drawing Activities for Kids
🍎
Classroom Ideas: Differentiated Art Instruction
🎨
A Class Election: A Classroom Coloring and Learning Guide
🎨
Cupcake Decorating Coloring Ideas for Kids Who Love to Create
🎨
Walrus Coloring and Drawing Ideas for Kids
🎨
How to Draw a A Grid of Squares: A Step-by-Step Guide for Kids
🌈
Creative Ways to Color Weather Scenes
👨👩👧
Easy Grandparent and Grandchild Activities With Coloring Pages
🎨
A Sandcastle Coloring and Drawing Ideas for Kids
🎨
Garden Composting: A Coloring and Food Science Guide for Kids
🔤
Drawing Activities for Early Literacy Skills
🖍️
Tips for Coloring Skin Tones
🎨
Hydra Coloring and Drawing Ideas for Kids
🎨
Building a Moon Base: A Coloring and Space Mission Guide for Kids
🎨
Fun Buildings and Houses Drawing Activities for Kids
🧒
Fun Ways to Build Ages 3-4
🎨
A Woolly Rhino Coloring Page: Fun Facts for Young Paleontologists
📴
Making the Most of Sick Days at Home Without Screens
📐
How Children Understand Graphs and Charts With Art
🎨
Caiman Coloring and Drawing Ideas for Kids
📐
Teaching Shapes Through Coloring and Drawing
🌈
Relaxing Community Helpers Coloring Activities
🎨
River Bend Coloring Page: A Nature Learning Guide for Kids
🎨
Cricket Coloring Pages and Drawing Ideas for Kids
👨👩👧
Creative After-School Activities for Kids
✏️
Easy Steps to Practice Holding a Pencil Correctly
🎨
A Row of Planted Seeds: A Gardening Guide for Kids and Families
🎨
Easy Everyday Objects Drawing Ideas
🎨
How to Draw a Wind Chimes: A Coloring and Music Guide for Kids
🎨
A Show-and-Tell Object: A Classroom Coloring and Learning Guide
🎨
How to Draw a Zentangle Pattern: A Step-by-Step Guide
🎨
A Pet Birthday Celebration: A Simple Pet Care Guide for Kids
🎨
A Launch Countdown: A Coloring and Space Mission Guide for Kids
🎨
A Carnival Game Booth Coloring and Drawing Ideas for Kids
🎨
Classroom Printing on a Budget: A Practical Guide
🎨
A Kids' Business Idea: A Money Guide for Kids and Parents
🎨
A Medieval Trade Caravan: A Medieval Coloring and History Guide for Kids
🎨
Meet Mosaic Art: An Art Appreciation Guide for Kids
🎨
A Wagon Ride on the Farm Coloring and Drawing Ideas for Kids
📐
How Children Understand Grids and Coordinates With Art
🧘
Why Coloring in Silence Feels Calming
📴
Creative Alternatives to Screens During Weekend Mornings
🎨
A Kids' Pretend Store: A Money Guide for Kids and Parents
💡
Building Creative Confidence Through Coloring and Drawing
🎨
Meet the Scientist: A Community Helper Coloring Guide
🎨
Winter Hot Cocoa by the Fire: Coloring Ideas and Activities for the Whole Family
🎲
Using Drawing for Collaborative Drawing Games
🧒
How Drawing Supports Hand-Eye Coordination
🍂
Fun Winter Classroom Coloring Ideas
🎨
Golf Coloring Pages and Drawing Ideas for Kids
🎨
A Beginner's Guide to Drawing Emotions and Faces
🎨
Kale Coloring and Drawing Ideas for Kids
👨👩👧
Creative Activities for Only Children for Kids
🎨
Marble Run Coloring and Drawing Ideas for Kids
👨👩👧
Coloring Ideas for Low-Mess Activities
🎨
A Solar Oven S'more: A Step-by-Step Science Guide for Kids
🎨
Creative Weather Drawing Exercises
🎨
The Letter Q: An Alphabet and Number Coloring Page
🎨
Fall Pumpkin Carving: Coloring Ideas and Activities for the Whole Family
📴
Creative Alternatives to Screens During Outdoor Picnics
🎨
A Savings Goal Thermometer: A Money Guide for Kids and Parents
🎨
Sea Sponge Coloring and Drawing Ideas for Kids
🎨
A Pet Sitter Visit: A Simple Pet Care Guide for Kids
👨👩👧
Fun and Simple After-School Activities
🎨
Color vs. Black-and-White Printing: A Practical Guide
🎨
Wearing Glasses: A Coloring and Health Guide for Kids
📐
Learning Patterns Through Drawing
🎲
Step-by-Step Drawing-Based Party Games
🍂
Fun Graduation Season Classroom Coloring Ideas
🎨
Tug of War Coloring Pages and Drawing Ideas for Kids
🍂
Creative Spring Coloring Projects for Classrooms
🖌️
Why Outlining Techniques Matters for Young Artists
🎨
A Pet's Name Tag: A Simple Pet Care Guide for Kids
🎨
Meet the Zookeeper: A Community Helper Coloring Guide
🎨
A Mars Rover Deployment: A Coloring and Space Mission Guide for Kids
🎨
An X-Ray Vision Superhero: A Superhero Coloring and Design Guide for Kids
🎨
Viking Explorers: An Ancient History Coloring Guide for Kids
🎨
Delta River Mouth Coloring Page: A Nature Learning Guide for Kids
🎲
Fun Treasure Map Games for Kids
🔎
A Beginner's Guide to Sketching to Understand Complex Ideas
🎨
A Wild Mustang Running Free: A Wild West Coloring and History Guide for Kids
🎨
Comforting a Sad Friend: A Simple Social Skill for Kids
🏺
Why Ancient Egyptian Art Matter to Historians
🎨
a Class Photo Frame: Free Ideas for Your Next Celebration
👨👩👧
Fun and Simple Grandparent and Grandchild Activities
🎨
Burnishing Technique: A Buying and Technique Guide
🎨
Choosing the Right Printer Ink: A Practical Guide
🎨
Wild Turkey Coloring and Drawing Ideas for Kids
🎨
Turning Coloring Pages Into Cards: A Practical Guide
🎨
Teaching Courage: A Simple Activity for Kids
🎨
Fun Vehicles Drawing Activities for Kids
🍎
A Teacher's Guide to Indoor Recess Activities
🎨
Exploring A Spiral Galaxy: A Coloring and Learning Guide for Kids
🎨
The Boy Who Called Wolf: A Classic Story Coloring Guide for Kids
🎨
Easy Dinosaurs Drawing Ideas
🎨
Fun Pickup Truck Coloring and Drawing Ideas for Kids
🍎
Classroom Ideas: Classroom Coloring Stations
🎨
Pumpkin Coloring and Drawing Ideas for Kids
🎨
A Treasure Map Coloring and Drawing Ideas for Kids
🎨
Rain Boots and an Umbrella: Coloring Ideas and Activities for the Whole Family
🎨
Holding the Door for Someone: A Simple Social Skill for Kids
🎨
A Sequoia Tree: A Coloring and Nature Guide for Kids
🎨
Rooster Coloring Page Ideas for Kids
🎨
a Worry Monster Craft: A Simple Mindfulness Activity for Kids
🎨
A Diwali Rangoli Design: Coloring Ideas and Fun Facts for Kids
🎨
A Loop of Repeated Steps: A Coloring and STEM Guide for Kids
🎨
Meet the Fisherman: A Community Helper Coloring Guide
🎨
A Wheelbarrow of Mulch: A Gardening Guide for Kids and Families
🖌️
Simple Steps for Using Colored Pencils
🎨
A Trail of Wildflowers: Coloring Ideas for Your Next Family Adventure
🎨
Teaching Dependability: A Simple Activity for Kids
🌈
A Guide to Fairy Tale Scenes Coloring Pages
🎨
Forbidden City: Coloring Page and Fun Facts for Kids
👨👩👧
Fun and Simple Sibling Bonding Activities
🔬
Understanding Digital vs Traditional Color
🎨
A Superhero Costume Design Contest: A Superhero Coloring and Design Guide for Kids
🎨
Baby Shower Coloring Sheets: Free Ideas for Your Next Celebration
🔤
Learning Animal Names Through Drawing
🧒
How Drawing Supports Ages 2-3
🎨
A Samoan Traditional Lavalava: A Coloring and Culture Guide for Kids
🔬
A Simple Guide to Color Wheels
🖍️
A Beginner's Guide to Coloring Skies and Backgrounds
🎲
Using Drawing for Chess Strategy Diagrams
🎨
Using Please and Thank You at a Restaurant: A Simple Social Skill for Kids
🎨
Sunrise Over Hills Coloring Page: A Nature Learning Guide for Kids
🎨
A Moon Cake for Mid-Autumn Festival: Coloring Ideas and Fun Facts for Kids
🎨
Farm Dog Coloring and Drawing Ideas for Kids
🎨
New Year's Eve Coloring Ideas and Activities for the Whole Family
🖍️
Simple Techniques for Coloring Skies and Backgrounds
🎨
Crystal Unicorn Coloring and Drawing Ideas for Kids
🎨
Zipping a Jacket: A Simple Life Skill for Kids
🎨
Alcohol Markers vs. Water-Based Markers: A Buying and Technique Guide
🎨
Rock-a-Bye Baby: A Nursery Rhyme Coloring Guide for Kids
🍂
Fun Autumn Classroom Coloring Ideas
🖍️
Tips for Coloring With Markers
🌈
Fun Robots and Machines Coloring Pages for Kids
💡
Why Creative Journaling Matters for Young Artists
🎨
A Skyscraper Being Built Coloring and Drawing Ideas for Kids
🎨
Bhangra Dancers: A Coloring and Movement Guide for Kids
🎨
An Allowance Chart: A Money Guide for Kids and Parents
🖌️
Exploring Cross-Hatching
🎨
the First Day of School Coloring Ideas and Activities for the Whole Family
🎨
Meet the Journalist: A Community Helper Coloring Guide
🎨
A Wild West Saddle: A Wild West Coloring and History Guide for Kids
🎨
A Delivery Drone: A Coloring and Invention Guide for Kids
🍂
Printable Spring Coloring Pages for Kids
🏺
Why Cave Paintings Matter to Historians
🎨
Preparing a Go-Bag: A Family Safety Guide
🎨
A Family Reunification Plan: A Family Safety Guide
💡
The Role of Creative Confidence in Children's Art
🎨
A Sea Chart and Compass Coloring and Drawing Ideas for Kids
🎨
Earth Day Coloring Ideas and Activities for the Whole Family
🎨
A Moon Buggy: A Coloring and Space Mission Guide for Kids
💡
Nurturing Free Drawing at Home
🎨
Quail Coloring Page Ideas for Kids
🎨
a Worry Jar Craft: A Simple Mindfulness Activity for Kids
🎨
Staying Positive During an Emergency: A Family Safety Guide
🎨
Sharks and Minnows: A Coloring and Playtime Guide for Kids
🌈
Relaxing Dinosaurs Coloring Activities
🎨
Fun Musical Instruments Drawing Activities for Kids
🔬
Understanding Warm and Cool Colors
🎨
Triangular Crayons for Grip: A Buying and Technique Guide
🎨
Asking for Help Politely: A Simple Life Skill for Kids
🎨
Exploring The Big Dipper: A Coloring and Learning Guide for Kids
🎨
A Dance Recital: A Coloring and Movement Guide for Kids
🎨
Backyard Deer Coloring and Drawing Ideas for Kids
🎨
A Dragon Guarding a Castle: A Medieval Coloring and History Guide for Kids
🎨
A Medieval Scribe Writing: A Medieval Coloring and History Guide for Kids
🎨
A Rocket Engine Ignition: A Coloring and Space Mission Guide for Kids
✏️
Why Drawing Curved Lines Matters for New Artists
🎨
Emotions and Faces Drawing Prompts for Beginners
🎨
A Tisket A Tasket: A Nursery Rhyme Coloring Guide for Kids
🖌️
Exploring Using Oil Pastels
🎨
A Castle Rose Garden: A Medieval Coloring and History Guide for Kids
🎨
Exploring Ireland: A Coloring and Culture Guide for Kids
🎨
Friendship Kindness Cards: A Simple Mindfulness Activity for Kids
✏️
Fun Exercises for Pencil Control
💗
Exploring What Art Therapy Actually Is Through Art
💗
Exploring Art for Quiet Reflection Through Art
🎨
A Boardwalk Bumper Cars Ride Coloring and Drawing Ideas for Kids
🧠
Exploring Drawing and Observation Skills
🎨
A Lantern-Lit Ship at Night Coloring and Drawing Ideas for Kids
🎨
A Tunnel Boring Machine Coloring and Drawing Ideas for Kids
🎨
The Maya Pyramid Temples: An Ancient History Coloring Guide for Kids
🎨
Daddy Long Legs Coloring and Drawing Ideas for Kids
✏️
How to Improve Your Drawing Paper Types
🎨
How to Draw a Gong: A Coloring and Music Guide for Kids
🧠
How Drawing May Support Patience
🎨
Concert Stage Lights: A Coloring and Movement Guide for Kids
🎨
Germs and Handwashing: A Coloring and Health Guide for Kids
🎨
Octopus Coloring and Drawing Ideas for Kids
💡
Nurturing Daydreaming at Home
👨👩👧
Fun and Simple Low-Mess Activities
🎨
A Forest Ranger Station: Coloring Ideas for Your Next Family Adventure
📐
How Children Understand Sequences With Art
🎨
Teaching Wisdom: A Simple Activity for Kids
🍂
Printable Summer Coloring Pages for Kids
🎨
Exploring Nepal: A Coloring and Culture Guide for Kids
🧠
How Drawing May Support Spatial Awareness
🎨
Double Rainbow Coloring Page: A Nature Learning Guide for Kids
🎲
Using Drawing for Visual Puzzle Games
🎨
Fun Birds Drawing Activities for Kids
🎨
Bubble Breathing: A Simple Mindfulness Activity for Kids
🎨
A Starfish on the Sand Coloring and Drawing Ideas for Kids
🧠
How Drawing May Support Fine Motor Coordination
🖌️
How to Practice Composition Basics
📴
Creative Alternatives to Screens During Camping Trips
💡
Nurturing Combining Ideas at Home
🖌️
Why Using Oil Pastels Matters for Young Artists
🎨
A Medieval Village Market: A Medieval Coloring and History Guide for Kids
🎨
Canada Day Coloring Ideas and Activities for the Whole Family
👨👩👧
Coloring Ideas for Bedtime Wind-Down Routines
💗
The Role of Coloring in Art for Quiet Reflection
🎨
The Number 13: An Alphabet and Number Coloring Page
📐
Fun Drawing Activities for Patterns
🎲
Step-by-Step Memory Matching Games
🎨
A Chameleon Changing Colors Coloring and Drawing Ideas for Kids
🎨
Mindful Eating: A Simple Mindfulness Activity for Kids
🍂
Creative Valentine's Day Coloring Projects for Classrooms
🎨
A Training Centrifuge: A Coloring and Space Mission Guide for Kids
🎨
Mindful Coloring Mandalas: A Simple Mindfulness Activity for Kids
🎨
Exploring the Philippines: A Coloring and Culture Guide for Kids
🔤
Learning the Alphabet Through Drawing
🎨
How to Draw a Moon Mandala: A Step-by-Step Guide
🎨
A Garden Fairy House: A Gardening Guide for Kids and Families
🔎
Why Visual Thinkers Use Flowcharts
🍂
Celebrate Hanukkah With Coloring Activities
🎨
Eco-Friendly Printing: A Practical Guide
💡
The Role of Free Drawing in Children's Art
🎲
Using Drawing for Tic-Tac-Toe Variations
🎨
A Medieval Falconer: A Medieval Coloring and History Guide for Kids
🎨
Meet the Architect: A Community Helper Coloring Guide
🎨
A House of Mirrors Coloring and Drawing Ideas for Kids
📴
Screen-Free Coloring Ideas for Holiday Travel
👨👩👧
Creative Sibling Bonding Activities for Kids
👨👩👧
Coloring Ideas for Quiet Time Activities
🖍️
Why Coloring Cartoon Characters Makes a Difference
🎨
The Number 18: An Alphabet and Number Coloring Page
💡
The Role of Making Mistakes in Art in Children's Art
🌈
Fun Seasonal Scenes Coloring Pages for Kids
🎨
A Castle Drawbridge: A Medieval Coloring and History Guide for Kids
🎨
Saying Please and Thank You: A Simple Life Skill for Kids
🎨
Milkshake Coloring Ideas for Kids Who Love to Create
🎨
Little Red Riding Hood: A Classic Story Coloring Guide for Kids
🧒
What to Expect When Teaching Pencil Grip Development
🎨
Making a Grocery List: A Simple Life Skill for Kids
🎨
Kids Yoga Poses for Calm: A Simple Mindfulness Activity for Kids
✏️
How to Improve Your Sketching Basics
🎨
A Classroom Aquarium: A Classroom Coloring and Learning Guide
🎨
A Summer Swimsuit: Coloring Ideas and Activities for the Whole Family
💡
The Role of Creative Journaling in Children's Art
🎨
Meet the Judge: A Community Helper Coloring Guide
👨👩👧
Making the Most of Outdoor-Inspired Drawing
🎨
A Superhero Training Obstacle Course: A Superhero Coloring and Design Guide for Kids
🍂
Printable Thanksgiving Coloring Pages for Kids
🎨
A Grater: A Kitchen Guide for Kids and Parents
🎨
Fun Nature Scenes Drawing Activities for Kids
🎨
a Growth Mindset Poster: A Simple Mindfulness Activity for Kids
🎨
A Circus Elephant Coloring and Drawing Ideas for Kids
📴
Making the Most of Waiting Rooms Without Screens
🎨
A Cowboy Bandit on Horseback: A Wild West Coloring and History Guide for Kids
🎨
Diwali Coloring Ideas and Activities for the Whole Family
🌈
Relaxing Space Coloring Activities
🎨
How to Draw Under the Sea Step by Step
🖍️
A Beginner's Guide to Choosing Paper for Coloring
🎨
A Kite Festival in the Sky: Coloring Ideas and Fun Facts for Kids
🎨
Teaching Generosity: A Simple Activity for Kids
🎨
an Emotional Regulation Toolkit: A Simple Mindfulness Activity for Kids
🧒
Understanding Fine Motor Skills in Early Childhood
🌈
Fun Ocean Life Coloring Pages for Kids
🌈
Fun Flowers and Gardens Coloring Pages for Kids
🎨
Being a Good Sport After Losing: A Simple Social Skill for Kids
🎨
A Frog on a Lily Pad Coloring and Drawing Ideas for Kids
🎨
Standing Up for a Friend: A Simple Social Skill for Kids
🎨
Packing a Lunch: A Simple Life Skill for Kids
🍎
A Teacher's Guide to Classroom Printable Activities
🎨
How to Draw a A Shape Puzzle Page: A Step-by-Step Guide for Kids
🎨
Cabbage Coloring and Drawing Ideas for Kids
🎨
A Violinist Performing: A Coloring and Movement Guide for Kids
🎨
A Kids' Cooking Class Scene: A Kitchen Guide for Kids and Parents
🎨
Pow Wow Dancers: A Coloring and Movement Guide for Kids
🎨
Moose Coloring and Drawing Ideas for Kids
🎨
Cactus: A Coloring and Nature Guide for Kids
🎨
Niagara Falls: Coloring Page and Fun Facts for Kids
🎨
Setting an Alarm Clock: A Simple Life Skill for Kids
📴
Why Coloring Beats Scrolling on Weekend Mornings
🎨
Australia Day Coloring Ideas and Activities for the Whole Family
🎨
A Camping Flashlight: Coloring Ideas for Your Next Family Adventure
🎨
A Dog Learning to Fetch: A Simple Pet Care Guide for Kids
📐
Fun Drawing Activities for Grids and Coordinates
🎨
Exploring Sweden: A Coloring and Culture Guide for Kids
🎨
A Science Fair Project: A Classroom Coloring and Learning Guide
🍎
Simple Assessing Creativity in the Classroom for Busy Classrooms
🧠
Exploring Drawing and Spatial Awareness
🎨
A Vertical Garden Wall: A Gardening Guide for Kids and Families
🍂
Celebrate Father's Day With Coloring Activities
🎨
Carrot Coloring and Drawing Ideas for Kids
🔤
Visual Vocabulary: Descriptive Words
🔤
Visual Vocabulary: Story Sequencing
📐
Fun Drawing Activities for Sequences
🎨
A Cowboy Campfire Sing-Along: A Wild West Coloring and History Guide for Kids
🎨
Solomon Grundy: A Nursery Rhyme Coloring Guide for Kids
🌈
Creative Ways to Color Emotions and Faces
🎨
Iguazu Falls: Coloring Page and Fun Facts for Kids
🎨
a Sticker Chart Printable: Free Ideas for Your Next Celebration
🎨
Eid al-Fitr Coloring Ideas and Activities for the Whole Family
🎨
Father's Day Coloring Ideas and Activities for the Whole Family
🎨
A Kitchen Apron for Kids: A Kitchen Guide for Kids and Parents
🎨
Okra Coloring and Drawing Ideas for Kids
🎨
A Marching Band Drumline: A Coloring and Movement Guide for Kids
🎨
An Egyptian Traditional Galabeya: A Coloring and Culture Guide for Kids
🎨
Sleepover Activity Ideas: Free Ideas for Your Next Celebration
🎨
Teaching Gratitude Journaling: A Simple Activity for Kids
🎨
A Homemade Bubble Solution: A Step-by-Step Science Guide for Kids
🎨
A Group Campfire Sing-Along: Coloring Ideas for Your Next Family Adventure
🌈
A Guide to Everyday Objects Coloring Pages
 A Beginner's Guide to Drawing Curved Lines
🎨
How to Draw a Clarinet: A Coloring and Music Guide for Kids
🧘
Simple Steps for Guided Mindful Coloring
🎨
Dominoes Coloring and Drawing Ideas for Kids
🎨
A Dinosaur Volcano Scene Coloring Page: Fun Facts for Young Paleontologists
🎨
Fun Everyday Objects Drawing Activities for Kids
🎨
An Asteroid Mining Concept: A Coloring and Space Mission Guide for Kids
💗
How Drawing Supports Processing Big Feelings
🎨
Window Cling Coloring: Free Ideas for Your Next Celebration
🎨
Tide Rock Pool Coloring Page: A Nature Learning Guide for Kids
🖍️
How to Get Better at Choosing Your First Coloring Pencils
🎨
Sandbox Coloring and Drawing Ideas for Kids
👨👩👧
Easy Travel-Friendly Activities With Coloring Pages
🌈
Relaxing Everyday Objects Coloring Activities
🔬
Subtractive Color Mixing Explained for Kids
🎨
An Oktoberfest Dirndl Dress: Coloring Ideas and Fun Facts for Kids
✏️
How to Improve Your Drawing Simple Animals
🧒
Understanding Hand-Eye Coordination in Early Childhood
🎨
Brussels Sprout Coloring and Drawing Ideas for Kids
🍎
Simple Group Art Projects for Busy Classrooms
🍎
Simple Bulletin Board Ideas for Busy Classrooms
🎨
Candy Jar Coloring Ideas for Kids Who Love to Create
🖍️
How to Get Better at Coloring Skin Tones
🧘
Exploring Coloring in Silence
🎨
An Ancient Marketplace Bazaar: An Ancient History Coloring Guide for Kids
🍎
How Teachers Can Use Cross-Curricular Art Lessons
🌈
Printable Seasonal Scenes Coloring Activities
🎨
Rocking Horse Coloring and Drawing Ideas for Kids
🎨
Magnolia Flower: A Coloring and Nature Guide for Kids
🎨
Teaching Assertiveness: A Simple Activity for Kids
🧒
What to Expect When Teaching Ages 4-5
🎨
A Peruvian Poncho: A Coloring and Culture Guide for Kids
🎨
A Ringmaster's Top Hat Coloring and Drawing Ideas for Kids
🏺
Why Ancient Cave Pigments Matter to Historians
🎨
A Simple Water Filter: A Step-by-Step Science Guide for Kids
🏺
How Ancient Symbols Shaped Human Communication
🎨
How to Draw a Mandala With Hearts: A Step-by-Step Guide
🎨
Meet the Sea Captain: A Community Helper Coloring Guide
🎨
Ice Skating Coloring Pages and Drawing Ideas for Kids
🎨
Monday's Child: A Nursery Rhyme Coloring Guide for Kids
🎨
Greenhouse Growing: A Coloring and Food Science Guide for Kids
🧠
Can Drawing Improve Critical Thinking?
🖌️
How to Practice Using Crayons Creatively
🔎
How Diagrams in Science Support Learning
🎨
Choosing Crayons for Toddlers: A Buying and Technique Guide
🎨
The Snow Queen: A Classic Story Coloring Guide for Kids
🎨
An Ancient Greek Olympic Athlete: An Ancient History Coloring Guide for Kids
🖌️
How to Practice Using Oil Pastels
🎨
Griffin Coloring and Drawing Ideas for Kids
📐
Learning Number Lines Through Drawing
🎨
Ogre Coloring and Drawing Ideas for Kids
🎨
Packing a Backpack: A Simple Life Skill for Kids
🌈
A Guide to Holiday Scenes Coloring Pages
A Beginner's Guide to Drawing Curved Lines
🎨
How to Draw a Clarinet: A Coloring and Music Guide for Kids
🧘
Simple Steps for Guided Mindful Coloring
🎨
Dominoes Coloring and Drawing Ideas for Kids
🎨
A Dinosaur Volcano Scene Coloring Page: Fun Facts for Young Paleontologists
🎨
Fun Everyday Objects Drawing Activities for Kids
🎨
An Asteroid Mining Concept: A Coloring and Space Mission Guide for Kids
💗
How Drawing Supports Processing Big Feelings
🎨
Window Cling Coloring: Free Ideas for Your Next Celebration
🎨
Tide Rock Pool Coloring Page: A Nature Learning Guide for Kids
🖍️
How to Get Better at Choosing Your First Coloring Pencils
🎨
Sandbox Coloring and Drawing Ideas for Kids
👨👩👧
Easy Travel-Friendly Activities With Coloring Pages
🌈
Relaxing Everyday Objects Coloring Activities
🔬
Subtractive Color Mixing Explained for Kids
🎨
An Oktoberfest Dirndl Dress: Coloring Ideas and Fun Facts for Kids
✏️
How to Improve Your Drawing Simple Animals
🧒
Understanding Hand-Eye Coordination in Early Childhood
🎨
Brussels Sprout Coloring and Drawing Ideas for Kids
🍎
Simple Group Art Projects for Busy Classrooms
🍎
Simple Bulletin Board Ideas for Busy Classrooms
🎨
Candy Jar Coloring Ideas for Kids Who Love to Create
🖍️
How to Get Better at Coloring Skin Tones
🧘
Exploring Coloring in Silence
🎨
An Ancient Marketplace Bazaar: An Ancient History Coloring Guide for Kids
🍎
How Teachers Can Use Cross-Curricular Art Lessons
🌈
Printable Seasonal Scenes Coloring Activities
🎨
Rocking Horse Coloring and Drawing Ideas for Kids
🎨
Magnolia Flower: A Coloring and Nature Guide for Kids
🎨
Teaching Assertiveness: A Simple Activity for Kids
🧒
What to Expect When Teaching Ages 4-5
🎨
A Peruvian Poncho: A Coloring and Culture Guide for Kids
🎨
A Ringmaster's Top Hat Coloring and Drawing Ideas for Kids
🏺
Why Ancient Cave Pigments Matter to Historians
🎨
A Simple Water Filter: A Step-by-Step Science Guide for Kids
🏺
How Ancient Symbols Shaped Human Communication
🎨
How to Draw a Mandala With Hearts: A Step-by-Step Guide
🎨
Meet the Sea Captain: A Community Helper Coloring Guide
🎨
Ice Skating Coloring Pages and Drawing Ideas for Kids
🎨
Monday's Child: A Nursery Rhyme Coloring Guide for Kids
🎨
Greenhouse Growing: A Coloring and Food Science Guide for Kids
🧠
Can Drawing Improve Critical Thinking?
🖌️
How to Practice Using Crayons Creatively
🔎
How Diagrams in Science Support Learning
🎨
Choosing Crayons for Toddlers: A Buying and Technique Guide
🎨
The Snow Queen: A Classic Story Coloring Guide for Kids
🎨
An Ancient Greek Olympic Athlete: An Ancient History Coloring Guide for Kids
🖌️
How to Practice Using Oil Pastels
🎨
Griffin Coloring and Drawing Ideas for Kids
📐
Learning Number Lines Through Drawing
🎨
Ogre Coloring and Drawing Ideas for Kids
🎨
Packing a Backpack: A Simple Life Skill for Kids
🌈
A Guide to Holiday Scenes Coloring Pages
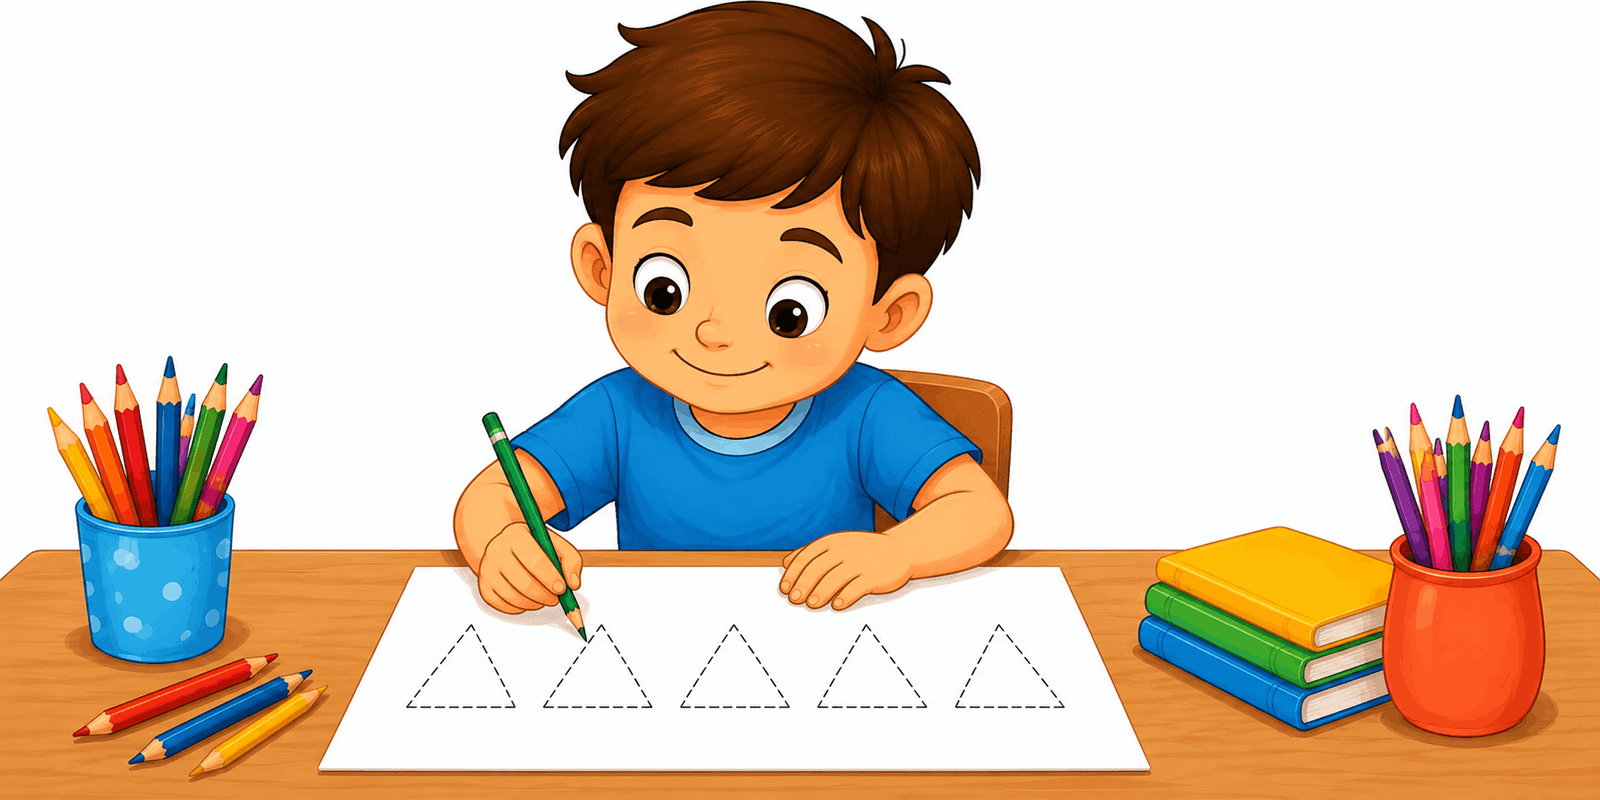 A Beginner's Guide to Drawing Triangles
🎨
Severe Weather Warning Signs: A Family Safety Guide
🧠
Can Drawing Improve Imagination?
🎨
Kitchen Utensils Coloring Ideas for Kids Who Love to Create
🎨
Memory Match Cards Coloring and Drawing Ideas for Kids
🎨
A Cat Being Brushed: A Simple Pet Care Guide for Kids
🌈
A Guide to Sports Scenes Coloring Pages
👨👩👧
Making the Most of Quiet Time Activities
🎨
Little Miss Muffet: A Nursery Rhyme Coloring Guide for Kids
🎨
Exploring A Space Telescope: A Coloring and Learning Guide for Kids
🍎
How Teachers Can Use Circle Time Activities
🖍️
Why Coloring With Markers Makes a Difference
🧒
Drawing Activities for Ages 2-3
🎨
A Pet's First Day Home: A Simple Pet Care Guide for Kids
🌈
Flowers and Gardens Coloring Ideas for Classrooms
🎨
A Kwanzaa Kinara: Coloring Ideas and Fun Facts for Kids
🎨
A Window Box Planter: A Gardening Guide for Kids and Families
🎨
A Robot Dog: A Coloring and Invention Guide for Kids
🎨
Radish Coloring and Drawing Ideas for Kids
🖌️
A Beginner's Guide to Composition Basics
🎨
A Sandbox Dig: A Coloring and Playtime Guide for Kids
🎨
Meet the Park Ranger: A Community Helper Coloring Guide
🍂
Printable Hanukkah Coloring Pages for Kids
🧘
Simple Steps for Nature-Inspired Calm Coloring
🎨
Egg Collecting: A Coloring and Food Science Guide for Kids
🎨
A Cutting Knife (Kid-Safe): A Kitchen Guide for Kids and Parents
🍂
Creative Birthday Celebrations Coloring Projects for Classrooms
📴
Screen-Free Coloring Ideas for Waiting Rooms
🎨
Yoga Stretches for Kids: A Coloring and Health Guide for Kids
🔬
What Is Subtractive Color Mixing?
🎨
Tango Dancers: A Coloring and Movement Guide for Kids
🧠
How Drawing May Support Sequential Thinking
🎨
A Microphone on Stage: A Coloring and Movement Guide for Kids
🖍️
Simple Techniques for Choosing Paper for Coloring
🎨
Meet Michelangelo: An Art Appreciation Guide for Kids
🎨
Venus Flytrap: A Coloring and Nature Guide for Kids
🎨
A Waterfall Hike: Coloring Ideas for Your Next Family Adventure
🧘
How Coloring Before Exams Can Create a Quiet Moment
👨👩👧
Fun and Simple Outdoor-Inspired Drawing
🔎
Exploring Idea Webs for Students
🎨
A Simple Circuit with a Light Bulb: A Step-by-Step Science Guide for Kids
🎨
A Field Day Race: A Classroom Coloring and Learning Guide
🎨
A Garden Gate: A Gardening Guide for Kids and Families
🎨
Zombie Tag: A Coloring and Playtime Guide for Kids
🎨
Teaching Patience: A Simple Activity for Kids
📴
Hands-On Activities for Outdoor Picnics
🎨
A Piggy Bank Shaped Like an Animal: A Money Guide for Kids and Parents
👨👩👧
Easy Budget-Friendly Activities With Coloring Pages
🎨
Asking Before Borrowing Something: A Simple Social Skill for Kids
🎨
Animals Drawing Prompts for Beginners
🎨
A Multicultural Potluck Table: Coloring Ideas and Fun Facts for Kids
🎨
A Class Map on the Wall: A Classroom Coloring and Learning Guide
🎨
A Circuit Board: A Coloring and STEM Guide for Kids
🎨
A Simple Machine Wheel and Axle: A Coloring and STEM Guide for Kids
🎨
Tiger Coloring and Drawing Ideas for Kids
🧠
Exploring Drawing and Problem-Solving
🎨
A Homemade Fire Extinguisher Demo: A Step-by-Step Science Guide for Kids
🎨
A Book Fair Table: A Classroom Coloring and Learning Guide
🎲
How to Play Memory Matching Games
👨👩👧
Coloring Ideas for After-School Activities
🎨
Answering the Phone Politely: A Simple Social Skill for Kids
🎨
A Frontier Fort: A Wild West Coloring and History Guide for Kids
🎨
A Simple Electric Circuit: A Step-by-Step Science Guide for Kids
🎨
How to Draw a A Cluster of Stars: A Step-by-Step Guide for Kids
🎨
A Folk Dance Circle: A Coloring and Movement Guide for Kids
🎨
Wiping Up a Spill: A Simple Life Skill for Kids
🎨
A Ranch Barn: A Wild West Coloring and History Guide for Kids
🍎
Classroom Ideas: Art Lessons for History Class
🍎
How Teachers Can Use Indoor Recess Activities
🎨
A Beginner's Guide to Drawing Birds
🎨
Fall Apple Picking: Coloring Ideas and Activities for the Whole Family
💡
The Role of Personal Artistic Style in Children's Art
📐
How Children Understand Shapes With Art
🏺
What We Know About Ancient Art Materials
🎨
A Kitchen Scale: A Kitchen Guide for Kids and Parents
🎨
A Fall Flannel Jacket: Coloring Ideas and Activities for the Whole Family
🎨
Jumping in Leaf Piles: Coloring Ideas and Activities for the Whole Family
🎨
Meet Jackson Pollock: An Art Appreciation Guide for Kids
🎨
How to Draw Musical Instruments Step by Step
🍎
Classroom Ideas: Morning Work Activities
🍂
Printable New Year Coloring Pages for Kids
🎨
Double-Sided Printing: A Practical Guide
🎨
A Beginner's Guide to Drawing Castles
💡
Nurturing Imaginative Play at Home
🧒
Understanding Ages 2-3 in Early Childhood
🎨
One Two Buckle My Shoe: A Nursery Rhyme Coloring Guide for Kids
🖍️
A Beginner's Guide to Choosing a Color Palette
🎨
Coloring Page Display Wall Ideas: A Practical Guide
🎨
The Letter M: An Alphabet and Number Coloring Page
🍂
Creative Independence Day Coloring Projects for Classrooms
🎨
A Pirate's Parrot Squawking Coloring and Drawing Ideas for Kids
🎨
Hopscotch Court Coloring and Drawing Ideas for Kids
🎨
Sand Dollar Coloring and Drawing Ideas for Kids
🌈
Relaxing Seasonal Scenes Coloring Activities
🍎
How Teachers Can Use Early Finisher Activities
🎨
Mongoose Coloring and Drawing Ideas for Kids
🎨
Meet Edgar Degas: An Art Appreciation Guide for Kids
🎨
Stonehenge: Coloring Page and Fun Facts for Kids
🎨
A Growing-Power Superhero: A Superhero Coloring and Design Guide for Kids
🎨
A Brazilian Carnival Costume: A Coloring and Culture Guide for Kids
🧒
Understanding Pattern Recognition in Early Childhood
🎨
Chicken Coloring and Drawing Ideas for Kids
🎨
A Visit to the Doctor: A Coloring and Health Guide for Kids
🎨
the Winter Solstice Coloring Ideas and Activities for the Whole Family
🎨
An Ethiopian Habesha Kemis: A Coloring and Culture Guide for Kids
🎨
The Cat and the Fiddle: A Nursery Rhyme Coloring Guide for Kids
🎨
Groundhog Day Coloring Ideas and Activities for the Whole Family
🎨
Sweeping a Floor: A Simple Life Skill for Kids
🎨
A Milk Plastic Experiment: A Step-by-Step Science Guide for Kids
🎨
Meet Still Life Painting: An Art Appreciation Guide for Kids
🎨
Fun Sports Drawing Activities for Kids
🎨
A Fire-Power Superhero: A Superhero Coloring and Design Guide for Kids
🎨
Mindful Listening: A Simple Mindfulness Activity for Kids
🎨
Counting Coins: A Money Guide for Kids and Parents
🌈
A Guide to Dinosaurs Coloring Pages
🎨
A Family Preparedness Backpack: A Family Safety Guide
🎨
A Castle Herb Garden: A Medieval Coloring and History Guide for Kids
🎨
Robin Coloring Page Ideas for Kids
🎨
An Astronaut's Exercise Routine: A Coloring and Space Mission Guide for Kids
🔬
The Science Behind CMYK Printing Colors
🖍️
Why Coloring Animals Realistically Makes a Difference
🌈
Printable Robots and Machines Coloring Activities
🎨
A Birthday Money Gift: A Money Guide for Kids and Parents
🎨
Kingfisher Coloring Page Ideas for Kids
🎨
Vulture Coloring Page Ideas for Kids
👨👩👧
Fun and Simple Waiting Room Activities
🔎
Exploring Visual Problem-Solving for Students
🧘
Simple Steps for Bedtime Coloring Routines
🎨
A Muffin Tin: A Kitchen Guide for Kids and Parents
🎨
Meet the Librarian: A Community Helper Coloring Guide
🎨
Raven Coloring Page Ideas for Kids
🎨
The Gingerbread Man: A Classic Story Coloring Guide for Kids
🎨
Nightingale Coloring Page Ideas for Kids
🎨
A Tea Ceremony Setting: Coloring Ideas and Fun Facts for Kids
🎨
a Word Search Coloring Combo: Free Ideas for Your Next Celebration
👨👩👧
Creative Travel-Friendly Activities for Kids
🎨
Sea Lion Coloring and Drawing Ideas for Kids
🎨
Machu Picchu: Coloring Page and Fun Facts for Kids
🎨
Uluru: Coloring Page and Fun Facts for Kids
🎨
A Desert Coyote Howling at the Moon: A Wild West Coloring and History Guide for Kids
🎨
How to Draw a A Big and Small Shape Pair: A Step-by-Step Guide for Kids
🎨
Orca Coloring and Drawing Ideas for Kids
🎨
A Medieval Windmill: A Medieval Coloring and History Guide for Kids
✏️
Easy Steps to Practice Pencil Control
🎨
A Measuring Cup Set: A Kitchen Guide for Kids and Parents
🔤
How Pictures Help Children Learn Colors in a New Language
🎨
Line Dancing: A Coloring and Movement Guide for Kids
🎨
A Computer Server Room Concept: A Coloring and STEM Guide for Kids
🧠
Exploring Drawing and Visual Thinking
🎨
Yeti Coloring and Drawing Ideas for Kids
🎨
Easy Sports Drawing Ideas
🧠
The Link Between Drawing and Fine Motor Coordination
👨👩👧
Creative Holiday Break Activities for Kids
🎨
How to Draw a Dreamcatcher Pattern: A Step-by-Step Guide
A Beginner's Guide to Drawing Triangles
🎨
Severe Weather Warning Signs: A Family Safety Guide
🧠
Can Drawing Improve Imagination?
🎨
Kitchen Utensils Coloring Ideas for Kids Who Love to Create
🎨
Memory Match Cards Coloring and Drawing Ideas for Kids
🎨
A Cat Being Brushed: A Simple Pet Care Guide for Kids
🌈
A Guide to Sports Scenes Coloring Pages
👨👩👧
Making the Most of Quiet Time Activities
🎨
Little Miss Muffet: A Nursery Rhyme Coloring Guide for Kids
🎨
Exploring A Space Telescope: A Coloring and Learning Guide for Kids
🍎
How Teachers Can Use Circle Time Activities
🖍️
Why Coloring With Markers Makes a Difference
🧒
Drawing Activities for Ages 2-3
🎨
A Pet's First Day Home: A Simple Pet Care Guide for Kids
🌈
Flowers and Gardens Coloring Ideas for Classrooms
🎨
A Kwanzaa Kinara: Coloring Ideas and Fun Facts for Kids
🎨
A Window Box Planter: A Gardening Guide for Kids and Families
🎨
A Robot Dog: A Coloring and Invention Guide for Kids
🎨
Radish Coloring and Drawing Ideas for Kids
🖌️
A Beginner's Guide to Composition Basics
🎨
A Sandbox Dig: A Coloring and Playtime Guide for Kids
🎨
Meet the Park Ranger: A Community Helper Coloring Guide
🍂
Printable Hanukkah Coloring Pages for Kids
🧘
Simple Steps for Nature-Inspired Calm Coloring
🎨
Egg Collecting: A Coloring and Food Science Guide for Kids
🎨
A Cutting Knife (Kid-Safe): A Kitchen Guide for Kids and Parents
🍂
Creative Birthday Celebrations Coloring Projects for Classrooms
📴
Screen-Free Coloring Ideas for Waiting Rooms
🎨
Yoga Stretches for Kids: A Coloring and Health Guide for Kids
🔬
What Is Subtractive Color Mixing?
🎨
Tango Dancers: A Coloring and Movement Guide for Kids
🧠
How Drawing May Support Sequential Thinking
🎨
A Microphone on Stage: A Coloring and Movement Guide for Kids
🖍️
Simple Techniques for Choosing Paper for Coloring
🎨
Meet Michelangelo: An Art Appreciation Guide for Kids
🎨
Venus Flytrap: A Coloring and Nature Guide for Kids
🎨
A Waterfall Hike: Coloring Ideas for Your Next Family Adventure
🧘
How Coloring Before Exams Can Create a Quiet Moment
👨👩👧
Fun and Simple Outdoor-Inspired Drawing
🔎
Exploring Idea Webs for Students
🎨
A Simple Circuit with a Light Bulb: A Step-by-Step Science Guide for Kids
🎨
A Field Day Race: A Classroom Coloring and Learning Guide
🎨
A Garden Gate: A Gardening Guide for Kids and Families
🎨
Zombie Tag: A Coloring and Playtime Guide for Kids
🎨
Teaching Patience: A Simple Activity for Kids
📴
Hands-On Activities for Outdoor Picnics
🎨
A Piggy Bank Shaped Like an Animal: A Money Guide for Kids and Parents
👨👩👧
Easy Budget-Friendly Activities With Coloring Pages
🎨
Asking Before Borrowing Something: A Simple Social Skill for Kids
🎨
Animals Drawing Prompts for Beginners
🎨
A Multicultural Potluck Table: Coloring Ideas and Fun Facts for Kids
🎨
A Class Map on the Wall: A Classroom Coloring and Learning Guide
🎨
A Circuit Board: A Coloring and STEM Guide for Kids
🎨
A Simple Machine Wheel and Axle: A Coloring and STEM Guide for Kids
🎨
Tiger Coloring and Drawing Ideas for Kids
🧠
Exploring Drawing and Problem-Solving
🎨
A Homemade Fire Extinguisher Demo: A Step-by-Step Science Guide for Kids
🎨
A Book Fair Table: A Classroom Coloring and Learning Guide
🎲
How to Play Memory Matching Games
👨👩👧
Coloring Ideas for After-School Activities
🎨
Answering the Phone Politely: A Simple Social Skill for Kids
🎨
A Frontier Fort: A Wild West Coloring and History Guide for Kids
🎨
A Simple Electric Circuit: A Step-by-Step Science Guide for Kids
🎨
How to Draw a A Cluster of Stars: A Step-by-Step Guide for Kids
🎨
A Folk Dance Circle: A Coloring and Movement Guide for Kids
🎨
Wiping Up a Spill: A Simple Life Skill for Kids
🎨
A Ranch Barn: A Wild West Coloring and History Guide for Kids
🍎
Classroom Ideas: Art Lessons for History Class
🍎
How Teachers Can Use Indoor Recess Activities
🎨
A Beginner's Guide to Drawing Birds
🎨
Fall Apple Picking: Coloring Ideas and Activities for the Whole Family
💡
The Role of Personal Artistic Style in Children's Art
📐
How Children Understand Shapes With Art
🏺
What We Know About Ancient Art Materials
🎨
A Kitchen Scale: A Kitchen Guide for Kids and Parents
🎨
A Fall Flannel Jacket: Coloring Ideas and Activities for the Whole Family
🎨
Jumping in Leaf Piles: Coloring Ideas and Activities for the Whole Family
🎨
Meet Jackson Pollock: An Art Appreciation Guide for Kids
🎨
How to Draw Musical Instruments Step by Step
🍎
Classroom Ideas: Morning Work Activities
🍂
Printable New Year Coloring Pages for Kids
🎨
Double-Sided Printing: A Practical Guide
🎨
A Beginner's Guide to Drawing Castles
💡
Nurturing Imaginative Play at Home
🧒
Understanding Ages 2-3 in Early Childhood
🎨
One Two Buckle My Shoe: A Nursery Rhyme Coloring Guide for Kids
🖍️
A Beginner's Guide to Choosing a Color Palette
🎨
Coloring Page Display Wall Ideas: A Practical Guide
🎨
The Letter M: An Alphabet and Number Coloring Page
🍂
Creative Independence Day Coloring Projects for Classrooms
🎨
A Pirate's Parrot Squawking Coloring and Drawing Ideas for Kids
🎨
Hopscotch Court Coloring and Drawing Ideas for Kids
🎨
Sand Dollar Coloring and Drawing Ideas for Kids
🌈
Relaxing Seasonal Scenes Coloring Activities
🍎
How Teachers Can Use Early Finisher Activities
🎨
Mongoose Coloring and Drawing Ideas for Kids
🎨
Meet Edgar Degas: An Art Appreciation Guide for Kids
🎨
Stonehenge: Coloring Page and Fun Facts for Kids
🎨
A Growing-Power Superhero: A Superhero Coloring and Design Guide for Kids
🎨
A Brazilian Carnival Costume: A Coloring and Culture Guide for Kids
🧒
Understanding Pattern Recognition in Early Childhood
🎨
Chicken Coloring and Drawing Ideas for Kids
🎨
A Visit to the Doctor: A Coloring and Health Guide for Kids
🎨
the Winter Solstice Coloring Ideas and Activities for the Whole Family
🎨
An Ethiopian Habesha Kemis: A Coloring and Culture Guide for Kids
🎨
The Cat and the Fiddle: A Nursery Rhyme Coloring Guide for Kids
🎨
Groundhog Day Coloring Ideas and Activities for the Whole Family
🎨
Sweeping a Floor: A Simple Life Skill for Kids
🎨
A Milk Plastic Experiment: A Step-by-Step Science Guide for Kids
🎨
Meet Still Life Painting: An Art Appreciation Guide for Kids
🎨
Fun Sports Drawing Activities for Kids
🎨
A Fire-Power Superhero: A Superhero Coloring and Design Guide for Kids
🎨
Mindful Listening: A Simple Mindfulness Activity for Kids
🎨
Counting Coins: A Money Guide for Kids and Parents
🌈
A Guide to Dinosaurs Coloring Pages
🎨
A Family Preparedness Backpack: A Family Safety Guide
🎨
A Castle Herb Garden: A Medieval Coloring and History Guide for Kids
🎨
Robin Coloring Page Ideas for Kids
🎨
An Astronaut's Exercise Routine: A Coloring and Space Mission Guide for Kids
🔬
The Science Behind CMYK Printing Colors
🖍️
Why Coloring Animals Realistically Makes a Difference
🌈
Printable Robots and Machines Coloring Activities
🎨
A Birthday Money Gift: A Money Guide for Kids and Parents
🎨
Kingfisher Coloring Page Ideas for Kids
🎨
Vulture Coloring Page Ideas for Kids
👨👩👧
Fun and Simple Waiting Room Activities
🔎
Exploring Visual Problem-Solving for Students
🧘
Simple Steps for Bedtime Coloring Routines
🎨
A Muffin Tin: A Kitchen Guide for Kids and Parents
🎨
Meet the Librarian: A Community Helper Coloring Guide
🎨
Raven Coloring Page Ideas for Kids
🎨
The Gingerbread Man: A Classic Story Coloring Guide for Kids
🎨
Nightingale Coloring Page Ideas for Kids
🎨
A Tea Ceremony Setting: Coloring Ideas and Fun Facts for Kids
🎨
a Word Search Coloring Combo: Free Ideas for Your Next Celebration
👨👩👧
Creative Travel-Friendly Activities for Kids
🎨
Sea Lion Coloring and Drawing Ideas for Kids
🎨
Machu Picchu: Coloring Page and Fun Facts for Kids
🎨
Uluru: Coloring Page and Fun Facts for Kids
🎨
A Desert Coyote Howling at the Moon: A Wild West Coloring and History Guide for Kids
🎨
How to Draw a A Big and Small Shape Pair: A Step-by-Step Guide for Kids
🎨
Orca Coloring and Drawing Ideas for Kids
🎨
A Medieval Windmill: A Medieval Coloring and History Guide for Kids
✏️
Easy Steps to Practice Pencil Control
🎨
A Measuring Cup Set: A Kitchen Guide for Kids and Parents
🔤
How Pictures Help Children Learn Colors in a New Language
🎨
Line Dancing: A Coloring and Movement Guide for Kids
🎨
A Computer Server Room Concept: A Coloring and STEM Guide for Kids
🧠
Exploring Drawing and Visual Thinking
🎨
Yeti Coloring and Drawing Ideas for Kids
🎨
Easy Sports Drawing Ideas
🧠
The Link Between Drawing and Fine Motor Coordination
👨👩👧
Creative Holiday Break Activities for Kids
🎨
How to Draw a Dreamcatcher Pattern: A Step-by-Step Guide
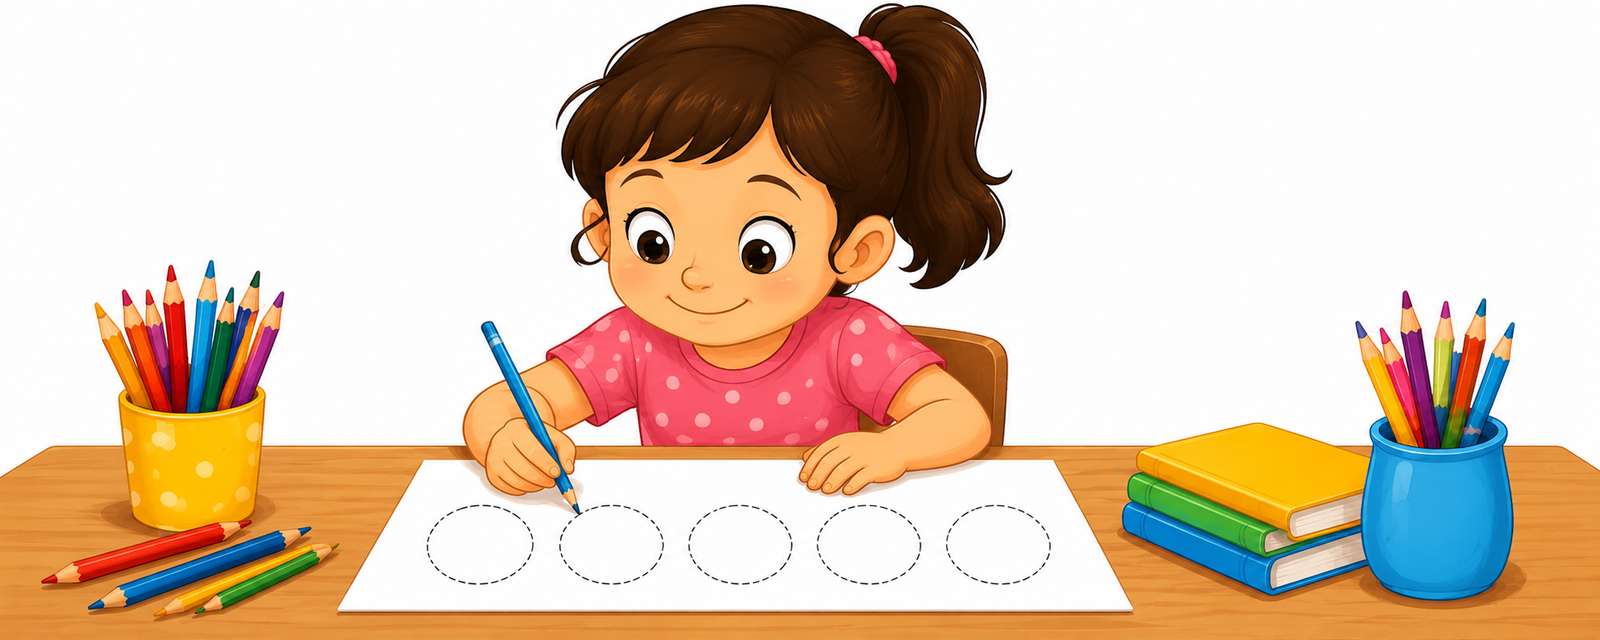 A Beginner's Guide to Drawing Circles
📐
Teaching Number Lines Through Coloring and Drawing
✏️
Easy Steps to Practice Warm-Up Drawing Exercises
🎨
Exploring Pluto: A Coloring and Learning Guide for Kids
🎨
A Beginner's Guide to Drawing Nature Scenes
🎨
A Paper Circuit Card: A Coloring and STEM Guide for Kids
🧒
Drawing Activities for Ages 6-7
📴
Hands-On Activities for Family Game Nights
🎨
Teaching Gentleness: A Simple Activity for Kids
🎨
Exploring Iceland: A Coloring and Culture Guide for Kids
🎨
Safe Driving in Bad Weather: A Family Safety Guide
🎨
A Cheer Dance Routine: A Coloring and Movement Guide for Kids
🎨
Teaching Encouragement: A Simple Activity for Kids
🎨
A Traditional Harvest Festival Outfit: A Coloring and Culture Guide for Kids
🎨
Water Polo Coloring Pages and Drawing Ideas for Kids
🖍️
Tips for Coloring Small Details
🖍️
How to Get Better at Coloring Large Areas
🎨
Including Someone Who Is Left Out: A Simple Social Skill for Kids
🎨
Garden Snail Coloring and Drawing Ideas for Kids
🎨
Easy Self-Portraits Drawing Ideas
💬
Understanding Symbols and Icons
🖌️
Simple Steps for Using Crayons Creatively
🎨
Mermaid Coloring and Drawing Ideas for Kids
🍂
Fun New Year Classroom Coloring Ideas
💗
How Drawing Supports Art and Relaxation
🎨
A Mixing Stand Mixer: A Kitchen Guide for Kids and Parents
🎨
A Seed Packet: A Gardening Guide for Kids and Families
🎨
Toy Drone Coloring and Drawing Ideas for Kids
🎨
Finch Coloring Page Ideas for Kids
🔎
Using Concept Mapping to Solve Problems
🎨
A Beach Picnic Coloring and Drawing Ideas for Kids
🍎
Simple Transition Time Activities for Busy Classrooms
🎨
How to Draw Castles Step by Step
🎨
Exploring The Space Shuttle: A Coloring and Learning Guide for Kids
🍂
Seasonal Coloring Guide: Birthday Celebrations
📴
Making the Most of Quiet Time Before Bed Without Screens
🔎
Why Visual Thinkers Use Visual Note-Taking
🎨
How to Draw a A Row of Circles: A Step-by-Step Guide for Kids
🎨
An Opera Singer: A Coloring and Movement Guide for Kids
🎨
The Number 15: An Alphabet and Number Coloring Page
👨👩👧
Making the Most of Waiting Room Activities
🎨
Space and Planets Drawing Prompts for Beginners
💬
Understanding Diagrams
🎨
Sharing Toys with a Friend: A Simple Social Skill for Kids
🎨
Crossing the Street Safely: A Simple Life Skill for Kids
🎨
Bee Coloring and Drawing Ideas for Kids
🎨
Exploring Denmark: A Coloring and Culture Guide for Kids
🎨
Fun Rocket Ship Coloring and Drawing Ideas for Kids
🎨
Setting Up a Classroom Coloring Station: A Practical Guide
🖌️
A Beginner's Guide to Using Oil Pastels
🌈
Creative Ways to Color Farm Scenes
🎨
A Site Surveyor with a Tripod Coloring and Drawing Ideas for Kids
🎨
A Homemade Lava Lamp: A Step-by-Step Science Guide for Kids
🎨
Ancient Japanese Samurai: An Ancient History Coloring Guide for Kids
🎨
Karate Coloring Pages and Drawing Ideas for Kids
🖍️
How to Get Better at Avoiding Smudges While Coloring
🎨
Body Scan Relaxation: A Simple Mindfulness Activity for Kids
💗
How Drawing Supports Art as a Creative Outlet
🔬
A Simple Guide to Subtractive Color Mixing
🍎
Classroom Ideas: Transition Time Activities
🎨
The Letter P: An Alphabet and Number Coloring Page
📐
Why Spatial Relationships and Drawing Go Together
🎨
A Flying Drone: A Coloring and Invention Guide for Kids
🔎
Exploring Visual Research Methods for Students
🎨
a Quiet Time Basket: A Simple Mindfulness Activity for Kids
🎨
a Calm Corner Setup: A Simple Mindfulness Activity for Kids
🧒
Understanding The Pictorial Stage in Early Childhood
🎨
A Pet Photo Album: A Simple Pet Care Guide for Kids
🎨
Neuschwanstein Castle: Coloring Page and Fun Facts for Kids
🔬
What Is Color Contrast?
🎨
Pitching a Tent: Coloring Ideas for Your Next Family Adventure
🌈
Holiday Scenes Coloring Ideas for Classrooms
💡
Nurturing Visual Brainstorming at Home
🎨
Goose Coloring Page Ideas for Kids
🎨
A House Being Framed Coloring and Drawing Ideas for Kids
🎨
An Ice-Power Superhero: A Superhero Coloring and Design Guide for Kids
🎨
A Superhero Emergency Response: A Superhero Coloring and Design Guide for Kids
🎨
Exploring A Solar System Diagram: A Coloring and Learning Guide for Kids
🎨
The Number 2: An Alphabet and Number Coloring Page
🎨
A Fall Scarecrow: Coloring Ideas and Activities for the Whole Family
🎨
Mount Rushmore: Coloring Page and Fun Facts for Kids
📐
Why Sequences and Drawing Go Together
🖍️
Simple Techniques for Choosing a Color Palette
🌈
Fun Farm Scenes Coloring Pages for Kids
🖌️
Exploring Layering Techniques
📐
Fun Drawing Activities for Symmetry
🎨
Snapping Turtle Coloring and Drawing Ideas for Kids
🎨
Bumper Cars Coloring and Drawing Ideas for Kids
🧒
Understanding Drawing Milestones in Early Childhood
🎨
Teaching Forgiveness: A Simple Activity for Kids
🎨
Hummingbird Coloring Page Ideas for Kids
🎨
Exploring Australia: A Coloring and Culture Guide for Kids
🎨
Ancient Nubian Pyramids: An Ancient History Coloring Guide for Kids
🎨
A Root Cellar: A Coloring and Food Science Guide for Kids
🍂
Seasonal Coloring Guide: Mother's Day
🎨
A Bridge Under Construction Coloring and Drawing Ideas for Kids
🎨
Fun Robots Drawing Activities for Kids
🎨
A Wild West Wagon Train: A Wild West Coloring and History Guide for Kids
🎨
Fun Police Car Coloring and Drawing Ideas for Kids
🎨
How to Draw a Spiral Pattern: A Step-by-Step Guide
🎨
Flying Fish Coloring and Drawing Ideas for Kids
🎨
Gel Pens vs. Markers: A Buying and Technique Guide
🎨
A Site Safety Sign Coloring and Drawing Ideas for Kids
🎨
Five Little Ducks: A Nursery Rhyme Coloring Guide for Kids
🎨
Exploring Jupiter: A Coloring and Learning Guide for Kids
💡
How Drawing Encourages Creative Problem-Solving
🏺
Why Ancient Symbols Matter to Historians
🎨
A Stilt Walker Coloring and Drawing Ideas for Kids
🎨
A Crab Scuttling on the Sand Coloring and Drawing Ideas for Kids
🎨
Rabbit Coloring and Drawing Ideas for Kids
🎨
A Rope Swing Over a Creek: Coloring Ideas for Your Next Family Adventure
🧒
How Drawing Supports Pencil Grip Development
🍂
Printable Winter Coloring Pages for Kids
🔤
Learning Question Words Through Drawing
🎨
Laminating Pages for Reuse: A Practical Guide
🌈
Creative Ways to Color Fairy Tale Scenes
🍎
A Teacher's Guide to Transition Time Activities
🎨
Pig Coloring and Drawing Ideas for Kids
🎨
Mushroom Coloring and Drawing Ideas for Kids
🎨
A Medieval Castle: A Medieval Coloring and History Guide for Kids
📐
Learning 3D Shapes Through Drawing
🎨
Exploring Turkey: A Coloring and Culture Guide for Kids
🎨
Ancient Cave Paintings: An Ancient History Coloring Guide for Kids
🎨
How to Draw a Overlapping Circles: A Step-by-Step Guide for Kids
🎨
Training a Puppy to Sit: A Simple Pet Care Guide for Kids
🎨
A Coin Counting Machine: A Money Guide for Kids and Parents
🎨
Teaching Cheerfulness: A Simple Activity for Kids
🎨
Mudskipper Fish Coloring and Drawing Ideas for Kids
👨👩👧
Why Parents Love Activities for Twins
🎨
a Turkey Dinner Table Coloring Ideas and Activities for the Whole Family
🎨
Grand Canyon: Coloring Page and Fun Facts for Kids
🧒
A Parent's Guide to Fine Motor Skills
🔬
The Science Behind Secondary Colors
🎨
Teaching Leadership: A Simple Activity for Kids
🧒
Drawing Activities for Children Who Dislike Drawing
🎨
An Electrician's Wiring Coloring and Drawing Ideas for Kids
🎨
A Beach Volleyball Net Coloring and Drawing Ideas for Kids
🖌️
Why Using Crayons Creatively Matters for Young Artists
🎲
Treasure Map Games: A Creative Twist
🎨
Easy Weather Drawing Ideas
🎨
Creative Everyday Objects Drawing Exercises
🎨
Lunch Box Note Coloring: Free Ideas for Your Next Celebration
💡
Why Imaginary Worlds Matters for Young Artists
🎨
Planting a Flag on the Moon: A Coloring and Space Mission Guide for Kids
🔎
A Beginner's Guide to Storyboarding for Projects
✏️
Why Drawing Simple Objects Matters for New Artists
🍎
Simple Classroom Management Through Art for Busy Classrooms
🎨
Teddy Bear Coloring and Drawing Ideas for Kids
💡
Building Storytelling Through Coloring and Drawing
🎨
A Knight's Loyal Steed: A Medieval Coloring and History Guide for Kids
🔎
Exploring Flowcharts for Students
🍂
Printable Father's Day Coloring Pages for Kids
🎨
An Invisible Ink Message: A Step-by-Step Science Guide for Kids
🎨
A Wooden Spoon: A Kitchen Guide for Kids and Parents
🎨
A Math Worksheet: A Classroom Coloring and Learning Guide
🧠
Exploring Drawing and Organizing Ideas
🎨
A Ninja Warrior Obstacle Course: A Coloring and Playtime Guide for Kids
🎨
Nudibranch Coloring and Drawing Ideas for Kids
💬
The Power of Visual Instructions
🎨
Pizza Coloring Ideas for Kids Who Love to Create
🧒
How Drawing Supports Shape Recognition
🎨
Mockingbird Coloring Page Ideas for Kids
🎨
A Superhero Helping at School: A Superhero Coloring and Design Guide for Kids
🎨
A Chef's Hat: A Kitchen Guide for Kids and Parents
🎨
If You're Happy and You Know It: A Nursery Rhyme Coloring Guide for Kids
🎨
How to Draw a Polka Dot Pattern: A Step-by-Step Guide
🎨
How to Draw a Tribal Pattern: A Step-by-Step Guide
🎨
A Traditional Embroidered Vest: A Coloring and Culture Guide for Kids
💗
Understanding Family Art Time and Connection
🧠
Can Drawing Improve Planning Skills?
🎨
An Obstacle Course: A Coloring and Playtime Guide for Kids
A Beginner's Guide to Drawing Circles
📐
Teaching Number Lines Through Coloring and Drawing
✏️
Easy Steps to Practice Warm-Up Drawing Exercises
🎨
Exploring Pluto: A Coloring and Learning Guide for Kids
🎨
A Beginner's Guide to Drawing Nature Scenes
🎨
A Paper Circuit Card: A Coloring and STEM Guide for Kids
🧒
Drawing Activities for Ages 6-7
📴
Hands-On Activities for Family Game Nights
🎨
Teaching Gentleness: A Simple Activity for Kids
🎨
Exploring Iceland: A Coloring and Culture Guide for Kids
🎨
Safe Driving in Bad Weather: A Family Safety Guide
🎨
A Cheer Dance Routine: A Coloring and Movement Guide for Kids
🎨
Teaching Encouragement: A Simple Activity for Kids
🎨
A Traditional Harvest Festival Outfit: A Coloring and Culture Guide for Kids
🎨
Water Polo Coloring Pages and Drawing Ideas for Kids
🖍️
Tips for Coloring Small Details
🖍️
How to Get Better at Coloring Large Areas
🎨
Including Someone Who Is Left Out: A Simple Social Skill for Kids
🎨
Garden Snail Coloring and Drawing Ideas for Kids
🎨
Easy Self-Portraits Drawing Ideas
💬
Understanding Symbols and Icons
🖌️
Simple Steps for Using Crayons Creatively
🎨
Mermaid Coloring and Drawing Ideas for Kids
🍂
Fun New Year Classroom Coloring Ideas
💗
How Drawing Supports Art and Relaxation
🎨
A Mixing Stand Mixer: A Kitchen Guide for Kids and Parents
🎨
A Seed Packet: A Gardening Guide for Kids and Families
🎨
Toy Drone Coloring and Drawing Ideas for Kids
🎨
Finch Coloring Page Ideas for Kids
🔎
Using Concept Mapping to Solve Problems
🎨
A Beach Picnic Coloring and Drawing Ideas for Kids
🍎
Simple Transition Time Activities for Busy Classrooms
🎨
How to Draw Castles Step by Step
🎨
Exploring The Space Shuttle: A Coloring and Learning Guide for Kids
🍂
Seasonal Coloring Guide: Birthday Celebrations
📴
Making the Most of Quiet Time Before Bed Without Screens
🔎
Why Visual Thinkers Use Visual Note-Taking
🎨
How to Draw a A Row of Circles: A Step-by-Step Guide for Kids
🎨
An Opera Singer: A Coloring and Movement Guide for Kids
🎨
The Number 15: An Alphabet and Number Coloring Page
👨👩👧
Making the Most of Waiting Room Activities
🎨
Space and Planets Drawing Prompts for Beginners
💬
Understanding Diagrams
🎨
Sharing Toys with a Friend: A Simple Social Skill for Kids
🎨
Crossing the Street Safely: A Simple Life Skill for Kids
🎨
Bee Coloring and Drawing Ideas for Kids
🎨
Exploring Denmark: A Coloring and Culture Guide for Kids
🎨
Fun Rocket Ship Coloring and Drawing Ideas for Kids
🎨
Setting Up a Classroom Coloring Station: A Practical Guide
🖌️
A Beginner's Guide to Using Oil Pastels
🌈
Creative Ways to Color Farm Scenes
🎨
A Site Surveyor with a Tripod Coloring and Drawing Ideas for Kids
🎨
A Homemade Lava Lamp: A Step-by-Step Science Guide for Kids
🎨
Ancient Japanese Samurai: An Ancient History Coloring Guide for Kids
🎨
Karate Coloring Pages and Drawing Ideas for Kids
🖍️
How to Get Better at Avoiding Smudges While Coloring
🎨
Body Scan Relaxation: A Simple Mindfulness Activity for Kids
💗
How Drawing Supports Art as a Creative Outlet
🔬
A Simple Guide to Subtractive Color Mixing
🍎
Classroom Ideas: Transition Time Activities
🎨
The Letter P: An Alphabet and Number Coloring Page
📐
Why Spatial Relationships and Drawing Go Together
🎨
A Flying Drone: A Coloring and Invention Guide for Kids
🔎
Exploring Visual Research Methods for Students
🎨
a Quiet Time Basket: A Simple Mindfulness Activity for Kids
🎨
a Calm Corner Setup: A Simple Mindfulness Activity for Kids
🧒
Understanding The Pictorial Stage in Early Childhood
🎨
A Pet Photo Album: A Simple Pet Care Guide for Kids
🎨
Neuschwanstein Castle: Coloring Page and Fun Facts for Kids
🔬
What Is Color Contrast?
🎨
Pitching a Tent: Coloring Ideas for Your Next Family Adventure
🌈
Holiday Scenes Coloring Ideas for Classrooms
💡
Nurturing Visual Brainstorming at Home
🎨
Goose Coloring Page Ideas for Kids
🎨
A House Being Framed Coloring and Drawing Ideas for Kids
🎨
An Ice-Power Superhero: A Superhero Coloring and Design Guide for Kids
🎨
A Superhero Emergency Response: A Superhero Coloring and Design Guide for Kids
🎨
Exploring A Solar System Diagram: A Coloring and Learning Guide for Kids
🎨
The Number 2: An Alphabet and Number Coloring Page
🎨
A Fall Scarecrow: Coloring Ideas and Activities for the Whole Family
🎨
Mount Rushmore: Coloring Page and Fun Facts for Kids
📐
Why Sequences and Drawing Go Together
🖍️
Simple Techniques for Choosing a Color Palette
🌈
Fun Farm Scenes Coloring Pages for Kids
🖌️
Exploring Layering Techniques
📐
Fun Drawing Activities for Symmetry
🎨
Snapping Turtle Coloring and Drawing Ideas for Kids
🎨
Bumper Cars Coloring and Drawing Ideas for Kids
🧒
Understanding Drawing Milestones in Early Childhood
🎨
Teaching Forgiveness: A Simple Activity for Kids
🎨
Hummingbird Coloring Page Ideas for Kids
🎨
Exploring Australia: A Coloring and Culture Guide for Kids
🎨
Ancient Nubian Pyramids: An Ancient History Coloring Guide for Kids
🎨
A Root Cellar: A Coloring and Food Science Guide for Kids
🍂
Seasonal Coloring Guide: Mother's Day
🎨
A Bridge Under Construction Coloring and Drawing Ideas for Kids
🎨
Fun Robots Drawing Activities for Kids
🎨
A Wild West Wagon Train: A Wild West Coloring and History Guide for Kids
🎨
Fun Police Car Coloring and Drawing Ideas for Kids
🎨
How to Draw a Spiral Pattern: A Step-by-Step Guide
🎨
Flying Fish Coloring and Drawing Ideas for Kids
🎨
Gel Pens vs. Markers: A Buying and Technique Guide
🎨
A Site Safety Sign Coloring and Drawing Ideas for Kids
🎨
Five Little Ducks: A Nursery Rhyme Coloring Guide for Kids
🎨
Exploring Jupiter: A Coloring and Learning Guide for Kids
💡
How Drawing Encourages Creative Problem-Solving
🏺
Why Ancient Symbols Matter to Historians
🎨
A Stilt Walker Coloring and Drawing Ideas for Kids
🎨
A Crab Scuttling on the Sand Coloring and Drawing Ideas for Kids
🎨
Rabbit Coloring and Drawing Ideas for Kids
🎨
A Rope Swing Over a Creek: Coloring Ideas for Your Next Family Adventure
🧒
How Drawing Supports Pencil Grip Development
🍂
Printable Winter Coloring Pages for Kids
🔤
Learning Question Words Through Drawing
🎨
Laminating Pages for Reuse: A Practical Guide
🌈
Creative Ways to Color Fairy Tale Scenes
🍎
A Teacher's Guide to Transition Time Activities
🎨
Pig Coloring and Drawing Ideas for Kids
🎨
Mushroom Coloring and Drawing Ideas for Kids
🎨
A Medieval Castle: A Medieval Coloring and History Guide for Kids
📐
Learning 3D Shapes Through Drawing
🎨
Exploring Turkey: A Coloring and Culture Guide for Kids
🎨
Ancient Cave Paintings: An Ancient History Coloring Guide for Kids
🎨
How to Draw a Overlapping Circles: A Step-by-Step Guide for Kids
🎨
Training a Puppy to Sit: A Simple Pet Care Guide for Kids
🎨
A Coin Counting Machine: A Money Guide for Kids and Parents
🎨
Teaching Cheerfulness: A Simple Activity for Kids
🎨
Mudskipper Fish Coloring and Drawing Ideas for Kids
👨👩👧
Why Parents Love Activities for Twins
🎨
a Turkey Dinner Table Coloring Ideas and Activities for the Whole Family
🎨
Grand Canyon: Coloring Page and Fun Facts for Kids
🧒
A Parent's Guide to Fine Motor Skills
🔬
The Science Behind Secondary Colors
🎨
Teaching Leadership: A Simple Activity for Kids
🧒
Drawing Activities for Children Who Dislike Drawing
🎨
An Electrician's Wiring Coloring and Drawing Ideas for Kids
🎨
A Beach Volleyball Net Coloring and Drawing Ideas for Kids
🖌️
Why Using Crayons Creatively Matters for Young Artists
🎲
Treasure Map Games: A Creative Twist
🎨
Easy Weather Drawing Ideas
🎨
Creative Everyday Objects Drawing Exercises
🎨
Lunch Box Note Coloring: Free Ideas for Your Next Celebration
💡
Why Imaginary Worlds Matters for Young Artists
🎨
Planting a Flag on the Moon: A Coloring and Space Mission Guide for Kids
🔎
A Beginner's Guide to Storyboarding for Projects
✏️
Why Drawing Simple Objects Matters for New Artists
🍎
Simple Classroom Management Through Art for Busy Classrooms
🎨
Teddy Bear Coloring and Drawing Ideas for Kids
💡
Building Storytelling Through Coloring and Drawing
🎨
A Knight's Loyal Steed: A Medieval Coloring and History Guide for Kids
🔎
Exploring Flowcharts for Students
🍂
Printable Father's Day Coloring Pages for Kids
🎨
An Invisible Ink Message: A Step-by-Step Science Guide for Kids
🎨
A Wooden Spoon: A Kitchen Guide for Kids and Parents
🎨
A Math Worksheet: A Classroom Coloring and Learning Guide
🧠
Exploring Drawing and Organizing Ideas
🎨
A Ninja Warrior Obstacle Course: A Coloring and Playtime Guide for Kids
🎨
Nudibranch Coloring and Drawing Ideas for Kids
💬
The Power of Visual Instructions
🎨
Pizza Coloring Ideas for Kids Who Love to Create
🧒
How Drawing Supports Shape Recognition
🎨
Mockingbird Coloring Page Ideas for Kids
🎨
A Superhero Helping at School: A Superhero Coloring and Design Guide for Kids
🎨
A Chef's Hat: A Kitchen Guide for Kids and Parents
🎨
If You're Happy and You Know It: A Nursery Rhyme Coloring Guide for Kids
🎨
How to Draw a Polka Dot Pattern: A Step-by-Step Guide
🎨
How to Draw a Tribal Pattern: A Step-by-Step Guide
🎨
A Traditional Embroidered Vest: A Coloring and Culture Guide for Kids
💗
Understanding Family Art Time and Connection
🧠
Can Drawing Improve Planning Skills?
🎨
An Obstacle Course: A Coloring and Playtime Guide for Kids
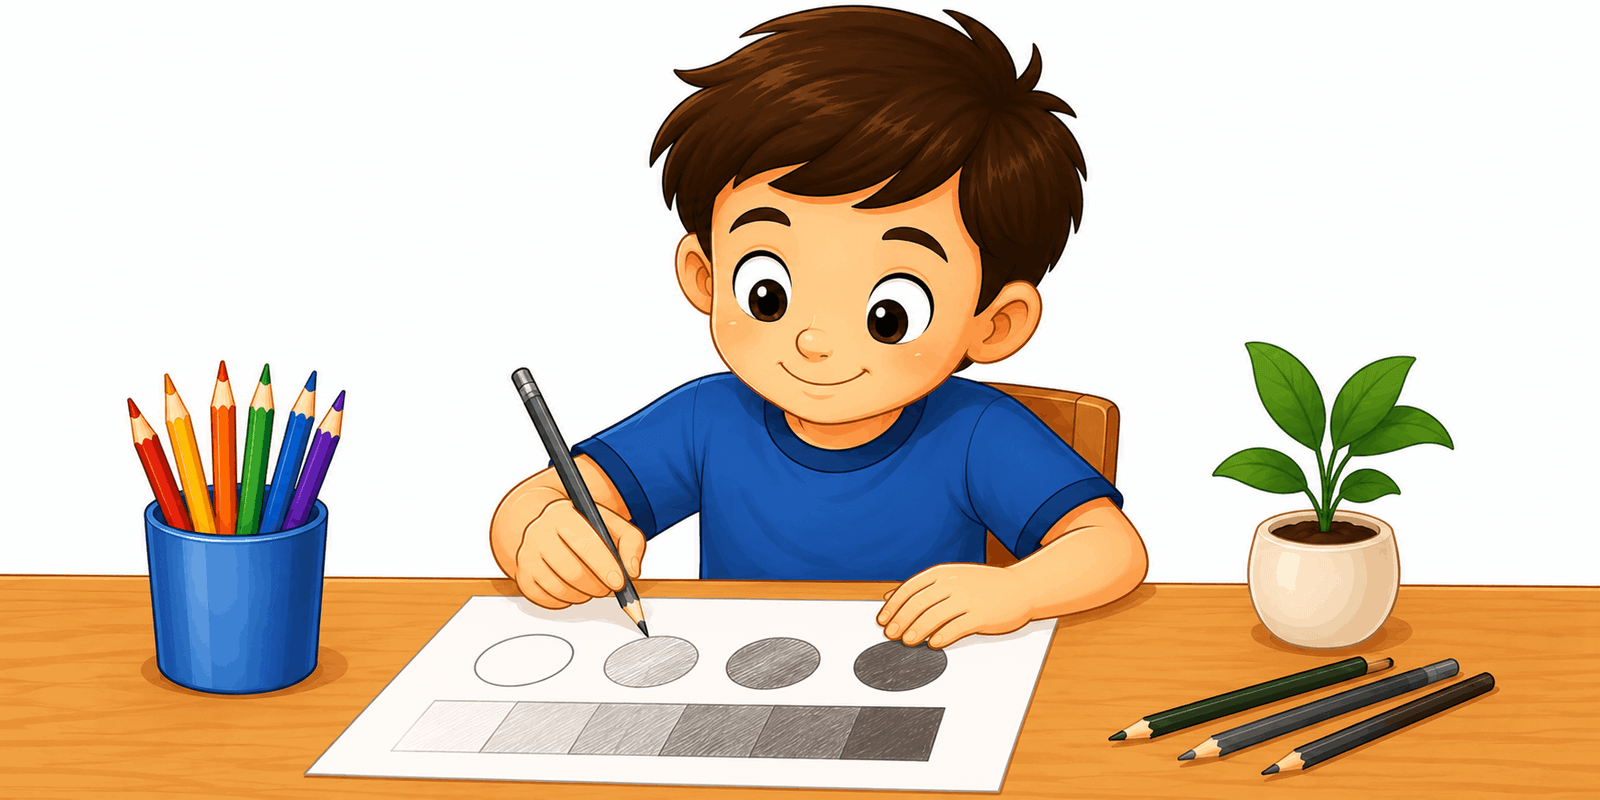 A Beginner's Guide to Shading Basics
🎨
A Cotton Candy Stand Coloring and Drawing Ideas for Kids
🍂
Celebrate New Year With Coloring Activities
💗
Understanding Stress Relief
💡
The Role of Inventing New Ideas in Children's Art
🎨
Mother May I: A Coloring and Playtime Guide for Kids
🎨
Teaching Resilience: A Simple Activity for Kids
🎨
Meet Grandma Moses: An Art Appreciation Guide for Kids
🎨
Cloud Formations Coloring Page: A Nature Learning Guide for Kids
🎨
Fruit Basket Coloring Ideas for Kids Who Love to Create
📐
Teaching Proportion Through Coloring and Drawing
🧠
How Drawing May Support Hand-Eye Coordination
🎨
A Street Musician: A Coloring and Movement Guide for Kids
🎨
Coffee and Pastry Coloring Ideas for Kids Who Love to Create
🌈
Musical Themes Coloring Ideas for Classrooms
🎨
A Kids' First Paycheck Concept: A Money Guide for Kids and Parents
🎨
Teaching Loyalty: A Simple Activity for Kids
🎨
A Space Robot: A Coloring and Invention Guide for Kids
🎨
Wild Turkey Coloring Page Ideas for Kids
🔎
Using Visual Problem-Solving to Solve Problems
🎨
The Crow and the Pitcher: A Classic Story Coloring Guide for Kids
🎨
A Traditional Festival Mask Costume: A Coloring and Culture Guide for Kids
🍎
Using Coloring Pages for Cross-Curricular Art Lessons
🔬
A Simple Guide to Color Theory Basics
🎨
A Classroom Calendar: A Classroom Coloring and Learning Guide
🎨
A Peg Leg Pirate Coloring and Drawing Ideas for Kids
🎨
A STEM Career Engineer: A Coloring and STEM Guide for Kids
🎨
Orangutan Coloring and Drawing Ideas for Kids
🔎
How Visual Note-Taking Support Learning
🎨
Saying Goodbye Politely: A Simple Social Skill for Kids
🌈
A Guide to Flowers and Gardens Coloring Pages
🎨
Meet the Graphic Designer: A Community Helper Coloring Guide
🎨
Hanging Up a Coat: A Simple Life Skill for Kids
🧘
Exploring Coloring as a Calm-Down Tool
💬
From Cave Drawings to Emojis and Modern Pictograms
🎨
Hide and Seek: A Coloring and Playtime Guide for Kids
🎨
Werewolf Coloring and Drawing Ideas for Kids
🎨
Poppy: A Coloring and Nature Guide for Kids
🎨
A Zip Line Adventure: Coloring Ideas for Your Next Family Adventure
🎨
A Self-Driving Car: A Coloring and Invention Guide for Kids
🧒
A Parent's Guide to Pencil Grip Development
🎨
A Family Meeting Point Plan: A Family Safety Guide
🎨
A Tongs: A Kitchen Guide for Kids and Parents
🎨
A Rain Jacket: Coloring Ideas and Activities for the Whole Family
🎨
Counting by Tens: An Alphabet and Number Coloring Page
🖌️
Exploring Working With Light and Shadow
🧒
How Drawing Supports Ages 3-4
🎨
Meet Rembrandt: An Art Appreciation Guide for Kids
🔎
How Data Visualization Basics Support Learning
🎨
A Tiny Microbot: A Coloring and Invention Guide for Kids
🍎
Using Coloring Pages for Art Lessons for History Class
🎨
A Shadow Tracking Activity: A Step-by-Step Science Guide for Kids
🍂
Celebrate Spring With Coloring Activities
🎨
How to Draw a Diamond Pattern: A Step-by-Step Guide
🧒
Drawing Activities for The Pictorial Stage
🎨
Meet Diego Rivera: An Art Appreciation Guide for Kids
✏️
Easy Steps to Practice Drawing Simple Objects
🧒
Fun Ways to Build Drawing Milestones
🖍️
Why Mixing Warm and Cool Colors Makes a Difference
🎨
Gazelle Coloring and Drawing Ideas for Kids
🎨
A Rodeo Arena: A Wild West Coloring and History Guide for Kids
🧘
How Guided Mindful Coloring Can Create a Quiet Moment
🎨
A Beach Frisbee Toss Coloring and Drawing Ideas for Kids
🎨
Rooster Coloring and Drawing Ideas for Kids
🌈
Creative Ways to Color Space
🌈
Creative Ways to Color Mandalas
🌈
Relaxing Holiday Scenes Coloring Activities
🎨
A Dumpling Steamer: Coloring Ideas and Fun Facts for Kids
🎨
A Website Wireframe Sketch: A Coloring and STEM Guide for Kids
🎨
The Five Senses: A Coloring and Health Guide for Kids
🎲
Fun Scavenger Hunt Drawings for Kids
🎨
Lobster Coloring and Drawing Ideas for Kids
💡
Building Doodling Through Coloring and Drawing
🔎
A Beginner's Guide to Concept Mapping
🎨
A Virtual Reality Headset: A Coloring and Invention Guide for Kids
🎨
A Farm Robot: A Coloring and Invention Guide for Kids
🧘
Simple Steps for Quiet Morning Coloring
🎨
Track and Field Coloring Pages and Drawing Ideas for Kids
🎨
Snowboarding Coloring Pages and Drawing Ideas for Kids
🎨
How to Draw a Yin Yang Symmetry: A Step-by-Step Guide
🧒
How Drawing Supports Drawing Milestones
🎨
a Goal Chart Printable: Free Ideas for Your Next Celebration
🎨
A Bowl of Ramen: Coloring Ideas and Fun Facts for Kids
🎨
Preparing a Car Emergency Kit: A Family Safety Guide
🎨
Severe Weather Season Awareness: A Family Safety Guide
🌈
Printable Vehicles Coloring Activities
🍂
Creative Cultural Festivals Coloring Projects for Classrooms
🎨
Taking Out the Trash: A Simple Life Skill for Kids
🎨
A Summer Lemonade Stand: Coloring Ideas and Activities for the Whole Family
🎨
Ocean Sunset Coloring and Drawing Ideas for Kids
🎨
A Royal Family Portrait: A Medieval Coloring and History Guide for Kids
🎨
A Robot Musician: A Coloring and Invention Guide for Kids
💗
The Role of Coloring in What Art Therapy Actually Is
📐
Learning Symmetry Through Drawing
🎨
Teaching Bravery: A Simple Activity for Kids
💡
Nurturing Storytelling at Home
🎨
A Superhero's Gadget Belt: A Superhero Coloring and Design Guide for Kids
🎨
Spring Seed Planting: Coloring Ideas and Activities for the Whole Family
🎨
St. Patrick's Day Coloring Ideas and Activities for the Whole Family
🎨
Ramadan Coloring Ideas and Activities for the Whole Family
🧒
How Drawing Supports Encouraging Reluctant Artists
🎨
A Frontier Schoolhouse: A Wild West Coloring and History Guide for Kids
🎨
A Big Top Tent Interior Coloring and Drawing Ideas for Kids
🎨
A Sunflower Growing Tall: A Gardening Guide for Kids and Families
🎨
Statue Tag: A Coloring and Playtime Guide for Kids
🎲
Step-by-Step Drawing Challenges
🔎
Why Visual Thinkers Use Data Visualization Basics
🧘
Exploring Coloring for Focus
🎨
A Spelling Bee: A Classroom Coloring and Learning Guide
🎨
A Water-Power Superhero: A Superhero Coloring and Design Guide for Kids
🎨
Rainbow Coloring Page: A Nature Learning Guide for Kids
📐
How Children Understand 3D Shapes With Art
👨👩👧
Easy Activities for Twins With Coloring Pages
🎨
Grebe Coloring Page Ideas for Kids
🔬
Warm and Cool Colors Explained for Kids
🎨
How to Draw a Flute: A Coloring and Music Guide for Kids
🎨
A Superhero Comic Book Cover Design: A Superhero Coloring and Design Guide for Kids
🎨
Exploring A Space Suit: A Coloring and Learning Guide for Kids
🎨
Wisteria Vine: A Coloring and Nature Guide for Kids
🧒
What to Expect When Teaching The Symbol-Making Stage
🎨
A Community Garden: A Coloring and Food Science Guide for Kids
💡
How Drawing Encourages Free Drawing
🔤
Visual Vocabulary: Question Words
🎨
A Pet's Bed: A Simple Pet Care Guide for Kids
🎨
Oil Pastels: A Buying and Technique Guide
🍂
Celebrate Valentine's Day With Coloring Activities
💗
The Role of Coloring in Art and Relaxation
A Beginner's Guide to Shading Basics
🎨
A Cotton Candy Stand Coloring and Drawing Ideas for Kids
🍂
Celebrate New Year With Coloring Activities
💗
Understanding Stress Relief
💡
The Role of Inventing New Ideas in Children's Art
🎨
Mother May I: A Coloring and Playtime Guide for Kids
🎨
Teaching Resilience: A Simple Activity for Kids
🎨
Meet Grandma Moses: An Art Appreciation Guide for Kids
🎨
Cloud Formations Coloring Page: A Nature Learning Guide for Kids
🎨
Fruit Basket Coloring Ideas for Kids Who Love to Create
📐
Teaching Proportion Through Coloring and Drawing
🧠
How Drawing May Support Hand-Eye Coordination
🎨
A Street Musician: A Coloring and Movement Guide for Kids
🎨
Coffee and Pastry Coloring Ideas for Kids Who Love to Create
🌈
Musical Themes Coloring Ideas for Classrooms
🎨
A Kids' First Paycheck Concept: A Money Guide for Kids and Parents
🎨
Teaching Loyalty: A Simple Activity for Kids
🎨
A Space Robot: A Coloring and Invention Guide for Kids
🎨
Wild Turkey Coloring Page Ideas for Kids
🔎
Using Visual Problem-Solving to Solve Problems
🎨
The Crow and the Pitcher: A Classic Story Coloring Guide for Kids
🎨
A Traditional Festival Mask Costume: A Coloring and Culture Guide for Kids
🍎
Using Coloring Pages for Cross-Curricular Art Lessons
🔬
A Simple Guide to Color Theory Basics
🎨
A Classroom Calendar: A Classroom Coloring and Learning Guide
🎨
A Peg Leg Pirate Coloring and Drawing Ideas for Kids
🎨
A STEM Career Engineer: A Coloring and STEM Guide for Kids
🎨
Orangutan Coloring and Drawing Ideas for Kids
🔎
How Visual Note-Taking Support Learning
🎨
Saying Goodbye Politely: A Simple Social Skill for Kids
🌈
A Guide to Flowers and Gardens Coloring Pages
🎨
Meet the Graphic Designer: A Community Helper Coloring Guide
🎨
Hanging Up a Coat: A Simple Life Skill for Kids
🧘
Exploring Coloring as a Calm-Down Tool
💬
From Cave Drawings to Emojis and Modern Pictograms
🎨
Hide and Seek: A Coloring and Playtime Guide for Kids
🎨
Werewolf Coloring and Drawing Ideas for Kids
🎨
Poppy: A Coloring and Nature Guide for Kids
🎨
A Zip Line Adventure: Coloring Ideas for Your Next Family Adventure
🎨
A Self-Driving Car: A Coloring and Invention Guide for Kids
🧒
A Parent's Guide to Pencil Grip Development
🎨
A Family Meeting Point Plan: A Family Safety Guide
🎨
A Tongs: A Kitchen Guide for Kids and Parents
🎨
A Rain Jacket: Coloring Ideas and Activities for the Whole Family
🎨
Counting by Tens: An Alphabet and Number Coloring Page
🖌️
Exploring Working With Light and Shadow
🧒
How Drawing Supports Ages 3-4
🎨
Meet Rembrandt: An Art Appreciation Guide for Kids
🔎
How Data Visualization Basics Support Learning
🎨
A Tiny Microbot: A Coloring and Invention Guide for Kids
🍎
Using Coloring Pages for Art Lessons for History Class
🎨
A Shadow Tracking Activity: A Step-by-Step Science Guide for Kids
🍂
Celebrate Spring With Coloring Activities
🎨
How to Draw a Diamond Pattern: A Step-by-Step Guide
🧒
Drawing Activities for The Pictorial Stage
🎨
Meet Diego Rivera: An Art Appreciation Guide for Kids
✏️
Easy Steps to Practice Drawing Simple Objects
🧒
Fun Ways to Build Drawing Milestones
🖍️
Why Mixing Warm and Cool Colors Makes a Difference
🎨
Gazelle Coloring and Drawing Ideas for Kids
🎨
A Rodeo Arena: A Wild West Coloring and History Guide for Kids
🧘
How Guided Mindful Coloring Can Create a Quiet Moment
🎨
A Beach Frisbee Toss Coloring and Drawing Ideas for Kids
🎨
Rooster Coloring and Drawing Ideas for Kids
🌈
Creative Ways to Color Space
🌈
Creative Ways to Color Mandalas
🌈
Relaxing Holiday Scenes Coloring Activities
🎨
A Dumpling Steamer: Coloring Ideas and Fun Facts for Kids
🎨
A Website Wireframe Sketch: A Coloring and STEM Guide for Kids
🎨
The Five Senses: A Coloring and Health Guide for Kids
🎲
Fun Scavenger Hunt Drawings for Kids
🎨
Lobster Coloring and Drawing Ideas for Kids
💡
Building Doodling Through Coloring and Drawing
🔎
A Beginner's Guide to Concept Mapping
🎨
A Virtual Reality Headset: A Coloring and Invention Guide for Kids
🎨
A Farm Robot: A Coloring and Invention Guide for Kids
🧘
Simple Steps for Quiet Morning Coloring
🎨
Track and Field Coloring Pages and Drawing Ideas for Kids
🎨
Snowboarding Coloring Pages and Drawing Ideas for Kids
🎨
How to Draw a Yin Yang Symmetry: A Step-by-Step Guide
🧒
How Drawing Supports Drawing Milestones
🎨
a Goal Chart Printable: Free Ideas for Your Next Celebration
🎨
A Bowl of Ramen: Coloring Ideas and Fun Facts for Kids
🎨
Preparing a Car Emergency Kit: A Family Safety Guide
🎨
Severe Weather Season Awareness: A Family Safety Guide
🌈
Printable Vehicles Coloring Activities
🍂
Creative Cultural Festivals Coloring Projects for Classrooms
🎨
Taking Out the Trash: A Simple Life Skill for Kids
🎨
A Summer Lemonade Stand: Coloring Ideas and Activities for the Whole Family
🎨
Ocean Sunset Coloring and Drawing Ideas for Kids
🎨
A Royal Family Portrait: A Medieval Coloring and History Guide for Kids
🎨
A Robot Musician: A Coloring and Invention Guide for Kids
💗
The Role of Coloring in What Art Therapy Actually Is
📐
Learning Symmetry Through Drawing
🎨
Teaching Bravery: A Simple Activity for Kids
💡
Nurturing Storytelling at Home
🎨
A Superhero's Gadget Belt: A Superhero Coloring and Design Guide for Kids
🎨
Spring Seed Planting: Coloring Ideas and Activities for the Whole Family
🎨
St. Patrick's Day Coloring Ideas and Activities for the Whole Family
🎨
Ramadan Coloring Ideas and Activities for the Whole Family
🧒
How Drawing Supports Encouraging Reluctant Artists
🎨
A Frontier Schoolhouse: A Wild West Coloring and History Guide for Kids
🎨
A Big Top Tent Interior Coloring and Drawing Ideas for Kids
🎨
A Sunflower Growing Tall: A Gardening Guide for Kids and Families
🎨
Statue Tag: A Coloring and Playtime Guide for Kids
🎲
Step-by-Step Drawing Challenges
🔎
Why Visual Thinkers Use Data Visualization Basics
🧘
Exploring Coloring for Focus
🎨
A Spelling Bee: A Classroom Coloring and Learning Guide
🎨
A Water-Power Superhero: A Superhero Coloring and Design Guide for Kids
🎨
Rainbow Coloring Page: A Nature Learning Guide for Kids
📐
How Children Understand 3D Shapes With Art
👨👩👧
Easy Activities for Twins With Coloring Pages
🎨
Grebe Coloring Page Ideas for Kids
🔬
Warm and Cool Colors Explained for Kids
🎨
How to Draw a Flute: A Coloring and Music Guide for Kids
🎨
A Superhero Comic Book Cover Design: A Superhero Coloring and Design Guide for Kids
🎨
Exploring A Space Suit: A Coloring and Learning Guide for Kids
🎨
Wisteria Vine: A Coloring and Nature Guide for Kids
🧒
What to Expect When Teaching The Symbol-Making Stage
🎨
A Community Garden: A Coloring and Food Science Guide for Kids
💡
How Drawing Encourages Free Drawing
🔤
Visual Vocabulary: Question Words
🎨
A Pet's Bed: A Simple Pet Care Guide for Kids
🎨
Oil Pastels: A Buying and Technique Guide
🍂
Celebrate Valentine's Day With Coloring Activities
💗
The Role of Coloring in Art and Relaxation
 How Drawing Encourages Character Design
🎲
How to Play Collaborative Drawing Games
🎨
A Superhero Standing Up for a Friend: A Superhero Coloring and Design Guide for Kids
🎨
Kraken Coloring and Drawing Ideas for Kids
🎨
What Time Is It, Mr. Fox: A Coloring and Playtime Guide for Kids
🎨
Mole Coloring and Drawing Ideas for Kids
🎨
A Camp Counselor: Coloring Ideas for Your Next Family Adventure
✏️
How to Improve Your Drawing Curved Lines
🎨
A Beginner's Guide to Drawing Dinosaurs
🎨
Basilisk Coloring and Drawing Ideas for Kids
🎨
A Native American Village (Respectfully Depicted): A Wild West Coloring and History Guide for Kids
🎨
Meet the Fashion Designer: A Community Helper Coloring Guide
🎨
The Princess and the Pea: A Classic Story Coloring Guide for Kids
🎨
A Painter on Scaffolding Coloring and Drawing Ideas for Kids
🎨
How to Draw a French Horn: A Coloring and Music Guide for Kids
🎨
A Simple Density Experiment with Oil and Water: A Step-by-Step Science Guide for Kids
🎨
A Kettle: A Kitchen Guide for Kids and Parents
🎨
A Beginner's Guide to Drawing Gardens and Flowers
🔬
Understanding Color Wheels
✏️
Easy Steps to Practice Drawing Simple Animals
🎨
Yogurt Making: A Coloring and Food Science Guide for Kids
💡
The Role of Visual Brainstorming in Children's Art
🧘
A Beginner's Guide to Deep Breathing and Coloring
🎨
A Solar Panel: A Coloring and Invention Guide for Kids
🎨
The Inca City of Machu Picchu: An Ancient History Coloring Guide for Kids
🎨
How to Draw a Triangle: A Coloring and Music Guide for Kids
🧒
Understanding Left-Handed Children in Early Childhood
🎨
Binding a Coloring Book at Home: A Practical Guide
💡
How Drawing Encourages Doodling
🎨
Wombat Coloring and Drawing Ideas for Kids
🎨
Sea Serpent Coloring and Drawing Ideas for Kids
🎨
Folding Laundry: A Simple Life Skill for Kids
👨👩👧
Fun and Simple Travel-Friendly Activities
💬
Understanding Picture Books
🎨
A Home Generator Safety Guide: A Family Safety Guide
🖌️
Simple Steps for Using Oil Pastels
🖍️
Simple Techniques for Layering Colors
🖍️
Simple Techniques for Applying Even Pressure
🎨
Puma Coloring and Drawing Ideas for Kids
🎨
Colosseum: Coloring Page and Fun Facts for Kids
🧘
How Mindful Coloring for Beginners Can Create a Quiet Moment
🎨
How to Draw a Electric Guitar: A Coloring and Music Guide for Kids
🎨
A Neighborhood Emergency Plan: A Family Safety Guide
🎨
Meet Paul Cezanne: An Art Appreciation Guide for Kids
🎨
Exploring Earth: A Coloring and Learning Guide for Kids
🎨
A Ship's Figurehead Coloring and Drawing Ideas for Kids
🎨
Pegasus Coloring and Drawing Ideas for Kids
🎨
Teaching Tolerance: A Simple Activity for Kids
🎨
Ancient Mesopotamian Ziggurats: An Ancient History Coloring Guide for Kids
🎨
A Boardwalk Ferris Wheel Coloring and Drawing Ideas for Kids
🎨
Parakeet Coloring and Drawing Ideas for Kids
📐
How Children Understand Symmetry With Art
🎨
Graduation Day Coloring Ideas and Activities for the Whole Family
🎨
A Gelato Cart: Coloring Ideas and Fun Facts for Kids
🎨
Tacos Coloring Ideas for Kids Who Love to Create
👨👩👧
Creative Activities for Twins for Kids
🎨
Being Welcoming to a New Student: A Simple Social Skill for Kids
🎨
a Kindness Chain: A Simple Mindfulness Activity for Kids
🍎
Using Coloring Pages for Classroom Coloring Stations
🎨
Jack Be Nimble: A Nursery Rhyme Coloring Guide for Kids
🎨
A Pirate Adventure Camp Coloring and Drawing Ideas for Kids
🔬
A Simple Guide to Primary Colors
🧠
Can Drawing Improve Patience?
🎨
Zebra Coloring and Drawing Ideas for Kids
🎨
A Family Budget Chart: A Money Guide for Kids and Parents
🖍️
Simple Techniques for Using Complementary Colors
🎨
Fun Gondola Coloring and Drawing Ideas for Kids
🎨
Hamster Coloring and Drawing Ideas for Kids
🎨
The Letter Z: An Alphabet and Number Coloring Page
👨👩👧
Why Parents Love Low-Mess Activities
🎨
Raising Your Hand to Speak: A Simple Social Skill for Kids
🧘
How Coloring for Focus Can Create a Quiet Moment
🍂
Printable Graduation Season Coloring Pages for Kids
🎨
Fog Over a Forest Coloring Page: A Nature Learning Guide for Kids
🎨
A Paddleboard on Calm Water Coloring and Drawing Ideas for Kids
🎨
Cleaning a Fish Tank: A Simple Pet Care Guide for Kids
🎨
Teaching Integrity: A Simple Activity for Kids
🌈
A Guide to Nature Landscapes Coloring Pages
🎨
How to Draw a Labyrinth Pattern: A Step-by-Step Guide
🍂
Fun Hanukkah Classroom Coloring Ideas
🎨
Tap Shoes: A Coloring and Movement Guide for Kids
🌈
Printable Farm Scenes Coloring Activities
🎨
A Kraken Legend Coloring and Drawing Ideas for Kids
🎨
A Camping Lantern: Coloring Ideas for Your Next Family Adventure
🎨
Chess Coloring Pages and Drawing Ideas for Kids
🎨
Exploring An Alien Planet: A Coloring and Learning Guide for Kids
📴
Why Coloring Beats Scrolling on Restaurant Wait Times
💡
Nurturing Open-Ended Play at Home
🎨
Easy Under the Sea Drawing Ideas
🎨
A Robotics Kit: A Coloring and STEM Guide for Kids
🎨
A Fall Cider Mill Trip: Coloring Ideas and Activities for the Whole Family
🎨
A Class Field Trip: A Classroom Coloring and Learning Guide
🎨
A School Talent Show: A Coloring and Movement Guide for Kids
💡
How Drawing Encourages Storytelling
🎨
Stargazing at Night: Coloring Ideas for Your Next Family Adventure
🎨
Fun Insects Drawing Activities for Kids
🎨
A Tilt-a-Whirl Ride Coloring and Drawing Ideas for Kids
🎲
Using Drawing for Drawing Prompt Games
🔬
What Is Color Wheels?
🎨
Red Light Green Light: A Coloring and Playtime Guide for Kids
🎨
A Pet Grooming Kit: A Simple Pet Care Guide for Kids
🎨
Exploring An Astronaut: A Coloring and Learning Guide for Kids
🖍️
How to Get Better at Coloring Cartoon Characters
💡
Nurturing Creative Confidence at Home
🎨
Chichen Itza: Coloring Page and Fun Facts for Kids
👨👩👧
Fun and Simple Screen-Free Afternoons
🔎
Exploring Sketching to Understand Complex Ideas for Students
🖍️
Why Choosing Your First Coloring Pencils Makes a Difference
🌈
Creative Ways to Color Fantasy Creatures
💡
Building Inventing New Ideas Through Coloring and Drawing
🎨
A Pet's Bedtime Routine: A Simple Pet Care Guide for Kids
🎨
Rainforest Canopy Coloring Page: A Nature Learning Guide for Kids
🎨
A Garden Hoe: A Gardening Guide for Kids and Families
📐
Learning Tessellations Through Drawing
👨👩👧
Easy Holiday Break Activities With Coloring Pages
🎨
A Wild West Town Main Street: A Wild West Coloring and History Guide for Kids
👨👩👧
Making the Most of Screen-Free Afternoons
🌈
A Guide to Emotions and Faces Coloring Pages
🧘
How Mandala Coloring Can Create a Quiet Moment
🌈
Relaxing Buildings and Castles Coloring Activities
🍎
A Teacher's Guide to Art Lessons for Math Class
🧒
Understanding Shape Recognition in Early Childhood
🎨
How to Draw a Honeycomb Pattern: A Step-by-Step Guide
🔬
Understanding How Light Creates Color
🍂
Printable Valentine's Day Coloring Pages for Kids
🧒
Fun Ways to Build The Scribbling Stage
🎨
How to Draw a A Shape Pattern Sequence: A Step-by-Step Guide for Kids
🍎
Simple Early Finisher Activities for Busy Classrooms
🎨
Jellyfish Coloring and Drawing Ideas for Kids
🎨
An Egg and Spoon Race: A Coloring and Playtime Guide for Kids
🎨
Sea Dragon Coloring and Drawing Ideas for Kids
📐
Why Grids and Coordinates and Drawing Go Together
🧒
A Parent's Guide to Children Who Dislike Drawing
🎨
A Beginner's Guide to Drawing Everyday Objects
🎨
A Programming Language Logo Concept: A Coloring and STEM Guide for Kids
🎨
Meet Leonardo da Vinci: An Art Appreciation Guide for Kids
🎨
Meet the Pilot: A Community Helper Coloring Guide
🌈
Fairy Tale Scenes Coloring Ideas for Classrooms
🎨
Complimenting a Friend: A Simple Social Skill for Kids
🎨
A Stagecoach: A Wild West Coloring and History Guide for Kids
🎨
A Road Roller Machine Coloring and Drawing Ideas for Kids
🌈
Creative Ways to Color Ocean Life
🌈
A Guide to Insects and Bugs Coloring Pages
🎨
Meet Watercolor Painting: An Art Appreciation Guide for Kids
🎨
Saying Sorry and Meaning It: A Simple Social Skill for Kids
🎨
Vehicles Drawing Prompts for Beginners
🔤
Drawing Activities for Emotions and Feelings Words
🎨
A Dino Egg Hatching Close-Up Coloring Page: Fun Facts for Young Paleontologists
🖍️
Simple Techniques for Coloring Cartoon Characters
🎨
Peter Peter Pumpkin Eater: A Nursery Rhyme Coloring Guide for Kids
🎨
How to Draw a An Arch Shape: A Step-by-Step Guide for Kids
🎨
Teaching Gratitude: A Simple Activity for Kids
🎨
A Superhero's First Day on the Job: A Superhero Coloring and Design Guide for Kids
🎨
A Peeler: A Kitchen Guide for Kids and Parents
📐
Why Graphs and Charts and Drawing Go Together
🎨
A Teleportation Superhero: A Superhero Coloring and Design Guide for Kids
🎨
Party Favor Coloring Sheets: Free Ideas for Your Next Celebration
🎨
Hot Spring Coloring Page: A Nature Learning Guide for Kids
🎨
Phoenix Coloring and Drawing Ideas for Kids
🎨
Tennis Coloring Pages and Drawing Ideas for Kids
🎨
Creative Buildings and Houses Drawing Exercises
🎨
The Letter G: An Alphabet and Number Coloring Page
🔎
How Mind Maps Support Learning
🎨
Mermaid Lagoon Coloring and Drawing Ideas for Kids
🎨
Respecting Personal Space: A Simple Social Skill for Kids
🎨
A Giant Robot: A Coloring and Invention Guide for Kids
🎨
A Roller Coaster Coloring and Drawing Ideas for Kids
🎨
A Beach Chair Coloring and Drawing Ideas for Kids
🎨
Creative Nature Scenes Drawing Exercises
🎨
Meet the Photographer: A Community Helper Coloring Guide
🎨
Sahara Desert: Coloring Page and Fun Facts for Kids
✏️
Why Drawing Squares and Rectangles Matters for New Artists
🎨
How to Draw a A Pattern of Triangles: A Step-by-Step Guide for Kids
💬
Why Maps and Wayfinding Symbols Matter in Everyday Life
🎨
Vegetable Garden Bed Coloring and Drawing Ideas for Kids
🎨
A Compass and Map: Coloring Ideas for Your Next Family Adventure
🎨
Polly Put the Kettle On: A Nursery Rhyme Coloring Guide for Kids
🎨
A Bucket and Shovel Coloring and Drawing Ideas for Kids
How Drawing Encourages Character Design
🎲
How to Play Collaborative Drawing Games
🎨
A Superhero Standing Up for a Friend: A Superhero Coloring and Design Guide for Kids
🎨
Kraken Coloring and Drawing Ideas for Kids
🎨
What Time Is It, Mr. Fox: A Coloring and Playtime Guide for Kids
🎨
Mole Coloring and Drawing Ideas for Kids
🎨
A Camp Counselor: Coloring Ideas for Your Next Family Adventure
✏️
How to Improve Your Drawing Curved Lines
🎨
A Beginner's Guide to Drawing Dinosaurs
🎨
Basilisk Coloring and Drawing Ideas for Kids
🎨
A Native American Village (Respectfully Depicted): A Wild West Coloring and History Guide for Kids
🎨
Meet the Fashion Designer: A Community Helper Coloring Guide
🎨
The Princess and the Pea: A Classic Story Coloring Guide for Kids
🎨
A Painter on Scaffolding Coloring and Drawing Ideas for Kids
🎨
How to Draw a French Horn: A Coloring and Music Guide for Kids
🎨
A Simple Density Experiment with Oil and Water: A Step-by-Step Science Guide for Kids
🎨
A Kettle: A Kitchen Guide for Kids and Parents
🎨
A Beginner's Guide to Drawing Gardens and Flowers
🔬
Understanding Color Wheels
✏️
Easy Steps to Practice Drawing Simple Animals
🎨
Yogurt Making: A Coloring and Food Science Guide for Kids
💡
The Role of Visual Brainstorming in Children's Art
🧘
A Beginner's Guide to Deep Breathing and Coloring
🎨
A Solar Panel: A Coloring and Invention Guide for Kids
🎨
The Inca City of Machu Picchu: An Ancient History Coloring Guide for Kids
🎨
How to Draw a Triangle: A Coloring and Music Guide for Kids
🧒
Understanding Left-Handed Children in Early Childhood
🎨
Binding a Coloring Book at Home: A Practical Guide
💡
How Drawing Encourages Doodling
🎨
Wombat Coloring and Drawing Ideas for Kids
🎨
Sea Serpent Coloring and Drawing Ideas for Kids
🎨
Folding Laundry: A Simple Life Skill for Kids
👨👩👧
Fun and Simple Travel-Friendly Activities
💬
Understanding Picture Books
🎨
A Home Generator Safety Guide: A Family Safety Guide
🖌️
Simple Steps for Using Oil Pastels
🖍️
Simple Techniques for Layering Colors
🖍️
Simple Techniques for Applying Even Pressure
🎨
Puma Coloring and Drawing Ideas for Kids
🎨
Colosseum: Coloring Page and Fun Facts for Kids
🧘
How Mindful Coloring for Beginners Can Create a Quiet Moment
🎨
How to Draw a Electric Guitar: A Coloring and Music Guide for Kids
🎨
A Neighborhood Emergency Plan: A Family Safety Guide
🎨
Meet Paul Cezanne: An Art Appreciation Guide for Kids
🎨
Exploring Earth: A Coloring and Learning Guide for Kids
🎨
A Ship's Figurehead Coloring and Drawing Ideas for Kids
🎨
Pegasus Coloring and Drawing Ideas for Kids
🎨
Teaching Tolerance: A Simple Activity for Kids
🎨
Ancient Mesopotamian Ziggurats: An Ancient History Coloring Guide for Kids
🎨
A Boardwalk Ferris Wheel Coloring and Drawing Ideas for Kids
🎨
Parakeet Coloring and Drawing Ideas for Kids
📐
How Children Understand Symmetry With Art
🎨
Graduation Day Coloring Ideas and Activities for the Whole Family
🎨
A Gelato Cart: Coloring Ideas and Fun Facts for Kids
🎨
Tacos Coloring Ideas for Kids Who Love to Create
👨👩👧
Creative Activities for Twins for Kids
🎨
Being Welcoming to a New Student: A Simple Social Skill for Kids
🎨
a Kindness Chain: A Simple Mindfulness Activity for Kids
🍎
Using Coloring Pages for Classroom Coloring Stations
🎨
Jack Be Nimble: A Nursery Rhyme Coloring Guide for Kids
🎨
A Pirate Adventure Camp Coloring and Drawing Ideas for Kids
🔬
A Simple Guide to Primary Colors
🧠
Can Drawing Improve Patience?
🎨
Zebra Coloring and Drawing Ideas for Kids
🎨
A Family Budget Chart: A Money Guide for Kids and Parents
🖍️
Simple Techniques for Using Complementary Colors
🎨
Fun Gondola Coloring and Drawing Ideas for Kids
🎨
Hamster Coloring and Drawing Ideas for Kids
🎨
The Letter Z: An Alphabet and Number Coloring Page
👨👩👧
Why Parents Love Low-Mess Activities
🎨
Raising Your Hand to Speak: A Simple Social Skill for Kids
🧘
How Coloring for Focus Can Create a Quiet Moment
🍂
Printable Graduation Season Coloring Pages for Kids
🎨
Fog Over a Forest Coloring Page: A Nature Learning Guide for Kids
🎨
A Paddleboard on Calm Water Coloring and Drawing Ideas for Kids
🎨
Cleaning a Fish Tank: A Simple Pet Care Guide for Kids
🎨
Teaching Integrity: A Simple Activity for Kids
🌈
A Guide to Nature Landscapes Coloring Pages
🎨
How to Draw a Labyrinth Pattern: A Step-by-Step Guide
🍂
Fun Hanukkah Classroom Coloring Ideas
🎨
Tap Shoes: A Coloring and Movement Guide for Kids
🌈
Printable Farm Scenes Coloring Activities
🎨
A Kraken Legend Coloring and Drawing Ideas for Kids
🎨
A Camping Lantern: Coloring Ideas for Your Next Family Adventure
🎨
Chess Coloring Pages and Drawing Ideas for Kids
🎨
Exploring An Alien Planet: A Coloring and Learning Guide for Kids
📴
Why Coloring Beats Scrolling on Restaurant Wait Times
💡
Nurturing Open-Ended Play at Home
🎨
Easy Under the Sea Drawing Ideas
🎨
A Robotics Kit: A Coloring and STEM Guide for Kids
🎨
A Fall Cider Mill Trip: Coloring Ideas and Activities for the Whole Family
🎨
A Class Field Trip: A Classroom Coloring and Learning Guide
🎨
A School Talent Show: A Coloring and Movement Guide for Kids
💡
How Drawing Encourages Storytelling
🎨
Stargazing at Night: Coloring Ideas for Your Next Family Adventure
🎨
Fun Insects Drawing Activities for Kids
🎨
A Tilt-a-Whirl Ride Coloring and Drawing Ideas for Kids
🎲
Using Drawing for Drawing Prompt Games
🔬
What Is Color Wheels?
🎨
Red Light Green Light: A Coloring and Playtime Guide for Kids
🎨
A Pet Grooming Kit: A Simple Pet Care Guide for Kids
🎨
Exploring An Astronaut: A Coloring and Learning Guide for Kids
🖍️
How to Get Better at Coloring Cartoon Characters
💡
Nurturing Creative Confidence at Home
🎨
Chichen Itza: Coloring Page and Fun Facts for Kids
👨👩👧
Fun and Simple Screen-Free Afternoons
🔎
Exploring Sketching to Understand Complex Ideas for Students
🖍️
Why Choosing Your First Coloring Pencils Makes a Difference
🌈
Creative Ways to Color Fantasy Creatures
💡
Building Inventing New Ideas Through Coloring and Drawing
🎨
A Pet's Bedtime Routine: A Simple Pet Care Guide for Kids
🎨
Rainforest Canopy Coloring Page: A Nature Learning Guide for Kids
🎨
A Garden Hoe: A Gardening Guide for Kids and Families
📐
Learning Tessellations Through Drawing
👨👩👧
Easy Holiday Break Activities With Coloring Pages
🎨
A Wild West Town Main Street: A Wild West Coloring and History Guide for Kids
👨👩👧
Making the Most of Screen-Free Afternoons
🌈
A Guide to Emotions and Faces Coloring Pages
🧘
How Mandala Coloring Can Create a Quiet Moment
🌈
Relaxing Buildings and Castles Coloring Activities
🍎
A Teacher's Guide to Art Lessons for Math Class
🧒
Understanding Shape Recognition in Early Childhood
🎨
How to Draw a Honeycomb Pattern: A Step-by-Step Guide
🔬
Understanding How Light Creates Color
🍂
Printable Valentine's Day Coloring Pages for Kids
🧒
Fun Ways to Build The Scribbling Stage
🎨
How to Draw a A Shape Pattern Sequence: A Step-by-Step Guide for Kids
🍎
Simple Early Finisher Activities for Busy Classrooms
🎨
Jellyfish Coloring and Drawing Ideas for Kids
🎨
An Egg and Spoon Race: A Coloring and Playtime Guide for Kids
🎨
Sea Dragon Coloring and Drawing Ideas for Kids
📐
Why Grids and Coordinates and Drawing Go Together
🧒
A Parent's Guide to Children Who Dislike Drawing
🎨
A Beginner's Guide to Drawing Everyday Objects
🎨
A Programming Language Logo Concept: A Coloring and STEM Guide for Kids
🎨
Meet Leonardo da Vinci: An Art Appreciation Guide for Kids
🎨
Meet the Pilot: A Community Helper Coloring Guide
🌈
Fairy Tale Scenes Coloring Ideas for Classrooms
🎨
Complimenting a Friend: A Simple Social Skill for Kids
🎨
A Stagecoach: A Wild West Coloring and History Guide for Kids
🎨
A Road Roller Machine Coloring and Drawing Ideas for Kids
🌈
Creative Ways to Color Ocean Life
🌈
A Guide to Insects and Bugs Coloring Pages
🎨
Meet Watercolor Painting: An Art Appreciation Guide for Kids
🎨
Saying Sorry and Meaning It: A Simple Social Skill for Kids
🎨
Vehicles Drawing Prompts for Beginners
🔤
Drawing Activities for Emotions and Feelings Words
🎨
A Dino Egg Hatching Close-Up Coloring Page: Fun Facts for Young Paleontologists
🖍️
Simple Techniques for Coloring Cartoon Characters
🎨
Peter Peter Pumpkin Eater: A Nursery Rhyme Coloring Guide for Kids
🎨
How to Draw a An Arch Shape: A Step-by-Step Guide for Kids
🎨
Teaching Gratitude: A Simple Activity for Kids
🎨
A Superhero's First Day on the Job: A Superhero Coloring and Design Guide for Kids
🎨
A Peeler: A Kitchen Guide for Kids and Parents
📐
Why Graphs and Charts and Drawing Go Together
🎨
A Teleportation Superhero: A Superhero Coloring and Design Guide for Kids
🎨
Party Favor Coloring Sheets: Free Ideas for Your Next Celebration
🎨
Hot Spring Coloring Page: A Nature Learning Guide for Kids
🎨
Phoenix Coloring and Drawing Ideas for Kids
🎨
Tennis Coloring Pages and Drawing Ideas for Kids
🎨
Creative Buildings and Houses Drawing Exercises
🎨
The Letter G: An Alphabet and Number Coloring Page
🔎
How Mind Maps Support Learning
🎨
Mermaid Lagoon Coloring and Drawing Ideas for Kids
🎨
Respecting Personal Space: A Simple Social Skill for Kids
🎨
A Giant Robot: A Coloring and Invention Guide for Kids
🎨
A Roller Coaster Coloring and Drawing Ideas for Kids
🎨
A Beach Chair Coloring and Drawing Ideas for Kids
🎨
Creative Nature Scenes Drawing Exercises
🎨
Meet the Photographer: A Community Helper Coloring Guide
🎨
Sahara Desert: Coloring Page and Fun Facts for Kids
✏️
Why Drawing Squares and Rectangles Matters for New Artists
🎨
How to Draw a A Pattern of Triangles: A Step-by-Step Guide for Kids
💬
Why Maps and Wayfinding Symbols Matter in Everyday Life
🎨
Vegetable Garden Bed Coloring and Drawing Ideas for Kids
🎨
A Compass and Map: Coloring Ideas for Your Next Family Adventure
🎨
Polly Put the Kettle On: A Nursery Rhyme Coloring Guide for Kids
🎨
A Bucket and Shovel Coloring and Drawing Ideas for Kids
 The Link Between Drawing and Planning Skills
🎨
A Sea Chest of Gold Coins Coloring and Drawing Ideas for Kids
🎨
A Kids' Yard Work Business: A Money Guide for Kids and Parents
🎨
A Ladder Against a Wall Coloring and Drawing Ideas for Kids
🎨
A Beach Bike Ride Coloring and Drawing Ideas for Kids
🖍️
A Beginner's Guide to Avoiding Smudges While Coloring
💗
Understanding Art for Stressful Days
🌈
Fun Community Helpers Coloring Pages for Kids
🎨
Camel Coloring and Drawing Ideas for Kids
🎨
A Seesaw Ride: A Coloring and Playtime Guide for Kids
🎨
Rattlesnake Coloring and Drawing Ideas for Kids
🎨
Meet the News Anchor: A Community Helper Coloring Guide
🎨
The Boy Who Cried Wolf: A Classic Story Coloring Guide for Kids
🎨
Exploring Belgium: A Coloring and Culture Guide for Kids
💡
Building Imaginary Worlds Through Coloring and Drawing
👨👩👧
Easy Birthday Party Activities With Coloring Pages
🎨
Pastel Pencils: A Buying and Technique Guide
💗
Exploring The Difference Between Art Therapy and Coloring Through Art
🖍️
A Beginner's Guide to Coloring Large Areas
🎨
Horse Coloring and Drawing Ideas for Kids
🎨
A Trilobite Coloring Page: Fun Facts for Young Paleontologists
🎨
Pinwheel Coloring and Drawing Ideas for Kids
🎨
Christmas Coloring Ideas and Activities for the Whole Family
🎨
Firefly Coloring and Drawing Ideas for Kids
🎨
Easy Buildings and Houses Drawing Ideas
🎨
A Sunken Shipwreck Coloring and Drawing Ideas for Kids
🎨
A Summer Popsicle Stand: Coloring Ideas and Activities for the Whole Family
🎲
Using Drawing for Sketch Relay Games
🎨
Pine Tree: A Coloring and Nature Guide for Kids
🧒
Drawing Activities for Drawing Development Stages
🎨
A GPS Satellite: A Coloring and Space Mission Guide for Kids
🌈
Relaxing Ocean Life Coloring Activities
🎨
Trampoline Coloring Pages and Drawing Ideas for Kids
🎨
A Marble Run Machine: A Coloring and STEM Guide for Kids
🎨
Wooden Blocks Coloring and Drawing Ideas for Kids
📐
How Children Understand Measurement With Art
🎲
Step-by-Step Mazes
🎨
Meet the Police Officer: A Community Helper Coloring Guide
🎨
A Construction Worker in a Hard Hat Coloring and Drawing Ideas for Kids
🎨
Meet Landscape Painting: An Art Appreciation Guide for Kids
🎨
Space Needle: Coloring Page and Fun Facts for Kids
🎨
The Little Red Hen: A Classic Story Coloring Guide for Kids
🍎
A Teacher's Guide to Cross-Curricular Art Lessons
🏺
Why Ancient Pottery Art Matter to Historians
🔬
What Is Secondary Colors?
🍂
Fun Halloween Classroom Coloring Ideas
🧠
How Drawing May Support Memory
🎨
Amazon Rainforest: Coloring Page and Fun Facts for Kids
✏️
Easy Steps to Practice Drawing Triangles
🎨
How to Draw a Crescent Moon Shape: A Step-by-Step Guide for Kids
💬
Why Emojis and Modern Pictograms Matter in Everyday Life
🎨
Upcycling Coloring Pages Into Crafts: A Practical Guide
🎨
Okapi Coloring and Drawing Ideas for Kids
🧒
A Parent's Guide to Ages 4-5
🎨
How to Draw a Oval: A Step-by-Step Guide for Kids
🎨
The Wheels on the Bus: A Nursery Rhyme Coloring Guide for Kids
🏺
Exploring Ancient Symbols
🧠
Why Drawing Can Help With Cognitive Development
🧠
Why Drawing Can Help With Imagination
🎨
A Spring Butterfly Garden: Coloring Ideas and Activities for the Whole Family
🎨
A Cattle Drive: A Wild West Coloring and History Guide for Kids
🧘
A Beginner's Guide to Coloring With Soft Music
🎨
Yankee Doodle: A Nursery Rhyme Coloring Guide for Kids
🔤
Visual Vocabulary: Opposites
🎨
Meet Claude Monet: An Art Appreciation Guide for Kids
🎨
Table Manners at Dinner: A Simple Social Skill for Kids
🎨
Snow Sledding: Coloring Ideas and Activities for the Whole Family
💡
Nurturing Character Design at Home
🎨
Horned Lizard Coloring and Drawing Ideas for Kids
🔬
What Is Why Printers Use CMYK?
🖍️
Why Blending Colors Smoothly Makes a Difference
🎨
The Digestive System: A Coloring and Health Guide for Kids
🎨
Hyena Coloring and Drawing Ideas for Kids
🎨
Ocelot Coloring and Drawing Ideas for Kids
🎨
Teaching Graciousness: A Simple Activity for Kids
🎨
Tying Shoelaces: A Simple Life Skill for Kids
🎨
Hansel and Gretel: A Classic Story Coloring Guide for Kids
🎨
Fun Submarine Coloring and Drawing Ideas for Kids
🎨
Cerberus Coloring and Drawing Ideas for Kids
👨👩👧
Coloring Ideas for Waiting Room Activities
🎨
Keeping a Promise: A Simple Social Skill for Kids
✏️
Why Sketching Basics Matters for New Artists
🎨
A Simple Interest Concept (Coins Growing Over Time): A Money Guide for Kids and Parents
📐
Why Measurement and Drawing Go Together
🎨
A Paper Chromatography Flower: A Step-by-Step Science Guide for Kids
🎨
How to Draw a An Arrow Shape: A Step-by-Step Guide for Kids
🧠
How Drawing May Support Cognitive Development
🧠
The Link Between Drawing and Working Memory
🎨
A Cave Painting of a Dinosaur Coloring Page: Fun Facts for Young Paleontologists
🌈
Community Helpers Coloring Ideas for Classrooms
🎨
Dual-Tip Markers: A Buying and Technique Guide
🎨
a Mask Cutout Printable: Free Ideas for Your Next Celebration
💗
Understanding Drawing Feelings Instead of Words
🎨
A Dance Battle: A Coloring and Movement Guide for Kids
🎨
Meet the Airline Pilot: A Community Helper Coloring Guide
👨👩👧
Easy Outdoor-Inspired Drawing With Coloring Pages
🔎
Exploring Mind Maps for Students
💗
Creative Approaches to Emotional Expression
🎨
Red Barn Coloring and Drawing Ideas for Kids
🖍️
Simple Techniques for Coloring With Crayons
🎨
Answering the Phone Politely: A Simple Life Skill for Kids
🧘
Why Guided Mindful Coloring Feels Calming
🎨
Easy Robots Drawing Ideas
🎨
A Tibetan Traditional Chuba: A Coloring and Culture Guide for Kids
🎨
A Tide Pool Full of Creatures Coloring and Drawing Ideas for Kids
🍎
Simple Art Lessons for Science Class for Busy Classrooms
🖍️
Why Using Complementary Colors Makes a Difference
🎨
Cheese Platter Coloring Ideas for Kids Who Love to Create
🎨
Popsicle Coloring Ideas for Kids Who Love to Create
🎨
Stuck in the Mud Tag: A Coloring and Playtime Guide for Kids
🔎
How Connecting Ideas Through Drawing Support Learning
📐
Why Fractions and Drawing Go Together
🎨
Fun Fire Truck Coloring and Drawing Ideas for Kids
🎨
A Community Building Project Coloring and Drawing Ideas for Kids
🎨
Growing Taller: A Coloring and Health Guide for Kids
🌈
Weather Scenes Coloring Ideas for Classrooms
👨👩👧
Coloring Ideas for Morning Routine Activities
🎨
A Vietnamese Ao Dai: A Coloring and Culture Guide for Kids
🧘
How Coloring in Silence Can Create a Quiet Moment
🎨
Sandwich Coloring Ideas for Kids Who Love to Create
💡
The Role of Finding Inspiration in Children's Art
🎨
Affirmation Coloring: A Simple Mindfulness Activity for Kids
🍂
Printable Christmas Coloring Pages for Kids
🎨
A Class Art Wall Display: A Classroom Coloring and Learning Guide
🎲
Using Drawing for Memory Matching Games
🎲
Step-by-Step Treasure Map Games
🎨
Taking Responsibility for a Mistake: A Simple Social Skill for Kids
🔎
Using Flowcharts to Solve Problems
🎨
Red Rover: A Coloring and Playtime Guide for Kids
🎨
A Kids' Money Quiz Chart: A Money Guide for Kids and Parents
🧒
What to Expect When Teaching Left-Handed Children
🔤
Drawing Activities for Action Words
🎨
Meet Jean-Michel Basquiat: An Art Appreciation Guide for Kids
🍂
Printable Autumn Coloring Pages for Kids
🎨
Cow Coloring and Drawing Ideas for Kids
🎨
Exploring Canada: A Coloring and Culture Guide for Kids
🎲
Fun Board Game Design for Kids
🎨
A Family Bike Ride on a Trail: Coloring Ideas for Your Next Family Adventure
🎨
Hot Dog Coloring Ideas for Kids Who Love to Create
🖍️
How to Get Better at Coloring Animals Realistically
🖌️
Exploring Outlining Techniques
👨👩👧
Easy Weekend Family Activities With Coloring Pages
🎨
A Traditional Dance Costume with Bells: A Coloring and Culture Guide for Kids
🎨
Exploring Venus: A Coloring and Learning Guide for Kids
💗
The Role of Coloring in Coping With Change Through Drawing
🎨
Pea Pod Coloring and Drawing Ideas for Kids
🔎
How Organizing Research With Sketches Support Learning
🎨
The Ugly Duckling: A Classic Story Coloring Guide for Kids
🎨
Mindful Walking: A Simple Mindfulness Activity for Kids
🎨
Meadow of Wildflowers Coloring Page: A Nature Learning Guide for Kids
🧠
The Link Between Drawing and Hand-Eye Coordination
🎨
A Traditional Dragon Dance: A Coloring and Movement Guide for Kids
🎨
A Gear System: A Coloring and STEM Guide for Kids
🧠
Why Drawing Can Help With Sequential Thinking
📐
Why Proportion and Drawing Go Together
🎨
Being Kind to Someone Different: A Simple Social Skill for Kids
🌈
Relaxing Fairy Tale Scenes Coloring Activities
🎨
How to Draw a Rectangle: A Step-by-Step Guide for Kids
🎨
A Trained Seal Coloring and Drawing Ideas for Kids
🎨
Cuttlefish Coloring and Drawing Ideas for Kids
🌈
A Guide to Community Helpers Coloring Pages
🎨
Meet Abstract Expressionism: An Art Appreciation Guide for Kids
🎨
Fun Steam Train Coloring and Drawing Ideas for Kids
🎨
How to Draw a Wavy Line: A Step-by-Step Guide for Kids
🎨
How to Draw a Xylophone: A Coloring and Music Guide for Kids
🎨
Pineapple Coloring and Drawing Ideas for Kids
🎨
How to Draw a Fractal Pattern: A Step-by-Step Guide
📴
Hands-On Activities for Weekend Mornings
🎨
Handling Disagreements Calmly: A Simple Social Skill for Kids
🎨
Weevil Coloring and Drawing Ideas for Kids
🧠
The Link Between Drawing and Attention to Detail
🎨
A Dinosaur Egg Nest Coloring Page: Fun Facts for Young Paleontologists
🎨
Ice Skating on a Pond: Coloring Ideas and Activities for the Whole Family
🎨
Toy Train Set Coloring and Drawing Ideas for Kids
🎨
Meet Gustav Klimt: An Art Appreciation Guide for Kids
🏺
The History of Ancient Egyptian Art
🎨
Skateboarding Coloring Pages and Drawing Ideas for Kids
🔤
Drawing Activities for Sight Words
🎨
Starfish Coloring and Drawing Ideas for Kids
🎨
Box Turtle Coloring and Drawing Ideas for Kids
👨👩👧
Making the Most of Low-Mess Activities
🍎
Using Coloring Pages for Transition Time Activities
🎨
Desert Dunes Coloring Page: A Nature Learning Guide for Kids
🎨
Broccoli Coloring and Drawing Ideas for Kids
🧠
The Link Between Drawing and Observation Skills
🎨
Framing Kids Coloring Art: A Practical Guide
🎲
Pictionary-Style Games: A Creative Twist
🎨
A Brick Wall Being Built Coloring and Drawing Ideas for Kids
🎨
Building a Travel Coloring Kit: A Buying and Technique Guide
🔬
The Science Behind Color Wheels
🎨
Exploring A Satellite: A Coloring and Learning Guide for Kids
🎨
Eyes and How We See: A Coloring and Health Guide for Kids
🎨
Staying Hydrated: A Coloring and Health Guide for Kids
🖌️
How to Practice Using Watercolor
🎨
Teaching Positivity: A Simple Activity for Kids
🏺
Why Early Writing Systems Matter to Historians
🌈
Printable Fantasy Creatures Coloring Activities
🎨
The Letter Y: An Alphabet and Number Coloring Page
🧒
Understanding The Scribbling Stage in Early Childhood
🎨
A Kitchen Timer: A Kitchen Guide for Kids and Parents
🎨
A Crow's Nest Lookout Coloring and Drawing Ideas for Kids
🔤
Drawing Activities for Colors in a New Language
🎨
Meet the Baker Kneading Bread: A Community Helper Coloring Guide
🍎
A Teacher's Guide to Group Art Projects
🏺
Exploring Ancient Pottery Art
🎨
Snail on a Leaf Coloring and Drawing Ideas for Kids
🎨
How to Draw a Sorting Shapes by Size: A Step-by-Step Guide for Kids
🖍️
A Beginner's Guide to Blending Colors Smoothly
🎲
How to Play Drawing-Based Party Games
🎨
Meet Katsushika Hokusai: An Art Appreciation Guide for Kids
🎨
An Ancient Scribe Writing on Papyrus: An Ancient History Coloring Guide for Kids
🎨
A Falafel Plate: Coloring Ideas and Fun Facts for Kids
🍎
Simple Circle Time Activities for Busy Classrooms
🖍️
Simple Techniques for Mixing Warm and Cool Colors
🔎
Why Visual Thinkers Use Storyboarding for Projects
🎨
Fun Ferry Boat Coloring and Drawing Ideas for Kids
🎨
How to Draw a Maracas: A Coloring and Music Guide for Kids
💗
Creative Approaches to Family Art Time and Connection
💡
Why Doodling Matters for Young Artists
🎨
Exploring Russia: A Coloring and Culture Guide for Kids
🎨
Twistable Crayons: A Buying and Technique Guide
🎨
Lightning Safety Rules: A Family Safety Guide
🎨
A Library Coloring Program: A Practical Guide
🎨
How to Draw a Feather Mandala: A Step-by-Step Guide
🎨
Learning About Allergies: A Coloring and Health Guide for Kids
🎨
Sailfish Coloring and Drawing Ideas for Kids
🍂
Celebrate Easter With Coloring Activities
🎨
A Music Festival Crowd: A Coloring and Movement Guide for Kids
🎨
A Raised Garden Bed: A Gardening Guide for Kids and Families
🎨
Tuna Coloring and Drawing Ideas for Kids
🎨
Pond Turtle Coloring and Drawing Ideas for Kids
🎨
How to Draw a Trapezoid: A Step-by-Step Guide for Kids
🎨
Baseball Coloring Pages and Drawing Ideas for Kids
💗
Exploring Processing Big Feelings Through Art
🎨
A Fishing Boat at Work: A Coloring and Food Science Guide for Kids
🔤
Visual Vocabulary: Sentence Building
🎨
How to Draw a Gingham Pattern: A Step-by-Step Guide
🎨
Exploring Ethiopia: A Coloring and Culture Guide for Kids
🏺
How Cave Paintings Shaped Human Communication
🎨
a Graduation Cap Coloring Sheet: Free Ideas for Your Next Celebration
🍎
How Teachers Can Use Classroom Reward Activities
🍂
Seasonal Coloring Guide: Cultural Festivals
🌈
Printable Ocean Life Coloring Activities
🎨
Fun Favorite Foods Drawing Activities for Kids
🎨
How to Draw a Harp: A Coloring and Music Guide for Kids
🎨
A Traditional Wedding Headdress: A Coloring and Culture Guide for Kids
🎨
A Family Fire Drill: A Family Safety Guide
📴
Why Coloring Beats Scrolling on Waiting Rooms
🎨
Meet the Nurse: A Community Helper Coloring Guide
🎨
Fun Taxi Cab Coloring and Drawing Ideas for Kids
💗
Understanding The Difference Between Art Therapy and Coloring
🍂
Creative Thanksgiving Coloring Projects for Classrooms
🎨
Thanksgiving Coloring Ideas and Activities for the Whole Family
🌈
Creative Ways to Color Insects and Bugs
🎨
Meet Roy Lichtenstein: An Art Appreciation Guide for Kids
🎨
Tick Coloring and Drawing Ideas for Kids
🧒
How Drawing Supports Pre-Writing Skills
🎨
A Thai Traditional Silk Dress: A Coloring and Culture Guide for Kids
🍂
Celebrate Mother's Day With Coloring Activities
🎨
Quetzalcoatlus Coloring Page: Fun Facts for Young Paleontologists
🎨
Using Scissors Safely: A Simple Life Skill for Kids
🎨
A Break Dancer: A Coloring and Movement Guide for Kids
🎨
Jump Rope Double Dutch: A Coloring and Playtime Guide for Kids
🎨
A Music Box: A Coloring and Movement Guide for Kids
🎨
A Community Garden Plot: A Gardening Guide for Kids and Families
🔤
Learning New Vocabulary Words Through Drawing
🎨
Creative Emotions and Faces Drawing Exercises
🎨
The Letter E: An Alphabet and Number Coloring Page
🎨
A Prototype Model: A Coloring and STEM Guide for Kids
🎨
Playground Slide Coloring and Drawing Ideas for Kids
🎨
a Camping Trip Coloring Ideas and Activities for the Whole Family
🔎
Why Visual Thinkers Use Diagrams in Science
🍎
A Teacher's Guide to Classroom Management Through Art
🎨
A Rapper on Stage: A Coloring and Movement Guide for Kids
🎨
A Garden Arch with Vines: A Gardening Guide for Kids and Families
🎨
A Wallet and Coin Purse: A Money Guide for Kids and Parents
🎨
A Healthy Snack Choice: A Coloring and Health Guide for Kids
📐
How Children Understand Counting With Art
🎨
Mindful Stretching: A Simple Mindfulness Activity for Kids
🎨
Badminton Coloring Pages and Drawing Ideas for Kids
🎨
A Family Beach Umbrella Setup Coloring and Drawing Ideas for Kids
💬
The Power of Visual Storytelling
💡
How Drawing Encourages Divergent Thinking
🎲
Fun Strategy Sketching for Sports for Kids
🎨
A Simple Bank Account: A Money Guide for Kids and Parents
🎨
A Piggy Bank Being Counted: A Money Guide for Kids and Parents
💡
Building Artistic Risk-Taking Through Coloring and Drawing
🎨
A Kids' Pet Responsibility Chart: A Simple Pet Care Guide for Kids
🎨
Green Bean Coloring and Drawing Ideas for Kids
🎨
A Sea Shanty Sing-Along Coloring and Drawing Ideas for Kids
👨👩👧
Why Parents Love Sibling Bonding Activities
🎨
Teaching Determination: A Simple Activity for Kids
🎨
Creative Farm Life Drawing Exercises
🎨
Tomato Coloring and Drawing Ideas for Kids
🔤
How Pictures Help Children Learn Opposites
🎨
A Mermaid Spotted at Sea Coloring and Drawing Ideas for Kids
🎲
Using Drawing for Guess-the-Drawing Games
🎨
Being a Good Listener: A Simple Life Skill for Kids
🎨
A Fire Eater Coloring and Drawing Ideas for Kids
🎨
Checkers Board Coloring and Drawing Ideas for Kids
🖍️
How to Get Better at Mixing Warm and Cool Colors
🎨
Salamander Coloring and Drawing Ideas for Kids
🎨
Following a Recipe: A Simple Life Skill for Kids
🎨
A Hoverboard: A Coloring and Invention Guide for Kids
🎨
A Strongman Coloring and Drawing Ideas for Kids
🎨
Llama Coloring and Drawing Ideas for Kids
🔎
A Beginner's Guide to Brainstorming With Pictures
🧒
What to Expect When Teaching Hand-Eye Coordination
🎨
How to Draw a Diamond: A Step-by-Step Guide for Kids
🏺
Exploring Prehistoric Drawing Tools
🎨
A Beginner's Guide to Drawing Community Helpers
🍎
Simple Cross-Curricular Art Lessons for Busy Classrooms
The Link Between Drawing and Planning Skills
🎨
A Sea Chest of Gold Coins Coloring and Drawing Ideas for Kids
🎨
A Kids' Yard Work Business: A Money Guide for Kids and Parents
🎨
A Ladder Against a Wall Coloring and Drawing Ideas for Kids
🎨
A Beach Bike Ride Coloring and Drawing Ideas for Kids
🖍️
A Beginner's Guide to Avoiding Smudges While Coloring
💗
Understanding Art for Stressful Days
🌈
Fun Community Helpers Coloring Pages for Kids
🎨
Camel Coloring and Drawing Ideas for Kids
🎨
A Seesaw Ride: A Coloring and Playtime Guide for Kids
🎨
Rattlesnake Coloring and Drawing Ideas for Kids
🎨
Meet the News Anchor: A Community Helper Coloring Guide
🎨
The Boy Who Cried Wolf: A Classic Story Coloring Guide for Kids
🎨
Exploring Belgium: A Coloring and Culture Guide for Kids
💡
Building Imaginary Worlds Through Coloring and Drawing
👨👩👧
Easy Birthday Party Activities With Coloring Pages
🎨
Pastel Pencils: A Buying and Technique Guide
💗
Exploring The Difference Between Art Therapy and Coloring Through Art
🖍️
A Beginner's Guide to Coloring Large Areas
🎨
Horse Coloring and Drawing Ideas for Kids
🎨
A Trilobite Coloring Page: Fun Facts for Young Paleontologists
🎨
Pinwheel Coloring and Drawing Ideas for Kids
🎨
Christmas Coloring Ideas and Activities for the Whole Family
🎨
Firefly Coloring and Drawing Ideas for Kids
🎨
Easy Buildings and Houses Drawing Ideas
🎨
A Sunken Shipwreck Coloring and Drawing Ideas for Kids
🎨
A Summer Popsicle Stand: Coloring Ideas and Activities for the Whole Family
🎲
Using Drawing for Sketch Relay Games
🎨
Pine Tree: A Coloring and Nature Guide for Kids
🧒
Drawing Activities for Drawing Development Stages
🎨
A GPS Satellite: A Coloring and Space Mission Guide for Kids
🌈
Relaxing Ocean Life Coloring Activities
🎨
Trampoline Coloring Pages and Drawing Ideas for Kids
🎨
A Marble Run Machine: A Coloring and STEM Guide for Kids
🎨
Wooden Blocks Coloring and Drawing Ideas for Kids
📐
How Children Understand Measurement With Art
🎲
Step-by-Step Mazes
🎨
Meet the Police Officer: A Community Helper Coloring Guide
🎨
A Construction Worker in a Hard Hat Coloring and Drawing Ideas for Kids
🎨
Meet Landscape Painting: An Art Appreciation Guide for Kids
🎨
Space Needle: Coloring Page and Fun Facts for Kids
🎨
The Little Red Hen: A Classic Story Coloring Guide for Kids
🍎
A Teacher's Guide to Cross-Curricular Art Lessons
🏺
Why Ancient Pottery Art Matter to Historians
🔬
What Is Secondary Colors?
🍂
Fun Halloween Classroom Coloring Ideas
🧠
How Drawing May Support Memory
🎨
Amazon Rainforest: Coloring Page and Fun Facts for Kids
✏️
Easy Steps to Practice Drawing Triangles
🎨
How to Draw a Crescent Moon Shape: A Step-by-Step Guide for Kids
💬
Why Emojis and Modern Pictograms Matter in Everyday Life
🎨
Upcycling Coloring Pages Into Crafts: A Practical Guide
🎨
Okapi Coloring and Drawing Ideas for Kids
🧒
A Parent's Guide to Ages 4-5
🎨
How to Draw a Oval: A Step-by-Step Guide for Kids
🎨
The Wheels on the Bus: A Nursery Rhyme Coloring Guide for Kids
🏺
Exploring Ancient Symbols
🧠
Why Drawing Can Help With Cognitive Development
🧠
Why Drawing Can Help With Imagination
🎨
A Spring Butterfly Garden: Coloring Ideas and Activities for the Whole Family
🎨
A Cattle Drive: A Wild West Coloring and History Guide for Kids
🧘
A Beginner's Guide to Coloring With Soft Music
🎨
Yankee Doodle: A Nursery Rhyme Coloring Guide for Kids
🔤
Visual Vocabulary: Opposites
🎨
Meet Claude Monet: An Art Appreciation Guide for Kids
🎨
Table Manners at Dinner: A Simple Social Skill for Kids
🎨
Snow Sledding: Coloring Ideas and Activities for the Whole Family
💡
Nurturing Character Design at Home
🎨
Horned Lizard Coloring and Drawing Ideas for Kids
🔬
What Is Why Printers Use CMYK?
🖍️
Why Blending Colors Smoothly Makes a Difference
🎨
The Digestive System: A Coloring and Health Guide for Kids
🎨
Hyena Coloring and Drawing Ideas for Kids
🎨
Ocelot Coloring and Drawing Ideas for Kids
🎨
Teaching Graciousness: A Simple Activity for Kids
🎨
Tying Shoelaces: A Simple Life Skill for Kids
🎨
Hansel and Gretel: A Classic Story Coloring Guide for Kids
🎨
Fun Submarine Coloring and Drawing Ideas for Kids
🎨
Cerberus Coloring and Drawing Ideas for Kids
👨👩👧
Coloring Ideas for Waiting Room Activities
🎨
Keeping a Promise: A Simple Social Skill for Kids
✏️
Why Sketching Basics Matters for New Artists
🎨
A Simple Interest Concept (Coins Growing Over Time): A Money Guide for Kids and Parents
📐
Why Measurement and Drawing Go Together
🎨
A Paper Chromatography Flower: A Step-by-Step Science Guide for Kids
🎨
How to Draw a An Arrow Shape: A Step-by-Step Guide for Kids
🧠
How Drawing May Support Cognitive Development
🧠
The Link Between Drawing and Working Memory
🎨
A Cave Painting of a Dinosaur Coloring Page: Fun Facts for Young Paleontologists
🌈
Community Helpers Coloring Ideas for Classrooms
🎨
Dual-Tip Markers: A Buying and Technique Guide
🎨
a Mask Cutout Printable: Free Ideas for Your Next Celebration
💗
Understanding Drawing Feelings Instead of Words
🎨
A Dance Battle: A Coloring and Movement Guide for Kids
🎨
Meet the Airline Pilot: A Community Helper Coloring Guide
👨👩👧
Easy Outdoor-Inspired Drawing With Coloring Pages
🔎
Exploring Mind Maps for Students
💗
Creative Approaches to Emotional Expression
🎨
Red Barn Coloring and Drawing Ideas for Kids
🖍️
Simple Techniques for Coloring With Crayons
🎨
Answering the Phone Politely: A Simple Life Skill for Kids
🧘
Why Guided Mindful Coloring Feels Calming
🎨
Easy Robots Drawing Ideas
🎨
A Tibetan Traditional Chuba: A Coloring and Culture Guide for Kids
🎨
A Tide Pool Full of Creatures Coloring and Drawing Ideas for Kids
🍎
Simple Art Lessons for Science Class for Busy Classrooms
🖍️
Why Using Complementary Colors Makes a Difference
🎨
Cheese Platter Coloring Ideas for Kids Who Love to Create
🎨
Popsicle Coloring Ideas for Kids Who Love to Create
🎨
Stuck in the Mud Tag: A Coloring and Playtime Guide for Kids
🔎
How Connecting Ideas Through Drawing Support Learning
📐
Why Fractions and Drawing Go Together
🎨
Fun Fire Truck Coloring and Drawing Ideas for Kids
🎨
A Community Building Project Coloring and Drawing Ideas for Kids
🎨
Growing Taller: A Coloring and Health Guide for Kids
🌈
Weather Scenes Coloring Ideas for Classrooms
👨👩👧
Coloring Ideas for Morning Routine Activities
🎨
A Vietnamese Ao Dai: A Coloring and Culture Guide for Kids
🧘
How Coloring in Silence Can Create a Quiet Moment
🎨
Sandwich Coloring Ideas for Kids Who Love to Create
💡
The Role of Finding Inspiration in Children's Art
🎨
Affirmation Coloring: A Simple Mindfulness Activity for Kids
🍂
Printable Christmas Coloring Pages for Kids
🎨
A Class Art Wall Display: A Classroom Coloring and Learning Guide
🎲
Using Drawing for Memory Matching Games
🎲
Step-by-Step Treasure Map Games
🎨
Taking Responsibility for a Mistake: A Simple Social Skill for Kids
🔎
Using Flowcharts to Solve Problems
🎨
Red Rover: A Coloring and Playtime Guide for Kids
🎨
A Kids' Money Quiz Chart: A Money Guide for Kids and Parents
🧒
What to Expect When Teaching Left-Handed Children
🔤
Drawing Activities for Action Words
🎨
Meet Jean-Michel Basquiat: An Art Appreciation Guide for Kids
🍂
Printable Autumn Coloring Pages for Kids
🎨
Cow Coloring and Drawing Ideas for Kids
🎨
Exploring Canada: A Coloring and Culture Guide for Kids
🎲
Fun Board Game Design for Kids
🎨
A Family Bike Ride on a Trail: Coloring Ideas for Your Next Family Adventure
🎨
Hot Dog Coloring Ideas for Kids Who Love to Create
🖍️
How to Get Better at Coloring Animals Realistically
🖌️
Exploring Outlining Techniques
👨👩👧
Easy Weekend Family Activities With Coloring Pages
🎨
A Traditional Dance Costume with Bells: A Coloring and Culture Guide for Kids
🎨
Exploring Venus: A Coloring and Learning Guide for Kids
💗
The Role of Coloring in Coping With Change Through Drawing
🎨
Pea Pod Coloring and Drawing Ideas for Kids
🔎
How Organizing Research With Sketches Support Learning
🎨
The Ugly Duckling: A Classic Story Coloring Guide for Kids
🎨
Mindful Walking: A Simple Mindfulness Activity for Kids
🎨
Meadow of Wildflowers Coloring Page: A Nature Learning Guide for Kids
🧠
The Link Between Drawing and Hand-Eye Coordination
🎨
A Traditional Dragon Dance: A Coloring and Movement Guide for Kids
🎨
A Gear System: A Coloring and STEM Guide for Kids
🧠
Why Drawing Can Help With Sequential Thinking
📐
Why Proportion and Drawing Go Together
🎨
Being Kind to Someone Different: A Simple Social Skill for Kids
🌈
Relaxing Fairy Tale Scenes Coloring Activities
🎨
How to Draw a Rectangle: A Step-by-Step Guide for Kids
🎨
A Trained Seal Coloring and Drawing Ideas for Kids
🎨
Cuttlefish Coloring and Drawing Ideas for Kids
🌈
A Guide to Community Helpers Coloring Pages
🎨
Meet Abstract Expressionism: An Art Appreciation Guide for Kids
🎨
Fun Steam Train Coloring and Drawing Ideas for Kids
🎨
How to Draw a Wavy Line: A Step-by-Step Guide for Kids
🎨
How to Draw a Xylophone: A Coloring and Music Guide for Kids
🎨
Pineapple Coloring and Drawing Ideas for Kids
🎨
How to Draw a Fractal Pattern: A Step-by-Step Guide
📴
Hands-On Activities for Weekend Mornings
🎨
Handling Disagreements Calmly: A Simple Social Skill for Kids
🎨
Weevil Coloring and Drawing Ideas for Kids
🧠
The Link Between Drawing and Attention to Detail
🎨
A Dinosaur Egg Nest Coloring Page: Fun Facts for Young Paleontologists
🎨
Ice Skating on a Pond: Coloring Ideas and Activities for the Whole Family
🎨
Toy Train Set Coloring and Drawing Ideas for Kids
🎨
Meet Gustav Klimt: An Art Appreciation Guide for Kids
🏺
The History of Ancient Egyptian Art
🎨
Skateboarding Coloring Pages and Drawing Ideas for Kids
🔤
Drawing Activities for Sight Words
🎨
Starfish Coloring and Drawing Ideas for Kids
🎨
Box Turtle Coloring and Drawing Ideas for Kids
👨👩👧
Making the Most of Low-Mess Activities
🍎
Using Coloring Pages for Transition Time Activities
🎨
Desert Dunes Coloring Page: A Nature Learning Guide for Kids
🎨
Broccoli Coloring and Drawing Ideas for Kids
🧠
The Link Between Drawing and Observation Skills
🎨
Framing Kids Coloring Art: A Practical Guide
🎲
Pictionary-Style Games: A Creative Twist
🎨
A Brick Wall Being Built Coloring and Drawing Ideas for Kids
🎨
Building a Travel Coloring Kit: A Buying and Technique Guide
🔬
The Science Behind Color Wheels
🎨
Exploring A Satellite: A Coloring and Learning Guide for Kids
🎨
Eyes and How We See: A Coloring and Health Guide for Kids
🎨
Staying Hydrated: A Coloring and Health Guide for Kids
🖌️
How to Practice Using Watercolor
🎨
Teaching Positivity: A Simple Activity for Kids
🏺
Why Early Writing Systems Matter to Historians
🌈
Printable Fantasy Creatures Coloring Activities
🎨
The Letter Y: An Alphabet and Number Coloring Page
🧒
Understanding The Scribbling Stage in Early Childhood
🎨
A Kitchen Timer: A Kitchen Guide for Kids and Parents
🎨
A Crow's Nest Lookout Coloring and Drawing Ideas for Kids
🔤
Drawing Activities for Colors in a New Language
🎨
Meet the Baker Kneading Bread: A Community Helper Coloring Guide
🍎
A Teacher's Guide to Group Art Projects
🏺
Exploring Ancient Pottery Art
🎨
Snail on a Leaf Coloring and Drawing Ideas for Kids
🎨
How to Draw a Sorting Shapes by Size: A Step-by-Step Guide for Kids
🖍️
A Beginner's Guide to Blending Colors Smoothly
🎲
How to Play Drawing-Based Party Games
🎨
Meet Katsushika Hokusai: An Art Appreciation Guide for Kids
🎨
An Ancient Scribe Writing on Papyrus: An Ancient History Coloring Guide for Kids
🎨
A Falafel Plate: Coloring Ideas and Fun Facts for Kids
🍎
Simple Circle Time Activities for Busy Classrooms
🖍️
Simple Techniques for Mixing Warm and Cool Colors
🔎
Why Visual Thinkers Use Storyboarding for Projects
🎨
Fun Ferry Boat Coloring and Drawing Ideas for Kids
🎨
How to Draw a Maracas: A Coloring and Music Guide for Kids
💗
Creative Approaches to Family Art Time and Connection
💡
Why Doodling Matters for Young Artists
🎨
Exploring Russia: A Coloring and Culture Guide for Kids
🎨
Twistable Crayons: A Buying and Technique Guide
🎨
Lightning Safety Rules: A Family Safety Guide
🎨
A Library Coloring Program: A Practical Guide
🎨
How to Draw a Feather Mandala: A Step-by-Step Guide
🎨
Learning About Allergies: A Coloring and Health Guide for Kids
🎨
Sailfish Coloring and Drawing Ideas for Kids
🍂
Celebrate Easter With Coloring Activities
🎨
A Music Festival Crowd: A Coloring and Movement Guide for Kids
🎨
A Raised Garden Bed: A Gardening Guide for Kids and Families
🎨
Tuna Coloring and Drawing Ideas for Kids
🎨
Pond Turtle Coloring and Drawing Ideas for Kids
🎨
How to Draw a Trapezoid: A Step-by-Step Guide for Kids
🎨
Baseball Coloring Pages and Drawing Ideas for Kids
💗
Exploring Processing Big Feelings Through Art
🎨
A Fishing Boat at Work: A Coloring and Food Science Guide for Kids
🔤
Visual Vocabulary: Sentence Building
🎨
How to Draw a Gingham Pattern: A Step-by-Step Guide
🎨
Exploring Ethiopia: A Coloring and Culture Guide for Kids
🏺
How Cave Paintings Shaped Human Communication
🎨
a Graduation Cap Coloring Sheet: Free Ideas for Your Next Celebration
🍎
How Teachers Can Use Classroom Reward Activities
🍂
Seasonal Coloring Guide: Cultural Festivals
🌈
Printable Ocean Life Coloring Activities
🎨
Fun Favorite Foods Drawing Activities for Kids
🎨
How to Draw a Harp: A Coloring and Music Guide for Kids
🎨
A Traditional Wedding Headdress: A Coloring and Culture Guide for Kids
🎨
A Family Fire Drill: A Family Safety Guide
📴
Why Coloring Beats Scrolling on Waiting Rooms
🎨
Meet the Nurse: A Community Helper Coloring Guide
🎨
Fun Taxi Cab Coloring and Drawing Ideas for Kids
💗
Understanding The Difference Between Art Therapy and Coloring
🍂
Creative Thanksgiving Coloring Projects for Classrooms
🎨
Thanksgiving Coloring Ideas and Activities for the Whole Family
🌈
Creative Ways to Color Insects and Bugs
🎨
Meet Roy Lichtenstein: An Art Appreciation Guide for Kids
🎨
Tick Coloring and Drawing Ideas for Kids
🧒
How Drawing Supports Pre-Writing Skills
🎨
A Thai Traditional Silk Dress: A Coloring and Culture Guide for Kids
🍂
Celebrate Mother's Day With Coloring Activities
🎨
Quetzalcoatlus Coloring Page: Fun Facts for Young Paleontologists
🎨
Using Scissors Safely: A Simple Life Skill for Kids
🎨
A Break Dancer: A Coloring and Movement Guide for Kids
🎨
Jump Rope Double Dutch: A Coloring and Playtime Guide for Kids
🎨
A Music Box: A Coloring and Movement Guide for Kids
🎨
A Community Garden Plot: A Gardening Guide for Kids and Families
🔤
Learning New Vocabulary Words Through Drawing
🎨
Creative Emotions and Faces Drawing Exercises
🎨
The Letter E: An Alphabet and Number Coloring Page
🎨
A Prototype Model: A Coloring and STEM Guide for Kids
🎨
Playground Slide Coloring and Drawing Ideas for Kids
🎨
a Camping Trip Coloring Ideas and Activities for the Whole Family
🔎
Why Visual Thinkers Use Diagrams in Science
🍎
A Teacher's Guide to Classroom Management Through Art
🎨
A Rapper on Stage: A Coloring and Movement Guide for Kids
🎨
A Garden Arch with Vines: A Gardening Guide for Kids and Families
🎨
A Wallet and Coin Purse: A Money Guide for Kids and Parents
🎨
A Healthy Snack Choice: A Coloring and Health Guide for Kids
📐
How Children Understand Counting With Art
🎨
Mindful Stretching: A Simple Mindfulness Activity for Kids
🎨
Badminton Coloring Pages and Drawing Ideas for Kids
🎨
A Family Beach Umbrella Setup Coloring and Drawing Ideas for Kids
💬
The Power of Visual Storytelling
💡
How Drawing Encourages Divergent Thinking
🎲
Fun Strategy Sketching for Sports for Kids
🎨
A Simple Bank Account: A Money Guide for Kids and Parents
🎨
A Piggy Bank Being Counted: A Money Guide for Kids and Parents
💡
Building Artistic Risk-Taking Through Coloring and Drawing
🎨
A Kids' Pet Responsibility Chart: A Simple Pet Care Guide for Kids
🎨
Green Bean Coloring and Drawing Ideas for Kids
🎨
A Sea Shanty Sing-Along Coloring and Drawing Ideas for Kids
👨👩👧
Why Parents Love Sibling Bonding Activities
🎨
Teaching Determination: A Simple Activity for Kids
🎨
Creative Farm Life Drawing Exercises
🎨
Tomato Coloring and Drawing Ideas for Kids
🔤
How Pictures Help Children Learn Opposites
🎨
A Mermaid Spotted at Sea Coloring and Drawing Ideas for Kids
🎲
Using Drawing for Guess-the-Drawing Games
🎨
Being a Good Listener: A Simple Life Skill for Kids
🎨
A Fire Eater Coloring and Drawing Ideas for Kids
🎨
Checkers Board Coloring and Drawing Ideas for Kids
🖍️
How to Get Better at Mixing Warm and Cool Colors
🎨
Salamander Coloring and Drawing Ideas for Kids
🎨
Following a Recipe: A Simple Life Skill for Kids
🎨
A Hoverboard: A Coloring and Invention Guide for Kids
🎨
A Strongman Coloring and Drawing Ideas for Kids
🎨
Llama Coloring and Drawing Ideas for Kids
🔎
A Beginner's Guide to Brainstorming With Pictures
🧒
What to Expect When Teaching Hand-Eye Coordination
🎨
How to Draw a Diamond: A Step-by-Step Guide for Kids
🏺
Exploring Prehistoric Drawing Tools
🎨
A Beginner's Guide to Drawing Community Helpers
🍎
Simple Cross-Curricular Art Lessons for Busy Classrooms
 Can Drawing Improve Problem-Solving?
🎨
Raking Autumn Leaves: Coloring Ideas and Activities for the Whole Family
🧠
Exploring Drawing and Confidence Building
🍂
Celebrate Back-to-School Season With Coloring Activities
🎨
A Fireworks Festival: Coloring Ideas and Fun Facts for Kids
💬
From Cave Drawings to Comic Strips
🌈
Creative Ways to Color Holiday Scenes
🎨
Fun School Bus Coloring and Drawing Ideas for Kids
🎨
A Homemade Kaleidoscope: A Step-by-Step Science Guide for Kids
🎨
Gardening Gloves: A Gardening Guide for Kids and Families
🎨
A Computer Keyboard and Mouse: A Coloring and STEM Guide for Kids
🎨
Hanukkah Coloring Ideas and Activities for the Whole Family
🎨
A Royal Coronation: A Medieval Coloring and History Guide for Kids
🎨
Coral Garden Coloring and Drawing Ideas for Kids
🎨
A Bibimbap Bowl: Coloring Ideas and Fun Facts for Kids
🎲
Step-by-Step Dot-to-Dot Games
🎨
Eiffel Tower: Coloring Page and Fun Facts for Kids
🎨
A Bulldozer Clearing Ground Coloring and Drawing Ideas for Kids
🎨
How to Draw a Counting to Five with Shapes: A Step-by-Step Guide for Kids
🎨
How to Draw a Sitar: A Coloring and Music Guide for Kids
🎨
Meet the Florist: A Community Helper Coloring Guide
🎨
Ancient Musicians and Instruments: An Ancient History Coloring Guide for Kids
🎨
Exploring Planet Rings: A Coloring and Learning Guide for Kids
🎨
Wearing a Helmet Safely: A Coloring and Health Guide for Kids
🎨
Bird of Paradise Coloring Page Ideas for Kids
🎨
Gardens and Flowers Drawing Prompts for Beginners
🎨
Exploring A Solar Eclipse: A Coloring and Learning Guide for Kids
🎨
A Family Watching the Sunset at the Beach Coloring and Drawing Ideas for Kids
🎨
A Street Food Market: Coloring Ideas and Fun Facts for Kids
🎨
Fresh Cookies from the Oven Coloring Ideas for Kids Who Love to Create
🎨
Iris Flower: A Coloring and Nature Guide for Kids
👨👩👧
Coloring Ideas for Budget-Friendly Activities
🏺
The History of Ancient Storytelling Through Pictures
🎨
Honeybee Coloring and Drawing Ideas for Kids
🎨
How to Draw a A Teardrop Shape: A Step-by-Step Guide for Kids
🎨
Farm Silo Coloring and Drawing Ideas for Kids
🖌️
Why Creating Texture Matters for Young Artists
🎨
Sunflower: A Coloring and Nature Guide for Kids
🎨
A Welcome Home Ceremony: A Coloring and Space Mission Guide for Kids
🎨
A West African Dashiki: A Coloring and Culture Guide for Kids
🎨
A Mexican Charro Suit: A Coloring and Culture Guide for Kids
🎨
The Ancient Silk Road Caravan: An Ancient History Coloring Guide for Kids
🎨
Georgie Porgie: A Nursery Rhyme Coloring Guide for Kids
🎨
Musical Instruments Drawing Prompts for Beginners
🎨
A Ladle: A Kitchen Guide for Kids and Parents
🎨
The Letter T: An Alphabet and Number Coloring Page
👨👩👧
Why Parents Love Weekend Family Activities
🧒
Drawing Activities for Pattern Recognition
🌈
A Guide to Animals Coloring Pages
🎨
Meet Alexander Calder: An Art Appreciation Guide for Kids
🎨
Using a Napkin Properly: A Simple Life Skill for Kids
🎨
Meet Folk Art Style: An Art Appreciation Guide for Kids
🎨
A Cowboy Roping a Steer: A Wild West Coloring and History Guide for Kids
🖍️
Why Coloring With Crayons Makes a Difference
🎨
A Vegetable Garden Row: A Gardening Guide for Kids and Families
🎨
A Sea Turtle Near the Ship Coloring and Drawing Ideas for Kids
🎨
Owl Coloring Page Ideas for Kids
🎨
Exploring Portugal: A Coloring and Culture Guide for Kids
🏺
How Early Writing Systems Shaped Human Communication
🔤
Drawing Activities for Animal Names
💡
How Drawing Encourages Personal Artistic Style
🎨
Maple Tree: A Coloring and Nature Guide for Kids
✏️
Easy Steps to Practice Drawing Simple Faces
🎨
Jump Rope Coloring Pages and Drawing Ideas for Kids
🎨
A Dinosaur Skeleton Fossil Coloring Page: Fun Facts for Young Paleontologists
🖌️
A Beginner's Guide to Using Crayons Creatively
🖍️
How to Get Better at Choosing a Color Palette
🖍️
How to Get Better at Coloring With Crayons
🎨
Partridge Coloring Page Ideas for Kids
🎨
A Smart Home Device: A Coloring and Invention Guide for Kids
✏️
How to Improve Your Basic Perspective
🎨
A Garden Rake: A Gardening Guide for Kids and Families
🔤
Using Coloring Pages to Teach New Vocabulary Words
🖌️
How to Practice Blending Techniques
🧠
Exploring Drawing and Planning Skills
📐
How Children Understand Angles With Art
🧒
How Drawing Supports Left-Handed Children
🎨
Fun Seasons Drawing Activities for Kids
🎨
Robots Drawing Prompts for Beginners
🎨
Buildings and Houses Drawing Prompts for Beginners
🔤
How Pictures Help Children Learn Emotions and Feelings Words
🎨
Clownfish Coloring and Drawing Ideas for Kids
🎨
A Lunar Lander: A Coloring and Space Mission Guide for Kids
🎨
A Tadpole Coloring and Drawing Ideas for Kids
🧒
What to Expect When Teaching Fine Motor Skills
🎨
A Farmers Cooperative: A Coloring and Food Science Guide for Kids
🖌️
A Beginner's Guide to Creating Texture
🎨
Tea Party Set Coloring Ideas for Kids Who Love to Create
🎨
Petunia: A Coloring and Nature Guide for Kids
🎨
Pinecone: A Coloring and Nature Guide for Kids
🎨
A Cactus Flower Blooming: A Wild West Coloring and History Guide for Kids
🏺
The History of Early Writing Systems
🎨
A Rolling Pin: A Kitchen Guide for Kids and Parents
🎨
Seed Sprouting: A Coloring and Food Science Guide for Kids
🎨
A Castle Great Hall: A Medieval Coloring and History Guide for Kids
🎨
Tulip: A Coloring and Nature Guide for Kids
🔎
How Sketch Journaling Support Learning
💗
The Role of Coloring in The Difference Between Art Therapy and Coloring
💬
Why Comic Strips Matter in Everyday Life
🎨
A Coloring Page Advent Calendar: A Practical Guide
🧠
Can Drawing Improve Self-Expression?
📴
Creative Alternatives to Screens During Waiting Rooms
🎨
A Fishing Net Full of Fish Coloring and Drawing Ideas for Kids
📴
Why Coloring Beats Scrolling on Rainy Afternoons
🌈
Creative Ways to Color Sports Scenes
🎨
Lyrebird Coloring Page Ideas for Kids
🎨
Loon Coloring Page Ideas for Kids
🎨
An Invisible Power Superhero: A Superhero Coloring and Design Guide for Kids
🎨
A Baklava Tray: Coloring Ideas and Fun Facts for Kids
📐
Teaching Grids and Coordinates Through Coloring and Drawing
🎨
A Construction Crew Meeting Coloring and Drawing Ideas for Kids
🏺
What We Know About Ancient Symbols
🎨
A Superhero Courage Badge: A Superhero Coloring and Design Guide for Kids
🎨
A Ring Toss Game Coloring and Drawing Ideas for Kids
🎨
How to Draw a Washboard: A Coloring and Music Guide for Kids
📴
Screen-Free Coloring Ideas for Weekend Mornings
💡
Why Free Drawing Matters for Young Artists
🎨
Meet the Veterinarian: A Community Helper Coloring Guide
🎨
Reading a Clock: A Simple Life Skill for Kids
🎨
Meet Oil Painting: An Art Appreciation Guide for Kids
✏️
Easy Steps to Practice Shading Basics
🎨
Boxing Coloring Pages and Drawing Ideas for Kids
🎨
A Beginner's Guide to Drawing Musical Instruments
🎨
Insects Drawing Prompts for Beginners
🎨
Crab Coloring and Drawing Ideas for Kids
📴
Why Coloring Beats Scrolling on Device-Free Evenings
🎨
Carnation: A Coloring and Nature Guide for Kids
🎨
A Weather Radio at Home: A Family Safety Guide
🎨
A Wild West Bandana: A Wild West Coloring and History Guide for Kids
🎨
Lemon Coloring and Drawing Ideas for Kids
🎨
A Recycling-Power Superhero: A Superhero Coloring and Design Guide for Kids
🖍️
Simple Techniques for Blending Colors Smoothly
🎨
A Scottish Kilt: A Coloring and Culture Guide for Kids
🎨
A Maori Traditional Cloak: A Coloring and Culture Guide for Kids
🎨
A Pirate Ship Battle Coloring and Drawing Ideas for Kids
🌈
Fun Holiday Scenes Coloring Pages for Kids
🎨
Meet the Electrician: A Community Helper Coloring Guide
🔬
What Is Warm and Cool Colors?
🍂
Fun Back-to-School Season Classroom Coloring Ideas
🎨
The Human Skeleton: A Coloring and Health Guide for Kids
🖍️
Simple Techniques for Coloring Skin Tones
🎨
Ivy Vine: A Coloring and Nature Guide for Kids
🧒
What to Expect When Teaching Ages 2-3
🎨
Dung Beetle Coloring and Drawing Ideas for Kids
🧠
How Drawing May Support Planning Skills
🎨
Baby Chick Coloring and Drawing Ideas for Kids
🧠
Can Drawing Improve Confidence Building?
🍎
Classroom Ideas: Classroom Management Through Art
🎨
A First Day of School Sign: A Classroom Coloring and Learning Guide
🎨
A Tiny House Build Coloring and Drawing Ideas for Kids
🎨
Ancient Native American Cliff Dwellings: An Ancient History Coloring Guide for Kids
✏️
Fun Exercises for Shading Basics
🧒
A Parent's Guide to Color Recognition
🔬
What Is Primary Colors?
🎨
a New Baby Announcement: Free Ideas for Your Next Celebration
🎨
A Choir Singing: A Coloring and Movement Guide for Kids
💡
How Drawing Encourages Imaginative Play
🧒
A Parent's Guide to Preschoolers
🎨
Ancient Chinese Silk Road Traders: An Ancient History Coloring Guide for Kids
✏️
Fun Exercises for Drawing Triangles
🎨
Diving Coloring Pages and Drawing Ideas for Kids
🎨
Capture the Flag: A Coloring and Playtime Guide for Kids
🎨
Monitor Lizard Coloring and Drawing Ideas for Kids
🎨
Ancient Indian Temple Carvings: An Ancient History Coloring Guide for Kids
🍎
Simple Classroom Printable Activities for Busy Classrooms
🎨
A STEM Career Scientist: A Coloring and STEM Guide for Kids
🎨
A Donation Jar for Charity: A Money Guide for Kids and Parents
📴
Hands-On Activities for Holiday Travel
🎨
Using Blending Stumps: A Buying and Technique Guide
✏️
Easy Steps to Practice Drawing Squares and Rectangles
🎨
Teaching Cooperation: A Simple Activity for Kids
💡
Nurturing Artistic Risk-Taking at Home
🎨
An Astronaut Helmet Visor Reflection: A Coloring and Space Mission Guide for Kids
🎨
Acropolis of Athens: Coloring Page and Fun Facts for Kids
🎨
Easy Original Superhero Characters Drawing Ideas
📐
Fun Drawing Activities for Fractions
🎨
Square Breathing: A Simple Mindfulness Activity for Kids
💬
How Emojis and Modern Pictograms Communicate Ideas
🍂
Celebrate Graduation Season With Coloring Activities
📴
Why Coloring Beats Scrolling on Sibling Playtime
🎨
How to Draw a Op Art Illusion: A Step-by-Step Guide
🎨
A Camping First Aid Kit: Coloring Ideas for Your Next Family Adventure
👨👩👧
Fun and Simple Activities for Only Children
🎨
Cockatoo Coloring Page Ideas for Kids
🎨
How to Draw a Building a Picture from Shapes: A Step-by-Step Guide for Kids
🎲
Fun Guess-the-Drawing Games for Kids
🎨
Summer Camping Under the Stars: Coloring Ideas and Activities for the Whole Family
🌈
A Guide to Buildings and Castles Coloring Pages
Can Drawing Improve Problem-Solving?
🎨
Raking Autumn Leaves: Coloring Ideas and Activities for the Whole Family
🧠
Exploring Drawing and Confidence Building
🍂
Celebrate Back-to-School Season With Coloring Activities
🎨
A Fireworks Festival: Coloring Ideas and Fun Facts for Kids
💬
From Cave Drawings to Comic Strips
🌈
Creative Ways to Color Holiday Scenes
🎨
Fun School Bus Coloring and Drawing Ideas for Kids
🎨
A Homemade Kaleidoscope: A Step-by-Step Science Guide for Kids
🎨
Gardening Gloves: A Gardening Guide for Kids and Families
🎨
A Computer Keyboard and Mouse: A Coloring and STEM Guide for Kids
🎨
Hanukkah Coloring Ideas and Activities for the Whole Family
🎨
A Royal Coronation: A Medieval Coloring and History Guide for Kids
🎨
Coral Garden Coloring and Drawing Ideas for Kids
🎨
A Bibimbap Bowl: Coloring Ideas and Fun Facts for Kids
🎲
Step-by-Step Dot-to-Dot Games
🎨
Eiffel Tower: Coloring Page and Fun Facts for Kids
🎨
A Bulldozer Clearing Ground Coloring and Drawing Ideas for Kids
🎨
How to Draw a Counting to Five with Shapes: A Step-by-Step Guide for Kids
🎨
How to Draw a Sitar: A Coloring and Music Guide for Kids
🎨
Meet the Florist: A Community Helper Coloring Guide
🎨
Ancient Musicians and Instruments: An Ancient History Coloring Guide for Kids
🎨
Exploring Planet Rings: A Coloring and Learning Guide for Kids
🎨
Wearing a Helmet Safely: A Coloring and Health Guide for Kids
🎨
Bird of Paradise Coloring Page Ideas for Kids
🎨
Gardens and Flowers Drawing Prompts for Beginners
🎨
Exploring A Solar Eclipse: A Coloring and Learning Guide for Kids
🎨
A Family Watching the Sunset at the Beach Coloring and Drawing Ideas for Kids
🎨
A Street Food Market: Coloring Ideas and Fun Facts for Kids
🎨
Fresh Cookies from the Oven Coloring Ideas for Kids Who Love to Create
🎨
Iris Flower: A Coloring and Nature Guide for Kids
👨👩👧
Coloring Ideas for Budget-Friendly Activities
🏺
The History of Ancient Storytelling Through Pictures
🎨
Honeybee Coloring and Drawing Ideas for Kids
🎨
How to Draw a A Teardrop Shape: A Step-by-Step Guide for Kids
🎨
Farm Silo Coloring and Drawing Ideas for Kids
🖌️
Why Creating Texture Matters for Young Artists
🎨
Sunflower: A Coloring and Nature Guide for Kids
🎨
A Welcome Home Ceremony: A Coloring and Space Mission Guide for Kids
🎨
A West African Dashiki: A Coloring and Culture Guide for Kids
🎨
A Mexican Charro Suit: A Coloring and Culture Guide for Kids
🎨
The Ancient Silk Road Caravan: An Ancient History Coloring Guide for Kids
🎨
Georgie Porgie: A Nursery Rhyme Coloring Guide for Kids
🎨
Musical Instruments Drawing Prompts for Beginners
🎨
A Ladle: A Kitchen Guide for Kids and Parents
🎨
The Letter T: An Alphabet and Number Coloring Page
👨👩👧
Why Parents Love Weekend Family Activities
🧒
Drawing Activities for Pattern Recognition
🌈
A Guide to Animals Coloring Pages
🎨
Meet Alexander Calder: An Art Appreciation Guide for Kids
🎨
Using a Napkin Properly: A Simple Life Skill for Kids
🎨
Meet Folk Art Style: An Art Appreciation Guide for Kids
🎨
A Cowboy Roping a Steer: A Wild West Coloring and History Guide for Kids
🖍️
Why Coloring With Crayons Makes a Difference
🎨
A Vegetable Garden Row: A Gardening Guide for Kids and Families
🎨
A Sea Turtle Near the Ship Coloring and Drawing Ideas for Kids
🎨
Owl Coloring Page Ideas for Kids
🎨
Exploring Portugal: A Coloring and Culture Guide for Kids
🏺
How Early Writing Systems Shaped Human Communication
🔤
Drawing Activities for Animal Names
💡
How Drawing Encourages Personal Artistic Style
🎨
Maple Tree: A Coloring and Nature Guide for Kids
✏️
Easy Steps to Practice Drawing Simple Faces
🎨
Jump Rope Coloring Pages and Drawing Ideas for Kids
🎨
A Dinosaur Skeleton Fossil Coloring Page: Fun Facts for Young Paleontologists
🖌️
A Beginner's Guide to Using Crayons Creatively
🖍️
How to Get Better at Choosing a Color Palette
🖍️
How to Get Better at Coloring With Crayons
🎨
Partridge Coloring Page Ideas for Kids
🎨
A Smart Home Device: A Coloring and Invention Guide for Kids
✏️
How to Improve Your Basic Perspective
🎨
A Garden Rake: A Gardening Guide for Kids and Families
🔤
Using Coloring Pages to Teach New Vocabulary Words
🖌️
How to Practice Blending Techniques
🧠
Exploring Drawing and Planning Skills
📐
How Children Understand Angles With Art
🧒
How Drawing Supports Left-Handed Children
🎨
Fun Seasons Drawing Activities for Kids
🎨
Robots Drawing Prompts for Beginners
🎨
Buildings and Houses Drawing Prompts for Beginners
🔤
How Pictures Help Children Learn Emotions and Feelings Words
🎨
Clownfish Coloring and Drawing Ideas for Kids
🎨
A Lunar Lander: A Coloring and Space Mission Guide for Kids
🎨
A Tadpole Coloring and Drawing Ideas for Kids
🧒
What to Expect When Teaching Fine Motor Skills
🎨
A Farmers Cooperative: A Coloring and Food Science Guide for Kids
🖌️
A Beginner's Guide to Creating Texture
🎨
Tea Party Set Coloring Ideas for Kids Who Love to Create
🎨
Petunia: A Coloring and Nature Guide for Kids
🎨
Pinecone: A Coloring and Nature Guide for Kids
🎨
A Cactus Flower Blooming: A Wild West Coloring and History Guide for Kids
🏺
The History of Early Writing Systems
🎨
A Rolling Pin: A Kitchen Guide for Kids and Parents
🎨
Seed Sprouting: A Coloring and Food Science Guide for Kids
🎨
A Castle Great Hall: A Medieval Coloring and History Guide for Kids
🎨
Tulip: A Coloring and Nature Guide for Kids
🔎
How Sketch Journaling Support Learning
💗
The Role of Coloring in The Difference Between Art Therapy and Coloring
💬
Why Comic Strips Matter in Everyday Life
🎨
A Coloring Page Advent Calendar: A Practical Guide
🧠
Can Drawing Improve Self-Expression?
📴
Creative Alternatives to Screens During Waiting Rooms
🎨
A Fishing Net Full of Fish Coloring and Drawing Ideas for Kids
📴
Why Coloring Beats Scrolling on Rainy Afternoons
🌈
Creative Ways to Color Sports Scenes
🎨
Lyrebird Coloring Page Ideas for Kids
🎨
Loon Coloring Page Ideas for Kids
🎨
An Invisible Power Superhero: A Superhero Coloring and Design Guide for Kids
🎨
A Baklava Tray: Coloring Ideas and Fun Facts for Kids
📐
Teaching Grids and Coordinates Through Coloring and Drawing
🎨
A Construction Crew Meeting Coloring and Drawing Ideas for Kids
🏺
What We Know About Ancient Symbols
🎨
A Superhero Courage Badge: A Superhero Coloring and Design Guide for Kids
🎨
A Ring Toss Game Coloring and Drawing Ideas for Kids
🎨
How to Draw a Washboard: A Coloring and Music Guide for Kids
📴
Screen-Free Coloring Ideas for Weekend Mornings
💡
Why Free Drawing Matters for Young Artists
🎨
Meet the Veterinarian: A Community Helper Coloring Guide
🎨
Reading a Clock: A Simple Life Skill for Kids
🎨
Meet Oil Painting: An Art Appreciation Guide for Kids
✏️
Easy Steps to Practice Shading Basics
🎨
Boxing Coloring Pages and Drawing Ideas for Kids
🎨
A Beginner's Guide to Drawing Musical Instruments
🎨
Insects Drawing Prompts for Beginners
🎨
Crab Coloring and Drawing Ideas for Kids
📴
Why Coloring Beats Scrolling on Device-Free Evenings
🎨
Carnation: A Coloring and Nature Guide for Kids
🎨
A Weather Radio at Home: A Family Safety Guide
🎨
A Wild West Bandana: A Wild West Coloring and History Guide for Kids
🎨
Lemon Coloring and Drawing Ideas for Kids
🎨
A Recycling-Power Superhero: A Superhero Coloring and Design Guide for Kids
🖍️
Simple Techniques for Blending Colors Smoothly
🎨
A Scottish Kilt: A Coloring and Culture Guide for Kids
🎨
A Maori Traditional Cloak: A Coloring and Culture Guide for Kids
🎨
A Pirate Ship Battle Coloring and Drawing Ideas for Kids
🌈
Fun Holiday Scenes Coloring Pages for Kids
🎨
Meet the Electrician: A Community Helper Coloring Guide
🔬
What Is Warm and Cool Colors?
🍂
Fun Back-to-School Season Classroom Coloring Ideas
🎨
The Human Skeleton: A Coloring and Health Guide for Kids
🖍️
Simple Techniques for Coloring Skin Tones
🎨
Ivy Vine: A Coloring and Nature Guide for Kids
🧒
What to Expect When Teaching Ages 2-3
🎨
Dung Beetle Coloring and Drawing Ideas for Kids
🧠
How Drawing May Support Planning Skills
🎨
Baby Chick Coloring and Drawing Ideas for Kids
🧠
Can Drawing Improve Confidence Building?
🍎
Classroom Ideas: Classroom Management Through Art
🎨
A First Day of School Sign: A Classroom Coloring and Learning Guide
🎨
A Tiny House Build Coloring and Drawing Ideas for Kids
🎨
Ancient Native American Cliff Dwellings: An Ancient History Coloring Guide for Kids
✏️
Fun Exercises for Shading Basics
🧒
A Parent's Guide to Color Recognition
🔬
What Is Primary Colors?
🎨
a New Baby Announcement: Free Ideas for Your Next Celebration
🎨
A Choir Singing: A Coloring and Movement Guide for Kids
💡
How Drawing Encourages Imaginative Play
🧒
A Parent's Guide to Preschoolers
🎨
Ancient Chinese Silk Road Traders: An Ancient History Coloring Guide for Kids
✏️
Fun Exercises for Drawing Triangles
🎨
Diving Coloring Pages and Drawing Ideas for Kids
🎨
Capture the Flag: A Coloring and Playtime Guide for Kids
🎨
Monitor Lizard Coloring and Drawing Ideas for Kids
🎨
Ancient Indian Temple Carvings: An Ancient History Coloring Guide for Kids
🍎
Simple Classroom Printable Activities for Busy Classrooms
🎨
A STEM Career Scientist: A Coloring and STEM Guide for Kids
🎨
A Donation Jar for Charity: A Money Guide for Kids and Parents
📴
Hands-On Activities for Holiday Travel
🎨
Using Blending Stumps: A Buying and Technique Guide
✏️
Easy Steps to Practice Drawing Squares and Rectangles
🎨
Teaching Cooperation: A Simple Activity for Kids
💡
Nurturing Artistic Risk-Taking at Home
🎨
An Astronaut Helmet Visor Reflection: A Coloring and Space Mission Guide for Kids
🎨
Acropolis of Athens: Coloring Page and Fun Facts for Kids
🎨
Easy Original Superhero Characters Drawing Ideas
📐
Fun Drawing Activities for Fractions
🎨
Square Breathing: A Simple Mindfulness Activity for Kids
💬
How Emojis and Modern Pictograms Communicate Ideas
🍂
Celebrate Graduation Season With Coloring Activities
📴
Why Coloring Beats Scrolling on Sibling Playtime
🎨
How to Draw a Op Art Illusion: A Step-by-Step Guide
🎨
A Camping First Aid Kit: Coloring Ideas for Your Next Family Adventure
👨👩👧
Fun and Simple Activities for Only Children
🎨
Cockatoo Coloring Page Ideas for Kids
🎨
How to Draw a Building a Picture from Shapes: A Step-by-Step Guide for Kids
🎲
Fun Guess-the-Drawing Games for Kids
🎨
Summer Camping Under the Stars: Coloring Ideas and Activities for the Whole Family
🌈
A Guide to Buildings and Castles Coloring Pages
 A Beginner's Guide to Warm-Up Drawing Exercises
🎨
Teaching Optimism: A Simple Activity for Kids
🖌️
Exploring Stippling
🖍️
Why Coloring Skies and Backgrounds Makes a Difference
🎨
A Video Game Design Sketch: A Coloring and STEM Guide for Kids
🎨
Sea Urchin Coloring and Drawing Ideas for Kids
🎨
A Fizzing Bath Bomb: A Step-by-Step Science Guide for Kids
🎨
A Harlequin Costume Coloring and Drawing Ideas for Kids
💬
The Power of Emojis and Modern Pictograms
🎨
Saber-Tooth Tiger Coloring Page: Fun Facts for Young Paleontologists
🍎
Classroom Ideas: Classroom Printable Activities
🌈
Creative Ways to Color Vehicles
🖍️
Simple Techniques for Coloring Mandalas
🎨
A Family Walking the Dog: A Simple Pet Care Guide for Kids
🎨
A Knight's Helmet: A Medieval Coloring and History Guide for Kids
🎨
Star Breathing: A Simple Mindfulness Activity for Kids
🎨
Exploring Mars: A Coloring and Learning Guide for Kids
💬
Understanding Infographics
🍂
Celebrate Halloween With Coloring Activities
🖍️
A Beginner's Guide to Coloring Cartoon Characters
💗
Understanding Creative Outlets for Teens
🍂
Creative Easter Coloring Projects for Classrooms
🎨
Toner-Saving Print Settings: A Practical Guide
🎨
A T-Rex and Triceratops Face-Off Coloring Page: Fun Facts for Young Paleontologists
🎲
How to Play Tic-Tac-Toe Variations
🎨
A Baby Dinosaur Hatching Coloring Page: Fun Facts for Young Paleontologists
🎨
The Number 1: An Alphabet and Number Coloring Page
🎨
An Autumn Scarf and Boots: Coloring Ideas and Activities for the Whole Family
🎨
How to Draw Robots Step by Step
🎨
A Filipino Barong Tagalog: A Coloring and Culture Guide for Kids
🍎
Classroom Ideas: Circle Time Activities
💬
Understanding Maps and Wayfinding Symbols
🎲
How to Play Football Play Diagrams
🎨
A Trampoline Bounce Game: A Coloring and Playtime Guide for Kids
🎨
Glitter Gel Pens: A Buying and Technique Guide
🎨
Earthquake Safety Drills: A Family Safety Guide
🎨
A Compass Rose Coloring and Drawing Ideas for Kids
📴
Creative Alternatives to Screens During Device-Free Evenings
🎨
Bison Coloring and Drawing Ideas for Kids
🎨
Victoria Falls: Coloring Page and Fun Facts for Kids
🧒
A Parent's Guide to Kindergarteners
🧠
The Link Between Drawing and Self-Expression
🧒
What to Expect When Teaching Drawing Development Stages
🎨
A Tiny Nanobot: A Coloring and Invention Guide for Kids
🎨
Cheese Making: A Coloring and Food Science Guide for Kids
🎲
Using Drawing for Board Game Design
🎨
A Bird Cage: A Simple Pet Care Guide for Kids
🧒
Drawing Activities for Hand-Eye Coordination
🧒
What to Expect When Teaching Kindergarteners
🎨
Easy Insects Drawing Ideas
🎨
Honeybee Honey Making: A Coloring and Food Science Guide for Kids
💗
Creative Approaches to What Art Therapy Actually Is
🎨
A Ship's Bell Coloring and Drawing Ideas for Kids
👨👩👧
Coloring Ideas for Activities for Twins
🎨
Brushing Hair: A Simple Life Skill for Kids
🎨
Peaceful Place Visualization: A Simple Mindfulness Activity for Kids
🎨
Fun Ice Cream Truck Coloring and Drawing Ideas for Kids
🔤
How Pictures Help Children Learn Animal Names
🎲
Using Drawing for Drawing Battles
🎨
Tide Pool Scene Coloring and Drawing Ideas for Kids
🧒
A Parent's Guide to Shape Recognition
🎨
Kickball Coloring Pages and Drawing Ideas for Kids
🎨
A Cookie Sheet Full of Treats: A Kitchen Guide for Kids and Parents
🎨
A Hero Saving a Cat from a Tree: A Superhero Coloring and Design Guide for Kids
🎨
Carpenter Ant Coloring and Drawing Ideas for Kids
🎨
Fun Hot Rod Coloring and Drawing Ideas for Kids
🎨
A Superhero Overcoming Fear: A Superhero Coloring and Design Guide for Kids
🎨
Fantasy Creatures Drawing Prompts for Beginners
🎨
Ancient Minoan Palaces: An Ancient History Coloring Guide for Kids
🎨
How to Draw a Dotted Line: A Step-by-Step Guide for Kids
🎨
A Disaster Preparedness Checklist: A Family Safety Guide
🎨
A Simple Machine Lever: A Coloring and STEM Guide for Kids
🧠
Why Drawing Can Help With Fine Motor Coordination
🌈
Dinosaurs Coloring Ideas for Classrooms
📐
How Children Understand Fractions With Art
🎨
A Launch Pad at Night: A Coloring and Space Mission Guide for Kids
🎨
A Security Robot: A Coloring and Invention Guide for Kids
🎨
A Music Class: A Classroom Coloring and Learning Guide
🎨
Organizing a Coloring Page Binder: A Practical Guide
🖍️
Tips for Blending Colors Smoothly
🎨
A Seed Starting Tray: A Gardening Guide for Kids and Families
🎨
Whale Shark Coloring and Drawing Ideas for Kids
🎨
Exploring Japan: A Coloring and Culture Guide for Kids
📐
Teaching Sequences Through Coloring and Drawing
🎨
A Nail Gun and Hammer Coloring and Drawing Ideas for Kids
🎨
How to Draw a Didgeridoo: A Coloring and Music Guide for Kids
🔬
Digital vs Traditional Color Explained for Kids
🎨
Painted Lady Butterfly Coloring and Drawing Ideas for Kids
🔤
Learning Colors in a New Language Through Drawing
🎨
A Cafeteria Lunch Line: A Classroom Coloring and Learning Guide
🧠
Why Drawing Can Help With Attention to Detail
🎨
A Balance Beam Walk: A Coloring and Playtime Guide for Kids
🎲
Collaborative Drawing Games: A Creative Twist
👨👩👧
Easy Sibling Bonding Activities With Coloring Pages
🎨
Making a Bed: A Simple Life Skill for Kids
🎨
Teaching Trustworthiness: A Simple Activity for Kids
🎨
A Cement Mixer Truck Coloring and Drawing Ideas for Kids
🎨
Blending Markers: A Buying and Technique Guide
A Beginner's Guide to Warm-Up Drawing Exercises
🎨
Teaching Optimism: A Simple Activity for Kids
🖌️
Exploring Stippling
🖍️
Why Coloring Skies and Backgrounds Makes a Difference
🎨
A Video Game Design Sketch: A Coloring and STEM Guide for Kids
🎨
Sea Urchin Coloring and Drawing Ideas for Kids
🎨
A Fizzing Bath Bomb: A Step-by-Step Science Guide for Kids
🎨
A Harlequin Costume Coloring and Drawing Ideas for Kids
💬
The Power of Emojis and Modern Pictograms
🎨
Saber-Tooth Tiger Coloring Page: Fun Facts for Young Paleontologists
🍎
Classroom Ideas: Classroom Printable Activities
🌈
Creative Ways to Color Vehicles
🖍️
Simple Techniques for Coloring Mandalas
🎨
A Family Walking the Dog: A Simple Pet Care Guide for Kids
🎨
A Knight's Helmet: A Medieval Coloring and History Guide for Kids
🎨
Star Breathing: A Simple Mindfulness Activity for Kids
🎨
Exploring Mars: A Coloring and Learning Guide for Kids
💬
Understanding Infographics
🍂
Celebrate Halloween With Coloring Activities
🖍️
A Beginner's Guide to Coloring Cartoon Characters
💗
Understanding Creative Outlets for Teens
🍂
Creative Easter Coloring Projects for Classrooms
🎨
Toner-Saving Print Settings: A Practical Guide
🎨
A T-Rex and Triceratops Face-Off Coloring Page: Fun Facts for Young Paleontologists
🎲
How to Play Tic-Tac-Toe Variations
🎨
A Baby Dinosaur Hatching Coloring Page: Fun Facts for Young Paleontologists
🎨
The Number 1: An Alphabet and Number Coloring Page
🎨
An Autumn Scarf and Boots: Coloring Ideas and Activities for the Whole Family
🎨
How to Draw Robots Step by Step
🎨
A Filipino Barong Tagalog: A Coloring and Culture Guide for Kids
🍎
Classroom Ideas: Circle Time Activities
💬
Understanding Maps and Wayfinding Symbols
🎲
How to Play Football Play Diagrams
🎨
A Trampoline Bounce Game: A Coloring and Playtime Guide for Kids
🎨
Glitter Gel Pens: A Buying and Technique Guide
🎨
Earthquake Safety Drills: A Family Safety Guide
🎨
A Compass Rose Coloring and Drawing Ideas for Kids
📴
Creative Alternatives to Screens During Device-Free Evenings
🎨
Bison Coloring and Drawing Ideas for Kids
🎨
Victoria Falls: Coloring Page and Fun Facts for Kids
🧒
A Parent's Guide to Kindergarteners
🧠
The Link Between Drawing and Self-Expression
🧒
What to Expect When Teaching Drawing Development Stages
🎨
A Tiny Nanobot: A Coloring and Invention Guide for Kids
🎨
Cheese Making: A Coloring and Food Science Guide for Kids
🎲
Using Drawing for Board Game Design
🎨
A Bird Cage: A Simple Pet Care Guide for Kids
🧒
Drawing Activities for Hand-Eye Coordination
🧒
What to Expect When Teaching Kindergarteners
🎨
Easy Insects Drawing Ideas
🎨
Honeybee Honey Making: A Coloring and Food Science Guide for Kids
💗
Creative Approaches to What Art Therapy Actually Is
🎨
A Ship's Bell Coloring and Drawing Ideas for Kids
👨👩👧
Coloring Ideas for Activities for Twins
🎨
Brushing Hair: A Simple Life Skill for Kids
🎨
Peaceful Place Visualization: A Simple Mindfulness Activity for Kids
🎨
Fun Ice Cream Truck Coloring and Drawing Ideas for Kids
🔤
How Pictures Help Children Learn Animal Names
🎲
Using Drawing for Drawing Battles
🎨
Tide Pool Scene Coloring and Drawing Ideas for Kids
🧒
A Parent's Guide to Shape Recognition
🎨
Kickball Coloring Pages and Drawing Ideas for Kids
🎨
A Cookie Sheet Full of Treats: A Kitchen Guide for Kids and Parents
🎨
A Hero Saving a Cat from a Tree: A Superhero Coloring and Design Guide for Kids
🎨
Carpenter Ant Coloring and Drawing Ideas for Kids
🎨
Fun Hot Rod Coloring and Drawing Ideas for Kids
🎨
A Superhero Overcoming Fear: A Superhero Coloring and Design Guide for Kids
🎨
Fantasy Creatures Drawing Prompts for Beginners
🎨
Ancient Minoan Palaces: An Ancient History Coloring Guide for Kids
🎨
How to Draw a Dotted Line: A Step-by-Step Guide for Kids
🎨
A Disaster Preparedness Checklist: A Family Safety Guide
🎨
A Simple Machine Lever: A Coloring and STEM Guide for Kids
🧠
Why Drawing Can Help With Fine Motor Coordination
🌈
Dinosaurs Coloring Ideas for Classrooms
📐
How Children Understand Fractions With Art
🎨
A Launch Pad at Night: A Coloring and Space Mission Guide for Kids
🎨
A Security Robot: A Coloring and Invention Guide for Kids
🎨
A Music Class: A Classroom Coloring and Learning Guide
🎨
Organizing a Coloring Page Binder: A Practical Guide
🖍️
Tips for Blending Colors Smoothly
🎨
A Seed Starting Tray: A Gardening Guide for Kids and Families
🎨
Whale Shark Coloring and Drawing Ideas for Kids
🎨
Exploring Japan: A Coloring and Culture Guide for Kids
📐
Teaching Sequences Through Coloring and Drawing
🎨
A Nail Gun and Hammer Coloring and Drawing Ideas for Kids
🎨
How to Draw a Didgeridoo: A Coloring and Music Guide for Kids
🔬
Digital vs Traditional Color Explained for Kids
🎨
Painted Lady Butterfly Coloring and Drawing Ideas for Kids
🔤
Learning Colors in a New Language Through Drawing
🎨
A Cafeteria Lunch Line: A Classroom Coloring and Learning Guide
🧠
Why Drawing Can Help With Attention to Detail
🎨
A Balance Beam Walk: A Coloring and Playtime Guide for Kids
🎲
Collaborative Drawing Games: A Creative Twist
👨👩👧
Easy Sibling Bonding Activities With Coloring Pages
🎨
Making a Bed: A Simple Life Skill for Kids
🎨
Teaching Trustworthiness: A Simple Activity for Kids
🎨
A Cement Mixer Truck Coloring and Drawing Ideas for Kids
🎨
Blending Markers: A Buying and Technique Guide
 Why Pencil Control Matters for New Artists
🎨
Music Note Doodles: A Coloring and Movement Guide for Kids
🖍️
How to Get Better at Coloring Inside the Lines
🎨
Easter Coloring Ideas and Activities for the Whole Family
🌈
Creative Ways to Color Flowers and Gardens
🎨
How to Draw a Wave Pattern: A Step-by-Step Guide
💡
Building Imaginative Play Through Coloring and Drawing
🎨
Parrot Coloring Page Ideas for Kids
💡
Nurturing Original Thinking at Home
🎨
A Balloon Rocket: A Step-by-Step Science Guide for Kids
🔬
A Simple Guide to Why Screens Use RGB
🎨
An Art Class Easel: A Classroom Coloring and Learning Guide
🎨
Coloring Page Subscription Ideas: A Practical Guide
🎨
A Square Dance: A Coloring and Movement Guide for Kids
💗
Creative Approaches to Art as a Creative Outlet
🎨
Penguin Coloring and Drawing Ideas for Kids
🎨
Meet Keith Haring: An Art Appreciation Guide for Kids
🎨
A 3D Printer: A Coloring and Invention Guide for Kids
🎨
A Medieval King and Queen: A Medieval Coloring and History Guide for Kids
🎨
a Birthday Party with Balloons Coloring Ideas and Activities for the Whole Family
🎨
A Fall Corn Maze: Coloring Ideas and Activities for the Whole Family
🎨
The Lion and the Mouse: A Classic Story Coloring Guide for Kids
🎨
A Garden Bench: A Gardening Guide for Kids and Families
🎨
a Maze Activity Sheet: Free Ideas for Your Next Celebration
🎨
A Marching Band: A Coloring and Movement Guide for Kids
🎨
Pretzel Coloring Ideas for Kids Who Love to Create
📴
Screen-Free Coloring Ideas for Sibling Playtime
🎨
How to Draw a Geometric Mandala: A Step-by-Step Guide
🎨
A Team Brainstorming Session: A Coloring and STEM Guide for Kids
👨👩👧
Coloring Ideas for Holiday Break Activities
🎨
Ancient Egyptian Pyramids: An Ancient History Coloring Guide for Kids
🍎
A Teacher's Guide to Substitute Teacher Activities
💗
The Role of Coloring in Emotional Expression
🎨
How to Draw a Aztec Pattern: A Step-by-Step Guide
📐
Learning Proportion Through Drawing
🎨
Decorating a Christmas Tree Coloring Ideas and Activities for the Whole Family
🎨
Underwater Cave Coloring and Drawing Ideas for Kids
🍂
Seasonal Coloring Guide: New Year
🎨
Number Bonds to Ten: An Alphabet and Number Coloring Page
🎨
A Relay Race: A Coloring and Playtime Guide for Kids
🎨
Saying Excuse Me: A Simple Social Skill for Kids
👨👩👧
Fun and Simple Road Trip Activities
🎨
Northern Lights Sky: Coloring Page and Fun Facts for Kids
✏️
Why Basic Perspective Matters for New Artists
🧘
Exploring Mandala Coloring
🎨
A School Garden: A Classroom Coloring and Learning Guide
🔤
Drawing Activities for New Vocabulary Words
🎨
Four Square: A Coloring and Playtime Guide for Kids
🎨
Fun Snowplow Coloring and Drawing Ideas for Kids
🎨
the Summer Solstice Coloring Ideas and Activities for the Whole Family
🎲
Step-by-Step Drawing Prompt Games
🎨
Hoopoe Coloring Page Ideas for Kids
🎨
Gratitude Journaling: A Simple Mindfulness Activity for Kids
Why Pencil Control Matters for New Artists
🎨
Music Note Doodles: A Coloring and Movement Guide for Kids
🖍️
How to Get Better at Coloring Inside the Lines
🎨
Easter Coloring Ideas and Activities for the Whole Family
🌈
Creative Ways to Color Flowers and Gardens
🎨
How to Draw a Wave Pattern: A Step-by-Step Guide
💡
Building Imaginative Play Through Coloring and Drawing
🎨
Parrot Coloring Page Ideas for Kids
💡
Nurturing Original Thinking at Home
🎨
A Balloon Rocket: A Step-by-Step Science Guide for Kids
🔬
A Simple Guide to Why Screens Use RGB
🎨
An Art Class Easel: A Classroom Coloring and Learning Guide
🎨
Coloring Page Subscription Ideas: A Practical Guide
🎨
A Square Dance: A Coloring and Movement Guide for Kids
💗
Creative Approaches to Art as a Creative Outlet
🎨
Penguin Coloring and Drawing Ideas for Kids
🎨
Meet Keith Haring: An Art Appreciation Guide for Kids
🎨
A 3D Printer: A Coloring and Invention Guide for Kids
🎨
A Medieval King and Queen: A Medieval Coloring and History Guide for Kids
🎨
a Birthday Party with Balloons Coloring Ideas and Activities for the Whole Family
🎨
A Fall Corn Maze: Coloring Ideas and Activities for the Whole Family
🎨
The Lion and the Mouse: A Classic Story Coloring Guide for Kids
🎨
A Garden Bench: A Gardening Guide for Kids and Families
🎨
a Maze Activity Sheet: Free Ideas for Your Next Celebration
🎨
A Marching Band: A Coloring and Movement Guide for Kids
🎨
Pretzel Coloring Ideas for Kids Who Love to Create
📴
Screen-Free Coloring Ideas for Sibling Playtime
🎨
How to Draw a Geometric Mandala: A Step-by-Step Guide
🎨
A Team Brainstorming Session: A Coloring and STEM Guide for Kids
👨👩👧
Coloring Ideas for Holiday Break Activities
🎨
Ancient Egyptian Pyramids: An Ancient History Coloring Guide for Kids
🍎
A Teacher's Guide to Substitute Teacher Activities
💗
The Role of Coloring in Emotional Expression
🎨
How to Draw a Aztec Pattern: A Step-by-Step Guide
📐
Learning Proportion Through Drawing
🎨
Decorating a Christmas Tree Coloring Ideas and Activities for the Whole Family
🎨
Underwater Cave Coloring and Drawing Ideas for Kids
🍂
Seasonal Coloring Guide: New Year
🎨
Number Bonds to Ten: An Alphabet and Number Coloring Page
🎨
A Relay Race: A Coloring and Playtime Guide for Kids
🎨
Saying Excuse Me: A Simple Social Skill for Kids
👨👩👧
Fun and Simple Road Trip Activities
🎨
Northern Lights Sky: Coloring Page and Fun Facts for Kids
✏️
Why Basic Perspective Matters for New Artists
🧘
Exploring Mandala Coloring
🎨
A School Garden: A Classroom Coloring and Learning Guide
🔤
Drawing Activities for New Vocabulary Words
🎨
Four Square: A Coloring and Playtime Guide for Kids
🎨
Fun Snowplow Coloring and Drawing Ideas for Kids
🎨
the Summer Solstice Coloring Ideas and Activities for the Whole Family
🎲
Step-by-Step Drawing Prompt Games
🎨
Hoopoe Coloring Page Ideas for Kids
🎨
Gratitude Journaling: A Simple Mindfulness Activity for Kids
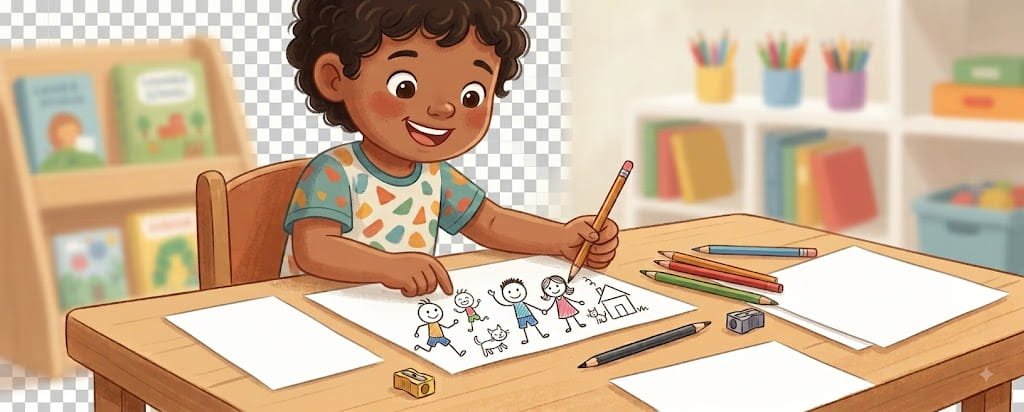 A Beginner's Guide to Drawing Stick Figures
🧘
A Beginner's Guide to Coloring in Silence
🎲
How to Play Storyboard Games
🧒
Drawing Activities for Fine Motor Skills
🎨
How to Draw a Grid Pattern: A Step-by-Step Guide
🎨
Fire Dragon Coloring and Drawing Ideas for Kids
🎨
A Kids' Recycling for Cash Program: A Money Guide for Kids and Parents
👨👩👧
Easy Waiting Room Activities With Coloring Pages
🔎
Using Visual Note-Taking to Solve Problems
🎨
Flood Safety Basics: A Family Safety Guide
✏️
Fun Exercises for Drawing Circles
🍎
How Teachers Can Use Classroom Printable Activities
🎨
A Tambourine Dancer: A Coloring and Movement Guide for Kids
🍂
Creative Back-to-School Season Coloring Projects for Classrooms
🎨
A Knight's Tournament Joust: A Medieval Coloring and History Guide for Kids
🎨
Wildebeest Coloring and Drawing Ideas for Kids
🎨
How to Draw Buildings and Houses Step by Step
🎨
Self-Portraits Drawing Prompts for Beginners
🎨
Songkran Water Festival: Coloring Ideas and Fun Facts for Kids
🎨
A Ship's Rigging and Sails Coloring and Drawing Ideas for Kids
📐
Learning Sequences Through Drawing
🎨
A Pet Emergency Kit: A Simple Pet Care Guide for Kids
🎨
A Toad in a Garden Coloring and Drawing Ideas for Kids
🎨
A Desert Canyon: A Wild West Coloring and History Guide for Kids
👨👩👧
Making the Most of Bedtime Wind-Down Routines
🧘
A Beginner's Guide to Repetitive Pattern Coloring
🎨
A Circus Tent Coloring and Drawing Ideas for Kids
🎨
Sweet Potato Coloring and Drawing Ideas for Kids
🖍️
Why Avoiding Smudges While Coloring Makes a Difference
🎨
Tying Coloring Pages Into Homeschool: A Practical Guide
🎲
Using Drawing for Football Play Diagrams
🧒
Drawing Activities for Color Recognition
🎨
A Magician on Stage Coloring and Drawing Ideas for Kids
🎨
A Three-Legged Race: A Coloring and Playtime Guide for Kids
🎨
Fun Dinosaurs Drawing Activities for Kids
🍂
Printable Independence Day Coloring Pages for Kids
🎨
Unicorn Coloring and Drawing Ideas for Kids
🎨
Daisy: A Coloring and Nature Guide for Kids
🧒
What to Expect When Teaching The Pictorial Stage
👨👩👧
Making the Most of Travel-Friendly Activities
🎨
Butter Churning: A Coloring and Food Science Guide for Kids
🧠
The Link Between Drawing and Patience
🎨
A Summer Beach Ball: Coloring Ideas and Activities for the Whole Family
🎨
A Campsite Picnic Table: Coloring Ideas for Your Next Family Adventure
🎨
A Toolbox and Tools Coloring and Drawing Ideas for Kids
🎨
Being Considerate of Others' Feelings: A Simple Social Skill for Kids
🎨
Grasshopper Coloring and Drawing Ideas for Kids
🎨
Fun Zeppelin Coloring and Drawing Ideas for Kids
💗
Understanding Art as a Creative Outlet
🎨
Teaching Respect: A Simple Activity for Kids
🔎
Using Brainstorming With Pictures to Solve Problems
👨👩👧
Fun and Simple Birthday Party Activities
🎨
Ancient African Kingdoms: An Ancient History Coloring Guide for Kids
🎨
Stonehenge Builders: An Ancient History Coloring Guide for Kids
🖍️
A Beginner's Guide to Layering Colors
🎨
A Can Opener: A Kitchen Guide for Kids and Parents
🎨
Rubik's Cube Coloring and Drawing Ideas for Kids
🎨
Lion Coloring and Drawing Ideas for Kids
🎲
Board Game Design: A Creative Twist
🎨
Rice Growing: A Coloring and Food Science Guide for Kids
🎨
Labeling a Coloring Page Collection: A Practical Guide
🎨
A Library Corner: A Classroom Coloring and Learning Guide
🎨
Volleyball Coloring Pages and Drawing Ideas for Kids
💡
Why Character Design Matters for Young Artists
🎨
Carnival in Brazil Coloring Ideas and Activities for the Whole Family
🎨
Whooping Crane Coloring Page Ideas for Kids
🎨
Exploring China: A Coloring and Culture Guide for Kids
🎨
Wedding Kids-Table Activities: Free Ideas for Your Next Celebration
🎨
Seasons Drawing Prompts for Beginners
🍂
Celebrate Cultural Festivals With Coloring Activities
🧘
Why Coloring Before Exams Feels Calming
🎨
Door Hanger Coloring: Free Ideas for Your Next Celebration
🎨
Preparing Pets for an Emergency: A Family Safety Guide
🎨
a Family Tree Printable: Free Ideas for Your Next Celebration
🖍️
Tips for Layering Colors
🎨
The Letter S: An Alphabet and Number Coloring Page
🎨
Gorilla Coloring and Drawing Ideas for Kids
🎨
Meet Street Art Murals: An Art Appreciation Guide for Kids
🎨
A Chinese New Year Dragon: Coloring Ideas and Fun Facts for Kids
🎨
A Ballet Dancer: A Coloring and Movement Guide for Kids
🧠
Why Drawing Can Help With Confidence Building
🎨
Cassowary Coloring Page Ideas for Kids
🍎
Classroom Ideas: Substitute Teacher Activities
🎨
Holi Festival of Colors Coloring Ideas and Activities for the Whole Family
🎨
Wrapping a Gift: A Simple Life Skill for Kids
🧘
Exploring Bedtime Coloring Routines
✏️
Fun Exercises for Drawing Straight Lines
📴
Screen-Free Coloring Ideas for Long Car Rides
🎨
Food Truck Coloring Ideas for Kids Who Love to Create
🎨
a Color-by-Number Printable: Free Ideas for Your Next Celebration
🎨
a Memory Card Game Printable: Free Ideas for Your Next Celebration
🎨
How to Draw Weather Step by Step
🎨
Bread Making: A Coloring and Food Science Guide for Kids
🧠
The Link Between Drawing and Visual Thinking
🎨
A First Aid Kit: A Coloring and Health Guide for Kids
🎨
Birthday Banner Coloring: Free Ideas for Your Next Celebration
🎨
A Colander: A Kitchen Guide for Kids and Parents
🎨
Halloween Coloring Ideas and Activities for the Whole Family
🎨
A Medieval Minstrel: A Medieval Coloring and History Guide for Kids
🎨
Meet the Artist: A Community Helper Coloring Guide
🎨
The Fox and the Grapes: A Classic Story Coloring Guide for Kids
🔬
CMYK Printing Colors Explained for Kids
🎨
A LEGO-Style Construction Scene Coloring and Drawing Ideas for Kids
🎨
A Sunhat and Flip-Flops Coloring and Drawing Ideas for Kids
🍂
Fun Birthday Celebrations Classroom Coloring Ideas
🎨
A Desert Island Coloring and Drawing Ideas for Kids
🎨
A Booster Separation: A Coloring and Space Mission Guide for Kids
🔤
Learning Numbers in a New Language Through Drawing
💡
Why Combining Ideas Matters for Young Artists
🎨
How to Draw a Infinity Loop Pattern: A Step-by-Step Guide
📐
Fun Drawing Activities for Graphs and Charts
📐
Why Geometry and Drawing Go Together
🎨
Fun Golf Cart Coloring and Drawing Ideas for Kids
🎨
A Human Cannonball Coloring and Drawing Ideas for Kids
🍎
Classroom Ideas: Early Finisher Activities
🎨
Exploring A Lunar Eclipse: A Coloring and Learning Guide for Kids
🎨
A Pirate Captain Coloring and Drawing Ideas for Kids
🎨
Duck Duck Goose: A Coloring and Playtime Guide for Kids
🎨
A Commercial Spaceplane: A Coloring and Space Mission Guide for Kids
🎨
How to Draw Seasons Step by Step
🎨
An Argentine Gaucho Outfit: A Coloring and Culture Guide for Kids
🎨
An Ancient Stone Tool Maker: An Ancient History Coloring Guide for Kids
🖍️
A Beginner's Guide to Coloring Skin Tones
🎨
A Rain Barrel: A Gardening Guide for Kids and Families
🎨
Heron Coloring Page Ideas for Kids
🎨
A Flower Pot: A Gardening Guide for Kids and Families
🎨
A Simple Machine Wedge: A Coloring and STEM Guide for Kids
🎨
Getting Fresh Air Outside: A Coloring and Health Guide for Kids
🎨
Communicating with Mission Control: A Coloring and Space Mission Guide for Kids
🎨
Easy Fantasy Creatures Drawing Ideas
🧒
Fun Ways to Build Pre-Writing Skills
🍎
Using Coloring Pages for Early Finisher Activities
🍎
Using Coloring Pages for Classroom Reward Activities
🎨
A Fire Drill Line: A Classroom Coloring and Learning Guide
💬
The Power of Picture Books
🎨
Marco Polo: A Coloring and Playtime Guide for Kids
💗
How Drawing Supports What Art Therapy Actually Is
🎨
A Debugging Detective Scene: A Coloring and STEM Guide for Kids
🎨
Bear Coloring and Drawing Ideas for Kids
🔎
Using Diagrams in Science to Solve Problems
💗
Exploring Art as a Creative Outlet Through Art
💗
The Role of Coloring in Stress Relief
🎲
Step-by-Step Guess-the-Drawing Games
🎨
A Cowboy Hat Tipped in Greeting: A Wild West Coloring and History Guide for Kids
🎨
A Ringmaster Coloring and Drawing Ideas for Kids
🎨
Calendar Coloring Pages: Free Ideas for Your Next Celebration
🎨
How to Draw a Pan Flute: A Coloring and Music Guide for Kids
🌈
A Guide to Seasonal Scenes Coloring Pages
👨👩👧
Making the Most of Birthday Party Activities
🎨
Mangrove Forest Coloring Page: A Nature Learning Guide for Kids
🔤
Using Coloring Pages to Teach Colors in a New Language
🎨
A Lemonade Stand Business: A Money Guide for Kids and Parents
🎨
Teaching Good Humor: A Simple Activity for Kids
🔎
Exploring Visual Note-Taking for Students
🎨
Frost Patterns Coloring Page: A Nature Learning Guide for Kids
🎨
Barnacle Coloring and Drawing Ideas for Kids
🍎
Using Coloring Pages for End-of-Year Activities
🖌️
Why Cross-Hatching Matters for Young Artists
🎨
Comparing Prices While Shopping: A Money Guide for Kids and Parents
🎨
Making a New Friend: A Simple Social Skill for Kids
🎨
Big Ben: Coloring Page and Fun Facts for Kids
📐
Fun Drawing Activities for 3D Shapes
🍂
Seasonal Coloring Guide: Spring
💬
From Cave Drawings to Diagrams
🎨
Goose Coloring and Drawing Ideas for Kids
🌈
Printable Buildings and Castles Coloring Activities
🎨
Freeze Tag: A Coloring and Playtime Guide for Kids
🧒
Drawing Activities for Encouraging Reluctant Artists
🎨
Shading With Colored Pencils: A Buying and Technique Guide
🎨
How to Draw a A Shape Scavenger Hunt Page: A Step-by-Step Guide for Kids
🎨
How to Draw a Matching Shape Pairs: A Step-by-Step Guide for Kids
🍂
Celebrate Christmas With Coloring Activities
🎨
Minotaur Coloring and Drawing Ideas for Kids
🎨
The Frog Prince: A Classic Story Coloring Guide for Kids
🎨
Feeding a Pet on Schedule: A Simple Life Skill for Kids
🎨
Exploring Mercury: A Coloring and Learning Guide for Kids
🎨
Mushroom Patch: A Coloring and Nature Guide for Kids
🎨
Fun Emotions and Faces Drawing Activities for Kids
🎨
The Nightingale: A Classic Story Coloring Guide for Kids
🌈
Creative Ways to Color Musical Themes
🎲
Step-by-Step Pictionary-Style Games
🎨
A Scaffolding Frame Coloring and Drawing Ideas for Kids
🎨
Bell Pepper Coloring and Drawing Ideas for Kids
🎨
A Beginner's Guide to Drawing Fantasy Creatures
🎲
Fun Drawing-Based Party Games for Kids
🌈
Fun Food and Treats Coloring Pages for Kids
💡
Building Free Drawing Through Coloring and Drawing
🔬
Understanding Secondary Colors
🎨
Scaling a Page to Fit Paper: A Practical Guide
💬
From Cave Drawings to Picture Books
🎨
How to Draw Animals Step by Step
🎨
Waterfall Coloring Page: A Nature Learning Guide for Kids
🎨
Aurora Borealis Coloring Page: A Nature Learning Guide for Kids
💗
Understanding Coping With Change Through Drawing
🎨
Coloring Page Storage Folder Ideas: A Practical Guide
👨👩👧
Creative Budget-Friendly Activities for Kids
🔎
A Beginner's Guide to Sketch Journaling
🎨
An Egyptian Pharaoh: An Ancient History Coloring Guide for Kids
🎨
Exploring Neptune: A Coloring and Learning Guide for Kids
🔬
A Simple Guide to Color Psychology
🎨
A Dinosaur Footprint Coloring Page: Fun Facts for Young Paleontologists
🎲
Fun Tic-Tac-Toe Variations for Kids
📴
Why Coloring Beats Scrolling on Sick Days at Home
🎨
A Spacecraft Window View: A Coloring and Space Mission Guide for Kids
🎨
Exploring The Milky Way Galaxy: A Coloring and Learning Guide for Kids
🔤
Learning Family Words Through Drawing
🎨
Hagia Sophia: Coloring Page and Fun Facts for Kids
🎨
King Midas and the Golden Touch: A Classic Story Coloring Guide for Kids
🎨
A Medical Robot: A Coloring and Invention Guide for Kids
✏️
Easy Steps to Practice Drawing Stick Figures
🍎
A Teacher's Guide to Assessing Creativity in the Classroom
🎨
Milk Delivery: A Coloring and Food Science Guide for Kids
🎨
Exploring A Supernova: A Coloring and Learning Guide for Kids
🧠
The Link Between Drawing and Memory
🎨
Pomegranate Coloring and Drawing Ideas for Kids
🎨
A Battery and Light Bulb Circuit: A Coloring and STEM Guide for Kids
🌈
Fun Mandalas Coloring Pages for Kids
🖌️
Simple Steps for Outlining Techniques
🎨
Red Panda Coloring and Drawing Ideas for Kids
🎲
Using Drawing for Drawing Challenges
🧒
What to Expect When Teaching Pre-Writing Skills
🎨
a Feelings Wheel: A Simple Mindfulness Activity for Kids
🔬
Color Theory Basics Explained for Kids
🍎
How Teachers Can Use Morning Work Activities
🎨
Cookies Coloring Ideas for Kids Who Love to Create
🎨
A School Award Ceremony: A Classroom Coloring and Learning Guide
👨👩👧
Making the Most of Grandparent and Grandchild Activities
🔬
A Simple Guide to Why Printers Use CMYK
🎨
A Beginner's Guide to Drawing Under the Sea
👨👩👧
Creative Summer Break Activities for Kids
🎨
Buckingham Palace: Coloring Page and Fun Facts for Kids
🎨
Sing a Song of Sixpence: A Nursery Rhyme Coloring Guide for Kids
🎨
Wrestling Coloring Pages and Drawing Ideas for Kids
🎨
A Sailor's Knot Coloring and Drawing Ideas for Kids
🎨
Pangolin Coloring and Drawing Ideas for Kids
🎨
Windmills of Kinderdijk: Coloring Page and Fun Facts for Kids
🎨
Exploring Hungary: A Coloring and Culture Guide for Kids
🎨
A Lion Tamer Coloring and Drawing Ideas for Kids
🎨
A Spatula: A Kitchen Guide for Kids and Parents
🎨
A Feast Table for a Harvest Festival: Coloring Ideas and Fun Facts for Kids
🎨
The Letter X: An Alphabet and Number Coloring Page
🎨
A Compost Bin: A Gardening Guide for Kids and Families
🖍️
Why Applying Even Pressure Makes a Difference
📐
Why Tessellations and Drawing Go Together
👨👩👧
Making the Most of After-School Activities
🎨
A Construction Site Sunset Coloring and Drawing Ideas for Kids
🎨
A Model Building Kit Coloring and Drawing Ideas for Kids
🧒
Fun Ways to Build Color Recognition
🧒
Understanding Children Who Dislike Drawing in Early Childhood
🎨
A Pot Holder: A Kitchen Guide for Kids and Parents
🧒
How Drawing Supports Color Recognition
🎨
Fun Weather Drawing Activities for Kids
🎨
An Ancient Japanese Pagoda: An Ancient History Coloring Guide for Kids
🎨
How to Draw a Bugle: A Coloring and Music Guide for Kids
🎨
a Gratitude Jar: A Simple Mindfulness Activity for Kids
✏️
Why Warm-Up Drawing Exercises Matters for New Artists
🎨
A Rock Candy Crystal: A Step-by-Step Science Guide for Kids
🎨
Salt Harvesting: A Coloring and Food Science Guide for Kids
🎨
Waffles Coloring Ideas for Kids Who Love to Create
🎨
Ichthyosaurus Coloring Page: Fun Facts for Young Paleontologists
🖍️
Simple Techniques for Choosing Your First Coloring Pencils
🎨
A Grocery Store Budget List: A Money Guide for Kids and Parents
👨👩👧
Coloring Ideas for Summer Break Activities
🎨
Making a Simple Sandwich: A Simple Life Skill for Kids
A Beginner's Guide to Drawing Stick Figures
🧘
A Beginner's Guide to Coloring in Silence
🎲
How to Play Storyboard Games
🧒
Drawing Activities for Fine Motor Skills
🎨
How to Draw a Grid Pattern: A Step-by-Step Guide
🎨
Fire Dragon Coloring and Drawing Ideas for Kids
🎨
A Kids' Recycling for Cash Program: A Money Guide for Kids and Parents
👨👩👧
Easy Waiting Room Activities With Coloring Pages
🔎
Using Visual Note-Taking to Solve Problems
🎨
Flood Safety Basics: A Family Safety Guide
✏️
Fun Exercises for Drawing Circles
🍎
How Teachers Can Use Classroom Printable Activities
🎨
A Tambourine Dancer: A Coloring and Movement Guide for Kids
🍂
Creative Back-to-School Season Coloring Projects for Classrooms
🎨
A Knight's Tournament Joust: A Medieval Coloring and History Guide for Kids
🎨
Wildebeest Coloring and Drawing Ideas for Kids
🎨
How to Draw Buildings and Houses Step by Step
🎨
Self-Portraits Drawing Prompts for Beginners
🎨
Songkran Water Festival: Coloring Ideas and Fun Facts for Kids
🎨
A Ship's Rigging and Sails Coloring and Drawing Ideas for Kids
📐
Learning Sequences Through Drawing
🎨
A Pet Emergency Kit: A Simple Pet Care Guide for Kids
🎨
A Toad in a Garden Coloring and Drawing Ideas for Kids
🎨
A Desert Canyon: A Wild West Coloring and History Guide for Kids
👨👩👧
Making the Most of Bedtime Wind-Down Routines
🧘
A Beginner's Guide to Repetitive Pattern Coloring
🎨
A Circus Tent Coloring and Drawing Ideas for Kids
🎨
Sweet Potato Coloring and Drawing Ideas for Kids
🖍️
Why Avoiding Smudges While Coloring Makes a Difference
🎨
Tying Coloring Pages Into Homeschool: A Practical Guide
🎲
Using Drawing for Football Play Diagrams
🧒
Drawing Activities for Color Recognition
🎨
A Magician on Stage Coloring and Drawing Ideas for Kids
🎨
A Three-Legged Race: A Coloring and Playtime Guide for Kids
🎨
Fun Dinosaurs Drawing Activities for Kids
🍂
Printable Independence Day Coloring Pages for Kids
🎨
Unicorn Coloring and Drawing Ideas for Kids
🎨
Daisy: A Coloring and Nature Guide for Kids
🧒
What to Expect When Teaching The Pictorial Stage
👨👩👧
Making the Most of Travel-Friendly Activities
🎨
Butter Churning: A Coloring and Food Science Guide for Kids
🧠
The Link Between Drawing and Patience
🎨
A Summer Beach Ball: Coloring Ideas and Activities for the Whole Family
🎨
A Campsite Picnic Table: Coloring Ideas for Your Next Family Adventure
🎨
A Toolbox and Tools Coloring and Drawing Ideas for Kids
🎨
Being Considerate of Others' Feelings: A Simple Social Skill for Kids
🎨
Grasshopper Coloring and Drawing Ideas for Kids
🎨
Fun Zeppelin Coloring and Drawing Ideas for Kids
💗
Understanding Art as a Creative Outlet
🎨
Teaching Respect: A Simple Activity for Kids
🔎
Using Brainstorming With Pictures to Solve Problems
👨👩👧
Fun and Simple Birthday Party Activities
🎨
Ancient African Kingdoms: An Ancient History Coloring Guide for Kids
🎨
Stonehenge Builders: An Ancient History Coloring Guide for Kids
🖍️
A Beginner's Guide to Layering Colors
🎨
A Can Opener: A Kitchen Guide for Kids and Parents
🎨
Rubik's Cube Coloring and Drawing Ideas for Kids
🎨
Lion Coloring and Drawing Ideas for Kids
🎲
Board Game Design: A Creative Twist
🎨
Rice Growing: A Coloring and Food Science Guide for Kids
🎨
Labeling a Coloring Page Collection: A Practical Guide
🎨
A Library Corner: A Classroom Coloring and Learning Guide
🎨
Volleyball Coloring Pages and Drawing Ideas for Kids
💡
Why Character Design Matters for Young Artists
🎨
Carnival in Brazil Coloring Ideas and Activities for the Whole Family
🎨
Whooping Crane Coloring Page Ideas for Kids
🎨
Exploring China: A Coloring and Culture Guide for Kids
🎨
Wedding Kids-Table Activities: Free Ideas for Your Next Celebration
🎨
Seasons Drawing Prompts for Beginners
🍂
Celebrate Cultural Festivals With Coloring Activities
🧘
Why Coloring Before Exams Feels Calming
🎨
Door Hanger Coloring: Free Ideas for Your Next Celebration
🎨
Preparing Pets for an Emergency: A Family Safety Guide
🎨
a Family Tree Printable: Free Ideas for Your Next Celebration
🖍️
Tips for Layering Colors
🎨
The Letter S: An Alphabet and Number Coloring Page
🎨
Gorilla Coloring and Drawing Ideas for Kids
🎨
Meet Street Art Murals: An Art Appreciation Guide for Kids
🎨
A Chinese New Year Dragon: Coloring Ideas and Fun Facts for Kids
🎨
A Ballet Dancer: A Coloring and Movement Guide for Kids
🧠
Why Drawing Can Help With Confidence Building
🎨
Cassowary Coloring Page Ideas for Kids
🍎
Classroom Ideas: Substitute Teacher Activities
🎨
Holi Festival of Colors Coloring Ideas and Activities for the Whole Family
🎨
Wrapping a Gift: A Simple Life Skill for Kids
🧘
Exploring Bedtime Coloring Routines
✏️
Fun Exercises for Drawing Straight Lines
📴
Screen-Free Coloring Ideas for Long Car Rides
🎨
Food Truck Coloring Ideas for Kids Who Love to Create
🎨
a Color-by-Number Printable: Free Ideas for Your Next Celebration
🎨
a Memory Card Game Printable: Free Ideas for Your Next Celebration
🎨
How to Draw Weather Step by Step
🎨
Bread Making: A Coloring and Food Science Guide for Kids
🧠
The Link Between Drawing and Visual Thinking
🎨
A First Aid Kit: A Coloring and Health Guide for Kids
🎨
Birthday Banner Coloring: Free Ideas for Your Next Celebration
🎨
A Colander: A Kitchen Guide for Kids and Parents
🎨
Halloween Coloring Ideas and Activities for the Whole Family
🎨
A Medieval Minstrel: A Medieval Coloring and History Guide for Kids
🎨
Meet the Artist: A Community Helper Coloring Guide
🎨
The Fox and the Grapes: A Classic Story Coloring Guide for Kids
🔬
CMYK Printing Colors Explained for Kids
🎨
A LEGO-Style Construction Scene Coloring and Drawing Ideas for Kids
🎨
A Sunhat and Flip-Flops Coloring and Drawing Ideas for Kids
🍂
Fun Birthday Celebrations Classroom Coloring Ideas
🎨
A Desert Island Coloring and Drawing Ideas for Kids
🎨
A Booster Separation: A Coloring and Space Mission Guide for Kids
🔤
Learning Numbers in a New Language Through Drawing
💡
Why Combining Ideas Matters for Young Artists
🎨
How to Draw a Infinity Loop Pattern: A Step-by-Step Guide
📐
Fun Drawing Activities for Graphs and Charts
📐
Why Geometry and Drawing Go Together
🎨
Fun Golf Cart Coloring and Drawing Ideas for Kids
🎨
A Human Cannonball Coloring and Drawing Ideas for Kids
🍎
Classroom Ideas: Early Finisher Activities
🎨
Exploring A Lunar Eclipse: A Coloring and Learning Guide for Kids
🎨
A Pirate Captain Coloring and Drawing Ideas for Kids
🎨
Duck Duck Goose: A Coloring and Playtime Guide for Kids
🎨
A Commercial Spaceplane: A Coloring and Space Mission Guide for Kids
🎨
How to Draw Seasons Step by Step
🎨
An Argentine Gaucho Outfit: A Coloring and Culture Guide for Kids
🎨
An Ancient Stone Tool Maker: An Ancient History Coloring Guide for Kids
🖍️
A Beginner's Guide to Coloring Skin Tones
🎨
A Rain Barrel: A Gardening Guide for Kids and Families
🎨
Heron Coloring Page Ideas for Kids
🎨
A Flower Pot: A Gardening Guide for Kids and Families
🎨
A Simple Machine Wedge: A Coloring and STEM Guide for Kids
🎨
Getting Fresh Air Outside: A Coloring and Health Guide for Kids
🎨
Communicating with Mission Control: A Coloring and Space Mission Guide for Kids
🎨
Easy Fantasy Creatures Drawing Ideas
🧒
Fun Ways to Build Pre-Writing Skills
🍎
Using Coloring Pages for Early Finisher Activities
🍎
Using Coloring Pages for Classroom Reward Activities
🎨
A Fire Drill Line: A Classroom Coloring and Learning Guide
💬
The Power of Picture Books
🎨
Marco Polo: A Coloring and Playtime Guide for Kids
💗
How Drawing Supports What Art Therapy Actually Is
🎨
A Debugging Detective Scene: A Coloring and STEM Guide for Kids
🎨
Bear Coloring and Drawing Ideas for Kids
🔎
Using Diagrams in Science to Solve Problems
💗
Exploring Art as a Creative Outlet Through Art
💗
The Role of Coloring in Stress Relief
🎲
Step-by-Step Guess-the-Drawing Games
🎨
A Cowboy Hat Tipped in Greeting: A Wild West Coloring and History Guide for Kids
🎨
A Ringmaster Coloring and Drawing Ideas for Kids
🎨
Calendar Coloring Pages: Free Ideas for Your Next Celebration
🎨
How to Draw a Pan Flute: A Coloring and Music Guide for Kids
🌈
A Guide to Seasonal Scenes Coloring Pages
👨👩👧
Making the Most of Birthday Party Activities
🎨
Mangrove Forest Coloring Page: A Nature Learning Guide for Kids
🔤
Using Coloring Pages to Teach Colors in a New Language
🎨
A Lemonade Stand Business: A Money Guide for Kids and Parents
🎨
Teaching Good Humor: A Simple Activity for Kids
🔎
Exploring Visual Note-Taking for Students
🎨
Frost Patterns Coloring Page: A Nature Learning Guide for Kids
🎨
Barnacle Coloring and Drawing Ideas for Kids
🍎
Using Coloring Pages for End-of-Year Activities
🖌️
Why Cross-Hatching Matters for Young Artists
🎨
Comparing Prices While Shopping: A Money Guide for Kids and Parents
🎨
Making a New Friend: A Simple Social Skill for Kids
🎨
Big Ben: Coloring Page and Fun Facts for Kids
📐
Fun Drawing Activities for 3D Shapes
🍂
Seasonal Coloring Guide: Spring
💬
From Cave Drawings to Diagrams
🎨
Goose Coloring and Drawing Ideas for Kids
🌈
Printable Buildings and Castles Coloring Activities
🎨
Freeze Tag: A Coloring and Playtime Guide for Kids
🧒
Drawing Activities for Encouraging Reluctant Artists
🎨
Shading With Colored Pencils: A Buying and Technique Guide
🎨
How to Draw a A Shape Scavenger Hunt Page: A Step-by-Step Guide for Kids
🎨
How to Draw a Matching Shape Pairs: A Step-by-Step Guide for Kids
🍂
Celebrate Christmas With Coloring Activities
🎨
Minotaur Coloring and Drawing Ideas for Kids
🎨
The Frog Prince: A Classic Story Coloring Guide for Kids
🎨
Feeding a Pet on Schedule: A Simple Life Skill for Kids
🎨
Exploring Mercury: A Coloring and Learning Guide for Kids
🎨
Mushroom Patch: A Coloring and Nature Guide for Kids
🎨
Fun Emotions and Faces Drawing Activities for Kids
🎨
The Nightingale: A Classic Story Coloring Guide for Kids
🌈
Creative Ways to Color Musical Themes
🎲
Step-by-Step Pictionary-Style Games
🎨
A Scaffolding Frame Coloring and Drawing Ideas for Kids
🎨
Bell Pepper Coloring and Drawing Ideas for Kids
🎨
A Beginner's Guide to Drawing Fantasy Creatures
🎲
Fun Drawing-Based Party Games for Kids
🌈
Fun Food and Treats Coloring Pages for Kids
💡
Building Free Drawing Through Coloring and Drawing
🔬
Understanding Secondary Colors
🎨
Scaling a Page to Fit Paper: A Practical Guide
💬
From Cave Drawings to Picture Books
🎨
How to Draw Animals Step by Step
🎨
Waterfall Coloring Page: A Nature Learning Guide for Kids
🎨
Aurora Borealis Coloring Page: A Nature Learning Guide for Kids
💗
Understanding Coping With Change Through Drawing
🎨
Coloring Page Storage Folder Ideas: A Practical Guide
👨👩👧
Creative Budget-Friendly Activities for Kids
🔎
A Beginner's Guide to Sketch Journaling
🎨
An Egyptian Pharaoh: An Ancient History Coloring Guide for Kids
🎨
Exploring Neptune: A Coloring and Learning Guide for Kids
🔬
A Simple Guide to Color Psychology
🎨
A Dinosaur Footprint Coloring Page: Fun Facts for Young Paleontologists
🎲
Fun Tic-Tac-Toe Variations for Kids
📴
Why Coloring Beats Scrolling on Sick Days at Home
🎨
A Spacecraft Window View: A Coloring and Space Mission Guide for Kids
🎨
Exploring The Milky Way Galaxy: A Coloring and Learning Guide for Kids
🔤
Learning Family Words Through Drawing
🎨
Hagia Sophia: Coloring Page and Fun Facts for Kids
🎨
King Midas and the Golden Touch: A Classic Story Coloring Guide for Kids
🎨
A Medical Robot: A Coloring and Invention Guide for Kids
✏️
Easy Steps to Practice Drawing Stick Figures
🍎
A Teacher's Guide to Assessing Creativity in the Classroom
🎨
Milk Delivery: A Coloring and Food Science Guide for Kids
🎨
Exploring A Supernova: A Coloring and Learning Guide for Kids
🧠
The Link Between Drawing and Memory
🎨
Pomegranate Coloring and Drawing Ideas for Kids
🎨
A Battery and Light Bulb Circuit: A Coloring and STEM Guide for Kids
🌈
Fun Mandalas Coloring Pages for Kids
🖌️
Simple Steps for Outlining Techniques
🎨
Red Panda Coloring and Drawing Ideas for Kids
🎲
Using Drawing for Drawing Challenges
🧒
What to Expect When Teaching Pre-Writing Skills
🎨
a Feelings Wheel: A Simple Mindfulness Activity for Kids
🔬
Color Theory Basics Explained for Kids
🍎
How Teachers Can Use Morning Work Activities
🎨
Cookies Coloring Ideas for Kids Who Love to Create
🎨
A School Award Ceremony: A Classroom Coloring and Learning Guide
👨👩👧
Making the Most of Grandparent and Grandchild Activities
🔬
A Simple Guide to Why Printers Use CMYK
🎨
A Beginner's Guide to Drawing Under the Sea
👨👩👧
Creative Summer Break Activities for Kids
🎨
Buckingham Palace: Coloring Page and Fun Facts for Kids
🎨
Sing a Song of Sixpence: A Nursery Rhyme Coloring Guide for Kids
🎨
Wrestling Coloring Pages and Drawing Ideas for Kids
🎨
A Sailor's Knot Coloring and Drawing Ideas for Kids
🎨
Pangolin Coloring and Drawing Ideas for Kids
🎨
Windmills of Kinderdijk: Coloring Page and Fun Facts for Kids
🎨
Exploring Hungary: A Coloring and Culture Guide for Kids
🎨
A Lion Tamer Coloring and Drawing Ideas for Kids
🎨
A Spatula: A Kitchen Guide for Kids and Parents
🎨
A Feast Table for a Harvest Festival: Coloring Ideas and Fun Facts for Kids
🎨
The Letter X: An Alphabet and Number Coloring Page
🎨
A Compost Bin: A Gardening Guide for Kids and Families
🖍️
Why Applying Even Pressure Makes a Difference
📐
Why Tessellations and Drawing Go Together
👨👩👧
Making the Most of After-School Activities
🎨
A Construction Site Sunset Coloring and Drawing Ideas for Kids
🎨
A Model Building Kit Coloring and Drawing Ideas for Kids
🧒
Fun Ways to Build Color Recognition
🧒
Understanding Children Who Dislike Drawing in Early Childhood
🎨
A Pot Holder: A Kitchen Guide for Kids and Parents
🧒
How Drawing Supports Color Recognition
🎨
Fun Weather Drawing Activities for Kids
🎨
An Ancient Japanese Pagoda: An Ancient History Coloring Guide for Kids
🎨
How to Draw a Bugle: A Coloring and Music Guide for Kids
🎨
a Gratitude Jar: A Simple Mindfulness Activity for Kids
✏️
Why Warm-Up Drawing Exercises Matters for New Artists
🎨
A Rock Candy Crystal: A Step-by-Step Science Guide for Kids
🎨
Salt Harvesting: A Coloring and Food Science Guide for Kids
🎨
Waffles Coloring Ideas for Kids Who Love to Create
🎨
Ichthyosaurus Coloring Page: Fun Facts for Young Paleontologists
🖍️
Simple Techniques for Choosing Your First Coloring Pencils
🎨
A Grocery Store Budget List: A Money Guide for Kids and Parents
👨👩👧
Coloring Ideas for Summer Break Activities
🎨
Making a Simple Sandwich: A Simple Life Skill for Kids
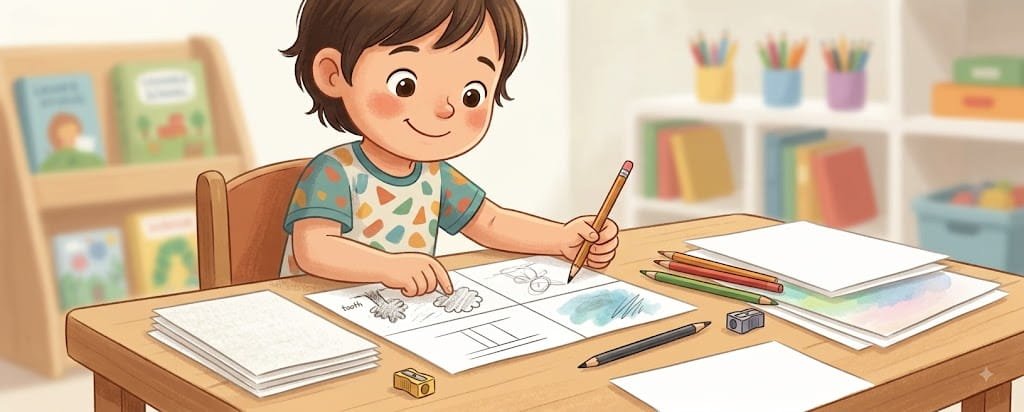 A Beginner's Guide to Drawing Paper Types
🎨
A Boardwalk Arcade Coloring and Drawing Ideas for Kids
🎨
A Simple Machine Pulley: A Coloring and STEM Guide for Kids
🎨
An Amber Fossil Coloring Page: Fun Facts for Young Paleontologists
🎨
How to Draw Original Superhero Characters Step by Step
🏺
What We Know About Ancient Storytelling Through Pictures
📐
How Children Understand Number Lines With Art
🎨
A Spacewalk Tether: A Coloring and Space Mission Guide for Kids
🎨
Washing Hands Thoroughly: A Simple Life Skill for Kids
🎨
Cricket Coloring and Drawing Ideas for Kids
✏️
Easy Steps to Practice Drawing Curved Lines
🧒
Fun Ways to Build Kindergarteners
🎨
Coloring Subscription Boxes: A Buying and Technique Guide
🎨
Basketball Coloring Pages and Drawing Ideas for Kids
🎨
Summer Meadow Coloring Page: A Nature Learning Guide for Kids
🎨
A Saucepan: A Kitchen Guide for Kids and Parents
🧠
The Link Between Drawing and Spatial Awareness
🎨
Coral Reef Coloring and Drawing Ideas for Kids
👨👩👧
Creative Morning Routine Activities for Kids
🎨
A Bake Sale Stand: A Money Guide for Kids and Parents
🎨
A Medieval Archer: A Medieval Coloring and History Guide for Kids
🌈
Robots and Machines Coloring Ideas for Classrooms
🎨
An Excavator Digging Coloring and Drawing Ideas for Kids
🍎
A Teacher's Guide to End-of-Year Activities
🎨
Invitation Card Coloring: Free Ideas for Your Next Celebration
🎨
A Sailor Went to Sea: A Nursery Rhyme Coloring Guide for Kids
🎨
Pet Mouse Coloring and Drawing Ideas for Kids
🌈
Fun Musical Themes Coloring Pages for Kids
🎨
How to Draw a Mosaic Tile Pattern: A Step-by-Step Guide
🎨
A Family Financial Goal Chart: A Money Guide for Kids and Parents
👨👩👧
Coloring Ideas for Road Trip Activities
🧘
How Slow Coloring Practice Can Create a Quiet Moment
🎨
A Naked Egg Experiment: A Step-by-Step Science Guide for Kids
🎨
Icicle Formation Coloring Page: A Nature Learning Guide for Kids
🎨
Table Tennis Coloring Pages and Drawing Ideas for Kids
🎨
Exploring A Space Explorer: A Coloring and Learning Guide for Kids
🎨
A School Locker: A Classroom Coloring and Learning Guide
🔤
Drawing Activities for Opposites
🎨
A Garden Hose Reel: A Gardening Guide for Kids and Families
🎨
Making S'mores: Coloring Ideas for Your Next Family Adventure
💡
Building Visual Brainstorming Through Coloring and Drawing
🎨
A Superhero Symbol Design: A Superhero Coloring and Design Guide for Kids
🍂
Printable Halloween Coloring Pages for Kids
🎨
How to Draw a A Shape Made of Lines: A Step-by-Step Guide for Kids
🎨
Gymnastics Coloring Pages and Drawing Ideas for Kids
💗
How Drawing Supports Art for Stressful Days
🎨
A Substitute Teacher Day: A Classroom Coloring and Learning Guide
🎨
Watercolor Basics for Beginners: A Buying and Technique Guide
🧒
Understanding Ages 4-5 in Early Childhood
🎨
Smoke Detector Checks: A Family Safety Guide
🎨
Fencing Coloring Pages and Drawing Ideas for Kids
💗
Creative Approaches to Building Self-Esteem Through Art
🌈
Creative Ways to Color Animals
🎲
Drawing Challenges: A Creative Twist
🎨
Sample Collection on Mars: A Coloring and Space Mission Guide for Kids
🎨
How to Draw a Viola: A Coloring and Music Guide for Kids
💬
How Infographics Communicate Ideas
🌈
Fun Everyday Objects Coloring Pages for Kids
🎨
A Baby Triceratops Coloring Page: Fun Facts for Young Paleontologists
🏺
The History of Ancient Art Materials
🏺
What We Know About Ancient Pottery Art
🎨
Ancient Explorers Charting New Lands: An Ancient History Coloring Guide for Kids
🎨
Easy Community Helpers Drawing Ideas
🎨
How to Draw a Spiral: A Step-by-Step Guide for Kids
🎨
Fun Speedboat Coloring and Drawing Ideas for Kids
🎨
Wetland Marsh Coloring Page: A Nature Learning Guide for Kids
🖍️
How to Get Better at Applying Even Pressure
🧒
Fun Ways to Build Toddlers (Ages 1-2)
🍎
Simple Indoor Recess Activities for Busy Classrooms
🎨
How to Draw a Quilt Block Pattern: A Step-by-Step Guide
🎨
Dinosaurs Drawing Prompts for Beginners
📴
Why Coloring Beats Scrolling on Long Car Rides
💡
Why Creative Problem-Solving Matters for Young Artists
🎨
How to Draw a Marbling Pattern: A Step-by-Step Guide
🎨
Rose: A Coloring and Nature Guide for Kids
🎨
Three Blind Mice: A Nursery Rhyme Coloring Guide for Kids
🎨
A Report Card: A Classroom Coloring and Learning Guide
🎨
Fun Ambulance Coloring and Drawing Ideas for Kids
🎨
Castles Drawing Prompts for Beginners
🎨
A Static Electricity Cereal Trick: A Step-by-Step Science Guide for Kids
🎨
A Family Emergency Kit: A Family Safety Guide
🎨
A School Play: A Classroom Coloring and Learning Guide
🎨
A Turkish Traditional Dress: A Coloring and Culture Guide for Kids
🎨
A Dim Sum Cart: Coloring Ideas and Fun Facts for Kids
🔤
How Pictures Help Children Learn New Vocabulary Words
💗
Understanding Processing Big Feelings
🎨
Carnotaurus Coloring Page: Fun Facts for Young Paleontologists
🎨
A Bee Visiting a Flower: A Gardening Guide for Kids and Families
🎨
A Kids' Job Board at Home: A Money Guide for Kids and Parents
📐
How Children Understand Geometry With Art
🔬
Understanding Color Theory Basics
🎨
Sailing Coloring Pages and Drawing Ideas for Kids
🔤
Drawing Activities for Question Words
🎨
A Lighthouse on a Cliff Coloring and Drawing Ideas for Kids
🖍️
Simple Techniques for Coloring Animals Realistically
🖍️
A Beginner's Guide to Choosing Your First Coloring Pencils
🎨
A Karaoke Night: A Coloring and Movement Guide for Kids
🖍️
Why Layering Colors Makes a Difference
A Beginner's Guide to Drawing Paper Types
🎨
A Boardwalk Arcade Coloring and Drawing Ideas for Kids
🎨
A Simple Machine Pulley: A Coloring and STEM Guide for Kids
🎨
An Amber Fossil Coloring Page: Fun Facts for Young Paleontologists
🎨
How to Draw Original Superhero Characters Step by Step
🏺
What We Know About Ancient Storytelling Through Pictures
📐
How Children Understand Number Lines With Art
🎨
A Spacewalk Tether: A Coloring and Space Mission Guide for Kids
🎨
Washing Hands Thoroughly: A Simple Life Skill for Kids
🎨
Cricket Coloring and Drawing Ideas for Kids
✏️
Easy Steps to Practice Drawing Curved Lines
🧒
Fun Ways to Build Kindergarteners
🎨
Coloring Subscription Boxes: A Buying and Technique Guide
🎨
Basketball Coloring Pages and Drawing Ideas for Kids
🎨
Summer Meadow Coloring Page: A Nature Learning Guide for Kids
🎨
A Saucepan: A Kitchen Guide for Kids and Parents
🧠
The Link Between Drawing and Spatial Awareness
🎨
Coral Reef Coloring and Drawing Ideas for Kids
👨👩👧
Creative Morning Routine Activities for Kids
🎨
A Bake Sale Stand: A Money Guide for Kids and Parents
🎨
A Medieval Archer: A Medieval Coloring and History Guide for Kids
🌈
Robots and Machines Coloring Ideas for Classrooms
🎨
An Excavator Digging Coloring and Drawing Ideas for Kids
🍎
A Teacher's Guide to End-of-Year Activities
🎨
Invitation Card Coloring: Free Ideas for Your Next Celebration
🎨
A Sailor Went to Sea: A Nursery Rhyme Coloring Guide for Kids
🎨
Pet Mouse Coloring and Drawing Ideas for Kids
🌈
Fun Musical Themes Coloring Pages for Kids
🎨
How to Draw a Mosaic Tile Pattern: A Step-by-Step Guide
🎨
A Family Financial Goal Chart: A Money Guide for Kids and Parents
👨👩👧
Coloring Ideas for Road Trip Activities
🧘
How Slow Coloring Practice Can Create a Quiet Moment
🎨
A Naked Egg Experiment: A Step-by-Step Science Guide for Kids
🎨
Icicle Formation Coloring Page: A Nature Learning Guide for Kids
🎨
Table Tennis Coloring Pages and Drawing Ideas for Kids
🎨
Exploring A Space Explorer: A Coloring and Learning Guide for Kids
🎨
A School Locker: A Classroom Coloring and Learning Guide
🔤
Drawing Activities for Opposites
🎨
A Garden Hose Reel: A Gardening Guide for Kids and Families
🎨
Making S'mores: Coloring Ideas for Your Next Family Adventure
💡
Building Visual Brainstorming Through Coloring and Drawing
🎨
A Superhero Symbol Design: A Superhero Coloring and Design Guide for Kids
🍂
Printable Halloween Coloring Pages for Kids
🎨
How to Draw a A Shape Made of Lines: A Step-by-Step Guide for Kids
🎨
Gymnastics Coloring Pages and Drawing Ideas for Kids
💗
How Drawing Supports Art for Stressful Days
🎨
A Substitute Teacher Day: A Classroom Coloring and Learning Guide
🎨
Watercolor Basics for Beginners: A Buying and Technique Guide
🧒
Understanding Ages 4-5 in Early Childhood
🎨
Smoke Detector Checks: A Family Safety Guide
🎨
Fencing Coloring Pages and Drawing Ideas for Kids
💗
Creative Approaches to Building Self-Esteem Through Art
🌈
Creative Ways to Color Animals
🎲
Drawing Challenges: A Creative Twist
🎨
Sample Collection on Mars: A Coloring and Space Mission Guide for Kids
🎨
How to Draw a Viola: A Coloring and Music Guide for Kids
💬
How Infographics Communicate Ideas
🌈
Fun Everyday Objects Coloring Pages for Kids
🎨
A Baby Triceratops Coloring Page: Fun Facts for Young Paleontologists
🏺
The History of Ancient Art Materials
🏺
What We Know About Ancient Pottery Art
🎨
Ancient Explorers Charting New Lands: An Ancient History Coloring Guide for Kids
🎨
Easy Community Helpers Drawing Ideas
🎨
How to Draw a Spiral: A Step-by-Step Guide for Kids
🎨
Fun Speedboat Coloring and Drawing Ideas for Kids
🎨
Wetland Marsh Coloring Page: A Nature Learning Guide for Kids
🖍️
How to Get Better at Applying Even Pressure
🧒
Fun Ways to Build Toddlers (Ages 1-2)
🍎
Simple Indoor Recess Activities for Busy Classrooms
🎨
How to Draw a Quilt Block Pattern: A Step-by-Step Guide
🎨
Dinosaurs Drawing Prompts for Beginners
📴
Why Coloring Beats Scrolling on Long Car Rides
💡
Why Creative Problem-Solving Matters for Young Artists
🎨
How to Draw a Marbling Pattern: A Step-by-Step Guide
🎨
Rose: A Coloring and Nature Guide for Kids
🎨
Three Blind Mice: A Nursery Rhyme Coloring Guide for Kids
🎨
A Report Card: A Classroom Coloring and Learning Guide
🎨
Fun Ambulance Coloring and Drawing Ideas for Kids
🎨
Castles Drawing Prompts for Beginners
🎨
A Static Electricity Cereal Trick: A Step-by-Step Science Guide for Kids
🎨
A Family Emergency Kit: A Family Safety Guide
🎨
A School Play: A Classroom Coloring and Learning Guide
🎨
A Turkish Traditional Dress: A Coloring and Culture Guide for Kids
🎨
A Dim Sum Cart: Coloring Ideas and Fun Facts for Kids
🔤
How Pictures Help Children Learn New Vocabulary Words
💗
Understanding Processing Big Feelings
🎨
Carnotaurus Coloring Page: Fun Facts for Young Paleontologists
🎨
A Bee Visiting a Flower: A Gardening Guide for Kids and Families
🎨
A Kids' Job Board at Home: A Money Guide for Kids and Parents
📐
How Children Understand Geometry With Art
🔬
Understanding Color Theory Basics
🎨
Sailing Coloring Pages and Drawing Ideas for Kids
🔤
Drawing Activities for Question Words
🎨
A Lighthouse on a Cliff Coloring and Drawing Ideas for Kids
🖍️
Simple Techniques for Coloring Animals Realistically
🖍️
A Beginner's Guide to Choosing Your First Coloring Pencils
🎨
A Karaoke Night: A Coloring and Movement Guide for Kids
🖍️
Why Layering Colors Makes a Difference
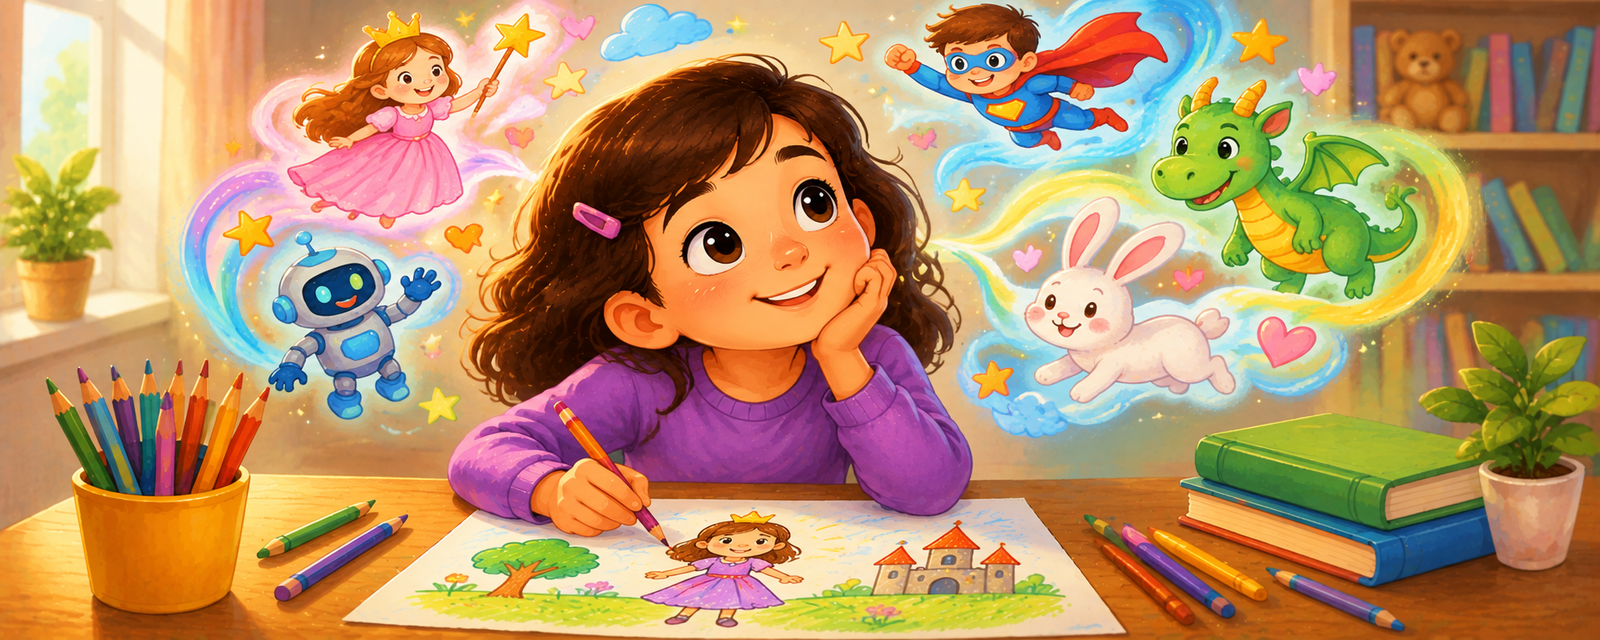 How Drawing Encourages Imaginary Worlds
🎨
The North Wind and the Sun: A Classic Story Coloring Guide for Kids
🎨
Tornado Coloring Page: A Nature Learning Guide for Kids
🎨
Cow Milking: A Coloring and Food Science Guide for Kids
🎨
American Football Coloring Pages and Drawing Ideas for Kids
🎨
A Sink or Float Test: A Step-by-Step Science Guide for Kids
💗
Exploring Art and Relaxation Through Art
✏️
Fun Exercises for Warm-Up Drawing Exercises
🎨
Canyon Layers Coloring Page: A Nature Learning Guide for Kids
🔤
Using Coloring Pages to Teach Opposites
🎨
Witch Coloring and Drawing Ideas for Kids
🎨
Writing a Thank You Note: A Simple Life Skill for Kids
🧘
Why Mindful Coloring for Beginners Feels Calming
🎨
Sagrada Familia: Coloring Page and Fun Facts for Kids
🎨
Rumpelstiltskin: A Classic Story Coloring Guide for Kids
🎨
Choosing a Coloring Book for Adults: A Buying and Technique Guide
🎨
Sports Drawing Prompts for Beginners
🏺
How Ancient Art Materials Shaped Human Communication
🎨
A Ship's Cannon Coloring and Drawing Ideas for Kids
🧠
Why Drawing Can Help With Critical Thinking
🎨
Pufferfish Coloring and Drawing Ideas for Kids
🎨
A Castle Under a Full Moon: A Medieval Coloring and History Guide for Kids
🎨
A Sailboat Race Coloring and Drawing Ideas for Kids
🎨
How to Draw Farm Life Step by Step
🎨
A Robot Orchestra: A Coloring and Invention Guide for Kids
🍂
Seasonal Coloring Guide: Winter
🎨
Farm Tractor Scene Coloring and Drawing Ideas for Kids
🎨
A Deserted Island Hut Coloring and Drawing Ideas for Kids
🎨
Sphinx Coloring and Drawing Ideas for Kids
💡
Nurturing Inventing New Ideas at Home
🧘
Why Quiet Morning Coloring Feels Calming
🎨
Mount Fuji: Coloring Page and Fun Facts for Kids
🎨
Erasable Colored Pencils: A Buying and Technique Guide
🔎
Exploring Storyboarding for Projects for Students
🎨
A Carnival Mask Coloring and Drawing Ideas for Kids
🎨
An Oven Mitt: A Kitchen Guide for Kids and Parents
🎨
A Toaster: A Kitchen Guide for Kids and Parents
🎨
A Simple Machine Inclined Plane: A Coloring and STEM Guide for Kids
💡
The Role of Artistic Risk-Taking in Children's Art
🌈
Creative Ways to Color Seasonal Scenes
💬
Why Wordless Storytelling Matter in Everyday Life
🎨
A Walking Water Experiment: A Step-by-Step Science Guide for Kids
🎨
a Welcome Home Sign: Free Ideas for Your Next Celebration
🎨
Celery Coloring and Drawing Ideas for Kids
🌈
Printable Fairy Tale Scenes Coloring Activities
🎨
Mahjong Tile Coloring and Drawing Ideas for Kids
🎨
Garter Snake Coloring and Drawing Ideas for Kids
🎨
Millipede Coloring and Drawing Ideas for Kids
💬
How Visual Storytelling Communicate Ideas
🎨
Winter Fireplace Reading: Coloring Ideas and Activities for the Whole Family
🎨
Exploring Brazil: A Coloring and Culture Guide for Kids
🎨
Ocean Wave Breathing: A Simple Mindfulness Activity for Kids
🎨
A Thanksgiving Feast Table: Coloring Ideas and Fun Facts for Kids
💡
Nurturing Making Mistakes in Art at Home
🎨
Chicken Little: A Classic Story Coloring Guide for Kids
🍎
A Teacher's Guide to Differentiated Art Instruction
🎨
Sugar Making: A Coloring and Food Science Guide for Kids
🖍️
Simple Techniques for Avoiding Smudges While Coloring
🎨
Teaching Open-Mindedness: A Simple Activity for Kids
🔬
The Science Behind Additive Color Mixing
🖍️
Tips for Using Complementary Colors
🎨
Farm Pond Coloring and Drawing Ideas for Kids
🎨
Golem Coloring and Drawing Ideas for Kids
🌈
Relaxing Food and Treats Coloring Activities
🔎
Using Idea Webs to Solve Problems
🎨
How to Draw a Tessellation Pattern: A Step-by-Step Guide
🧠
Exploring Drawing and Attention to Detail
🔎
A Beginner's Guide to Data Visualization Basics
🎨
How to Draw Sports Step by Step
🎨
Fish Harvesting: A Coloring and Food Science Guide for Kids
🔤
Learning Sentence Building Through Drawing
🎨
A Maypole Dance: A Coloring and Movement Guide for Kids
🎨
Drinking Enough Water: A Coloring and Health Guide for Kids
🎨
A Kickball Game: A Coloring and Playtime Guide for Kids
🎨
A Raccoon at the Campsite: Coloring Ideas for Your Next Family Adventure
🎲
Step-by-Step Tic-Tac-Toe Variations
🧒
How Drawing Supports Kindergarteners
🔬
Understanding Why Screens Use RGB
🎨
Neon Markers: A Buying and Technique Guide
🔬
Why Printers Use CMYK Explained for Kids
🎨
Creative Self-Portraits Drawing Exercises
🎨
Leopard Coloring and Drawing Ideas for Kids
🎨
Filling a Water Bowl: A Simple Pet Care Guide for Kids
How Drawing Encourages Imaginary Worlds
🎨
The North Wind and the Sun: A Classic Story Coloring Guide for Kids
🎨
Tornado Coloring Page: A Nature Learning Guide for Kids
🎨
Cow Milking: A Coloring and Food Science Guide for Kids
🎨
American Football Coloring Pages and Drawing Ideas for Kids
🎨
A Sink or Float Test: A Step-by-Step Science Guide for Kids
💗
Exploring Art and Relaxation Through Art
✏️
Fun Exercises for Warm-Up Drawing Exercises
🎨
Canyon Layers Coloring Page: A Nature Learning Guide for Kids
🔤
Using Coloring Pages to Teach Opposites
🎨
Witch Coloring and Drawing Ideas for Kids
🎨
Writing a Thank You Note: A Simple Life Skill for Kids
🧘
Why Mindful Coloring for Beginners Feels Calming
🎨
Sagrada Familia: Coloring Page and Fun Facts for Kids
🎨
Rumpelstiltskin: A Classic Story Coloring Guide for Kids
🎨
Choosing a Coloring Book for Adults: A Buying and Technique Guide
🎨
Sports Drawing Prompts for Beginners
🏺
How Ancient Art Materials Shaped Human Communication
🎨
A Ship's Cannon Coloring and Drawing Ideas for Kids
🧠
Why Drawing Can Help With Critical Thinking
🎨
Pufferfish Coloring and Drawing Ideas for Kids
🎨
A Castle Under a Full Moon: A Medieval Coloring and History Guide for Kids
🎨
A Sailboat Race Coloring and Drawing Ideas for Kids
🎨
How to Draw Farm Life Step by Step
🎨
A Robot Orchestra: A Coloring and Invention Guide for Kids
🍂
Seasonal Coloring Guide: Winter
🎨
Farm Tractor Scene Coloring and Drawing Ideas for Kids
🎨
A Deserted Island Hut Coloring and Drawing Ideas for Kids
🎨
Sphinx Coloring and Drawing Ideas for Kids
💡
Nurturing Inventing New Ideas at Home
🧘
Why Quiet Morning Coloring Feels Calming
🎨
Mount Fuji: Coloring Page and Fun Facts for Kids
🎨
Erasable Colored Pencils: A Buying and Technique Guide
🔎
Exploring Storyboarding for Projects for Students
🎨
A Carnival Mask Coloring and Drawing Ideas for Kids
🎨
An Oven Mitt: A Kitchen Guide for Kids and Parents
🎨
A Toaster: A Kitchen Guide for Kids and Parents
🎨
A Simple Machine Inclined Plane: A Coloring and STEM Guide for Kids
💡
The Role of Artistic Risk-Taking in Children's Art
🌈
Creative Ways to Color Seasonal Scenes
💬
Why Wordless Storytelling Matter in Everyday Life
🎨
A Walking Water Experiment: A Step-by-Step Science Guide for Kids
🎨
a Welcome Home Sign: Free Ideas for Your Next Celebration
🎨
Celery Coloring and Drawing Ideas for Kids
🌈
Printable Fairy Tale Scenes Coloring Activities
🎨
Mahjong Tile Coloring and Drawing Ideas for Kids
🎨
Garter Snake Coloring and Drawing Ideas for Kids
🎨
Millipede Coloring and Drawing Ideas for Kids
💬
How Visual Storytelling Communicate Ideas
🎨
Winter Fireplace Reading: Coloring Ideas and Activities for the Whole Family
🎨
Exploring Brazil: A Coloring and Culture Guide for Kids
🎨
Ocean Wave Breathing: A Simple Mindfulness Activity for Kids
🎨
A Thanksgiving Feast Table: Coloring Ideas and Fun Facts for Kids
💡
Nurturing Making Mistakes in Art at Home
🎨
Chicken Little: A Classic Story Coloring Guide for Kids
🍎
A Teacher's Guide to Differentiated Art Instruction
🎨
Sugar Making: A Coloring and Food Science Guide for Kids
🖍️
Simple Techniques for Avoiding Smudges While Coloring
🎨
Teaching Open-Mindedness: A Simple Activity for Kids
🔬
The Science Behind Additive Color Mixing
🖍️
Tips for Using Complementary Colors
🎨
Farm Pond Coloring and Drawing Ideas for Kids
🎨
Golem Coloring and Drawing Ideas for Kids
🌈
Relaxing Food and Treats Coloring Activities
🔎
Using Idea Webs to Solve Problems
🎨
How to Draw a Tessellation Pattern: A Step-by-Step Guide
🧠
Exploring Drawing and Attention to Detail
🔎
A Beginner's Guide to Data Visualization Basics
🎨
How to Draw Sports Step by Step
🎨
Fish Harvesting: A Coloring and Food Science Guide for Kids
🔤
Learning Sentence Building Through Drawing
🎨
A Maypole Dance: A Coloring and Movement Guide for Kids
🎨
Drinking Enough Water: A Coloring and Health Guide for Kids
🎨
A Kickball Game: A Coloring and Playtime Guide for Kids
🎨
A Raccoon at the Campsite: Coloring Ideas for Your Next Family Adventure
🎲
Step-by-Step Tic-Tac-Toe Variations
🧒
How Drawing Supports Kindergarteners
🔬
Understanding Why Screens Use RGB
🎨
Neon Markers: A Buying and Technique Guide
🔬
Why Printers Use CMYK Explained for Kids
🎨
Creative Self-Portraits Drawing Exercises
🎨
Leopard Coloring and Drawing Ideas for Kids
🎨
Filling a Water Bowl: A Simple Pet Care Guide for Kids
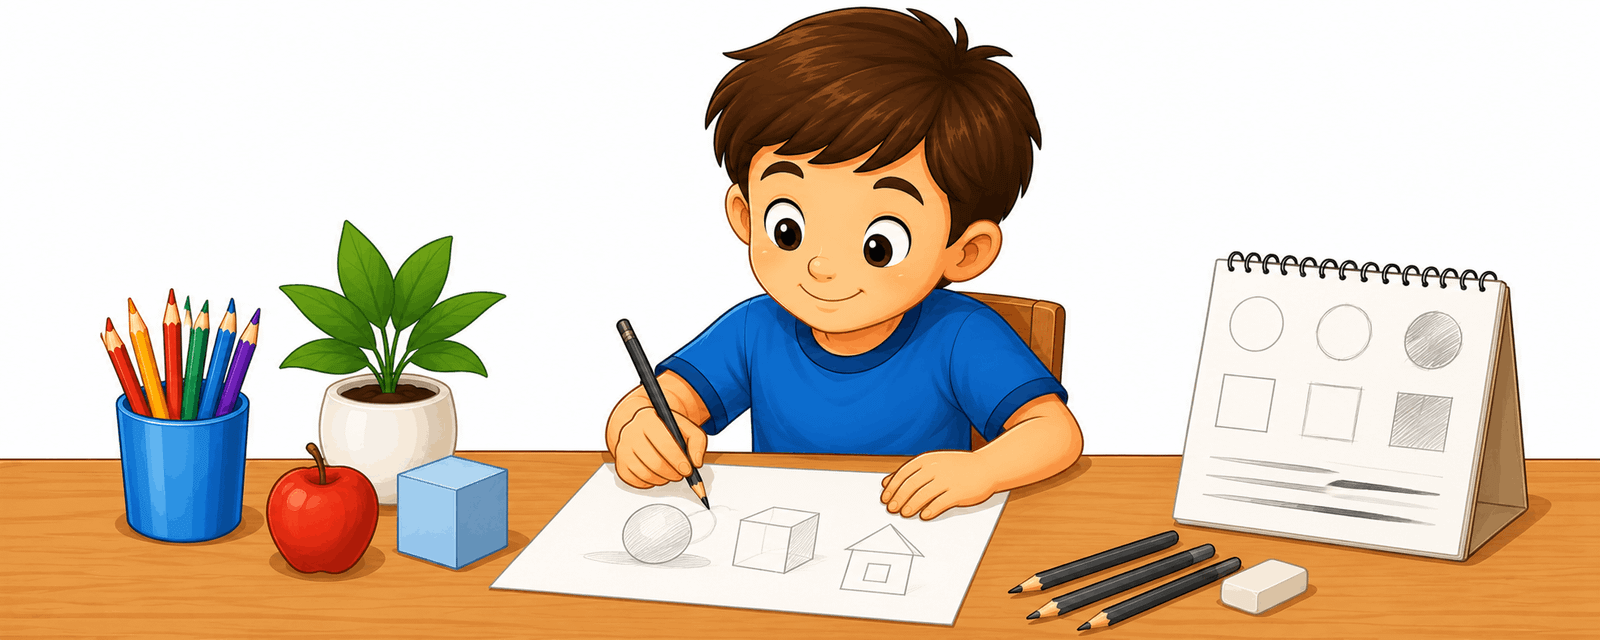 A Beginner's Guide to Sketching Basics
🎨
Easy Vehicles Drawing Ideas
🎨
How to Draw a Kalimba: A Coloring and Music Guide for Kids
🔤
How Pictures Help Children Learn Descriptive Words
🔤
Using Coloring Pages to Teach Emotions and Feelings Words
📴
Making the Most of Outdoor Picnics Without Screens
🎨
Shipwreck Scene Coloring and Drawing Ideas for Kids
🎨
A Working Beehive: A Coloring and Food Science Guide for Kids
💗
The Role of Coloring in Art for Stressful Days
🔤
Visual Vocabulary: Colors in a New Language
🎨
Golden Gate Bridge: Coloring Page and Fun Facts for Kids
🧒
How Drawing Supports The Scribbling Stage
🎨
Brooklyn Bridge: Coloring Page and Fun Facts for Kids
🎨
Breathing Exercise Cards: A Simple Mindfulness Activity for Kids
🎨
Ancient Greek Pottery Art: An Ancient History Coloring Guide for Kids
🔬
What Is Color Theory Basics?
🎨
Farmers Market Stand Coloring Ideas for Kids Who Love to Create
📴
Why Coloring Beats Scrolling on Quiet Time Before Bed
🎨
How to Draw a Batik Pattern: A Step-by-Step Guide
🎨
How to Draw a Cylinder: A Step-by-Step Guide for Kids
✏️
How to Improve Your Drawing Squares and Rectangles
🎲
Fun Sketch Relay Games for Kids
🎨
An Underwater Robot: A Coloring and Invention Guide for Kids
🎨
Spider Coloring and Drawing Ideas for Kids
🧒
Fun Ways to Build Shape Recognition
🔬
The Science Behind Color Theory Basics
🍂
Fun Summer Classroom Coloring Ideas
✏️
Easy Steps to Practice Drawing From Imagination
💡
How Drawing Encourages Creative Confidence
📴
Screen-Free Coloring Ideas for Family Game Nights
🎨
A Spring Umbrella Walk: Coloring Ideas and Activities for the Whole Family
🎨
Sunset Over the Ocean Coloring Page: A Nature Learning Guide for Kids
🎨
A Sushi Platter: Coloring Ideas and Fun Facts for Kids
🎨
A Parrot on a Shoulder Coloring and Drawing Ideas for Kids
🎨
Beach Flip-Flops: Coloring Ideas and Activities for the Whole Family
🎨
Rhino Coloring and Drawing Ideas for Kids
👨👩👧
Coloring Ideas for Travel-Friendly Activities
🧠
How Drawing May Support Attention to Detail
🎨
A Cleaning Robot: A Coloring and Invention Guide for Kids
🎨
A Circus Band Coloring and Drawing Ideas for Kids
🔤
How Pictures Help Children Learn Action Words
🎨
Sushi Coloring Ideas for Kids Who Love to Create
🎨
A Shape-Shifting Superhero: A Superhero Coloring and Design Guide for Kids
🎨
Cockroach Coloring and Drawing Ideas for Kids
🎨
Ergonomic Grip Tools: A Buying and Technique Guide
👨👩👧
Creative Birthday Party Activities for Kids
🧒
A Parent's Guide to Ages 6-7
🎨
Old King Cole: A Nursery Rhyme Coloring Guide for Kids
🎨
A Sailboat on the Horizon Coloring and Drawing Ideas for Kids
🍎
Classroom Ideas: Cross-Curricular Art Lessons
💬
Why Symbols and Icons Matter in Everyday Life
🎨
Muffins Coloring Ideas for Kids Who Love to Create
🎨
Brushing and Flossing: A Coloring and Health Guide for Kids
🎨
A Campfire Sing-Along: Coloring Ideas for Your Next Family Adventure
🍂
Celebrate Summer With Coloring Activities
🎨
A Beach Bonfire Sing-Along Coloring and Drawing Ideas for Kids
💬
From Cave Drawings to Visual Instructions
💡
The Role of Character Design in Children's Art
🎨
Eel Coloring and Drawing Ideas for Kids
👨👩👧
Coloring Ideas for Outdoor-Inspired Drawing
🎨
Elf Coloring and Drawing Ideas for Kids
🎨
A Weather Satellite: A Coloring and Space Mission Guide for Kids
💗
How Drawing Supports Creative Outlets for Teens
💡
How Drawing Encourages Making Mistakes in Art
🎨
A Barrel of Supplies Coloring and Drawing Ideas for Kids
📴
Why Coloring Beats Scrolling on Family Game Nights
🎨
Petra: Coloring Page and Fun Facts for Kids
🎨
Meet Art Deco Style: An Art Appreciation Guide for Kids
🎨
Creative Original Superhero Characters Drawing Exercises
🎨
A Carnival Photo Booth Coloring and Drawing Ideas for Kids
🍎
How Teachers Can Use Classroom Management Through Art
🌈
Relaxing Insects and Bugs Coloring Activities
🎨
Gradient Blending Technique: A Buying and Technique Guide
🎨
Everyday Objects Drawing Prompts for Beginners
🍎
How Teachers Can Use Differentiated Art Instruction
💗
Understanding Emotional Expression
🎨
London Bridge: A Coloring and Playtime Guide for Kids
🧘
Why Deep Breathing and Coloring Feels Calming
🎨
Aztec Warriors: An Ancient History Coloring Guide for Kids
🎨
A Tutu and Ballet Shoes: A Coloring and Movement Guide for Kids
🎨
Cardstock vs. Regular Paper: A Practical Guide
🎨
Pasta Bowl Coloring Ideas for Kids Who Love to Create
✏️
Fun Exercises for Drawing Squares and Rectangles
🎨
Meet Impressionism: An Art Appreciation Guide for Kids
🎨
Gingerbread House Coloring Ideas for Kids Who Love to Create
💗
Creative Approaches to Creative Journaling
🎨
A Balanced Meal: A Coloring and Health Guide for Kids
💡
Why Visual Brainstorming Matters for Young Artists
🧘
Why Repetitive Pattern Coloring Feels Calming
🎨
Metallic Gel Pens: A Buying and Technique Guide
🎨
Hula Hoop Coloring Pages and Drawing Ideas for Kids
🎨
Platypus Coloring and Drawing Ideas for Kids
🎨
Teaching Creativity: A Simple Activity for Kids
🎨
Teaching Flexibility: A Simple Activity for Kids
🎨
A Plant-Power Superhero: A Superhero Coloring and Design Guide for Kids
🎨
Ancient Celtic Warriors: An Ancient History Coloring Guide for Kids
🧒
Fun Ways to Build Children Who Dislike Drawing
🎨
a Puzzle Activity Sheet: Free Ideas for Your Next Celebration
🎨
Exploring A Rocket Launch: A Coloring and Learning Guide for Kids
🔬
A Simple Guide to Warm and Cool Colors
🎨
Mango Coloring and Drawing Ideas for Kids
🎨
A Building Challenge with Blocks: A Coloring and STEM Guide for Kids
🖌️
Simple Steps for Working With Light and Shadow
✏️
Fun Exercises for Drawing Simple Animals
🎨
A Sunny Beach Day Picnic Basket Coloring and Drawing Ideas for Kids
🍎
Simple Art Lessons for History Class for Busy Classrooms
🎨
Exercise and Moving Your Body: A Coloring and Health Guide for Kids
🎲
Fun Drawing Challenges for Kids
🧠
Exploring Drawing and Hand-Eye Coordination
🎨
A Rainbow in a Jar: A Step-by-Step Science Guide for Kids
🏺
Exploring Petroglyphs and Rock Art
🎨
a Dot-to-Dot Printable: Free Ideas for Your Next Celebration
🎨
A Dodgeball Match: A Coloring and Playtime Guide for Kids
🎨
Hibiscus Flower: A Coloring and Nature Guide for Kids
✏️
Easy Steps to Practice Choosing Your First Pencil
🍂
Printable Birthday Celebrations Coloring Pages for Kids
🎨
Cleaning a Hamster Cage: A Simple Pet Care Guide for Kids
🎨
Aladdin and the Magic Lamp: A Classic Story Coloring Guide for Kids
🧘
Exploring Deep Breathing and Coloring
🎨
This Little Piggy: A Nursery Rhyme Coloring Guide for Kids
🎨
A Beach Ball Coloring and Drawing Ideas for Kids
🎨
A School Bus Ride: A Classroom Coloring and Learning Guide
🎨
Chicken Egg Laying: A Coloring and Food Science Guide for Kids
🎨
The Heart and How It Beats: A Coloring and Health Guide for Kids
🎨
Fruit Smoothie Bar Coloring Ideas for Kids Who Love to Create
🎨
A Winter Frosty Window: Coloring Ideas and Activities for the Whole Family
👨👩👧
Why Parents Love Birthday Party Activities
🎨
Humpback Whale Coloring and Drawing Ideas for Kids
🎨
The Roman Colosseum: An Ancient History Coloring Guide for Kids
🎨
Puppy Coloring and Drawing Ideas for Kids
🎨
Follow the Leader: A Coloring and Playtime Guide for Kids
🔎
Exploring Organizing Research With Sketches for Students
🔬
The Science Behind Color Contrast
🎨
Rowing Coloring Pages and Drawing Ideas for Kids
🎨
Tyrannosaurus Rex Coloring Page: Fun Facts for Young Paleontologists
🎨
Pterodactyl Coloring Page: Fun Facts for Young Paleontologists
🎨
Meet the Dentist: A Community Helper Coloring Guide
🔎
Using Sketch Journaling to Solve Problems
🔬
How Light Creates Color Explained for Kids
🏺
Why Ancient Art Materials Matter to Historians
🧠
The Link Between Drawing and Concentration and Focus
🎨
An Engineering Challenge Bridge: A Coloring and STEM Guide for Kids
🎨
A Pet's Cozy Blanket: A Simple Pet Care Guide for Kids
🔬
Understanding Subtractive Color Mixing
🧘
How Deep Breathing and Coloring Can Create a Quiet Moment
🎨
How to Draw a Chevron Pattern: A Step-by-Step Guide
👨👩👧
Making the Most of Sibling Bonding Activities
📐
Teaching Angles Through Coloring and Drawing
🔬
A Simple Guide to Digital vs Traditional Color
🍎
How Teachers Can Use Substitute Teacher Activities
🎨
A Kids' Garden Club: A Gardening Guide for Kids and Families
🎨
Teaching Honesty: A Simple Activity for Kids
🎨
A Medieval Fair with Jugglers: A Medieval Coloring and History Guide for Kids
🎨
The Monkey and the Crocodile: A Classic Story Coloring Guide for Kids
🎨
Easy Castles Drawing Ideas
✏️
Fun Exercises for Drawing Curved Lines
🎨
Grocery Food Delivery: A Coloring and Food Science Guide for Kids
🍎
Simple Substitute Teacher Activities for Busy Classrooms
🎨
A Butterfly Garden: A Gardening Guide for Kids and Families
🧒
Drawing Activities for Pencil Grip Development
💡
Nurturing Creative Problem-Solving at Home
🎨
Curly Locks: A Nursery Rhyme Coloring Guide for Kids
🎨
A Kids' Emergency Contact Bracelet: A Family Safety Guide
🎨
Goldfish Coloring and Drawing Ideas for Kids
💡
How Drawing Encourages Combining Ideas
🎨
Toy Robot Coloring and Drawing Ideas for Kids
A Beginner's Guide to Sketching Basics
🎨
Easy Vehicles Drawing Ideas
🎨
How to Draw a Kalimba: A Coloring and Music Guide for Kids
🔤
How Pictures Help Children Learn Descriptive Words
🔤
Using Coloring Pages to Teach Emotions and Feelings Words
📴
Making the Most of Outdoor Picnics Without Screens
🎨
Shipwreck Scene Coloring and Drawing Ideas for Kids
🎨
A Working Beehive: A Coloring and Food Science Guide for Kids
💗
The Role of Coloring in Art for Stressful Days
🔤
Visual Vocabulary: Colors in a New Language
🎨
Golden Gate Bridge: Coloring Page and Fun Facts for Kids
🧒
How Drawing Supports The Scribbling Stage
🎨
Brooklyn Bridge: Coloring Page and Fun Facts for Kids
🎨
Breathing Exercise Cards: A Simple Mindfulness Activity for Kids
🎨
Ancient Greek Pottery Art: An Ancient History Coloring Guide for Kids
🔬
What Is Color Theory Basics?
🎨
Farmers Market Stand Coloring Ideas for Kids Who Love to Create
📴
Why Coloring Beats Scrolling on Quiet Time Before Bed
🎨
How to Draw a Batik Pattern: A Step-by-Step Guide
🎨
How to Draw a Cylinder: A Step-by-Step Guide for Kids
✏️
How to Improve Your Drawing Squares and Rectangles
🎲
Fun Sketch Relay Games for Kids
🎨
An Underwater Robot: A Coloring and Invention Guide for Kids
🎨
Spider Coloring and Drawing Ideas for Kids
🧒
Fun Ways to Build Shape Recognition
🔬
The Science Behind Color Theory Basics
🍂
Fun Summer Classroom Coloring Ideas
✏️
Easy Steps to Practice Drawing From Imagination
💡
How Drawing Encourages Creative Confidence
📴
Screen-Free Coloring Ideas for Family Game Nights
🎨
A Spring Umbrella Walk: Coloring Ideas and Activities for the Whole Family
🎨
Sunset Over the Ocean Coloring Page: A Nature Learning Guide for Kids
🎨
A Sushi Platter: Coloring Ideas and Fun Facts for Kids
🎨
A Parrot on a Shoulder Coloring and Drawing Ideas for Kids
🎨
Beach Flip-Flops: Coloring Ideas and Activities for the Whole Family
🎨
Rhino Coloring and Drawing Ideas for Kids
👨👩👧
Coloring Ideas for Travel-Friendly Activities
🧠
How Drawing May Support Attention to Detail
🎨
A Cleaning Robot: A Coloring and Invention Guide for Kids
🎨
A Circus Band Coloring and Drawing Ideas for Kids
🔤
How Pictures Help Children Learn Action Words
🎨
Sushi Coloring Ideas for Kids Who Love to Create
🎨
A Shape-Shifting Superhero: A Superhero Coloring and Design Guide for Kids
🎨
Cockroach Coloring and Drawing Ideas for Kids
🎨
Ergonomic Grip Tools: A Buying and Technique Guide
👨👩👧
Creative Birthday Party Activities for Kids
🧒
A Parent's Guide to Ages 6-7
🎨
Old King Cole: A Nursery Rhyme Coloring Guide for Kids
🎨
A Sailboat on the Horizon Coloring and Drawing Ideas for Kids
🍎
Classroom Ideas: Cross-Curricular Art Lessons
💬
Why Symbols and Icons Matter in Everyday Life
🎨
Muffins Coloring Ideas for Kids Who Love to Create
🎨
Brushing and Flossing: A Coloring and Health Guide for Kids
🎨
A Campfire Sing-Along: Coloring Ideas for Your Next Family Adventure
🍂
Celebrate Summer With Coloring Activities
🎨
A Beach Bonfire Sing-Along Coloring and Drawing Ideas for Kids
💬
From Cave Drawings to Visual Instructions
💡
The Role of Character Design in Children's Art
🎨
Eel Coloring and Drawing Ideas for Kids
👨👩👧
Coloring Ideas for Outdoor-Inspired Drawing
🎨
Elf Coloring and Drawing Ideas for Kids
🎨
A Weather Satellite: A Coloring and Space Mission Guide for Kids
💗
How Drawing Supports Creative Outlets for Teens
💡
How Drawing Encourages Making Mistakes in Art
🎨
A Barrel of Supplies Coloring and Drawing Ideas for Kids
📴
Why Coloring Beats Scrolling on Family Game Nights
🎨
Petra: Coloring Page and Fun Facts for Kids
🎨
Meet Art Deco Style: An Art Appreciation Guide for Kids
🎨
Creative Original Superhero Characters Drawing Exercises
🎨
A Carnival Photo Booth Coloring and Drawing Ideas for Kids
🍎
How Teachers Can Use Classroom Management Through Art
🌈
Relaxing Insects and Bugs Coloring Activities
🎨
Gradient Blending Technique: A Buying and Technique Guide
🎨
Everyday Objects Drawing Prompts for Beginners
🍎
How Teachers Can Use Differentiated Art Instruction
💗
Understanding Emotional Expression
🎨
London Bridge: A Coloring and Playtime Guide for Kids
🧘
Why Deep Breathing and Coloring Feels Calming
🎨
Aztec Warriors: An Ancient History Coloring Guide for Kids
🎨
A Tutu and Ballet Shoes: A Coloring and Movement Guide for Kids
🎨
Cardstock vs. Regular Paper: A Practical Guide
🎨
Pasta Bowl Coloring Ideas for Kids Who Love to Create
✏️
Fun Exercises for Drawing Squares and Rectangles
🎨
Meet Impressionism: An Art Appreciation Guide for Kids
🎨
Gingerbread House Coloring Ideas for Kids Who Love to Create
💗
Creative Approaches to Creative Journaling
🎨
A Balanced Meal: A Coloring and Health Guide for Kids
💡
Why Visual Brainstorming Matters for Young Artists
🧘
Why Repetitive Pattern Coloring Feels Calming
🎨
Metallic Gel Pens: A Buying and Technique Guide
🎨
Hula Hoop Coloring Pages and Drawing Ideas for Kids
🎨
Platypus Coloring and Drawing Ideas for Kids
🎨
Teaching Creativity: A Simple Activity for Kids
🎨
Teaching Flexibility: A Simple Activity for Kids
🎨
A Plant-Power Superhero: A Superhero Coloring and Design Guide for Kids
🎨
Ancient Celtic Warriors: An Ancient History Coloring Guide for Kids
🧒
Fun Ways to Build Children Who Dislike Drawing
🎨
a Puzzle Activity Sheet: Free Ideas for Your Next Celebration
🎨
Exploring A Rocket Launch: A Coloring and Learning Guide for Kids
🔬
A Simple Guide to Warm and Cool Colors
🎨
Mango Coloring and Drawing Ideas for Kids
🎨
A Building Challenge with Blocks: A Coloring and STEM Guide for Kids
🖌️
Simple Steps for Working With Light and Shadow
✏️
Fun Exercises for Drawing Simple Animals
🎨
A Sunny Beach Day Picnic Basket Coloring and Drawing Ideas for Kids
🍎
Simple Art Lessons for History Class for Busy Classrooms
🎨
Exercise and Moving Your Body: A Coloring and Health Guide for Kids
🎲
Fun Drawing Challenges for Kids
🧠
Exploring Drawing and Hand-Eye Coordination
🎨
A Rainbow in a Jar: A Step-by-Step Science Guide for Kids
🏺
Exploring Petroglyphs and Rock Art
🎨
a Dot-to-Dot Printable: Free Ideas for Your Next Celebration
🎨
A Dodgeball Match: A Coloring and Playtime Guide for Kids
🎨
Hibiscus Flower: A Coloring and Nature Guide for Kids
✏️
Easy Steps to Practice Choosing Your First Pencil
🍂
Printable Birthday Celebrations Coloring Pages for Kids
🎨
Cleaning a Hamster Cage: A Simple Pet Care Guide for Kids
🎨
Aladdin and the Magic Lamp: A Classic Story Coloring Guide for Kids
🧘
Exploring Deep Breathing and Coloring
🎨
This Little Piggy: A Nursery Rhyme Coloring Guide for Kids
🎨
A Beach Ball Coloring and Drawing Ideas for Kids
🎨
A School Bus Ride: A Classroom Coloring and Learning Guide
🎨
Chicken Egg Laying: A Coloring and Food Science Guide for Kids
🎨
The Heart and How It Beats: A Coloring and Health Guide for Kids
🎨
Fruit Smoothie Bar Coloring Ideas for Kids Who Love to Create
🎨
A Winter Frosty Window: Coloring Ideas and Activities for the Whole Family
👨👩👧
Why Parents Love Birthday Party Activities
🎨
Humpback Whale Coloring and Drawing Ideas for Kids
🎨
The Roman Colosseum: An Ancient History Coloring Guide for Kids
🎨
Puppy Coloring and Drawing Ideas for Kids
🎨
Follow the Leader: A Coloring and Playtime Guide for Kids
🔎
Exploring Organizing Research With Sketches for Students
🔬
The Science Behind Color Contrast
🎨
Rowing Coloring Pages and Drawing Ideas for Kids
🎨
Tyrannosaurus Rex Coloring Page: Fun Facts for Young Paleontologists
🎨
Pterodactyl Coloring Page: Fun Facts for Young Paleontologists
🎨
Meet the Dentist: A Community Helper Coloring Guide
🔎
Using Sketch Journaling to Solve Problems
🔬
How Light Creates Color Explained for Kids
🏺
Why Ancient Art Materials Matter to Historians
🧠
The Link Between Drawing and Concentration and Focus
🎨
An Engineering Challenge Bridge: A Coloring and STEM Guide for Kids
🎨
A Pet's Cozy Blanket: A Simple Pet Care Guide for Kids
🔬
Understanding Subtractive Color Mixing
🧘
How Deep Breathing and Coloring Can Create a Quiet Moment
🎨
How to Draw a Chevron Pattern: A Step-by-Step Guide
👨👩👧
Making the Most of Sibling Bonding Activities
📐
Teaching Angles Through Coloring and Drawing
🔬
A Simple Guide to Digital vs Traditional Color
🍎
How Teachers Can Use Substitute Teacher Activities
🎨
A Kids' Garden Club: A Gardening Guide for Kids and Families
🎨
Teaching Honesty: A Simple Activity for Kids
🎨
A Medieval Fair with Jugglers: A Medieval Coloring and History Guide for Kids
🎨
The Monkey and the Crocodile: A Classic Story Coloring Guide for Kids
🎨
Easy Castles Drawing Ideas
✏️
Fun Exercises for Drawing Curved Lines
🎨
Grocery Food Delivery: A Coloring and Food Science Guide for Kids
🍎
Simple Substitute Teacher Activities for Busy Classrooms
🎨
A Butterfly Garden: A Gardening Guide for Kids and Families
🧒
Drawing Activities for Pencil Grip Development
💡
Nurturing Creative Problem-Solving at Home
🎨
Curly Locks: A Nursery Rhyme Coloring Guide for Kids
🎨
A Kids' Emergency Contact Bracelet: A Family Safety Guide
🎨
Goldfish Coloring and Drawing Ideas for Kids
💡
How Drawing Encourages Combining Ideas
🎨
Toy Robot Coloring and Drawing Ideas for Kids
 A Beginner's Guide to Drawing Straight Lines
🎨
Pheasant Coloring Page Ideas for Kids
🔬
Color Contrast Explained for Kids
🎨
The Letter U: An Alphabet and Number Coloring Page
🎨
Chess Piece Coloring and Drawing Ideas for Kids
🎨
A Kids' First Purchase Decision: A Money Guide for Kids and Parents
🎨
Exploring Scotland: A Coloring and Culture Guide for Kids
🎨
Building a Coloring Page Rotation System: A Practical Guide
🎨
A Vet Check-Up for a Pet: A Simple Pet Care Guide for Kids
🌈
Relaxing Weather Scenes Coloring Activities
🎨
The Lantern Festival: Coloring Ideas and Fun Facts for Kids
🎨
Resting When You're Sick: A Coloring and Health Guide for Kids
🎨
Swimming Coloring Pages and Drawing Ideas for Kids
🎨
A Beginner's Guide to Drawing Vehicles
🍂
Seasonal Coloring Guide: Independence Day
🎨
A Simple Maze Algorithm: A Coloring and STEM Guide for Kids
🍂
Creative Autumn Coloring Projects for Classrooms
💡
Building Daydreaming Through Coloring and Drawing
🎨
Meet Frida Kahlo: An Art Appreciation Guide for Kids
A Beginner's Guide to Drawing Straight Lines
🎨
Pheasant Coloring Page Ideas for Kids
🔬
Color Contrast Explained for Kids
🎨
The Letter U: An Alphabet and Number Coloring Page
🎨
Chess Piece Coloring and Drawing Ideas for Kids
🎨
A Kids' First Purchase Decision: A Money Guide for Kids and Parents
🎨
Exploring Scotland: A Coloring and Culture Guide for Kids
🎨
Building a Coloring Page Rotation System: A Practical Guide
🎨
A Vet Check-Up for a Pet: A Simple Pet Care Guide for Kids
🌈
Relaxing Weather Scenes Coloring Activities
🎨
The Lantern Festival: Coloring Ideas and Fun Facts for Kids
🎨
Resting When You're Sick: A Coloring and Health Guide for Kids
🎨
Swimming Coloring Pages and Drawing Ideas for Kids
🎨
A Beginner's Guide to Drawing Vehicles
🍂
Seasonal Coloring Guide: Independence Day
🎨
A Simple Maze Algorithm: A Coloring and STEM Guide for Kids
🍂
Creative Autumn Coloring Projects for Classrooms
💡
Building Daydreaming Through Coloring and Drawing
🎨
Meet Frida Kahlo: An Art Appreciation Guide for Kids
 A Beginner's Guide to Drawing Squares and Rectangles
🎨
Exploring A Mars Rover: A Coloring and Learning Guide for Kids
🎨
A Garden Trellis: A Gardening Guide for Kids and Families
🎨
A Pet's Vaccination Visit: A Simple Pet Care Guide for Kids
🎨
Lizard Coloring and Drawing Ideas for Kids
🎨
Bye Baby Bunting: A Nursery Rhyme Coloring Guide for Kids
🔤
Learning Everyday Objects Through Drawing
💡
Why Creative Confidence Matters for Young Artists
👨👩👧
Easy After-School Activities With Coloring Pages
👨👩👧
Coloring Ideas for Birthday Party Activities
🎨
A Dutch Traditional Clogs and Cap: A Coloring and Culture Guide for Kids
🏺
Why Prehistoric Drawing Tools Matter to Historians
🍎
Classroom Ideas: Group Art Projects
🧠
How Drawing May Support Creative Thinking
🎨
A Hand of Playing Cards Coloring and Drawing Ideas for Kids
🎨
A Camping Hammock: Coloring Ideas for Your Next Family Adventure
🎨
Meet Sketching Outdoors: An Art Appreciation Guide for Kids
🎨
Respecting a Teacher's Instructions: A Simple Social Skill for Kids
🎨
White House: Coloring Page and Fun Facts for Kids
🎨
A Superhero Sidekick: A Superhero Coloring and Design Guide for Kids
🎨
Onion Coloring and Drawing Ideas for Kids
🎨
Iguanodon Coloring Page: Fun Facts for Young Paleontologists
🎨
Summer Sprinkler Play: Coloring Ideas and Activities for the Whole Family
👨👩👧
Easy Summer Break Activities With Coloring Pages
🧒
A Parent's Guide to First-Time Artists
🍂
Seasonal Coloring Guide: Christmas
🎨
A Space Garden Experiment: A Coloring and Space Mission Guide for Kids
🎨
Teaching Thoughtfulness: A Simple Activity for Kids
🌈
Emotions and Faces Coloring Ideas for Classrooms
🎨
Creative Space and Planets Drawing Exercises
🎨
A Hanukkah Menorah: Coloring Ideas and Fun Facts for Kids
🎨
Creative Fantasy Creatures Drawing Exercises
🎨
A Classroom Chalkboard: A Classroom Coloring and Learning Guide
🎨
Apple Orchard Coloring and Drawing Ideas for Kids
🎨
A Potted Herb Garden: A Coloring and Nature Guide for Kids
🎨
A Prairie Homestead: A Wild West Coloring and History Guide for Kids
🎨
Fun Sailboat Coloring and Drawing Ideas for Kids
✏️
Easy Steps to Practice Drawing Paper Types
🎨
A Kite Flying Over the Beach Coloring and Drawing Ideas for Kids
🎨
The Letter A: An Alphabet and Number Coloring Page
💡
How Drawing Encourages Artistic Risk-Taking
🎨
Chinese New Year Coloring Ideas and Activities for the Whole Family
🖍️
Simple Techniques for Coloring Inside the Lines
👨👩👧
Creative Grandparent and Grandchild Activities for Kids
🔬
RGB Color Mixing Explained for Kids
🏺
Exploring Ancient Cave Pigments
💬
Understanding Visual Instructions
🎨
A Coding Camp Classroom: A Coloring and STEM Guide for Kids
🎨
Sea Turtle Coloring and Drawing Ideas for Kids
🎨
Tuatara Coloring and Drawing Ideas for Kids
🎨
Choosing a Coloring Book for Kids: A Buying and Technique Guide
🎨
A Popcorn Cart Coloring and Drawing Ideas for Kids
🎨
An Ancient King's Throne Room: An Ancient History Coloring Guide for Kids
🎨
A Holi Color Festival: Coloring Ideas and Fun Facts for Kids
🎨
A Jollof Rice Pot: Coloring Ideas and Fun Facts for Kids
🌈
Mandalas Coloring Ideas for Classrooms
🎨
Meet Yayoi Kusama: An Art Appreciation Guide for Kids
🎨
Skink Coloring and Drawing Ideas for Kids
🎨
Meet the Baker: A Community Helper Coloring Guide
🎨
A Rooftop Under Construction Coloring and Drawing Ideas for Kids
✏️
Easy Steps to Practice Drawing Circles
🎨
How to Draw a A Shape Inside a Shape: A Step-by-Step Guide for Kids
💬
Understanding Emojis and Modern Pictograms
🎨
A Garden Path of Stepping Stones: A Gardening Guide for Kids and Families
🎨
Polar Bear Coloring and Drawing Ideas for Kids
🎨
A Friendly Android: A Coloring and Invention Guide for Kids
🏺
How Ancient Pottery Art Shaped Human Communication
🎨
A Garden Gnome: A Gardening Guide for Kids and Families
🌈
Fun Animals Coloring Pages for Kids
🧠
Exploring Drawing and Creative Thinking
🎨
A Tumbleweed Rolling By: A Wild West Coloring and History Guide for Kids
🎨
A Boardwalk Cotton Candy Stand Coloring and Drawing Ideas for Kids
💗
Exploring Family Art Time and Connection Through Art
🎨
Curling Coloring Pages and Drawing Ideas for Kids
🎨
Chinchilla Coloring and Drawing Ideas for Kids
✏️
Fun Exercises for Holding a Pencil Correctly
🎨
A Spacewalk Repair: A Coloring and Space Mission Guide for Kids
🎨
A Friendly Robot: A Coloring and Invention Guide for Kids
🖍️
A Beginner's Guide to Coloring Small Details
🖍️
Why Choosing a Color Palette Makes a Difference
🎨
Fun Cable Car Coloring and Drawing Ideas for Kids
🎨
A Rube Goldberg Contraption: A Coloring and STEM Guide for Kids
🎨
Mother's Day Coloring Ideas and Activities for the Whole Family
🎨
A Kids' Budgeting Notebook: A Money Guide for Kids and Parents
🎨
Alligator Coloring and Drawing Ideas for Kids
🎨
A Beach Towel and Cooler Coloring and Drawing Ideas for Kids
🎨
How to Draw a Double Bass: A Coloring and Music Guide for Kids
🎨
A Home Emergency Supply List: A Family Safety Guide
🎨
a Thinking of You Card: Free Ideas for Your Next Celebration
💗
Exploring Creative Outlets for Teens Through Art
🍎
Simple Differentiated Art Instruction for Busy Classrooms
🎲
Fun Storyboard Games for Kids
📐
Fun Drawing Activities for Geometry
🎨
A Cowboy on a Horse: A Wild West Coloring and History Guide for Kids
🎨
An Inuit Traditional Parka: A Coloring and Culture Guide for Kids
🎨
The Brain and Thinking: A Coloring and Health Guide for Kids
🎨
Croissant Coloring Ideas for Kids Who Love to Create
🌈
Fun Emotions and Faces Coloring Pages for Kids
🎨
A Mountain Overlook: Coloring Ideas for Your Next Family Adventure
🎨
Meet Piet Mondrian: An Art Appreciation Guide for Kids
🔎
How Brainstorming With Pictures Support Learning
🎨
Digital Coloring Apps: A Buying and Technique Guide
🎨
A Funhouse Slide Coloring and Drawing Ideas for Kids
🎨
Counting Coins: A Simple Life Skill for Kids
🧒
What to Expect When Teaching Children Who Dislike Drawing
🧒
Understanding Preschoolers in Early Childhood
🏺
Exploring Ancient Art Materials
🎨
A 3D Printer at Work: A Coloring and STEM Guide for Kids
🎨
Fun Garbage Truck Coloring and Drawing Ideas for Kids
🎨
Therizinosaurus Coloring Page: Fun Facts for Young Paleontologists
🎨
Judging Criteria for Coloring Contests: A Practical Guide
🔤
Using Coloring Pages to Teach Numbers in a New Language
🎨
Vaccines and Staying Healthy: A Coloring and Health Guide for Kids
🎨
Forest Guardian Coloring and Drawing Ideas for Kids
🎨
Healthy Teeth and Brushing: A Coloring and Health Guide for Kids
🧒
Drawing Activities for First-Time Artists
📴
Making the Most of Weekend Mornings Without Screens
🎨
Mission Control: A Coloring and Space Mission Guide for Kids
🎨
A Robot Arm: A Coloring and Invention Guide for Kids
✏️
Fun Exercises for Choosing Your First Pencil
💬
Understanding Sign Language and Gesture
🧠
Can Drawing Improve Attention to Detail?
🌈
Creative Ways to Color Everyday Objects
📐
How Children Understand Proportion With Art
🔬
Understanding RGB Color Mixing
🍂
Creative Summer Coloring Projects for Classrooms
🎨
How to Draw a Sun Mandala: A Step-by-Step Guide
🎨
Bubble Wrap Coloring and Drawing Ideas for Kids
🎨
A Castle Chapel: A Medieval Coloring and History Guide for Kids
🎨
How to Draw Self-Portraits Step by Step
🔎
Exploring Brainstorming With Pictures for Students
🎨
How to Draw a Counting to Ten with Shapes: A Step-by-Step Guide for Kids
🎨
Creative Insects Drawing Exercises
🎨
Kids Yoga Poses Coloring Pages and Drawing Ideas for Kids
🎨
Piglet Coloring and Drawing Ideas for Kids
🧒
A Parent's Guide to Drawing Milestones
🎨
Head Shoulders Knees and Toes: A Nursery Rhyme Coloring Guide for Kids
📴
Screen-Free Coloring Ideas for Device-Free Evenings
🎨
Teaching Humility: A Simple Activity for Kids
🎨
Thunderbird Coloring and Drawing Ideas for Kids
🎨
A Traffic Cone Row Coloring and Drawing Ideas for Kids
🎨
Easy Musical Instruments Drawing Ideas
🎨
Exploring A Comet: A Coloring and Learning Guide for Kids
💗
Understanding Building Self-Esteem Through Art
🎨
Brachiosaurus Coloring Page: Fun Facts for Young Paleontologists
🎨
A Beginner's Guide to Drawing Farm Life
🍂
Creative Halloween Coloring Projects for Classrooms
🎨
Compsognathus Coloring Page: Fun Facts for Young Paleontologists
🎨
Salad Bowl Coloring Ideas for Kids Who Love to Create
🎨
Kiwi Bird Coloring Page Ideas for Kids
A Beginner's Guide to Drawing Squares and Rectangles
🎨
Exploring A Mars Rover: A Coloring and Learning Guide for Kids
🎨
A Garden Trellis: A Gardening Guide for Kids and Families
🎨
A Pet's Vaccination Visit: A Simple Pet Care Guide for Kids
🎨
Lizard Coloring and Drawing Ideas for Kids
🎨
Bye Baby Bunting: A Nursery Rhyme Coloring Guide for Kids
🔤
Learning Everyday Objects Through Drawing
💡
Why Creative Confidence Matters for Young Artists
👨👩👧
Easy After-School Activities With Coloring Pages
👨👩👧
Coloring Ideas for Birthday Party Activities
🎨
A Dutch Traditional Clogs and Cap: A Coloring and Culture Guide for Kids
🏺
Why Prehistoric Drawing Tools Matter to Historians
🍎
Classroom Ideas: Group Art Projects
🧠
How Drawing May Support Creative Thinking
🎨
A Hand of Playing Cards Coloring and Drawing Ideas for Kids
🎨
A Camping Hammock: Coloring Ideas for Your Next Family Adventure
🎨
Meet Sketching Outdoors: An Art Appreciation Guide for Kids
🎨
Respecting a Teacher's Instructions: A Simple Social Skill for Kids
🎨
White House: Coloring Page and Fun Facts for Kids
🎨
A Superhero Sidekick: A Superhero Coloring and Design Guide for Kids
🎨
Onion Coloring and Drawing Ideas for Kids
🎨
Iguanodon Coloring Page: Fun Facts for Young Paleontologists
🎨
Summer Sprinkler Play: Coloring Ideas and Activities for the Whole Family
👨👩👧
Easy Summer Break Activities With Coloring Pages
🧒
A Parent's Guide to First-Time Artists
🍂
Seasonal Coloring Guide: Christmas
🎨
A Space Garden Experiment: A Coloring and Space Mission Guide for Kids
🎨
Teaching Thoughtfulness: A Simple Activity for Kids
🌈
Emotions and Faces Coloring Ideas for Classrooms
🎨
Creative Space and Planets Drawing Exercises
🎨
A Hanukkah Menorah: Coloring Ideas and Fun Facts for Kids
🎨
Creative Fantasy Creatures Drawing Exercises
🎨
A Classroom Chalkboard: A Classroom Coloring and Learning Guide
🎨
Apple Orchard Coloring and Drawing Ideas for Kids
🎨
A Potted Herb Garden: A Coloring and Nature Guide for Kids
🎨
A Prairie Homestead: A Wild West Coloring and History Guide for Kids
🎨
Fun Sailboat Coloring and Drawing Ideas for Kids
✏️
Easy Steps to Practice Drawing Paper Types
🎨
A Kite Flying Over the Beach Coloring and Drawing Ideas for Kids
🎨
The Letter A: An Alphabet and Number Coloring Page
💡
How Drawing Encourages Artistic Risk-Taking
🎨
Chinese New Year Coloring Ideas and Activities for the Whole Family
🖍️
Simple Techniques for Coloring Inside the Lines
👨👩👧
Creative Grandparent and Grandchild Activities for Kids
🔬
RGB Color Mixing Explained for Kids
🏺
Exploring Ancient Cave Pigments
💬
Understanding Visual Instructions
🎨
A Coding Camp Classroom: A Coloring and STEM Guide for Kids
🎨
Sea Turtle Coloring and Drawing Ideas for Kids
🎨
Tuatara Coloring and Drawing Ideas for Kids
🎨
Choosing a Coloring Book for Kids: A Buying and Technique Guide
🎨
A Popcorn Cart Coloring and Drawing Ideas for Kids
🎨
An Ancient King's Throne Room: An Ancient History Coloring Guide for Kids
🎨
A Holi Color Festival: Coloring Ideas and Fun Facts for Kids
🎨
A Jollof Rice Pot: Coloring Ideas and Fun Facts for Kids
🌈
Mandalas Coloring Ideas for Classrooms
🎨
Meet Yayoi Kusama: An Art Appreciation Guide for Kids
🎨
Skink Coloring and Drawing Ideas for Kids
🎨
Meet the Baker: A Community Helper Coloring Guide
🎨
A Rooftop Under Construction Coloring and Drawing Ideas for Kids
✏️
Easy Steps to Practice Drawing Circles
🎨
How to Draw a A Shape Inside a Shape: A Step-by-Step Guide for Kids
💬
Understanding Emojis and Modern Pictograms
🎨
A Garden Path of Stepping Stones: A Gardening Guide for Kids and Families
🎨
Polar Bear Coloring and Drawing Ideas for Kids
🎨
A Friendly Android: A Coloring and Invention Guide for Kids
🏺
How Ancient Pottery Art Shaped Human Communication
🎨
A Garden Gnome: A Gardening Guide for Kids and Families
🌈
Fun Animals Coloring Pages for Kids
🧠
Exploring Drawing and Creative Thinking
🎨
A Tumbleweed Rolling By: A Wild West Coloring and History Guide for Kids
🎨
A Boardwalk Cotton Candy Stand Coloring and Drawing Ideas for Kids
💗
Exploring Family Art Time and Connection Through Art
🎨
Curling Coloring Pages and Drawing Ideas for Kids
🎨
Chinchilla Coloring and Drawing Ideas for Kids
✏️
Fun Exercises for Holding a Pencil Correctly
🎨
A Spacewalk Repair: A Coloring and Space Mission Guide for Kids
🎨
A Friendly Robot: A Coloring and Invention Guide for Kids
🖍️
A Beginner's Guide to Coloring Small Details
🖍️
Why Choosing a Color Palette Makes a Difference
🎨
Fun Cable Car Coloring and Drawing Ideas for Kids
🎨
A Rube Goldberg Contraption: A Coloring and STEM Guide for Kids
🎨
Mother's Day Coloring Ideas and Activities for the Whole Family
🎨
A Kids' Budgeting Notebook: A Money Guide for Kids and Parents
🎨
Alligator Coloring and Drawing Ideas for Kids
🎨
A Beach Towel and Cooler Coloring and Drawing Ideas for Kids
🎨
How to Draw a Double Bass: A Coloring and Music Guide for Kids
🎨
A Home Emergency Supply List: A Family Safety Guide
🎨
a Thinking of You Card: Free Ideas for Your Next Celebration
💗
Exploring Creative Outlets for Teens Through Art
🍎
Simple Differentiated Art Instruction for Busy Classrooms
🎲
Fun Storyboard Games for Kids
📐
Fun Drawing Activities for Geometry
🎨
A Cowboy on a Horse: A Wild West Coloring and History Guide for Kids
🎨
An Inuit Traditional Parka: A Coloring and Culture Guide for Kids
🎨
The Brain and Thinking: A Coloring and Health Guide for Kids
🎨
Croissant Coloring Ideas for Kids Who Love to Create
🌈
Fun Emotions and Faces Coloring Pages for Kids
🎨
A Mountain Overlook: Coloring Ideas for Your Next Family Adventure
🎨
Meet Piet Mondrian: An Art Appreciation Guide for Kids
🔎
How Brainstorming With Pictures Support Learning
🎨
Digital Coloring Apps: A Buying and Technique Guide
🎨
A Funhouse Slide Coloring and Drawing Ideas for Kids
🎨
Counting Coins: A Simple Life Skill for Kids
🧒
What to Expect When Teaching Children Who Dislike Drawing
🧒
Understanding Preschoolers in Early Childhood
🏺
Exploring Ancient Art Materials
🎨
A 3D Printer at Work: A Coloring and STEM Guide for Kids
🎨
Fun Garbage Truck Coloring and Drawing Ideas for Kids
🎨
Therizinosaurus Coloring Page: Fun Facts for Young Paleontologists
🎨
Judging Criteria for Coloring Contests: A Practical Guide
🔤
Using Coloring Pages to Teach Numbers in a New Language
🎨
Vaccines and Staying Healthy: A Coloring and Health Guide for Kids
🎨
Forest Guardian Coloring and Drawing Ideas for Kids
🎨
Healthy Teeth and Brushing: A Coloring and Health Guide for Kids
🧒
Drawing Activities for First-Time Artists
📴
Making the Most of Weekend Mornings Without Screens
🎨
Mission Control: A Coloring and Space Mission Guide for Kids
🎨
A Robot Arm: A Coloring and Invention Guide for Kids
✏️
Fun Exercises for Choosing Your First Pencil
💬
Understanding Sign Language and Gesture
🧠
Can Drawing Improve Attention to Detail?
🌈
Creative Ways to Color Everyday Objects
📐
How Children Understand Proportion With Art
🔬
Understanding RGB Color Mixing
🍂
Creative Summer Coloring Projects for Classrooms
🎨
How to Draw a Sun Mandala: A Step-by-Step Guide
🎨
Bubble Wrap Coloring and Drawing Ideas for Kids
🎨
A Castle Chapel: A Medieval Coloring and History Guide for Kids
🎨
How to Draw Self-Portraits Step by Step
🔎
Exploring Brainstorming With Pictures for Students
🎨
How to Draw a Counting to Ten with Shapes: A Step-by-Step Guide for Kids
🎨
Creative Insects Drawing Exercises
🎨
Kids Yoga Poses Coloring Pages and Drawing Ideas for Kids
🎨
Piglet Coloring and Drawing Ideas for Kids
🧒
A Parent's Guide to Drawing Milestones
🎨
Head Shoulders Knees and Toes: A Nursery Rhyme Coloring Guide for Kids
📴
Screen-Free Coloring Ideas for Device-Free Evenings
🎨
Teaching Humility: A Simple Activity for Kids
🎨
Thunderbird Coloring and Drawing Ideas for Kids
🎨
A Traffic Cone Row Coloring and Drawing Ideas for Kids
🎨
Easy Musical Instruments Drawing Ideas
🎨
Exploring A Comet: A Coloring and Learning Guide for Kids
💗
Understanding Building Self-Esteem Through Art
🎨
Brachiosaurus Coloring Page: Fun Facts for Young Paleontologists
🎨
A Beginner's Guide to Drawing Farm Life
🍂
Creative Halloween Coloring Projects for Classrooms
🎨
Compsognathus Coloring Page: Fun Facts for Young Paleontologists
🎨
Salad Bowl Coloring Ideas for Kids Who Love to Create
🎨
Kiwi Bird Coloring Page Ideas for Kids
 A Beginner's Guide to Drawing Simple Faces
🍎
A Teacher's Guide to Art Lessons for Science Class
🎨
Creative Robots Drawing Exercises
📴
Creative Alternatives to Screens During Sibling Playtime
🎨
How to Draw a Paisley Pattern: A Step-by-Step Guide
🎨
Wolf Coloring and Drawing Ideas for Kids
🎨
A Calm Bedtime Routine: A Coloring and Health Guide for Kids
👨👩👧
Easy Activities for Only Children With Coloring Pages
🎨
How to Draw a Drum Kit: A Coloring and Music Guide for Kids
🎨
Choosing the Best Paper for Coloring Pages: A Practical Guide
🍎
Simple Classroom Coloring Stations for Busy Classrooms
🧠
The Link Between Drawing and Critical Thinking
🎨
How to Draw a Peacock Pattern Mandala: A Step-by-Step Guide
📐
Learning Angles Through Drawing
🎨
A Wild West Mining Town: A Wild West Coloring and History Guide for Kids
🎨
Saving Allowance in a Jar: A Simple Life Skill for Kids
🎲
How to Play Drawing Challenges
🎨
A Re-Entry Capsule: A Coloring and Space Mission Guide for Kids
🎨
A Sheriff's Star Badge: A Wild West Coloring and History Guide for Kids
🎨
Training in a Pool for Zero-G: A Coloring and Space Mission Guide for Kids
🔬
Primary Colors Explained for Kids
🎨
How to Draw a Stripe Pattern: A Step-by-Step Guide
🎨
How to Draw a Star: A Step-by-Step Guide for Kids
🎨
A Hiking Trail: Coloring Ideas for Your Next Family Adventure
🎨
May Day Coloring Ideas and Activities for the Whole Family
🎨
A Space Tourism Rocket: A Coloring and Space Mission Guide for Kids
🎨
A Window Installer Coloring and Drawing Ideas for Kids
🎨
How to Draw a Cello: A Coloring and Music Guide for Kids
🎨
A Jazz Band: A Coloring and Movement Guide for Kids
🎨
Fun Helicopter Coloring and Drawing Ideas for Kids
✏️
How to Improve Your Drawing From Imagination
🎨
Printing in Grayscale: A Practical Guide
💬
The Power of Wordless Storytelling
🎨
A Bread Basket: A Kitchen Guide for Kids and Parents
📴
Screen-Free Coloring Ideas for Restaurant Wait Times
💡
Building Finding Inspiration Through Coloring and Drawing
🧒
A Parent's Guide to Left-Handed Children
🔬
How Eyes Perceive Color Explained for Kids
🧘
Simple Steps for Deep Breathing and Coloring
🧠
Exploring Drawing and Self-Expression
🎨
Sardines Hiding Game: A Coloring and Playtime Guide for Kids
👨👩👧
Easy Low-Mess Activities With Coloring Pages
🧒
A Parent's Guide to Hand-Eye Coordination
🎨
A Beginner's Guide to Drawing Space and Planets
🧠
Why Drawing Can Help With Observation Skills
🎨
Scarecrow Coloring and Drawing Ideas for Kids
🌈
Everyday Objects Coloring Ideas for Classrooms
🏺
The History of Cave Paintings
🎨
A Beginner's Guide to Drawing Family Portraits
📐
Why 3D Shapes and Drawing Go Together
🏺
The History of Hieroglyphics
🎨
Vineyard Grape Growing: A Coloring and Food Science Guide for Kids
🖍️
How to Get Better at Coloring Small Details
🎨
Family Portraits Drawing Prompts for Beginners
🎨
Creative Under the Sea Drawing Exercises
🎨
High Jump Coloring Pages and Drawing Ideas for Kids
🧠
Exploring Drawing and Critical Thinking
🎨
A Medieval Banquet Table: A Medieval Coloring and History Guide for Kids
🎨
Monarch Butterfly Coloring and Drawing Ideas for Kids
🧒
Fun Ways to Build Left-Handed Children
🎨
A Family Recipe Book: A Kitchen Guide for Kids and Parents
🧠
Can Drawing Improve Cognitive Development?
🎨
French Fries Coloring Ideas for Kids Who Love to Create
🎨
Teaching Perseverance: A Simple Activity for Kids
🎨
Anole Lizard Coloring and Drawing Ideas for Kids
🎨
Painted Turtle Coloring and Drawing Ideas for Kids
🌈
A Guide to Jungle Scenes Coloring Pages
🎨
Wizard Coloring and Drawing Ideas for Kids
🎨
A Pirates and Treasure Hunt Game: A Coloring and Playtime Guide for Kids
🎲
Step-by-Step Board Game Design
🎨
Hollywood Sign: Coloring Page and Fun Facts for Kids
🎨
A Force-Field Superhero: A Superhero Coloring and Design Guide for Kids
🎨
Eco-Friendly Coloring Supplies: A Buying and Technique Guide
🎨
A Hungarian Folk Costume: A Coloring and Culture Guide for Kids
🍎
Classroom Ideas: Indoor Recess Activities
🎨
Printing Coloring Pages as Posters: A Practical Guide
💬
From Cave Drawings to Symbols and Icons
🖍️
Tips for Coloring Animals Realistically
📴
Why Coloring Beats Scrolling on Camping Trips
🎨
Angelfish Coloring and Drawing Ideas for Kids
🎨
A Pet's Favorite Walk Route: A Simple Pet Care Guide for Kids
👨👩👧
Coloring Ideas for Rainy Day Activities
🔬
Color Wheels Explained for Kids
🎨
Exploring Finland: A Coloring and Culture Guide for Kids
💬
From Cave Drawings to Infographics
🎨
Archaeopteryx Coloring Page: Fun Facts for Young Paleontologists
🎨
A Family Grocery Budget Trip: A Money Guide for Kids and Parents
🎨
A Royal Procession: A Medieval Coloring and History Guide for Kids
🧘
Why Slow Coloring Practice Feels Calming
🔬
Secondary Colors Explained for Kids
🎨
Understanding the Color Wheel: A Buying and Technique Guide
🎨
Ancient Egyptian Boats on the Nile: An Ancient History Coloring Guide for Kids
🧠
How Drawing May Support Concentration and Focus
🖌️
A Beginner's Guide to Using Watercolor
🎨
Flashlight Tag: A Coloring and Playtime Guide for Kids
📐
Fun Drawing Activities for Spatial Relationships
🎨
Exploring Poland: A Coloring and Culture Guide for Kids
🎨
Exploring the Czech Republic: A Coloring and Culture Guide for Kids
🎨
Fun Cargo Ship Coloring and Drawing Ideas for Kids
🎨
Fun Tow Truck Coloring and Drawing Ideas for Kids
🎨
A Sunhat and Sunglasses: Coloring Ideas and Activities for the Whole Family
🎨
Dandelion: A Coloring and Nature Guide for Kids
🎨
A Frontier General Store: A Wild West Coloring and History Guide for Kids
🎨
Using Good Table Manners: A Simple Life Skill for Kids
🧘
Simple Steps for Coloring for Sensory Breaks
🧒
Understanding Encouraging Reluctant Artists in Early Childhood
🎨
Power Outage Preparedness: A Family Safety Guide
🧠
Can Drawing Improve Hand-Eye Coordination?
🎨
Lemonade Stand Coloring Ideas for Kids Who Love to Create
🎨
Bagel Coloring Ideas for Kids Who Love to Create
🎲
Using Drawing for Pictionary-Style Games
🎨
the Chinese Lantern Festival Coloring Ideas and Activities for the Whole Family
👨👩👧
Why Parents Love Quiet Time Activities
🎨
A Plumber's Pipe Wrench Coloring and Drawing Ideas for Kids
🎨
How to Draw Favorite Foods Step by Step
🧒
Understanding Building Drawing Confidence in Early Childhood
🎨
A Wild West Saloon: A Wild West Coloring and History Guide for Kids
🎨
Goldilocks and the Three Bears: A Classic Story Coloring Guide for Kids
🎨
Exploring Jamaica: A Coloring and Culture Guide for Kids
💗
The Role of Coloring in Drawing Feelings Instead of Words
🎨
A Fall Leaf Pile Jump: Coloring Ideas and Activities for the Whole Family
🎨
Great White Shark Coloring and Drawing Ideas for Kids
🧒
A Parent's Guide to The Pictorial Stage
🍎
How Teachers Can Use End-of-Year Activities
🎨
A Churro Cart: Coloring Ideas and Fun Facts for Kids
🎨
a Pumpkin Patch Trip Coloring Ideas and Activities for the Whole Family
🎨
A Swiss Traditional Dress: A Coloring and Culture Guide for Kids
🎨
Row Row Row Your Boat: A Nursery Rhyme Coloring Guide for Kids
🎲
Drawing Prompt Games: A Creative Twist
🎨
Tortoise Coloring and Drawing Ideas for Kids
🎨
Jackalope Coloring and Drawing Ideas for Kids
🎨
A Sleeping Bag in Space: A Coloring and Space Mission Guide for Kids
🎨
A Ranch with a Windmill: A Wild West Coloring and History Guide for Kids
🎨
Fun Space and Planets Drawing Activities for Kids
A Beginner's Guide to Drawing Simple Faces
🍎
A Teacher's Guide to Art Lessons for Science Class
🎨
Creative Robots Drawing Exercises
📴
Creative Alternatives to Screens During Sibling Playtime
🎨
How to Draw a Paisley Pattern: A Step-by-Step Guide
🎨
Wolf Coloring and Drawing Ideas for Kids
🎨
A Calm Bedtime Routine: A Coloring and Health Guide for Kids
👨👩👧
Easy Activities for Only Children With Coloring Pages
🎨
How to Draw a Drum Kit: A Coloring and Music Guide for Kids
🎨
Choosing the Best Paper for Coloring Pages: A Practical Guide
🍎
Simple Classroom Coloring Stations for Busy Classrooms
🧠
The Link Between Drawing and Critical Thinking
🎨
How to Draw a Peacock Pattern Mandala: A Step-by-Step Guide
📐
Learning Angles Through Drawing
🎨
A Wild West Mining Town: A Wild West Coloring and History Guide for Kids
🎨
Saving Allowance in a Jar: A Simple Life Skill for Kids
🎲
How to Play Drawing Challenges
🎨
A Re-Entry Capsule: A Coloring and Space Mission Guide for Kids
🎨
A Sheriff's Star Badge: A Wild West Coloring and History Guide for Kids
🎨
Training in a Pool for Zero-G: A Coloring and Space Mission Guide for Kids
🔬
Primary Colors Explained for Kids
🎨
How to Draw a Stripe Pattern: A Step-by-Step Guide
🎨
How to Draw a Star: A Step-by-Step Guide for Kids
🎨
A Hiking Trail: Coloring Ideas for Your Next Family Adventure
🎨
May Day Coloring Ideas and Activities for the Whole Family
🎨
A Space Tourism Rocket: A Coloring and Space Mission Guide for Kids
🎨
A Window Installer Coloring and Drawing Ideas for Kids
🎨
How to Draw a Cello: A Coloring and Music Guide for Kids
🎨
A Jazz Band: A Coloring and Movement Guide for Kids
🎨
Fun Helicopter Coloring and Drawing Ideas for Kids
✏️
How to Improve Your Drawing From Imagination
🎨
Printing in Grayscale: A Practical Guide
💬
The Power of Wordless Storytelling
🎨
A Bread Basket: A Kitchen Guide for Kids and Parents
📴
Screen-Free Coloring Ideas for Restaurant Wait Times
💡
Building Finding Inspiration Through Coloring and Drawing
🧒
A Parent's Guide to Left-Handed Children
🔬
How Eyes Perceive Color Explained for Kids
🧘
Simple Steps for Deep Breathing and Coloring
🧠
Exploring Drawing and Self-Expression
🎨
Sardines Hiding Game: A Coloring and Playtime Guide for Kids
👨👩👧
Easy Low-Mess Activities With Coloring Pages
🧒
A Parent's Guide to Hand-Eye Coordination
🎨
A Beginner's Guide to Drawing Space and Planets
🧠
Why Drawing Can Help With Observation Skills
🎨
Scarecrow Coloring and Drawing Ideas for Kids
🌈
Everyday Objects Coloring Ideas for Classrooms
🏺
The History of Cave Paintings
🎨
A Beginner's Guide to Drawing Family Portraits
📐
Why 3D Shapes and Drawing Go Together
🏺
The History of Hieroglyphics
🎨
Vineyard Grape Growing: A Coloring and Food Science Guide for Kids
🖍️
How to Get Better at Coloring Small Details
🎨
Family Portraits Drawing Prompts for Beginners
🎨
Creative Under the Sea Drawing Exercises
🎨
High Jump Coloring Pages and Drawing Ideas for Kids
🧠
Exploring Drawing and Critical Thinking
🎨
A Medieval Banquet Table: A Medieval Coloring and History Guide for Kids
🎨
Monarch Butterfly Coloring and Drawing Ideas for Kids
🧒
Fun Ways to Build Left-Handed Children
🎨
A Family Recipe Book: A Kitchen Guide for Kids and Parents
🧠
Can Drawing Improve Cognitive Development?
🎨
French Fries Coloring Ideas for Kids Who Love to Create
🎨
Teaching Perseverance: A Simple Activity for Kids
🎨
Anole Lizard Coloring and Drawing Ideas for Kids
🎨
Painted Turtle Coloring and Drawing Ideas for Kids
🌈
A Guide to Jungle Scenes Coloring Pages
🎨
Wizard Coloring and Drawing Ideas for Kids
🎨
A Pirates and Treasure Hunt Game: A Coloring and Playtime Guide for Kids
🎲
Step-by-Step Board Game Design
🎨
Hollywood Sign: Coloring Page and Fun Facts for Kids
🎨
A Force-Field Superhero: A Superhero Coloring and Design Guide for Kids
🎨
Eco-Friendly Coloring Supplies: A Buying and Technique Guide
🎨
A Hungarian Folk Costume: A Coloring and Culture Guide for Kids
🍎
Classroom Ideas: Indoor Recess Activities
🎨
Printing Coloring Pages as Posters: A Practical Guide
💬
From Cave Drawings to Symbols and Icons
🖍️
Tips for Coloring Animals Realistically
📴
Why Coloring Beats Scrolling on Camping Trips
🎨
Angelfish Coloring and Drawing Ideas for Kids
🎨
A Pet's Favorite Walk Route: A Simple Pet Care Guide for Kids
👨👩👧
Coloring Ideas for Rainy Day Activities
🔬
Color Wheels Explained for Kids
🎨
Exploring Finland: A Coloring and Culture Guide for Kids
💬
From Cave Drawings to Infographics
🎨
Archaeopteryx Coloring Page: Fun Facts for Young Paleontologists
🎨
A Family Grocery Budget Trip: A Money Guide for Kids and Parents
🎨
A Royal Procession: A Medieval Coloring and History Guide for Kids
🧘
Why Slow Coloring Practice Feels Calming
🔬
Secondary Colors Explained for Kids
🎨
Understanding the Color Wheel: A Buying and Technique Guide
🎨
Ancient Egyptian Boats on the Nile: An Ancient History Coloring Guide for Kids
🧠
How Drawing May Support Concentration and Focus
🖌️
A Beginner's Guide to Using Watercolor
🎨
Flashlight Tag: A Coloring and Playtime Guide for Kids
📐
Fun Drawing Activities for Spatial Relationships
🎨
Exploring Poland: A Coloring and Culture Guide for Kids
🎨
Exploring the Czech Republic: A Coloring and Culture Guide for Kids
🎨
Fun Cargo Ship Coloring and Drawing Ideas for Kids
🎨
Fun Tow Truck Coloring and Drawing Ideas for Kids
🎨
A Sunhat and Sunglasses: Coloring Ideas and Activities for the Whole Family
🎨
Dandelion: A Coloring and Nature Guide for Kids
🎨
A Frontier General Store: A Wild West Coloring and History Guide for Kids
🎨
Using Good Table Manners: A Simple Life Skill for Kids
🧘
Simple Steps for Coloring for Sensory Breaks
🧒
Understanding Encouraging Reluctant Artists in Early Childhood
🎨
Power Outage Preparedness: A Family Safety Guide
🧠
Can Drawing Improve Hand-Eye Coordination?
🎨
Lemonade Stand Coloring Ideas for Kids Who Love to Create
🎨
Bagel Coloring Ideas for Kids Who Love to Create
🎲
Using Drawing for Pictionary-Style Games
🎨
the Chinese Lantern Festival Coloring Ideas and Activities for the Whole Family
👨👩👧
Why Parents Love Quiet Time Activities
🎨
A Plumber's Pipe Wrench Coloring and Drawing Ideas for Kids
🎨
How to Draw Favorite Foods Step by Step
🧒
Understanding Building Drawing Confidence in Early Childhood
🎨
A Wild West Saloon: A Wild West Coloring and History Guide for Kids
🎨
Goldilocks and the Three Bears: A Classic Story Coloring Guide for Kids
🎨
Exploring Jamaica: A Coloring and Culture Guide for Kids
💗
The Role of Coloring in Drawing Feelings Instead of Words
🎨
A Fall Leaf Pile Jump: Coloring Ideas and Activities for the Whole Family
🎨
Great White Shark Coloring and Drawing Ideas for Kids
🧒
A Parent's Guide to The Pictorial Stage
🍎
How Teachers Can Use End-of-Year Activities
🎨
A Churro Cart: Coloring Ideas and Fun Facts for Kids
🎨
a Pumpkin Patch Trip Coloring Ideas and Activities for the Whole Family
🎨
A Swiss Traditional Dress: A Coloring and Culture Guide for Kids
🎨
Row Row Row Your Boat: A Nursery Rhyme Coloring Guide for Kids
🎲
Drawing Prompt Games: A Creative Twist
🎨
Tortoise Coloring and Drawing Ideas for Kids
🎨
Jackalope Coloring and Drawing Ideas for Kids
🎨
A Sleeping Bag in Space: A Coloring and Space Mission Guide for Kids
🎨
A Ranch with a Windmill: A Wild West Coloring and History Guide for Kids
🎨
Fun Space and Planets Drawing Activities for Kids
 A Beginner's Guide to Pencil Control
🎨
Sending a Letter: A Simple Life Skill for Kids
🧒
What to Expect When Teaching Pattern Recognition
🎨
Exploring Kenya: A Coloring and Culture Guide for Kids
🌈
Creative Ways to Color Food and Treats
🎨
Teaching Friendliness: A Simple Activity for Kids
🧘
A Beginner's Guide to Coloring for Focus
🏺
Why Early Human Communication Matter to Historians
🔬
A Simple Guide to Color Contrast
🎨
Making a Coloring Page Booklet: A Practical Guide
🎨
A Bowl of Pho: Coloring Ideas and Fun Facts for Kids
🎨
Blueberry Coloring and Drawing Ideas for Kids
🎨
Hedgehog Coloring and Drawing Ideas for Kids
🎨
A Medieval Guild Hall: A Medieval Coloring and History Guide for Kids
🎨
A Whisk: A Kitchen Guide for Kids and Parents
🔎
A Beginner's Guide to Idea Webs
🎨
London Eye: Coloring Page and Fun Facts for Kids
🎨
Exploring Egypt: A Coloring and Culture Guide for Kids
💗
The Role of Coloring in Creative Outlets for Teens
🎨
A Trip to the Eye Doctor: A Coloring and Health Guide for Kids
🎨
Macaw Coloring Page Ideas for Kids
🎨
Weaver Bird Coloring Page Ideas for Kids
🎨
Tidying a Bedroom: A Simple Life Skill for Kids
🎨
How to Draw Nature Scenes Step by Step
🏺
What We Know About Early Human Communication
🎨
A Mixing Bowl: A Kitchen Guide for Kids and Parents
🎨
Exploring A Shooting Star: A Coloring and Learning Guide for Kids
🎨
Water Safety During a Flood: A Family Safety Guide
🖍️
Tips for Coloring With Crayons
🍂
Creative Mother's Day Coloring Projects for Classrooms
🎨
Meet the Teacher: A Community Helper Coloring Guide
🎨
Boiling Water Safety After a Storm: A Family Safety Guide
🎲
Dot-to-Dot Games: A Creative Twist
🎨
A Medieval Farmer's Field: A Medieval Coloring and History Guide for Kids
🧒
Fun Ways to Build Ages 6-7
🎲
Using Drawing for Strategy Sketching for Sports
🍎
Using Coloring Pages for Substitute Teacher Activities
🖍️
How to Get Better at Blending Colors Smoothly
🎨
A Superhero Graduation Day: A Superhero Coloring and Design Guide for Kids
🎨
Exploring A Black Hole: A Coloring and Learning Guide for Kids
🎨
Ferret Coloring and Drawing Ideas for Kids
🔬
The Science Behind How Eyes Perceive Color
🎨
Printer Settings for Best Color: A Practical Guide
🔎
How Idea Webs Support Learning
🎲
Step-by-Step Scavenger Hunt Drawings
🎨
Albatross Coloring Page Ideas for Kids
🏺
The History of Early Human Communication
🎨
A Robot Painter: A Coloring and Invention Guide for Kids
🏺
What We Know About Cave Paintings
🎨
A Snorkel and Mask Coloring and Drawing Ideas for Kids
💗
Exploring Creative Journaling Through Art
🎨
Self-Esteem Affirmation Cards: A Simple Mindfulness Activity for Kids
🎨
A Homemade Barometer: A Step-by-Step Science Guide for Kids
🎨
A Disappearing Act Coloring and Drawing Ideas for Kids
🎨
A Snowball Fight: Coloring Ideas and Activities for the Whole Family
🎨
a Fireworks Night Coloring Ideas and Activities for the Whole Family
🎨
Meet the Garbage Collector: A Community Helper Coloring Guide
🧘
A Beginner's Guide to Guided Mindful Coloring
🎨
A Buried Treasure X Mark Coloring and Drawing Ideas for Kids
🎨
Farm Fence Line Coloring and Drawing Ideas for Kids
🎨
Spring Puddle Jumping: Coloring Ideas and Activities for the Whole Family
🎨
A Medieval Stone Bridge: A Medieval Coloring and History Guide for Kids
📐
Teaching Patterns Through Coloring and Drawing
🎨
How to Draw Fantasy Creatures Step by Step
🧒
A Parent's Guide to Ages 2-3
🎨
A Bouncy Egg Experiment: A Step-by-Step Science Guide for Kids
🎨
Exploring A Space Walk: A Coloring and Learning Guide for Kids
🎨
Corn on the Cob Coloring and Drawing Ideas for Kids
🔤
How Pictures Help Children Learn Sentence Building
🎨
Antelope Coloring and Drawing Ideas for Kids
🎨
A Mind-Reading Superhero: A Superhero Coloring and Design Guide for Kids
🎨
Icarus and the Wax Wings: A Classic Story Coloring Guide for Kids
🧘
Simple Steps for Coloring During Travel
🎨
Cycling Coloring Pages and Drawing Ideas for Kids
🏺
The History of Petroglyphs and Rock Art
🎨
Centipede Coloring and Drawing Ideas for Kids
🍂
Celebrate St. Patrick's Day With Coloring Activities
🖍️
Why Coloring Mandalas Makes a Difference
🖌️
A Beginner's Guide to Working With Light and Shadow
📴
Why Coloring Beats Scrolling on Summer Vacations
🎨
A Winter Snow Fort: Coloring Ideas and Activities for the Whole Family
🎨
Toad Coloring and Drawing Ideas for Kids
🎨
Jack and the Beanstalk: A Classic Story Coloring Guide for Kids
🎨
A Family Building a Sandcastle Together Coloring and Drawing Ideas for Kids
🔎
How Concept Mapping Support Learning
🎨
Exploring Argentina: A Coloring and Culture Guide for Kids
🎨
Pancakes Coloring Ideas for Kids Who Love to Create
🎨
Swapping Coloring Pages With Friends: A Practical Guide
🎨
Docking with a Space Station: A Coloring and Space Mission Guide for Kids
🧒
How Drawing Supports Children Who Dislike Drawing
🎨
A Cotton Candy Machine Coloring and Drawing Ideas for Kids
🎨
A Beach Sandcastle with a Moat Coloring and Drawing Ideas for Kids
🎨
A Math Puzzle Grid: A Coloring and STEM Guide for Kids
🌈
Buildings and Castles Coloring Ideas for Classrooms
🎨
Celebrating a Friend's Success: A Simple Social Skill for Kids
🧘
Exploring Quiet Morning Coloring
🎨
How to Draw a Tambourine: A Coloring and Music Guide for Kids
✏️
Fun Exercises for Sketching Basics
🔤
Learning Opposites Through Drawing
🎨
Oasis in a Desert Coloring Page: A Nature Learning Guide for Kids
💬
From Cave Drawings to Maps and Wayfinding Symbols
🎨
Vegetable Basket Coloring Ideas for Kids Who Love to Create
🎨
Nymph Coloring and Drawing Ideas for Kids
🎲
Sketch Relay Games: A Creative Twist
🧘
Why Coloring During Travel Feels Calming
🔎
Why Visual Thinkers Use Organizing Research With Sketches
🧘
Why Coloring With Soft Music Feels Calming
🎨
Comparing Colored Pencil Brands: A Buying and Technique Guide
🌈
Printable Emotions and Faces Coloring Activities
💡
Building Original Thinking Through Coloring and Drawing
🎨
a Gratitude Tree: A Simple Mindfulness Activity for Kids
A Beginner's Guide to Pencil Control
🎨
Sending a Letter: A Simple Life Skill for Kids
🧒
What to Expect When Teaching Pattern Recognition
🎨
Exploring Kenya: A Coloring and Culture Guide for Kids
🌈
Creative Ways to Color Food and Treats
🎨
Teaching Friendliness: A Simple Activity for Kids
🧘
A Beginner's Guide to Coloring for Focus
🏺
Why Early Human Communication Matter to Historians
🔬
A Simple Guide to Color Contrast
🎨
Making a Coloring Page Booklet: A Practical Guide
🎨
A Bowl of Pho: Coloring Ideas and Fun Facts for Kids
🎨
Blueberry Coloring and Drawing Ideas for Kids
🎨
Hedgehog Coloring and Drawing Ideas for Kids
🎨
A Medieval Guild Hall: A Medieval Coloring and History Guide for Kids
🎨
A Whisk: A Kitchen Guide for Kids and Parents
🔎
A Beginner's Guide to Idea Webs
🎨
London Eye: Coloring Page and Fun Facts for Kids
🎨
Exploring Egypt: A Coloring and Culture Guide for Kids
💗
The Role of Coloring in Creative Outlets for Teens
🎨
A Trip to the Eye Doctor: A Coloring and Health Guide for Kids
🎨
Macaw Coloring Page Ideas for Kids
🎨
Weaver Bird Coloring Page Ideas for Kids
🎨
Tidying a Bedroom: A Simple Life Skill for Kids
🎨
How to Draw Nature Scenes Step by Step
🏺
What We Know About Early Human Communication
🎨
A Mixing Bowl: A Kitchen Guide for Kids and Parents
🎨
Exploring A Shooting Star: A Coloring and Learning Guide for Kids
🎨
Water Safety During a Flood: A Family Safety Guide
🖍️
Tips for Coloring With Crayons
🍂
Creative Mother's Day Coloring Projects for Classrooms
🎨
Meet the Teacher: A Community Helper Coloring Guide
🎨
Boiling Water Safety After a Storm: A Family Safety Guide
🎲
Dot-to-Dot Games: A Creative Twist
🎨
A Medieval Farmer's Field: A Medieval Coloring and History Guide for Kids
🧒
Fun Ways to Build Ages 6-7
🎲
Using Drawing for Strategy Sketching for Sports
🍎
Using Coloring Pages for Substitute Teacher Activities
🖍️
How to Get Better at Blending Colors Smoothly
🎨
A Superhero Graduation Day: A Superhero Coloring and Design Guide for Kids
🎨
Exploring A Black Hole: A Coloring and Learning Guide for Kids
🎨
Ferret Coloring and Drawing Ideas for Kids
🔬
The Science Behind How Eyes Perceive Color
🎨
Printer Settings for Best Color: A Practical Guide
🔎
How Idea Webs Support Learning
🎲
Step-by-Step Scavenger Hunt Drawings
🎨
Albatross Coloring Page Ideas for Kids
🏺
The History of Early Human Communication
🎨
A Robot Painter: A Coloring and Invention Guide for Kids
🏺
What We Know About Cave Paintings
🎨
A Snorkel and Mask Coloring and Drawing Ideas for Kids
💗
Exploring Creative Journaling Through Art
🎨
Self-Esteem Affirmation Cards: A Simple Mindfulness Activity for Kids
🎨
A Homemade Barometer: A Step-by-Step Science Guide for Kids
🎨
A Disappearing Act Coloring and Drawing Ideas for Kids
🎨
A Snowball Fight: Coloring Ideas and Activities for the Whole Family
🎨
a Fireworks Night Coloring Ideas and Activities for the Whole Family
🎨
Meet the Garbage Collector: A Community Helper Coloring Guide
🧘
A Beginner's Guide to Guided Mindful Coloring
🎨
A Buried Treasure X Mark Coloring and Drawing Ideas for Kids
🎨
Farm Fence Line Coloring and Drawing Ideas for Kids
🎨
Spring Puddle Jumping: Coloring Ideas and Activities for the Whole Family
🎨
A Medieval Stone Bridge: A Medieval Coloring and History Guide for Kids
📐
Teaching Patterns Through Coloring and Drawing
🎨
How to Draw Fantasy Creatures Step by Step
🧒
A Parent's Guide to Ages 2-3
🎨
A Bouncy Egg Experiment: A Step-by-Step Science Guide for Kids
🎨
Exploring A Space Walk: A Coloring and Learning Guide for Kids
🎨
Corn on the Cob Coloring and Drawing Ideas for Kids
🔤
How Pictures Help Children Learn Sentence Building
🎨
Antelope Coloring and Drawing Ideas for Kids
🎨
A Mind-Reading Superhero: A Superhero Coloring and Design Guide for Kids
🎨
Icarus and the Wax Wings: A Classic Story Coloring Guide for Kids
🧘
Simple Steps for Coloring During Travel
🎨
Cycling Coloring Pages and Drawing Ideas for Kids
🏺
The History of Petroglyphs and Rock Art
🎨
Centipede Coloring and Drawing Ideas for Kids
🍂
Celebrate St. Patrick's Day With Coloring Activities
🖍️
Why Coloring Mandalas Makes a Difference
🖌️
A Beginner's Guide to Working With Light and Shadow
📴
Why Coloring Beats Scrolling on Summer Vacations
🎨
A Winter Snow Fort: Coloring Ideas and Activities for the Whole Family
🎨
Toad Coloring and Drawing Ideas for Kids
🎨
Jack and the Beanstalk: A Classic Story Coloring Guide for Kids
🎨
A Family Building a Sandcastle Together Coloring and Drawing Ideas for Kids
🔎
How Concept Mapping Support Learning
🎨
Exploring Argentina: A Coloring and Culture Guide for Kids
🎨
Pancakes Coloring Ideas for Kids Who Love to Create
🎨
Swapping Coloring Pages With Friends: A Practical Guide
🎨
Docking with a Space Station: A Coloring and Space Mission Guide for Kids
🧒
How Drawing Supports Children Who Dislike Drawing
🎨
A Cotton Candy Machine Coloring and Drawing Ideas for Kids
🎨
A Beach Sandcastle with a Moat Coloring and Drawing Ideas for Kids
🎨
A Math Puzzle Grid: A Coloring and STEM Guide for Kids
🌈
Buildings and Castles Coloring Ideas for Classrooms
🎨
Celebrating a Friend's Success: A Simple Social Skill for Kids
🧘
Exploring Quiet Morning Coloring
🎨
How to Draw a Tambourine: A Coloring and Music Guide for Kids
✏️
Fun Exercises for Sketching Basics
🔤
Learning Opposites Through Drawing
🎨
Oasis in a Desert Coloring Page: A Nature Learning Guide for Kids
💬
From Cave Drawings to Maps and Wayfinding Symbols
🎨
Vegetable Basket Coloring Ideas for Kids Who Love to Create
🎨
Nymph Coloring and Drawing Ideas for Kids
🎲
Sketch Relay Games: A Creative Twist
🧘
Why Coloring During Travel Feels Calming
🔎
Why Visual Thinkers Use Organizing Research With Sketches
🧘
Why Coloring With Soft Music Feels Calming
🎨
Comparing Colored Pencil Brands: A Buying and Technique Guide
🌈
Printable Emotions and Faces Coloring Activities
💡
Building Original Thinking Through Coloring and Drawing
🎨
a Gratitude Tree: A Simple Mindfulness Activity for Kids
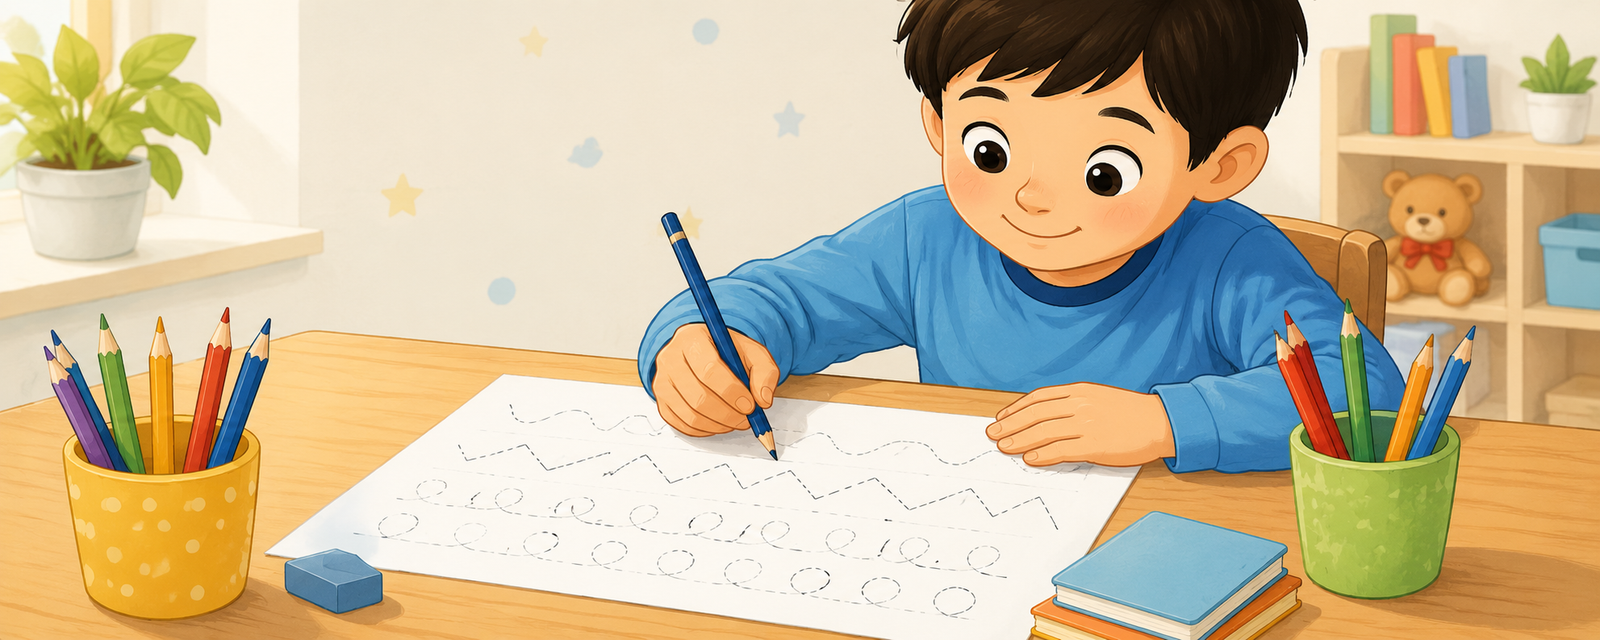 How to Improve Your Pencil Control
🎨
Archery Coloring Pages and Drawing Ideas for Kids
🎨
A Beginner's Guide to Drawing Animals
👨👩👧
Creative Outdoor-Inspired Drawing for Kids
🎲
Drawing-Based Party Games: A Creative Twist
🎨
Meet the Hairdresser: A Community Helper Coloring Guide
✏️
How to Improve Your Choosing Your First Pencil
💗
Exploring Coping With Change Through Drawing Through Art
🎨
Sand Dune Ripples Coloring Page: A Nature Learning Guide for Kids
🎨
A Data Chart and Graph: A Coloring and STEM Guide for Kids
🎨
Giraffe Coloring and Drawing Ideas for Kids
📐
Why Angles and Drawing Go Together
🎨
A Castle Watchtower: A Medieval Coloring and History Guide for Kids
📐
Learning Spatial Relationships Through Drawing
🎨
A Kids' Entrepreneur Fair: A Money Guide for Kids and Parents
🎨
Water Lily: A Coloring and Nature Guide for Kids
🎨
Scorpion Coloring and Drawing Ideas for Kids
🎨
Elephant Coloring and Drawing Ideas for Kids
🎨
A Wind Turbine: A Coloring and Invention Guide for Kids
🎨
A Growing Crystal Garden: A Step-by-Step Science Guide for Kids
🎨
House Fly Coloring and Drawing Ideas for Kids
🎨
Safe Sheltering in a Storm: A Family Safety Guide
🎨
Creative Gardens and Flowers Drawing Exercises
🎨
Needs vs. Wants Sorting: A Money Guide for Kids and Parents
🎨
Teaching Helpfulness: A Simple Activity for Kids
🎨
An Ancient Trading Marketplace: An Ancient History Coloring Guide for Kids
🎨
A Floating Paperclip Trick: A Step-by-Step Science Guide for Kids
🍎
Classroom Ideas: Bulletin Board Ideas
🎨
A Hula Dancer: A Coloring and Movement Guide for Kids
🎨
The Number 11: An Alphabet and Number Coloring Page
🎲
How to Play Pictionary-Style Games
🎨
Dragon Coloring and Drawing Ideas for Kids
👨👩👧
Why Parents Love Activities for Only Children
🎨
A Flight Simulator: A Coloring and Space Mission Guide for Kids
🧒
What to Expect When Teaching Toddlers (Ages 1-2)
🎨
Exploring Saudi Arabia: A Coloring and Culture Guide for Kids
🎨
Smoothie Coloring Ideas for Kids Who Love to Create
🎨
A Weekly Chore Chart with Pay: A Money Guide for Kids and Parents
🎨
Ice Dragon Coloring and Drawing Ideas for Kids
🧒
What to Expect When Teaching The Scribbling Stage
🎨
A Superhero Team Meeting: A Superhero Coloring and Design Guide for Kids
🎨
A Homemade Wind Vane: A Step-by-Step Science Guide for Kids
🎨
an Advanced Connect-the-Dots: Free Ideas for Your Next Celebration
🎨
Exploring The Asteroid Belt: A Coloring and Learning Guide for Kids
🍎
How Teachers Can Use Art Lessons for Math Class
✏️
How to Improve Your Drawing Triangles
🎨
A Backpack Full of Books: A Classroom Coloring and Learning Guide
🖌️
Exploring Blending Techniques
🎨
A Greek Mythology Scene: An Ancient History Coloring Guide for Kids
🌈
Printable Birds Coloring Activities
🎨
An Escape Room Puzzle: A Coloring and STEM Guide for Kids
🎨
Fun Bulldozer Coloring and Drawing Ideas for Kids
💗
Understanding Creative Journaling
How to Improve Your Pencil Control
🎨
Archery Coloring Pages and Drawing Ideas for Kids
🎨
A Beginner's Guide to Drawing Animals
👨👩👧
Creative Outdoor-Inspired Drawing for Kids
🎲
Drawing-Based Party Games: A Creative Twist
🎨
Meet the Hairdresser: A Community Helper Coloring Guide
✏️
How to Improve Your Choosing Your First Pencil
💗
Exploring Coping With Change Through Drawing Through Art
🎨
Sand Dune Ripples Coloring Page: A Nature Learning Guide for Kids
🎨
A Data Chart and Graph: A Coloring and STEM Guide for Kids
🎨
Giraffe Coloring and Drawing Ideas for Kids
📐
Why Angles and Drawing Go Together
🎨
A Castle Watchtower: A Medieval Coloring and History Guide for Kids
📐
Learning Spatial Relationships Through Drawing
🎨
A Kids' Entrepreneur Fair: A Money Guide for Kids and Parents
🎨
Water Lily: A Coloring and Nature Guide for Kids
🎨
Scorpion Coloring and Drawing Ideas for Kids
🎨
Elephant Coloring and Drawing Ideas for Kids
🎨
A Wind Turbine: A Coloring and Invention Guide for Kids
🎨
A Growing Crystal Garden: A Step-by-Step Science Guide for Kids
🎨
House Fly Coloring and Drawing Ideas for Kids
🎨
Safe Sheltering in a Storm: A Family Safety Guide
🎨
Creative Gardens and Flowers Drawing Exercises
🎨
Needs vs. Wants Sorting: A Money Guide for Kids and Parents
🎨
Teaching Helpfulness: A Simple Activity for Kids
🎨
An Ancient Trading Marketplace: An Ancient History Coloring Guide for Kids
🎨
A Floating Paperclip Trick: A Step-by-Step Science Guide for Kids
🍎
Classroom Ideas: Bulletin Board Ideas
🎨
A Hula Dancer: A Coloring and Movement Guide for Kids
🎨
The Number 11: An Alphabet and Number Coloring Page
🎲
How to Play Pictionary-Style Games
🎨
Dragon Coloring and Drawing Ideas for Kids
👨👩👧
Why Parents Love Activities for Only Children
🎨
A Flight Simulator: A Coloring and Space Mission Guide for Kids
🧒
What to Expect When Teaching Toddlers (Ages 1-2)
🎨
Exploring Saudi Arabia: A Coloring and Culture Guide for Kids
🎨
Smoothie Coloring Ideas for Kids Who Love to Create
🎨
A Weekly Chore Chart with Pay: A Money Guide for Kids and Parents
🎨
Ice Dragon Coloring and Drawing Ideas for Kids
🧒
What to Expect When Teaching The Scribbling Stage
🎨
A Superhero Team Meeting: A Superhero Coloring and Design Guide for Kids
🎨
A Homemade Wind Vane: A Step-by-Step Science Guide for Kids
🎨
an Advanced Connect-the-Dots: Free Ideas for Your Next Celebration
🎨
Exploring The Asteroid Belt: A Coloring and Learning Guide for Kids
🍎
How Teachers Can Use Art Lessons for Math Class
✏️
How to Improve Your Drawing Triangles
🎨
A Backpack Full of Books: A Classroom Coloring and Learning Guide
🖌️
Exploring Blending Techniques
🎨
A Greek Mythology Scene: An Ancient History Coloring Guide for Kids
🌈
Printable Birds Coloring Activities
🎨
An Escape Room Puzzle: A Coloring and STEM Guide for Kids
🎨
Fun Bulldozer Coloring and Drawing Ideas for Kids
💗
Understanding Creative Journaling
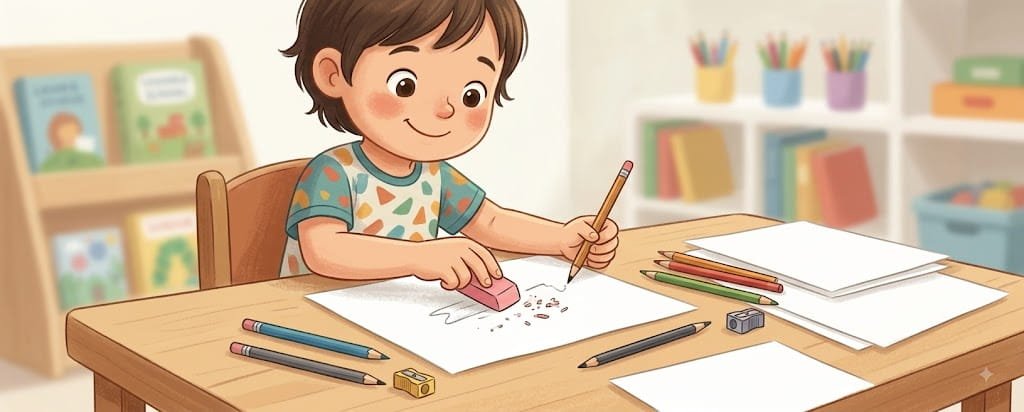 A Beginner's Guide to Using an Eraser Effectively
🎨
A Homemade Sundial: A Step-by-Step Science Guide for Kids
🍎
How Teachers Can Use Art Lessons for Science Class
🎨
The Letter D: An Alphabet and Number Coloring Page
🎨
Exploring The Moon: A Coloring and Learning Guide for Kids
🎨
Staying Calm During a Storm: A Family Safety Guide
🏺
What We Know About Ancient Egyptian Art
🎨
Dilophosaurus Coloring Page: Fun Facts for Young Paleontologists
🎨
A Giant Ground Sloth Coloring Page: Fun Facts for Young Paleontologists
🎨
A Kids' Cash Register Toy: A Money Guide for Kids and Parents
🎨
Setting a Table: A Simple Life Skill for Kids
🎨
A Transforming Robot: A Coloring and Invention Guide for Kids
🎨
A Lantern Parade at Night: Coloring Ideas and Fun Facts for Kids
🍎
Simple Morning Work Activities for Busy Classrooms
🎨
Friendly Vampire Coloring and Drawing Ideas for Kids
🎨
Pogo Stick Coloring and Drawing Ideas for Kids
🎲
Step-by-Step Strategy Sketching for Sports
🎨
Choosing Sketchbooks for Kids: A Buying and Technique Guide
🧘
Simple Steps for Slow Coloring Practice
🎨
Ancient Astronomers Studying Stars: An Ancient History Coloring Guide for Kids
💗
The Role of Coloring in Expressing Gratitude Through Art
🎨
Banana Coloring and Drawing Ideas for Kids
🎨
A Printable Coloring Page Calendar: A Practical Guide
🎨
Picnic Basket Coloring Ideas for Kids Who Love to Create
🎨
Toy Xylophone Coloring and Drawing Ideas for Kids
🎨
an Anger Thermometer: A Simple Mindfulness Activity for Kids
🎨
Olive Oil Pressing: A Coloring and Food Science Guide for Kids
🎨
The Letter L: An Alphabet and Number Coloring Page
🎨
Fundraising With Coloring Pages: A Practical Guide
🎨
A Pet Adoption Day: A Simple Pet Care Guide for Kids
🎨
Snake Coloring and Drawing Ideas for Kids
🎨
Tree Frog Coloring and Drawing Ideas for Kids
🎨
Meet Edvard Munch: An Art Appreciation Guide for Kids
🧒
What to Expect When Teaching Drawing Milestones
🎨
Blizzard and Snowstorm Prep: A Family Safety Guide
🎨
An Irish Step Dancer: A Coloring and Movement Guide for Kids
📴
Creative Alternatives to Screens During Rainy Afternoons
🎨
The Town Musicians of Bremen: A Classic Story Coloring Guide for Kids
🧘
A Beginner's Guide to Coloring Before Exams
🎨
Beetle Coloring and Drawing Ideas for Kids
🎨
Rain Rain Go Away: A Nursery Rhyme Coloring Guide for Kids
🎨
Exploring The Sun: A Coloring and Learning Guide for Kids
🎨
A Classroom Science Experiment: A Classroom Coloring and Learning Guide
💡
The Role of Original Thinking in Children's Art
🎨
Lemur Coloring and Drawing Ideas for Kids
🎨
Bamboo Stalk: A Coloring and Nature Guide for Kids
📐
How Children Understand Spatial Relationships With Art
🎨
Buttoning a Shirt: A Simple Life Skill for Kids
🔎
A Beginner's Guide to Connecting Ideas Through Drawing
🍂
Seasonal Coloring Guide: Valentine's Day
🎨
An Acorn and Oak Leaf: A Coloring and Nature Guide for Kids
🎨
A Tap Dancer: A Coloring and Movement Guide for Kids
🎲
Using Drawing for Storyboard Games
🎨
A Cowboy Campout Under the Stars: A Wild West Coloring and History Guide for Kids
🎨
a Feelings Journal: A Simple Mindfulness Activity for Kids
💡
Why Imaginative Play Matters for Young Artists
📐
Teaching Fractions Through Coloring and Drawing
🎨
An Ice Age Scene Coloring Page: Fun Facts for Young Paleontologists
🎨
A Summer Treehouse: Coloring Ideas and Activities for the Whole Family
🎨
A Sandbox Construction Site Toy Coloring and Drawing Ideas for Kids
✏️
How to Improve Your Shading Basics
🎨
a Bingo Card Printable: Free Ideas for Your Next Celebration
🖍️
Why Coloring Small Details Makes a Difference
🎨
Teaching Empathy: A Simple Activity for Kids
📴
Screen-Free Coloring Ideas for Summer Vacations
🎨
Oktoberfest Coloring Ideas and Activities for the Whole Family
🌈
Creative Ways to Color Nature Landscapes
🌈
Space Coloring Ideas for Classrooms
👨👩👧
Fun and Simple Weekend Family Activities
🎨
Coloring Book Binding Types: A Buying and Technique Guide
🎨
A Juggler Coloring and Drawing Ideas for Kids
🎨
Hailstorm Coloring Page: A Nature Learning Guide for Kids
🌈
Printable Space Coloring Activities
🎨
Backyard Fox Coloring and Drawing Ideas for Kids
🎨
A Coral Reef Below the Waves Coloring and Drawing Ideas for Kids
👨👩👧
Why Parents Love After-School Activities
💡
Building Making Mistakes in Art Through Coloring and Drawing
🎨
A Pet-Friendly Backyard: A Simple Pet Care Guide for Kids
🎨
A Ramadan Lantern: Coloring Ideas and Fun Facts for Kids
🎨
A Wheelbarrow Full of Soil: A Gardening Guide for Kids and Families
🎨
Snow White: A Classic Story Coloring Guide for Kids
🎨
Exploring South Korea: A Coloring and Culture Guide for Kids
🎨
A Countdown Clock: A Coloring and Space Mission Guide for Kids
🎨
A Pet Rabbit's Hutch: A Simple Pet Care Guide for Kids
🎨
A Bug Spray and Sunscreen Kit: Coloring Ideas for Your Next Family Adventure
🔎
A Beginner's Guide to Timeline Diagrams
🎨
An Ancient Roman Aqueduct: An Ancient History Coloring Guide for Kids
🎨
Coloring Contest Ideas for Classrooms: A Practical Guide
🎨
A Pirate's Hat Coloring and Drawing Ideas for Kids
🔤
Visual Vocabulary: Numbers in a New Language
A Beginner's Guide to Using an Eraser Effectively
🎨
A Homemade Sundial: A Step-by-Step Science Guide for Kids
🍎
How Teachers Can Use Art Lessons for Science Class
🎨
The Letter D: An Alphabet and Number Coloring Page
🎨
Exploring The Moon: A Coloring and Learning Guide for Kids
🎨
Staying Calm During a Storm: A Family Safety Guide
🏺
What We Know About Ancient Egyptian Art
🎨
Dilophosaurus Coloring Page: Fun Facts for Young Paleontologists
🎨
A Giant Ground Sloth Coloring Page: Fun Facts for Young Paleontologists
🎨
A Kids' Cash Register Toy: A Money Guide for Kids and Parents
🎨
Setting a Table: A Simple Life Skill for Kids
🎨
A Transforming Robot: A Coloring and Invention Guide for Kids
🎨
A Lantern Parade at Night: Coloring Ideas and Fun Facts for Kids
🍎
Simple Morning Work Activities for Busy Classrooms
🎨
Friendly Vampire Coloring and Drawing Ideas for Kids
🎨
Pogo Stick Coloring and Drawing Ideas for Kids
🎲
Step-by-Step Strategy Sketching for Sports
🎨
Choosing Sketchbooks for Kids: A Buying and Technique Guide
🧘
Simple Steps for Slow Coloring Practice
🎨
Ancient Astronomers Studying Stars: An Ancient History Coloring Guide for Kids
💗
The Role of Coloring in Expressing Gratitude Through Art
🎨
Banana Coloring and Drawing Ideas for Kids
🎨
A Printable Coloring Page Calendar: A Practical Guide
🎨
Picnic Basket Coloring Ideas for Kids Who Love to Create
🎨
Toy Xylophone Coloring and Drawing Ideas for Kids
🎨
an Anger Thermometer: A Simple Mindfulness Activity for Kids
🎨
Olive Oil Pressing: A Coloring and Food Science Guide for Kids
🎨
The Letter L: An Alphabet and Number Coloring Page
🎨
Fundraising With Coloring Pages: A Practical Guide
🎨
A Pet Adoption Day: A Simple Pet Care Guide for Kids
🎨
Snake Coloring and Drawing Ideas for Kids
🎨
Tree Frog Coloring and Drawing Ideas for Kids
🎨
Meet Edvard Munch: An Art Appreciation Guide for Kids
🧒
What to Expect When Teaching Drawing Milestones
🎨
Blizzard and Snowstorm Prep: A Family Safety Guide
🎨
An Irish Step Dancer: A Coloring and Movement Guide for Kids
📴
Creative Alternatives to Screens During Rainy Afternoons
🎨
The Town Musicians of Bremen: A Classic Story Coloring Guide for Kids
🧘
A Beginner's Guide to Coloring Before Exams
🎨
Beetle Coloring and Drawing Ideas for Kids
🎨
Rain Rain Go Away: A Nursery Rhyme Coloring Guide for Kids
🎨
Exploring The Sun: A Coloring and Learning Guide for Kids
🎨
A Classroom Science Experiment: A Classroom Coloring and Learning Guide
💡
The Role of Original Thinking in Children's Art
🎨
Lemur Coloring and Drawing Ideas for Kids
🎨
Bamboo Stalk: A Coloring and Nature Guide for Kids
📐
How Children Understand Spatial Relationships With Art
🎨
Buttoning a Shirt: A Simple Life Skill for Kids
🔎
A Beginner's Guide to Connecting Ideas Through Drawing
🍂
Seasonal Coloring Guide: Valentine's Day
🎨
An Acorn and Oak Leaf: A Coloring and Nature Guide for Kids
🎨
A Tap Dancer: A Coloring and Movement Guide for Kids
🎲
Using Drawing for Storyboard Games
🎨
A Cowboy Campout Under the Stars: A Wild West Coloring and History Guide for Kids
🎨
a Feelings Journal: A Simple Mindfulness Activity for Kids
💡
Why Imaginative Play Matters for Young Artists
📐
Teaching Fractions Through Coloring and Drawing
🎨
An Ice Age Scene Coloring Page: Fun Facts for Young Paleontologists
🎨
A Summer Treehouse: Coloring Ideas and Activities for the Whole Family
🎨
A Sandbox Construction Site Toy Coloring and Drawing Ideas for Kids
✏️
How to Improve Your Shading Basics
🎨
a Bingo Card Printable: Free Ideas for Your Next Celebration
🖍️
Why Coloring Small Details Makes a Difference
🎨
Teaching Empathy: A Simple Activity for Kids
📴
Screen-Free Coloring Ideas for Summer Vacations
🎨
Oktoberfest Coloring Ideas and Activities for the Whole Family
🌈
Creative Ways to Color Nature Landscapes
🌈
Space Coloring Ideas for Classrooms
👨👩👧
Fun and Simple Weekend Family Activities
🎨
Coloring Book Binding Types: A Buying and Technique Guide
🎨
A Juggler Coloring and Drawing Ideas for Kids
🎨
Hailstorm Coloring Page: A Nature Learning Guide for Kids
🌈
Printable Space Coloring Activities
🎨
Backyard Fox Coloring and Drawing Ideas for Kids
🎨
A Coral Reef Below the Waves Coloring and Drawing Ideas for Kids
👨👩👧
Why Parents Love After-School Activities
💡
Building Making Mistakes in Art Through Coloring and Drawing
🎨
A Pet-Friendly Backyard: A Simple Pet Care Guide for Kids
🎨
A Ramadan Lantern: Coloring Ideas and Fun Facts for Kids
🎨
A Wheelbarrow Full of Soil: A Gardening Guide for Kids and Families
🎨
Snow White: A Classic Story Coloring Guide for Kids
🎨
Exploring South Korea: A Coloring and Culture Guide for Kids
🎨
A Countdown Clock: A Coloring and Space Mission Guide for Kids
🎨
A Pet Rabbit's Hutch: A Simple Pet Care Guide for Kids
🎨
A Bug Spray and Sunscreen Kit: Coloring Ideas for Your Next Family Adventure
🔎
A Beginner's Guide to Timeline Diagrams
🎨
An Ancient Roman Aqueduct: An Ancient History Coloring Guide for Kids
🎨
Coloring Contest Ideas for Classrooms: A Practical Guide
🎨
A Pirate's Hat Coloring and Drawing Ideas for Kids
🔤
Visual Vocabulary: Numbers in a New Language
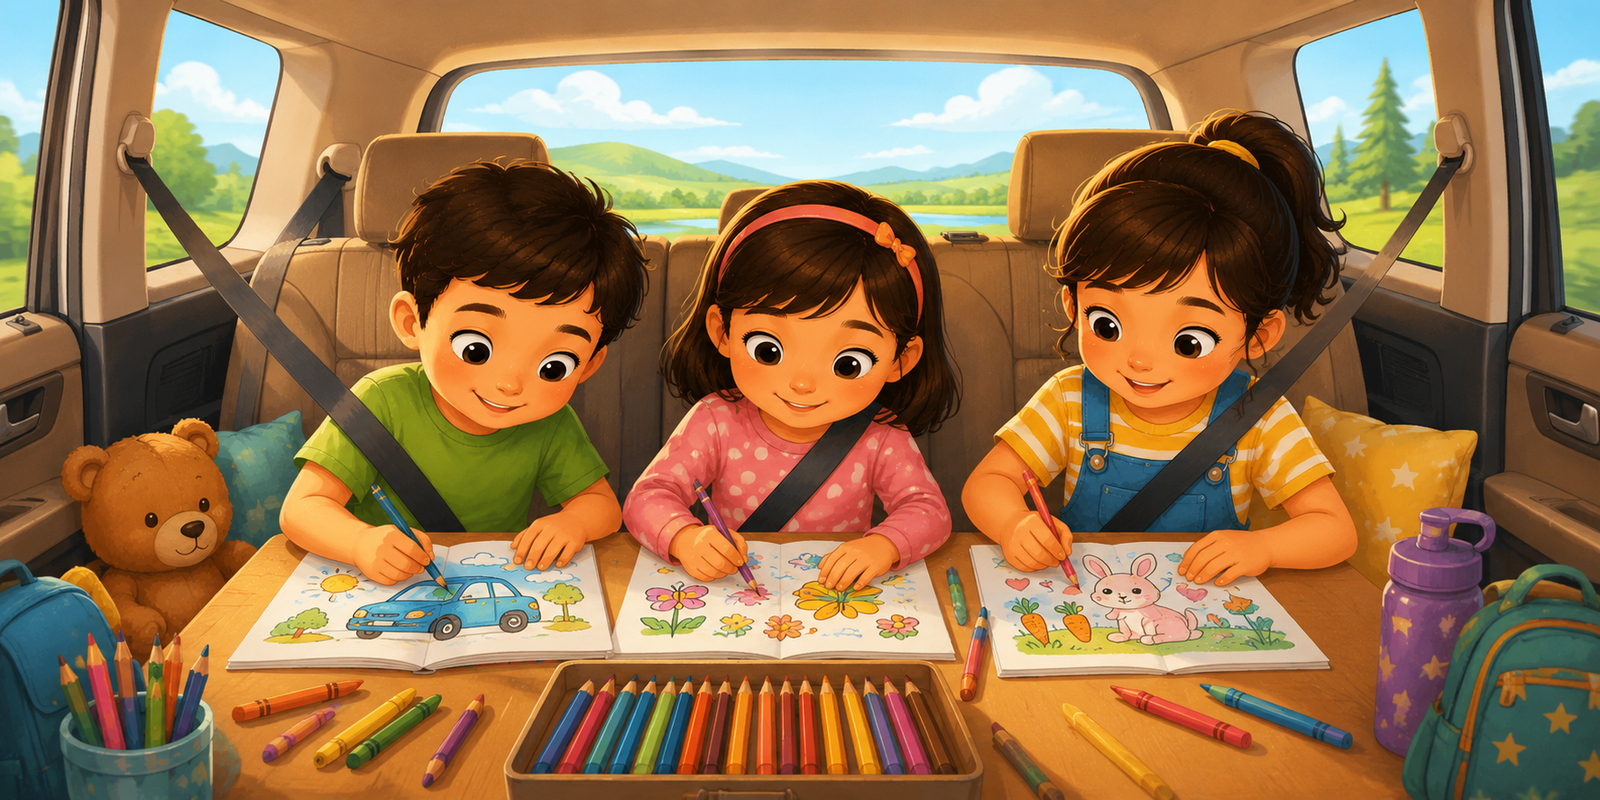 Creative Alternatives to Screens During Long Car Rides
🎨
A Knight's Squire: A Medieval Coloring and History Guide for Kids
🎨
Teaching Punctuality: A Simple Activity for Kids
🎨
Organizing a Toy Shelf: A Simple Life Skill for Kids
🎨
Easy Birds Drawing Ideas
✏️
How to Improve Your Drawing Circles
🎨
A Sunscreen and Beach Bag Coloring and Drawing Ideas for Kids
🍂
Creative New Year Coloring Projects for Classrooms
🎨
How to Draw a Concentric Circles Pattern: A Step-by-Step Guide
🎨
Iguana Coloring and Drawing Ideas for Kids
🎨
A Humanoid Robot: A Coloring and Invention Guide for Kids
🎨
Fun Tractor Coloring and Drawing Ideas for Kids
🎨
Mary Had a Little Lamb: A Nursery Rhyme Coloring Guide for Kids
🧒
Fun Ways to Build Preschoolers
🍎
A Teacher's Guide to Bulletin Board Ideas
🖍️
A Beginner's Guide to Applying Even Pressure
🎨
Skiing Coloring Pages and Drawing Ideas for Kids
📐
Learning Grids and Coordinates Through Drawing
🎨
A Knight's Quest Scroll: A Medieval Coloring and History Guide for Kids
👨👩👧
Fun and Simple Activities for Twins
🎨
A Scarecrow in the Garden: A Gardening Guide for Kids and Families
🎨
Kangaroo Coloring and Drawing Ideas for Kids
🌈
Fun Fairy Tale Scenes Coloring Pages for Kids
🎨
The Letter V: An Alphabet and Number Coloring Page
💗
Creative Approaches to Coping With Change Through Drawing
🎨
A Dodo Bird Coloring Page: Fun Facts for Young Paleontologists
📴
Why Coloring Beats Scrolling on Holiday Travel
🎨
Collecting Pinecones and Leaves: Coloring Ideas for Your Next Family Adventure
🎨
A Castle Silhouette at Sunset: A Medieval Coloring and History Guide for Kids
🍎
Using Coloring Pages for Classroom Management Through Art
Creative Alternatives to Screens During Long Car Rides
🎨
A Knight's Squire: A Medieval Coloring and History Guide for Kids
🎨
Teaching Punctuality: A Simple Activity for Kids
🎨
Organizing a Toy Shelf: A Simple Life Skill for Kids
🎨
Easy Birds Drawing Ideas
✏️
How to Improve Your Drawing Circles
🎨
A Sunscreen and Beach Bag Coloring and Drawing Ideas for Kids
🍂
Creative New Year Coloring Projects for Classrooms
🎨
How to Draw a Concentric Circles Pattern: A Step-by-Step Guide
🎨
Iguana Coloring and Drawing Ideas for Kids
🎨
A Humanoid Robot: A Coloring and Invention Guide for Kids
🎨
Fun Tractor Coloring and Drawing Ideas for Kids
🎨
Mary Had a Little Lamb: A Nursery Rhyme Coloring Guide for Kids
🧒
Fun Ways to Build Preschoolers
🍎
A Teacher's Guide to Bulletin Board Ideas
🖍️
A Beginner's Guide to Applying Even Pressure
🎨
Skiing Coloring Pages and Drawing Ideas for Kids
📐
Learning Grids and Coordinates Through Drawing
🎨
A Knight's Quest Scroll: A Medieval Coloring and History Guide for Kids
👨👩👧
Fun and Simple Activities for Twins
🎨
A Scarecrow in the Garden: A Gardening Guide for Kids and Families
🎨
Kangaroo Coloring and Drawing Ideas for Kids
🌈
Fun Fairy Tale Scenes Coloring Pages for Kids
🎨
The Letter V: An Alphabet and Number Coloring Page
💗
Creative Approaches to Coping With Change Through Drawing
🎨
A Dodo Bird Coloring Page: Fun Facts for Young Paleontologists
📴
Why Coloring Beats Scrolling on Holiday Travel
🎨
Collecting Pinecones and Leaves: Coloring Ideas for Your Next Family Adventure
🎨
A Castle Silhouette at Sunset: A Medieval Coloring and History Guide for Kids
🍎
Using Coloring Pages for Classroom Management Through Art
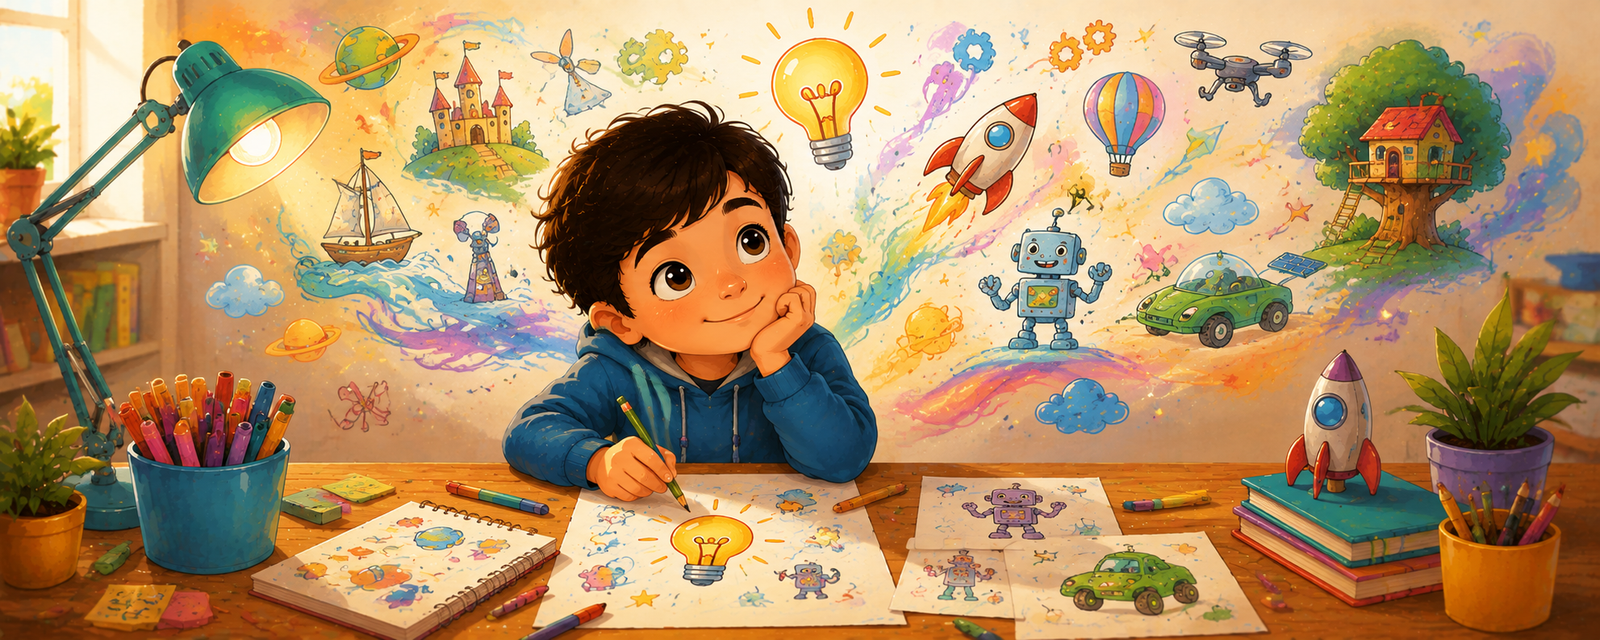 How Drawing Encourages Inventing New Ideas
👨👩👧
Why Parents Love Holiday Break Activities
💬
How Visual Instructions Communicate Ideas
🎨
Fjord Landscape Coloring Page: A Nature Learning Guide for Kids
🎨
The Letter O: An Alphabet and Number Coloring Page
🎨
Exploring The International Space Station: A Coloring and Learning Guide for Kids
🎨
A Beginner's Guide to Drawing Buildings and Houses
🎨
A Court Jester: A Medieval Coloring and History Guide for Kids
🎲
Using Drawing for Dot-to-Dot Games
🎨
Wind-Up Toy Coloring and Drawing Ideas for Kids
🎨
Antarctica Ice Shelf: Coloring Page and Fun Facts for Kids
🔤
How Pictures Help Children Learn Sight Words
🎨
Swing Set Coloring and Drawing Ideas for Kids
👨👩👧
Easy Rainy Day Activities With Coloring Pages
🎨
The Ant and the Grasshopper: A Classic Story Coloring Guide for Kids
💬
How Maps and Wayfinding Symbols Communicate Ideas
🎨
Pteranodon Coloring Page: Fun Facts for Young Paleontologists
🎨
A Family Walk for Exercise: A Coloring and Health Guide for Kids
🎨
a Harvest Festival Coloring Ideas and Activities for the Whole Family
🎨
Exploring The Orion Constellation: A Coloring and Learning Guide for Kids
🎨
An App Icon Design: A Coloring and STEM Guide for Kids
🎲
How to Play Chess Strategy Diagrams
🖌️
Why Using Colored Pencils Matters for Young Artists
🎨
A Campground Shower House: Coloring Ideas for Your Next Family Adventure
🎨
A Camping Cookout: Coloring Ideas for Your Next Family Adventure
🎨
A Norwegian Bunad: A Coloring and Culture Guide for Kids
🖍️
A Beginner's Guide to Coloring With Crayons
💬
The Power of Comic Strips
🎨
Darts Coloring Pages and Drawing Ideas for Kids
🍂
Seasonal Coloring Guide: Halloween
🎨
There Was an Old Woman Who Lived in a Shoe: A Nursery Rhyme Coloring Guide for Kids
🎨
Iceberg Floating Coloring Page: A Nature Learning Guide for Kids
🎨
Prairie Grassland Coloring Page: A Nature Learning Guide for Kids
🖌️
Simple Steps for Cross-Hatching
👨👩👧
Making the Most of Activities for Twins
🔎
Using Visual Research Methods to Solve Problems
🎨
Lightning Bolt Coloring Page: A Nature Learning Guide for Kids
🎨
A Family Jumping Waves Coloring and Drawing Ideas for Kids
🧒
How Drawing Supports Ages 5-6
🎲
Step-by-Step Football Play Diagrams
💗
Exploring Emotional Expression Through Art
🎨
Day of the Dead Coloring Ideas and Activities for the Whole Family
🎨
A Ranch Hand at Work: A Wild West Coloring and History Guide for Kids
🎨
How to Draw a Ocean Wave Mandala: A Step-by-Step Guide
🎨
Space Ice Cream: A Coloring and Space Mission Guide for Kids
How Drawing Encourages Inventing New Ideas
👨👩👧
Why Parents Love Holiday Break Activities
💬
How Visual Instructions Communicate Ideas
🎨
Fjord Landscape Coloring Page: A Nature Learning Guide for Kids
🎨
The Letter O: An Alphabet and Number Coloring Page
🎨
Exploring The International Space Station: A Coloring and Learning Guide for Kids
🎨
A Beginner's Guide to Drawing Buildings and Houses
🎨
A Court Jester: A Medieval Coloring and History Guide for Kids
🎲
Using Drawing for Dot-to-Dot Games
🎨
Wind-Up Toy Coloring and Drawing Ideas for Kids
🎨
Antarctica Ice Shelf: Coloring Page and Fun Facts for Kids
🔤
How Pictures Help Children Learn Sight Words
🎨
Swing Set Coloring and Drawing Ideas for Kids
👨👩👧
Easy Rainy Day Activities With Coloring Pages
🎨
The Ant and the Grasshopper: A Classic Story Coloring Guide for Kids
💬
How Maps and Wayfinding Symbols Communicate Ideas
🎨
Pteranodon Coloring Page: Fun Facts for Young Paleontologists
🎨
A Family Walk for Exercise: A Coloring and Health Guide for Kids
🎨
a Harvest Festival Coloring Ideas and Activities for the Whole Family
🎨
Exploring The Orion Constellation: A Coloring and Learning Guide for Kids
🎨
An App Icon Design: A Coloring and STEM Guide for Kids
🎲
How to Play Chess Strategy Diagrams
🖌️
Why Using Colored Pencils Matters for Young Artists
🎨
A Campground Shower House: Coloring Ideas for Your Next Family Adventure
🎨
A Camping Cookout: Coloring Ideas for Your Next Family Adventure
🎨
A Norwegian Bunad: A Coloring and Culture Guide for Kids
🖍️
A Beginner's Guide to Coloring With Crayons
💬
The Power of Comic Strips
🎨
Darts Coloring Pages and Drawing Ideas for Kids
🍂
Seasonal Coloring Guide: Halloween
🎨
There Was an Old Woman Who Lived in a Shoe: A Nursery Rhyme Coloring Guide for Kids
🎨
Iceberg Floating Coloring Page: A Nature Learning Guide for Kids
🎨
Prairie Grassland Coloring Page: A Nature Learning Guide for Kids
🖌️
Simple Steps for Cross-Hatching
👨👩👧
Making the Most of Activities for Twins
🔎
Using Visual Research Methods to Solve Problems
🎨
Lightning Bolt Coloring Page: A Nature Learning Guide for Kids
🎨
A Family Jumping Waves Coloring and Drawing Ideas for Kids
🧒
How Drawing Supports Ages 5-6
🎲
Step-by-Step Football Play Diagrams
💗
Exploring Emotional Expression Through Art
🎨
Day of the Dead Coloring Ideas and Activities for the Whole Family
🎨
A Ranch Hand at Work: A Wild West Coloring and History Guide for Kids
🎨
How to Draw a Ocean Wave Mandala: A Step-by-Step Guide
🎨
Space Ice Cream: A Coloring and Space Mission Guide for Kids
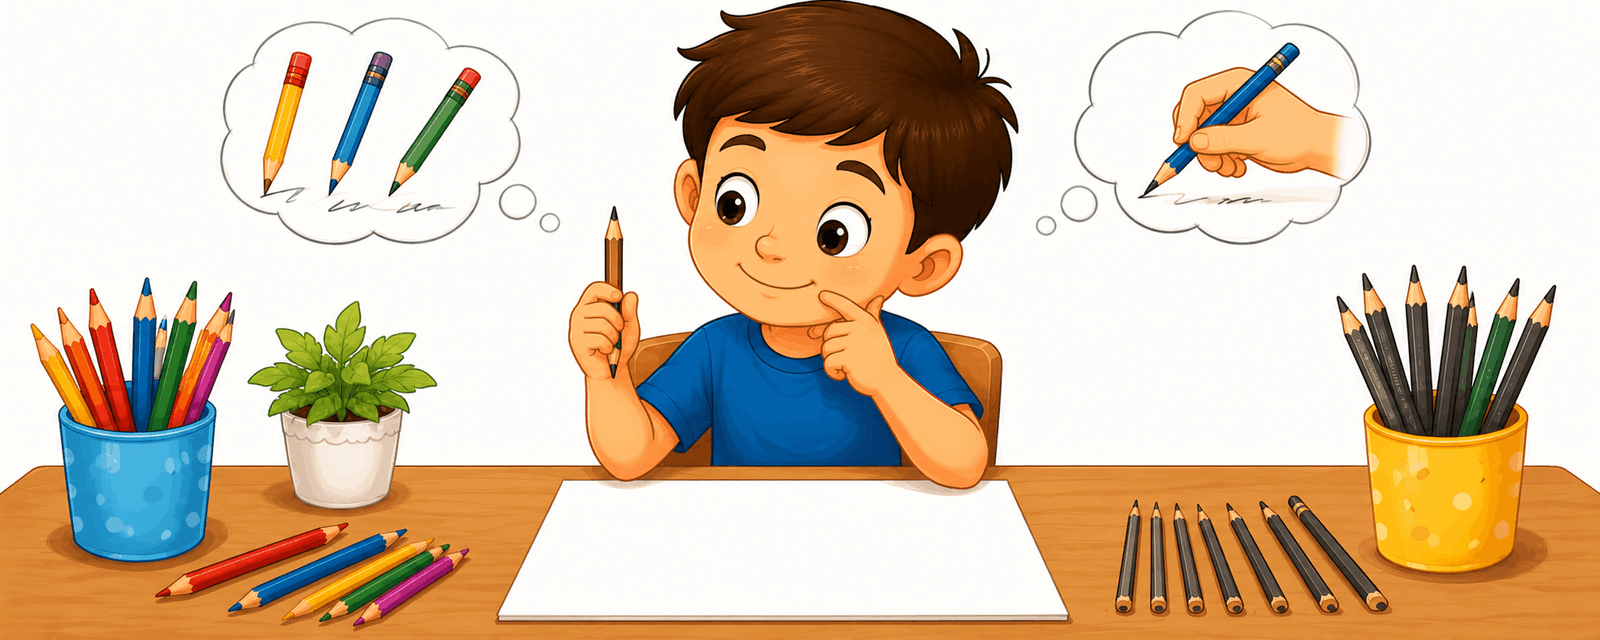 A Beginner's Guide to Choosing Your First Pencil
🎨
How to Draw a Bass Guitar: A Coloring and Music Guide for Kids
🎨
Coral Reef Ecosystem Coloring Page: A Nature Learning Guide for Kids
🎨
A Beach Kite Festival Coloring and Drawing Ideas for Kids
💗
The Role of Coloring in Art as a Creative Outlet
🍎
A Teacher's Guide to Classroom Reward Activities
🎨
Exploring An Astronaut Helmet: A Coloring and Learning Guide for Kids
🎨
A Family Disaster Plan Map: A Family Safety Guide
🎨
A Robot Helper: A Coloring and Invention Guide for Kids
🎨
Volcano Eruption Coloring Page: A Nature Learning Guide for Kids
🎨
A Cupcake Wrapper Set: A Kitchen Guide for Kids and Parents
🎨
A Class Photo Day: A Classroom Coloring and Learning Guide
🍎
Simple End-of-Year Activities for Busy Classrooms
🎨
Cobra Coloring and Drawing Ideas for Kids
🎨
An Acrobat Coloring and Drawing Ideas for Kids
🎨
A Beach Sunset Coloring and Drawing Ideas for Kids
🎨
A Food Truck: A Coloring and Food Science Guide for Kids
🎨
Watermelon Coloring and Drawing Ideas for Kids
🎨
A Knight on Horseback: A Medieval Coloring and History Guide for Kids
🎨
Blind Man's Bluff: A Coloring and Playtime Guide for Kids
🎨
A Kayak on Calm Water: Coloring Ideas for Your Next Family Adventure
🎨
A Freeze-Dried Space Food Tray: A Coloring and Space Mission Guide for Kids
👨👩👧
Making the Most of Holiday Break Activities
🎨
A Castle Flag on a Tower: A Medieval Coloring and History Guide for Kids
🎨
An Ancient Roman Chariot Race: An Ancient History Coloring Guide for Kids
🎨
Grape Cluster Coloring and Drawing Ideas for Kids
🎨
A Drone Being Programmed: A Coloring and STEM Guide for Kids
🎨
How to Draw a Radial Symmetry Design: A Step-by-Step Guide
🎨
Teaching Self-Control: A Simple Activity for Kids
🎨
A Jet Pack: A Coloring and Invention Guide for Kids
🎨
Sensory Play Ideas: A Simple Mindfulness Activity for Kids
🧠
Can Drawing Improve Fine Motor Coordination?
🎨
Backyard Raccoon Coloring and Drawing Ideas for Kids
🧠
Why Drawing Can Help With Visual Thinking
🌈
Fun Jungle Scenes Coloring Pages for Kids
🎨
Pill Bug Coloring and Drawing Ideas for Kids
🍂
Fun Christmas Classroom Coloring Ideas
🎨
Cucumber Coloring and Drawing Ideas for Kids
💬
The Power of Symbols and Icons
🎨
A Group Project: A Classroom Coloring and Learning Guide
🎨
A Russian Sarafan: A Coloring and Culture Guide for Kids
🎨
A Superhero City Parade: A Superhero Coloring and Design Guide for Kids
🧘
Exploring Coloring With Soft Music
🎨
How to Draw a Henna-Inspired Pattern: A Step-by-Step Guide
👨👩👧
Making the Most of Budget-Friendly Activities
🎨
How to Draw Everyday Objects Step by Step
🎨
How to Draw a Piano: A Coloring and Music Guide for Kids
🎨
A Balancing Act Coloring and Drawing Ideas for Kids
🎨
An Orchestra Performance: A Coloring and Movement Guide for Kids
🎨
A Rock Band on Stage: A Coloring and Movement Guide for Kids
🎨
A Cowboy Campfire: A Wild West Coloring and History Guide for Kids
🎨
A Hard Hat and Safety Vest Coloring and Drawing Ideas for Kids
🎨
How to Draw a Mandolin: A Coloring and Music Guide for Kids
🎨
A Belly Dancer: A Coloring and Movement Guide for Kids
🖌️
How to Practice Outlining Techniques
🎨
Alcatraz Island: Coloring Page and Fun Facts for Kids
🎨
An Indian Sari: A Coloring and Culture Guide for Kids
🎨
Exploring Israel: A Coloring and Culture Guide for Kids
🌈
Creative Ways to Color Robots and Machines
🎲
Tic-Tac-Toe Variations: A Creative Twist
🎨
Wyvern Coloring and Drawing Ideas for Kids
📐
Teaching Tessellations Through Coloring and Drawing
🎨
Ancient Roman Gladiators: An Ancient History Coloring Guide for Kids
💗
How Drawing Supports Stress Relief
✏️
Fun Exercises for Using an Eraser Effectively
🖌️
Exploring Using Watercolor
🎲
Step-by-Step Chess Strategy Diagrams
🧒
A Parent's Guide to The Scribbling Stage
🎨
How to Draw a Cone: A Step-by-Step Guide for Kids
🎨
Coffee Roasting: A Coloring and Food Science Guide for Kids
🎨
Name Tag Coloring: Free Ideas for Your Next Celebration
🍂
Seasonal Coloring Guide: Hanukkah
🎨
The Letter W: An Alphabet and Number Coloring Page
🔤
Visual Vocabulary: New Vocabulary Words
🧒
How Drawing Supports The Pictorial Stage
🎨
A Robot Bird: A Coloring and Invention Guide for Kids
🔤
Learning Early Literacy Skills Through Drawing
📴
Screen-Free Coloring Ideas for Rainy Afternoons
🎨
Favorite Foods Drawing Prompts for Beginners
🎨
Wheat Harvesting: A Coloring and Food Science Guide for Kids
🎨
A Rock Garden: A Gardening Guide for Kids and Families
🎨
Sloth Coloring and Drawing Ideas for Kids
🎨
Zinnia: A Coloring and Nature Guide for Kids
🎨
Fun Rickshaw Coloring and Drawing Ideas for Kids
🎨
Exploring Moon Phases: A Coloring and Learning Guide for Kids
🎨
A School Talent Show: A Classroom Coloring and Learning Guide
🎨
Being Patient with a Younger Sibling: A Simple Social Skill for Kids
🎨
A Garden Sundial: A Gardening Guide for Kids and Families
🎨
A Pet Leash and Collar: A Simple Pet Care Guide for Kids
🎨
Glacier Landscape Coloring Page: A Nature Learning Guide for Kids
💬
How Symbols and Icons Communicate Ideas
🎨
Capoeira: A Coloring and Movement Guide for Kids
💬
Why Picture Books Matter in Everyday Life
🎨
A Litter Box: A Simple Pet Care Guide for Kids
🎨
Exploring France: A Coloring and Culture Guide for Kids
🎨
How to Draw Insects Step by Step
🎨
A Hawaiian Lei and Muumuu: A Coloring and Culture Guide for Kids
🎨
Wasp Coloring and Drawing Ideas for Kids
🎨
A Plant Growing Toward Light: A Step-by-Step Science Guide for Kids
🎨
Yo-Yo Coloring and Drawing Ideas for Kids
🎨
A Kids' Craft Sale Table: A Money Guide for Kids and Parents
🎨
Blue Mosque: Coloring Page and Fun Facts for Kids
🎨
Stag Beetle Coloring and Drawing Ideas for Kids
🎨
Chocolate Making: A Coloring and Food Science Guide for Kids
🎨
How to Draw a Bagpipes: A Coloring and Music Guide for Kids
🔤
How Pictures Help Children Learn Family Words
🎨
Gargoyle Coloring and Drawing Ideas for Kids
🧒
What to Expect When Teaching Ages 5-6
🧘
Simple Steps for Mindful Coloring for Beginners
🎨
The Venice Carnival Masks: Coloring Ideas and Fun Facts for Kids
🎨
A Basting Brush: A Kitchen Guide for Kids and Parents
🎨
Getting a Check-Up: A Coloring and Health Guide for Kids
👨👩👧
Coloring Ideas for Screen-Free Afternoons
🔬
Understanding How Eyes Perceive Color
🔬
What Is RGB Color Mixing?
🎨
Soccer Coloring Pages and Drawing Ideas for Kids
💬
Understanding Wordless Storytelling
🎲
Visual Puzzle Games: A Creative Twist
💡
Nurturing Doodling at Home
🎨
Flying Lizard Coloring and Drawing Ideas for Kids
🎨
Meet the Referee: A Community Helper Coloring Guide
🧘
A Beginner's Guide to Quiet Morning Coloring
🎨
Weather Drawing Prompts for Beginners
🧒
Understanding Kindergarteners in Early Childhood
🎨
A Sakura Branch: A Coloring and Nature Guide for Kids
A Beginner's Guide to Choosing Your First Pencil
🎨
How to Draw a Bass Guitar: A Coloring and Music Guide for Kids
🎨
Coral Reef Ecosystem Coloring Page: A Nature Learning Guide for Kids
🎨
A Beach Kite Festival Coloring and Drawing Ideas for Kids
💗
The Role of Coloring in Art as a Creative Outlet
🍎
A Teacher's Guide to Classroom Reward Activities
🎨
Exploring An Astronaut Helmet: A Coloring and Learning Guide for Kids
🎨
A Family Disaster Plan Map: A Family Safety Guide
🎨
A Robot Helper: A Coloring and Invention Guide for Kids
🎨
Volcano Eruption Coloring Page: A Nature Learning Guide for Kids
🎨
A Cupcake Wrapper Set: A Kitchen Guide for Kids and Parents
🎨
A Class Photo Day: A Classroom Coloring and Learning Guide
🍎
Simple End-of-Year Activities for Busy Classrooms
🎨
Cobra Coloring and Drawing Ideas for Kids
🎨
An Acrobat Coloring and Drawing Ideas for Kids
🎨
A Beach Sunset Coloring and Drawing Ideas for Kids
🎨
A Food Truck: A Coloring and Food Science Guide for Kids
🎨
Watermelon Coloring and Drawing Ideas for Kids
🎨
A Knight on Horseback: A Medieval Coloring and History Guide for Kids
🎨
Blind Man's Bluff: A Coloring and Playtime Guide for Kids
🎨
A Kayak on Calm Water: Coloring Ideas for Your Next Family Adventure
🎨
A Freeze-Dried Space Food Tray: A Coloring and Space Mission Guide for Kids
👨👩👧
Making the Most of Holiday Break Activities
🎨
A Castle Flag on a Tower: A Medieval Coloring and History Guide for Kids
🎨
An Ancient Roman Chariot Race: An Ancient History Coloring Guide for Kids
🎨
Grape Cluster Coloring and Drawing Ideas for Kids
🎨
A Drone Being Programmed: A Coloring and STEM Guide for Kids
🎨
How to Draw a Radial Symmetry Design: A Step-by-Step Guide
🎨
Teaching Self-Control: A Simple Activity for Kids
🎨
A Jet Pack: A Coloring and Invention Guide for Kids
🎨
Sensory Play Ideas: A Simple Mindfulness Activity for Kids
🧠
Can Drawing Improve Fine Motor Coordination?
🎨
Backyard Raccoon Coloring and Drawing Ideas for Kids
🧠
Why Drawing Can Help With Visual Thinking
🌈
Fun Jungle Scenes Coloring Pages for Kids
🎨
Pill Bug Coloring and Drawing Ideas for Kids
🍂
Fun Christmas Classroom Coloring Ideas
🎨
Cucumber Coloring and Drawing Ideas for Kids
💬
The Power of Symbols and Icons
🎨
A Group Project: A Classroom Coloring and Learning Guide
🎨
A Russian Sarafan: A Coloring and Culture Guide for Kids
🎨
A Superhero City Parade: A Superhero Coloring and Design Guide for Kids
🧘
Exploring Coloring With Soft Music
🎨
How to Draw a Henna-Inspired Pattern: A Step-by-Step Guide
👨👩👧
Making the Most of Budget-Friendly Activities
🎨
How to Draw Everyday Objects Step by Step
🎨
How to Draw a Piano: A Coloring and Music Guide for Kids
🎨
A Balancing Act Coloring and Drawing Ideas for Kids
🎨
An Orchestra Performance: A Coloring and Movement Guide for Kids
🎨
A Rock Band on Stage: A Coloring and Movement Guide for Kids
🎨
A Cowboy Campfire: A Wild West Coloring and History Guide for Kids
🎨
A Hard Hat and Safety Vest Coloring and Drawing Ideas for Kids
🎨
How to Draw a Mandolin: A Coloring and Music Guide for Kids
🎨
A Belly Dancer: A Coloring and Movement Guide for Kids
🖌️
How to Practice Outlining Techniques
🎨
Alcatraz Island: Coloring Page and Fun Facts for Kids
🎨
An Indian Sari: A Coloring and Culture Guide for Kids
🎨
Exploring Israel: A Coloring and Culture Guide for Kids
🌈
Creative Ways to Color Robots and Machines
🎲
Tic-Tac-Toe Variations: A Creative Twist
🎨
Wyvern Coloring and Drawing Ideas for Kids
📐
Teaching Tessellations Through Coloring and Drawing
🎨
Ancient Roman Gladiators: An Ancient History Coloring Guide for Kids
💗
How Drawing Supports Stress Relief
✏️
Fun Exercises for Using an Eraser Effectively
🖌️
Exploring Using Watercolor
🎲
Step-by-Step Chess Strategy Diagrams
🧒
A Parent's Guide to The Scribbling Stage
🎨
How to Draw a Cone: A Step-by-Step Guide for Kids
🎨
Coffee Roasting: A Coloring and Food Science Guide for Kids
🎨
Name Tag Coloring: Free Ideas for Your Next Celebration
🍂
Seasonal Coloring Guide: Hanukkah
🎨
The Letter W: An Alphabet and Number Coloring Page
🔤
Visual Vocabulary: New Vocabulary Words
🧒
How Drawing Supports The Pictorial Stage
🎨
A Robot Bird: A Coloring and Invention Guide for Kids
🔤
Learning Early Literacy Skills Through Drawing
📴
Screen-Free Coloring Ideas for Rainy Afternoons
🎨
Favorite Foods Drawing Prompts for Beginners
🎨
Wheat Harvesting: A Coloring and Food Science Guide for Kids
🎨
A Rock Garden: A Gardening Guide for Kids and Families
🎨
Sloth Coloring and Drawing Ideas for Kids
🎨
Zinnia: A Coloring and Nature Guide for Kids
🎨
Fun Rickshaw Coloring and Drawing Ideas for Kids
🎨
Exploring Moon Phases: A Coloring and Learning Guide for Kids
🎨
A School Talent Show: A Classroom Coloring and Learning Guide
🎨
Being Patient with a Younger Sibling: A Simple Social Skill for Kids
🎨
A Garden Sundial: A Gardening Guide for Kids and Families
🎨
A Pet Leash and Collar: A Simple Pet Care Guide for Kids
🎨
Glacier Landscape Coloring Page: A Nature Learning Guide for Kids
💬
How Symbols and Icons Communicate Ideas
🎨
Capoeira: A Coloring and Movement Guide for Kids
💬
Why Picture Books Matter in Everyday Life
🎨
A Litter Box: A Simple Pet Care Guide for Kids
🎨
Exploring France: A Coloring and Culture Guide for Kids
🎨
How to Draw Insects Step by Step
🎨
A Hawaiian Lei and Muumuu: A Coloring and Culture Guide for Kids
🎨
Wasp Coloring and Drawing Ideas for Kids
🎨
A Plant Growing Toward Light: A Step-by-Step Science Guide for Kids
🎨
Yo-Yo Coloring and Drawing Ideas for Kids
🎨
A Kids' Craft Sale Table: A Money Guide for Kids and Parents
🎨
Blue Mosque: Coloring Page and Fun Facts for Kids
🎨
Stag Beetle Coloring and Drawing Ideas for Kids
🎨
Chocolate Making: A Coloring and Food Science Guide for Kids
🎨
How to Draw a Bagpipes: A Coloring and Music Guide for Kids
🔤
How Pictures Help Children Learn Family Words
🎨
Gargoyle Coloring and Drawing Ideas for Kids
🧒
What to Expect When Teaching Ages 5-6
🧘
Simple Steps for Mindful Coloring for Beginners
🎨
The Venice Carnival Masks: Coloring Ideas and Fun Facts for Kids
🎨
A Basting Brush: A Kitchen Guide for Kids and Parents
🎨
Getting a Check-Up: A Coloring and Health Guide for Kids
👨👩👧
Coloring Ideas for Screen-Free Afternoons
🔬
Understanding How Eyes Perceive Color
🔬
What Is RGB Color Mixing?
🎨
Soccer Coloring Pages and Drawing Ideas for Kids
💬
Understanding Wordless Storytelling
🎲
Visual Puzzle Games: A Creative Twist
💡
Nurturing Doodling at Home
🎨
Flying Lizard Coloring and Drawing Ideas for Kids
🎨
Meet the Referee: A Community Helper Coloring Guide
🧘
A Beginner's Guide to Quiet Morning Coloring
🎨
Weather Drawing Prompts for Beginners
🧒
Understanding Kindergarteners in Early Childhood
🎨
A Sakura Branch: A Coloring and Nature Guide for Kids
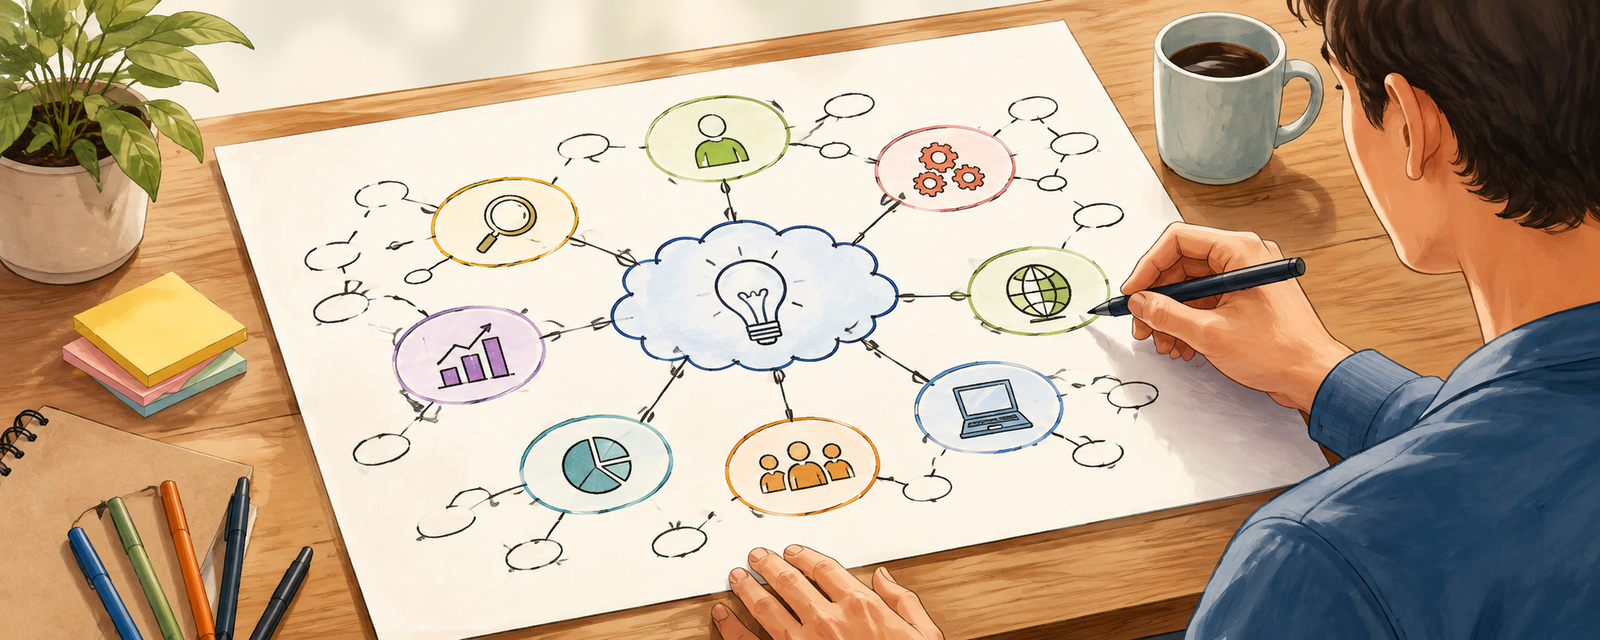 Why Visual Thinkers Use Concept Mapping
🎨
A Ranch Windmill Pump: A Wild West Coloring and History Guide for Kids
🎨
Watering the Garden: A Simple Life Skill for Kids
🎨
Eggplant Coloring and Drawing Ideas for Kids
📴
Hands-On Activities for Device-Free Evenings
🎨
A Prairie Sunset: A Wild West Coloring and History Guide for Kids
🎨
Ancient Babylonian Hanging Gardens: An Ancient History Coloring Guide for Kids
✏️
Fun Exercises for Drawing Simple Objects
🌈
Printable Dinosaurs Coloring Activities
🎨
Recycling Old Coloring Pages: A Practical Guide
🎨
Kiwi Fruit Coloring and Drawing Ideas for Kids
🌈
Fun Weather Scenes Coloring Pages for Kids
🎨
St. Nicholas Day Coloring Ideas and Activities for the Whole Family
🎨
Leprechaun Coloring and Drawing Ideas for Kids
🧒
How Drawing Supports Pattern Recognition
🎨
A Wild Horse Herd: A Wild West Coloring and History Guide for Kids
🧠
How Drawing May Support Problem-Solving
🎨
Megalodon Shark Coloring Page: Fun Facts for Young Paleontologists
🌈
Fun Buildings and Castles Coloring Pages for Kids
🌈
Creative Ways to Color Jungle Scenes
🎨
Python Coloring and Drawing Ideas for Kids
🍂
Printable Easter Coloring Pages for Kids
🎨
a County Fair Day Coloring Ideas and Activities for the Whole Family
Why Visual Thinkers Use Concept Mapping
🎨
A Ranch Windmill Pump: A Wild West Coloring and History Guide for Kids
🎨
Watering the Garden: A Simple Life Skill for Kids
🎨
Eggplant Coloring and Drawing Ideas for Kids
📴
Hands-On Activities for Device-Free Evenings
🎨
A Prairie Sunset: A Wild West Coloring and History Guide for Kids
🎨
Ancient Babylonian Hanging Gardens: An Ancient History Coloring Guide for Kids
✏️
Fun Exercises for Drawing Simple Objects
🌈
Printable Dinosaurs Coloring Activities
🎨
Recycling Old Coloring Pages: A Practical Guide
🎨
Kiwi Fruit Coloring and Drawing Ideas for Kids
🌈
Fun Weather Scenes Coloring Pages for Kids
🎨
St. Nicholas Day Coloring Ideas and Activities for the Whole Family
🎨
Leprechaun Coloring and Drawing Ideas for Kids
🧒
How Drawing Supports Pattern Recognition
🎨
A Wild Horse Herd: A Wild West Coloring and History Guide for Kids
🧠
How Drawing May Support Problem-Solving
🎨
Megalodon Shark Coloring Page: Fun Facts for Young Paleontologists
🌈
Fun Buildings and Castles Coloring Pages for Kids
🌈
Creative Ways to Color Jungle Scenes
🎨
Python Coloring and Drawing Ideas for Kids
🍂
Printable Easter Coloring Pages for Kids
🎨
a County Fair Day Coloring Ideas and Activities for the Whole Family
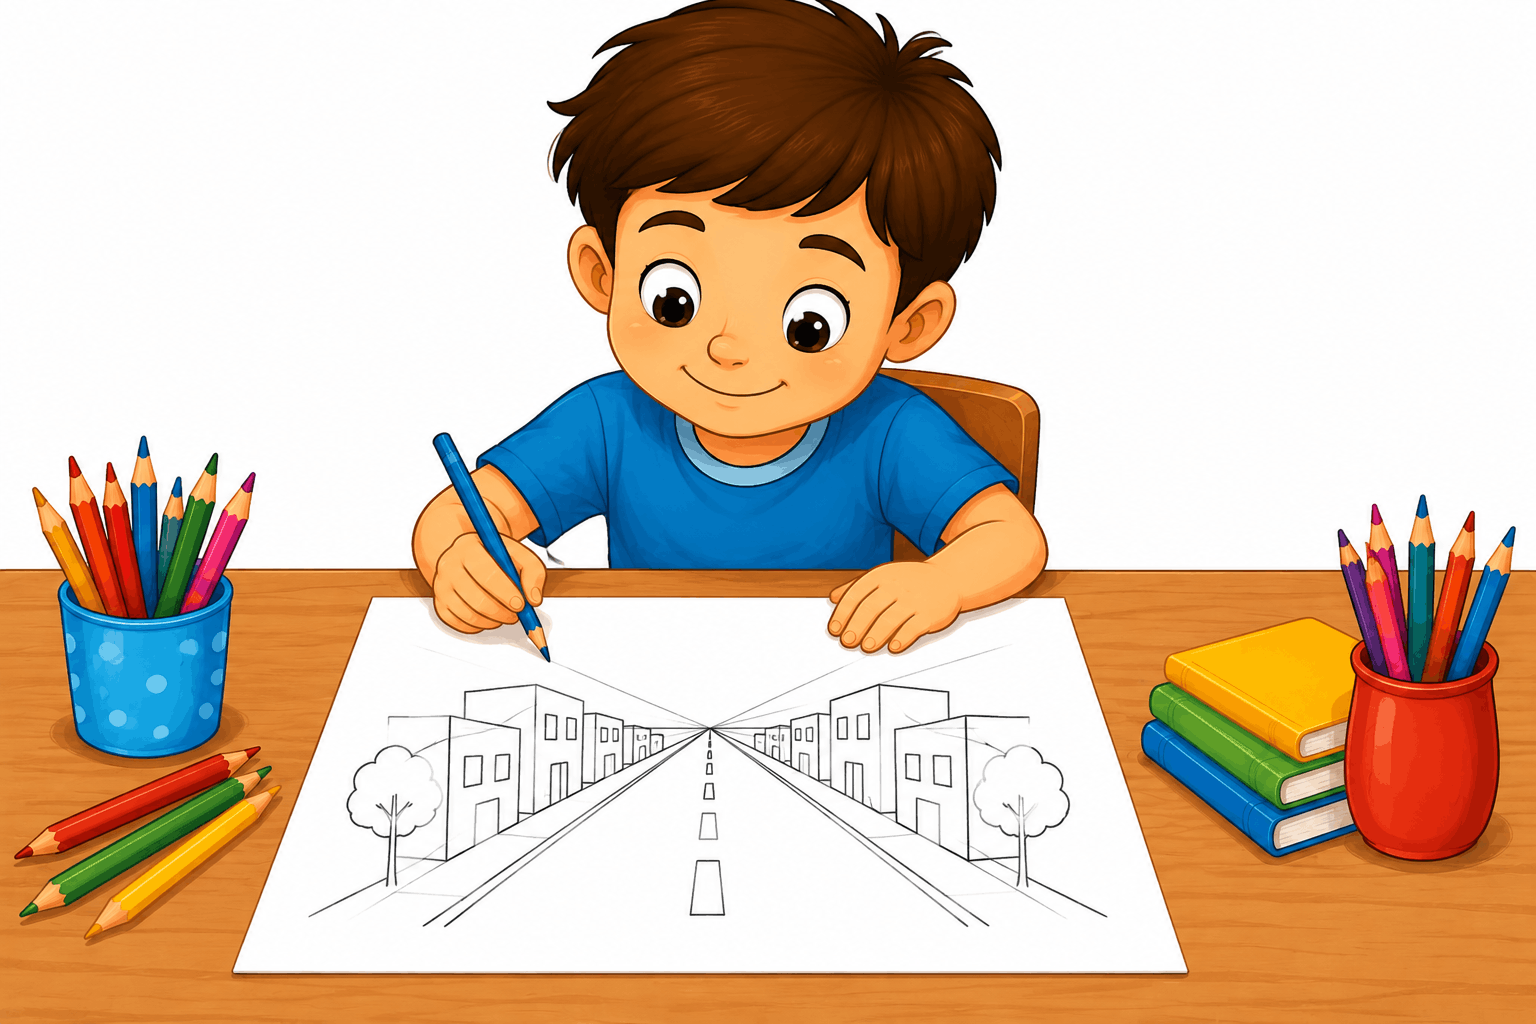 A Beginner's Guide to Basic Perspective
🎨
A Merry-Go-Round Ride: A Coloring and Playtime Guide for Kids
🍂
Seasonal Coloring Guide: Autumn
🎨
A Video Game Character Design: A Coloring and STEM Guide for Kids
🎨
Being a Gracious Host: A Simple Social Skill for Kids
🎨
Offering to Share Your Snack: A Simple Social Skill for Kids
🎨
A Garage Sale Stand: A Money Guide for Kids and Parents
🎨
How to Draw a Ikat Pattern: A Step-by-Step Guide
📐
Fun Drawing Activities for Number Lines
🎨
A Paper Bridge Strength Test: A Step-by-Step Science Guide for Kids
🍎
How Teachers Can Use Art Lessons for History Class
🔎
How Flowcharts Support Learning
🎨
Christ the Redeemer: Coloring Page and Fun Facts for Kids
🌈
Relaxing Flowers and Gardens Coloring Activities
✏️
How to Improve Your Drawing Simple Objects
🎨
A Pirate's Eye Patch Coloring and Drawing Ideas for Kids
🌈
Relaxing Birds Coloring Activities
🍂
Seasonal Coloring Guide: Thanksgiving
💡
Why Open-Ended Play Matters for Young Artists
💡
Why Finding Inspiration Matters for Young Artists
📴
Making the Most of Summer Vacations Without Screens
🎨
The Grand Old Duke of York: A Nursery Rhyme Coloring Guide for Kids
🎨
Peach Coloring and Drawing Ideas for Kids
🎨
Blue Whale Coloring and Drawing Ideas for Kids
👨👩👧
Coloring Ideas for Weekend Family Activities
🎨
Bearded Dragon Coloring and Drawing Ideas for Kids
🎨
A Beginner's Guide to Drawing Favorite Foods
🎨
The Letter I: An Alphabet and Number Coloring Page
🎲
How to Play Mazes
🎨
A Backpack and Walking Stick: Coloring Ideas for Your Next Family Adventure
🎨
Whirligig Coloring and Drawing Ideas for Kids
🎨
Pouring a Drink: A Simple Life Skill for Kids
✏️
Why Shading Basics Matters for New Artists
🎨
a Vision Board for Kids: Free Ideas for Your Next Celebration
🎨
Stretching Before Play: A Coloring and Health Guide for Kids
🎨
Positive Self-Talk Cards: A Simple Mindfulness Activity for Kids
🎨
An Invention Workshop Scene: A Coloring and Invention Guide for Kids
💡
How Drawing Encourages Daydreaming
🌈
Printable Food and Treats Coloring Activities
🎨
Covering a Cough: A Coloring and Health Guide for Kids
🎨
Magic 8 Ball Coloring and Drawing Ideas for Kids
🎨
Best Paper Weight for Markers: A Buying and Technique Guide
🎨
Ali Baba and the Forty Thieves: A Classic Story Coloring Guide for Kids
🎨
Mosquito Coloring and Drawing Ideas for Kids
🎨
Cherry Coloring and Drawing Ideas for Kids
🎨
A Message Written in Sand Coloring and Drawing Ideas for Kids
👨👩👧
Why Parents Love Summer Break Activities
🎨
Meet Cubism: An Art Appreciation Guide for Kids
🎨
A Sami Traditional Dress: A Coloring and Culture Guide for Kids
🎨
Thank You Card Coloring: Free Ideas for Your Next Celebration
🎨
A World Cuisine Cooking Class: Coloring Ideas and Fun Facts for Kids
💬
From Cave Drawings to Sign Language and Gesture
🔤
Using Coloring Pages to Teach Story Sequencing
🎨
Fun Self-Portraits Drawing Activities for Kids
🎨
Centaur Coloring and Drawing Ideas for Kids
🎨
A Pet Chart for Chores: A Simple Pet Care Guide for Kids
📐
Why Counting and Drawing Go Together
🎨
Fun Fantasy Creatures Drawing Activities for Kids
🎨
A Superhero Team Photo: A Superhero Coloring and Design Guide for Kids
🔬
What Is Digital vs Traditional Color?
🍂
Fun Thanksgiving Classroom Coloring Ideas
🍎
Classroom Ideas: Art Lessons for Math Class
🎨
Exploring Norway: A Coloring and Culture Guide for Kids
🎨
How to Draw a Butterfly Mandala: A Step-by-Step Guide
✏️
Why Drawing Triangles Matters for New Artists
🎨
Community Helpers Drawing Prompts for Beginners
🎨
Exploring Zero Gravity: A Coloring and Learning Guide for Kids
🎨
A Starfish on the Beach Coloring and Drawing Ideas for Kids
🧒
A Parent's Guide to Building Drawing Confidence
🌈
Printable Flowers and Gardens Coloring Activities
🎨
The Number 5: An Alphabet and Number Coloring Page
🎨
A Visit to the Dentist: A Coloring and Health Guide for Kids
🎨
A Growth Chart: A Coloring and Health Guide for Kids
🎨
Using an Umbrella: A Simple Life Skill for Kids
🎨
A Drum Circle: A Coloring and Movement Guide for Kids
🎨
A Wild West Sheriff: A Wild West Coloring and History Guide for Kids
🎨
Cardinal Coloring Page Ideas for Kids
🎨
Spinach Coloring and Drawing Ideas for Kids
🎨
A Dinosaur Guarding Its Nest Coloring Page: Fun Facts for Young Paleontologists
👨👩👧
Why Parents Love Budget-Friendly Activities
✏️
How to Improve Your Drawing Simple Faces
🎨
Food Canning and Preserving: A Coloring and Food Science Guide for Kids
🎨
A Bread Loaf Pan: A Kitchen Guide for Kids and Parents
🎨
The Letter B: An Alphabet and Number Coloring Page
🎨
Sun Safety and Sunscreen: A Coloring and Health Guide for Kids
🎨
Tetherball: A Coloring and Playtime Guide for Kids
🎨
Meet the Postal Worker: A Community Helper Coloring Guide
🎨
Exploring New Zealand: A Coloring and Culture Guide for Kids
🎨
Thunderstorm Safety: A Family Safety Guide
🎨
Strawberry Coloring and Drawing Ideas for Kids
🎨
The Number 14: An Alphabet and Number Coloring Page
🧒
Understanding Toddlers (Ages 1-2) in Early Childhood
🍂
Fun Mother's Day Classroom Coloring Ideas
🎨
Pop Goes the Weasel: A Nursery Rhyme Coloring Guide for Kids
🧠
Exploring Drawing and Cognitive Development
🎲
How to Play Sketch Relay Games
🎨
The Steadfast Tin Soldier: A Classic Story Coloring Guide for Kids
🎨
Popcorn Popping: A Coloring and Food Science Guide for Kids
A Beginner's Guide to Basic Perspective
🎨
A Merry-Go-Round Ride: A Coloring and Playtime Guide for Kids
🍂
Seasonal Coloring Guide: Autumn
🎨
A Video Game Character Design: A Coloring and STEM Guide for Kids
🎨
Being a Gracious Host: A Simple Social Skill for Kids
🎨
Offering to Share Your Snack: A Simple Social Skill for Kids
🎨
A Garage Sale Stand: A Money Guide for Kids and Parents
🎨
How to Draw a Ikat Pattern: A Step-by-Step Guide
📐
Fun Drawing Activities for Number Lines
🎨
A Paper Bridge Strength Test: A Step-by-Step Science Guide for Kids
🍎
How Teachers Can Use Art Lessons for History Class
🔎
How Flowcharts Support Learning
🎨
Christ the Redeemer: Coloring Page and Fun Facts for Kids
🌈
Relaxing Flowers and Gardens Coloring Activities
✏️
How to Improve Your Drawing Simple Objects
🎨
A Pirate's Eye Patch Coloring and Drawing Ideas for Kids
🌈
Relaxing Birds Coloring Activities
🍂
Seasonal Coloring Guide: Thanksgiving
💡
Why Open-Ended Play Matters for Young Artists
💡
Why Finding Inspiration Matters for Young Artists
📴
Making the Most of Summer Vacations Without Screens
🎨
The Grand Old Duke of York: A Nursery Rhyme Coloring Guide for Kids
🎨
Peach Coloring and Drawing Ideas for Kids
🎨
Blue Whale Coloring and Drawing Ideas for Kids
👨👩👧
Coloring Ideas for Weekend Family Activities
🎨
Bearded Dragon Coloring and Drawing Ideas for Kids
🎨
A Beginner's Guide to Drawing Favorite Foods
🎨
The Letter I: An Alphabet and Number Coloring Page
🎲
How to Play Mazes
🎨
A Backpack and Walking Stick: Coloring Ideas for Your Next Family Adventure
🎨
Whirligig Coloring and Drawing Ideas for Kids
🎨
Pouring a Drink: A Simple Life Skill for Kids
✏️
Why Shading Basics Matters for New Artists
🎨
a Vision Board for Kids: Free Ideas for Your Next Celebration
🎨
Stretching Before Play: A Coloring and Health Guide for Kids
🎨
Positive Self-Talk Cards: A Simple Mindfulness Activity for Kids
🎨
An Invention Workshop Scene: A Coloring and Invention Guide for Kids
💡
How Drawing Encourages Daydreaming
🌈
Printable Food and Treats Coloring Activities
🎨
Covering a Cough: A Coloring and Health Guide for Kids
🎨
Magic 8 Ball Coloring and Drawing Ideas for Kids
🎨
Best Paper Weight for Markers: A Buying and Technique Guide
🎨
Ali Baba and the Forty Thieves: A Classic Story Coloring Guide for Kids
🎨
Mosquito Coloring and Drawing Ideas for Kids
🎨
Cherry Coloring and Drawing Ideas for Kids
🎨
A Message Written in Sand Coloring and Drawing Ideas for Kids
👨👩👧
Why Parents Love Summer Break Activities
🎨
Meet Cubism: An Art Appreciation Guide for Kids
🎨
A Sami Traditional Dress: A Coloring and Culture Guide for Kids
🎨
Thank You Card Coloring: Free Ideas for Your Next Celebration
🎨
A World Cuisine Cooking Class: Coloring Ideas and Fun Facts for Kids
💬
From Cave Drawings to Sign Language and Gesture
🔤
Using Coloring Pages to Teach Story Sequencing
🎨
Fun Self-Portraits Drawing Activities for Kids
🎨
Centaur Coloring and Drawing Ideas for Kids
🎨
A Pet Chart for Chores: A Simple Pet Care Guide for Kids
📐
Why Counting and Drawing Go Together
🎨
Fun Fantasy Creatures Drawing Activities for Kids
🎨
A Superhero Team Photo: A Superhero Coloring and Design Guide for Kids
🔬
What Is Digital vs Traditional Color?
🍂
Fun Thanksgiving Classroom Coloring Ideas
🍎
Classroom Ideas: Art Lessons for Math Class
🎨
Exploring Norway: A Coloring and Culture Guide for Kids
🎨
How to Draw a Butterfly Mandala: A Step-by-Step Guide
✏️
Why Drawing Triangles Matters for New Artists
🎨
Community Helpers Drawing Prompts for Beginners
🎨
Exploring Zero Gravity: A Coloring and Learning Guide for Kids
🎨
A Starfish on the Beach Coloring and Drawing Ideas for Kids
🧒
A Parent's Guide to Building Drawing Confidence
🌈
Printable Flowers and Gardens Coloring Activities
🎨
The Number 5: An Alphabet and Number Coloring Page
🎨
A Visit to the Dentist: A Coloring and Health Guide for Kids
🎨
A Growth Chart: A Coloring and Health Guide for Kids
🎨
Using an Umbrella: A Simple Life Skill for Kids
🎨
A Drum Circle: A Coloring and Movement Guide for Kids
🎨
A Wild West Sheriff: A Wild West Coloring and History Guide for Kids
🎨
Cardinal Coloring Page Ideas for Kids
🎨
Spinach Coloring and Drawing Ideas for Kids
🎨
A Dinosaur Guarding Its Nest Coloring Page: Fun Facts for Young Paleontologists
👨👩👧
Why Parents Love Budget-Friendly Activities
✏️
How to Improve Your Drawing Simple Faces
🎨
Food Canning and Preserving: A Coloring and Food Science Guide for Kids
🎨
A Bread Loaf Pan: A Kitchen Guide for Kids and Parents
🎨
The Letter B: An Alphabet and Number Coloring Page
🎨
Sun Safety and Sunscreen: A Coloring and Health Guide for Kids
🎨
Tetherball: A Coloring and Playtime Guide for Kids
🎨
Meet the Postal Worker: A Community Helper Coloring Guide
🎨
Exploring New Zealand: A Coloring and Culture Guide for Kids
🎨
Thunderstorm Safety: A Family Safety Guide
🎨
Strawberry Coloring and Drawing Ideas for Kids
🎨
The Number 14: An Alphabet and Number Coloring Page
🧒
Understanding Toddlers (Ages 1-2) in Early Childhood
🍂
Fun Mother's Day Classroom Coloring Ideas
🎨
Pop Goes the Weasel: A Nursery Rhyme Coloring Guide for Kids
🧠
Exploring Drawing and Cognitive Development
🎲
How to Play Sketch Relay Games
🎨
The Steadfast Tin Soldier: A Classic Story Coloring Guide for Kids
🎨
Popcorn Popping: A Coloring and Food Science Guide for Kids
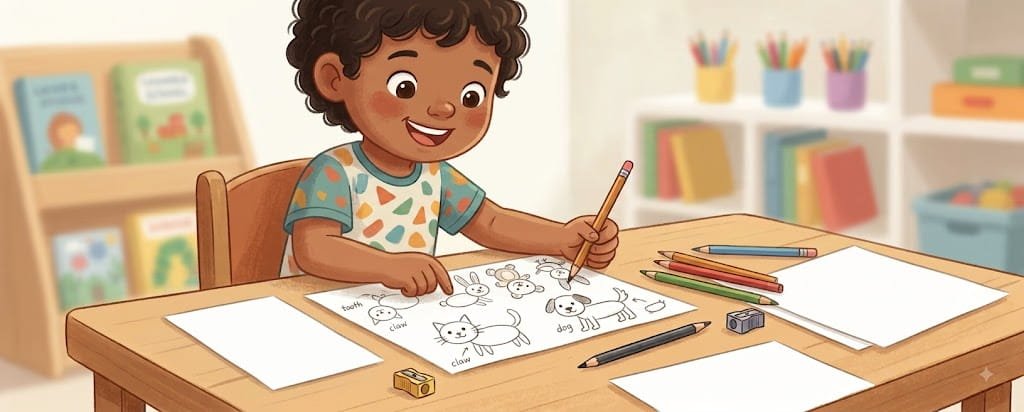 A Beginner's Guide to Drawing Simple Animals
🎨
Little Bo Peep: A Nursery Rhyme Coloring Guide for Kids
🔬
The Science Behind Why Printers Use CMYK
🎨
Hurricane Preparedness: A Family Safety Guide
🖌️
Why Using Watercolor Matters for Young Artists
🎨
Sydney Opera House: Coloring Page and Fun Facts for Kids
🎨
Washing Dishes: A Simple Life Skill for Kids
🍂
Fun Valentine's Day Classroom Coloring Ideas
🎨
Watering Can: A Gardening Guide for Kids and Families
🎨
Group Coloring Project Ideas: A Practical Guide
🎨
A Kids' Investing Concept (Growing a Plant as Metaphor): A Money Guide for Kids and Parents
🎨
Beauty and the Beast: A Classic Story Coloring Guide for Kids
🧒
A Parent's Guide to The Symbol-Making Stage
🍎
Using Coloring Pages for Assessing Creativity in the Classroom
🧠
Why Drawing Can Help With Organizing Ideas
🎨
A Campfire Story Circle: Coloring Ideas for Your Next Family Adventure
🎨
Exploring Nigeria: A Coloring and Culture Guide for Kids
🎨
Earwig Coloring and Drawing Ideas for Kids
🧒
Fun Ways to Build The Symbol-Making Stage
🧒
Understanding Ages 6-7 in Early Childhood
🎨
Ice Cream Sundae Coloring Ideas for Kids Who Love to Create
💬
From Cave Drawings to Traffic and Safety Signs
🎨
A Garden Journal: A Gardening Guide for Kids and Families
📴
Making the Most of Sibling Playtime Without Screens
🏺
How Prehistoric Drawing Tools Shaped Human Communication
🍂
Celebrate Thanksgiving With Coloring Activities
🍎
How Teachers Can Use Classroom Coloring Stations
🎨
A Flowchart of Steps: A Coloring and STEM Guide for Kids
🎨
Apple Coloring and Drawing Ideas for Kids
🎨
Jenga Tower Coloring and Drawing Ideas for Kids
💡
The Role of Open-Ended Play in Children's Art
🎨
Poison Dart Frog Coloring and Drawing Ideas for Kids
👨👩👧
Fun and Simple Budget-Friendly Activities
🎨
Fun Scooter Coloring and Drawing Ideas for Kids
🖍️
Tips for Coloring Mandalas
🎨
A Guinea Pig's Cage: A Simple Pet Care Guide for Kids
🎨
A Superhero Disguised as an Ordinary Person: A Superhero Coloring and Design Guide for Kids
🎨
Hammerhead Shark Coloring and Drawing Ideas for Kids
🎨
A Carnival Strongman Bell Coloring and Drawing Ideas for Kids
🎨
Creative Seasons Drawing Exercises
🎨
Doll House Coloring and Drawing Ideas for Kids
🎨
A Water Balloon Toss: A Coloring and Playtime Guide for Kids
👨👩👧
Fun and Simple Morning Routine Activities
🎨
A Neighborhood Bakery: A Coloring and Food Science Guide for Kids
🎨
Harbor Seal Coloring and Drawing Ideas for Kids
🎨
A Family Choosing a New Pet: A Simple Pet Care Guide for Kids
🎨
Cleaning Up After Play: A Simple Life Skill for Kids
🎨
Easy Family Portraits Drawing Ideas
🎨
A Circus Clown Coloring and Drawing Ideas for Kids
🎨
An Injera Platter: Coloring Ideas and Fun Facts for Kids
🧘
A Beginner's Guide to Slow Coloring Practice
🎨
Creative Musical Instruments Drawing Exercises
🧠
The Link Between Drawing and Cognitive Development
🎨
Birthday Party Printables: Free Ideas for Your Next Celebration
💗
How Drawing Supports Building Self-Esteem Through Art
🎨
Washing Your Hands: A Coloring and Health Guide for Kids
🎨
Fun Animals Drawing Activities for Kids
🎨
The Fisherman and His Wife: A Classic Story Coloring Guide for Kids
🎨
A Superhero Headquarters: A Superhero Coloring and Design Guide for Kids
🎨
A Pirate Crew Coloring and Drawing Ideas for Kids
🧠
Why Drawing Can Help With Planning Skills
🎨
A Dollar Bill: A Money Guide for Kids and Parents
🎨
A Wheelbarrow Race: A Coloring and Playtime Guide for Kids
📴
Hands-On Activities for Waiting Rooms
🌈
Farm Scenes Coloring Ideas for Classrooms
📐
Why Number Lines and Drawing Go Together
🔎
Why Visual Thinkers Use Idea Webs
👨👩👧
Fun and Simple Bedtime Wind-Down Routines
✏️
Why Drawing Simple Animals Matters for New Artists
🧠
Why Drawing Can Help With Working Memory
🖍️
How to Get Better at Coloring Skies and Backgrounds
🖌️
Why Blending Techniques Matters for Young Artists
🧒
A Parent's Guide to Pattern Recognition
🧒
A Parent's Guide to Encouraging Reluctant Artists
🎨
How to Draw a Octagon: A Step-by-Step Guide for Kids
🧘
Simple Steps for Coloring as a Calm-Down Tool
🌈
Fun Fantasy Creatures Coloring Pages for Kids
🎲
Using Drawing for Scavenger Hunt Drawings
🎨
Chameleon Coloring and Drawing Ideas for Kids
🔬
Understanding Primary Colors
🎨
A Seed Germination Jar: A Step-by-Step Science Guide for Kids
🧠
Can Drawing Improve Observation Skills?
💡
Building Divergent Thinking Through Coloring and Drawing
🎨
Jumbo Crayons for Toddlers: A Buying and Technique Guide
🎨
An Irish Traditional Dance Dress: A Coloring and Culture Guide for Kids
🎨
A Homemade Slime: A Step-by-Step Science Guide for Kids
🎨
Walking Stick Bug Coloring and Drawing Ideas for Kids
🎨
A Beach Bonfire Coloring and Drawing Ideas for Kids
🏺
How Hieroglyphics Shaped Human Communication
🎨
A Recipe Card: A Kitchen Guide for Kids and Parents
🎨
The Number 20: An Alphabet and Number Coloring Page
🖌️
Simple Steps for Creating Texture
👨👩👧
Creative Bedtime Wind-Down Routines for Kids
🎨
A New Playground Being Built Coloring and Drawing Ideas for Kids
🎨
Fun Dump Truck Coloring and Drawing Ideas for Kids
🎨
The Number 7: An Alphabet and Number Coloring Page
🎨
Spring Kite Flying: Coloring Ideas and Activities for the Whole Family
🎨
Kwanzaa Coloring Ideas and Activities for the Whole Family
🎨
Oktoberfest Pretzels: Coloring Ideas and Fun Facts for Kids
🎨
A Piano Recital: A Coloring and Movement Guide for Kids
🌈
Creative Ways to Color Dinosaurs
🎨
Willow Tree: A Coloring and Nature Guide for Kids
🧒
How Drawing Supports Preschoolers
👨👩👧
Making the Most of Weekend Family Activities
🎨
A Unicyclist Coloring and Drawing Ideas for Kids
🍎
How Teachers Can Use Bulletin Board Ideas
🖍️
Tips for Coloring Large Areas
🎨
Lamb Coloring and Drawing Ideas for Kids
🎨
a Family Reunion Picnic Coloring Ideas and Activities for the Whole Family
🧒
How Drawing Supports Ages 6-7
🎨
Axolotl Coloring and Drawing Ideas for Kids
🎨
Roadrunner Coloring Page Ideas for Kids
🎨
Thunderstorm Coloring Page: A Nature Learning Guide for Kids
🍎
Classroom Ideas: Art Lessons for Science Class
🎨
A Dish Towel: A Kitchen Guide for Kids and Parents
🧠
Can Drawing Improve Memory?
🎨
Plesiosaurus Coloring Page: Fun Facts for Young Paleontologists
🔬
What Is How Eyes Perceive Color?
🎨
How to Draw a Cymbals: A Coloring and Music Guide for Kids
🍎
Simple Art Lessons for Math Class for Busy Classrooms
🧠
Why Drawing Can Help With Creative Thinking
🎨
Writing a Thank You Card: A Simple Social Skill for Kids
🎨
Fun Castles Drawing Activities for Kids
🧠
The Link Between Drawing and Organizing Ideas
🎨
Chimera Coloring and Drawing Ideas for Kids
🎨
A Kids' Garden Plot: A Gardening Guide for Kids and Families
🎨
Cyclops Coloring and Drawing Ideas for Kids
🎨
The Wise Old Owl: A Classic Story Coloring Guide for Kids
🎨
Building a Color Mixing Chart: A Buying and Technique Guide
✏️
How to Improve Your Holding a Pencil Correctly
🎨
Pasta Making: A Coloring and Food Science Guide for Kids
🎨
A Recess Bell: A Classroom Coloring and Learning Guide
🎨
An Easter Basket: Coloring Ideas and Fun Facts for Kids
🎨
Clog Dancing: A Coloring and Movement Guide for Kids
🎨
Card Game Deck Coloring and Drawing Ideas for Kids
🎨
A Superhero Flying Pose: A Superhero Coloring and Design Guide for Kids
🧘
Exploring Coloring During Travel
🎨
A Homemade Thermometer: A Step-by-Step Science Guide for Kids
🎨
A Fall Hayride: Coloring Ideas and Activities for the Whole Family
🎨
Crocodile Coloring and Drawing Ideas for Kids
🎨
Hawk Coloring Page Ideas for Kids
🎨
Crow Coloring Page Ideas for Kids
🎨
How to Draw a Zigzag Line: A Step-by-Step Guide for Kids
🖍️
How to Get Better at Coloring With Watercolor Pencils
🎨
Musical Chairs: A Coloring and Playtime Guide for Kids
👨👩👧
Why Parents Love Bedtime Wind-Down Routines
🎨
Donkey Coloring and Drawing Ideas for Kids
🎨
A Seasonal Coloring Page Rotation: A Practical Guide
🎨
A Good Night's Sleep: A Coloring and Health Guide for Kids
🎨
Sparrow Coloring Page Ideas for Kids
🖌️
A Beginner's Guide to Cross-Hatching
🎨
Washing Fruits and Vegetables: A Coloring and Health Guide for Kids
🔎
How Visual Problem-Solving Support Learning
🎨
A Road Being Paved Coloring and Drawing Ideas for Kids
🏺
Why Hieroglyphics Matter to Historians
🎨
A Carnival Ticket Booth Coloring and Drawing Ideas for Kids
🎨
How to Draw a A 3D Cube Drawing: A Step-by-Step Guide for Kids
🎨
a Valentine Card Exchange: Free Ideas for Your Next Celebration
🎨
A Blender: A Kitchen Guide for Kids and Parents
🎨
Mosasaurus Coloring Page: Fun Facts for Young Paleontologists
🎲
How to Play Drawing Battles
🎨
A Space Suit Fitting: A Coloring and Space Mission Guide for Kids
🧠
How Drawing May Support Self-Expression
🎨
Barn Cat Coloring and Drawing Ideas for Kids
🎨
A Kitchen Island: A Kitchen Guide for Kids and Parents
🍂
Creative Earth Day Coloring Projects for Classrooms
🔤
Drawing Activities for Descriptive Words
🎨
Ears and How We Hear: A Coloring and Health Guide for Kids
🎨
A Pirate Cove Hideout Coloring and Drawing Ideas for Kids
🎨
A Royal Wizard: A Medieval Coloring and History Guide for Kids
🎨
A Space Capsule Interior: A Coloring and Space Mission Guide for Kids
🔬
The Science Behind Primary Colors
🖍️
A Beginner's Guide to Coloring Inside the Lines
🎨
Meet Pablo Picasso: An Art Appreciation Guide for Kids
🎨
Choosing Marker Nib Sizes: A Buying and Technique Guide
🎨
A Villain's Redemption Moment: A Superhero Coloring and Design Guide for Kids
🎨
A Home Fire Extinguisher: A Family Safety Guide
🎨
A Trivet: A Kitchen Guide for Kids and Parents
🍂
Creative St. Patrick's Day Coloring Projects for Classrooms
🌈
Fun Birds Coloring Pages for Kids
🎨
The Tongue and Tasting: A Coloring and Health Guide for Kids
🔎
How Visual Research Methods Support Learning
🎨
Swan Coloring Page Ideas for Kids
🎨
Taking Turns: A Simple Life Skill for Kids
🧒
A Parent's Guide to Toddlers (Ages 1-2)
🎨
Teaching Initiative: A Simple Activity for Kids
🎨
A Carousel Horse Coloring and Drawing Ideas for Kids
🔬
What Is Why Screens Use RGB?
🎨
A Day of the Dead Sugar Skull: Coloring Ideas and Fun Facts for Kids
🎨
A Garden Trowel: A Gardening Guide for Kids and Families
📐
Learning Fractions Through Drawing
🎨
Kappa Coloring and Drawing Ideas for Kids
🎨
Apologizing Sincerely: A Simple Social Skill for Kids
🎨
How to Draw a Lute: A Coloring and Music Guide for Kids
🎨
A Beach Reading Under an Umbrella Coloring and Drawing Ideas for Kids
🎨
A Water Cycle in a Bag: A Step-by-Step Science Guide for Kids
🎨
Beet Coloring and Drawing Ideas for Kids
🎨
Billiards Coloring Pages and Drawing Ideas for Kids
💬
Why Traffic and Safety Signs Matter in Everyday Life
🔤
Visual Vocabulary: Emotions and Feelings Words
🔤
Learning Action Words Through Drawing
🎨
A Whiteboard Lesson: A Classroom Coloring and Learning Guide
🎨
Diplodocus Coloring Page: Fun Facts for Young Paleontologists
🎨
Milking a Cow Coloring and Drawing Ideas for Kids
🔎
A Beginner's Guide to Organizing Research With Sketches
🎨
A Jackhammer at Work Coloring and Drawing Ideas for Kids
🎨
Ancient Persian Palaces: An Ancient History Coloring Guide for Kids
🎨
Creative Community Helpers Drawing Exercises
🎨
A Weather App for Families: A Family Safety Guide
🖍️
How to Get Better at Coloring With Markers
🖌️
Simple Steps for Composition Basics
📴
Hands-On Activities for Sick Days at Home
🎨
Fox Spirit Coloring and Drawing Ideas for Kids
🍂
Celebrate Independence Day With Coloring Activities
🎨
Action Figure Coloring and Drawing Ideas for Kids
🎨
A Cat Scratching Post: A Simple Pet Care Guide for Kids
🎲
Step-by-Step Storyboard Games
🎨
A German Dirndl and Lederhosen: A Coloring and Culture Guide for Kids
🏺
How Petroglyphs and Rock Art Shaped Human Communication
🎨
A Castle Moat: A Medieval Coloring and History Guide for Kids
🎨
A Pet Carrier for Travel: A Simple Pet Care Guide for Kids
📐
Teaching Counting Through Coloring and Drawing
🎨
A Robot on Wheels: A Coloring and Invention Guide for Kids
🎨
How to Draw a Pentagon: A Step-by-Step Guide for Kids
🎨
A Lighthouse by the Shore Coloring and Drawing Ideas for Kids
🏺
How Early Human Communication Shaped Human Communication
🎨
Capybara Coloring and Drawing Ideas for Kids
🎨
Quokka Coloring and Drawing Ideas for Kids
🔬
The Science Behind Why Screens Use RGB
🎨
Self-Compassion Cards: A Simple Mindfulness Activity for Kids
🎨
A Pirate's Sword Coloring and Drawing Ideas for Kids
🎨
A Ship in a Storm Coloring and Drawing Ideas for Kids
🎨
Mixing Bowl Coloring Ideas for Kids Who Love to Create
📐
How Children Understand Tessellations With Art
🎨
Fun Hang Glider Coloring and Drawing Ideas for Kids
👨👩👧
Creative Screen-Free Afternoons for Kids
👨👩👧
Creative Quiet Time Activities for Kids
🌈
Animals Coloring Ideas for Classrooms
🌈
Ocean Life Coloring Ideas for Classrooms
🎨
Harpy Coloring and Drawing Ideas for Kids
🧘
How Quiet Morning Coloring Can Create a Quiet Moment
🎨
Ancient Olympic Games Torch: An Ancient History Coloring Guide for Kids
🎨
A Spice Market Stall: Coloring Ideas and Fun Facts for Kids
🎨
A Coloring Mural Wall: A Practical Guide
🔤
Visual Vocabulary: Early Literacy Skills
🌈
Birds Coloring Ideas for Classrooms
🎨
Anansi the Spider: A Classic Story Coloring Guide for Kids
🎨
A Fire Escape Plan: A Family Safety Guide
🔤
Using Coloring Pages to Teach Sight Words
💡
How Drawing Encourages Visual Brainstorming
🎨
How to Draw a Lotus Flower Mandala: A Step-by-Step Guide
🎨
A Campfire at Night: Coloring Ideas for Your Next Family Adventure
🎨
Troll Coloring and Drawing Ideas for Kids
🎨
Meet the Carpenter: A Community Helper Coloring Guide
🎨
An Exoskeleton Suit: A Coloring and Invention Guide for Kids
🎨
Tornado Safety at Home: A Family Safety Guide
🎨
Ballroom Dancers: A Coloring and Movement Guide for Kids
🎨
A Beach Sandcastle Contest Coloring and Drawing Ideas for Kids
🌈
Printable Musical Themes Coloring Activities
🎨
Peanut Butter Making: A Coloring and Food Science Guide for Kids
🎨
Potato Coloring and Drawing Ideas for Kids
💬
From Cave Drawings to Wordless Storytelling
🎨
A Hearing Check-Up: A Coloring and Health Guide for Kids
👨👩👧
Why Parents Love Road Trip Activities
🎨
Ancient Viking Longships: An Ancient History Coloring Guide for Kids
🎨
Cheerleading Coloring Pages and Drawing Ideas for Kids
🎨
How to Draw a Kazoo: A Coloring and Music Guide for Kids
🎨
A Herb Garden Window Sill: A Gardening Guide for Kids and Families
🎨
Jigsaw Puzzle Coloring and Drawing Ideas for Kids
🎨
Roasting Marshmallows: Coloring Ideas for Your Next Family Adventure
🎨
A Horseshoe: A Wild West Coloring and History Guide for Kids
📐
Teaching Symmetry Through Coloring and Drawing
🎨
A Bird Feeder in the Garden: A Gardening Guide for Kids and Families
🎨
A New Puppy Learning Tricks: A Simple Pet Care Guide for Kids
🏺
What We Know About Prehistoric Drawing Tools
🧒
Drawing Activities for Pre-Writing Skills
🎨
Aphid Coloring and Drawing Ideas for Kids
🍎
A Teacher's Guide to Early Finisher Activities
🏺
Exploring Early Writing Systems
🎨
Nature Scenes Drawing Prompts for Beginners
🎨
Digital vs. Printed Coloring Pages: A Practical Guide
🎨
Breakfast Plate Coloring Ideas for Kids Who Love to Create
🔤
Visual Vocabulary: Family Words
🎨
A Winter Snow Angel: Coloring Ideas and Activities for the Whole Family
🎨
Easy Animals Drawing Ideas
🔤
Learning Story Sequencing Through Drawing
🎨
A Kids' Invention Convention: A Coloring and STEM Guide for Kids
🎨
A Garden Shed: A Gardening Guide for Kids and Families
🧒
Drawing Activities for Left-Handed Children
🎨
How to Draw a Triangle: A Step-by-Step Guide for Kids
🎨
A Simple Pulley System: A Step-by-Step Science Guide for Kids
🧘
Simple Steps for Coloring With Soft Music
🎲
Fun Football Play Diagrams for Kids
🎨
Rapunzel: A Classic Story Coloring Guide for Kids
🌈
Relaxing Farm Scenes Coloring Activities
🎨
Cicada Coloring and Drawing Ideas for Kids
🎨
Twinkle Twinkle Little Star: A Nursery Rhyme Coloring Guide for Kids
💗
Exploring Drawing Feelings Instead of Words Through Art
🍂
Seasonal Coloring Guide: Back-to-School Season
🌈
Printable Weather Scenes Coloring Activities
🖍️
How to Get Better at Coloring Mandalas
🎨
TV Tag: A Coloring and Playtime Guide for Kids
👨👩👧
Coloring Ideas for Sibling Bonding Activities
🎨
The Brave Little Tailor: A Classic Story Coloring Guide for Kids
🎨
A Balloon-Powered Car: A Step-by-Step Science Guide for Kids
🍎
Using Coloring Pages for Art Lessons for Science Class
💬
The Power of Sign Language and Gesture
🎨
Bonsai Tree: A Coloring and Nature Guide for Kids
🎨
Ancient Chinese Terracotta Warriors: An Ancient History Coloring Guide for Kids
🎨
Rainbow Breathing: A Simple Mindfulness Activity for Kids
🎨
Ancient Farmers and the First Crops: An Ancient History Coloring Guide for Kids
🔤
How Pictures Help Children Learn Numbers in a New Language
🎨
Velociraptor Coloring Page: Fun Facts for Young Paleontologists
🧠
Can Drawing Improve Concentration and Focus?
🌈
Fun Insects and Bugs Coloring Pages for Kids
🎨
Waiting Patiently in Line: A Simple Social Skill for Kids
🎨
A Construction Site Fence Coloring and Drawing Ideas for Kids
🎨
A Wooden House Frame Coloring and Drawing Ideas for Kids
🎨
A Superhero Origin Story Moment: A Superhero Coloring and Design Guide for Kids
🎨
La Tomatina Tomato Festival: Coloring Ideas and Fun Facts for Kids
💬
The Power of Infographics
🎨
A Beginner's Guide to Drawing Insects
💡
The Role of Combining Ideas in Children's Art
🖌️
Simple Steps for Blending Techniques
📐
Learning Geometry Through Drawing
🎨
A Healing-Power Superhero: A Superhero Coloring and Design Guide for Kids
🧘
Exploring Slow Coloring Practice
🎨
Hey Diddle Diddle: A Nursery Rhyme Coloring Guide for Kids
🎨
A Magnet and Paperclip Test: A Step-by-Step Science Guide for Kids
🎨
How to Draw a Cube: A Step-by-Step Guide for Kids
🧒
Understanding Pre-Writing Skills in Early Childhood
🎨
A Pirate Ship Coloring and Drawing Ideas for Kids
🎨
A Royal Throne Room: A Medieval Coloring and History Guide for Kids
🎨
A Piggy Bank Full to the Brim: A Money Guide for Kids and Parents
🌈
Relaxing Animals Coloring Activities
🧒
Fun Ways to Build The Pictorial Stage
🏺
How Ancient Cave Pigments Shaped Human Communication
💬
How Picture Books Communicate Ideas
🎨
Hippo Coloring and Drawing Ideas for Kids
👨👩👧
Why Parents Love Travel-Friendly Activities
🎨
A Wild West Wanted Poster: A Wild West Coloring and History Guide for Kids
🎨
Asking Permission Before Acting: A Simple Social Skill for Kids
👨👩👧
Making the Most of Morning Routine Activities
✏️
Fun Exercises for Basic Perspective
🌈
Printable Holiday Scenes Coloring Activities
🖍️
Why Coloring With Watercolor Pencils Makes a Difference
🎨
Gila Monster Coloring and Drawing Ideas for Kids
🎨
Ice Hockey Coloring Pages and Drawing Ideas for Kids
🖍️
A Beginner's Guide to Coloring With Markers
🎨
Listening When Someone Is Talking: A Simple Social Skill for Kids
🎨
A Morning Campsite Breakfast: Coloring Ideas for Your Next Family Adventure
🎨
The Tortoise and the Hare: A Classic Story Coloring Guide for Kids
🎨
How to Draw Community Helpers Step by Step
🎨
Spiral vs. Perfect-Bound Coloring Books: A Buying and Technique Guide
🏺
Why Petroglyphs and Rock Art Matter to Historians
🎨
The Owl and the Pussycat: A Nursery Rhyme Coloring Guide for Kids
🎨
Meteor Shower Sky Coloring Page: A Nature Learning Guide for Kids
📴
Screen-Free Coloring Ideas for Sick Days at Home
🎨
Seahorse Coloring and Drawing Ideas for Kids
🧒
Drawing Activities for Kindergarteners
🎨
Swordfish Coloring and Drawing Ideas for Kids
💗
Exploring Expressing Gratitude Through Art Through Art
🍂
Creative Father's Day Coloring Projects for Classrooms
🎨
Canary Coloring Page Ideas for Kids
🍂
Printable Earth Day Coloring Pages for Kids
🎨
A Beginner's Guide to Drawing Weather
🎨
Duck Coloring and Drawing Ideas for Kids
🎨
A Summer Water Balloon Fight: Coloring Ideas and Activities for the Whole Family
🎨
A Wildflower Meadow Patch: A Gardening Guide for Kids and Families
🎨
A Garden Scarecrow Building Day: A Gardening Guide for Kids and Families
🎲
Using Drawing for Drawing-Based Party Games
🎨
Simon Says: A Coloring and Playtime Guide for Kids
🎨
Meet the Tour Guide: A Community Helper Coloring Guide
🎨
Stegosaurus Coloring Page: Fun Facts for Young Paleontologists
🎨
Taco Truck Coloring Ideas for Kids Who Love to Create
🎲
Using Drawing for Treasure Map Games
🎨
Monkey Bars: A Coloring and Playtime Guide for Kids
🎨
Washable Markers for Toddlers: A Buying and Technique Guide
🎨
A Message in a Bottle Washed Ashore Coloring and Drawing Ideas for Kids
🎨
A Global Flag Parade: Coloring Ideas and Fun Facts for Kids
🎨
Winter Mittens: Coloring Ideas and Activities for the Whole Family
🎨
How to Draw a Kaleidoscope Pattern: A Step-by-Step Guide
🧒
How Drawing Supports Toddlers (Ages 1-2)
🎨
The Three Little Pigs: A Classic Story Coloring Guide for Kids
💗
How Drawing Supports Emotional Expression
🍎
Classroom Ideas: End-of-Year Activities
🎨
Creative Sports Drawing Exercises
🎨
A Ladybug on a Leaf: A Gardening Guide for Kids and Families
🔤
Visual Vocabulary: Animal Names
🎨
The Golden Goose: A Classic Story Coloring Guide for Kids
🎨
Easy Gardens and Flowers Drawing Ideas
🎨
Meet Henri Rousseau: An Art Appreciation Guide for Kids
📐
Teaching Spatial Relationships Through Coloring and Drawing
🎨
How to Draw a Hexagon: A Step-by-Step Guide for Kids
🧒
Understanding Ages 3-4 in Early Childhood
🎨
A Carnival Prize Wall Coloring and Drawing Ideas for Kids
💗
Exploring Art for Stressful Days Through Art
🔎
Why Visual Thinkers Use Visual Research Methods
🎨
A Robot Following Instructions: A Coloring and STEM Guide for Kids
🎨
How to Draw a Sorting Shapes by Color: A Step-by-Step Guide for Kids
🎨
Building a Themed Coloring Library: A Practical Guide
💡
Nurturing Imaginary Worlds at Home
🎨
Meet Norman Rockwell: An Art Appreciation Guide for Kids
🎨
A Crane Lifting a Beam Coloring and Drawing Ideas for Kids
🎨
Waiting Patiently in Line: A Simple Life Skill for Kids
🧒
Fun Ways to Build Ages 5-6
🏺
Exploring Ancient Storytelling Through Pictures
🎨
How to Draw a Recorder: A Coloring and Music Guide for Kids
🎨
Fun Original Superhero Characters Drawing Activities for Kids
🎨
Mount Everest: Coloring Page and Fun Facts for Kids
🎨
Creative Dinosaurs Drawing Exercises
🎨
Recipe Card Coloring: Free Ideas for Your Next Celebration
💗
The Role of Coloring in Family Art Time and Connection
🖍️
Tips for Coloring Cartoon Characters
💗
Creative Approaches to Drawing Feelings Instead of Words
🎨
Flamingo Coloring Page Ideas for Kids
🌈
A Guide to Birds Coloring Pages
🎨
Apple Picking: A Coloring and Food Science Guide for Kids
🎨
How to Draw a Organ: A Coloring and Music Guide for Kids
🎨
A Traditional Folk Dance Costume: Coloring Ideas and Fun Facts for Kids
💡
The Role of Creative Problem-Solving in Children's Art
🎨
Water Strider Coloring and Drawing Ideas for Kids
🧠
The Link Between Drawing and Creative Thinking
🎨
Sea Otter Coloring and Drawing Ideas for Kids
🎨
Being Honest Even When It's Hard: A Simple Social Skill for Kids
A Beginner's Guide to Drawing Simple Animals
🎨
Little Bo Peep: A Nursery Rhyme Coloring Guide for Kids
🔬
The Science Behind Why Printers Use CMYK
🎨
Hurricane Preparedness: A Family Safety Guide
🖌️
Why Using Watercolor Matters for Young Artists
🎨
Sydney Opera House: Coloring Page and Fun Facts for Kids
🎨
Washing Dishes: A Simple Life Skill for Kids
🍂
Fun Valentine's Day Classroom Coloring Ideas
🎨
Watering Can: A Gardening Guide for Kids and Families
🎨
Group Coloring Project Ideas: A Practical Guide
🎨
A Kids' Investing Concept (Growing a Plant as Metaphor): A Money Guide for Kids and Parents
🎨
Beauty and the Beast: A Classic Story Coloring Guide for Kids
🧒
A Parent's Guide to The Symbol-Making Stage
🍎
Using Coloring Pages for Assessing Creativity in the Classroom
🧠
Why Drawing Can Help With Organizing Ideas
🎨
A Campfire Story Circle: Coloring Ideas for Your Next Family Adventure
🎨
Exploring Nigeria: A Coloring and Culture Guide for Kids
🎨
Earwig Coloring and Drawing Ideas for Kids
🧒
Fun Ways to Build The Symbol-Making Stage
🧒
Understanding Ages 6-7 in Early Childhood
🎨
Ice Cream Sundae Coloring Ideas for Kids Who Love to Create
💬
From Cave Drawings to Traffic and Safety Signs
🎨
A Garden Journal: A Gardening Guide for Kids and Families
📴
Making the Most of Sibling Playtime Without Screens
🏺
How Prehistoric Drawing Tools Shaped Human Communication
🍂
Celebrate Thanksgiving With Coloring Activities
🍎
How Teachers Can Use Classroom Coloring Stations
🎨
A Flowchart of Steps: A Coloring and STEM Guide for Kids
🎨
Apple Coloring and Drawing Ideas for Kids
🎨
Jenga Tower Coloring and Drawing Ideas for Kids
💡
The Role of Open-Ended Play in Children's Art
🎨
Poison Dart Frog Coloring and Drawing Ideas for Kids
👨👩👧
Fun and Simple Budget-Friendly Activities
🎨
Fun Scooter Coloring and Drawing Ideas for Kids
🖍️
Tips for Coloring Mandalas
🎨
A Guinea Pig's Cage: A Simple Pet Care Guide for Kids
🎨
A Superhero Disguised as an Ordinary Person: A Superhero Coloring and Design Guide for Kids
🎨
Hammerhead Shark Coloring and Drawing Ideas for Kids
🎨
A Carnival Strongman Bell Coloring and Drawing Ideas for Kids
🎨
Creative Seasons Drawing Exercises
🎨
Doll House Coloring and Drawing Ideas for Kids
🎨
A Water Balloon Toss: A Coloring and Playtime Guide for Kids
👨👩👧
Fun and Simple Morning Routine Activities
🎨
A Neighborhood Bakery: A Coloring and Food Science Guide for Kids
🎨
Harbor Seal Coloring and Drawing Ideas for Kids
🎨
A Family Choosing a New Pet: A Simple Pet Care Guide for Kids
🎨
Cleaning Up After Play: A Simple Life Skill for Kids
🎨
Easy Family Portraits Drawing Ideas
🎨
A Circus Clown Coloring and Drawing Ideas for Kids
🎨
An Injera Platter: Coloring Ideas and Fun Facts for Kids
🧘
A Beginner's Guide to Slow Coloring Practice
🎨
Creative Musical Instruments Drawing Exercises
🧠
The Link Between Drawing and Cognitive Development
🎨
Birthday Party Printables: Free Ideas for Your Next Celebration
💗
How Drawing Supports Building Self-Esteem Through Art
🎨
Washing Your Hands: A Coloring and Health Guide for Kids
🎨
Fun Animals Drawing Activities for Kids
🎨
The Fisherman and His Wife: A Classic Story Coloring Guide for Kids
🎨
A Superhero Headquarters: A Superhero Coloring and Design Guide for Kids
🎨
A Pirate Crew Coloring and Drawing Ideas for Kids
🧠
Why Drawing Can Help With Planning Skills
🎨
A Dollar Bill: A Money Guide for Kids and Parents
🎨
A Wheelbarrow Race: A Coloring and Playtime Guide for Kids
📴
Hands-On Activities for Waiting Rooms
🌈
Farm Scenes Coloring Ideas for Classrooms
📐
Why Number Lines and Drawing Go Together
🔎
Why Visual Thinkers Use Idea Webs
👨👩👧
Fun and Simple Bedtime Wind-Down Routines
✏️
Why Drawing Simple Animals Matters for New Artists
🧠
Why Drawing Can Help With Working Memory
🖍️
How to Get Better at Coloring Skies and Backgrounds
🖌️
Why Blending Techniques Matters for Young Artists
🧒
A Parent's Guide to Pattern Recognition
🧒
A Parent's Guide to Encouraging Reluctant Artists
🎨
How to Draw a Octagon: A Step-by-Step Guide for Kids
🧘
Simple Steps for Coloring as a Calm-Down Tool
🌈
Fun Fantasy Creatures Coloring Pages for Kids
🎲
Using Drawing for Scavenger Hunt Drawings
🎨
Chameleon Coloring and Drawing Ideas for Kids
🔬
Understanding Primary Colors
🎨
A Seed Germination Jar: A Step-by-Step Science Guide for Kids
🧠
Can Drawing Improve Observation Skills?
💡
Building Divergent Thinking Through Coloring and Drawing
🎨
Jumbo Crayons for Toddlers: A Buying and Technique Guide
🎨
An Irish Traditional Dance Dress: A Coloring and Culture Guide for Kids
🎨
A Homemade Slime: A Step-by-Step Science Guide for Kids
🎨
Walking Stick Bug Coloring and Drawing Ideas for Kids
🎨
A Beach Bonfire Coloring and Drawing Ideas for Kids
🏺
How Hieroglyphics Shaped Human Communication
🎨
A Recipe Card: A Kitchen Guide for Kids and Parents
🎨
The Number 20: An Alphabet and Number Coloring Page
🖌️
Simple Steps for Creating Texture
👨👩👧
Creative Bedtime Wind-Down Routines for Kids
🎨
A New Playground Being Built Coloring and Drawing Ideas for Kids
🎨
Fun Dump Truck Coloring and Drawing Ideas for Kids
🎨
The Number 7: An Alphabet and Number Coloring Page
🎨
Spring Kite Flying: Coloring Ideas and Activities for the Whole Family
🎨
Kwanzaa Coloring Ideas and Activities for the Whole Family
🎨
Oktoberfest Pretzels: Coloring Ideas and Fun Facts for Kids
🎨
A Piano Recital: A Coloring and Movement Guide for Kids
🌈
Creative Ways to Color Dinosaurs
🎨
Willow Tree: A Coloring and Nature Guide for Kids
🧒
How Drawing Supports Preschoolers
👨👩👧
Making the Most of Weekend Family Activities
🎨
A Unicyclist Coloring and Drawing Ideas for Kids
🍎
How Teachers Can Use Bulletin Board Ideas
🖍️
Tips for Coloring Large Areas
🎨
Lamb Coloring and Drawing Ideas for Kids
🎨
a Family Reunion Picnic Coloring Ideas and Activities for the Whole Family
🧒
How Drawing Supports Ages 6-7
🎨
Axolotl Coloring and Drawing Ideas for Kids
🎨
Roadrunner Coloring Page Ideas for Kids
🎨
Thunderstorm Coloring Page: A Nature Learning Guide for Kids
🍎
Classroom Ideas: Art Lessons for Science Class
🎨
A Dish Towel: A Kitchen Guide for Kids and Parents
🧠
Can Drawing Improve Memory?
🎨
Plesiosaurus Coloring Page: Fun Facts for Young Paleontologists
🔬
What Is How Eyes Perceive Color?
🎨
How to Draw a Cymbals: A Coloring and Music Guide for Kids
🍎
Simple Art Lessons for Math Class for Busy Classrooms
🧠
Why Drawing Can Help With Creative Thinking
🎨
Writing a Thank You Card: A Simple Social Skill for Kids
🎨
Fun Castles Drawing Activities for Kids
🧠
The Link Between Drawing and Organizing Ideas
🎨
Chimera Coloring and Drawing Ideas for Kids
🎨
A Kids' Garden Plot: A Gardening Guide for Kids and Families
🎨
Cyclops Coloring and Drawing Ideas for Kids
🎨
The Wise Old Owl: A Classic Story Coloring Guide for Kids
🎨
Building a Color Mixing Chart: A Buying and Technique Guide
✏️
How to Improve Your Holding a Pencil Correctly
🎨
Pasta Making: A Coloring and Food Science Guide for Kids
🎨
A Recess Bell: A Classroom Coloring and Learning Guide
🎨
An Easter Basket: Coloring Ideas and Fun Facts for Kids
🎨
Clog Dancing: A Coloring and Movement Guide for Kids
🎨
Card Game Deck Coloring and Drawing Ideas for Kids
🎨
A Superhero Flying Pose: A Superhero Coloring and Design Guide for Kids
🧘
Exploring Coloring During Travel
🎨
A Homemade Thermometer: A Step-by-Step Science Guide for Kids
🎨
A Fall Hayride: Coloring Ideas and Activities for the Whole Family
🎨
Crocodile Coloring and Drawing Ideas for Kids
🎨
Hawk Coloring Page Ideas for Kids
🎨
Crow Coloring Page Ideas for Kids
🎨
How to Draw a Zigzag Line: A Step-by-Step Guide for Kids
🖍️
How to Get Better at Coloring With Watercolor Pencils
🎨
Musical Chairs: A Coloring and Playtime Guide for Kids
👨👩👧
Why Parents Love Bedtime Wind-Down Routines
🎨
Donkey Coloring and Drawing Ideas for Kids
🎨
A Seasonal Coloring Page Rotation: A Practical Guide
🎨
A Good Night's Sleep: A Coloring and Health Guide for Kids
🎨
Sparrow Coloring Page Ideas for Kids
🖌️
A Beginner's Guide to Cross-Hatching
🎨
Washing Fruits and Vegetables: A Coloring and Health Guide for Kids
🔎
How Visual Problem-Solving Support Learning
🎨
A Road Being Paved Coloring and Drawing Ideas for Kids
🏺
Why Hieroglyphics Matter to Historians
🎨
A Carnival Ticket Booth Coloring and Drawing Ideas for Kids
🎨
How to Draw a A 3D Cube Drawing: A Step-by-Step Guide for Kids
🎨
a Valentine Card Exchange: Free Ideas for Your Next Celebration
🎨
A Blender: A Kitchen Guide for Kids and Parents
🎨
Mosasaurus Coloring Page: Fun Facts for Young Paleontologists
🎲
How to Play Drawing Battles
🎨
A Space Suit Fitting: A Coloring and Space Mission Guide for Kids
🧠
How Drawing May Support Self-Expression
🎨
Barn Cat Coloring and Drawing Ideas for Kids
🎨
A Kitchen Island: A Kitchen Guide for Kids and Parents
🍂
Creative Earth Day Coloring Projects for Classrooms
🔤
Drawing Activities for Descriptive Words
🎨
Ears and How We Hear: A Coloring and Health Guide for Kids
🎨
A Pirate Cove Hideout Coloring and Drawing Ideas for Kids
🎨
A Royal Wizard: A Medieval Coloring and History Guide for Kids
🎨
A Space Capsule Interior: A Coloring and Space Mission Guide for Kids
🔬
The Science Behind Primary Colors
🖍️
A Beginner's Guide to Coloring Inside the Lines
🎨
Meet Pablo Picasso: An Art Appreciation Guide for Kids
🎨
Choosing Marker Nib Sizes: A Buying and Technique Guide
🎨
A Villain's Redemption Moment: A Superhero Coloring and Design Guide for Kids
🎨
A Home Fire Extinguisher: A Family Safety Guide
🎨
A Trivet: A Kitchen Guide for Kids and Parents
🍂
Creative St. Patrick's Day Coloring Projects for Classrooms
🌈
Fun Birds Coloring Pages for Kids
🎨
The Tongue and Tasting: A Coloring and Health Guide for Kids
🔎
How Visual Research Methods Support Learning
🎨
Swan Coloring Page Ideas for Kids
🎨
Taking Turns: A Simple Life Skill for Kids
🧒
A Parent's Guide to Toddlers (Ages 1-2)
🎨
Teaching Initiative: A Simple Activity for Kids
🎨
A Carousel Horse Coloring and Drawing Ideas for Kids
🔬
What Is Why Screens Use RGB?
🎨
A Day of the Dead Sugar Skull: Coloring Ideas and Fun Facts for Kids
🎨
A Garden Trowel: A Gardening Guide for Kids and Families
📐
Learning Fractions Through Drawing
🎨
Kappa Coloring and Drawing Ideas for Kids
🎨
Apologizing Sincerely: A Simple Social Skill for Kids
🎨
How to Draw a Lute: A Coloring and Music Guide for Kids
🎨
A Beach Reading Under an Umbrella Coloring and Drawing Ideas for Kids
🎨
A Water Cycle in a Bag: A Step-by-Step Science Guide for Kids
🎨
Beet Coloring and Drawing Ideas for Kids
🎨
Billiards Coloring Pages and Drawing Ideas for Kids
💬
Why Traffic and Safety Signs Matter in Everyday Life
🔤
Visual Vocabulary: Emotions and Feelings Words
🔤
Learning Action Words Through Drawing
🎨
A Whiteboard Lesson: A Classroom Coloring and Learning Guide
🎨
Diplodocus Coloring Page: Fun Facts for Young Paleontologists
🎨
Milking a Cow Coloring and Drawing Ideas for Kids
🔎
A Beginner's Guide to Organizing Research With Sketches
🎨
A Jackhammer at Work Coloring and Drawing Ideas for Kids
🎨
Ancient Persian Palaces: An Ancient History Coloring Guide for Kids
🎨
Creative Community Helpers Drawing Exercises
🎨
A Weather App for Families: A Family Safety Guide
🖍️
How to Get Better at Coloring With Markers
🖌️
Simple Steps for Composition Basics
📴
Hands-On Activities for Sick Days at Home
🎨
Fox Spirit Coloring and Drawing Ideas for Kids
🍂
Celebrate Independence Day With Coloring Activities
🎨
Action Figure Coloring and Drawing Ideas for Kids
🎨
A Cat Scratching Post: A Simple Pet Care Guide for Kids
🎲
Step-by-Step Storyboard Games
🎨
A German Dirndl and Lederhosen: A Coloring and Culture Guide for Kids
🏺
How Petroglyphs and Rock Art Shaped Human Communication
🎨
A Castle Moat: A Medieval Coloring and History Guide for Kids
🎨
A Pet Carrier for Travel: A Simple Pet Care Guide for Kids
📐
Teaching Counting Through Coloring and Drawing
🎨
A Robot on Wheels: A Coloring and Invention Guide for Kids
🎨
How to Draw a Pentagon: A Step-by-Step Guide for Kids
🎨
A Lighthouse by the Shore Coloring and Drawing Ideas for Kids
🏺
How Early Human Communication Shaped Human Communication
🎨
Capybara Coloring and Drawing Ideas for Kids
🎨
Quokka Coloring and Drawing Ideas for Kids
🔬
The Science Behind Why Screens Use RGB
🎨
Self-Compassion Cards: A Simple Mindfulness Activity for Kids
🎨
A Pirate's Sword Coloring and Drawing Ideas for Kids
🎨
A Ship in a Storm Coloring and Drawing Ideas for Kids
🎨
Mixing Bowl Coloring Ideas for Kids Who Love to Create
📐
How Children Understand Tessellations With Art
🎨
Fun Hang Glider Coloring and Drawing Ideas for Kids
👨👩👧
Creative Screen-Free Afternoons for Kids
👨👩👧
Creative Quiet Time Activities for Kids
🌈
Animals Coloring Ideas for Classrooms
🌈
Ocean Life Coloring Ideas for Classrooms
🎨
Harpy Coloring and Drawing Ideas for Kids
🧘
How Quiet Morning Coloring Can Create a Quiet Moment
🎨
Ancient Olympic Games Torch: An Ancient History Coloring Guide for Kids
🎨
A Spice Market Stall: Coloring Ideas and Fun Facts for Kids
🎨
A Coloring Mural Wall: A Practical Guide
🔤
Visual Vocabulary: Early Literacy Skills
🌈
Birds Coloring Ideas for Classrooms
🎨
Anansi the Spider: A Classic Story Coloring Guide for Kids
🎨
A Fire Escape Plan: A Family Safety Guide
🔤
Using Coloring Pages to Teach Sight Words
💡
How Drawing Encourages Visual Brainstorming
🎨
How to Draw a Lotus Flower Mandala: A Step-by-Step Guide
🎨
A Campfire at Night: Coloring Ideas for Your Next Family Adventure
🎨
Troll Coloring and Drawing Ideas for Kids
🎨
Meet the Carpenter: A Community Helper Coloring Guide
🎨
An Exoskeleton Suit: A Coloring and Invention Guide for Kids
🎨
Tornado Safety at Home: A Family Safety Guide
🎨
Ballroom Dancers: A Coloring and Movement Guide for Kids
🎨
A Beach Sandcastle Contest Coloring and Drawing Ideas for Kids
🌈
Printable Musical Themes Coloring Activities
🎨
Peanut Butter Making: A Coloring and Food Science Guide for Kids
🎨
Potato Coloring and Drawing Ideas for Kids
💬
From Cave Drawings to Wordless Storytelling
🎨
A Hearing Check-Up: A Coloring and Health Guide for Kids
👨👩👧
Why Parents Love Road Trip Activities
🎨
Ancient Viking Longships: An Ancient History Coloring Guide for Kids
🎨
Cheerleading Coloring Pages and Drawing Ideas for Kids
🎨
How to Draw a Kazoo: A Coloring and Music Guide for Kids
🎨
A Herb Garden Window Sill: A Gardening Guide for Kids and Families
🎨
Jigsaw Puzzle Coloring and Drawing Ideas for Kids
🎨
Roasting Marshmallows: Coloring Ideas for Your Next Family Adventure
🎨
A Horseshoe: A Wild West Coloring and History Guide for Kids
📐
Teaching Symmetry Through Coloring and Drawing
🎨
A Bird Feeder in the Garden: A Gardening Guide for Kids and Families
🎨
A New Puppy Learning Tricks: A Simple Pet Care Guide for Kids
🏺
What We Know About Prehistoric Drawing Tools
🧒
Drawing Activities for Pre-Writing Skills
🎨
Aphid Coloring and Drawing Ideas for Kids
🍎
A Teacher's Guide to Early Finisher Activities
🏺
Exploring Early Writing Systems
🎨
Nature Scenes Drawing Prompts for Beginners
🎨
Digital vs. Printed Coloring Pages: A Practical Guide
🎨
Breakfast Plate Coloring Ideas for Kids Who Love to Create
🔤
Visual Vocabulary: Family Words
🎨
A Winter Snow Angel: Coloring Ideas and Activities for the Whole Family
🎨
Easy Animals Drawing Ideas
🔤
Learning Story Sequencing Through Drawing
🎨
A Kids' Invention Convention: A Coloring and STEM Guide for Kids
🎨
A Garden Shed: A Gardening Guide for Kids and Families
🧒
Drawing Activities for Left-Handed Children
🎨
How to Draw a Triangle: A Step-by-Step Guide for Kids
🎨
A Simple Pulley System: A Step-by-Step Science Guide for Kids
🧘
Simple Steps for Coloring With Soft Music
🎲
Fun Football Play Diagrams for Kids
🎨
Rapunzel: A Classic Story Coloring Guide for Kids
🌈
Relaxing Farm Scenes Coloring Activities
🎨
Cicada Coloring and Drawing Ideas for Kids
🎨
Twinkle Twinkle Little Star: A Nursery Rhyme Coloring Guide for Kids
💗
Exploring Drawing Feelings Instead of Words Through Art
🍂
Seasonal Coloring Guide: Back-to-School Season
🌈
Printable Weather Scenes Coloring Activities
🖍️
How to Get Better at Coloring Mandalas
🎨
TV Tag: A Coloring and Playtime Guide for Kids
👨👩👧
Coloring Ideas for Sibling Bonding Activities
🎨
The Brave Little Tailor: A Classic Story Coloring Guide for Kids
🎨
A Balloon-Powered Car: A Step-by-Step Science Guide for Kids
🍎
Using Coloring Pages for Art Lessons for Science Class
💬
The Power of Sign Language and Gesture
🎨
Bonsai Tree: A Coloring and Nature Guide for Kids
🎨
Ancient Chinese Terracotta Warriors: An Ancient History Coloring Guide for Kids
🎨
Rainbow Breathing: A Simple Mindfulness Activity for Kids
🎨
Ancient Farmers and the First Crops: An Ancient History Coloring Guide for Kids
🔤
How Pictures Help Children Learn Numbers in a New Language
🎨
Velociraptor Coloring Page: Fun Facts for Young Paleontologists
🧠
Can Drawing Improve Concentration and Focus?
🌈
Fun Insects and Bugs Coloring Pages for Kids
🎨
Waiting Patiently in Line: A Simple Social Skill for Kids
🎨
A Construction Site Fence Coloring and Drawing Ideas for Kids
🎨
A Wooden House Frame Coloring and Drawing Ideas for Kids
🎨
A Superhero Origin Story Moment: A Superhero Coloring and Design Guide for Kids
🎨
La Tomatina Tomato Festival: Coloring Ideas and Fun Facts for Kids
💬
The Power of Infographics
🎨
A Beginner's Guide to Drawing Insects
💡
The Role of Combining Ideas in Children's Art
🖌️
Simple Steps for Blending Techniques
📐
Learning Geometry Through Drawing
🎨
A Healing-Power Superhero: A Superhero Coloring and Design Guide for Kids
🧘
Exploring Slow Coloring Practice
🎨
Hey Diddle Diddle: A Nursery Rhyme Coloring Guide for Kids
🎨
A Magnet and Paperclip Test: A Step-by-Step Science Guide for Kids
🎨
How to Draw a Cube: A Step-by-Step Guide for Kids
🧒
Understanding Pre-Writing Skills in Early Childhood
🎨
A Pirate Ship Coloring and Drawing Ideas for Kids
🎨
A Royal Throne Room: A Medieval Coloring and History Guide for Kids
🎨
A Piggy Bank Full to the Brim: A Money Guide for Kids and Parents
🌈
Relaxing Animals Coloring Activities
🧒
Fun Ways to Build The Pictorial Stage
🏺
How Ancient Cave Pigments Shaped Human Communication
💬
How Picture Books Communicate Ideas
🎨
Hippo Coloring and Drawing Ideas for Kids
👨👩👧
Why Parents Love Travel-Friendly Activities
🎨
A Wild West Wanted Poster: A Wild West Coloring and History Guide for Kids
🎨
Asking Permission Before Acting: A Simple Social Skill for Kids
👨👩👧
Making the Most of Morning Routine Activities
✏️
Fun Exercises for Basic Perspective
🌈
Printable Holiday Scenes Coloring Activities
🖍️
Why Coloring With Watercolor Pencils Makes a Difference
🎨
Gila Monster Coloring and Drawing Ideas for Kids
🎨
Ice Hockey Coloring Pages and Drawing Ideas for Kids
🖍️
A Beginner's Guide to Coloring With Markers
🎨
Listening When Someone Is Talking: A Simple Social Skill for Kids
🎨
A Morning Campsite Breakfast: Coloring Ideas for Your Next Family Adventure
🎨
The Tortoise and the Hare: A Classic Story Coloring Guide for Kids
🎨
How to Draw Community Helpers Step by Step
🎨
Spiral vs. Perfect-Bound Coloring Books: A Buying and Technique Guide
🏺
Why Petroglyphs and Rock Art Matter to Historians
🎨
The Owl and the Pussycat: A Nursery Rhyme Coloring Guide for Kids
🎨
Meteor Shower Sky Coloring Page: A Nature Learning Guide for Kids
📴
Screen-Free Coloring Ideas for Sick Days at Home
🎨
Seahorse Coloring and Drawing Ideas for Kids
🧒
Drawing Activities for Kindergarteners
🎨
Swordfish Coloring and Drawing Ideas for Kids
💗
Exploring Expressing Gratitude Through Art Through Art
🍂
Creative Father's Day Coloring Projects for Classrooms
🎨
Canary Coloring Page Ideas for Kids
🍂
Printable Earth Day Coloring Pages for Kids
🎨
A Beginner's Guide to Drawing Weather
🎨
Duck Coloring and Drawing Ideas for Kids
🎨
A Summer Water Balloon Fight: Coloring Ideas and Activities for the Whole Family
🎨
A Wildflower Meadow Patch: A Gardening Guide for Kids and Families
🎨
A Garden Scarecrow Building Day: A Gardening Guide for Kids and Families
🎲
Using Drawing for Drawing-Based Party Games
🎨
Simon Says: A Coloring and Playtime Guide for Kids
🎨
Meet the Tour Guide: A Community Helper Coloring Guide
🎨
Stegosaurus Coloring Page: Fun Facts for Young Paleontologists
🎨
Taco Truck Coloring Ideas for Kids Who Love to Create
🎲
Using Drawing for Treasure Map Games
🎨
Monkey Bars: A Coloring and Playtime Guide for Kids
🎨
Washable Markers for Toddlers: A Buying and Technique Guide
🎨
A Message in a Bottle Washed Ashore Coloring and Drawing Ideas for Kids
🎨
A Global Flag Parade: Coloring Ideas and Fun Facts for Kids
🎨
Winter Mittens: Coloring Ideas and Activities for the Whole Family
🎨
How to Draw a Kaleidoscope Pattern: A Step-by-Step Guide
🧒
How Drawing Supports Toddlers (Ages 1-2)
🎨
The Three Little Pigs: A Classic Story Coloring Guide for Kids
💗
How Drawing Supports Emotional Expression
🍎
Classroom Ideas: End-of-Year Activities
🎨
Creative Sports Drawing Exercises
🎨
A Ladybug on a Leaf: A Gardening Guide for Kids and Families
🔤
Visual Vocabulary: Animal Names
🎨
The Golden Goose: A Classic Story Coloring Guide for Kids
🎨
Easy Gardens and Flowers Drawing Ideas
🎨
Meet Henri Rousseau: An Art Appreciation Guide for Kids
📐
Teaching Spatial Relationships Through Coloring and Drawing
🎨
How to Draw a Hexagon: A Step-by-Step Guide for Kids
🧒
Understanding Ages 3-4 in Early Childhood
🎨
A Carnival Prize Wall Coloring and Drawing Ideas for Kids
💗
Exploring Art for Stressful Days Through Art
🔎
Why Visual Thinkers Use Visual Research Methods
🎨
A Robot Following Instructions: A Coloring and STEM Guide for Kids
🎨
How to Draw a Sorting Shapes by Color: A Step-by-Step Guide for Kids
🎨
Building a Themed Coloring Library: A Practical Guide
💡
Nurturing Imaginary Worlds at Home
🎨
Meet Norman Rockwell: An Art Appreciation Guide for Kids
🎨
A Crane Lifting a Beam Coloring and Drawing Ideas for Kids
🎨
Waiting Patiently in Line: A Simple Life Skill for Kids
🧒
Fun Ways to Build Ages 5-6
🏺
Exploring Ancient Storytelling Through Pictures
🎨
How to Draw a Recorder: A Coloring and Music Guide for Kids
🎨
Fun Original Superhero Characters Drawing Activities for Kids
🎨
Mount Everest: Coloring Page and Fun Facts for Kids
🎨
Creative Dinosaurs Drawing Exercises
🎨
Recipe Card Coloring: Free Ideas for Your Next Celebration
💗
The Role of Coloring in Family Art Time and Connection
🖍️
Tips for Coloring Cartoon Characters
💗
Creative Approaches to Drawing Feelings Instead of Words
🎨
Flamingo Coloring Page Ideas for Kids
🌈
A Guide to Birds Coloring Pages
🎨
Apple Picking: A Coloring and Food Science Guide for Kids
🎨
How to Draw a Organ: A Coloring and Music Guide for Kids
🎨
A Traditional Folk Dance Costume: Coloring Ideas and Fun Facts for Kids
💡
The Role of Creative Problem-Solving in Children's Art
🎨
Water Strider Coloring and Drawing Ideas for Kids
🧠
The Link Between Drawing and Creative Thinking
🎨
Sea Otter Coloring and Drawing Ideas for Kids
🎨
Being Honest Even When It's Hard: A Simple Social Skill for Kids
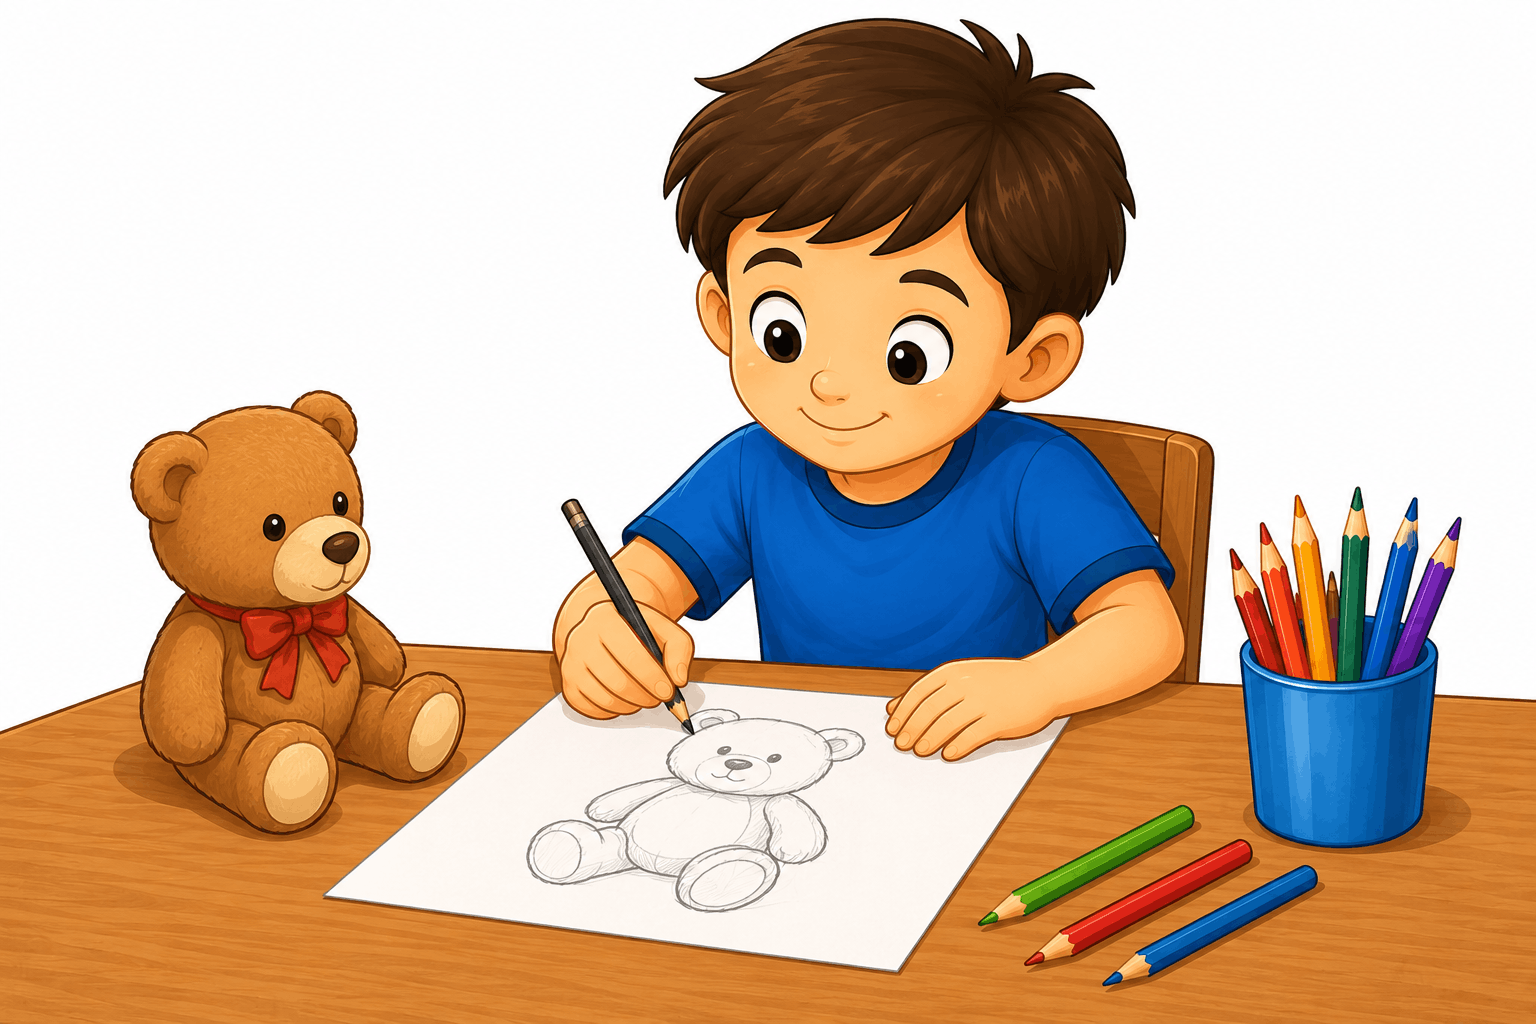 A Beginner's Guide to Drawing From Observation
🎨
Practicing Gratitude Out Loud: A Simple Social Skill for Kids
🔤
Learning Descriptive Words Through Drawing
🖍️
Tips for Avoiding Smudges While Coloring
💡
The Role of Imaginative Play in Children's Art
👨👩👧
Why Parents Love Waiting Room Activities
🎨
a Sensory Bottle Craft: A Simple Mindfulness Activity for Kids
🎨
How to Draw a Guitar: A Coloring and Music Guide for Kids
🎨
Easy Nature Scenes Drawing Ideas
🎨
Donuts Coloring Ideas for Kids Who Love to Create
🎨
A Summer Sunflower Field: Coloring Ideas and Activities for the Whole Family
🎨
A Canoe on a Lake: Coloring Ideas for Your Next Family Adventure
🔎
A Beginner's Guide to Mind Maps
🎨
A Curry Feast: Coloring Ideas and Fun Facts for Kids
🎨
Fruit Kabobs Coloring Ideas for Kids Who Love to Create
🎨
Sheep Shearing Coloring and Drawing Ideas for Kids
🖍️
Simple Techniques for Coloring Small Details
🌈
Creative Ways to Color Community Helpers
🎨
A Spring Rainbow After Rain: Coloring Ideas and Activities for the Whole Family
🎨
A Train Robbery Scene: A Wild West Coloring and History Guide for Kids
🎨
Meet the Truck Driver: A Community Helper Coloring Guide
🎨
A Surfboard Coloring and Drawing Ideas for Kids
🍎
Using Coloring Pages for Classroom Printable Activities
🎨
How to Draw a Marimba: A Coloring and Music Guide for Kids
🎨
A Climbing Wall: A Coloring and Playtime Guide for Kids
🎨
A Static Electricity Balloon Trick: A Step-by-Step Science Guide for Kids
🎨
Bumblebee Coloring and Drawing Ideas for Kids
🧒
Fun Ways to Build Drawing Development Stages
🍎
Using Coloring Pages for Bulletin Board Ideas
🎨
A Carnival Banner Coloring and Drawing Ideas for Kids
🎨
A Boardwalk Photo Booth Coloring and Drawing Ideas for Kids
🎨
Hellbender Salamander Coloring and Drawing Ideas for Kids
🎨
How to Draw a Rhombus: A Step-by-Step Guide for Kids
🍂
Fun Father's Day Classroom Coloring Ideas
💗
How Drawing Supports Expressing Gratitude Through Art
💗
How Drawing Supports Drawing Feelings Instead of Words
🎨
Winter Snowscape Coloring Page: A Nature Learning Guide for Kids
💗
The Role of Coloring in Processing Big Feelings
🎨
Skin and Touch: A Coloring and Health Guide for Kids
🖍️
Simple Techniques for Coloring With Watercolor Pencils
📴
Making the Most of Rainy Afternoons Without Screens
🧘
A Beginner's Guide to Mindful Coloring for Beginners
🎨
Coloring Tools for Left-Handers: A Buying and Technique Guide
🧘
Exploring Mindful Coloring for Beginners
🧒
Fun Ways to Build Ages 4-5
A Beginner's Guide to Drawing From Observation
🎨
Practicing Gratitude Out Loud: A Simple Social Skill for Kids
🔤
Learning Descriptive Words Through Drawing
🖍️
Tips for Avoiding Smudges While Coloring
💡
The Role of Imaginative Play in Children's Art
👨👩👧
Why Parents Love Waiting Room Activities
🎨
a Sensory Bottle Craft: A Simple Mindfulness Activity for Kids
🎨
How to Draw a Guitar: A Coloring and Music Guide for Kids
🎨
Easy Nature Scenes Drawing Ideas
🎨
Donuts Coloring Ideas for Kids Who Love to Create
🎨
A Summer Sunflower Field: Coloring Ideas and Activities for the Whole Family
🎨
A Canoe on a Lake: Coloring Ideas for Your Next Family Adventure
🔎
A Beginner's Guide to Mind Maps
🎨
A Curry Feast: Coloring Ideas and Fun Facts for Kids
🎨
Fruit Kabobs Coloring Ideas for Kids Who Love to Create
🎨
Sheep Shearing Coloring and Drawing Ideas for Kids
🖍️
Simple Techniques for Coloring Small Details
🌈
Creative Ways to Color Community Helpers
🎨
A Spring Rainbow After Rain: Coloring Ideas and Activities for the Whole Family
🎨
A Train Robbery Scene: A Wild West Coloring and History Guide for Kids
🎨
Meet the Truck Driver: A Community Helper Coloring Guide
🎨
A Surfboard Coloring and Drawing Ideas for Kids
🍎
Using Coloring Pages for Classroom Printable Activities
🎨
How to Draw a Marimba: A Coloring and Music Guide for Kids
🎨
A Climbing Wall: A Coloring and Playtime Guide for Kids
🎨
A Static Electricity Balloon Trick: A Step-by-Step Science Guide for Kids
🎨
Bumblebee Coloring and Drawing Ideas for Kids
🧒
Fun Ways to Build Drawing Development Stages
🍎
Using Coloring Pages for Bulletin Board Ideas
🎨
A Carnival Banner Coloring and Drawing Ideas for Kids
🎨
A Boardwalk Photo Booth Coloring and Drawing Ideas for Kids
🎨
Hellbender Salamander Coloring and Drawing Ideas for Kids
🎨
How to Draw a Rhombus: A Step-by-Step Guide for Kids
🍂
Fun Father's Day Classroom Coloring Ideas
💗
How Drawing Supports Expressing Gratitude Through Art
💗
How Drawing Supports Drawing Feelings Instead of Words
🎨
Winter Snowscape Coloring Page: A Nature Learning Guide for Kids
💗
The Role of Coloring in Processing Big Feelings
🎨
Skin and Touch: A Coloring and Health Guide for Kids
🖍️
Simple Techniques for Coloring With Watercolor Pencils
📴
Making the Most of Rainy Afternoons Without Screens
🧘
A Beginner's Guide to Mindful Coloring for Beginners
🎨
Coloring Tools for Left-Handers: A Buying and Technique Guide
🧘
Exploring Mindful Coloring for Beginners
🧒
Fun Ways to Build Ages 4-5
 How Drawing Supports Family Art Time and Connection
🎨
How to Draw a Ripple Pattern: A Step-by-Step Guide
🎨
Exploring India: A Coloring and Culture Guide for Kids
🧒
Fun Ways to Build First-Time Artists
🎨
Diddle Diddle Dumpling: A Nursery Rhyme Coloring Guide for Kids
📴
Creative Alternatives to Screens During Quiet Time Before Bed
🎨
Squid Coloring and Drawing Ideas for Kids
🎨
How to Draw a Trumpet: A Coloring and Music Guide for Kids
✏️
How to Improve Your Warm-Up Drawing Exercises
🖍️
Tips for Mixing Warm and Cool Colors
🎨
The Number 8: An Alphabet and Number Coloring Page
🎨
How to Draw a Symmetry Design: A Step-by-Step Guide
🧒
What to Expect When Teaching Shape Recognition
🎨
A Color-Changing Milk Experiment: A Step-by-Step Science Guide for Kids
✏️
Fun Exercises for Drawing From Imagination
🎨
Lacrosse Coloring Pages and Drawing Ideas for Kids
🎨
Octopus Tag: A Coloring and Playtime Guide for Kids
🎨
Fine Liner Pens: A Buying and Technique Guide
🎨
How to Draw a A Symmetrical Shape Pair: A Step-by-Step Guide for Kids
🧘
A Beginner's Guide to Mandala Coloring
🎨
A Native American Ceremonial Regalia (Respectfully Depicted): A Coloring and Culture Guide for Kids
🎨
Praying Mantis Coloring and Drawing Ideas for Kids
🎨
A Super-Hearing Superhero: A Superhero Coloring and Design Guide for Kids
🎨
Asparagus Coloring and Drawing Ideas for Kids
🎨
The Letter J: An Alphabet and Number Coloring Page
🎨
Meet the Farmer: A Community Helper Coloring Guide
🎨
Cupcake Coloring Ideas for Kids Who Love to Create
🎲
Fun Collaborative Drawing Games for Kids
🎨
Peony: A Coloring and Nature Guide for Kids
🎨
Glass Frog Coloring and Drawing Ideas for Kids
🎨
A Family Planting Day: A Gardening Guide for Kids and Families
🧒
Drawing Activities for Building Drawing Confidence
🎨
A Tent Zipper Closing at Dusk: Coloring Ideas for Your Next Family Adventure
🎨
A Clown Car Coloring and Drawing Ideas for Kids
🎨
Creative Animals Drawing Exercises
🎨
Treehouse Coloring and Drawing Ideas for Kids
🧒
A Parent's Guide to Ages 3-4
🎨
Fun Monster Truck Coloring and Drawing Ideas for Kids
How Drawing Supports Family Art Time and Connection
🎨
How to Draw a Ripple Pattern: A Step-by-Step Guide
🎨
Exploring India: A Coloring and Culture Guide for Kids
🧒
Fun Ways to Build First-Time Artists
🎨
Diddle Diddle Dumpling: A Nursery Rhyme Coloring Guide for Kids
📴
Creative Alternatives to Screens During Quiet Time Before Bed
🎨
Squid Coloring and Drawing Ideas for Kids
🎨
How to Draw a Trumpet: A Coloring and Music Guide for Kids
✏️
How to Improve Your Warm-Up Drawing Exercises
🖍️
Tips for Mixing Warm and Cool Colors
🎨
The Number 8: An Alphabet and Number Coloring Page
🎨
How to Draw a Symmetry Design: A Step-by-Step Guide
🧒
What to Expect When Teaching Shape Recognition
🎨
A Color-Changing Milk Experiment: A Step-by-Step Science Guide for Kids
✏️
Fun Exercises for Drawing From Imagination
🎨
Lacrosse Coloring Pages and Drawing Ideas for Kids
🎨
Octopus Tag: A Coloring and Playtime Guide for Kids
🎨
Fine Liner Pens: A Buying and Technique Guide
🎨
How to Draw a A Symmetrical Shape Pair: A Step-by-Step Guide for Kids
🧘
A Beginner's Guide to Mandala Coloring
🎨
A Native American Ceremonial Regalia (Respectfully Depicted): A Coloring and Culture Guide for Kids
🎨
Praying Mantis Coloring and Drawing Ideas for Kids
🎨
A Super-Hearing Superhero: A Superhero Coloring and Design Guide for Kids
🎨
Asparagus Coloring and Drawing Ideas for Kids
🎨
The Letter J: An Alphabet and Number Coloring Page
🎨
Meet the Farmer: A Community Helper Coloring Guide
🎨
Cupcake Coloring Ideas for Kids Who Love to Create
🎲
Fun Collaborative Drawing Games for Kids
🎨
Peony: A Coloring and Nature Guide for Kids
🎨
Glass Frog Coloring and Drawing Ideas for Kids
🎨
A Family Planting Day: A Gardening Guide for Kids and Families
🧒
Drawing Activities for Building Drawing Confidence
🎨
A Tent Zipper Closing at Dusk: Coloring Ideas for Your Next Family Adventure
🎨
A Clown Car Coloring and Drawing Ideas for Kids
🎨
Creative Animals Drawing Exercises
🎨
Treehouse Coloring and Drawing Ideas for Kids
🧒
A Parent's Guide to Ages 3-4
🎨
Fun Monster Truck Coloring and Drawing Ideas for Kids
 Fun Spring Classroom Coloring Ideas
🎨
A Beach Umbrella Coloring and Drawing Ideas for Kids
🎨
Sea Anemone Coloring and Drawing Ideas for Kids
🔎
A Beginner's Guide to Visual Research Methods
🎨
Using Indoor Voices: A Simple Social Skill for Kids
Fun Spring Classroom Coloring Ideas
🎨
A Beach Umbrella Coloring and Drawing Ideas for Kids
🎨
Sea Anemone Coloring and Drawing Ideas for Kids
🔎
A Beginner's Guide to Visual Research Methods
🎨
Using Indoor Voices: A Simple Social Skill for Kids
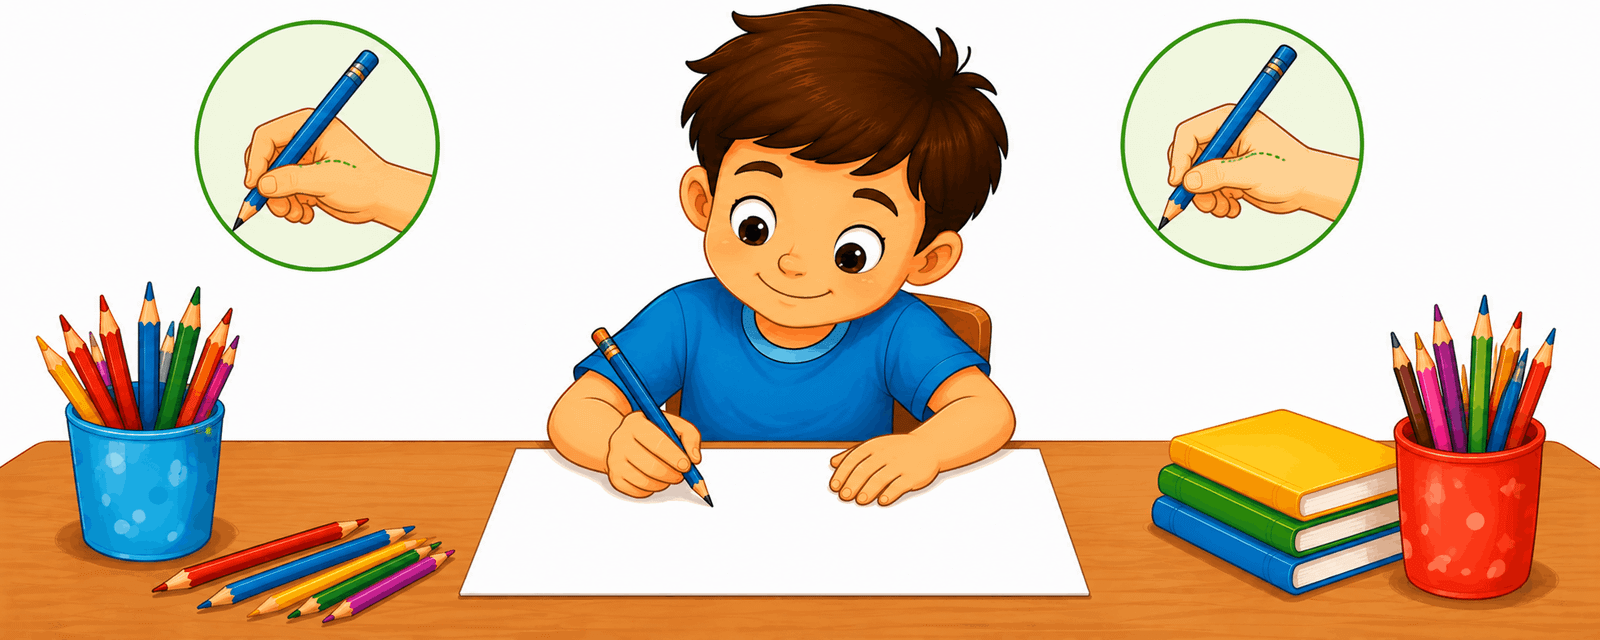 Why Holding a Pencil Correctly Matters for New Artists
👨👩👧
Fun and Simple Holiday Break Activities
✏️
Why Drawing Simple Faces Matters for New Artists
🎨
A Beach Day Sunburn Reminder Scene Coloring and Drawing Ideas for Kids
🎨
A Winter Snowsuit: Coloring Ideas and Activities for the Whole Family
🧠
Why Drawing Can Help With Memory
📐
How Children Understand Patterns With Art
💡
Building Creative Journaling Through Coloring and Drawing
🎨
Chrysanthemum: A Coloring and Nature Guide for Kids
🎨
Emu Coloring Page Ideas for Kids
🎨
Home Printer vs. Print Shop: A Practical Guide
💡
Why Making Mistakes in Art Matters for Young Artists
👨👩👧
Why Parents Love Grandparent and Grandchild Activities
🎨
Birds Drawing Prompts for Beginners
🎨
Exploring A Space Rover: A Coloring and Learning Guide for Kids
🎨
A Dance Studio Mirror: A Coloring and Movement Guide for Kids
🎨
A Record Player: A Coloring and Movement Guide for Kids
🖌️
A Beginner's Guide to Using Colored Pencils
🔤
Using Coloring Pages to Teach Family Words
🎨
The Number 19: An Alphabet and Number Coloring Page
🎨
How to Draw a Floral Mandala: A Step-by-Step Guide
🎨
A Kids' Savings Bond Concept: A Money Guide for Kids and Parents
🎨
Clover Leaf: A Coloring and Nature Guide for Kids
🎨
An Egg in Vinegar Experiment: A Step-by-Step Science Guide for Kids
🎨
Fun Skateboard Coloring and Drawing Ideas for Kids
🧠
How Drawing May Support Organizing Ideas
👨👩👧
Creative Weekend Family Activities for Kids
🎨
A Cat Napping in the Sun: A Simple Pet Care Guide for Kids
🌈
Sports Scenes Coloring Ideas for Classrooms
🎨
Morning Glory Vine: A Coloring and Nature Guide for Kids
🔎
Exploring Connecting Ideas Through Drawing for Students
🧘
Why Coloring for Sensory Breaks Feels Calming
📐
Learning Counting Through Drawing
🎨
Thumbelina: A Classic Story Coloring Guide for Kids
🎨
A Nepali Traditional Dress: A Coloring and Culture Guide for Kids
🎨
How to Draw a Accordion: A Coloring and Music Guide for Kids
🍎
How Teachers Can Use Back-to-School Activities
🎨
A Coding Block Puzzle: A Coloring and STEM Guide for Kids
🎨
Manta Ray Coloring and Drawing Ideas for Kids
🎨
A Knight's Coat of Arms: A Medieval Coloring and History Guide for Kids
🎨
Meet the Firefighter: A Community Helper Coloring Guide
🎨
The Wolf and the Seven Young Goats: A Classic Story Coloring Guide for Kids
✏️
Fun Exercises for Drawing From Observation
🍎
Simple Classroom Reward Activities for Busy Classrooms
🖍️
How to Get Better at Layering Colors
🎨
Marbles Coloring and Drawing Ideas for Kids
🎨
How to Draw a Celtic Knot Pattern: A Step-by-Step Guide
🎨
Snack Tray Coloring Ideas for Kids Who Love to Create
🎨
Trimming a Pet's Nails: A Simple Pet Care Guide for Kids
🔬
The Science Behind How Light Creates Color
🎨
Exploring The Space Station: A Coloring and Learning Guide for Kids
🎨
The Nose and Smelling: A Coloring and Health Guide for Kids
🎨
A Blacksmith's Forge: A Medieval Coloring and History Guide for Kids
👨👩👧
Why Parents Love Outdoor-Inspired Drawing
🎨
An Architect at a Drafting Table Coloring and Drawing Ideas for Kids
✏️
Fun Exercises for Drawing Paper Types
🎨
Pumpkin Patch Farm Coloring and Drawing Ideas for Kids
🧠
Exploring Drawing and Concentration and Focus
🖌️
Why Working With Light and Shadow Matters for Young Artists
🎨
Meet Vincent van Gogh: An Art Appreciation Guide for Kids
🔎
A Beginner's Guide to Visual Note-Taking
🎨
Meet the Plumber: A Community Helper Coloring Guide
🎨
Non-Toxic Art Supplies: A Buying and Technique Guide
💗
How Drawing Supports The Difference Between Art Therapy and Coloring
🎨
A Circus Parade Coloring and Drawing Ideas for Kids
🎨
Butternut Squash Coloring and Drawing Ideas for Kids
📴
Making the Most of Holiday Travel Without Screens
🔎
A Beginner's Guide to Diagrams in Science
🧒
How Drawing Supports The Symbol-Making Stage
🧘
Simple Steps for Coloring Before Exams
💬
Understanding Comic Strips
🎨
Salsa Dancers: A Coloring and Movement Guide for Kids
🎨
A Show and Tell Table: A Classroom Coloring and Learning Guide
🖍️
Tips for Coloring With Watercolor Pencils
🎨
Coconut Coloring and Drawing Ideas for Kids
🎨
Monkey Coloring and Drawing Ideas for Kids
🎨
Kite Coloring and Drawing Ideas for Kids
📴
Creative Alternatives to Screens During Summer Vacations
🎨
A Space Rover Robot: A Coloring and Invention Guide for Kids
🎨
Fun Motorcycle Coloring and Drawing Ideas for Kids
🧒
Fun Ways to Build Pattern Recognition
🎨
A Farm-to-Table Restaurant: A Coloring and Food Science Guide for Kids
🎨
A Gym Class: A Classroom Coloring and Learning Guide
🎨
Corn Snake Coloring and Drawing Ideas for Kids
🧘
A Beginner's Guide to Nature-Inspired Calm Coloring
🏺
Exploring Early Human Communication
🌈
Seasonal Scenes Coloring Ideas for Classrooms
🎨
Classroom Party Printables: Free Ideas for Your Next Celebration
🔬
A Simple Guide to CMYK Printing Colors
🎲
Fun Drawing Prompt Games for Kids
🎨
A Homemade Rain Cloud in a Jar: A Step-by-Step Science Guide for Kids
🎨
Exploring Austria: A Coloring and Culture Guide for Kids
🎨
Bamboo Forest Coloring Page: A Nature Learning Guide for Kids
🎨
A Science Fair Project Board: A Coloring and STEM Guide for Kids
🎨
Snow Boots: Coloring Ideas and Activities for the Whole Family
🎨
A Pack of Raptors Coloring Page: Fun Facts for Young Paleontologists
🌈
Printable Everyday Objects Coloring Activities
🎨
Chicken Coop Coloring and Drawing Ideas for Kids
🎨
a Calm-Down Glitter Jar: A Simple Mindfulness Activity for Kids
💬
How Traffic and Safety Signs Communicate Ideas
🎨
Limbo: A Coloring and Playtime Guide for Kids
🎨
Cherry Blossom Branch: A Coloring and Nature Guide for Kids
🎨
Meet M.C. Escher: An Art Appreciation Guide for Kids
🧒
Fun Ways to Build Pencil Grip Development
🎨
Backup Battery and Flashlight Kit: A Family Safety Guide
🖍️
Tips for Applying Even Pressure
🎨
A Knight Defending a Castle Gate: A Medieval Coloring and History Guide for Kids
💡
Nurturing Creative Journaling at Home
🎨
A Ferris Wheel Coloring and Drawing Ideas for Kids
💬
Understanding Traffic and Safety Signs
🎨
A Binary Code Pattern: A Coloring and STEM Guide for Kids
🔤
Drawing Activities for Story Sequencing
🎨
A Dew-Covered Spiderweb: Coloring Ideas for Your Next Family Adventure
🎨
A Frying Pan: A Kitchen Guide for Kids and Parents
🎨
Exploring A Rocket Blast Off: A Coloring and Learning Guide for Kids
🧒
Drawing Activities for Drawing Milestones
🎨
Morning Mindfulness: A Simple Mindfulness Activity for Kids
🎨
How to Draw a Tuba: A Coloring and Music Guide for Kids
🎨
How to Draw a Bongo Drums: A Coloring and Music Guide for Kids
🎨
Mushroom Farming: A Coloring and Food Science Guide for Kids
🎨
Frisbee Coloring Pages and Drawing Ideas for Kids
🎲
Fun Dot-to-Dot Games for Kids
🎨
Boxing Day Coloring Ideas and Activities for the Whole Family
🎨
an Easter Egg Hunt Coloring Ideas and Activities for the Whole Family
🎨
Respecting Someone's Belongings: A Simple Social Skill for Kids
🧒
A Parent's Guide to Drawing Development Stages
🎨
Original Superhero Characters Drawing Prompts for Beginners
🖌️
How to Practice Using Colored Pencils
📴
Making the Most of Family Game Nights Without Screens
🎨
Satellite Deployment: A Coloring and Space Mission Guide for Kids
🎨
a Feelings Detective Game: A Simple Mindfulness Activity for Kids
🎨
A Seashell Collection Coloring and Drawing Ideas for Kids
🎨
A Boardwalk Souvenir Shop Coloring and Drawing Ideas for Kids
💗
Creative Approaches to The Difference Between Art Therapy and Coloring
📐
Learning Measurement Through Drawing
🎨
Back to School Shopping Coloring Ideas and Activities for the Whole Family
🎨
Pelican Coloring and Drawing Ideas for Kids
🎨
Exploring Greece: A Coloring and Culture Guide for Kids
🎨
Kaleidoscope Coloring and Drawing Ideas for Kids
📐
Why Shapes and Drawing Go Together
🎨
Meet Surrealism: An Art Appreciation Guide for Kids
🎨
A Wheelbarrow of Bricks Coloring and Drawing Ideas for Kids
🎨
Exploring A Space Colony: A Coloring and Learning Guide for Kids
🎨
A Classroom Reading Corner: A Classroom Coloring and Learning Guide
🎨
Teaching Kindness: A Simple Activity for Kids
🎨
A Reptile Terrarium: A Simple Pet Care Guide for Kids
🎨
Gecko Coloring and Drawing Ideas for Kids
🎨
Water Dragon Lizard Coloring and Drawing Ideas for Kids
🎨
Relaxation Story Time: A Simple Mindfulness Activity for Kids
👨👩👧
Easy Screen-Free Afternoons With Coloring Pages
🎨
Being Patient While Waiting Your Turn: A Simple Social Skill for Kids
🎨
How to Draw Gardens and Flowers Step by Step
🎨
A Baobab Tree: A Coloring and Nature Guide for Kids
🎨
Giving a Genuine Compliment: A Simple Social Skill for Kids
🎨
How to Draw Family Portraits Step by Step
👨👩👧
Fun and Simple Quiet Time Activities
✏️
Why Drawing Paper Types Matters for New Artists
🍎
How Teachers Can Use Group Art Projects
🎨
Tic Tac Toe Board Coloring and Drawing Ideas for Kids
🎨
Burj Khalifa: Coloring Page and Fun Facts for Kids
📐
Teaching Geometry Through Coloring and Drawing
🎨
Mindful Breathing Balloon: A Simple Mindfulness Activity for Kids
💗
How Drawing Supports Art for Quiet Reflection
🔬
A Simple Guide to How Eyes Perceive Color
🎨
A Nature Scavenger Hunt: Coloring Ideas for Your Next Family Adventure
🎨
Succulent Plant: A Coloring and Nature Guide for Kids
🎨
A Turtle's Habitat: A Simple Pet Care Guide for Kids
🎨
A Horse Corral: A Wild West Coloring and History Guide for Kids
🔎
Why Visual Thinkers Use Brainstorming With Pictures
🔤
Using Coloring Pages to Teach Descriptive Words
📴
Screen-Free Coloring Ideas for Camping Trips
🎨
Fairy Coloring and Drawing Ideas for Kids
🎨
Falcon Coloring Page Ideas for Kids
🎨
Stork Coloring Page Ideas for Kids
🎨
Putting on Shoes Independently: A Simple Life Skill for Kids
🎨
Simple Simon: A Nursery Rhyme Coloring Guide for Kids
🎨
a Matching Game Printable: Free Ideas for Your Next Celebration
🎨
Carnival Lights at Night Coloring and Drawing Ideas for Kids
🎨
Long Jump Coloring Pages and Drawing Ideas for Kids
💗
Creative Approaches to Creative Outlets for Teens
🎨
Seesaw Coloring and Drawing Ideas for Kids
👨👩👧
Creative Waiting Room Activities for Kids
🧠
Exploring Drawing and Fine Motor Coordination
👨👩👧
Fun and Simple Summer Break Activities
🎨
Itsy Bitsy Spider: A Nursery Rhyme Coloring Guide for Kids
🎨
How to Draw a Trombone: A Coloring and Music Guide for Kids
🎨
How to Draw a Bassoon: A Coloring and Music Guide for Kids
🎨
The Letter F: An Alphabet and Number Coloring Page
🖍️
Why Coloring Skin Tones Makes a Difference
🎨
A Superhero Training Montage: A Superhero Coloring and Design Guide for Kids
🎨
Statue of Liberty: Coloring Page and Fun Facts for Kids
Why Holding a Pencil Correctly Matters for New Artists
👨👩👧
Fun and Simple Holiday Break Activities
✏️
Why Drawing Simple Faces Matters for New Artists
🎨
A Beach Day Sunburn Reminder Scene Coloring and Drawing Ideas for Kids
🎨
A Winter Snowsuit: Coloring Ideas and Activities for the Whole Family
🧠
Why Drawing Can Help With Memory
📐
How Children Understand Patterns With Art
💡
Building Creative Journaling Through Coloring and Drawing
🎨
Chrysanthemum: A Coloring and Nature Guide for Kids
🎨
Emu Coloring Page Ideas for Kids
🎨
Home Printer vs. Print Shop: A Practical Guide
💡
Why Making Mistakes in Art Matters for Young Artists
👨👩👧
Why Parents Love Grandparent and Grandchild Activities
🎨
Birds Drawing Prompts for Beginners
🎨
Exploring A Space Rover: A Coloring and Learning Guide for Kids
🎨
A Dance Studio Mirror: A Coloring and Movement Guide for Kids
🎨
A Record Player: A Coloring and Movement Guide for Kids
🖌️
A Beginner's Guide to Using Colored Pencils
🔤
Using Coloring Pages to Teach Family Words
🎨
The Number 19: An Alphabet and Number Coloring Page
🎨
How to Draw a Floral Mandala: A Step-by-Step Guide
🎨
A Kids' Savings Bond Concept: A Money Guide for Kids and Parents
🎨
Clover Leaf: A Coloring and Nature Guide for Kids
🎨
An Egg in Vinegar Experiment: A Step-by-Step Science Guide for Kids
🎨
Fun Skateboard Coloring and Drawing Ideas for Kids
🧠
How Drawing May Support Organizing Ideas
👨👩👧
Creative Weekend Family Activities for Kids
🎨
A Cat Napping in the Sun: A Simple Pet Care Guide for Kids
🌈
Sports Scenes Coloring Ideas for Classrooms
🎨
Morning Glory Vine: A Coloring and Nature Guide for Kids
🔎
Exploring Connecting Ideas Through Drawing for Students
🧘
Why Coloring for Sensory Breaks Feels Calming
📐
Learning Counting Through Drawing
🎨
Thumbelina: A Classic Story Coloring Guide for Kids
🎨
A Nepali Traditional Dress: A Coloring and Culture Guide for Kids
🎨
How to Draw a Accordion: A Coloring and Music Guide for Kids
🍎
How Teachers Can Use Back-to-School Activities
🎨
A Coding Block Puzzle: A Coloring and STEM Guide for Kids
🎨
Manta Ray Coloring and Drawing Ideas for Kids
🎨
A Knight's Coat of Arms: A Medieval Coloring and History Guide for Kids
🎨
Meet the Firefighter: A Community Helper Coloring Guide
🎨
The Wolf and the Seven Young Goats: A Classic Story Coloring Guide for Kids
✏️
Fun Exercises for Drawing From Observation
🍎
Simple Classroom Reward Activities for Busy Classrooms
🖍️
How to Get Better at Layering Colors
🎨
Marbles Coloring and Drawing Ideas for Kids
🎨
How to Draw a Celtic Knot Pattern: A Step-by-Step Guide
🎨
Snack Tray Coloring Ideas for Kids Who Love to Create
🎨
Trimming a Pet's Nails: A Simple Pet Care Guide for Kids
🔬
The Science Behind How Light Creates Color
🎨
Exploring The Space Station: A Coloring and Learning Guide for Kids
🎨
The Nose and Smelling: A Coloring and Health Guide for Kids
🎨
A Blacksmith's Forge: A Medieval Coloring and History Guide for Kids
👨👩👧
Why Parents Love Outdoor-Inspired Drawing
🎨
An Architect at a Drafting Table Coloring and Drawing Ideas for Kids
✏️
Fun Exercises for Drawing Paper Types
🎨
Pumpkin Patch Farm Coloring and Drawing Ideas for Kids
🧠
Exploring Drawing and Concentration and Focus
🖌️
Why Working With Light and Shadow Matters for Young Artists
🎨
Meet Vincent van Gogh: An Art Appreciation Guide for Kids
🔎
A Beginner's Guide to Visual Note-Taking
🎨
Meet the Plumber: A Community Helper Coloring Guide
🎨
Non-Toxic Art Supplies: A Buying and Technique Guide
💗
How Drawing Supports The Difference Between Art Therapy and Coloring
🎨
A Circus Parade Coloring and Drawing Ideas for Kids
🎨
Butternut Squash Coloring and Drawing Ideas for Kids
📴
Making the Most of Holiday Travel Without Screens
🔎
A Beginner's Guide to Diagrams in Science
🧒
How Drawing Supports The Symbol-Making Stage
🧘
Simple Steps for Coloring Before Exams
💬
Understanding Comic Strips
🎨
Salsa Dancers: A Coloring and Movement Guide for Kids
🎨
A Show and Tell Table: A Classroom Coloring and Learning Guide
🖍️
Tips for Coloring With Watercolor Pencils
🎨
Coconut Coloring and Drawing Ideas for Kids
🎨
Monkey Coloring and Drawing Ideas for Kids
🎨
Kite Coloring and Drawing Ideas for Kids
📴
Creative Alternatives to Screens During Summer Vacations
🎨
A Space Rover Robot: A Coloring and Invention Guide for Kids
🎨
Fun Motorcycle Coloring and Drawing Ideas for Kids
🧒
Fun Ways to Build Pattern Recognition
🎨
A Farm-to-Table Restaurant: A Coloring and Food Science Guide for Kids
🎨
A Gym Class: A Classroom Coloring and Learning Guide
🎨
Corn Snake Coloring and Drawing Ideas for Kids
🧘
A Beginner's Guide to Nature-Inspired Calm Coloring
🏺
Exploring Early Human Communication
🌈
Seasonal Scenes Coloring Ideas for Classrooms
🎨
Classroom Party Printables: Free Ideas for Your Next Celebration
🔬
A Simple Guide to CMYK Printing Colors
🎲
Fun Drawing Prompt Games for Kids
🎨
A Homemade Rain Cloud in a Jar: A Step-by-Step Science Guide for Kids
🎨
Exploring Austria: A Coloring and Culture Guide for Kids
🎨
Bamboo Forest Coloring Page: A Nature Learning Guide for Kids
🎨
A Science Fair Project Board: A Coloring and STEM Guide for Kids
🎨
Snow Boots: Coloring Ideas and Activities for the Whole Family
🎨
A Pack of Raptors Coloring Page: Fun Facts for Young Paleontologists
🌈
Printable Everyday Objects Coloring Activities
🎨
Chicken Coop Coloring and Drawing Ideas for Kids
🎨
a Calm-Down Glitter Jar: A Simple Mindfulness Activity for Kids
💬
How Traffic and Safety Signs Communicate Ideas
🎨
Limbo: A Coloring and Playtime Guide for Kids
🎨
Cherry Blossom Branch: A Coloring and Nature Guide for Kids
🎨
Meet M.C. Escher: An Art Appreciation Guide for Kids
🧒
Fun Ways to Build Pencil Grip Development
🎨
Backup Battery and Flashlight Kit: A Family Safety Guide
🖍️
Tips for Applying Even Pressure
🎨
A Knight Defending a Castle Gate: A Medieval Coloring and History Guide for Kids
💡
Nurturing Creative Journaling at Home
🎨
A Ferris Wheel Coloring and Drawing Ideas for Kids
💬
Understanding Traffic and Safety Signs
🎨
A Binary Code Pattern: A Coloring and STEM Guide for Kids
🔤
Drawing Activities for Story Sequencing
🎨
A Dew-Covered Spiderweb: Coloring Ideas for Your Next Family Adventure
🎨
A Frying Pan: A Kitchen Guide for Kids and Parents
🎨
Exploring A Rocket Blast Off: A Coloring and Learning Guide for Kids
🧒
Drawing Activities for Drawing Milestones
🎨
Morning Mindfulness: A Simple Mindfulness Activity for Kids
🎨
How to Draw a Tuba: A Coloring and Music Guide for Kids
🎨
How to Draw a Bongo Drums: A Coloring and Music Guide for Kids
🎨
Mushroom Farming: A Coloring and Food Science Guide for Kids
🎨
Frisbee Coloring Pages and Drawing Ideas for Kids
🎲
Fun Dot-to-Dot Games for Kids
🎨
Boxing Day Coloring Ideas and Activities for the Whole Family
🎨
an Easter Egg Hunt Coloring Ideas and Activities for the Whole Family
🎨
Respecting Someone's Belongings: A Simple Social Skill for Kids
🧒
A Parent's Guide to Drawing Development Stages
🎨
Original Superhero Characters Drawing Prompts for Beginners
🖌️
How to Practice Using Colored Pencils
📴
Making the Most of Family Game Nights Without Screens
🎨
Satellite Deployment: A Coloring and Space Mission Guide for Kids
🎨
a Feelings Detective Game: A Simple Mindfulness Activity for Kids
🎨
A Seashell Collection Coloring and Drawing Ideas for Kids
🎨
A Boardwalk Souvenir Shop Coloring and Drawing Ideas for Kids
💗
Creative Approaches to The Difference Between Art Therapy and Coloring
📐
Learning Measurement Through Drawing
🎨
Back to School Shopping Coloring Ideas and Activities for the Whole Family
🎨
Pelican Coloring and Drawing Ideas for Kids
🎨
Exploring Greece: A Coloring and Culture Guide for Kids
🎨
Kaleidoscope Coloring and Drawing Ideas for Kids
📐
Why Shapes and Drawing Go Together
🎨
Meet Surrealism: An Art Appreciation Guide for Kids
🎨
A Wheelbarrow of Bricks Coloring and Drawing Ideas for Kids
🎨
Exploring A Space Colony: A Coloring and Learning Guide for Kids
🎨
A Classroom Reading Corner: A Classroom Coloring and Learning Guide
🎨
Teaching Kindness: A Simple Activity for Kids
🎨
A Reptile Terrarium: A Simple Pet Care Guide for Kids
🎨
Gecko Coloring and Drawing Ideas for Kids
🎨
Water Dragon Lizard Coloring and Drawing Ideas for Kids
🎨
Relaxation Story Time: A Simple Mindfulness Activity for Kids
👨👩👧
Easy Screen-Free Afternoons With Coloring Pages
🎨
Being Patient While Waiting Your Turn: A Simple Social Skill for Kids
🎨
How to Draw Gardens and Flowers Step by Step
🎨
A Baobab Tree: A Coloring and Nature Guide for Kids
🎨
Giving a Genuine Compliment: A Simple Social Skill for Kids
🎨
How to Draw Family Portraits Step by Step
👨👩👧
Fun and Simple Quiet Time Activities
✏️
Why Drawing Paper Types Matters for New Artists
🍎
How Teachers Can Use Group Art Projects
🎨
Tic Tac Toe Board Coloring and Drawing Ideas for Kids
🎨
Burj Khalifa: Coloring Page and Fun Facts for Kids
📐
Teaching Geometry Through Coloring and Drawing
🎨
Mindful Breathing Balloon: A Simple Mindfulness Activity for Kids
💗
How Drawing Supports Art for Quiet Reflection
🔬
A Simple Guide to How Eyes Perceive Color
🎨
A Nature Scavenger Hunt: Coloring Ideas for Your Next Family Adventure
🎨
Succulent Plant: A Coloring and Nature Guide for Kids
🎨
A Turtle's Habitat: A Simple Pet Care Guide for Kids
🎨
A Horse Corral: A Wild West Coloring and History Guide for Kids
🔎
Why Visual Thinkers Use Brainstorming With Pictures
🔤
Using Coloring Pages to Teach Descriptive Words
📴
Screen-Free Coloring Ideas for Camping Trips
🎨
Fairy Coloring and Drawing Ideas for Kids
🎨
Falcon Coloring Page Ideas for Kids
🎨
Stork Coloring Page Ideas for Kids
🎨
Putting on Shoes Independently: A Simple Life Skill for Kids
🎨
Simple Simon: A Nursery Rhyme Coloring Guide for Kids
🎨
a Matching Game Printable: Free Ideas for Your Next Celebration
🎨
Carnival Lights at Night Coloring and Drawing Ideas for Kids
🎨
Long Jump Coloring Pages and Drawing Ideas for Kids
💗
Creative Approaches to Creative Outlets for Teens
🎨
Seesaw Coloring and Drawing Ideas for Kids
👨👩👧
Creative Waiting Room Activities for Kids
🧠
Exploring Drawing and Fine Motor Coordination
👨👩👧
Fun and Simple Summer Break Activities
🎨
Itsy Bitsy Spider: A Nursery Rhyme Coloring Guide for Kids
🎨
How to Draw a Trombone: A Coloring and Music Guide for Kids
🎨
How to Draw a Bassoon: A Coloring and Music Guide for Kids
🎨
The Letter F: An Alphabet and Number Coloring Page
🖍️
Why Coloring Skin Tones Makes a Difference
🎨
A Superhero Training Montage: A Superhero Coloring and Design Guide for Kids
🎨
Statue of Liberty: Coloring Page and Fun Facts for Kids
 A Beginner's Guide to Holding a Pencil Correctly
🔬
A Simple Guide to Secondary Colors
🍎
How Teachers Can Use Transition Time Activities
🎨
Figure Skating Coloring Pages and Drawing Ideas for Kids
👨👩👧
Creative Road Trip Activities for Kids
🎨
A Building Under Construction Coloring and Drawing Ideas for Kids
🎨
Meet the Lawyer: A Community Helper Coloring Guide
🧒
What to Expect When Teaching Preschoolers
🔎
Exploring Data Visualization Basics for Students
🔬
What Is Color Psychology?
🎨
A Wave Rolling onto Shore Coloring and Drawing Ideas for Kids
💬
How Sign Language and Gesture Communicate Ideas
🧠
Exploring Drawing and Imagination
📴
Hands-On Activities for Sibling Playtime
🎨
A Nature Journal: Coloring Ideas for Your Next Family Adventure
🎨
Sleeping Beauty: A Classic Story Coloring Guide for Kids
🎨
Fun Farm Life Drawing Activities for Kids
🎨
How to Draw a Saxophone: A Coloring and Music Guide for Kids
🎨
A St. Patrick's Day Parade: Coloring Ideas and Fun Facts for Kids
🎨
Creative Castles Drawing Exercises
🎨
Leek Coloring and Drawing Ideas for Kids
🎨
Brontosaurus Coloring Page: Fun Facts for Young Paleontologists
🎨
Gharial Coloring and Drawing Ideas for Kids
🧘
Simple Steps for Repetitive Pattern Coloring
🎨
Spring Blossoms Coloring Page: A Nature Learning Guide for Kids
🍂
Celebrate Earth Day With Coloring Activities
🎨
Board Game Box Coloring and Drawing Ideas for Kids
🎨
Fern: A Coloring and Nature Guide for Kids
🧒
What to Expect When Teaching Encouraging Reluctant Artists
🎨
Packing for a Trip: A Simple Life Skill for Kids
🧘
How Coloring With Soft Music Can Create a Quiet Moment
🔬
The Science Behind Digital vs Traditional Color
💡
The Role of Daydreaming in Children's Art
🎨
A Camping Cooler: Coloring Ideas for Your Next Family Adventure
✏️
Why Drawing From Imagination Matters for New Artists
🏺
The History of Ancient Cave Pigments
🎨
A Cinco de Mayo Fiesta: Coloring Ideas and Fun Facts for Kids
🎨
Organic Farming: A Coloring and Food Science Guide for Kids
🎨
How to Draw a Circle: A Step-by-Step Guide for Kids
🎨
The Indus Valley Civilization: An Ancient History Coloring Guide for Kids
🧠
Can Drawing Improve Organizing Ideas?
🎨
Hay Bale Field Coloring and Drawing Ideas for Kids
🎨
The Rio Carnival: Coloring Ideas and Fun Facts for Kids
💡
How Drawing Encourages Original Thinking
🧠
Exploring Drawing and Patience
💡
Building Open-Ended Play Through Coloring and Drawing
🌈
Relaxing Vehicles Coloring Activities
🎨
Fun Cable Ski Lift Coloring and Drawing Ideas for Kids
🎨
Emergency Contact Card for Kids: A Family Safety Guide
🎨
Printing in Bulk for Classrooms: A Practical Guide
🔤
Using Coloring Pages to Teach Action Words
🧘
How Bedtime Coloring Routines Can Create a Quiet Moment
🎨
How to Draw a Square: A Step-by-Step Guide for Kids
🎨
Coloring Aprons and Smocks: A Buying and Technique Guide
🎨
Fun Trolley Coloring and Drawing Ideas for Kids
🎨
A Baking Sheet: A Kitchen Guide for Kids and Parents
🎨
Whale Coloring and Drawing Ideas for Kids
💡
Why Daydreaming Matters for Young Artists
🧒
How Drawing Supports Ages 4-5
🎨
Meet Printmaking Art: An Art Appreciation Guide for Kids
🎨
Walking a Dog: A Simple Pet Care Guide for Kids
🎨
Putting Away Groceries: A Simple Life Skill for Kids
🎨
A Spanish Flamenco Dress: A Coloring and Culture Guide for Kids
🎨
A Coin Cleaning Chemistry Test: A Step-by-Step Science Guide for Kids
🌈
Printable Sports Scenes Coloring Activities
🌈
Relaxing Emotions and Faces Coloring Activities
🏺
Why Ancient Storytelling Through Pictures Matter to Historians
🍎
Using Coloring Pages for Indoor Recess Activities
🎨
A Storm Shelter Basement: A Family Safety Guide
🌈
Printable Community Helpers Coloring Activities
🎨
The Number 4: An Alphabet and Number Coloring Page
🎨
A Cowboy Hat and Boots: A Wild West Coloring and History Guide for Kids
🔎
Using Mind Maps to Solve Problems
🎨
Toucan Coloring Page Ideas for Kids
🎨
A Balloon and Bottle Air Pressure Trick: A Step-by-Step Science Guide for Kids
🎨
A Message in a Bottle Coloring and Drawing Ideas for Kids
🖍️
How to Get Better at Choosing Paper for Coloring
🎨
Stuffed Animal Coloring and Drawing Ideas for Kids
🎨
Summer Sunscreen and a Towel: Coloring Ideas and Activities for the Whole Family
💡
Why Original Thinking Matters for Young Artists
🎲
Step-by-Step Drawing Battles
🎨
Puffin Coloring Page Ideas for Kids
🎨
Meet the Scientist in a Lab: A Community Helper Coloring Guide
🍂
Printable Cultural Festivals Coloring Pages for Kids
🎨
Rugby Coloring Pages and Drawing Ideas for Kids
🎨
A Pirate's Telescope Coloring and Drawing Ideas for Kids
🎨
Backyard BBQ Grill Coloring Ideas for Kids Who Love to Create
🌈
Fun Nature Landscapes Coloring Pages for Kids
🌈
Creative Ways to Color Birds
👨👩👧
Making the Most of Road Trip Activities
🎨
A Superhero Running at Super Speed: A Superhero Coloring and Design Guide for Kids
🎨
Root Vegetable Growing: A Coloring and Food Science Guide for Kids
🍎
Classroom Ideas: Back-to-School Activities
🎨
Exploring A Cosmic Rainbow: A Coloring and Learning Guide for Kids
🔤
Drawing Activities for Everyday Objects
💡
The Role of Imaginary Worlds in Children's Art
👨👩👧
Why Parents Love Morning Routine Activities
🎨
Cock-a-Doodle-Doo: A Nursery Rhyme Coloring Guide for Kids
🎲
Fun Mazes for Kids
📴
Screen-Free Coloring Ideas for Quiet Time Before Bed
🎨
Giving a Dog a Bath: A Simple Pet Care Guide for Kids
🧒
Drawing Activities for Ages 3-4
🌈
Fantasy Creatures Coloring Ideas for Classrooms
🧘
Why Mandala Coloring Feels Calming
🎨
London Bridge Is Falling Down: A Nursery Rhyme Coloring Guide for Kids
🎨
A Mongolian Deel: A Coloring and Culture Guide for Kids
🍎
Using Coloring Pages for Back-to-School Activities
🎨
Tractor Seed Planting: A Coloring and Food Science Guide for Kids
🖍️
Tips for Coloring Inside the Lines
🎨
Barn Owl Coloring and Drawing Ideas for Kids
🎨
Corn Field Coloring and Drawing Ideas for Kids
🔤
Visual Vocabulary: Action Words
🎨
A Trailhead Sign: Coloring Ideas for Your Next Family Adventure
🎨
Exploring Switzerland: A Coloring and Culture Guide for Kids
💗
How Drawing Supports Coping With Change Through Drawing
🎨
A Bastille Day Fireworks Show: Coloring Ideas and Fun Facts for Kids
🎨
Redwood Forest Coloring Page: A Nature Learning Guide for Kids
🍂
Creative Graduation Season Coloring Projects for Classrooms
🌈
Food and Treats Coloring Ideas for Classrooms
🧒
A Parent's Guide to Pre-Writing Skills
🍎
Using Coloring Pages for Art Lessons for Math Class
🖍️
A Beginner's Guide to Coloring Mandalas
🎨
A Treasure Chest Coloring and Drawing Ideas for Kids
🖌️
How to Practice Layering Techniques
🎨
Rosh Hashanah Coloring Ideas and Activities for the Whole Family
🎨
A Fortune Teller's Tent Coloring and Drawing Ideas for Kids
🎨
A Coloring Page Time Capsule: A Practical Guide
🎨
Bastille Day Coloring Ideas and Activities for the Whole Family
🎨
A Robot Builder: A Coloring and Invention Guide for Kids
🔬
What Is CMYK Printing Colors?
🎨
Juggling Pins Coloring and Drawing Ideas for Kids
🎨
A Pattern Recognition Game: A Coloring and STEM Guide for Kids
🌈
A Guide to Robots and Machines Coloring Pages
💗
Exploring Building Self-Esteem Through Art Through Art
💗
Creative Approaches to Stress Relief
🧠
Why Drawing Can Help With Spatial Awareness
🎨
A Pet Food Bowl Set: A Simple Pet Care Guide for Kids
🎨
A Family Vacation Savings Jar: A Money Guide for Kids and Parents
🏺
What We Know About Early Writing Systems
🎨
Fun Toy Tank Coloring and Drawing Ideas for Kids
🎨
Creative Family Portraits Drawing Exercises
🎨
A Pet's Favorite Toy: A Simple Pet Care Guide for Kids
🔬
The Science Behind Color Psychology
🔬
A Simple Guide to Additive Color Mixing
🎨
Raspberry Coloring and Drawing Ideas for Kids
🎨
Shark Coloring and Drawing Ideas for Kids
🎨
Using Kind Words: A Simple Social Skill for Kids
🎨
Offering to Help Someone: A Simple Social Skill for Kids
🧘
A Beginner's Guide to Bedtime Coloring Routines
🧘
A Beginner's Guide to Coloring for Sensory Breaks
🎨
Rock Climbing Coloring Pages and Drawing Ideas for Kids
💬
How Comic Strips Communicate Ideas
🎲
Fun Pictionary-Style Games for Kids
🔤
Using Coloring Pages to Teach Question Words
🎨
Teaching Confidence: A Simple Activity for Kids
🎨
Chalk Pastels: A Buying and Technique Guide
🎨
Exploring Cuba: A Coloring and Culture Guide for Kids
🎨
Fun Cruise Ship Coloring and Drawing Ideas for Kids
💗
Understanding What Art Therapy Actually Is
🎨
Pony Coloring and Drawing Ideas for Kids
🎲
How to Play Visual Puzzle Games
🌈
A Guide to Ocean Life Coloring Pages
🎨
A Robot Teacher: A Coloring and Invention Guide for Kids
🎨
A Beginner's Guide to Drawing Seasons
🎨
Staying Active Indoors: A Coloring and Health Guide for Kids
🎨
Meet Self-Portrait Art: An Art Appreciation Guide for Kids
✏️
How to Improve Your Drawing Straight Lines
📴
Screen-Free Coloring Ideas for Outdoor Picnics
🎨
Fourth of July Coloring Ideas and Activities for the Whole Family
🎨
A Korean Hanbok: A Coloring and Culture Guide for Kids
🎨
Exploring South Africa: A Coloring and Culture Guide for Kids
🧘
How Coloring During Travel Can Create a Quiet Moment
🎨
Foggy Morning Meadow Coloring Page: A Nature Learning Guide for Kids
🎨
The Number 9: An Alphabet and Number Coloring Page
🎨
Dolphin Coloring and Drawing Ideas for Kids
🎨
Notre-Dame Cathedral: Coloring Page and Fun Facts for Kids
🎨
A Nigerian Agbada: A Coloring and Culture Guide for Kids
✏️
Easy Steps to Practice Drawing From Observation
🔬
The Science Behind Warm and Cool Colors
🎨
A Kindness-Power Superhero: A Superhero Coloring and Design Guide for Kids
🎨
a Paper Doll Printable: Free Ideas for Your Next Celebration
🎨
Printing Coloring Pages at Home: A Practical Guide
🎨
A Beginner's Guide to Drawing Robots
💡
Building Creative Problem-Solving Through Coloring and Drawing
🎨
A Camping Trip Photo Album: Coloring Ideas for Your Next Family Adventure
🎨
Meet the Sports Coach: A Community Helper Coloring Guide
🎨
The Great Zimbabwe Ruins: An Ancient History Coloring Guide for Kids
🎨
Allosaurus Coloring Page: Fun Facts for Young Paleontologists
🎨
The Number 3: An Alphabet and Number Coloring Page
🎨
A Family Camping Trailer: Coloring Ideas for Your Next Family Adventure
🎨
A Piggy Bank Labeled Save, Spend, Share: A Money Guide for Kids and Parents
📴
Hands-On Activities for Long Car Rides
🎨
Teaching Adaptability: A Simple Activity for Kids
🎨
A Zero Gravity Floating Object Demo: A Coloring and Space Mission Guide for Kids
🎨
How to Draw a Pyramid: A Step-by-Step Guide for Kids
🖌️
How to Practice Cross-Hatching
📴
Creative Alternatives to Screens During Holiday Travel
🧒
Drawing Activities for The Scribbling Stage
🎨
Fun Hovercraft Coloring and Drawing Ideas for Kids
🧒
Understanding Pencil Grip Development in Early Childhood
🎨
How to Draw a Keyboard: A Coloring and Music Guide for Kids
🌈
Fun Space Coloring Pages for Kids
🎨
Flying a Kite in Spring: Coloring Ideas and Activities for the Whole Family
🎨
Backgammon Board Coloring and Drawing Ideas for Kids
🎨
A Robot Chef: A Coloring and Invention Guide for Kids
🎨
How to Draw Dinosaurs Step by Step
🎨
An Ancient Library of Scrolls: An Ancient History Coloring Guide for Kids
🎨
Mud Turtle Coloring and Drawing Ideas for Kids
🎨
Fun Crane Truck Coloring and Drawing Ideas for Kids
🎨
A Robot Learning to Walk: A Coloring and Invention Guide for Kids
🎨
A Cookie Cutter: A Kitchen Guide for Kids and Parents
🎨
A Backyard Camping Night: Coloring Ideas for Your Next Family Adventure
🎨
A Parachute Landing: A Coloring and Space Mission Guide for Kids
👨👩👧
Making the Most of Rainy Day Activities
🎨
Star Light Star Bright: A Nursery Rhyme Coloring Guide for Kids
🍂
Celebrate Autumn With Coloring Activities
🎨
A Sea Monster Legend Coloring and Drawing Ideas for Kids
🎨
A Dinosaur Jungle Scene Coloring Page: Fun Facts for Young Paleontologists
🧘
Exploring Coloring Before Exams
🍂
Printable St. Patrick's Day Coloring Pages for Kids
🎨
Pat-a-Cake: A Nursery Rhyme Coloring Guide for Kids
🎨
Friendly Banshee Coloring and Drawing Ideas for Kids
🧒
How Drawing Supports Fine Motor Skills
🎨
Introducing Yourself Politely: A Simple Life Skill for Kids
🎨
A Robot Gardener: A Coloring and Invention Guide for Kids
🧒
Fun Ways to Build Ages 2-3
🎨
Sinkhole Coloring Page: A Nature Learning Guide for Kids
🍂
Seasonal Coloring Guide: Graduation Season
🎨
a Snow Day Coloring Ideas and Activities for the Whole Family
🎨
How to Draw Birds Step by Step
🎨
A Saber-Tooth Cat Coloring Page: Fun Facts for Young Paleontologists
🎨
Exploring Mexico: A Coloring and Culture Guide for Kids
🔎
Why Visual Thinkers Use Visual Problem-Solving
🧒
What to Expect When Teaching Building Drawing Confidence
🎨
A Coloring Page Art Show: A Practical Guide
🎨
A Sack Race: A Coloring and Playtime Guide for Kids
💡
Why Inventing New Ideas Matters for Young Artists
🎨
A Family Coupon Clipping Session: A Money Guide for Kids and Parents
🌈
A Guide to Musical Themes Coloring Pages
🎨
Duck Coloring Page Ideas for Kids
🍂
Fun Cultural Festivals Classroom Coloring Ideas
✏️
Fun Exercises for Drawing Stick Figures
🔤
Using Coloring Pages to Teach Everyday Objects
🎲
Using Drawing for Mazes
🎨
A Royal Princess Tower: A Medieval Coloring and History Guide for Kids
🎨
Meet Georgia O'Keeffe: An Art Appreciation Guide for Kids
🎨
Meet the Engineer: A Community Helper Coloring Guide
🧒
Fun Ways to Build Hand-Eye Coordination
🧒
Fun Ways to Build Building Drawing Confidence
🎨
An Invention Notebook: A Coloring and STEM Guide for Kids
🎨
A Garden Fence: A Gardening Guide for Kids and Families
🎨
Swallowtail Butterfly Coloring and Drawing Ideas for Kids
🎨
The Letter H: An Alphabet and Number Coloring Page
🎨
How to Draw a Animal-Print Mandala: A Step-by-Step Guide
🎨
Panda Coloring and Drawing Ideas for Kids
A Beginner's Guide to Holding a Pencil Correctly
🔬
A Simple Guide to Secondary Colors
🍎
How Teachers Can Use Transition Time Activities
🎨
Figure Skating Coloring Pages and Drawing Ideas for Kids
👨👩👧
Creative Road Trip Activities for Kids
🎨
A Building Under Construction Coloring and Drawing Ideas for Kids
🎨
Meet the Lawyer: A Community Helper Coloring Guide
🧒
What to Expect When Teaching Preschoolers
🔎
Exploring Data Visualization Basics for Students
🔬
What Is Color Psychology?
🎨
A Wave Rolling onto Shore Coloring and Drawing Ideas for Kids
💬
How Sign Language and Gesture Communicate Ideas
🧠
Exploring Drawing and Imagination
📴
Hands-On Activities for Sibling Playtime
🎨
A Nature Journal: Coloring Ideas for Your Next Family Adventure
🎨
Sleeping Beauty: A Classic Story Coloring Guide for Kids
🎨
Fun Farm Life Drawing Activities for Kids
🎨
How to Draw a Saxophone: A Coloring and Music Guide for Kids
🎨
A St. Patrick's Day Parade: Coloring Ideas and Fun Facts for Kids
🎨
Creative Castles Drawing Exercises
🎨
Leek Coloring and Drawing Ideas for Kids
🎨
Brontosaurus Coloring Page: Fun Facts for Young Paleontologists
🎨
Gharial Coloring and Drawing Ideas for Kids
🧘
Simple Steps for Repetitive Pattern Coloring
🎨
Spring Blossoms Coloring Page: A Nature Learning Guide for Kids
🍂
Celebrate Earth Day With Coloring Activities
🎨
Board Game Box Coloring and Drawing Ideas for Kids
🎨
Fern: A Coloring and Nature Guide for Kids
🧒
What to Expect When Teaching Encouraging Reluctant Artists
🎨
Packing for a Trip: A Simple Life Skill for Kids
🧘
How Coloring With Soft Music Can Create a Quiet Moment
🔬
The Science Behind Digital vs Traditional Color
💡
The Role of Daydreaming in Children's Art
🎨
A Camping Cooler: Coloring Ideas for Your Next Family Adventure
✏️
Why Drawing From Imagination Matters for New Artists
🏺
The History of Ancient Cave Pigments
🎨
A Cinco de Mayo Fiesta: Coloring Ideas and Fun Facts for Kids
🎨
Organic Farming: A Coloring and Food Science Guide for Kids
🎨
How to Draw a Circle: A Step-by-Step Guide for Kids
🎨
The Indus Valley Civilization: An Ancient History Coloring Guide for Kids
🧠
Can Drawing Improve Organizing Ideas?
🎨
Hay Bale Field Coloring and Drawing Ideas for Kids
🎨
The Rio Carnival: Coloring Ideas and Fun Facts for Kids
💡
How Drawing Encourages Original Thinking
🧠
Exploring Drawing and Patience
💡
Building Open-Ended Play Through Coloring and Drawing
🌈
Relaxing Vehicles Coloring Activities
🎨
Fun Cable Ski Lift Coloring and Drawing Ideas for Kids
🎨
Emergency Contact Card for Kids: A Family Safety Guide
🎨
Printing in Bulk for Classrooms: A Practical Guide
🔤
Using Coloring Pages to Teach Action Words
🧘
How Bedtime Coloring Routines Can Create a Quiet Moment
🎨
How to Draw a Square: A Step-by-Step Guide for Kids
🎨
Coloring Aprons and Smocks: A Buying and Technique Guide
🎨
Fun Trolley Coloring and Drawing Ideas for Kids
🎨
A Baking Sheet: A Kitchen Guide for Kids and Parents
🎨
Whale Coloring and Drawing Ideas for Kids
💡
Why Daydreaming Matters for Young Artists
🧒
How Drawing Supports Ages 4-5
🎨
Meet Printmaking Art: An Art Appreciation Guide for Kids
🎨
Walking a Dog: A Simple Pet Care Guide for Kids
🎨
Putting Away Groceries: A Simple Life Skill for Kids
🎨
A Spanish Flamenco Dress: A Coloring and Culture Guide for Kids
🎨
A Coin Cleaning Chemistry Test: A Step-by-Step Science Guide for Kids
🌈
Printable Sports Scenes Coloring Activities
🌈
Relaxing Emotions and Faces Coloring Activities
🏺
Why Ancient Storytelling Through Pictures Matter to Historians
🍎
Using Coloring Pages for Indoor Recess Activities
🎨
A Storm Shelter Basement: A Family Safety Guide
🌈
Printable Community Helpers Coloring Activities
🎨
The Number 4: An Alphabet and Number Coloring Page
🎨
A Cowboy Hat and Boots: A Wild West Coloring and History Guide for Kids
🔎
Using Mind Maps to Solve Problems
🎨
Toucan Coloring Page Ideas for Kids
🎨
A Balloon and Bottle Air Pressure Trick: A Step-by-Step Science Guide for Kids
🎨
A Message in a Bottle Coloring and Drawing Ideas for Kids
🖍️
How to Get Better at Choosing Paper for Coloring
🎨
Stuffed Animal Coloring and Drawing Ideas for Kids
🎨
Summer Sunscreen and a Towel: Coloring Ideas and Activities for the Whole Family
💡
Why Original Thinking Matters for Young Artists
🎲
Step-by-Step Drawing Battles
🎨
Puffin Coloring Page Ideas for Kids
🎨
Meet the Scientist in a Lab: A Community Helper Coloring Guide
🍂
Printable Cultural Festivals Coloring Pages for Kids
🎨
Rugby Coloring Pages and Drawing Ideas for Kids
🎨
A Pirate's Telescope Coloring and Drawing Ideas for Kids
🎨
Backyard BBQ Grill Coloring Ideas for Kids Who Love to Create
🌈
Fun Nature Landscapes Coloring Pages for Kids
🌈
Creative Ways to Color Birds
👨👩👧
Making the Most of Road Trip Activities
🎨
A Superhero Running at Super Speed: A Superhero Coloring and Design Guide for Kids
🎨
Root Vegetable Growing: A Coloring and Food Science Guide for Kids
🍎
Classroom Ideas: Back-to-School Activities
🎨
Exploring A Cosmic Rainbow: A Coloring and Learning Guide for Kids
🔤
Drawing Activities for Everyday Objects
💡
The Role of Imaginary Worlds in Children's Art
👨👩👧
Why Parents Love Morning Routine Activities
🎨
Cock-a-Doodle-Doo: A Nursery Rhyme Coloring Guide for Kids
🎲
Fun Mazes for Kids
📴
Screen-Free Coloring Ideas for Quiet Time Before Bed
🎨
Giving a Dog a Bath: A Simple Pet Care Guide for Kids
🧒
Drawing Activities for Ages 3-4
🌈
Fantasy Creatures Coloring Ideas for Classrooms
🧘
Why Mandala Coloring Feels Calming
🎨
London Bridge Is Falling Down: A Nursery Rhyme Coloring Guide for Kids
🎨
A Mongolian Deel: A Coloring and Culture Guide for Kids
🍎
Using Coloring Pages for Back-to-School Activities
🎨
Tractor Seed Planting: A Coloring and Food Science Guide for Kids
🖍️
Tips for Coloring Inside the Lines
🎨
Barn Owl Coloring and Drawing Ideas for Kids
🎨
Corn Field Coloring and Drawing Ideas for Kids
🔤
Visual Vocabulary: Action Words
🎨
A Trailhead Sign: Coloring Ideas for Your Next Family Adventure
🎨
Exploring Switzerland: A Coloring and Culture Guide for Kids
💗
How Drawing Supports Coping With Change Through Drawing
🎨
A Bastille Day Fireworks Show: Coloring Ideas and Fun Facts for Kids
🎨
Redwood Forest Coloring Page: A Nature Learning Guide for Kids
🍂
Creative Graduation Season Coloring Projects for Classrooms
🌈
Food and Treats Coloring Ideas for Classrooms
🧒
A Parent's Guide to Pre-Writing Skills
🍎
Using Coloring Pages for Art Lessons for Math Class
🖍️
A Beginner's Guide to Coloring Mandalas
🎨
A Treasure Chest Coloring and Drawing Ideas for Kids
🖌️
How to Practice Layering Techniques
🎨
Rosh Hashanah Coloring Ideas and Activities for the Whole Family
🎨
A Fortune Teller's Tent Coloring and Drawing Ideas for Kids
🎨
A Coloring Page Time Capsule: A Practical Guide
🎨
Bastille Day Coloring Ideas and Activities for the Whole Family
🎨
A Robot Builder: A Coloring and Invention Guide for Kids
🔬
What Is CMYK Printing Colors?
🎨
Juggling Pins Coloring and Drawing Ideas for Kids
🎨
A Pattern Recognition Game: A Coloring and STEM Guide for Kids
🌈
A Guide to Robots and Machines Coloring Pages
💗
Exploring Building Self-Esteem Through Art Through Art
💗
Creative Approaches to Stress Relief
🧠
Why Drawing Can Help With Spatial Awareness
🎨
A Pet Food Bowl Set: A Simple Pet Care Guide for Kids
🎨
A Family Vacation Savings Jar: A Money Guide for Kids and Parents
🏺
What We Know About Early Writing Systems
🎨
Fun Toy Tank Coloring and Drawing Ideas for Kids
🎨
Creative Family Portraits Drawing Exercises
🎨
A Pet's Favorite Toy: A Simple Pet Care Guide for Kids
🔬
The Science Behind Color Psychology
🔬
A Simple Guide to Additive Color Mixing
🎨
Raspberry Coloring and Drawing Ideas for Kids
🎨
Shark Coloring and Drawing Ideas for Kids
🎨
Using Kind Words: A Simple Social Skill for Kids
🎨
Offering to Help Someone: A Simple Social Skill for Kids
🧘
A Beginner's Guide to Bedtime Coloring Routines
🧘
A Beginner's Guide to Coloring for Sensory Breaks
🎨
Rock Climbing Coloring Pages and Drawing Ideas for Kids
💬
How Comic Strips Communicate Ideas
🎲
Fun Pictionary-Style Games for Kids
🔤
Using Coloring Pages to Teach Question Words
🎨
Teaching Confidence: A Simple Activity for Kids
🎨
Chalk Pastels: A Buying and Technique Guide
🎨
Exploring Cuba: A Coloring and Culture Guide for Kids
🎨
Fun Cruise Ship Coloring and Drawing Ideas for Kids
💗
Understanding What Art Therapy Actually Is
🎨
Pony Coloring and Drawing Ideas for Kids
🎲
How to Play Visual Puzzle Games
🌈
A Guide to Ocean Life Coloring Pages
🎨
A Robot Teacher: A Coloring and Invention Guide for Kids
🎨
A Beginner's Guide to Drawing Seasons
🎨
Staying Active Indoors: A Coloring and Health Guide for Kids
🎨
Meet Self-Portrait Art: An Art Appreciation Guide for Kids
✏️
How to Improve Your Drawing Straight Lines
📴
Screen-Free Coloring Ideas for Outdoor Picnics
🎨
Fourth of July Coloring Ideas and Activities for the Whole Family
🎨
A Korean Hanbok: A Coloring and Culture Guide for Kids
🎨
Exploring South Africa: A Coloring and Culture Guide for Kids
🧘
How Coloring During Travel Can Create a Quiet Moment
🎨
Foggy Morning Meadow Coloring Page: A Nature Learning Guide for Kids
🎨
The Number 9: An Alphabet and Number Coloring Page
🎨
Dolphin Coloring and Drawing Ideas for Kids
🎨
Notre-Dame Cathedral: Coloring Page and Fun Facts for Kids
🎨
A Nigerian Agbada: A Coloring and Culture Guide for Kids
✏️
Easy Steps to Practice Drawing From Observation
🔬
The Science Behind Warm and Cool Colors
🎨
A Kindness-Power Superhero: A Superhero Coloring and Design Guide for Kids
🎨
a Paper Doll Printable: Free Ideas for Your Next Celebration
🎨
Printing Coloring Pages at Home: A Practical Guide
🎨
A Beginner's Guide to Drawing Robots
💡
Building Creative Problem-Solving Through Coloring and Drawing
🎨
A Camping Trip Photo Album: Coloring Ideas for Your Next Family Adventure
🎨
Meet the Sports Coach: A Community Helper Coloring Guide
🎨
The Great Zimbabwe Ruins: An Ancient History Coloring Guide for Kids
🎨
Allosaurus Coloring Page: Fun Facts for Young Paleontologists
🎨
The Number 3: An Alphabet and Number Coloring Page
🎨
A Family Camping Trailer: Coloring Ideas for Your Next Family Adventure
🎨
A Piggy Bank Labeled Save, Spend, Share: A Money Guide for Kids and Parents
📴
Hands-On Activities for Long Car Rides
🎨
Teaching Adaptability: A Simple Activity for Kids
🎨
A Zero Gravity Floating Object Demo: A Coloring and Space Mission Guide for Kids
🎨
How to Draw a Pyramid: A Step-by-Step Guide for Kids
🖌️
How to Practice Cross-Hatching
📴
Creative Alternatives to Screens During Holiday Travel
🧒
Drawing Activities for The Scribbling Stage
🎨
Fun Hovercraft Coloring and Drawing Ideas for Kids
🧒
Understanding Pencil Grip Development in Early Childhood
🎨
How to Draw a Keyboard: A Coloring and Music Guide for Kids
🌈
Fun Space Coloring Pages for Kids
🎨
Flying a Kite in Spring: Coloring Ideas and Activities for the Whole Family
🎨
Backgammon Board Coloring and Drawing Ideas for Kids
🎨
A Robot Chef: A Coloring and Invention Guide for Kids
🎨
How to Draw Dinosaurs Step by Step
🎨
An Ancient Library of Scrolls: An Ancient History Coloring Guide for Kids
🎨
Mud Turtle Coloring and Drawing Ideas for Kids
🎨
Fun Crane Truck Coloring and Drawing Ideas for Kids
🎨
A Robot Learning to Walk: A Coloring and Invention Guide for Kids
🎨
A Cookie Cutter: A Kitchen Guide for Kids and Parents
🎨
A Backyard Camping Night: Coloring Ideas for Your Next Family Adventure
🎨
A Parachute Landing: A Coloring and Space Mission Guide for Kids
👨👩👧
Making the Most of Rainy Day Activities
🎨
Star Light Star Bright: A Nursery Rhyme Coloring Guide for Kids
🍂
Celebrate Autumn With Coloring Activities
🎨
A Sea Monster Legend Coloring and Drawing Ideas for Kids
🎨
A Dinosaur Jungle Scene Coloring Page: Fun Facts for Young Paleontologists
🧘
Exploring Coloring Before Exams
🍂
Printable St. Patrick's Day Coloring Pages for Kids
🎨
Pat-a-Cake: A Nursery Rhyme Coloring Guide for Kids
🎨
Friendly Banshee Coloring and Drawing Ideas for Kids
🧒
How Drawing Supports Fine Motor Skills
🎨
Introducing Yourself Politely: A Simple Life Skill for Kids
🎨
A Robot Gardener: A Coloring and Invention Guide for Kids
🧒
Fun Ways to Build Ages 2-3
🎨
Sinkhole Coloring Page: A Nature Learning Guide for Kids
🍂
Seasonal Coloring Guide: Graduation Season
🎨
a Snow Day Coloring Ideas and Activities for the Whole Family
🎨
How to Draw Birds Step by Step
🎨
A Saber-Tooth Cat Coloring Page: Fun Facts for Young Paleontologists
🎨
Exploring Mexico: A Coloring and Culture Guide for Kids
🔎
Why Visual Thinkers Use Visual Problem-Solving
🧒
What to Expect When Teaching Building Drawing Confidence
🎨
A Coloring Page Art Show: A Practical Guide
🎨
A Sack Race: A Coloring and Playtime Guide for Kids
💡
Why Inventing New Ideas Matters for Young Artists
🎨
A Family Coupon Clipping Session: A Money Guide for Kids and Parents
🌈
A Guide to Musical Themes Coloring Pages
🎨
Duck Coloring Page Ideas for Kids
🍂
Fun Cultural Festivals Classroom Coloring Ideas
✏️
Fun Exercises for Drawing Stick Figures
🔤
Using Coloring Pages to Teach Everyday Objects
🎲
Using Drawing for Mazes
🎨
A Royal Princess Tower: A Medieval Coloring and History Guide for Kids
🎨
Meet Georgia O'Keeffe: An Art Appreciation Guide for Kids
🎨
Meet the Engineer: A Community Helper Coloring Guide
🧒
Fun Ways to Build Hand-Eye Coordination
🧒
Fun Ways to Build Building Drawing Confidence
🎨
An Invention Notebook: A Coloring and STEM Guide for Kids
🎨
A Garden Fence: A Gardening Guide for Kids and Families
🎨
Swallowtail Butterfly Coloring and Drawing Ideas for Kids
🎨
The Letter H: An Alphabet and Number Coloring Page
🎨
How to Draw a Animal-Print Mandala: A Step-by-Step Guide
🎨
Panda Coloring and Drawing Ideas for Kids
 A Beginner's Guide to Drawing Simple Objects
💬
The Power of Traffic and Safety Signs
💗
Creative Approaches to Art and Relaxation
🎨
A Coloring Page Portfolio for Kids: A Practical Guide
🎨
The Number 16: An Alphabet and Number Coloring Page
🎨
Chocolate Bar Coloring Ideas for Kids Who Love to Create
📴
Making the Most of Long Car Rides Without Screens
✏️
Easy Steps to Practice Sketching Basics
🎨
The Muffin Man: A Nursery Rhyme Coloring Guide for Kids
🎨
A Beach Cabana Coloring and Drawing Ideas for Kids
🎨
A Salad Spinner: A Kitchen Guide for Kids and Parents
🎲
Fun Drawing Battles for Kids
🎨
Building a Sandcastle: Coloring Ideas and Activities for the Whole Family
🖌️
Exploring Composition Basics
💡
Nurturing Finding Inspiration at Home
🏺
The History of Ancient Symbols
🎨
How to Draw a Snowflake Mandala: A Step-by-Step Guide
🎨
Meet the Train Conductor: A Community Helper Coloring Guide
A Beginner's Guide to Drawing Simple Objects
💬
The Power of Traffic and Safety Signs
💗
Creative Approaches to Art and Relaxation
🎨
A Coloring Page Portfolio for Kids: A Practical Guide
🎨
The Number 16: An Alphabet and Number Coloring Page
🎨
Chocolate Bar Coloring Ideas for Kids Who Love to Create
📴
Making the Most of Long Car Rides Without Screens
✏️
Easy Steps to Practice Sketching Basics
🎨
The Muffin Man: A Nursery Rhyme Coloring Guide for Kids
🎨
A Beach Cabana Coloring and Drawing Ideas for Kids
🎨
A Salad Spinner: A Kitchen Guide for Kids and Parents
🎲
Fun Drawing Battles for Kids
🎨
Building a Sandcastle: Coloring Ideas and Activities for the Whole Family
🖌️
Exploring Composition Basics
💡
Nurturing Finding Inspiration at Home
🏺
The History of Ancient Symbols
🎨
How to Draw a Snowflake Mandala: A Step-by-Step Guide
🎨
Meet the Train Conductor: A Community Helper Coloring Guide
 Why Drawing Straight Lines Matters for New Artists
🎨
Kitten Coloring and Drawing Ideas for Kids
🎨
A Rescue Robot: A Coloring and Invention Guide for Kids
🎨
A Chinese Traditional Qipao: A Coloring and Culture Guide for Kids
💗
Exploring Stress Relief Through Art
🍂
Celebrate Birthday Celebrations With Coloring Activities
🎨
A Healthy Breakfast: A Coloring and Health Guide for Kids
🖍️
Simple Techniques for Coloring Large Areas
🎨
Pegacorn Coloring and Drawing Ideas for Kids
🎨
Baby Dragon Coloring and Drawing Ideas for Kids
🌈
A Guide to Space Coloring Pages
🎨
A Superhero City Skyline: A Superhero Coloring and Design Guide for Kids
🎨
Exploring Morocco: A Coloring and Culture Guide for Kids
🎨
Setting Up a Coloring Desk: A Buying and Technique Guide
🍂
Printable Mother's Day Coloring Pages for Kids
🧘
Simple Steps for Mandala Coloring
🎨
Paper Airplane Coloring and Drawing Ideas for Kids
🏺
Exploring Cave Paintings
💡
The Role of Storytelling in Children's Art
🎨
A Bird-Watching Walk: Coloring Ideas for Your Next Family Adventure
🎨
Cleaning Up a Shared Space: A Simple Social Skill for Kids
🎨
A Wild West Trading Post: A Wild West Coloring and History Guide for Kids
🎨
Luna Moth Coloring and Drawing Ideas for Kids
🎨
Cherry Blossom Grove Coloring Page: A Nature Learning Guide for Kids
🎨
A Savings Jar: A Money Guide for Kids and Parents
🧒
Drawing Activities for Ages 4-5
🎨
Frog Coloring and Drawing Ideas for Kids
🌈
Insects and Bugs Coloring Ideas for Classrooms
🎨
A Cargo Resupply Ship: A Coloring and Space Mission Guide for Kids
🎨
A Simple If-Then Decision: A Coloring and STEM Guide for Kids
🎲
Scavenger Hunt Drawings: A Creative Twist
🎨
Meet the Musician: A Community Helper Coloring Guide
🎨
Kookaburra Coloring Page Ideas for Kids
🎨
A Robot Spider: A Coloring and Invention Guide for Kids
🎨
How to Draw a Oboe: A Coloring and Music Guide for Kids
🧠
Why Drawing Can Help With Patience
📐
Why Symmetry and Drawing Go Together
🔎
A Beginner's Guide to Flowcharts
🎨
A DJ at Turntables: A Coloring and Movement Guide for Kids
🎨
A Fish and Chips Basket: Coloring Ideas and Fun Facts for Kids
💬
How Diagrams Communicate Ideas
🎨
A Boombox: A Coloring and Movement Guide for Kids
🎲
Fun Memory Matching Games for Kids
💡
Why Divergent Thinking Matters for Young Artists
🎨
How to Draw a Rangoli Design: A Step-by-Step Guide
🔎
Using Sketching to Understand Complex Ideas to Solve Problems
🎨
Fun Forklift Coloring and Drawing Ideas for Kids
🎨
A Bird Being Given Fresh Seed: A Simple Pet Care Guide for Kids
🎨
Under the Sea Drawing Prompts for Beginners
🎨
A Portable Camp Stove: Coloring Ideas for Your Next Family Adventure
🔎
Exploring Timeline Diagrams for Students
🎨
Goat Coloring and Drawing Ideas for Kids
🎨
Cauliflower Coloring and Drawing Ideas for Kids
📴
Hands-On Activities for Rainy Afternoons
🎨
Meet Andy Warhol: An Art Appreciation Guide for Kids
🍎
Using Coloring Pages for Circle Time Activities
🎨
Exploring A UFO: A Coloring and Learning Guide for Kids
🎨
A Watering Hose: A Gardening Guide for Kids and Families
🧠
Why Drawing Can Help With Hand-Eye Coordination
🧒
How Drawing Supports Drawing Development Stages
✏️
Why Drawing Circles Matters for New Artists
🎨
A Barn Raising Coloring and Drawing Ideas for Kids
🎨
A Homemade Volcano Eruption: A Step-by-Step Science Guide for Kids
🎨
a Road Trip Activity Pack: Free Ideas for Your Next Celebration
🎨
A Spice Rack: A Kitchen Guide for Kids and Parents
🌈
Printable Insects and Bugs Coloring Activities
🧠
Why Drawing Can Help With Problem-Solving
👨👩👧
Easy Bedtime Wind-Down Routines With Coloring Pages
🎨
How to Draw Vehicles Step by Step
👨👩👧
Fun and Simple Rainy Day Activities
🎨
Dragonfly Coloring and Drawing Ideas for Kids
🎨
Fun Fighter Jet Coloring and Drawing Ideas for Kids
🍎
Using Coloring Pages for Morning Work Activities
✏️
How to Improve Your Drawing From Observation
🎨
Tea Picking: A Coloring and Food Science Guide for Kids
👨👩👧
Why Parents Love Rainy Day Activities
📐
Teaching 3D Shapes Through Coloring and Drawing
🎨
A Ghanaian Kente Cloth: A Coloring and Culture Guide for Kids
🎨
How to Draw a Harmonica: A Coloring and Music Guide for Kids
📴
Creative Alternatives to Screens During Restaurant Wait Times
🎨
Exploring Ghana: A Coloring and Culture Guide for Kids
🎨
Katydid Coloring and Drawing Ideas for Kids
🎨
Coral Atoll Coloring Page: A Nature Learning Guide for Kids
🧒
Drawing Activities for Shape Recognition
🎨
Watering a Plant: A Simple Life Skill for Kids
🎨
Easy Seasons Drawing Ideas
🧘
Exploring Nature-Inspired Calm Coloring
🎨
A Kids' Hackathon Team: A Coloring and STEM Guide for Kids
🎨
A Fish Being Fed Flakes: A Simple Pet Care Guide for Kids
🌈
Relaxing Fantasy Creatures Coloring Activities
🧘
Exploring Repetitive Pattern Coloring
🎨
A Hip Hop Dancer: A Coloring and Movement Guide for Kids
🧠
Can Drawing Improve Creative Thinking?
🌈
Printable Mandalas Coloring Activities
🎨
A Winter Sledding Hill: Coloring Ideas and Activities for the Whole Family
🌈
A Guide to Vehicles Coloring Pages
🍂
Fun Earth Day Classroom Coloring Ideas
🎨
Exploring Saturn: A Coloring and Learning Guide for Kids
🎨
A Pirate's Golden Coin Coloring and Drawing Ideas for Kids
🎨
How to Draw a Damask Pattern: A Step-by-Step Guide
🎨
A Simple Money Math Worksheet: A Money Guide for Kids and Parents
🎨
Charcoal Pencils: A Buying and Technique Guide
🎲
Guess-the-Drawing Games: A Creative Twist
🎨
Leaning Tower of Pisa: Coloring Page and Fun Facts for Kids
🎨
a Body Awareness Chart: A Simple Mindfulness Activity for Kids
🎨
a Get Well Soon Card: Free Ideas for Your Next Celebration
🎨
Garlic Bulb Coloring and Drawing Ideas for Kids
🎨
A Class Newsletter: A Classroom Coloring and Learning Guide
🎨
Pet Turtle Coloring and Drawing Ideas for Kids
🎨
Fig Coloring and Drawing Ideas for Kids
👨👩👧
Easy Quiet Time Activities With Coloring Pages
🎨
Meet the Flight Attendant: A Community Helper Coloring Guide
🎨
A Kenyan Maasai Shuka: A Coloring and Culture Guide for Kids
🧠
How Drawing May Support Confidence Building
🎨
Cloud Dragon Coloring and Drawing Ideas for Kids
🌈
Relaxing Robots and Machines Coloring Activities
Why Drawing Straight Lines Matters for New Artists
🎨
Kitten Coloring and Drawing Ideas for Kids
🎨
A Rescue Robot: A Coloring and Invention Guide for Kids
🎨
A Chinese Traditional Qipao: A Coloring and Culture Guide for Kids
💗
Exploring Stress Relief Through Art
🍂
Celebrate Birthday Celebrations With Coloring Activities
🎨
A Healthy Breakfast: A Coloring and Health Guide for Kids
🖍️
Simple Techniques for Coloring Large Areas
🎨
Pegacorn Coloring and Drawing Ideas for Kids
🎨
Baby Dragon Coloring and Drawing Ideas for Kids
🌈
A Guide to Space Coloring Pages
🎨
A Superhero City Skyline: A Superhero Coloring and Design Guide for Kids
🎨
Exploring Morocco: A Coloring and Culture Guide for Kids
🎨
Setting Up a Coloring Desk: A Buying and Technique Guide
🍂
Printable Mother's Day Coloring Pages for Kids
🧘
Simple Steps for Mandala Coloring
🎨
Paper Airplane Coloring and Drawing Ideas for Kids
🏺
Exploring Cave Paintings
💡
The Role of Storytelling in Children's Art
🎨
A Bird-Watching Walk: Coloring Ideas for Your Next Family Adventure
🎨
Cleaning Up a Shared Space: A Simple Social Skill for Kids
🎨
A Wild West Trading Post: A Wild West Coloring and History Guide for Kids
🎨
Luna Moth Coloring and Drawing Ideas for Kids
🎨
Cherry Blossom Grove Coloring Page: A Nature Learning Guide for Kids
🎨
A Savings Jar: A Money Guide for Kids and Parents
🧒
Drawing Activities for Ages 4-5
🎨
Frog Coloring and Drawing Ideas for Kids
🌈
Insects and Bugs Coloring Ideas for Classrooms
🎨
A Cargo Resupply Ship: A Coloring and Space Mission Guide for Kids
🎨
A Simple If-Then Decision: A Coloring and STEM Guide for Kids
🎲
Scavenger Hunt Drawings: A Creative Twist
🎨
Meet the Musician: A Community Helper Coloring Guide
🎨
Kookaburra Coloring Page Ideas for Kids
🎨
A Robot Spider: A Coloring and Invention Guide for Kids
🎨
How to Draw a Oboe: A Coloring and Music Guide for Kids
🧠
Why Drawing Can Help With Patience
📐
Why Symmetry and Drawing Go Together
🔎
A Beginner's Guide to Flowcharts
🎨
A DJ at Turntables: A Coloring and Movement Guide for Kids
🎨
A Fish and Chips Basket: Coloring Ideas and Fun Facts for Kids
💬
How Diagrams Communicate Ideas
🎨
A Boombox: A Coloring and Movement Guide for Kids
🎲
Fun Memory Matching Games for Kids
💡
Why Divergent Thinking Matters for Young Artists
🎨
How to Draw a Rangoli Design: A Step-by-Step Guide
🔎
Using Sketching to Understand Complex Ideas to Solve Problems
🎨
Fun Forklift Coloring and Drawing Ideas for Kids
🎨
A Bird Being Given Fresh Seed: A Simple Pet Care Guide for Kids
🎨
Under the Sea Drawing Prompts for Beginners
🎨
A Portable Camp Stove: Coloring Ideas for Your Next Family Adventure
🔎
Exploring Timeline Diagrams for Students
🎨
Goat Coloring and Drawing Ideas for Kids
🎨
Cauliflower Coloring and Drawing Ideas for Kids
📴
Hands-On Activities for Rainy Afternoons
🎨
Meet Andy Warhol: An Art Appreciation Guide for Kids
🍎
Using Coloring Pages for Circle Time Activities
🎨
Exploring A UFO: A Coloring and Learning Guide for Kids
🎨
A Watering Hose: A Gardening Guide for Kids and Families
🧠
Why Drawing Can Help With Hand-Eye Coordination
🧒
How Drawing Supports Drawing Development Stages
✏️
Why Drawing Circles Matters for New Artists
🎨
A Barn Raising Coloring and Drawing Ideas for Kids
🎨
A Homemade Volcano Eruption: A Step-by-Step Science Guide for Kids
🎨
a Road Trip Activity Pack: Free Ideas for Your Next Celebration
🎨
A Spice Rack: A Kitchen Guide for Kids and Parents
🌈
Printable Insects and Bugs Coloring Activities
🧠
Why Drawing Can Help With Problem-Solving
👨👩👧
Easy Bedtime Wind-Down Routines With Coloring Pages
🎨
How to Draw Vehicles Step by Step
👨👩👧
Fun and Simple Rainy Day Activities
🎨
Dragonfly Coloring and Drawing Ideas for Kids
🎨
Fun Fighter Jet Coloring and Drawing Ideas for Kids
🍎
Using Coloring Pages for Morning Work Activities
✏️
How to Improve Your Drawing From Observation
🎨
Tea Picking: A Coloring and Food Science Guide for Kids
👨👩👧
Why Parents Love Rainy Day Activities
📐
Teaching 3D Shapes Through Coloring and Drawing
🎨
A Ghanaian Kente Cloth: A Coloring and Culture Guide for Kids
🎨
How to Draw a Harmonica: A Coloring and Music Guide for Kids
📴
Creative Alternatives to Screens During Restaurant Wait Times
🎨
Exploring Ghana: A Coloring and Culture Guide for Kids
🎨
Katydid Coloring and Drawing Ideas for Kids
🎨
Coral Atoll Coloring Page: A Nature Learning Guide for Kids
🧒
Drawing Activities for Shape Recognition
🎨
Watering a Plant: A Simple Life Skill for Kids
🎨
Easy Seasons Drawing Ideas
🧘
Exploring Nature-Inspired Calm Coloring
🎨
A Kids' Hackathon Team: A Coloring and STEM Guide for Kids
🎨
A Fish Being Fed Flakes: A Simple Pet Care Guide for Kids
🌈
Relaxing Fantasy Creatures Coloring Activities
🧘
Exploring Repetitive Pattern Coloring
🎨
A Hip Hop Dancer: A Coloring and Movement Guide for Kids
🧠
Can Drawing Improve Creative Thinking?
🌈
Printable Mandalas Coloring Activities
🎨
A Winter Sledding Hill: Coloring Ideas and Activities for the Whole Family
🌈
A Guide to Vehicles Coloring Pages
🍂
Fun Earth Day Classroom Coloring Ideas
🎨
Exploring Saturn: A Coloring and Learning Guide for Kids
🎨
A Pirate's Golden Coin Coloring and Drawing Ideas for Kids
🎨
How to Draw a Damask Pattern: A Step-by-Step Guide
🎨
A Simple Money Math Worksheet: A Money Guide for Kids and Parents
🎨
Charcoal Pencils: A Buying and Technique Guide
🎲
Guess-the-Drawing Games: A Creative Twist
🎨
Leaning Tower of Pisa: Coloring Page and Fun Facts for Kids
🎨
a Body Awareness Chart: A Simple Mindfulness Activity for Kids
🎨
a Get Well Soon Card: Free Ideas for Your Next Celebration
🎨
Garlic Bulb Coloring and Drawing Ideas for Kids
🎨
A Class Newsletter: A Classroom Coloring and Learning Guide
🎨
Pet Turtle Coloring and Drawing Ideas for Kids
🎨
Fig Coloring and Drawing Ideas for Kids
👨👩👧
Easy Quiet Time Activities With Coloring Pages
🎨
Meet the Flight Attendant: A Community Helper Coloring Guide
🎨
A Kenyan Maasai Shuka: A Coloring and Culture Guide for Kids
🧠
How Drawing May Support Confidence Building
🎨
Cloud Dragon Coloring and Drawing Ideas for Kids
🌈
Relaxing Robots and Machines Coloring Activities
 A Beginner's Guide to Mixing Warm and Cool Colors
🧠
Can Drawing Improve Spatial Awareness?
🎨
A Royal Banner: A Medieval Coloring and History Guide for Kids
🎨
Teaching Diligence: A Simple Activity for Kids
🎨
Meet the Lifeguard: A Community Helper Coloring Guide
🍎
Classroom Ideas: Classroom Reward Activities
🎨
A Robotic Arm on the Space Station: A Coloring and Space Mission Guide for Kids
🔎
Why Visual Thinkers Use Timeline Diagrams
🎨
How to Draw Emotions and Faces Step by Step
🎨
Apologizing Sincerely: A Simple Life Skill for Kids
🎨
Caterpillar Coloring and Drawing Ideas for Kids
A Beginner's Guide to Mixing Warm and Cool Colors
🧠
Can Drawing Improve Spatial Awareness?
🎨
A Royal Banner: A Medieval Coloring and History Guide for Kids
🎨
Teaching Diligence: A Simple Activity for Kids
🎨
Meet the Lifeguard: A Community Helper Coloring Guide
🍎
Classroom Ideas: Classroom Reward Activities
🎨
A Robotic Arm on the Space Station: A Coloring and Space Mission Guide for Kids
🔎
Why Visual Thinkers Use Timeline Diagrams
🎨
How to Draw Emotions and Faces Step by Step
🎨
Apologizing Sincerely: A Simple Life Skill for Kids
🎨
Caterpillar Coloring and Drawing Ideas for Kids
 Fun Independence Day Classroom Coloring Ideas
🎨
A Balloon-Powered Invention: A Coloring and STEM Guide for Kids
🎲
Fun Chess Strategy Diagrams for Kids
🎨
Printing Tips for Home Preschool: A Practical Guide
🌈
Nature Landscapes Coloring Ideas for Classrooms
🎲
Step-by-Step Sketch Relay Games
🎨
The Great Wall of China Builders: An Ancient History Coloring Guide for Kids
🎨
a Scavenger Hunt Printable: Free Ideas for Your Next Celebration
🖌️
How to Practice Creating Texture
🎨
A Logic Puzzle Box: A Coloring and STEM Guide for Kids
🎨
Meet Henri Matisse: An Art Appreciation Guide for Kids
🎨
A Superhero's Vehicle: A Superhero Coloring and Design Guide for Kids
🖍️
Simple Techniques for Coloring With Markers
🎨
A Castle Siege Tower: A Medieval Coloring and History Guide for Kids
🔎
Using Data Visualization Basics to Solve Problems
🎨
A Family Weather Journal: A Family Safety Guide
🧠
Can Drawing Improve Visual Thinking?
🎨
Teaching Curiosity: A Simple Activity for Kids
🎨
Newt Coloring and Drawing Ideas for Kids
🎨
A Blueprint and Ruler Coloring and Drawing Ideas for Kids
✏️
Why Choosing Your First Pencil Matters for New Artists
🎨
Winter Ice Fishing: Coloring Ideas and Activities for the Whole Family
🎨
Stingray Coloring and Drawing Ideas for Kids
📐
Fun Drawing Activities for Measurement
📐
Fun Drawing Activities for Angles
🎨
Meet Collage Art: An Art Appreciation Guide for Kids
🎨
Fun Race Car Coloring and Drawing Ideas for Kids
🎨
A Polish Traditional Folk Costume: A Coloring and Culture Guide for Kids
🎨
How to Draw a A Shape and Its Mirror Image: A Step-by-Step Guide for Kids
🎨
A Cutting Board: A Kitchen Guide for Kids and Parents
🎨
The Letter R: An Alphabet and Number Coloring Page
🎨
A Rock Climbing Wall: Coloring Ideas for Your Next Family Adventure
🎨
A Superhero Rescue Mission: A Superhero Coloring and Design Guide for Kids
🎨
A Balinese Traditional Dress: A Coloring and Culture Guide for Kids
🎨
Bakery Window Coloring Ideas for Kids Who Love to Create
🎨
Anteater Coloring and Drawing Ideas for Kids
🎨
Covering Your Mouth When You Cough: A Simple Social Skill for Kids
🎨
Riding a Bike: A Simple Life Skill for Kids
🔬
Additive Color Mixing Explained for Kids
🎨
Creative Favorite Foods Drawing Exercises
💬
From Cave Drawings to Visual Storytelling
🧠
Can Drawing Improve Sequential Thinking?
📴
Hands-On Activities for Quiet Time Before Bed
🎨
Exploring Spain: A Coloring and Culture Guide for Kids
✏️
Easy Steps to Practice Drawing Straight Lines
🍎
Using Coloring Pages for Group Art Projects
🖌️
Simple Steps for Stippling
🎨
Fun Community Helpers Drawing Activities for Kids
🎨
The Emperor's New Clothes: A Classic Story Coloring Guide for Kids
🔬
Understanding Why Printers Use CMYK
🎨
Orange Juice Making: A Coloring and Food Science Guide for Kids
🎨
A Sifter: A Kitchen Guide for Kids and Parents
🎨
The Letter C: An Alphabet and Number Coloring Page
🎨
Birthday Cake Coloring Ideas for Kids Who Love to Create
💬
Why Sign Language and Gesture Matter in Everyday Life
🔤
Using Coloring Pages to Teach Early Literacy Skills
🎨
Soup Pot Coloring Ideas for Kids Who Love to Create
🎨
A Crew Handshake in Space: A Coloring and Space Mission Guide for Kids
🎨
How to Draw a Violin: A Coloring and Music Guide for Kids
🎨
The Kremlin: Coloring Page and Fun Facts for Kids
🎨
A Steel Beam Delivery Coloring and Drawing Ideas for Kids
🍂
Printable Back-to-School Season Coloring Pages for Kids
🎨
How to Draw a Banjo: A Coloring and Music Guide for Kids
🎨
Flour Milling: A Coloring and Food Science Guide for Kids
🧠
How Drawing May Support Imagination
🎨
Brushing a Pet's Fur: A Simple Pet Care Guide for Kids
🎨
Bluebell Flowers: A Coloring and Nature Guide for Kids
🎨
A Secret Identity Reveal: A Superhero Coloring and Design Guide for Kids
🎨
Fruit Tree Pollination: A Coloring and Food Science Guide for Kids
🔤
Drawing Activities for Family Words
🧘
A Beginner's Guide to Coloring During Travel
🎨
Satyr Coloring and Drawing Ideas for Kids
🔎
How Storyboarding for Projects Support Learning
🎨
An Autumn Maple Leaf: A Coloring and Nature Guide for Kids
🎨
A Mission Patch Design: A Coloring and Space Mission Guide for Kids
🏺
What We Know About Ancient Cave Pigments
🎨
A Pie Dish: A Kitchen Guide for Kids and Parents
🎨
A Sticker Chart: A Classroom Coloring and Learning Guide
🎨
Pear Coloring and Drawing Ideas for Kids
🔤
Visual Vocabulary: the Alphabet
🎲
Memory Matching Games: A Creative Twist
📴
Making the Most of Camping Trips Without Screens
🧘
How Nature-Inspired Calm Coloring Can Create a Quiet Moment
🎨
Old MacDonald Had a Farm: A Nursery Rhyme Coloring Guide for Kids
🎨
Maple Syrup Tapping: A Coloring and Food Science Guide for Kids
🧒
Understanding First-Time Artists in Early Childhood
🎨
A Beach Volleyball Tournament Coloring and Drawing Ideas for Kids
🎨
A Pastry Brush: A Kitchen Guide for Kids and Parents
🎨
Sheep Coloring and Drawing Ideas for Kids
🌈
Vehicles Coloring Ideas for Classrooms
🎨
Seagull Coloring and Drawing Ideas for Kids
🌈
A Guide to Fantasy Creatures Coloring Pages
🌈
Fun Dinosaurs Coloring Pages for Kids
🎨
Peacock Coloring Page Ideas for Kids
🎨
A Bavarian Traditional Outfit: A Coloring and Culture Guide for Kids
🎨
Taj Mahal: Coloring Page and Fun Facts for Kids
🎨
Rhinoceros Beetle Coloring and Drawing Ideas for Kids
🎨
Autumn Leaves Falling Coloring Page: A Nature Learning Guide for Kids
🎨
Exploring The Moon Landing: A Coloring and Learning Guide for Kids
🎨
Spinosaurus Coloring Page: Fun Facts for Young Paleontologists
🎨
Feeding a Cat: A Simple Pet Care Guide for Kids
🎨
Palm Tree: A Coloring and Nature Guide for Kids
🎨
An Ancient Fortress Wall: An Ancient History Coloring Guide for Kids
🎨
A Reward System Built Around Coloring: A Practical Guide
🎨
Parasaurolophus Coloring Page: Fun Facts for Young Paleontologists
🎨
Meet Ansel Adams: An Art Appreciation Guide for Kids
🎨
Exploring Vietnam: A Coloring and Culture Guide for Kids
🎨
Hornet Coloring and Drawing Ideas for Kids
🎨
Peaceful Garden Visualization: A Simple Mindfulness Activity for Kids
🎨
A Space Telescope Repair Mission: A Coloring and Space Mission Guide for Kids
🎨
Meet Color Field Painting: An Art Appreciation Guide for Kids
🎨
A Time-Control Superhero: A Superhero Coloring and Design Guide for Kids
🎨
How to Draw a Stained Glass Pattern: A Step-by-Step Guide
🎨
Meet Salvador Dali: An Art Appreciation Guide for Kids
🧘
Why Coloring for Focus Feels Calming
🎨
Meet the Tailor: A Community Helper Coloring Guide
🎨
Sinbad the Sailor: A Classic Story Coloring Guide for Kids
🎨
Exploring Colombia: A Coloring and Culture Guide for Kids
🎨
Termite Coloring and Drawing Ideas for Kids
🎨
A Boardwalk Carousel Coloring and Drawing Ideas for Kids
🎨
A Class Pet: A Classroom Coloring and Learning Guide
🎨
Spring Flower Planting: Coloring Ideas and Activities for the Whole Family
🎨
Fishing by a Riverbank: Coloring Ideas for Your Next Family Adventure
🎨
A School Playground: A Classroom Coloring and Learning Guide
🎨
A Skull and Crossbones Flag Coloring and Drawing Ideas for Kids
🎨
A Deer Spotted in the Woods: Coloring Ideas for Your Next Family Adventure
✏️
Why Using an Eraser Effectively Matters for New Artists
🎨
A Baking Soda and Vinegar Volcano: A Step-by-Step Science Guide for Kids
🎨
Fun Bullet Train Coloring and Drawing Ideas for Kids
🎨
How to Draw a Sphere: A Step-by-Step Guide for Kids
🎨
The Number 6: An Alphabet and Number Coloring Page
🎨
The Number 17: An Alphabet and Number Coloring Page
🎨
A Royal Crown: A Medieval Coloring and History Guide for Kids
Fun Independence Day Classroom Coloring Ideas
🎨
A Balloon-Powered Invention: A Coloring and STEM Guide for Kids
🎲
Fun Chess Strategy Diagrams for Kids
🎨
Printing Tips for Home Preschool: A Practical Guide
🌈
Nature Landscapes Coloring Ideas for Classrooms
🎲
Step-by-Step Sketch Relay Games
🎨
The Great Wall of China Builders: An Ancient History Coloring Guide for Kids
🎨
a Scavenger Hunt Printable: Free Ideas for Your Next Celebration
🖌️
How to Practice Creating Texture
🎨
A Logic Puzzle Box: A Coloring and STEM Guide for Kids
🎨
Meet Henri Matisse: An Art Appreciation Guide for Kids
🎨
A Superhero's Vehicle: A Superhero Coloring and Design Guide for Kids
🖍️
Simple Techniques for Coloring With Markers
🎨
A Castle Siege Tower: A Medieval Coloring and History Guide for Kids
🔎
Using Data Visualization Basics to Solve Problems
🎨
A Family Weather Journal: A Family Safety Guide
🧠
Can Drawing Improve Visual Thinking?
🎨
Teaching Curiosity: A Simple Activity for Kids
🎨
Newt Coloring and Drawing Ideas for Kids
🎨
A Blueprint and Ruler Coloring and Drawing Ideas for Kids
✏️
Why Choosing Your First Pencil Matters for New Artists
🎨
Winter Ice Fishing: Coloring Ideas and Activities for the Whole Family
🎨
Stingray Coloring and Drawing Ideas for Kids
📐
Fun Drawing Activities for Measurement
📐
Fun Drawing Activities for Angles
🎨
Meet Collage Art: An Art Appreciation Guide for Kids
🎨
Fun Race Car Coloring and Drawing Ideas for Kids
🎨
A Polish Traditional Folk Costume: A Coloring and Culture Guide for Kids
🎨
How to Draw a A Shape and Its Mirror Image: A Step-by-Step Guide for Kids
🎨
A Cutting Board: A Kitchen Guide for Kids and Parents
🎨
The Letter R: An Alphabet and Number Coloring Page
🎨
A Rock Climbing Wall: Coloring Ideas for Your Next Family Adventure
🎨
A Superhero Rescue Mission: A Superhero Coloring and Design Guide for Kids
🎨
A Balinese Traditional Dress: A Coloring and Culture Guide for Kids
🎨
Bakery Window Coloring Ideas for Kids Who Love to Create
🎨
Anteater Coloring and Drawing Ideas for Kids
🎨
Covering Your Mouth When You Cough: A Simple Social Skill for Kids
🎨
Riding a Bike: A Simple Life Skill for Kids
🔬
Additive Color Mixing Explained for Kids
🎨
Creative Favorite Foods Drawing Exercises
💬
From Cave Drawings to Visual Storytelling
🧠
Can Drawing Improve Sequential Thinking?
📴
Hands-On Activities for Quiet Time Before Bed
🎨
Exploring Spain: A Coloring and Culture Guide for Kids
✏️
Easy Steps to Practice Drawing Straight Lines
🍎
Using Coloring Pages for Group Art Projects
🖌️
Simple Steps for Stippling
🎨
Fun Community Helpers Drawing Activities for Kids
🎨
The Emperor's New Clothes: A Classic Story Coloring Guide for Kids
🔬
Understanding Why Printers Use CMYK
🎨
Orange Juice Making: A Coloring and Food Science Guide for Kids
🎨
A Sifter: A Kitchen Guide for Kids and Parents
🎨
The Letter C: An Alphabet and Number Coloring Page
🎨
Birthday Cake Coloring Ideas for Kids Who Love to Create
💬
Why Sign Language and Gesture Matter in Everyday Life
🔤
Using Coloring Pages to Teach Early Literacy Skills
🎨
Soup Pot Coloring Ideas for Kids Who Love to Create
🎨
A Crew Handshake in Space: A Coloring and Space Mission Guide for Kids
🎨
How to Draw a Violin: A Coloring and Music Guide for Kids
🎨
The Kremlin: Coloring Page and Fun Facts for Kids
🎨
A Steel Beam Delivery Coloring and Drawing Ideas for Kids
🍂
Printable Back-to-School Season Coloring Pages for Kids
🎨
How to Draw a Banjo: A Coloring and Music Guide for Kids
🎨
Flour Milling: A Coloring and Food Science Guide for Kids
🧠
How Drawing May Support Imagination
🎨
Brushing a Pet's Fur: A Simple Pet Care Guide for Kids
🎨
Bluebell Flowers: A Coloring and Nature Guide for Kids
🎨
A Secret Identity Reveal: A Superhero Coloring and Design Guide for Kids
🎨
Fruit Tree Pollination: A Coloring and Food Science Guide for Kids
🔤
Drawing Activities for Family Words
🧘
A Beginner's Guide to Coloring During Travel
🎨
Satyr Coloring and Drawing Ideas for Kids
🔎
How Storyboarding for Projects Support Learning
🎨
An Autumn Maple Leaf: A Coloring and Nature Guide for Kids
🎨
A Mission Patch Design: A Coloring and Space Mission Guide for Kids
🏺
What We Know About Ancient Cave Pigments
🎨
A Pie Dish: A Kitchen Guide for Kids and Parents
🎨
A Sticker Chart: A Classroom Coloring and Learning Guide
🎨
Pear Coloring and Drawing Ideas for Kids
🔤
Visual Vocabulary: the Alphabet
🎲
Memory Matching Games: A Creative Twist
📴
Making the Most of Camping Trips Without Screens
🧘
How Nature-Inspired Calm Coloring Can Create a Quiet Moment
🎨
Old MacDonald Had a Farm: A Nursery Rhyme Coloring Guide for Kids
🎨
Maple Syrup Tapping: A Coloring and Food Science Guide for Kids
🧒
Understanding First-Time Artists in Early Childhood
🎨
A Beach Volleyball Tournament Coloring and Drawing Ideas for Kids
🎨
A Pastry Brush: A Kitchen Guide for Kids and Parents
🎨
Sheep Coloring and Drawing Ideas for Kids
🌈
Vehicles Coloring Ideas for Classrooms
🎨
Seagull Coloring and Drawing Ideas for Kids
🌈
A Guide to Fantasy Creatures Coloring Pages
🌈
Fun Dinosaurs Coloring Pages for Kids
🎨
Peacock Coloring Page Ideas for Kids
🎨
A Bavarian Traditional Outfit: A Coloring and Culture Guide for Kids
🎨
Taj Mahal: Coloring Page and Fun Facts for Kids
🎨
Rhinoceros Beetle Coloring and Drawing Ideas for Kids
🎨
Autumn Leaves Falling Coloring Page: A Nature Learning Guide for Kids
🎨
Exploring The Moon Landing: A Coloring and Learning Guide for Kids
🎨
Spinosaurus Coloring Page: Fun Facts for Young Paleontologists
🎨
Feeding a Cat: A Simple Pet Care Guide for Kids
🎨
Palm Tree: A Coloring and Nature Guide for Kids
🎨
An Ancient Fortress Wall: An Ancient History Coloring Guide for Kids
🎨
A Reward System Built Around Coloring: A Practical Guide
🎨
Parasaurolophus Coloring Page: Fun Facts for Young Paleontologists
🎨
Meet Ansel Adams: An Art Appreciation Guide for Kids
🎨
Exploring Vietnam: A Coloring and Culture Guide for Kids
🎨
Hornet Coloring and Drawing Ideas for Kids
🎨
Peaceful Garden Visualization: A Simple Mindfulness Activity for Kids
🎨
A Space Telescope Repair Mission: A Coloring and Space Mission Guide for Kids
🎨
Meet Color Field Painting: An Art Appreciation Guide for Kids
🎨
A Time-Control Superhero: A Superhero Coloring and Design Guide for Kids
🎨
How to Draw a Stained Glass Pattern: A Step-by-Step Guide
🎨
Meet Salvador Dali: An Art Appreciation Guide for Kids
🧘
Why Coloring for Focus Feels Calming
🎨
Meet the Tailor: A Community Helper Coloring Guide
🎨
Sinbad the Sailor: A Classic Story Coloring Guide for Kids
🎨
Exploring Colombia: A Coloring and Culture Guide for Kids
🎨
Termite Coloring and Drawing Ideas for Kids
🎨
A Boardwalk Carousel Coloring and Drawing Ideas for Kids
🎨
A Class Pet: A Classroom Coloring and Learning Guide
🎨
Spring Flower Planting: Coloring Ideas and Activities for the Whole Family
🎨
Fishing by a Riverbank: Coloring Ideas for Your Next Family Adventure
🎨
A School Playground: A Classroom Coloring and Learning Guide
🎨
A Skull and Crossbones Flag Coloring and Drawing Ideas for Kids
🎨
A Deer Spotted in the Woods: Coloring Ideas for Your Next Family Adventure
✏️
Why Using an Eraser Effectively Matters for New Artists
🎨
A Baking Soda and Vinegar Volcano: A Step-by-Step Science Guide for Kids
🎨
Fun Bullet Train Coloring and Drawing Ideas for Kids
🎨
How to Draw a Sphere: A Step-by-Step Guide for Kids
🎨
The Number 6: An Alphabet and Number Coloring Page
🎨
The Number 17: An Alphabet and Number Coloring Page
🎨
A Royal Crown: A Medieval Coloring and History Guide for Kids
Colored pencils are often the very first "real" art supply a child or beginner picks up, but there's a big difference between coloring inside the lines and actually drawing with colored pencils. With a few simple habits, the same box of pencils that fills in a coloring page can also create smooth gradients, realistic shading, and rich, layered color.
What Makes Colored Pencils Different?
Colored pencils lay down pigment mixed with a wax or oil binder, which means color builds up gradually rather than appearing all at once like paint or marker. This is actually their biggest strength: because each stroke only adds a little color, you have far more control over exactly how light, dark, or blended an area looks. Wax-based pencils are common, affordable, and great for beginners, while oil-based pencils tend to glide more smoothly and resist the waxy white haze called "bloom" that can appear on wax pencils over time.
Why It's Worth Learning
Because colored pencils are inexpensive, low-mess, and easy to control, they're one of the best mediums for building foundational skills like pressure control, layering, and blending before moving on to paint or pastel. Learning to use them well also teaches patience — good colored pencil work is built in thin layers rather than rushed in one pass, and that slower approach helps young artists notice details they'd otherwise skip past.
A Simple Colored Pencil Activity
- Draw or print a simple round shape, like an apple.
- Choose a base color and apply it very lightly across the whole shape, leaving a small white circle where the light would hit.
- Pick a darker shade of the same color and apply it around the edges of the apple, pressing a bit harder.
- Go back over the transition area between the light and dark shades with the base color to soften the line between them.
- Add a touch of a darker color, like brown or deep red, at the very bottom for shadow.
- Finish by pressing firmly with white in the highlight spot to make it pop.
Tips for Beginners
- Always start light — colored pencil is easy to build up but hard to lighten once it's pressed in.
- Sharpen often. A dull point spreads color unevenly and makes fine detail impossible.
- Layer colors instead of trying to find the "perfect" single pencil for a shade.
- Use circular strokes for smooth areas like skin or sky, and short directional strokes for texture like fur or grass.
- Keep a scrap piece of the same paper nearby to test colors before committing to your artwork.
Frequently Asked Questions
Why does my coloring look scratchy instead of smooth?
Scratchy coloring usually means the pressure is too heavy too early or the layers weren't built up gradually. Try going over the area again with lighter pressure and small circular strokes to fill in the gaps.
What's the difference between wax-based and oil-based colored pencils?
Wax-based pencils are softer, blend easily, and are usually the most affordable option, making them great for beginners. Oil-based pencils are firmer, hold a point longer, and don't develop the hazy "bloom" that wax pencils sometimes get.
Can colored pencils be used on regular printer paper?
Yes, though heavier paper or dedicated drawing paper holds up better to layering and blending. Regular paper works fine for practice sketches and most printed coloring pages.
Conclusion
Colored pencils reward patience more than any fancy technique — light layers, frequent sharpening, and a willingness to slow down will take your coloring from flat to dimensional. Once these basics feel comfortable, explore blending techniques to smooth your transitions even further, or try applying your new skills straight to a favorite coloring page.
🔥 Popular Posts
Why Visual Thinkers Use Concept Mapping
68 views
Why Visual Thinkers Use Sketch Journaling
62 views
A Beginner's Guide to Drawing Circles
51 views
A Beginner's Guide to Holding a Pencil Correctly
50 views
🧒
Fun Ways to Build The Symbol-Making Stage
48 views
A Beginner's Guide to Drawing Paper Types
47 views